
BACKYARD GARDENING MADE SIMPLE
![How To Grow, Harvest and Store Onions [Guide]](https://images.squarespace-cdn.com/content/v1/60e85024dc86d643da81c96a/1687201638150-N1KZIAZOTV1KUE0DNE47/image-asset.jpeg)
How To Grow, Harvest and Store Onions [Guide]
Growing onions at home is a rewarding endeavor. From the simple pleasure of harvesting your own crops to the ability to customize flavors in your favorite recipes, the journey of growing onions offers a delightful experience for any gardening enthusiast. Get ready to savor the distinct flavors and enjoy the convenience of having these versatile vegetables right at your fingertips.
Onions, with their pungent aroma and distinct flavor, are a staple ingredient in countless cuisines around the world. These versatile vegetables not only add depth and complexity to dishes but also offer a range of health benefits. Whether you prefer the mild sweetness of a Vidalia onion or the sharp bite of a red onion, growing your own onions at home can elevate your culinary experiences to new heights.
In addition to their culinary appeal, onions also provide numerous health benefits. They are rich in antioxidants, vitamins, and minerals that support overall well-being. Onions are known for their anti-inflammatory properties, cardiovascular benefits, and potential cancer-fighting compounds. Incorporating fresh, homegrown onions into your diet allows you to enjoy these nutritional advantages while savoring their incredible flavors.
So, whether you're an avid home cook looking to elevate your dishes or a health-conscious individual seeking the nutritional benefits of fresh produce, growing onions at home is a rewarding endeavor. From the simple pleasure of harvesting your own crops to the ability to customize flavors in your favorite recipes, the journey of growing onions offers a delightful experience for any gardening enthusiast. Get ready to savor the distinct flavors and enjoy the convenience of having these versatile vegetables right at your fingertips.
What Kind Of Onions Should You Grow?
When it comes to choosing onion varieties for your garden, there is a wide array of options available. Let's explore some popular onion varieties that are well-suited for home cultivation:
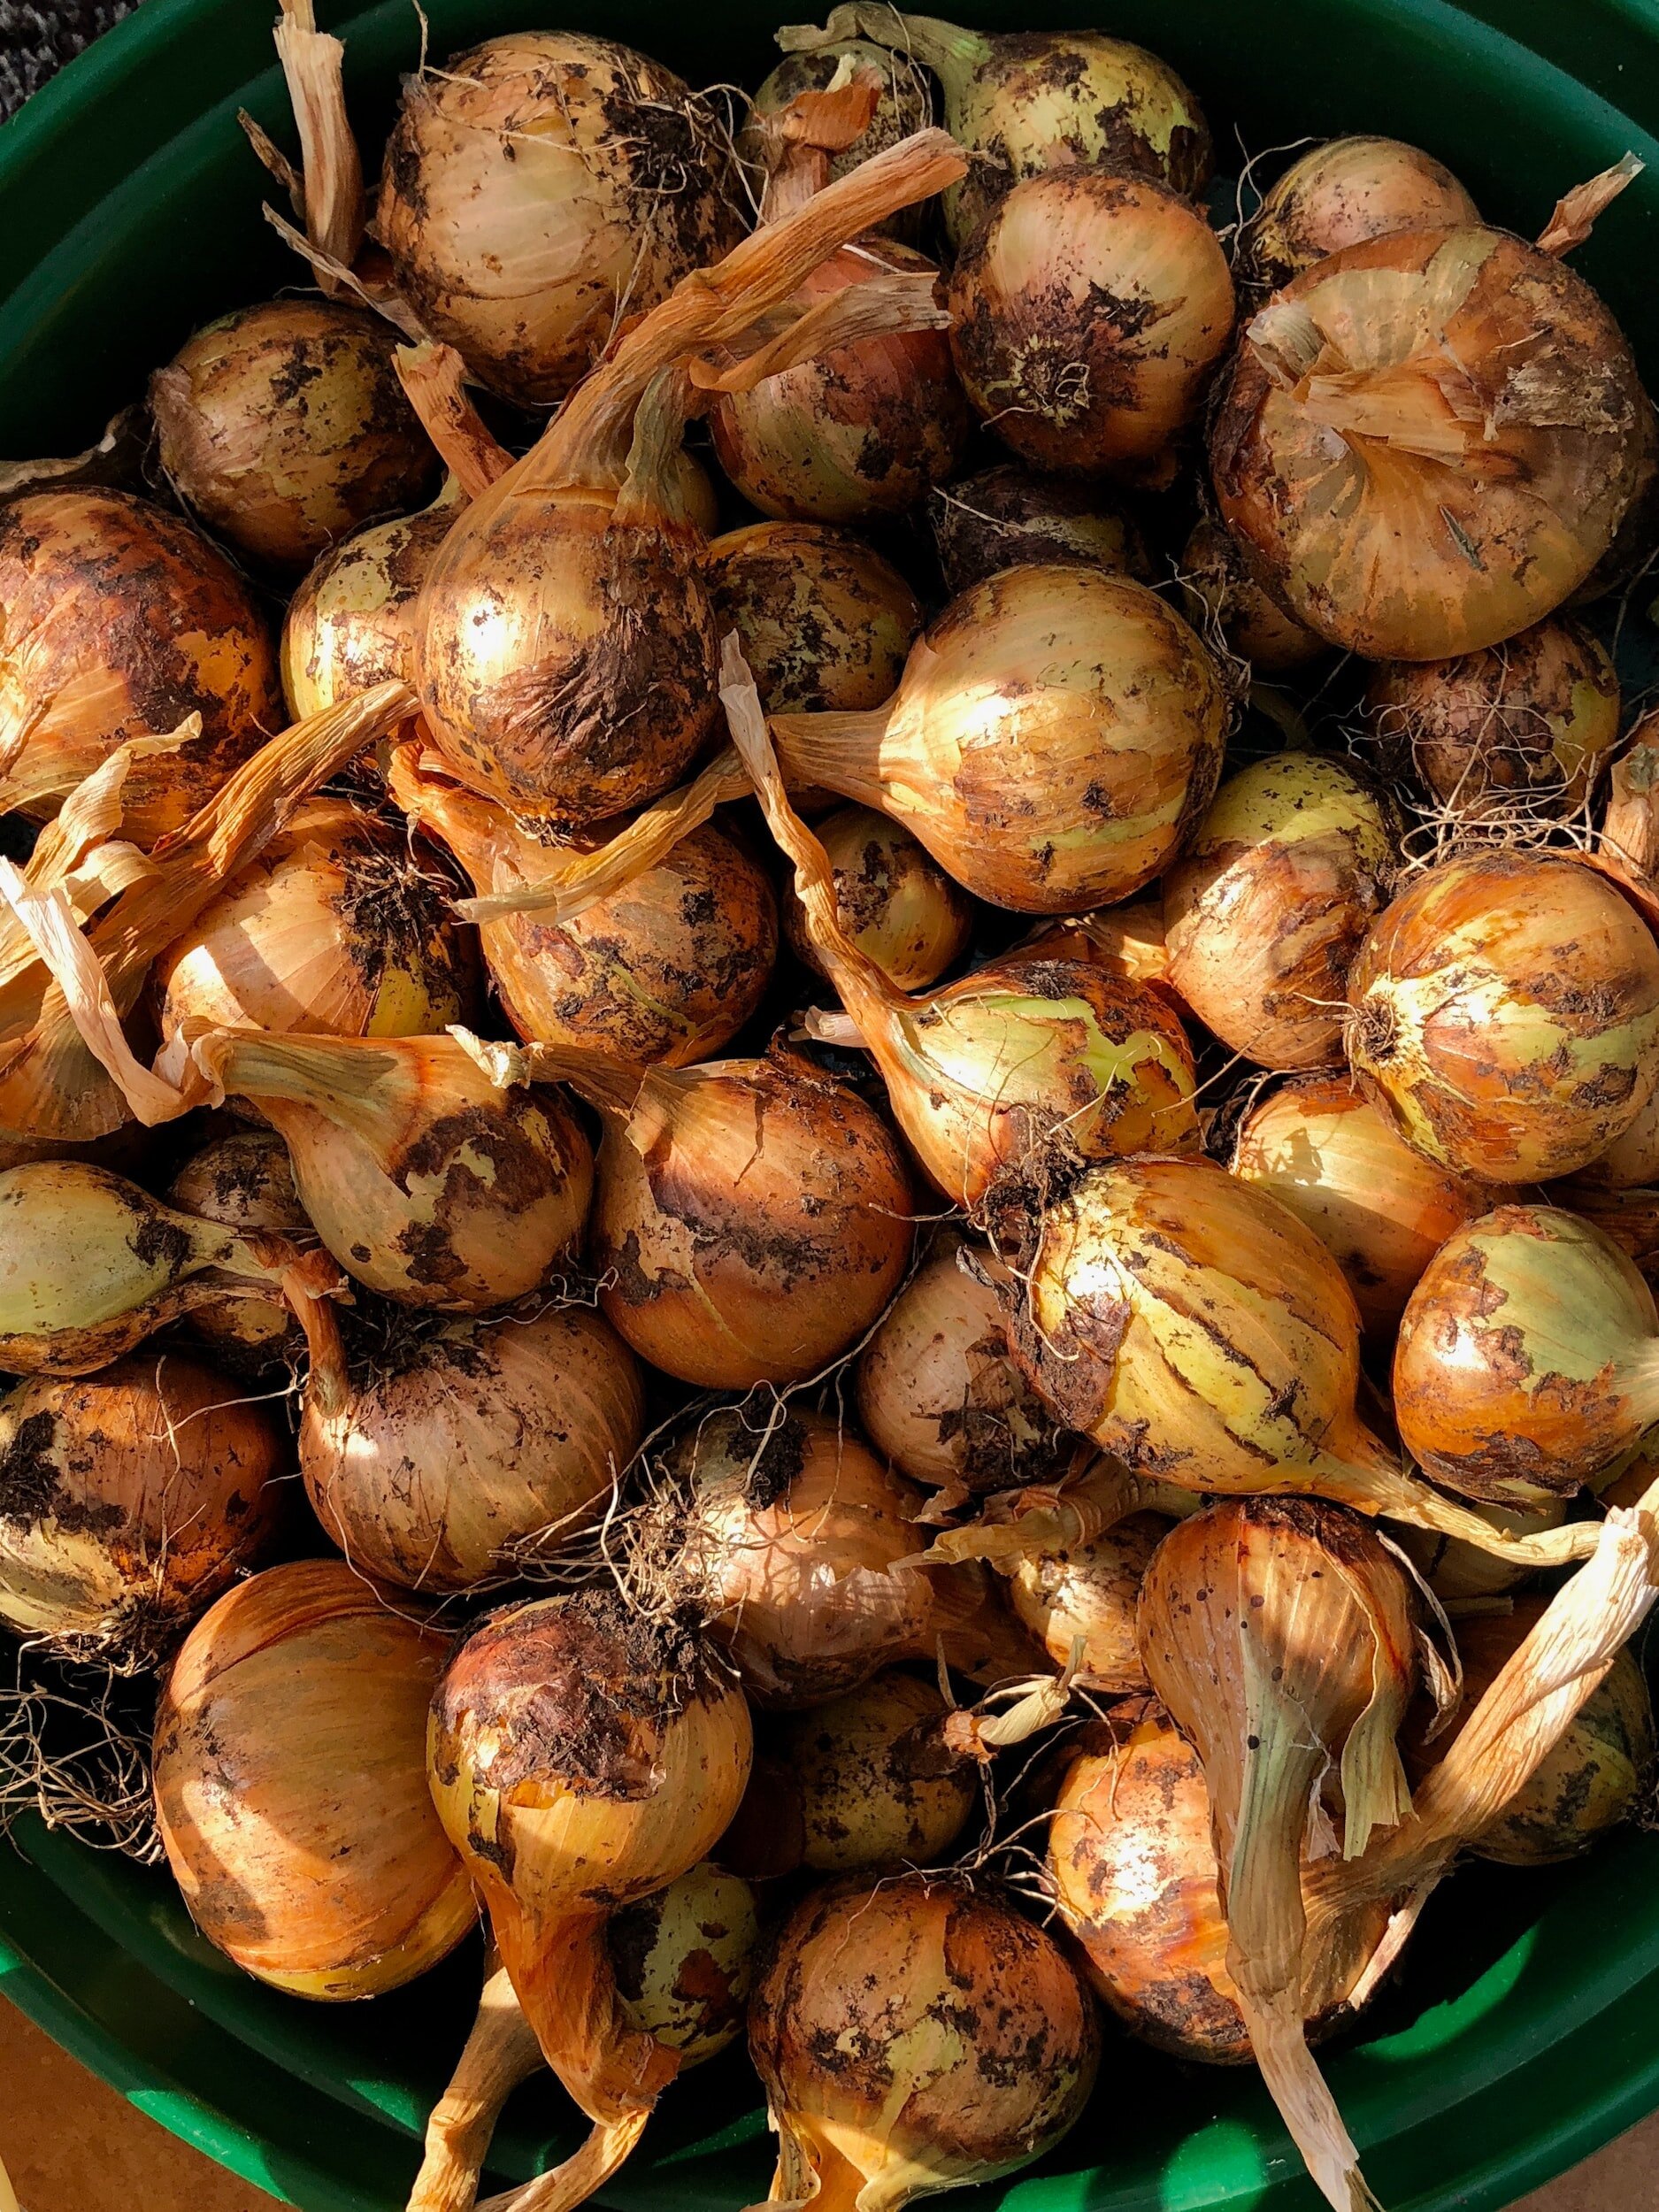
The 'Yellow Sweet Spanish' onion is a classic variety known for its large, golden bulbs. It has a mild and sweet flavor, making it a favorite for salads, sandwiches, and other raw preparations. With its globe-shaped bulbs and crisp texture, this variety is a versatile choice in the kitchen.
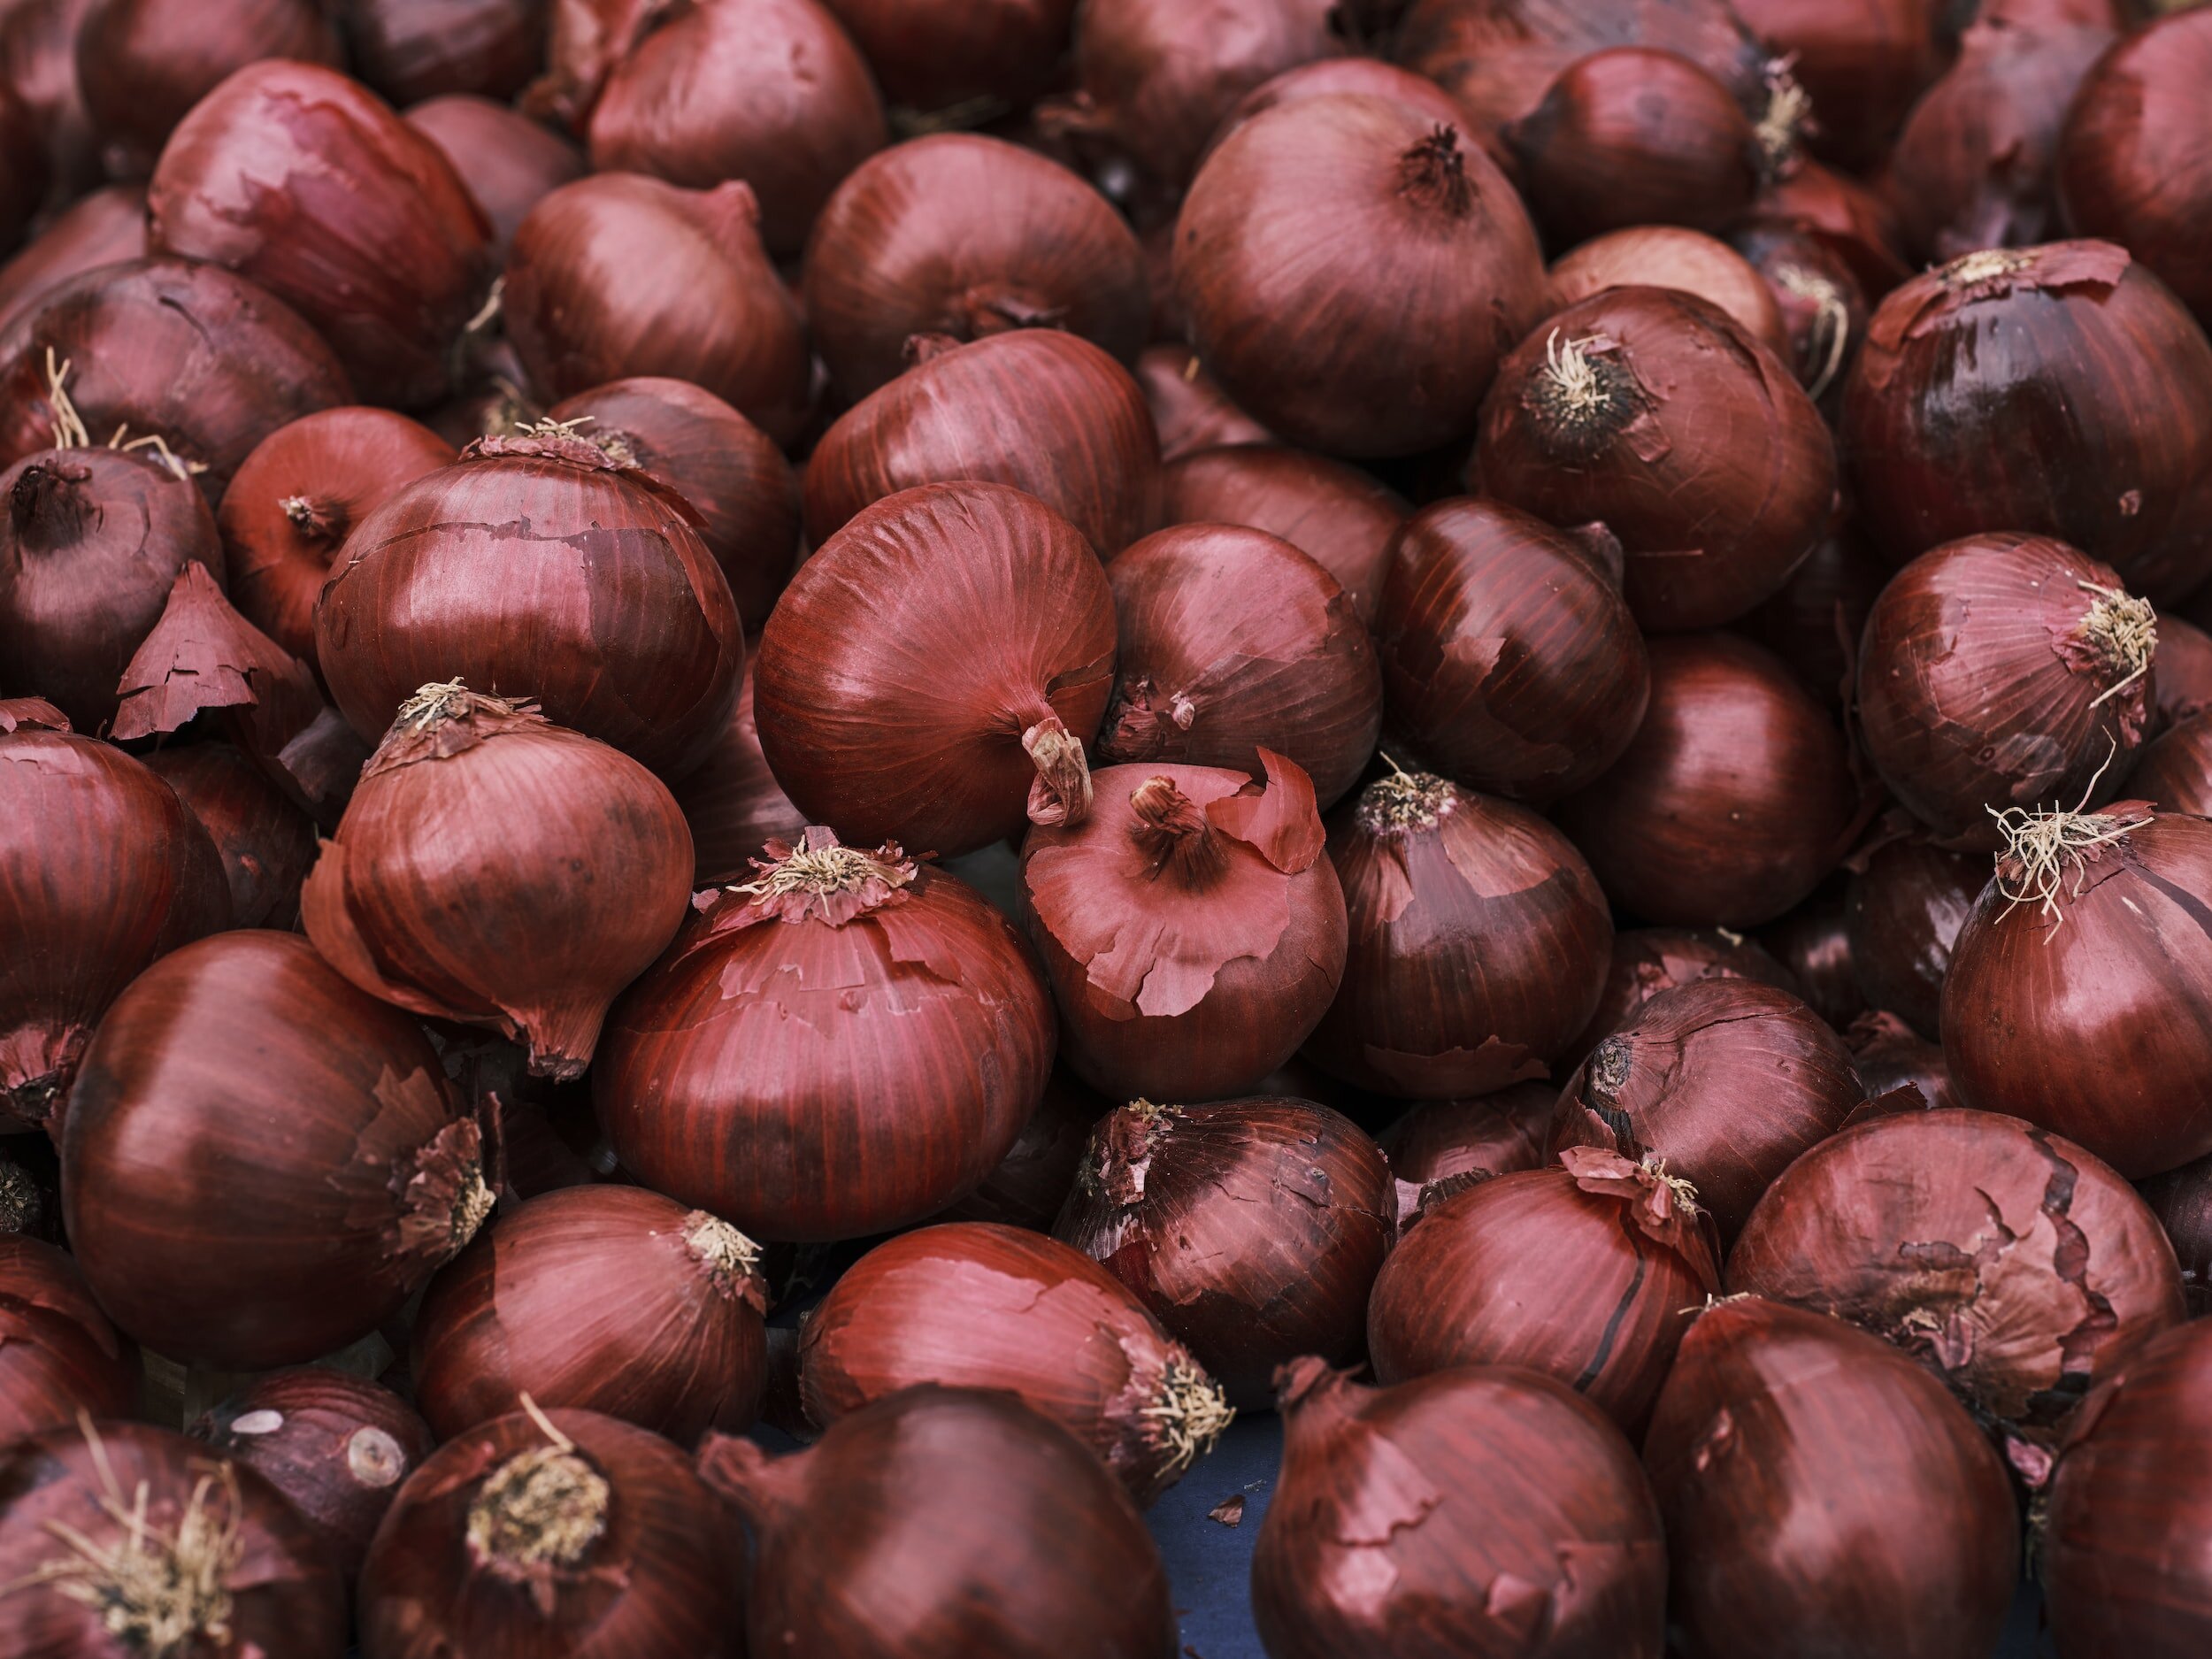
On the other hand, the 'Red Burgundy' onion offers a stunning deep-red color that adds visual appeal to any dish. It has a medium-sized bulb with a slightly milder taste compared to yellow onions. 'Red Burgundy' onions are perfect for grilling, roasting, or caramelizing, as they develop a rich and sweet flavor when cooked.
For those seeking a milder and sweeter onion, the 'White Lisbon' variety is an excellent option. These onions have a white or pale yellow skin and a delicate flavor. 'White Lisbon' onions are popular for their use in soups, stir-fries, and dishes where a subtle onion flavor is desired.
Long Day vs Short Day Onions
Onions are classified as either long-day or short-day varieties, based on their sensitivity to daylight hours. Long-day varieties, such as 'Yellow Sweet Spanish' and 'Red Burgundy,' require 14-16 hours of daylight to form bulbs. These varieties perform best in regions with longer daylight hours and cooler climates.
On the other hand, short-day varieties, like 'White Lisbon,' require 10-12 hours of daylight to form bulbs. These varieties are well-suited for regions with shorter daylight hours and warmer climates. It's crucial to choose the appropriate type of onion based on your location to ensure optimal bulb development.
Another factor to consider is the storage capability of the onion varieties. Some onions, like 'Yellow Sweet Spanish' and 'Red Burgundy,' have good storage potential and can be stored for several months under the right conditions. These varieties are ideal if you want to enjoy homegrown onions well into the winter months. 'White Lisbon' onions, on the other hand, are typically used and consumed fresh.
Where to Plant Onions
Onions thrive in full sun exposure, which is typically defined as at least 6-8 hours of direct sunlight per day. When selecting a site for growing onions, prioritize an area in your garden that receives ample sunlight throughout the day. The sunlight helps promote healthy growth, bulb development, and overall productivity of the onion plants.
Soil preparation is key to providing onions with the optimal growing conditions. Onions prefer well-draining soil that is rich in organic matter. Before planting, it's important to assess the soil's pH level. Onions generally prefer slightly acidic soil with a pH range of 6.0 to 7.5. You can adjust the soil pH by adding amendments like lime to raise the pH or sulfur to lower it. Conduct a soil test to determine the current pH level and make the necessary adjustments to create a favorable environment for onion growth.
In addition to pH adjustments, incorporating organic matter into the soil helps improve soil structure, drainage, and nutrient retention. Prior to planting onions, work compost or well-rotted manure into the soil to enrich it with organic matter. This practice not only enhances the soil's fertility but also supports healthy root development and bulb formation.
Onions require sufficient room to grow and spread their roots. Adequate spacing between plants allows for proper airflow, which helps prevent diseases and promotes healthy growth. Follow the recommended spacing guidelines provided for the specific onion variety you are planting.
Another important consideration is soil fertility. Select an area of your garden that has fertile soil or that has been amended with organic matter. Avoid areas with compacted soil or locations where water tends to accumulate, as these conditions can lead to poor onion growth and increased susceptibility to diseases.
Furthermore, pay attention to nearby plants and their compatibility with onions. Onions are known to have certain companion plants that can benefit their growth, such as carrots, beets, and lettuce. Avoid planting onions near plants that may compete for nutrients or inhibit their growth.
Growing Onions from Seed or Sets
There are two main methods for starting onions: from seeds or sets. Both methods have their advantages and considerations, so it's important to choose the one that suits your preferences and growing conditions.
Seed Onions
Starting onions from seeds offers a wider variety selection and is often more cost-effective. Seeds can be purchased from garden centers, online suppliers, or harvested from previous onion plants. This method allows you to choose from a diverse range of onion varieties, including those with specific flavor profiles, bulb shapes, and colors.
To start onions from seeds, begin by selecting a high-quality seed starting mix or create your own by combining equal parts of peat moss, vermiculite, and perlite. Fill seed trays or small containers with the seed starting mix. Sow the onion seeds thinly and evenly on the surface of the seed starting mix. Lightly press them into the soil, ensuring good seed-to-soil contact, but do not bury them too deeply. Cover the tray or container with a clear plastic lid or plastic wrap to create a greenhouse-like environment that retains moisture and warmth. This helps with seed germination. Place the trays or containers in a warm location with temperatures around 65-75°F (18-24°C). Ensure that the seeds receive adequate indirect light, either from a sunny windowsill or by using fluorescent lights. Keep the seed starting mix consistently moist but not waterlogged. Use a misting bottle or a gentle watering method to avoid dislodging the seeds.
Within 7-10 days, you should start seeing the onion seeds germinating. Once the seedlings have developed their first set of true leaves, they can be transplanted into individual pots or cell trays for further growth.
Onion Sets
Planting onion sets is a popular method for those who prefer a quicker start or live in regions with shorter growing seasons. Onion sets are small bulbs that have been grown from seeds the previous year and then harvested and stored. They are available in garden centers or through online suppliers.
To plant onion sets, choose firm and healthy onion sets that are free from mold or soft spots. Sets that are around 3/4 to 1 inch in diameter are ideal. Prepare the planting area by loosening the soil and removing any weeds or debris. Ensure the soil is well-draining and amended with compost or well-rotted organic matter. Dig a small hole or trench that is deep enough to accommodate the onion set. Place the set in the hole or trench with the pointed end facing up. Space the sets according to the recommended spacing for the specific variety you are planting. Typically, sets are spaced 4-6 inches apart in rows that are 12-18 inches apart. Gently backfill the soil around the sets, ensuring that they are covered to the neck, leaving only the tip exposed. Firmly press the soil around the sets to secure them in place. Water the newly planted sets thoroughly to settle the soil and encourage root development.
Onion sets have the advantage of providing a head start in the growing process since they have already gone through the initial stages of growth. They tend to mature earlier than onions started from seeds. However, they may have limited variety options compared to seeds, and some sets may have a higher risk of bolting or producing flowering stalks.
Caring for Onion Plants
Regular watering is crucial for the proper growth and development of onion plants. Onions require consistent moisture to promote bulb formation. However, it's important to strike a balance and avoid overwatering, as this can lead to rot and disease. Aim to keep the soil evenly moist, providing about 1 inch of water per week, including rainfall.
To determine when to water, monitor the soil moisture by inserting your finger about an inch into the soil. If it feels dry at that depth, it's time to water. Water deeply to encourage the roots to grow deeper into the soil. Avoid overhead watering, as it can increase the risk of fungal diseases. Instead, use a soaker hose or drip irrigation to deliver water directly to the soil.
Weed control is essential for onion plants as weeds can compete for nutrients, water, and sunlight. Weeds can also hinder proper airflow around the plants, increasing the risk of disease. Regularly inspect the onion bed and remove any weeds by hand, ensuring that you pull them out by the roots to prevent regrowth.
To minimize weed growth, you can apply a layer of organic mulch around the onion plants. This will help suppress weed growth and conserve soil moisture. Organic mulch options include straw, chopped leaves, or grass clippings. Apply a layer of mulch about 2-3 inches thick, making sure to keep it a few inches away from the onion stems to prevent excess moisture and potential rotting.
Onions benefit from regular fertilization to ensure healthy growth and bulb development. Before planting, it's recommended to prepare the soil by incorporating well-rotted compost or aged manure. This helps enrich the soil with essential nutrients and organic matter.
During the growing season, you can provide additional fertilizer to support onion growth. Use a balanced fertilizer, such as a 10-10-10 or 14-14-14, and follow the package instructions for application rates. Apply the fertilizer around the base of the plants, taking care not to let it come into direct contact with the leaves or bulbs.
Mulching offers several benefits when caring for onion plants. Firstly, it helps conserve soil moisture by reducing evaporation and preventing water runoff. This is especially important during hot and dry periods. Consistent soil moisture is essential for proper bulb development.
Secondly, mulch helps suppress weed growth by blocking sunlight and inhibiting weed seed germination. This reduces competition for nutrients, water, and light, allowing the onion plants to thrive.
Lastly, mulch acts as a natural insulator, regulating soil temperature. Onions prefer cooler soil temperatures, and mulch helps maintain a more stable environment, protecting the roots from extreme heat or cold.
Apply the mulch around the base of the onion plants once they have become established and the soil has warmed up. Replenish the mulch as needed to maintain the desired thickness and ensure its effectiveness throughout the growing season.
Onion Pests
Onion Thrips: These tiny insects feed on onion leaves, causing silvering or browning of the foliage. Severe infestations can lead to stunted growth and reduced bulb development.
Onion Maggots: The larvae of onion maggots feed on onion roots, leading to wilting, yellowing, and death of the plants. These maggots are typically found in the soil around the onion plants.
Aphids: These small insects can cluster on onion leaves, sucking sap and causing distortion and yellowing of the foliage. They can also transmit viral diseases to the plants.
When it comes to managing pests on onions, organic methods are often preferred to minimize the use of synthetic chemicals:
Row Covers: Use lightweight floating row covers to physically exclude pests like onion thrips. Cover the plants early in the season, securing the edges to prevent pests from entering. Be sure to remove the covers when the plants start to bulb and require pollination.
Beneficial Insects: Encourage beneficial insects like ladybugs, lacewings, and parasitic wasps that prey on pests like aphids and thrips. Planting flowers that attract these beneficial insects, such as marigolds or alyssum, can help attract and support them in your garden.
Natural Insecticides: If pest populations become overwhelming, you can use organic insecticides derived from natural sources, such as neem oil or insecticidal soap. Follow the instructions on the product labels for proper application and safety precautions.
Onion Diseases
Onion Downy Mildew: This fungal disease appears as yellow spots on the leaves, eventually turning the foliage brown. It thrives in cool, wet conditions. To prevent onion downy mildew, avoid overhead watering, promote good air circulation, and remove any infected plants promptly.
White Rot: White rot is a fungal disease that affects the roots and bulbs of onions. It causes white, fluffy fungal growth and can lead to the rotting of the bulbs. To prevent white rot, practice crop rotation, avoid planting onions in the same area for consecutive years, and ensure good soil drainage.
To manage diseases on onions, prevention is key. Here are some preventive measures:
Crop Rotation: Rotate your onion crops every year, preferably with plants from a different family, to reduce the risk of disease buildup in the soil.
Proper Sanitation: Clean up any debris or plant material from the garden, especially those infected with diseases. This helps prevent the spread and overwintering of pathogens.
Disease-resistant Varieties: Consider planting onion varieties that are known to have resistance to specific diseases prevalent in your area.
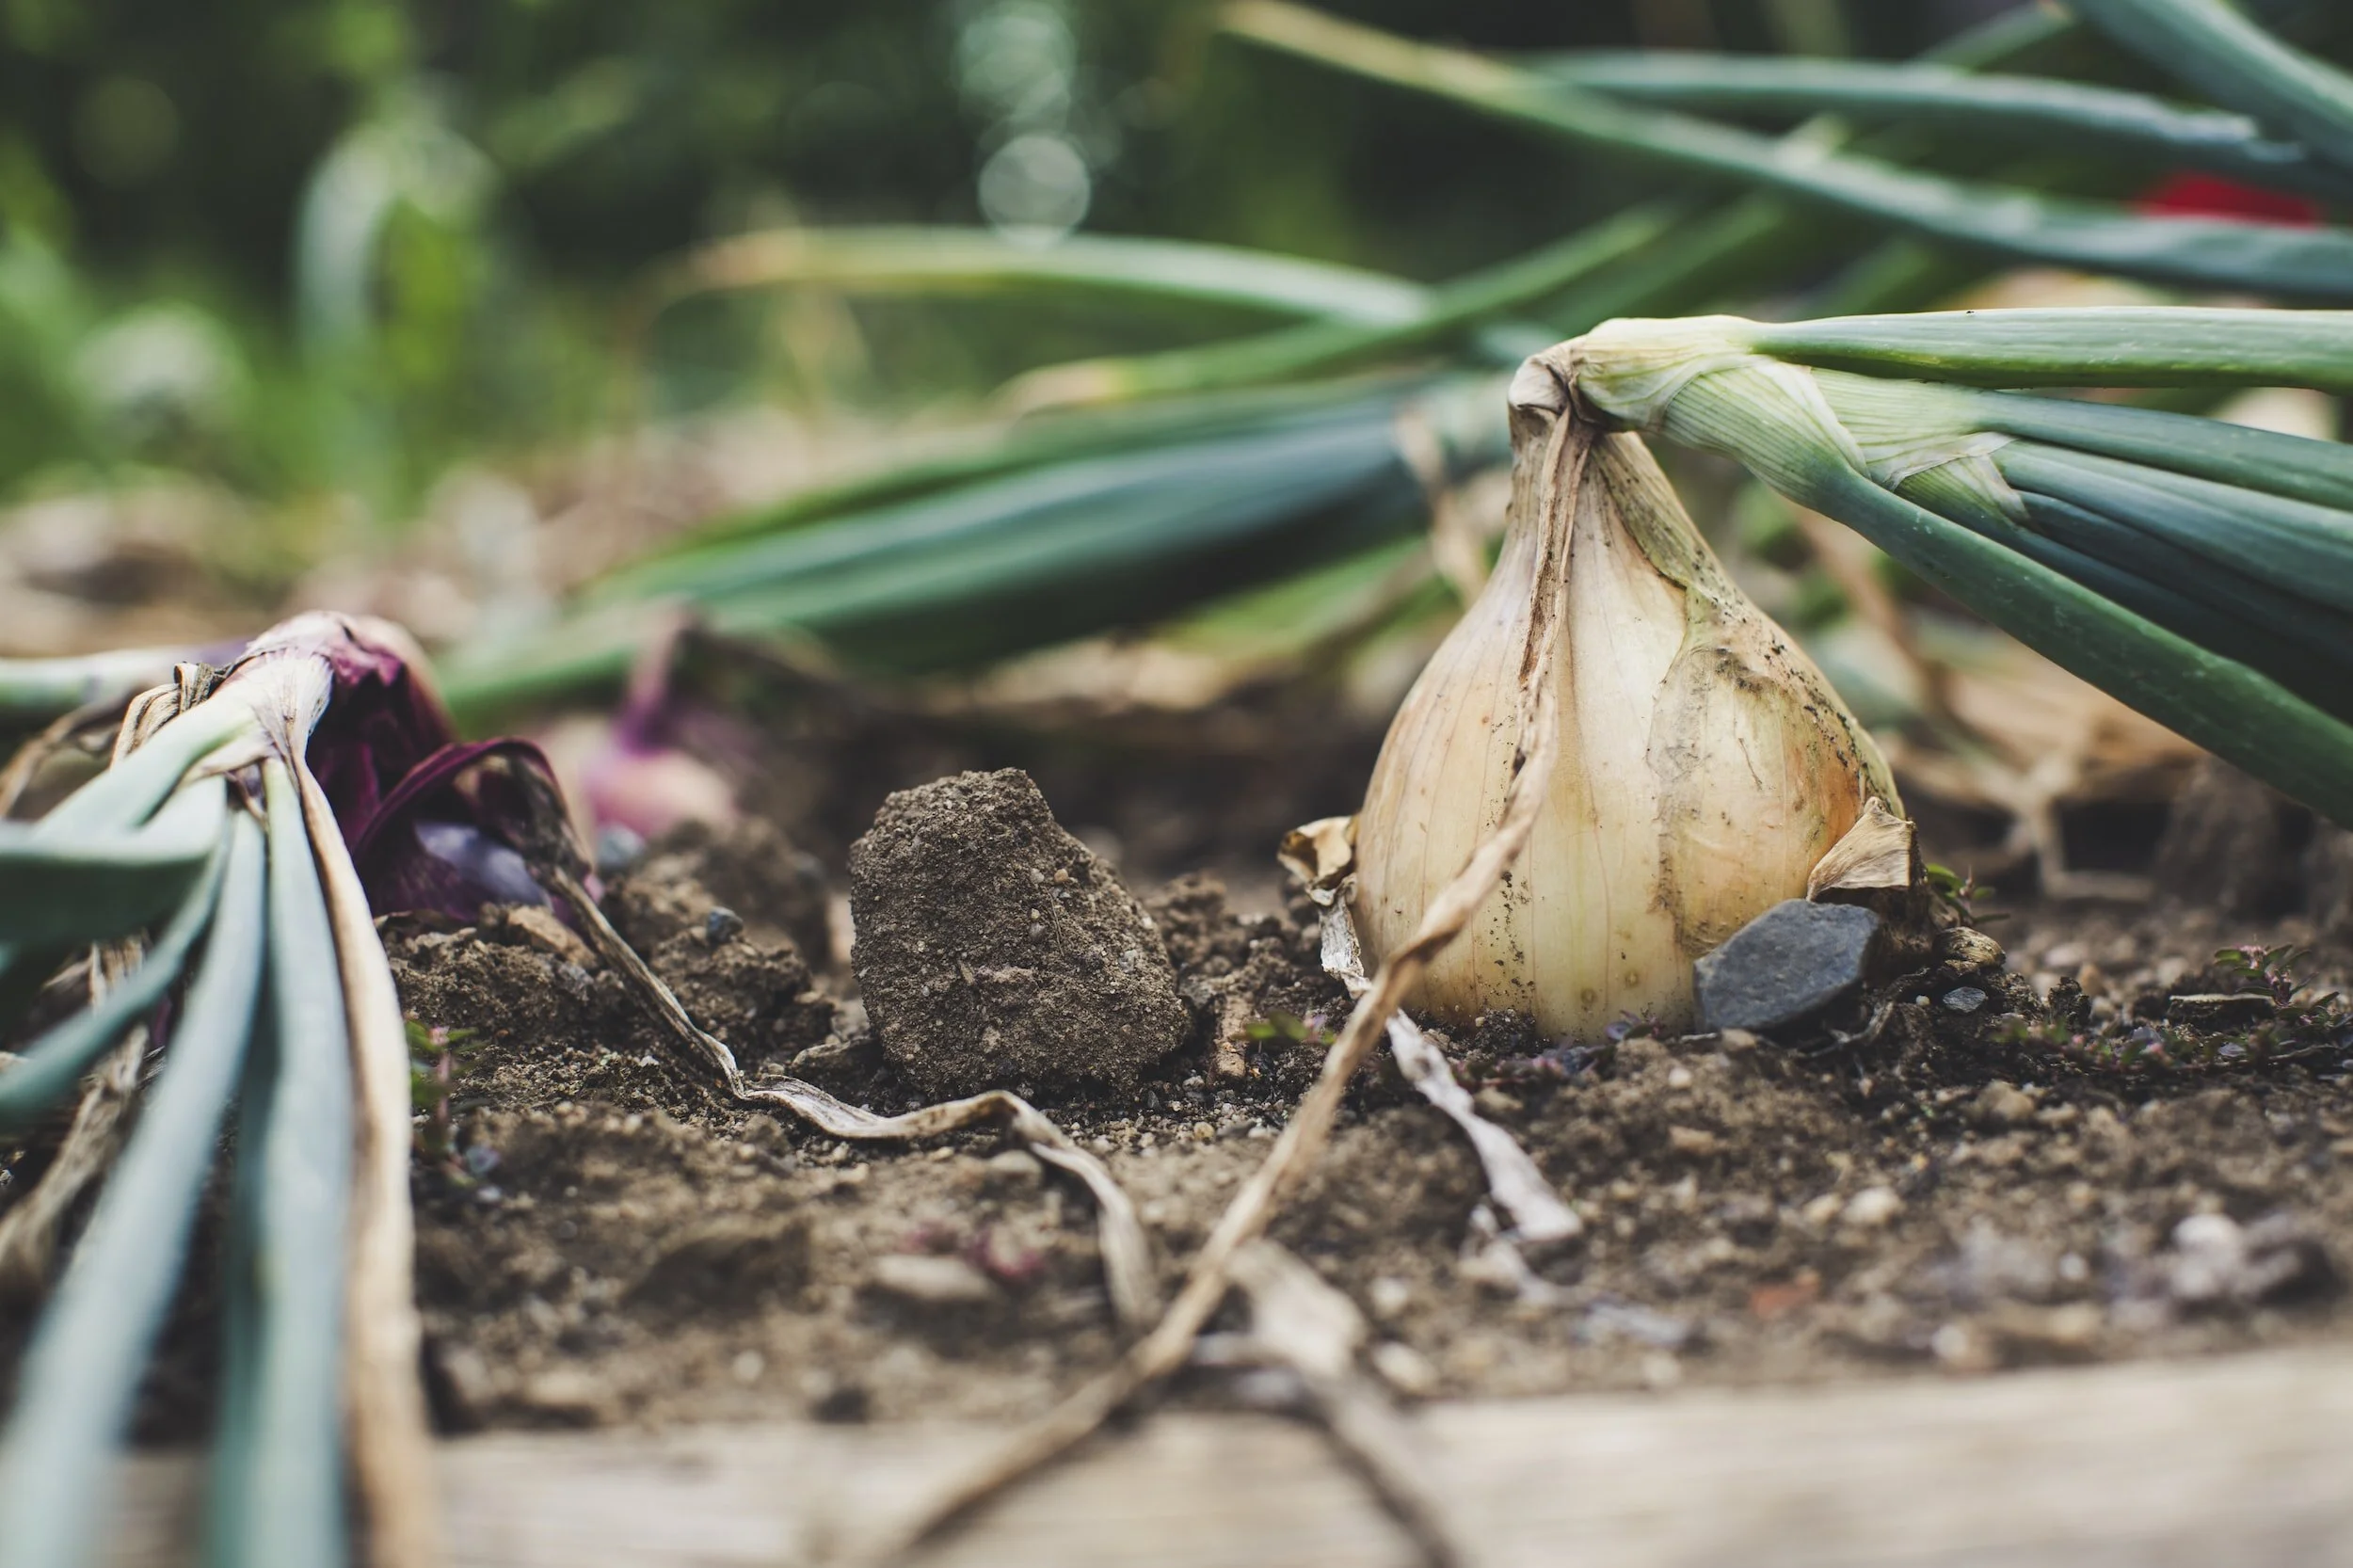
Harvesting Onions
To know when your onions are ready to harvest, look for yellowing and drying of the foliage, with the majority of leaves turning brown and falling over. This indicates that the bulbs have reached their full size and are ready for harvest. Before harvesting, stop watering the onions for a week or two. This helps the outer layers of the bulbs dry and prepare for storage.
Use a garden fork or shovel to gently loosen the soil around the onions, being careful not to damage the bulbs. Insert the tool a few inches away from the bulbs and lift them out of the ground. Once the onions are lifted, gently brush off excess soil, but avoid removing the outermost dry layers. The outer layers provide protection during storage.
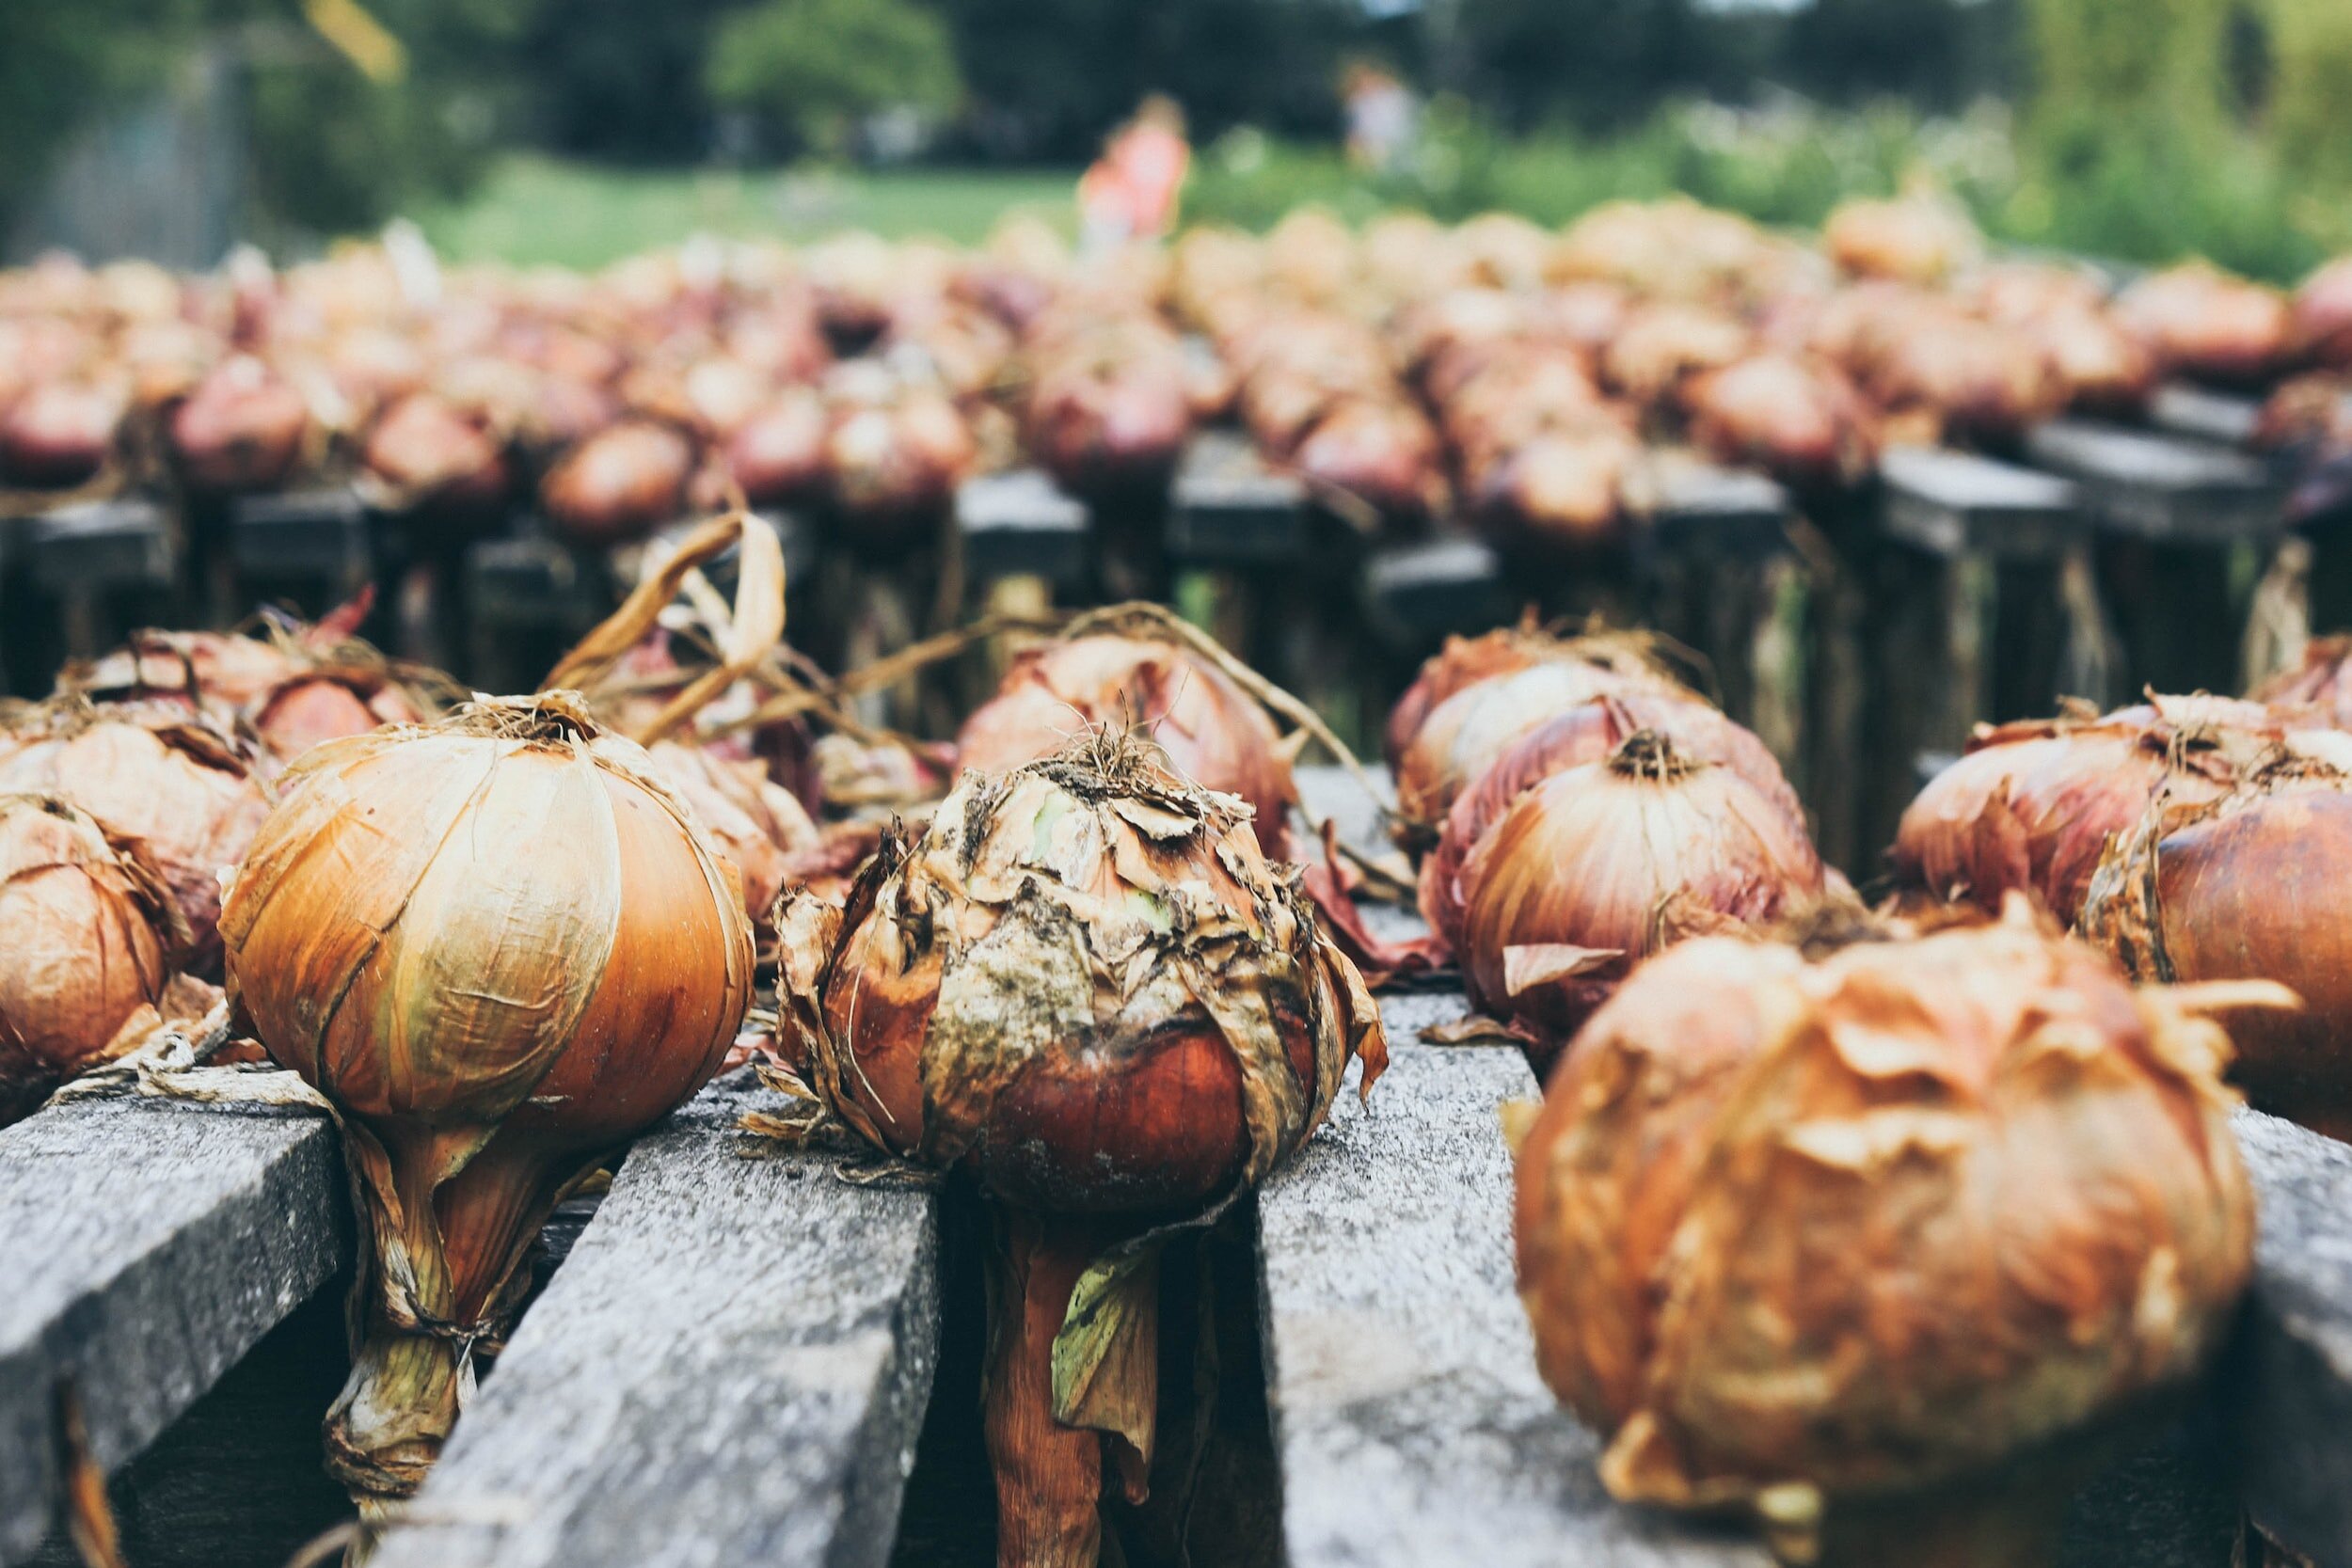
How to Cure Onions
Curing onions is an important step to enhance their storage capabilities. Curing involves drying the onions further to toughen their outer layers, extend their shelf life, and develop their flavor. Place the harvested onions in a well-ventilated area with low humidity. A dry, shaded spot such as a garage or covered porch works well. Spread the onions out in a single layer, ensuring good airflow around each bulb. Avoid overcrowding, as this can lead to moisture buildup and potential rotting. Allow the onions to cure for 2 to 3 weeks. During this time, the outer layers will dry and harden, and the flavors will intensify. Once the onions are fully cured, gently remove any remaining soil or loose layers of dry skin. Trim the roots to about half an inch and cut the tops down to an inch above the bulb.
How to Store Onions
If you have long-stemmed onions, you can braid their tops together and hang them in a cool, dry place. This method allows for good airflow and easy access to individual onions.
For onions without long stems, you can tie them in mesh bags or pantyhose and hang them in a well-ventilated area. Make sure to keep the onions separate to prevent the spread of rot if one onion spoils.
If you have a cool and dry basement or cellar, you can store onions in mesh bags or crates. Keep them in a single layer, allowing airflow between the bulbs. Check periodically for any signs of spoilage and remove any affected onions.
Remember that onions are best stored away from potatoes, as they can release moisture and gasses that may cause each other to spoil faster.
Growing onions at home can be a rewarding experience, providing you with fresh, flavorful bulbs for your culinary creations. By choosing the right varieties, providing optimal growing conditions, and following proper care and harvesting techniques, you can enjoy a bountiful onion harvest. From planting to curing and storing, each step is essential for maximizing the quality and shelf life of your onions. So, get started on your onion garden and savor the satisfaction of growing your own delicious and versatile vegetable.


From Compost to Amendments: Soil Solutions for Raised Garden Beds
There are many specialized garden soil for raised beds mixes available both commercially as a pre-bagged product and in bulk from local nurseries. I always recommend getting the best soil for raised beds you can afford, since it is the building block that will nourish your growing plants and give it what it needs in order to produce well. These blends are most likely to give you the best results. But plants are resilient creatures, so if your budget is limited or you don’t have access to the highest quality soil for raised beds, don’t let that stop you from trying to grow! You can plant cover crops and add liquid fertilizer to improve the quality of your soil over time.

The Cottage Peach is reader-supported. When you purchase through links on our site, we may earn an affiliate commission at no additional cost to you. All opinions are our own.
I’ve been gardening for most of my life in one form or another, but around ten years ago I was diagnosed with psoriatic arthritis, and since then I’ve had a whole decade to come up with the best gardening hacks to and gardening tools for gardening with chronic pain and low energy.
Psoriatic arthritis often confuses people who don’t have it - its cousins rheumatoid and osteoarthritis are far more common, so there’s a misconception that psoriatic arthritis isn’t as serious or doesn’t have as much of an impact on quality of life as these more well known forms of arthritis. The fact is that psoriatic arthritis is more than a skin condition. I experience severe joint pain and fatigue, just like someone with rheumatoid arthritis or osteoarthritis. I just get the added “bonus” of sensitive dry skin too. While exercise can help with my symptoms, it can also make them worse if I push myself too hard. I’ve had to learn my physical limitations by testing them, and they are a lot lower than someone living without an autoimmune disease. The idea that arthritis is an “old person's” condition is so pervasive that people often think it can’t really be that bad, especially since I don’t look sick and I’m not old. But invisible illnesses like arthritis and other autoimmune conditions can dramatically change your life, no matter your age or outward appearance.
In order to continue with my love of gardening even with arthritis, I invested in gardening tools that would make it possible for me to continue doing what I love. The biggest change I made in the garden to support my body came in the form of 6 new elevated garden beds from Gardener’s Supply Company.
Self-Watering Elevated Planter Box, 2' x 8'
These no-bend garden boxes keep plants hydrated via a series of innovative, connected reservoirs that deliver water to roots on demand. Four generous 5-gallon reservoirs extend the time between waterings and create more even moisture throughout the bed. And, since water is drawn primarily from the bottom instead of applied from the top, less water is lost to evaporation too! 10" planting depth accommodates a wide variety of crops, from tomatoes to root-crops like carrots.
The height of the planter box has other advantages too: fewer weeds, reduced maintenance, and fewer critters nibbling at your prize plants. The sturdy aluminum legs won't buckle or sag, and the wood is naturally rot-resistant and safe for your organic crops. Best of all, it allows me to garden at table-height, eliminating the bending and kneeling that makes gardening difficult on my joints. They are made of durable cedar wood with metal legs, and I like that the natural materials blend in seamlessly with the environment.
After building and placing my raised garden beds, it was time to fill them. But understanding what soil is best for raised beds isn’t always as straightforward as it seems. Filling raised garden beds will either set your garden up for success, or failure. The good news is once you’ve finished reading this post you’ll know exactly how to fill a raised bed cheaper, what to fill your raised beds with, what is the difference between garden soil and topsoil and more.
What should I fill my raised garden bed with?
The goal is to fill your raised garden beds with a mix of components that will deliver nutrients to your growing plants and encourage the right amount of water retention and drainage. You can accomplish this by putting organic matter such as old logs, sticks, grass clippings and leaf mold at the base, followed by a layer of topsoil and then finally a layer of compost.
The ratio that you use is going to depend on a lot of factors specific to your local climate. For example, in especially damp climates you’ll want to incorporate significantly more drainage. And, if you’re growing vegetables or other produce, you’re going to need a higher ratio of nutrient dense compost or fertilizer.
You can get bagged soil and compost from local nurseries, but it’s a lot more economical to have your soil delivered in bulk. For my six beds, I needed 3 yards of soil. I wanted to buy the soil in bulk because the cost would be less than half and I wouldn’t need to worry about recycling all those bags, but since my beds are raised off of the ground there’s no way they could support the weight of true garden soil - I needed a lightweight potting mix blend that would drain well but hold some moisture. I went with Coast of Maine potting mix because it’s some of the best soil you can buy, and the bags were recyclable at the same drop off points you can recycle your plastic shopping bags at in grocery stores.
If you do decide to get bagged soil, keep in mind that soil that is sold at big box stores like Lowes and Home Depot is questionable quality at best - in fact, last year there was a huge scandal because large amounts of this bagged soil were found to be contaminated with herbicides. It’s much safer to get your bagged soil or bulk soil from a local garden nursery that specializes in products meant for growing food and flowers. The last thing you want is to have all your hard work planning and planting your garden go to waste because your plants aren’t able to thrive in the soil that you used.
It’s very important not to underfill your beds. It will settle and sink down a lot more than you think. In addition, if you use too much organic matter like leaves this will cause your soil level to sink even more dramatically as the material decomposes throughout the season. This can happen pretty quickly. You’ll also need to top off your raised beds with a compost blend at the beginning of each new gardening season to accommodate for soil nutrients lost to plants using it up and general settling. A fresh layer of compost on top of your raised beds will revitalize the soil and make sure it is ready to continue helping your plants thrive for many years to come. You can also plant a cover crop in the fall to add additional nutrients to your soil, or use a mulch like wood chips that will slowly release nutrients as it breaks down.
How do you fill a raised bed cheaply?
If you’re on a tight budget for filling raised garden beds, I’d recommend the hugelkultur method. Hugelkultur is a centuries-old, traditional way of building a garden bed from rotten logs and plant debris. Buried in a hugelkultur bed, decomposing wood releases water and nutrients into the soil to conserve precious resources. This method is popular in permaculture and allows you to use less soil and more found organic matter that is free. Hugelkultur beds hold moisture extremely well and are great for dry climates. Don’t let a small budget keep you from gardening. There are many ways to improve the quality of your soil over time even if it isn’t that great in your first year.
Where can you find garden soil for raised beds?
The best place to find high quality garden soil for your raised beds is at your local garden nursery. Look for a topsoil/compost blend or raised bed mix. Sometimes you can even find local companies that offer residential composting services and then resell the compost as its own product. This is more common in rural areas.
What should you not put in a raised bed?
Avoid putting any painted or pressure treated woods in the base of your raised beds, as toxic chemicals can leach from the wood into your soil and plants.

What is the difference between garden soil and topsoil?
Garden soil is topsoil that has been enriched to make it better suited for plant growth. Amendments may include compost or other organic matter, and some soils – like perennial potting mixes – have added ingredients to encourage growth of specific types of plants.
Is topsoil OK for raised beds?
You should never use only topsoil for raised garden bed soil, or only compost. Your plants need a healthy balance of both in order to grow properly. This will depend on your climate and if any of your plants are heavy feeders that require lots of fertilizer. A general rule of thumb is to use a ratio of one to one - fifty percent topsoil and fifty percent compost.
Do you need special soil for raised beds?
There are many specialized garden soil for raised beds mixes available both commercially as a pre-bagged product and in bulk from local nurseries. I always recommend getting the best soil for raised beds you can afford, since it is the building block that will nourish your growing plants and give it what it needs in order to produce well. These blends are most likely to give you the best results. But plants are resilient creatures, so if your budget is limited or you don’t have access to the highest quality soil for raised beds, don’t let that stop you from trying to grow! You can plant cover crops and add liquid fertilizer to improve the quality of your soil over time.
Are you filling raised garden beds this year?
let me know how you grow in the comments!
![Growing Nasturtium Flowers In Your Garden [Guide]](https://images.squarespace-cdn.com/content/v1/60e85024dc86d643da81c96a/1687202115297-0IFUBMVBOEE2VAS4HSUU/image-asset.jpeg)
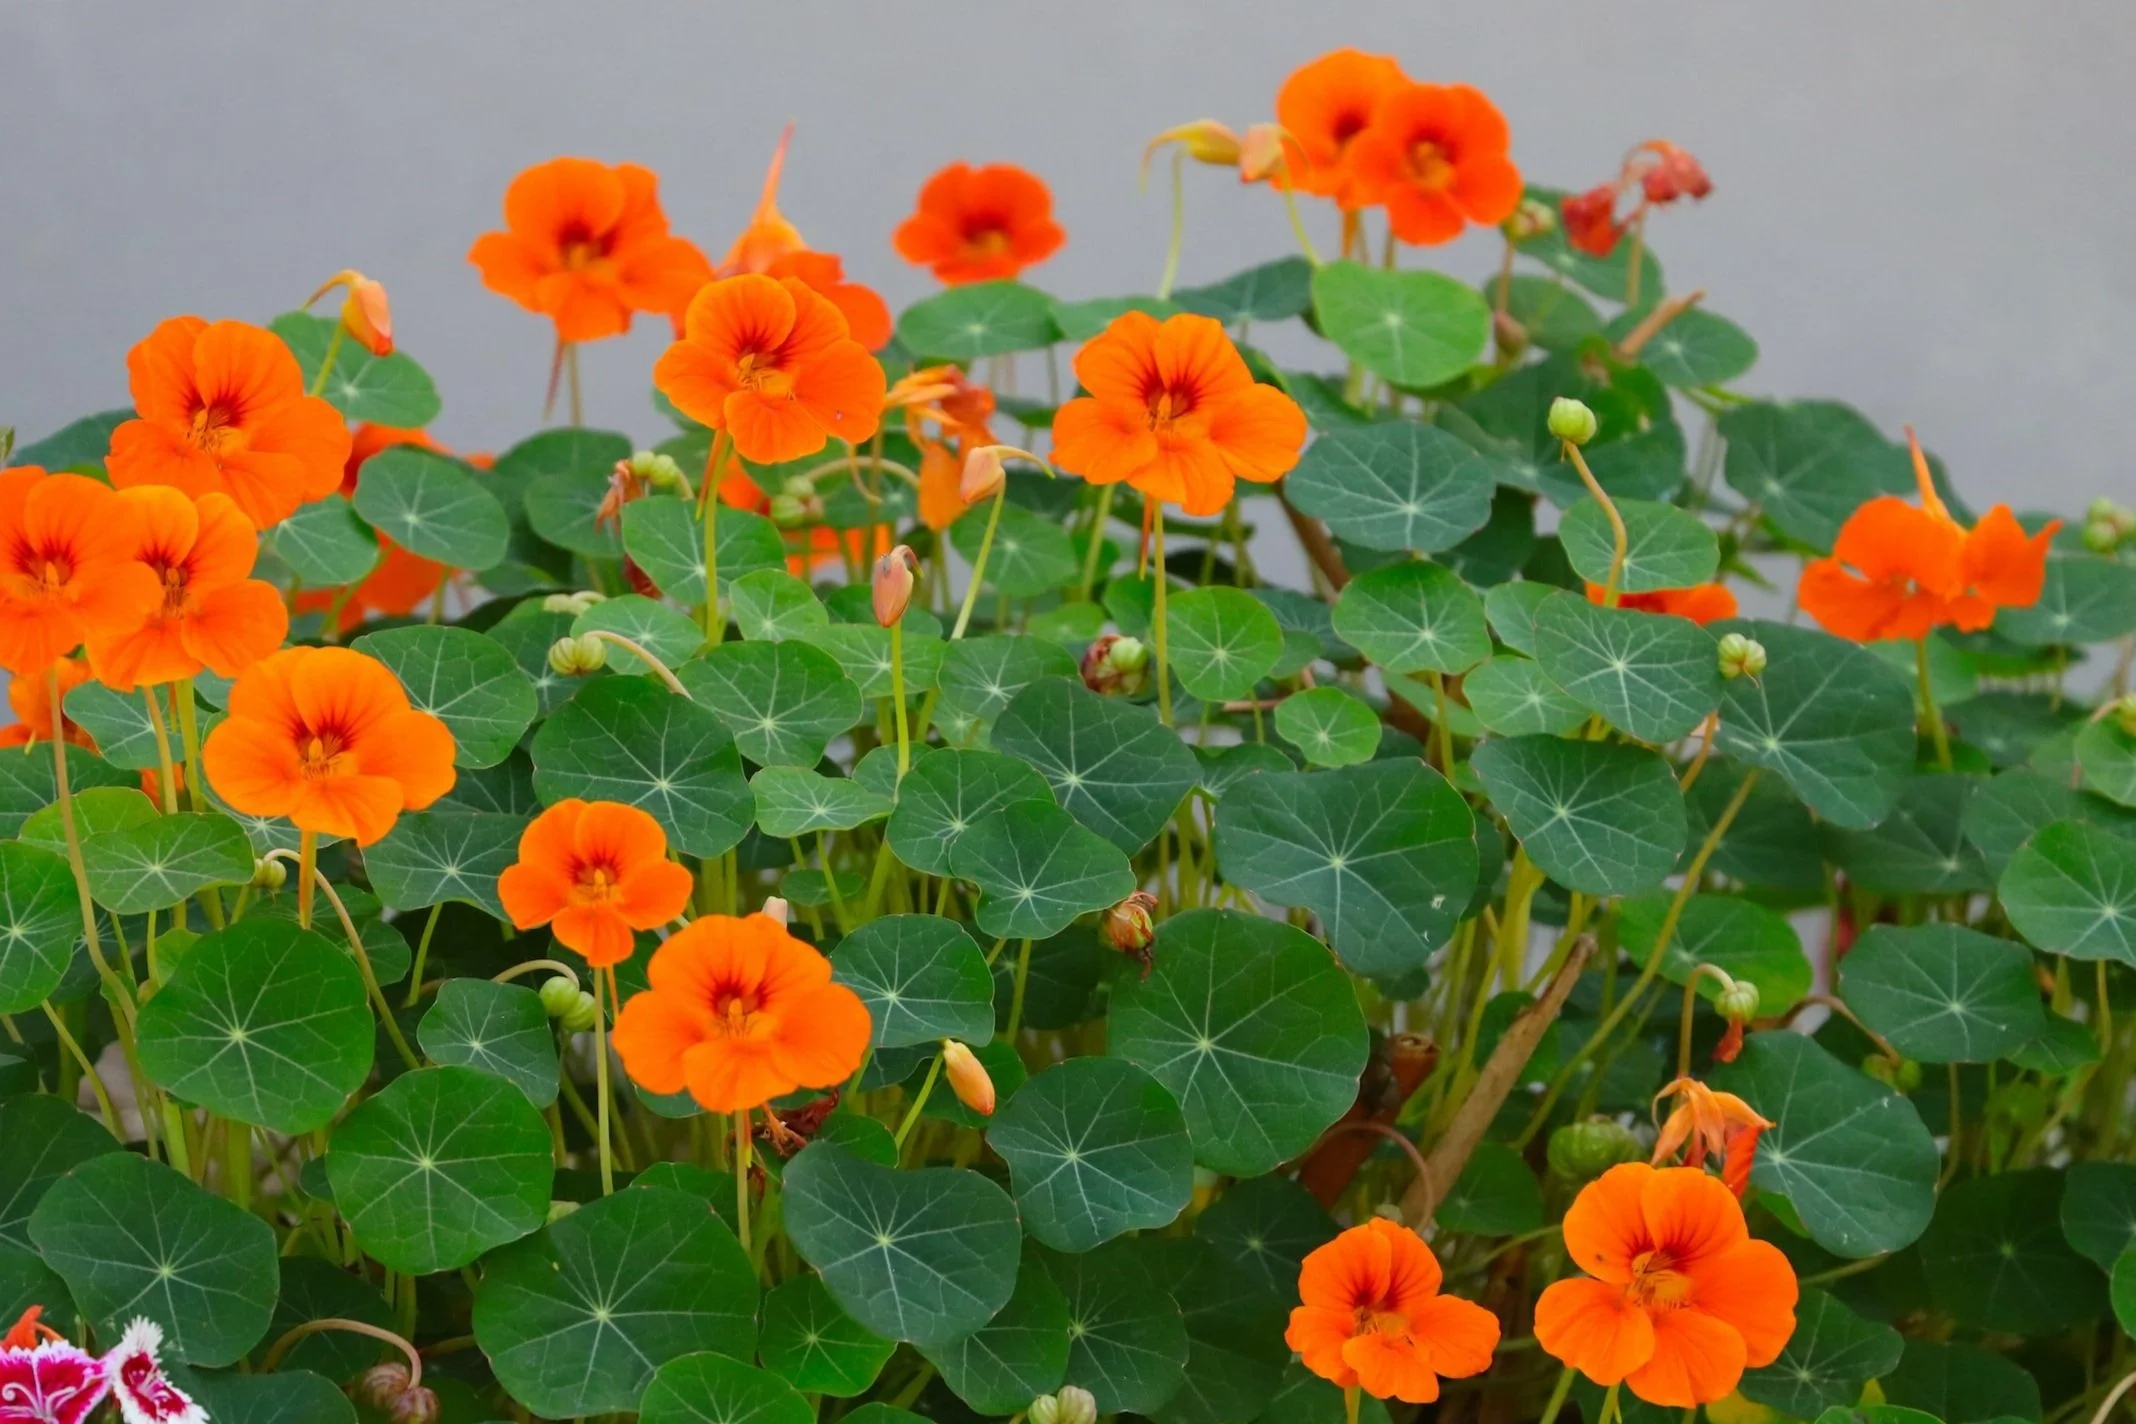
Growing Nasturtium Flowers In Your Garden [Guide]
Nasturtiums are beautiful flowers that come in a range of colors, including shades of yellow, orange, red, and even variegated combinations. What makes nasturtiums even more appealing is their versatility, as they can be grown in various garden settings, such as containers, borders, or hanging baskets. Whether you're a seasoned gardener or a beginner, nasturtiums are a great choice due to their ease of growth and low maintenance requirements.

Nasturtiums are beautiful flowers that come in a range of colors, including shades of yellow, orange, red, and even variegated combinations. What makes nasturtiums even more appealing is their versatility, as they can be grown in various garden settings, such as containers, borders, or hanging baskets. Whether you're a seasoned gardener or a beginner, nasturtiums are a great choice due to their ease of growth and low maintenance requirements.
One of the key benefits of growing nasturtiums is their stunning and vivid colors that can instantly liven up your garden. Their vibrant blooms can create a visually pleasing focal point or add a pop of color to a dull corner. Nasturtiums also attract pollinators like bees and butterflies, contributing to a healthy and vibrant ecosystem in your garden.
Apart from their ornamental value, nasturtiums are also edible. The leaves, flowers, and even the seeds of nasturtiums are edible and can be used in various culinary applications. The leaves have a peppery flavor similar to watercress, while the flowers have a slightly milder and sweeter taste. They can be added to salads, used as garnishes, or even infused into oils and vinegars for a unique flavor twist.
Another advantage of growing nasturtiums is their ability to repel certain pests in the garden. Nasturtiums emit a fragrance that deters aphids and other harmful insects, making them a natural pest control option. By planting nasturtiums alongside your other plants, you can create a more balanced and pest-resistant garden ecosystem.
Whether you're looking to enhance the visual appeal of your garden, enjoy their edible flowers and leaves, or utilize their natural pest-repelling properties, growing nasturtiums is a rewarding and beneficial gardening experience. With their vibrant colors, versatility, and culinary uses, nasturtiums are sure to bring joy and excitement to your garden and kitchen.
What Type of Nasturtium Should You Grow?
When it comes to nasturtium varieties, there are several popular options to choose from, each with its own unique characteristics and charm. Some of the commonly grown nasturtium varieties include Alaska, Jewel Mix, and Empress of India.
Alaska is a popular nasturtium variety known for its stunning variegated foliage. The leaves of Alaska are marbled with shades of green and cream, providing an eye-catching backdrop to the vibrant flowers. The flowers come in a range of colors, including shades of orange, yellow, and red. Alaska nasturtiums typically grow to a height of 10 to 12 inches (25 to 30 cm), making them suitable for containers or borders.
Jewel Mix is another popular choice among gardeners. This variety features a dazzling array of flower colors, including shades of orange, yellow, red, and mahogany. The flowers of Jewel Mix nasturtiums are larger in size and have a slightly ruffled appearance, adding a touch of elegance to any garden. The plants can reach a height of 12 to 18 inches (30 to 45 cm) and are well-suited for borders or hanging baskets.
Empress of India is a unique nasturtium variety known for its deep, velvety crimson flowers. The intense red blooms contrast beautifully with the plant's dark green foliage, creating a captivating visual display. Empress of India nasturtiums typically grow to a height of 12 to 14 inches (30 to 35 cm) and are well-suited for containers or borders.
When choosing a nasturtium variety, consider the specific garden setting you have in mind. Alaska nasturtiums, with their variegated foliage and versatile flower colors, can add a splash of interest to containers or borders. Their compact growth habit makes them suitable for smaller spaces.
Jewel Mix nasturtiums, with their larger and vibrant flowers, are great for adding a burst of color to borders, hanging baskets, or cascading over walls. Their trailing growth habit allows them to create a cascading effect, making them ideal for draping over edges or spilling out of containers.
Empress of India, with its deep red blooms and dark green foliage, creates a striking contrast. This variety can be planted as a focal point in containers or used to add depth and richness to borders.
Consider the available space, desired visual impact, and the specific garden setting when selecting nasturtium varieties. By choosing the right nasturtium variety for your garden, you can create a captivating display and enhance the overall aesthetics of your outdoor space.
Where Should You Plant Nasturtiums?
Nasturtiums thrive in full sun to partial shade, making it important to select a growing site that provides the optimal amount of sunlight. While they can tolerate some shade, nasturtiums generally produce more abundant blooms and lush foliage when exposed to at least 6 hours of direct sunlight per day. This ensures that the plants receive sufficient energy to develop vibrant flowers and lush foliage.
Soil preparation is essential for the successful growth of nasturtiums. These plants prefer well-draining soil that is rich in organic matter. Before planting, it is beneficial to amend the soil with compost or well-rotted manure to improve its fertility and texture. This enhances the soil's ability to retain moisture while also promoting healthy root development.
In addition to adding organic matter, ensuring proper drainage is crucial for nasturtiums. They are susceptible to root rot and other fungal diseases in waterlogged soil. If the soil in your chosen location is heavy or tends to retain water, consider incorporating sand or perlite to improve drainage. This will help prevent waterlogged conditions and promote healthy root growth.
Look for areas in your garden that receive ample sunlight throughout the day, especially during the morning and early afternoon. While nasturtiums can tolerate partial shade, providing them with enough sunlight will result in stronger growth and more abundant blooms.
Nasturtiums are known for their sprawling growth habit, so ensure that they have sufficient space to spread and trail without overcrowding nearby plants. In terms of soil compatibility, nasturtiums are generally adaptable and can grow well in a wide range of soil types.
How to Start Nasturtiums From Seed
Nasturtium seeds have a hard outer shell, and soaking them prior to planting can help speed up germination. Place the seeds in a container and cover them with warm water. Let them soak for 12 to 24 hours.
Once the seeds have been soaked, choose a well-prepared garden bed or container for direct sowing. Make sure the soil is moist but not waterlogged. Dig shallow holes or furrows about 1 inch deep and 6 to 12 inches apart, depending on the variety. Place the soaked seeds in the holes or furrows, spacing them about 1 inch apart. Cover the seeds with soil, gently firming it down to ensure good seed-to-soil contact. After planting, water the soil thoroughly but gently to avoid displacing the seeds. Keep the soil consistently moist until germination occurs.
Nasturtium seeds typically germinate within 7 to 14 days, depending on the temperature and conditions. Once the seedlings emerge, thin them to the desired spacing, usually around 12 inches apart for compact varieties and up to 24 inches apart for trailing varieties.
Caring for Nasturtium Flowers
Regular watering is crucial for the health and vitality of nasturtiums. These plants prefer consistently moist soil, especially during dry periods. Watering should be done deeply and evenly to ensure the entire root zone is adequately hydrated. It is important to avoid overwatering, as excessively wet soil can lead to root rot and other diseases. Monitor the moisture level of the soil and adjust your watering frequency accordingly. Mulching around the base of the plants can help retain moisture in the soil and reduce water evaporation.
Weed control is essential for the successful growth of nasturtiums. Weeds can compete with the plants for nutrients, water, and sunlight, potentially hindering their growth and development. Regularly inspect the planting area and remove any weeds that emerge. It is best to hand-pull weeds or use shallow cultivation to avoid damaging the shallow roots of the nasturtiums. Applying a layer of organic mulch around the plants can also help suppress weed growth by smothering weed seeds and preventing them from germinating.
Nasturtiums are generally not heavy feeders and can thrive in moderately fertile soil. However, providing them with some additional nutrients can promote better growth and more abundant flowering. Organic fertilizers, such as compost or well-rotted manure, are excellent choices for nourishing nasturtiums. These natural fertilizers provide a slow release of nutrients and help improve the soil structure. Apply compost or well-rotted manure around the base of the plants, taking care not to bury the stems. Avoid over-fertilizing, as this can result in excessive foliage growth at the expense of flower production.
Mulching offers several benefits when it comes to growing nasturtiums. A layer of organic mulch, such as straw, shredded leaves, or wood chips, helps conserve moisture in the soil by reducing water evaporation. This is particularly important during hot and dry periods. Mulch also acts as a natural weed barrier, suppressing the growth of unwanted plants and reducing the need for frequent weeding. Additionally, mulch helps regulate soil temperature, keeping the roots cool in hot weather and insulating them during cooler periods. Apply a layer of mulch around the base of the plants, taking care to keep it a few inches away from the stems to prevent moisture-related issues.
Should You Prune Nasturtiums?
Pruning nasturtiums can have several benefits, including promoting bushier growth and enhancing the overall appearance of the plants. By selectively removing certain stems or branches, you can encourage the development of lateral shoots, resulting in a fuller and more compact plant. Pruning also helps maintain the desired shape and size of the nasturtiums, preventing them from becoming leggy or sprawling.
If you’re wondering how to prune nasturtiums, start by assessing the overall growth of the plants. Look for long, straggly stems or branches that may be detracting from the plant's appearance. Using a pair of clean and sharp pruning shears or scissors, carefully trim back these overgrown stems to a desired length, preferably just above a set of healthy leaves or lateral shoot. This will encourage the plant to produce new growth from the trimmed area, leading to a bushier and more attractive plant overall.
It's important to note that pruning should be done selectively and with care, as excessive pruning or cutting into old wood can weaken the plant and affect its ability to produce flowers. It's recommended to prune nasturtiums during the active growing season, typically in late spring or early summer when the plants are actively producing new growth. Avoid pruning too late in the season, as this may remove potential flower buds and reduce the plant's blooming capacity.
How to Deadhead Nasturtiums
Deadheading is the process of removing spent or faded flowers from the nasturtium plants. It serves two main purposes: promoting continuous blooming and improving the overall appearance of the plants. When left unattended, the flowers of nasturtiums will naturally fade and form seed pods. By deadheading, you can redirect the plant's energy towards producing more flowers instead of setting seeds, resulting in a prolonged and abundant blooming period.
To deadhead nasturtiums, inspect the plants regularly and identify flowers that have started to fade or wilt. Follow the stem down to the first set of healthy leaves or lateral shoot, and use your fingers or a pair of pruning shears to remove the flower head just above this point. Make sure to cut or pinch off the entire flower, including the seed pod if it has started to develop. Removing the entire flower will prevent the formation of seeds and signal the plant to produce more flowers.
How to Harvest Nasturtium Flowers
Harvesting nasturtium flowers and leaves should be done when they are fully open and vibrant, usually in the morning when the plants are well-hydrated. Look for flowers that have reached their full size and display rich colors, such as vibrant oranges, yellows, and reds. Gently pluck the flowers from the stem, taking care not to damage the plant or surrounding blooms. As for the leaves, choose young and tender ones, as they tend to have a milder flavor. Harvesting both the flowers and leaves regularly will encourage the plant to produce more blooms throughout the season.
The bright and peppery flavor of nasturtium flowers makes them a delightful addition to salads, adding a burst of color and a hint of spice. They can also be used as a garnish for various dishes, imparting both visual appeal and a unique flavor. Nasturtium leaves can be used as a substitute for herbs like watercress or arugula, lending a similar peppery taste to soups, sauces, and pesto. Additionally, the unripe seed pods, often referred to as "capers," can be pickled and used in salads or as a flavorful topping for various dishes. Be creative in the kitchen and explore different ways to incorporate nasturtiums into your culinary repertoire.
![How To Grow, Harvest and Store Peppers [Guide]](https://images.squarespace-cdn.com/content/v1/60e85024dc86d643da81c96a/1687199213698-17WCT1RRZ9OCP737F1X7/image-asset.jpeg)
How To Grow, Harvest and Store Peppers [Guide]
Peppers are a vibrant and versatile addition to any garden, offering a spectrum of colors, flavors, and heat levels to elevate your culinary creations. Whether you prefer sweet bell peppers, spicy jalapeños, or exotic chili varieties, growing peppers in your own garden allows you to enjoy the freshest and most flavorful harvest. In this comprehensive guide, we will delve into the world of pepper cultivation, covering everything from choosing the right varieties to nurturing your plants and maximizing your pepper yield.

Peppers are a vibrant and versatile addition to any garden, offering a spectrum of colors, flavors, and heat levels to elevate your culinary creations. Whether you prefer sweet bell peppers, spicy jalapeños, or exotic chili varieties, growing peppers in your own garden allows you to enjoy the freshest and most flavorful harvest. In this comprehensive guide, we will delve into the world of pepper cultivation, covering everything from choosing the right varieties to nurturing your plants and maximizing your pepper yield.
The Pepper Family: Exploring Pepper Varieties
Peppers come in a wide range of varieties, each with its own unique characteristics and flavors:
Sweet Bell Pepper Varieties
California Wonder
Color: Initially green, maturing to a vibrant red.
Size: Large and blocky, typically 4-5 inches in length and width.
Flavor: Sweet and crisp, with a mild and pleasant taste. California Wonder is a classic bell pepper variety and is well-suited for stuffing, grilling, or using fresh in salads.
Golden California Wonder
Color: Bright golden yellow when ripe.
Size: Similar to the California Wonder, large and blocky, around 4-5 inches in length and width.
Flavor: Sweet and slightly fruity, with a milder taste compared to red bell peppers. Golden California Wonder adds a vibrant splash of color to dishes and is excellent for fresh eating, roasting, or sautéing.
Chocolate Beauty
Color: Deep, rich chocolate-brown when fully mature.
Size: Large and blocky, similar in size to other bell pepper varieties.
Flavor: Sweet, with a slightly smoky and rich flavor profile. Chocolate Beauty peppers are great for adding depth and complexity to dishes, especially when roasted or used in savory sauces.
Chili Pepper Varieties
Jalapeño Pepper
Color: Green when immature, turning red as it ripens.
Size: Medium-sized, usually 2-3 inches in length.
Flavor: Moderately spicy, with a distinctive heat and a hint of earthy and slightly sweet undertones. Jalapeños are versatile and commonly used in various cuisines.
Habanero Pepper
Color: Ranges from green to vibrant orange when fully ripe.
Size: Small to medium, typically 1-2 inches in length.
Flavor: Intensely hot and fruity, with a tropical flavor profile. Habaneros are among the hottest chili peppers, delivering a fiery kick to dishes.
Exotic Pepper Varieties
Poblano Pepper
Color: Dark green when immature, turning dark reddish-brown when fully ripe.
Size: Large and heart-shaped, averaging around 4-5 inches in length.
Flavor: Mild to medium heat, with a rich, earthy, and slightly smoky taste. Poblanos are commonly used in Mexican cuisine, particularly for stuffing and roasting.

Banana Pepper
Color: Yellow when fully ripe, but can be harvested while still green.
Size: Long and slender, typically 6-8 inches in length.
Flavor: Mild and tangy, with a subtle sweetness. Banana peppers are great for pickling, adding a tangy crunch to sandwiches and salads.
Shishito Pepper
Color: Bright green when immature, turning red as it ripens.
Size: Small and slender, typically 3-4 inches in length.
Flavor: Mild to medium heat, with a smoky and slightly sweet taste. Shishito peppers are often enjoyed blistered or grilled as a popular appetizer or side dish in Japanese cuisine.
How To Grow Peppers in Your Garden
To successfully grow peppers, it's important to understand their ideal growing conditions. Peppers thrive in full sun, requiring at least 6-8 hours of direct sunlight per day. Warm temperatures between 70-85°F (21-29°C) are ideal for pepper growth. Well-draining soil with organic matter and a pH level around 6.0-7.0 is best.
Starting Pepper Plants From Seeds
Start pepper seeds indoors 8-10 weeks before the last frost date in your area. Transplant seedlings outdoors after the danger of frost has passed and the soil has warmed up.
Starting pepper plants from seeds using heat mats can greatly improve the germination rate and early growth. Here's a step-by-step guide on how to do it:
Gather your supplies. You’ll need pepper seeds, seed-starting trays or pots with drainage holes, seed-starting mix or a well-draining soil mix, a heat mat specifically designed for seed germination and a clear plastic dome or plastic wrap to cover the trays.
Fill the trays with the seed-starting mix, leaving a small gap at the top for watering. Moisten the soil evenly, ensuring it is thoroughly damp but not waterlogged.
Read the seed packet instructions for specific sowing depth and spacing recommendations. Make small holes in the soil using a pencil or your finger. Place one or two pepper seeds in each hole and cover them gently with soil. Label the trays to keep track of the pepper varieties.
Place the heat mat on a stable, level surface. Plug in the mat and set the temperature according to the seed packet instructions or general guidelines for pepper seeds (usually around 75-85°F or 24-29°C). Ensure the mat is large enough to accommodate your trays. Cover the trays with a clear plastic dome or plastic wrap to create a mini-greenhouse effect and retain moisture.
Check the trays regularly to ensure the soil remains evenly moist, but avoid overwatering to prevent damping off. Keep an eye on the temperature and adjust it as necessary to maintain the recommended range. Monitor the seeds for germination, which typically occurs within 7-14 days, depending on the pepper variety.
Once the seedlings emerge, remove the plastic dome or wrap to promote airflow and prevent excessive humidity. Gradually reduce the heat mat temperature by a few degrees every few days and continue providing sufficient light, either from natural sunlight or using grow lights, to help the seedlings thrive.
When the seedlings have developed their first true leaves and are large enough to handle, transplant them into larger pots or containers. As the last frost date approaches, gradually acclimate the seedlings to outdoor conditions by placing them outside for increasing periods each day. This process is called hardening off.
Starting pepper plants from seeds using heat mats offers a controlled and optimal environment for germination, ensuring a higher success rate.
Caring for Pepper Plants
It’s important to provide adequate watering and fertilization. Water pepper plants deeply and infrequently to encourage deep root growth. Apply balanced fertilizer during planting and provide periodic feedings throughout the growing season.
Staking and Supporting Pepper Plants

Tall or heavy-bearing pepper varieties may require staking or supporting to prevent plant damage and ensure proper growth. By staking your pepper plants, you provide them with the necessary support to thrive and maximize their yield. It also makes it easier to care for the plants, allows better air circulation, and reduces the risk of disease. With proper staking and regular maintenance, your pepper plants will grow upright, produce abundant fruit, and bring you a bountiful harvest. Choose sturdy stakes or supports that are at least 3 to 4 feet tall and can withstand outdoor conditions. Bamboo stakes, metal stakes, or tomato cages are commonly used options. It's best to stake your pepper plants early in the growing season when they are still young and can be easily trained. Aim to stake them when they are around 6 to 8 inches tall. Insert the stakes into the ground near each pepper plant, ensuring they are positioned a few inches away from the main stem to avoid damaging the roots. Ideally, place the stakes on the side opposite to the prevailing wind direction.
Gently push the stakes into the ground until they are firmly anchored, ensuring they penetrate at least 6 to 8 inches deep for stability. If using tomato cages, position them over the pepper plants and secure them firmly. As the pepper plants grow, loosely tie the main stem to the stake using soft plant ties, twine, or fabric strips. Make sure the ties are not too tight to allow for natural growth and prevent damage to the stem. Regularly inspect the plants and adjust the ties as needed. Ensure the ties are not cutting into the stems, and provide enough slack to accommodate the plant's growth.
Growing Healthy Pepper Plants
To maintain healthy pepper plants, consider the following practices:
Pruning pepper plants: Remove lower leaves and branches to improve air circulation. Some gardeners recommend pinching off the growing tips to encourage bushier growth, but there is no evidence that this has the desired effect.
Managing Pests: Pepper plants are susceptible to various pests that can damage foliage, affect fruit development, and weaken the overall health of the plant. Here are some common pepper plant pests you may encounter:
Aphids: Aphids are small, soft-bodied insects that cluster on the undersides of leaves and stems. They suck plant sap, causing distorted growth, yellowing leaves, and stunted plants. To control aphids, try spraying a mixture of water and mild soap or use organic insecticidal soap. Beneficial insects like ladybugs can also help control aphid populations.
Pepper Weevils: Pepper weevils are small beetles that attack the fruit of pepper plants. They leave small, pin-sized holes in the peppers and cause damage to the seeds. The best control method is to practice good garden hygiene by promptly removing infested fruits and disposing of them properly.
Spider Mites: Spider mites are tiny pests that can be difficult to see with the naked eye. They feed on plant cells, causing leaves to turn yellow, appear stippled, and eventually dry out. Regularly misting the leaves with water and using insecticidal soap or neem oil can help control spider mites. Additionally, maintaining proper humidity levels in the growing area can discourage their growth.
Whiteflies: Whiteflies are small, white insects that cluster on the undersides of leaves. They suck plant sap and excrete honeydew, leading to yellowing leaves, stunted growth, and sooty mold development. Introduce natural predators like parasitic wasps or use yellow sticky traps to catch and control whiteflies.

Thrips: Thrips are slender, winged insects that feed on plant tissue by scraping the surface and sucking the sap. They cause silvery streaks on leaves, deformed growth, and browning of flower petals. Regularly spraying the plants with water and using yellow or blue sticky traps can help control thrips.
Slugs and Snails: Slugs and snails are common garden pests that feed on the leaves and fruit of pepper plants. They leave irregular holes in the leaves and may cause significant damage to young plants. Handpicking, using traps, or creating barriers with copper tape or diatomaceous earth around the plants can help control slugs and snails.
Maximizing Pepper Yield and Quality
To ensure abundant and high-quality pepper harvests, provide consistent watering and avoid water stress to promote flower development. Encourage pollination by attracting beneficial pollinators to your garden. Harvest peppers promptly to encourage continuous fruit production. Use sharp shears or a knife to cut the peppers from the plant.
Storing and Preserving Peppers: Store fresh peppers in a cool, dry place or in the refrigerator to extend their shelf life. Consider freezing, drying, or pickling peppers for long-term preservation.
Growing peppers in your garden is a rewarding experience that allows you to enjoy a diverse range of flavors, from sweet to spicy. By understanding the different pepper varieties, providing optimal growing conditions, and implementing proper care and maintenance techniques, you can cultivate healthy and productive pepper plants. From planting seeds to nurturing the plants, and from harvesting the fruits to preserving them, your pepper-growing journey is filled with possibilities for culinary creativity and garden-to-table enjoyment. So, roll up your sleeves, prepare your garden beds, and embark on a pepper-growing adventure that will spice up your meals!
![How To Grow, Harvest and Store Potatoes [Guide]](https://images.squarespace-cdn.com/content/v1/60e85024dc86d643da81c96a/1687198565594-27J97ZE9QJ65HWYS3815/image-asset.jpeg)
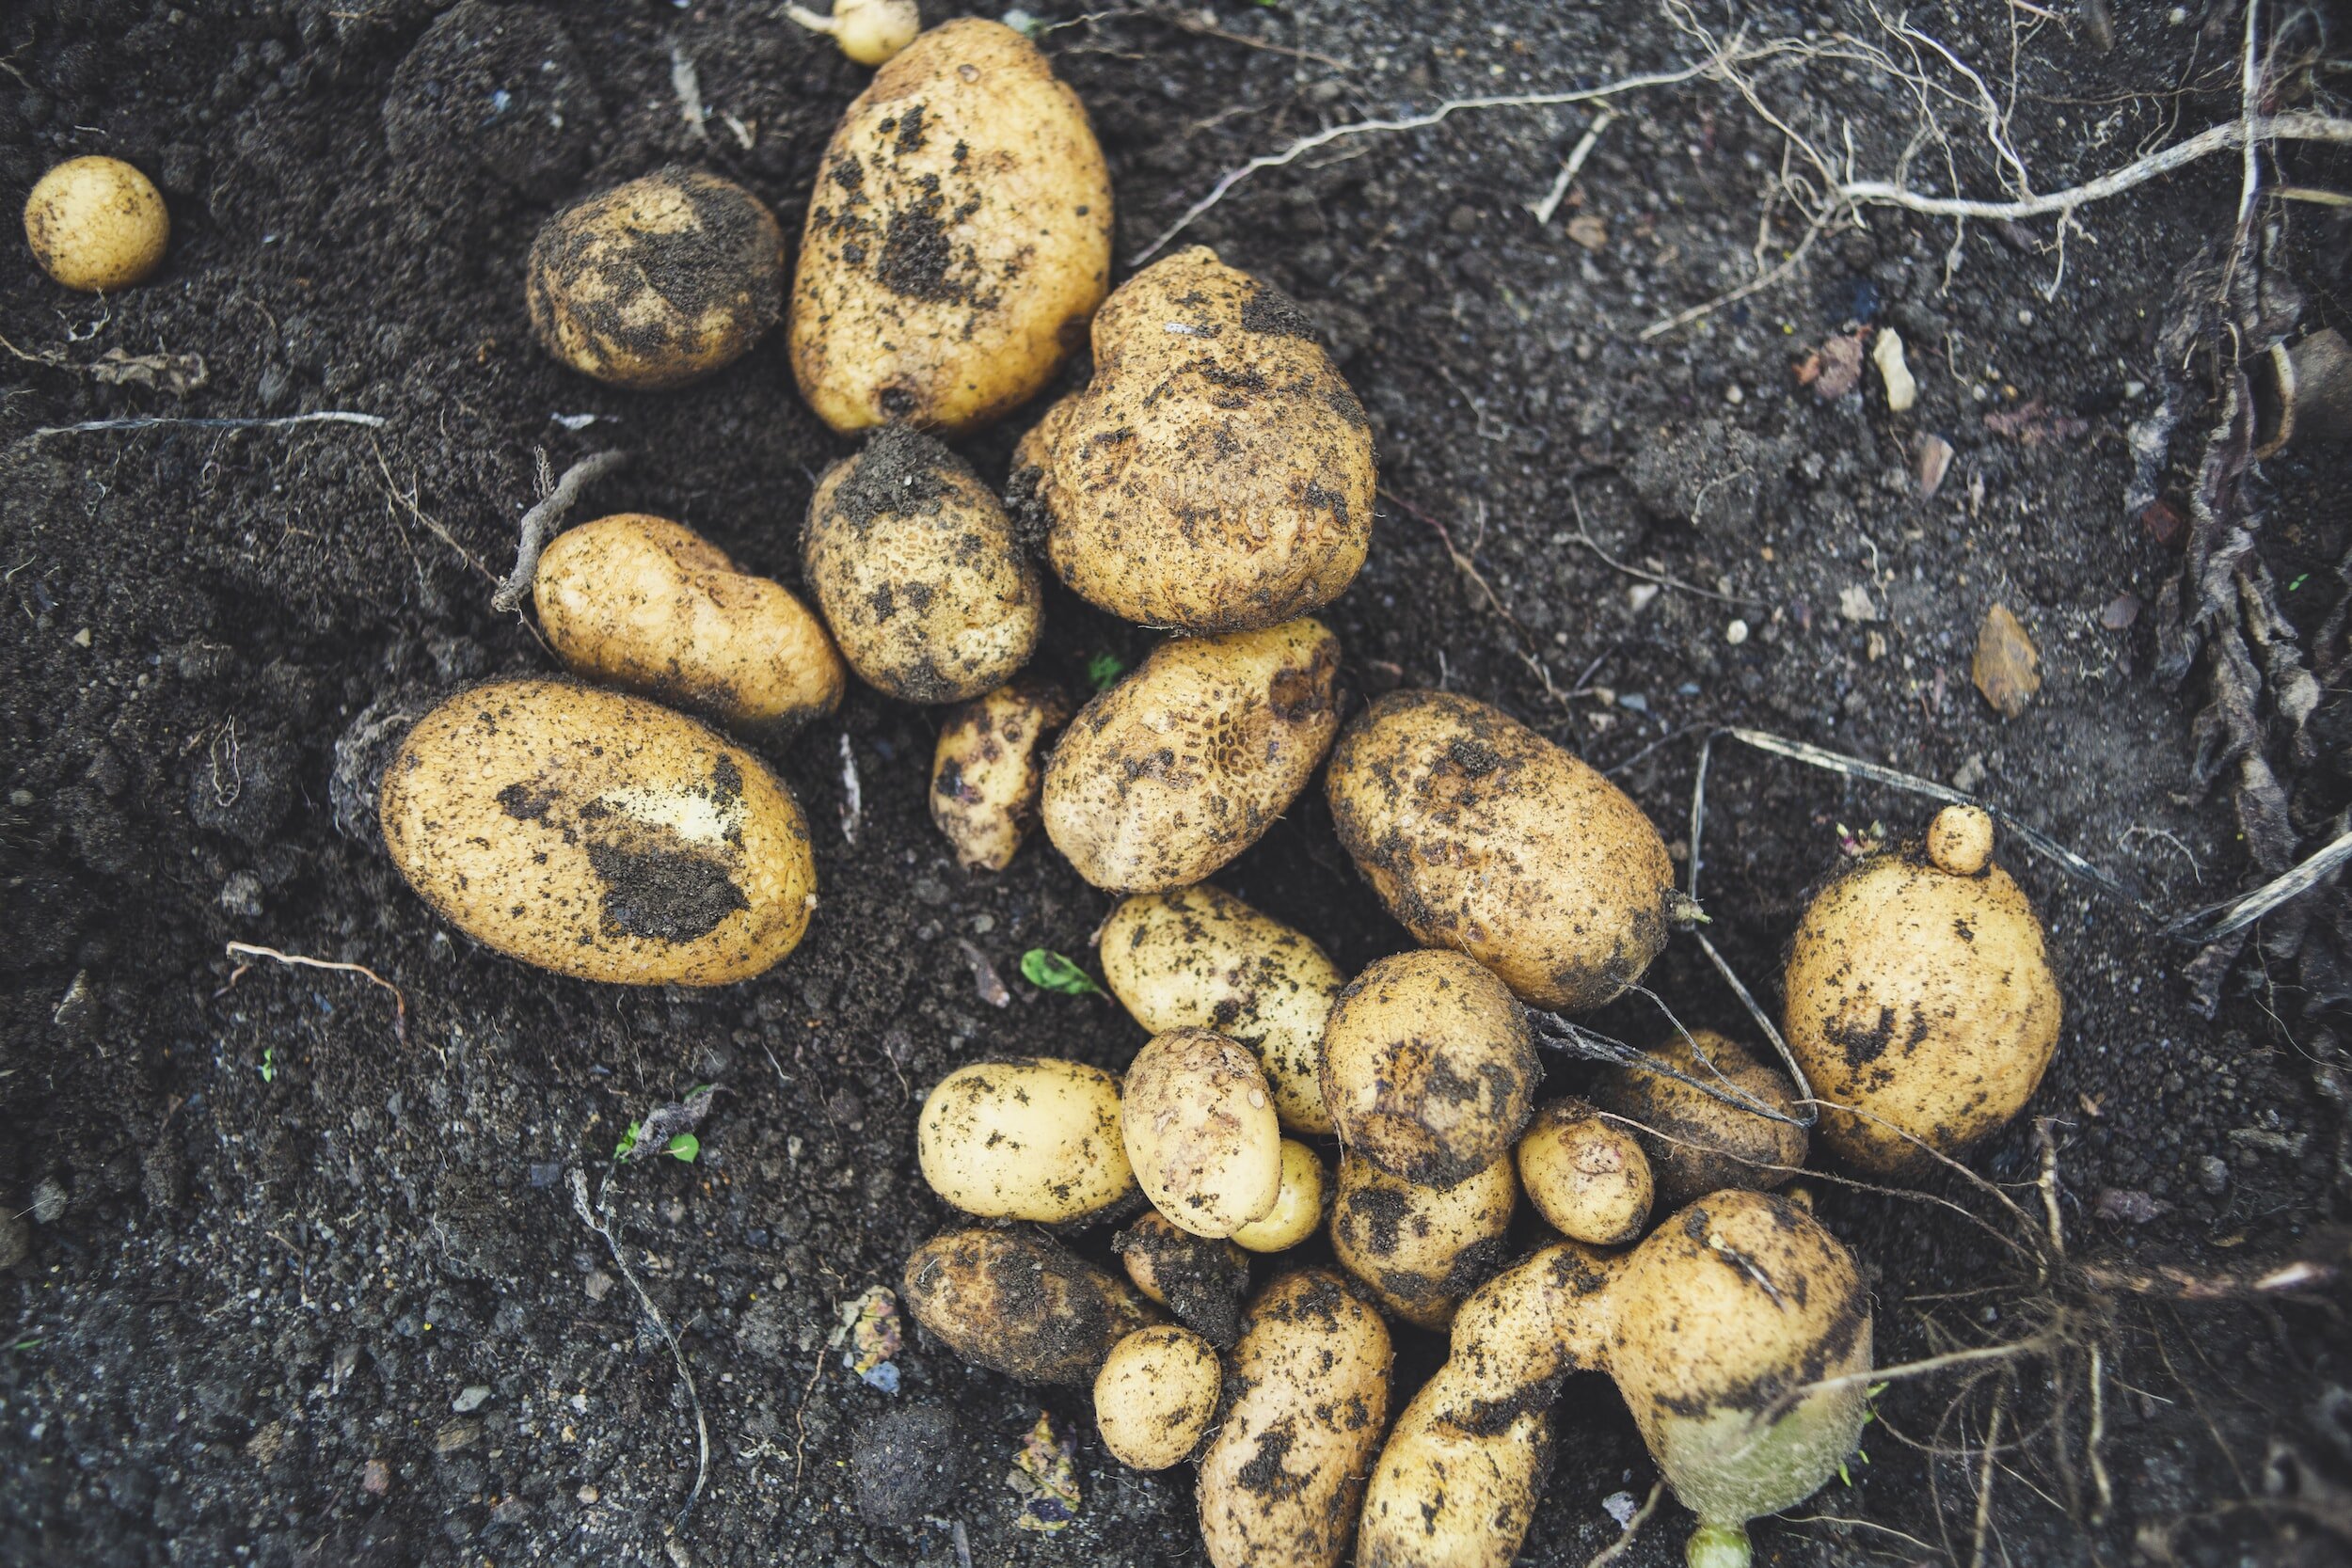
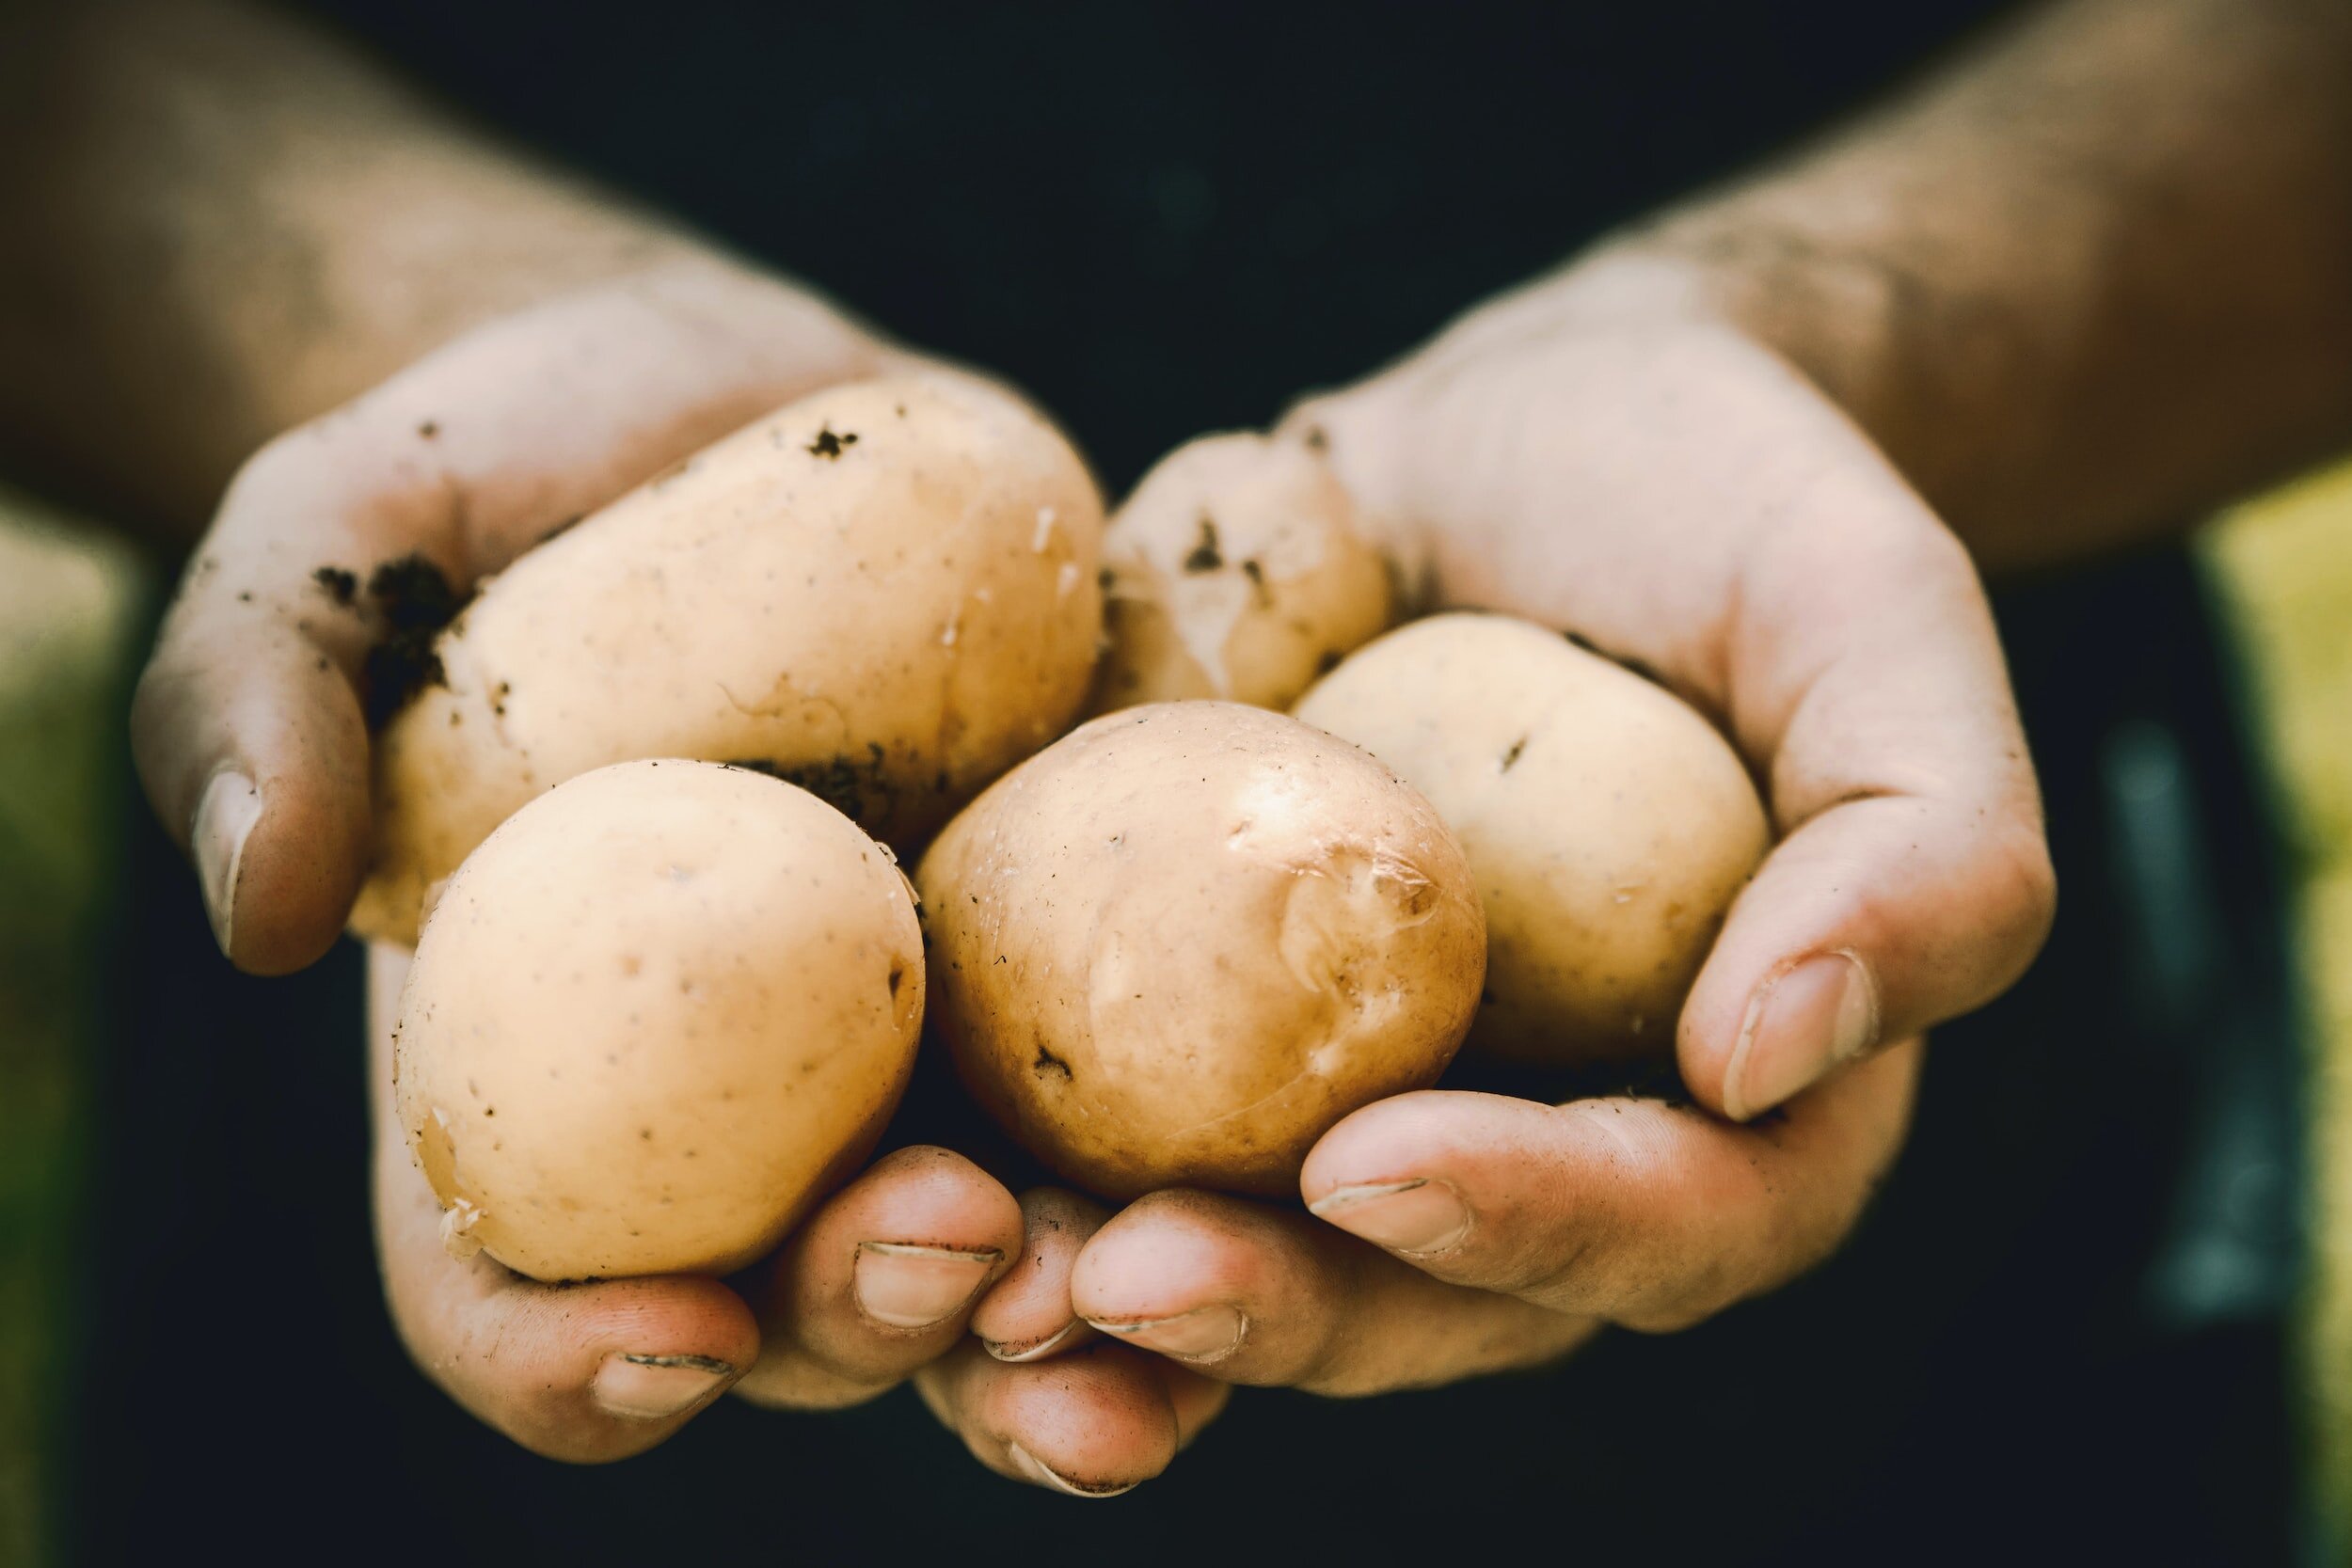
How To Grow, Harvest and Store Potatoes [Guide]
There's nothing quite like the joy of digging up your own fresh potatoes, knowing that you played a part in their growth from seed to harvest. By cultivating your own potatoes, you have complete control over the variety you grow, allowing you to explore different flavors and textures that may not be available in stores.
Growing your own potatoes provides a deeper understanding of the food system and a greater appreciation for the effort and care required to produce these nutritious tubers. It allows you to reconnect with nature and experience the joy of nurturing a plant from seed to maturity.

Potatoes, a staple and versatile vegetable, have long been cherished for their unique flavors and culinary versatility. From crispy French fries to creamy mashed potatoes and hearty potato soups, this humble tuber offers endless possibilities in the kitchen. Not only are potatoes delicious, but they also provide essential nutrients such as carbohydrates, dietary fiber, vitamin C, and potassium.
There's nothing quite like the joy of digging up your own fresh potatoes, knowing that you played a part in their growth from seed to harvest. By cultivating your own potatoes, you have complete control over the variety you grow, allowing you to explore different flavors and textures that may not be available in stores.
Growing your own potatoes provides a deeper understanding of the food system and a greater appreciation for the effort and care required to produce these nutritious tubers. It allows you to reconnect with nature and experience the joy of nurturing a plant from seed to maturity.
Not only do homegrown potatoes provide a rewarding gardening experience, but they also offer the added benefit of being free from harmful pesticides and chemicals that can be present in commercially grown potatoes. You have control over the cultivation process, allowing you to adopt organic practices and ensure the highest quality and health benefits for you and your family.
Whether you have a spacious backyard or limited space on a balcony or patio, potatoes can be grown in containers or traditional garden beds, making them accessible to gardeners of all levels.
What Kind Of Potatoes Can You Grow?
When it comes to choosing potato varieties, there are numerous options available, each with its own unique characteristics and culinary applications.
Russet potatoes are known for their rough, netted brown skin and white flesh. They have a starchy texture and a slightly mealy consistency, making them perfect for baking, mashing, and frying. Russets are often favored for their ability to yield crispy and fluffy French fries, as well as light and airy mashed potatoes. Their neutral flavor allows them to absorb seasonings and spices, making them versatile in various recipes.
Yukon Gold potatoes are prized for their smooth, golden-yellow skin and vibrant yellow flesh. They have a creamy and buttery texture that holds up well when boiled or roasted, making them ideal for dishes like creamy mashed potatoes, roasted potatoes, and potato salads. Yukon Golds have a rich, subtly sweet flavor that adds depth to any dish. Their thin skins are tender and can be left on for added texture and nutrients.
Red Pontiac potatoes feature a vibrant red skin and crisp, white flesh. They have a waxy texture and hold their shape well when boiled or roasted, making them great for potato salads, roasted vegetables, and soups. Red Pontiacs have a slightly sweet and earthy flavor that adds a delightful taste to any dish. Their attractive red skin also adds visual appeal when used in recipes that showcase the vibrant colors of the ingredients.
Each of these potato varieties has its own suitability for different culinary applications. Russet potatoes are the go-to choice for baking due to their high starch content and fluffy texture when cooked. Their thick skin helps retain moisture, resulting in a crispy exterior and light, tender interior. Yukon Gold and Red Pontiac potatoes are excellent for boiling because of their waxy texture. They hold their shape well during cooking and maintain a creamy consistency, making them ideal for potato salads, stews, or any recipe that requires boiled potatoes. Russet potatoes are often the preferred choice for frying, whether it's for making French fries or potato chips. Their high starch content and low moisture content allow them to achieve a crispy exterior and a soft, fluffy interior when fried.
Where to Plant Potatoes
Potatoes thrive in full sun exposure, so it is essential to choose a growing site that receives at least 6-8 hours of direct sunlight per day. This ensures optimal growth and encourages the development of healthy foliage and tubers. Adequate sunlight also helps prevent diseases and promotes good air circulation around the plants.
Soil preparation plays a crucial role in the successful growth of potatoes. Start by testing the soil pH using a soil testing kit, aiming for a slightly acidic to neutral range between 5.8 and 6.5. Adjust the pH if necessary by adding lime to raise it or sulfur to lower it. This helps create a favorable environment for nutrient uptake and minimizes the risk of nutrient deficiencies or toxicities.
In addition to pH adjustments, it's important to ensure that the soil is well-draining and loose. Potatoes prefer fluffy, loamy soil that allows for good drainage and root penetration. If your soil is heavy or compacted, incorporate organic matter such as compost, well-rotted manure, or peat moss to improve its texture and drainage capabilities. Organic matter also enriches the soil with nutrients, enhances water retention, and promotes beneficial microbial activity.
Potatoes need enough room to grow and spread their foliage without overcrowding. Adequate spacing allows for good air circulation and reduces the risk of diseases, especially those that thrive in damp and crowded conditions.
Select an area that is free from large trees or structures that may cast excessive shade over the potato plants. While some shade during the hottest part of the day can be beneficial, too much shade can hinder growth and reduce yield. Aim for a location where the potato plants will receive ample sunlight throughout the day.
Growing Seed Potatoes VS Grocery Store Potatoes

When starting potatoes, there are two main methods: using certified seed potatoes or sprouting potatoes from the grocery store. Certified seed potatoes are specially grown and certified disease-free, ensuring a higher chance of healthy and productive plants. On the other hand, sprouting potatoes from the grocery store can be a cost-effective option, but they may carry a higher risk of diseases and may not produce consistent results. Starting potatoes from certified seed potatoes is the recommended method for optimal results.
Before planting, you will need to "chit" the seed potatoes. Chitting refers to the process of encouraging the potatoes to sprout before planting. Arrange your seed potatoes in a single layer with the eyes facing upward. Allow the seed potatoes to sprout for a few weeks. During this time, small sprouts or "chits" will emerge from the eyes of the potatoes. Once the sprouts are about one inch long and you are ready to plant, cut any larger seed potatoes into roughly two inch chunks and allow the cuts to heal over and dry out for 24-48 hours to reduce the risk of rot.
Prepare the soil by removing any weeds and loosening it with a garden fork or tiller. Incorporate organic matter, such as compost or well-rotted manure, to enrich the soil. Dig a trench or individual holes for planting. The depth will depend on the size of the seed potatoes, but a general guideline is around 4 to 6 inches (10 to 15 cm) deep. Place the seed potatoes in the trench or holes, sprouts facing upward, with a spacing of about 12 to 15 inches (30 to 38 cm) between each potato. Ensure that the sprouts are positioned upward and not buried too deep.
Cover the potatoes with soil, leaving a small mound or ridge above the ground. As the plants grow, you can gradually mound soil around the stems to encourage more tuber development. Hilling is not necessary for determinate varieties of potatoes.
Sprouting grocery store potatoes can be an alternative if certified seed potatoes are not readily available. However, it's important to note that grocery store potatoes may carry diseases or have been treated with growth inhibitors. If you choose this method, select healthy, organic potatoes from the grocery store. Avoid potatoes that are sprouting excessively or showing signs of decay or disease. Place the potatoes in a cool, dry, and well-ventilated area with temperatures around 50 to 60°F (10 to 15°C). This will initiate the sprouting process. Allow the potatoes to sprout for several weeks until the sprouts are about 1 inch (2.5 cm) long. Check the potatoes regularly and discard any that show signs of rot or disease. Once the sprouts have reached the desired length, follow the planting steps outlined above for certified seed potatoes, including preparing the soil, digging trenches or holes, and planting the sprouted potatoes with the sprouts facing upward.
Why Should You Hill Potatoes?
Hilling is an important technique in potato cultivation that involves gradually covering the emerging plants with soil. Hilling encourages tuber development - by covering the lower stems and lower leaves with soil, the plant is stimulated to produce additional underground stems and tubers. This increases the yield of the potato crop. Furthermore, exposing the tubers to sunlight can cause them to turn green, indicating the presence of solanine, a toxic compound. Hilling helps prevent exposure to sunlight, ensuring the potatoes remain healthy and safe for consumption.
Here’s how to hill potatoes
Once the potato plants have emerged and reached a height of about 6 to 8 inches (15 to 20 cm), carefully mound soil around the base of the plants, covering the lower stems and lower leaves. Leave a small portion of the top foliage exposed. This ensures that the plant can still carry out photosynthesis and continue growing. Repeat the hilling process every few weeks as the plants continue to grow. By the end of the season, the mounded soil can reach a height of 8 to 12 inches (20 to 30 cm) above the original ground level.
Potato Plant Pests
Colorado potato beetles: These beetles are one of the most destructive pests of potatoes. Both the adult beetles and their larvae feed on potato foliage, causing significant damage if left unchecked.
Aphids: Aphids are small, sap-sucking insects that can infest potato plants. They reproduce rapidly and can cause distortion and stunted growth in the leaves. Aphids also secrete a sticky substance called honeydew, which can attract ants and promote the growth of sooty mold.
Potato tuber moths: These pests primarily target the tubers, causing damage by tunneling into the potatoes and rendering them unmarketable or unfit for consumption.
To prevent pests on your potatoes, inspect the plants regularly and manually remove pests such as Colorado potato beetles and their larvae. Drop them into a bucket of soapy water to prevent them from returning to the plants. Intercropping potatoes with repellent plants such as marigolds, tansy, or coriander can help deter pests. These companion plants emit natural compounds that repel insects.
Potato Plant Diseases
Late blight: Late blight is a devastating fungal disease that affects the foliage and tubers of potatoes. It thrives in cool, moist conditions and can spread rapidly, causing leaf lesions and rotting of the tubers.
Potato scab: Potato scab is a bacterial disease that results in rough, scaly patches on the potato tubers. It does not typically affect the edibility of the potatoes but can make them less appealing.
To prevent potato diseases, avoid planting potatoes or other related crops (such as tomatoes or peppers) in the same location year after year. Rotate potatoes with unrelated crops to disrupt the life cycle of pests and diseases. Remove and destroy any diseased plant material to prevent the spread of diseases. This includes removing infected foliage or tubers and properly disposing of them. Using certified disease-free seed potatoes can help reduce the risk of introducing diseases into your garden. Proper spacing between plants and removing weeds or excess vegetation around the potato patch promotes air circulation, which can help reduce humidity and prevent disease development.
How to Harvest Potatoes
When it comes to harvesting potatoes, it's important to wait until the plants have reached maturity. Signs of maturity include the yellowing and dying back of the foliage. This indicates that the potatoes have stopped growing and are ready to be harvested.
To harvest your potatoes, start by gently digging around the base of the plants with a garden fork or shovel, taking care not to pierce or cut the potatoes. Lift the plants out of the ground, shaking off excess soil or gently brushing it off the tubers.
How to Cure Potatoes
Curing potatoes after harvesting is an important step to toughen their skins and improve their storage capabilities. To cure potatoes, lay them out in a single layer in a cool, well-ventilated area for about two weeks. This allows the skins to thicken and any minor injuries to heal, reducing the risk of rot during storage.
How to Store Potatoes
Store potatoes in a cool, dark location with a temperature of around 45-50°F (7-10°C). Avoid exposure to sunlight as it can cause the potatoes to turn green and develop a bitter taste. If available, create a root cellar-like environment by storing potatoes in a cool, humid place with good airflow. Ideal conditions include a temperature range of 32-40°F (0-4°C) and humidity levels of 90-95%. This helps to prolong their storage life. Place potatoes in paper or burlap sacks that allow for airflow while blocking out light. Avoid using plastic bags, as they can trap moisture and promote rotting. Regularly inspect stored potatoes for signs of spoilage, such as soft spots, mold, or sprouting. Remove any spoiled potatoes promptly to prevent the spread of rot to the rest of the stored tubers.
Growing your own potatoes can be a rewarding experience. From choosing the right varieties to harvesting and storing them properly, you can enjoy the satisfaction of homegrown potatoes that are versatile in the kitchen and packed with flavor. So why not start your own potato garden, experiment with different varieties, and savor the delicious flavors and nutritional benefits that homegrown potatoes bring to your meals? Happy potato growing!

Nature's Therapy: Discover 5 Soothing Herbs for Your Spa Shower Routine
Adding herbal and aromatherapy elements to your bathing ritual has been a long standing tradition in cultures around the world, but there’s just something extra rewarding about it when you grow those flowers and herbs yourself. So head out to the garden and clip a few sprigs of whatever calls to you - we’ll go over some of the easiest ways to include plants in your shower routine.
Learning about how different herbs can provide different benefits for the skin and body can bring you closer to nature and yourself, as well as offering a ton of ways you can support yourself through a self care ritual not rooted in consumerism (hard to find these days). You’re probably familiar with using fragrant botanicals like eucalyptus and lavender in your spa shower routine, but here’s a few more herbs and flowers you should consider including next time you’re looking for a soothing sensory experience in the shower:

July brings heat waves and sticky summer afternoons,long days spent outside and probably a sunburn or two even among the most sunscreen-conscious among us. For me there is nothing more satisfying after a long day of work in the garden than taking a long herb-infused shower with botanicals picked fresh from the garden.
Adding herbal and aromatherapy elements to your bathing ritual has been a long standing tradition in cultures around the world, but there’s just something extra rewarding about it when you grow those flowers and herbs yourself. So head out to the garden and clip a few sprigs of whatever calls to you - we’ll go over some of the easiest ways to include plants in your shower routine.
Learning about how different herbs can provide different benefits for the skin and body can bring you closer to nature and yourself, as well as offering a ton of ways you can support yourself through a self care ritual not rooted in consumerism (hard to find these days). You’re probably familiar with using fragrant botanicals like eucalyptus and lavender in your spa shower routine, but here’s a few more herbs and flowers you should consider including next time you’re looking for a soothing sensory experience in the shower:
Best herbs for use in a spa shower routine
Peppermint: Peppermint has a cooling and refreshing scent that can help alleviate headaches, improve digestion, and boost energy levels. Sharp and energizing, perfect for hot days.
Rosemary: Rosemary has a woody and earthy scent that can help improve focus and concentration. It can also help boost the immune system and relieve stress. I love using rosemary in the winter, but for summer showers it adds a deep element that can’t be replicated.
Chamomile: Chamomile has a calming and soothing scent that can help reduce stress and anxiety. It can also help promote better sleep and alleviate skin irritations. This is my go to for chaotic weeks where work seems like it will never be done.
Lemongrass: Lemongrass has a fresh and citrusy scent that can help uplift the mood and relieve stress and anxiety. It can also help alleviate pain and inflammation in muscles and joints. Chronic pain baddies take note: lemongrass is a hard worker in your herbal medicine cabinet.
Frankincense: Frankincense has a warm and woody scent that can help promote relaxation and spiritual well-being. It can also help boost the immune system and improve respiratory health.
How to Create an Herb-Infused Shower
The options for ways to include herbs in your spa shower routine are practically endless. But here are a few simple methods you can make quickly and easily:
Herbs for Exfoliation
Including herbs in your sugar scrubs can support skin health and boost healthy glow while providing antimicrobial benefits that could help reduce blemish and acne. Smaller flower buds work best for blending into sugar scrubs. My favorites are Rosemary and Lavender for this technique. I would avoid brittle leaves that can break into lots of tiny pieces. To make a sugar scrub, combine 1 cup white or raw sugar with ¼-½ cup carrier oil of choice. I like to use almond or jojoba oil. To this mixture, add approximately a tablespoon of your dried herbs of choice and 15-20 drops of essential oil.

To use your DIY herbal scrub, scoop out a small amount and slowly massage into your skin in a circular motion. Rinse with warm water. Be careful - this can make your tub slippery!
Rinsing with Herbal Tea
An herbal tea shower rinse can make your shower feel like a spa instantly, and all you need is herbs and water. Use soothing chamomile for a relaxing shower after a long day or uplifting lemongrass in your shower rinse when you need to wake up and energize for a busy afternoon. To make an herbal rinse, just steep 2 tablespoons of your herbs of choice in 2 cups of hot water and allow to cool slightly so you don’t burn yourself. Pour over your body slowly at the end of your shower, after rinsing off with your usual soap of choice. Don’t rinse this off! Just pat dry and enjoy the subtle effects for the rest of your day.
Herbs for Aromatherapy
By now, most of us are familiar with the benefits of aromatherapy. This is one of my favorite ways to enhance my shower routine so it really feels like a spa day at home, and one of the longest lasting. In the summer I almost always have a bundle of fresh herbs drying on my shower head, which means I’m almost always enjoying the benefits of aromatherapy in the shower.
There’s a good reason shower aromatherapy is so popular. Botanicals like eucalyptus and peppermint can help alleviate respiratory issues and ease congestion, while the steam from the shower can also help open up the airways and promote better breathing. The use of aromatherapy in the shower can help uplift the mood and improve mental clarity and focus. It can help boost energy levels and promote a sense of positivity and well-being. Overall, aromatherapy in the shower can provide a relaxing and rejuvenating experience that promotes both physical and mental health.
The easiest way to use aromatherapy in the shower is by hanging a simple bundle of botanicals from your shower head using twine. You can also place loose herbs in a cloth sachet and steep this in your tub for a botanical bath with no cleanup necessary. The steam from your shower will release the active fragrance oil compounds in the plants into the air. To reap the benefits of this method, avoid turning on the vent fan in your bathroom if you can so the room can fill with steam (don’t do this often though and make sure you run it when you’re done to avoid mold and mildew buildup on your bathroom walls!)
Maximizing the benefits of the herb-infused shower
Want to go deeper? If you’re in need of a true mental reset, there’s a couple ways you can maximize the benefits of these herbal spa shower techniques
Breath Work
Breath work is a practice that can bring you into the present moment, allowing you to clear your head and fully notice what is happening around you. Box breathing, also known as square breathing, is a deep breathing technique that can help reduce stress and anxiety. Here's how to practice it:
Close your eyes and take a deep breath in through your nose for four seconds.
Hold your breath for four seconds.
Exhale slowly through your mouth for four seconds.
Hold your breath for four seconds.
Repeat steps 2-5 for several minutes, or until you feel calm and relaxed.
Remember to breathe deeply from your diaphragm, rather than shallow breaths from your chest. You can also try visualizing a box or square as you breathe, with each side representing one part of the breathing cycle. With practice, box breathing can become a useful tool to help you manage stress and feel more centered.

Acupressure
Acupressure mats are excellent for relieving joint pain, and if you’re wondering if acupressure for back pain is effective, it is! Two studies were funded by the European Union in 2014. In this study, 97% observed total muscle relaxation, improved posture, and a stronger-feeling spine, 93% observed a total elimination or significant reduction of back pain. But what does this have to do with your shower routine? Acupressure significantly increases the intensity of blood flow in the circulation of the skin and accelerates cell metabolism. Your skin will be bright red for 15-30 minutes after an acupressure session, and a bit hot to the touch as though you’ve already taken a hot shower. You’ll just have to trust me on this one - if you see how my skin looks after using the acupressure mat in this post, you’ll understand why this increase in circulation can improve the intensity and effectiveness of your spa shower experience.
Adding essential oils To Your Shower for extra relaxation and benefits
If you’re experimenting with aromatherapy in the shower using herbs but you’re finding the effect isn’t powerful enough, adding a few drops of essential oil to your herb bundles can dramatically increase the scent and intensity of your aromatherapy shower experience. I always keep a few bottles nearby - orange and lavender are my favorites.
Lastly, I want to encourage you to experiment with different herbs and techniques to find the best fit for your individual needs. The most gratifying thing about herbalism is finding the plants that you personally connect with the most, that resonate with your body's needs, and your list may look very different from mine. I’ve always said if I was a plant, I would be rosemary - it feels like my ultimate plant friend, designed for exactly what I struggle with. But your answer will most likely be different. The herbs I mentioned here are just a few of the hundreds you could grow, harvest and use in your herb infused spa shower routine.
Find these herbs and more by tapping here to visit my favorite online herb shop!

![The Power of Nature: How To Make Infused Oregano Oil for Your Health and Wellness [Recipe]](https://images.squarespace-cdn.com/content/v1/60e85024dc86d643da81c96a/1682625337753-AFI1M6MRRMDQ5CBNY2TX/unsplash-image-Fl2Ki3_GZIU.jpg)
![Make This Easy + Natural Botanical Hand Salve [Recipe]](https://images.squarespace-cdn.com/content/v1/60e85024dc86d643da81c96a/b57698b0-de70-4101-afaf-7af57788237d/Herbal+Face+Steam+Recipe+by+The+Cottage+Peach-1.jpg)