BACKYARD GARDENING MADE SIMPLE
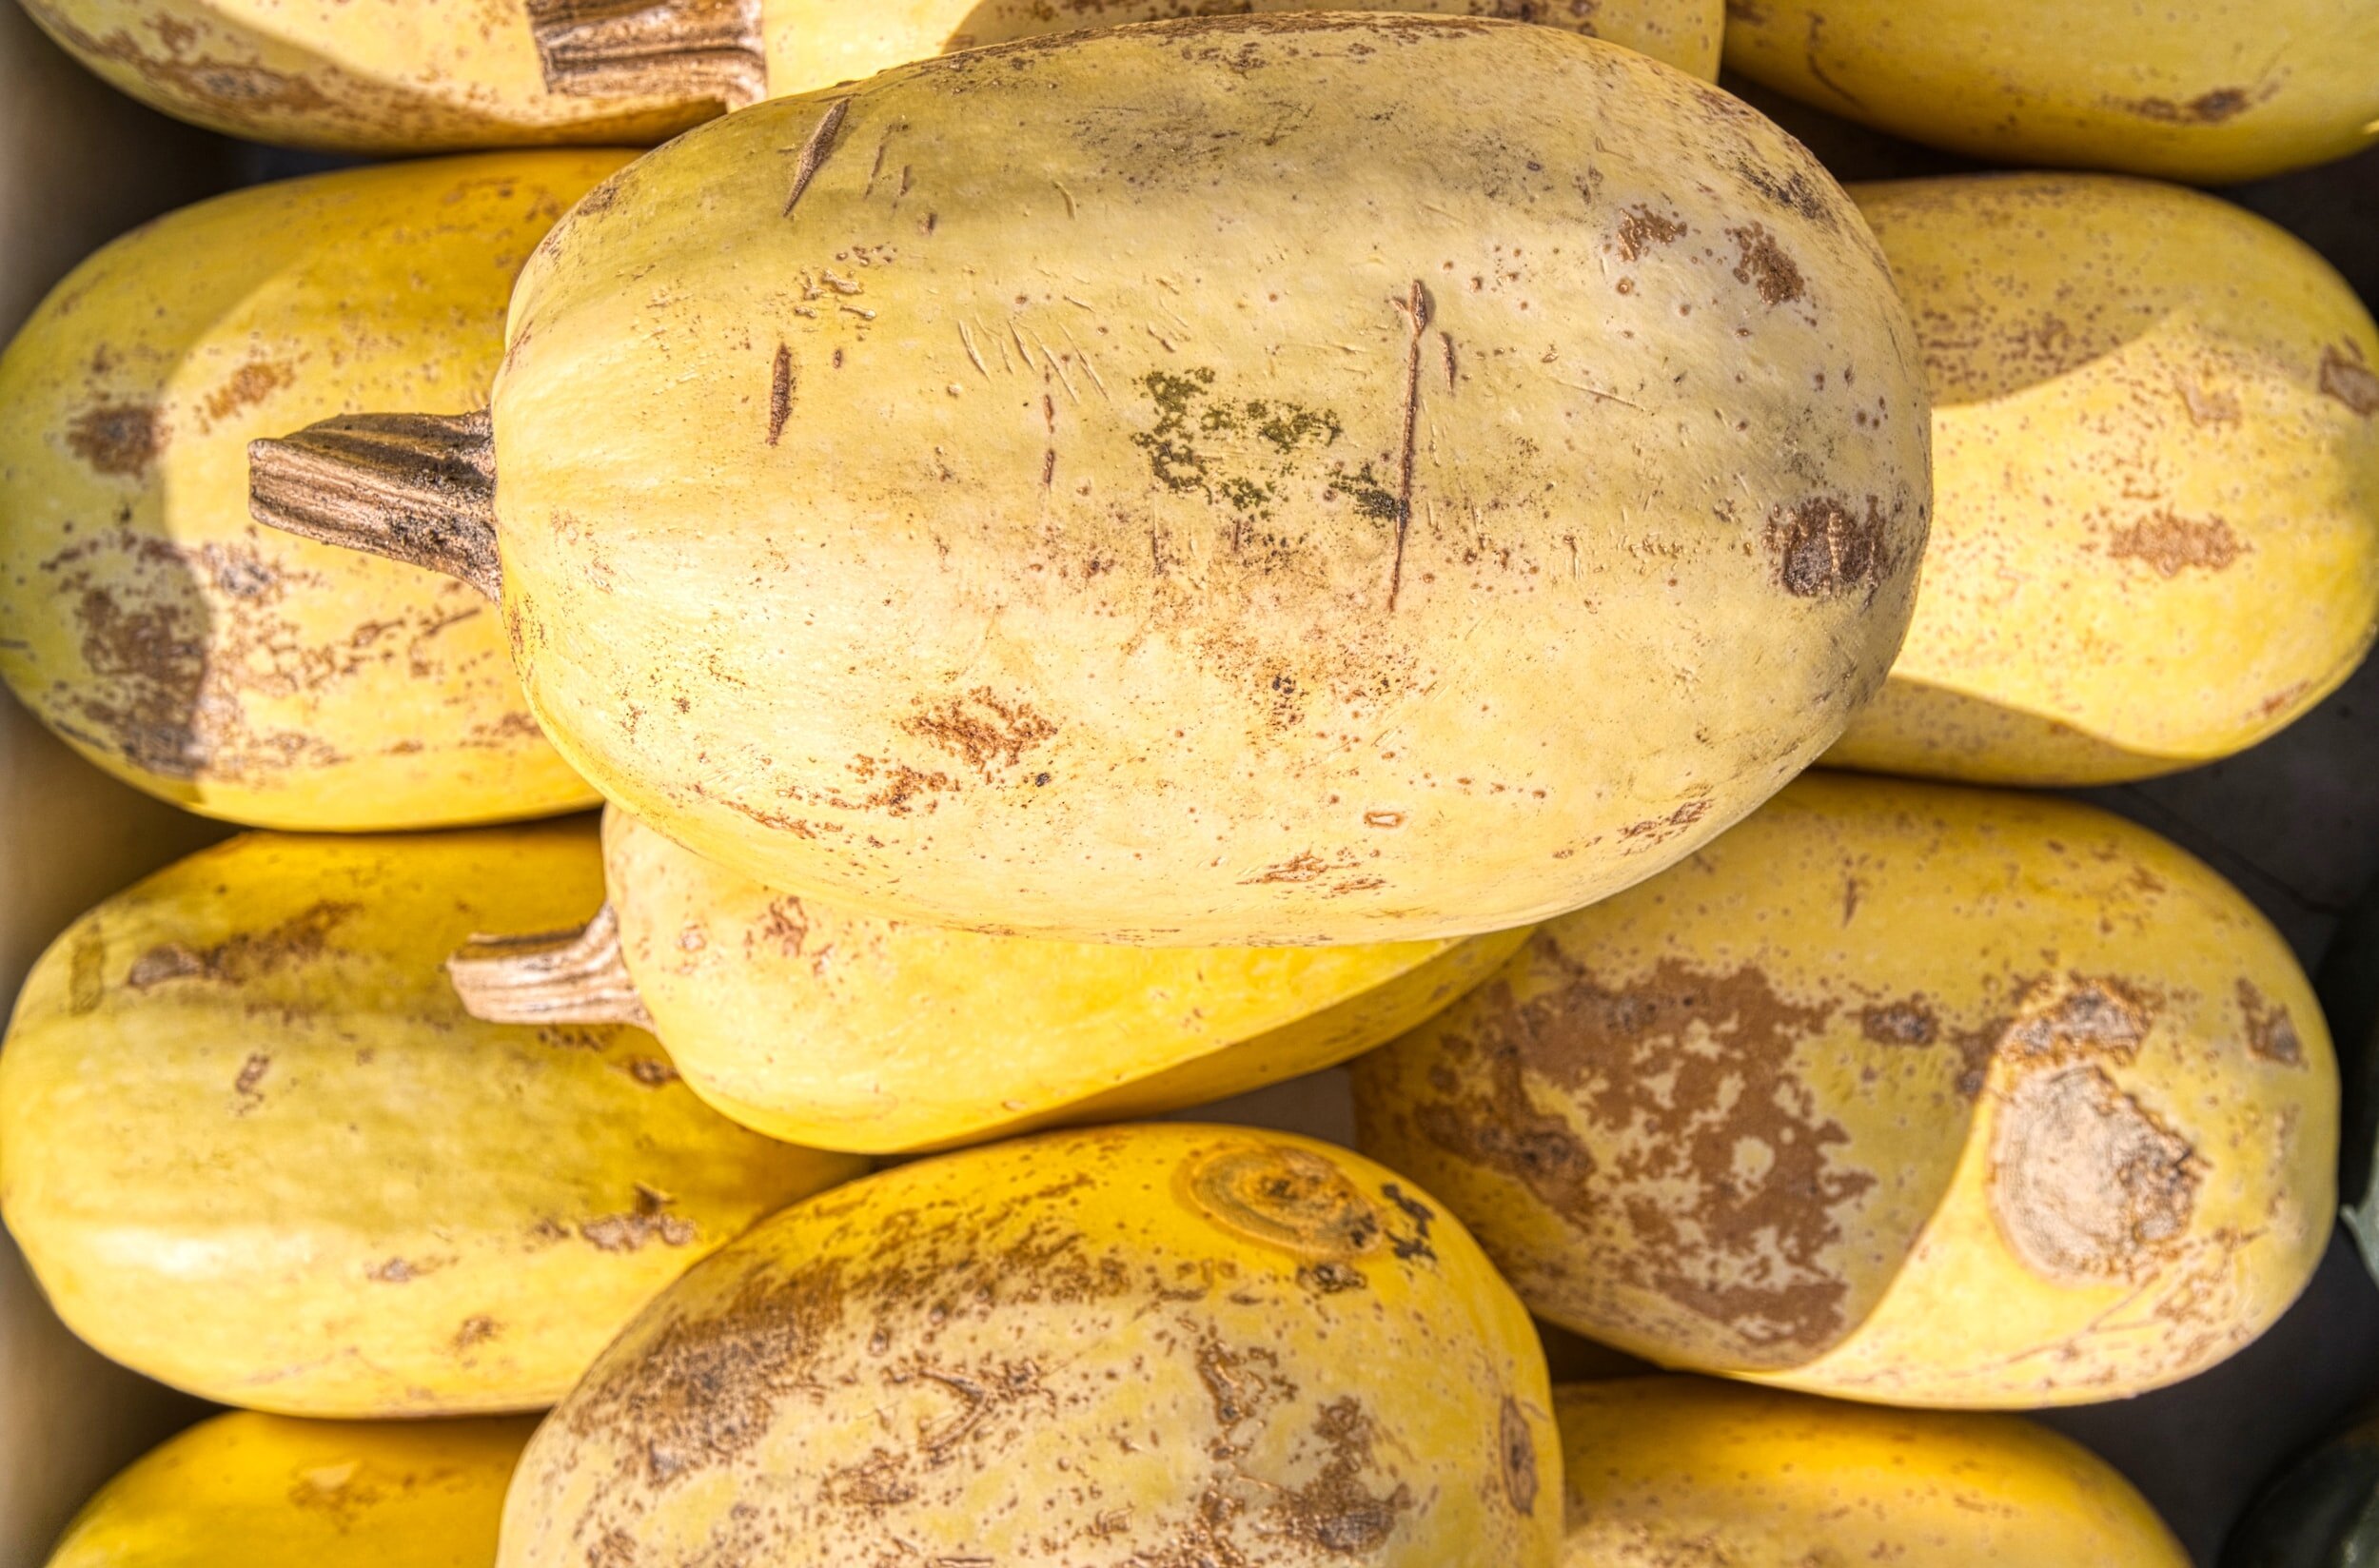
![How To Grow Squash In The Garden: Everything You Need To Know [Guide]](https://images.squarespace-cdn.com/content/v1/60e85024dc86d643da81c96a/1687197846000-Q6H2TI34PL467R0SWJ4T/image-asset.jpeg)
How To Grow Squash In The Garden: Everything You Need To Know [Guide]
Growing squash allows you to explore a wide range of varieties that may not be readily available in stores. You can experiment with heirloom or lesser-known varieties, each offering unique flavors and characteristics. This opens up a world of culinary possibilities, as you can tailor your dishes to your preferences and discover new and exciting flavor profiles.
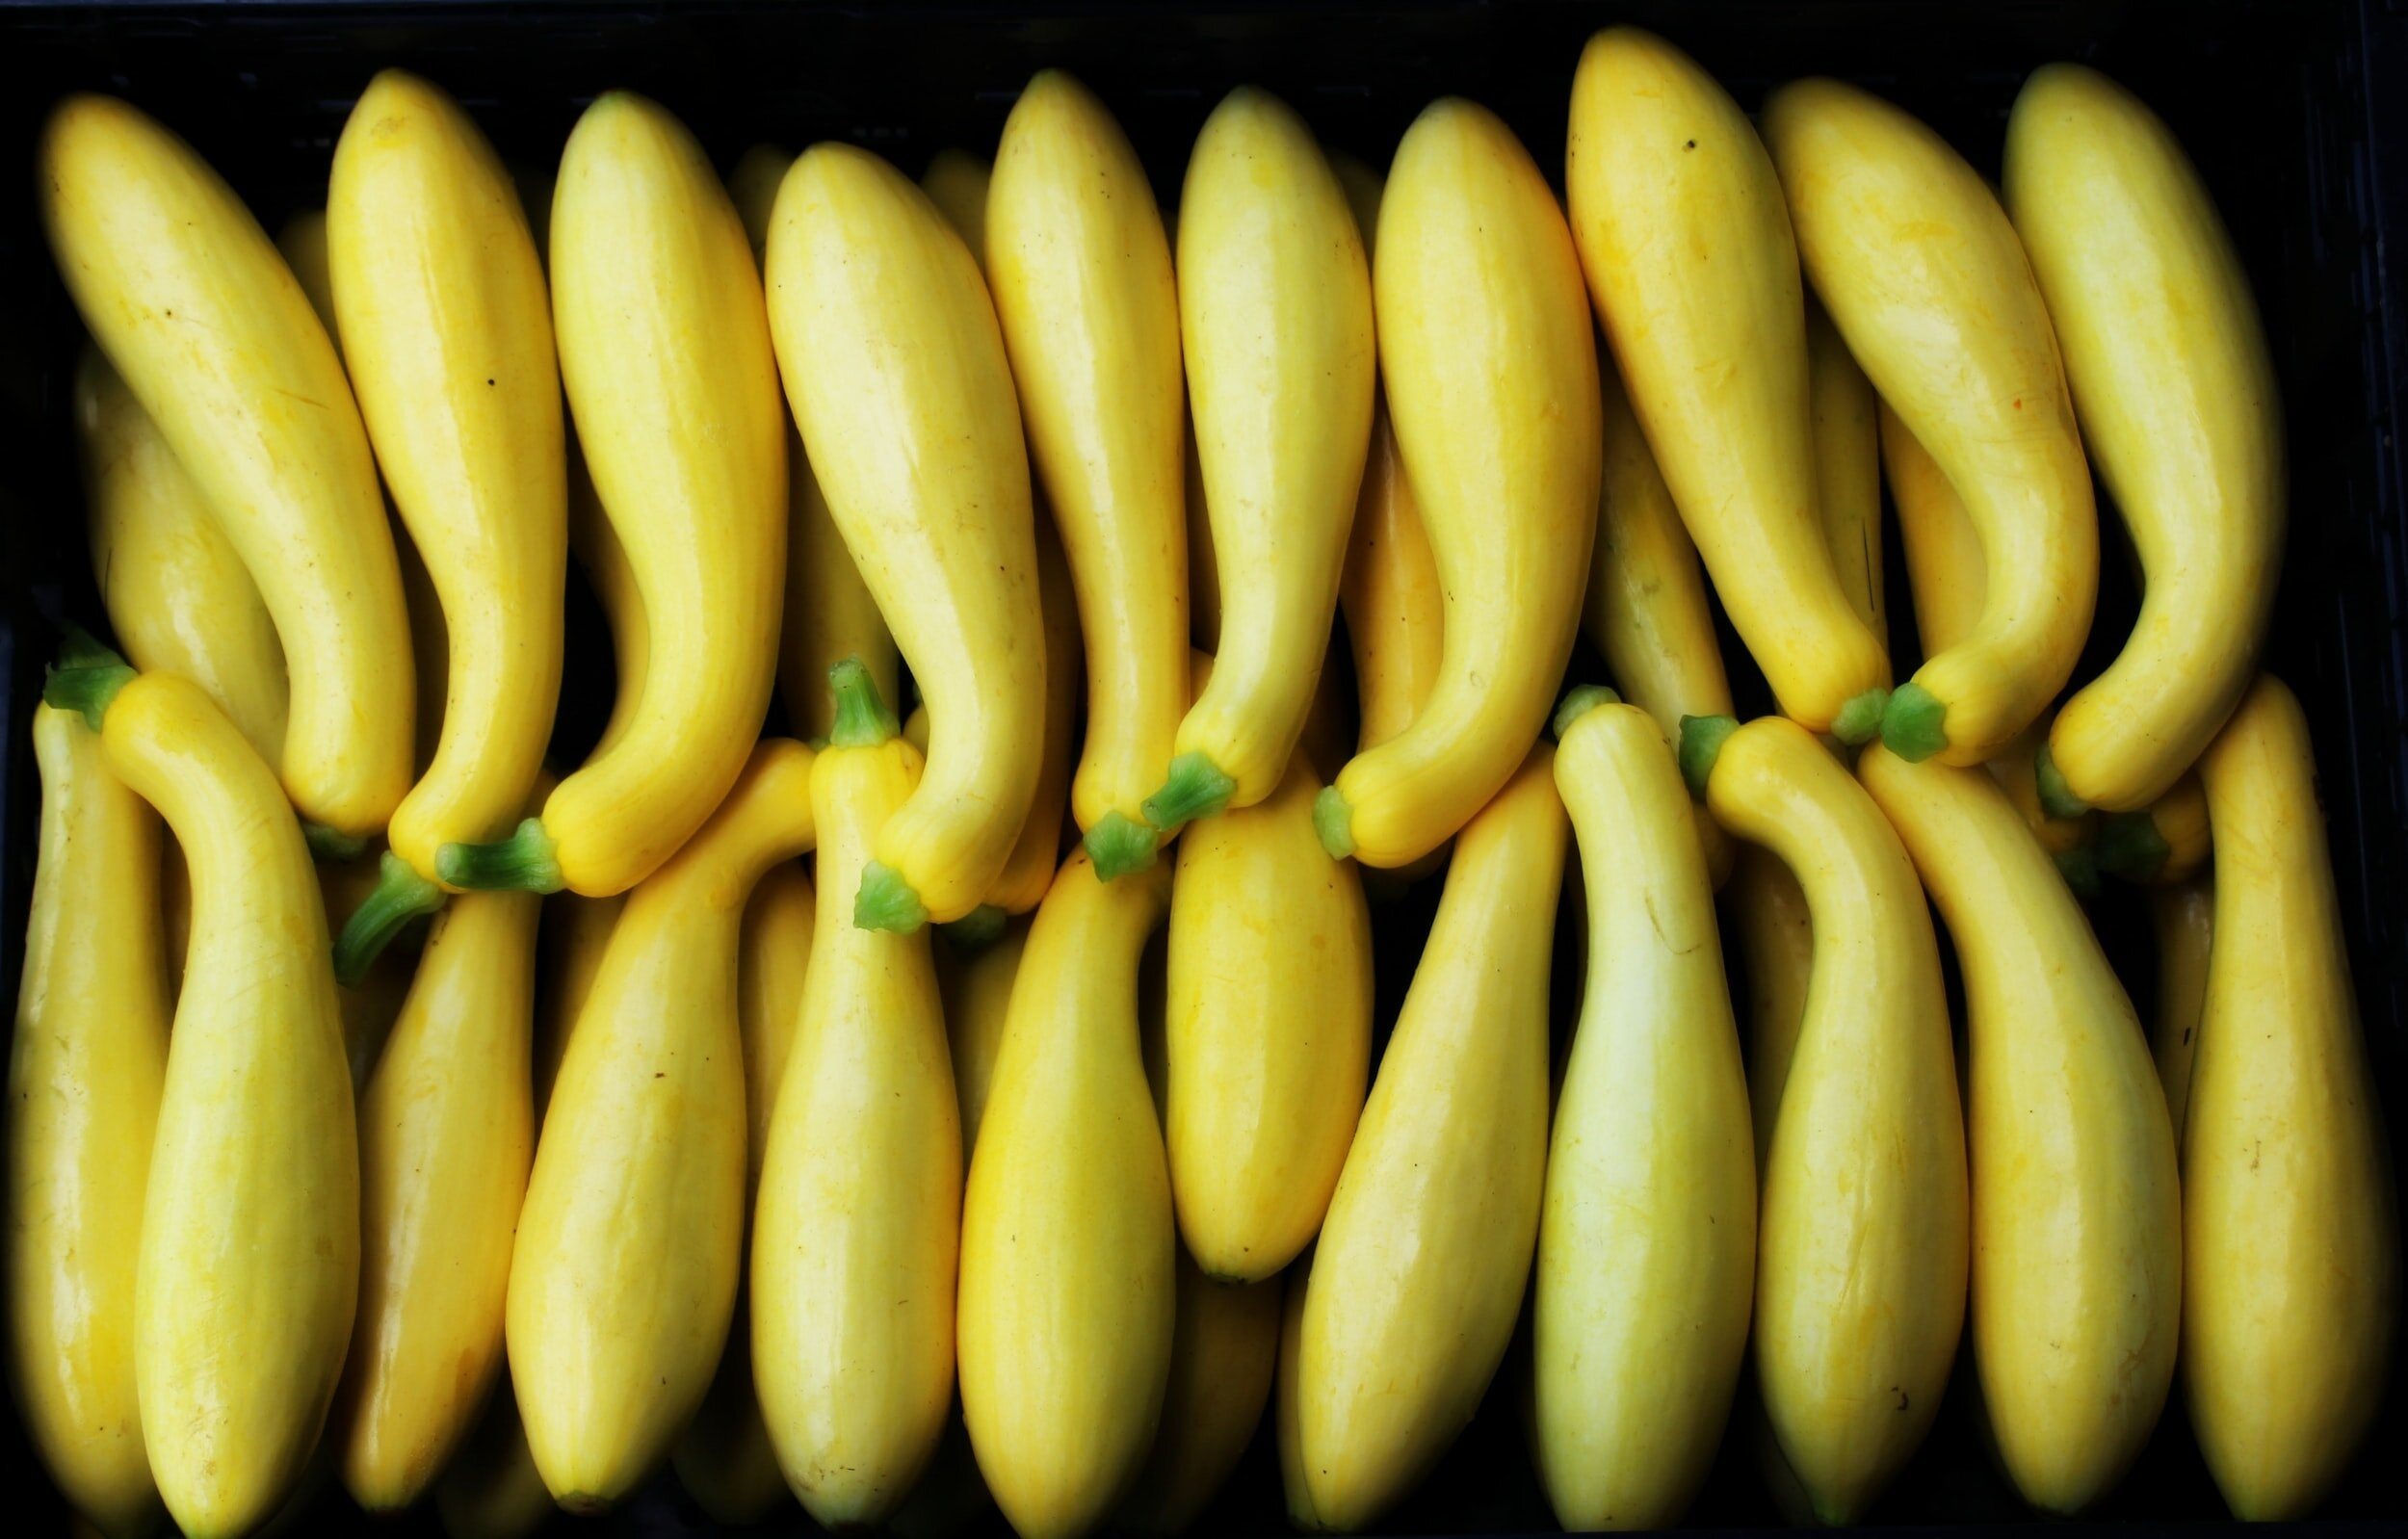
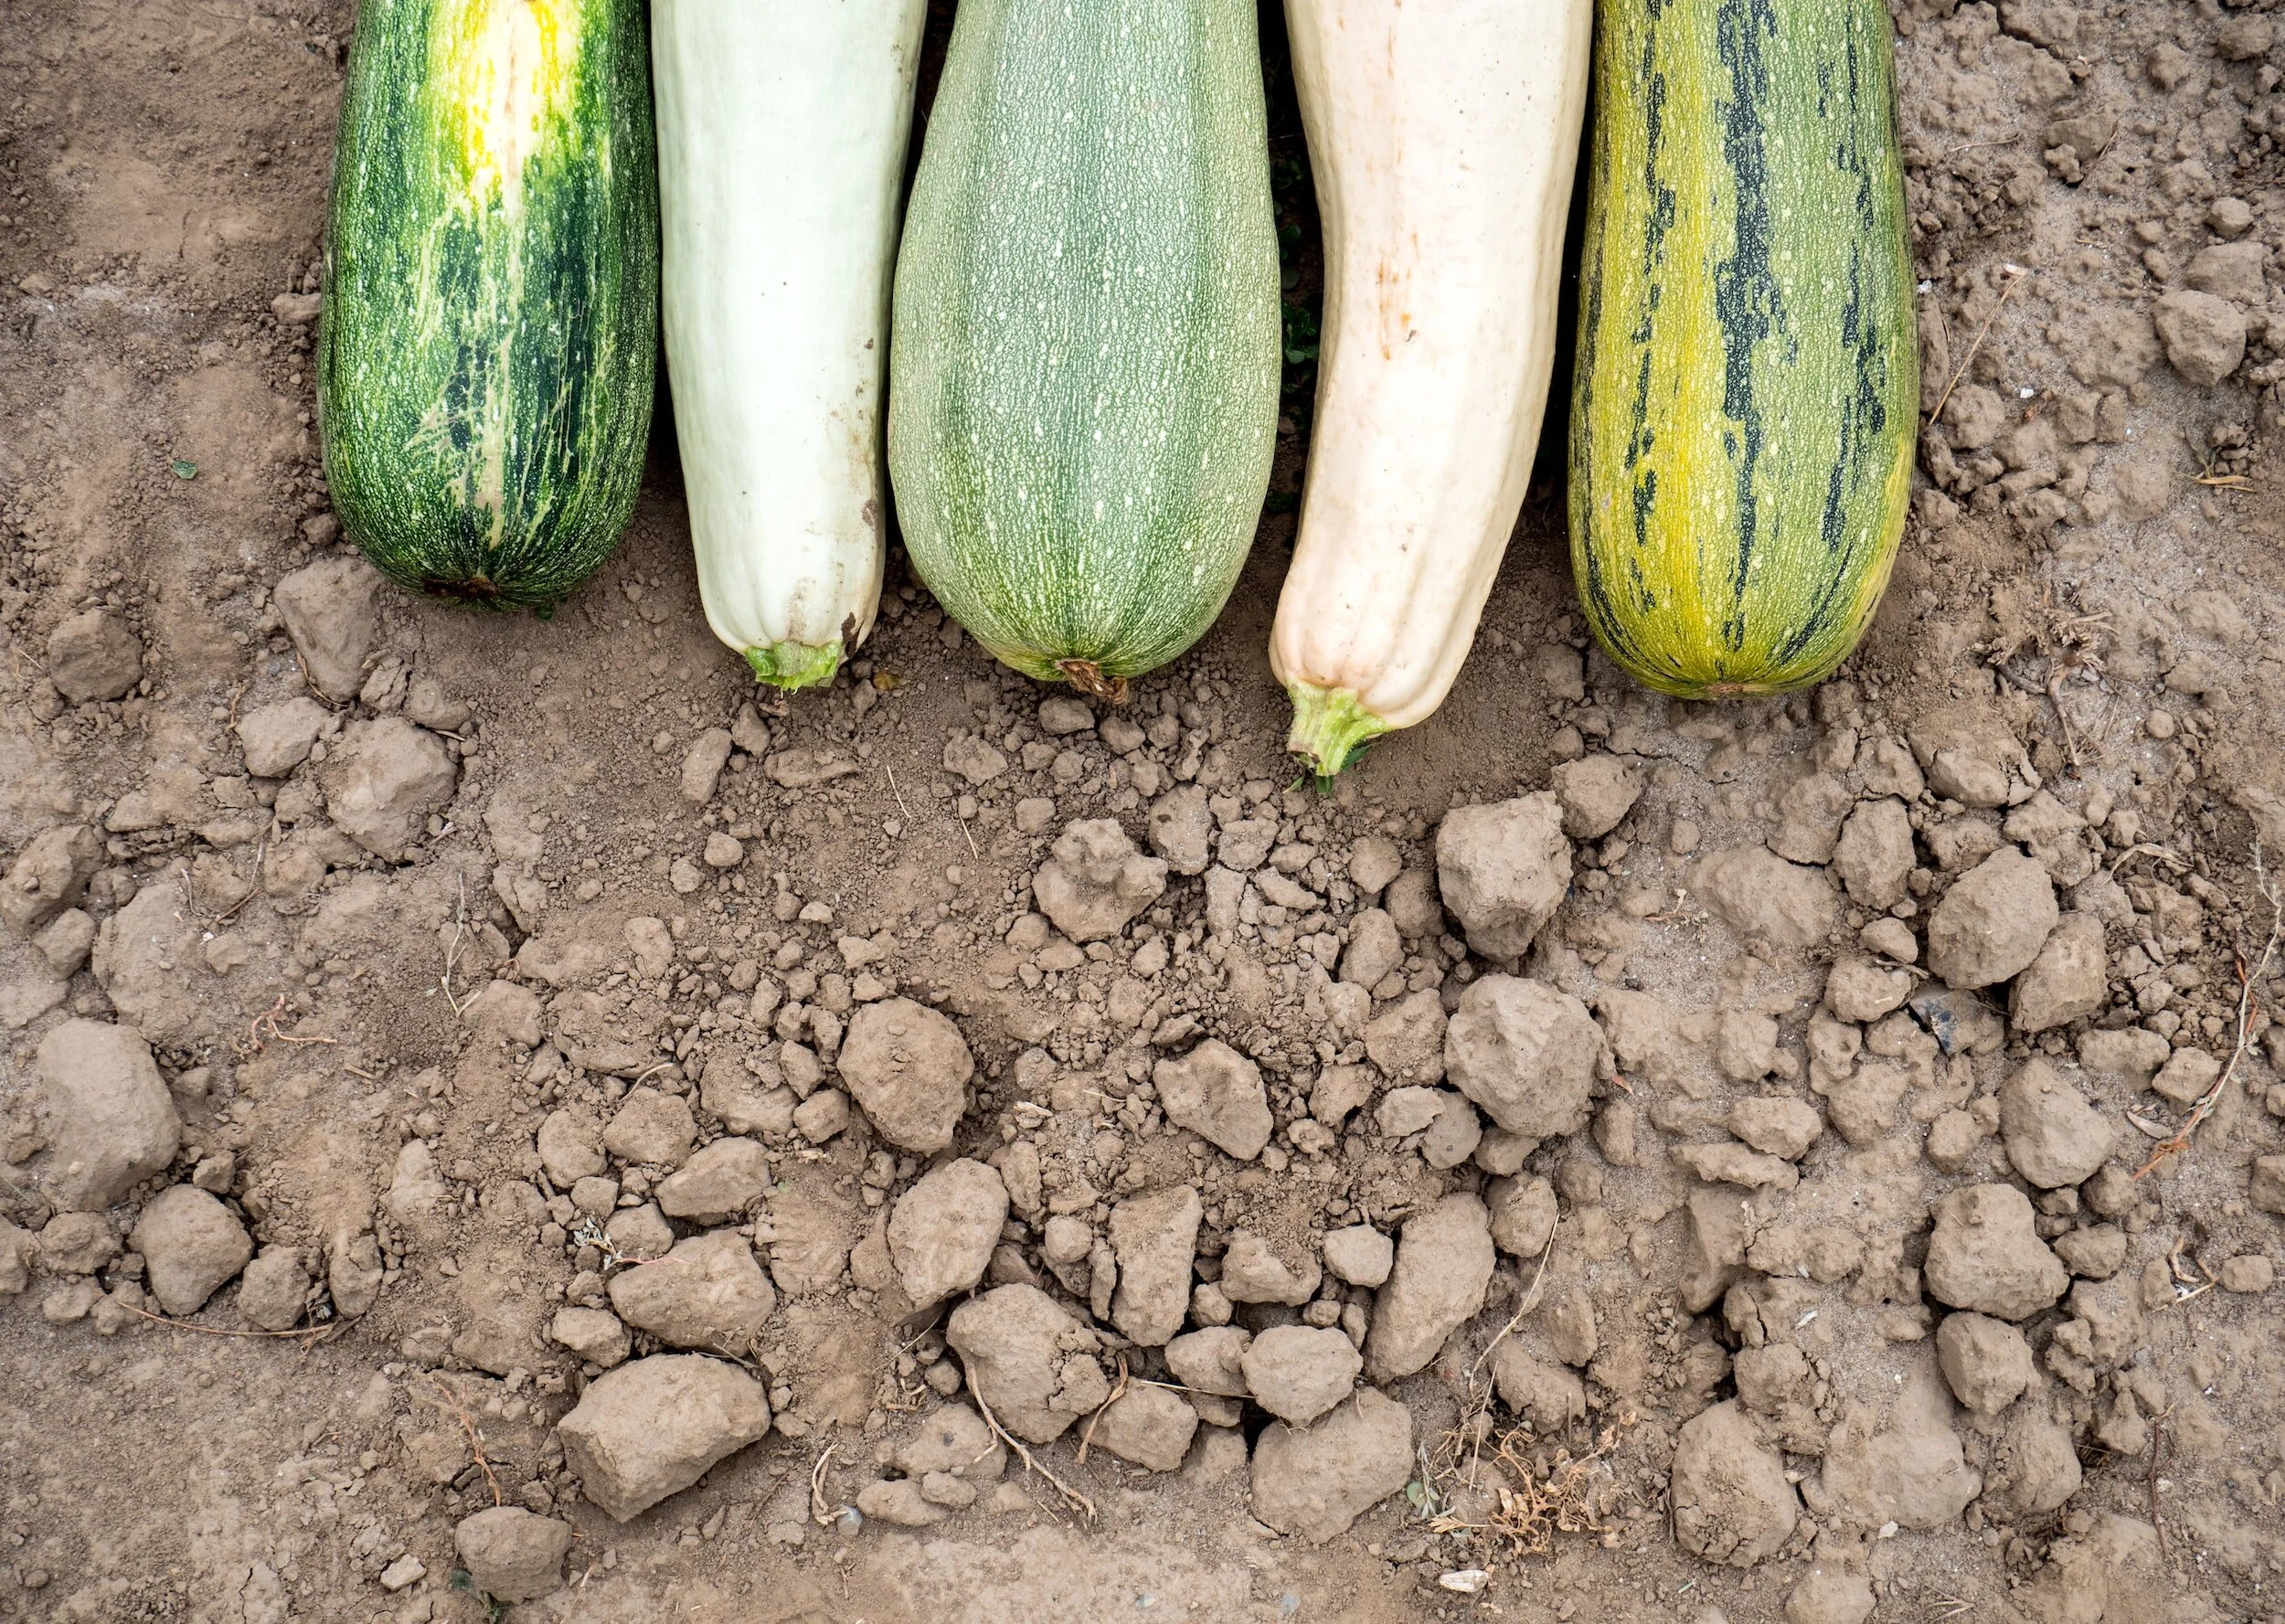
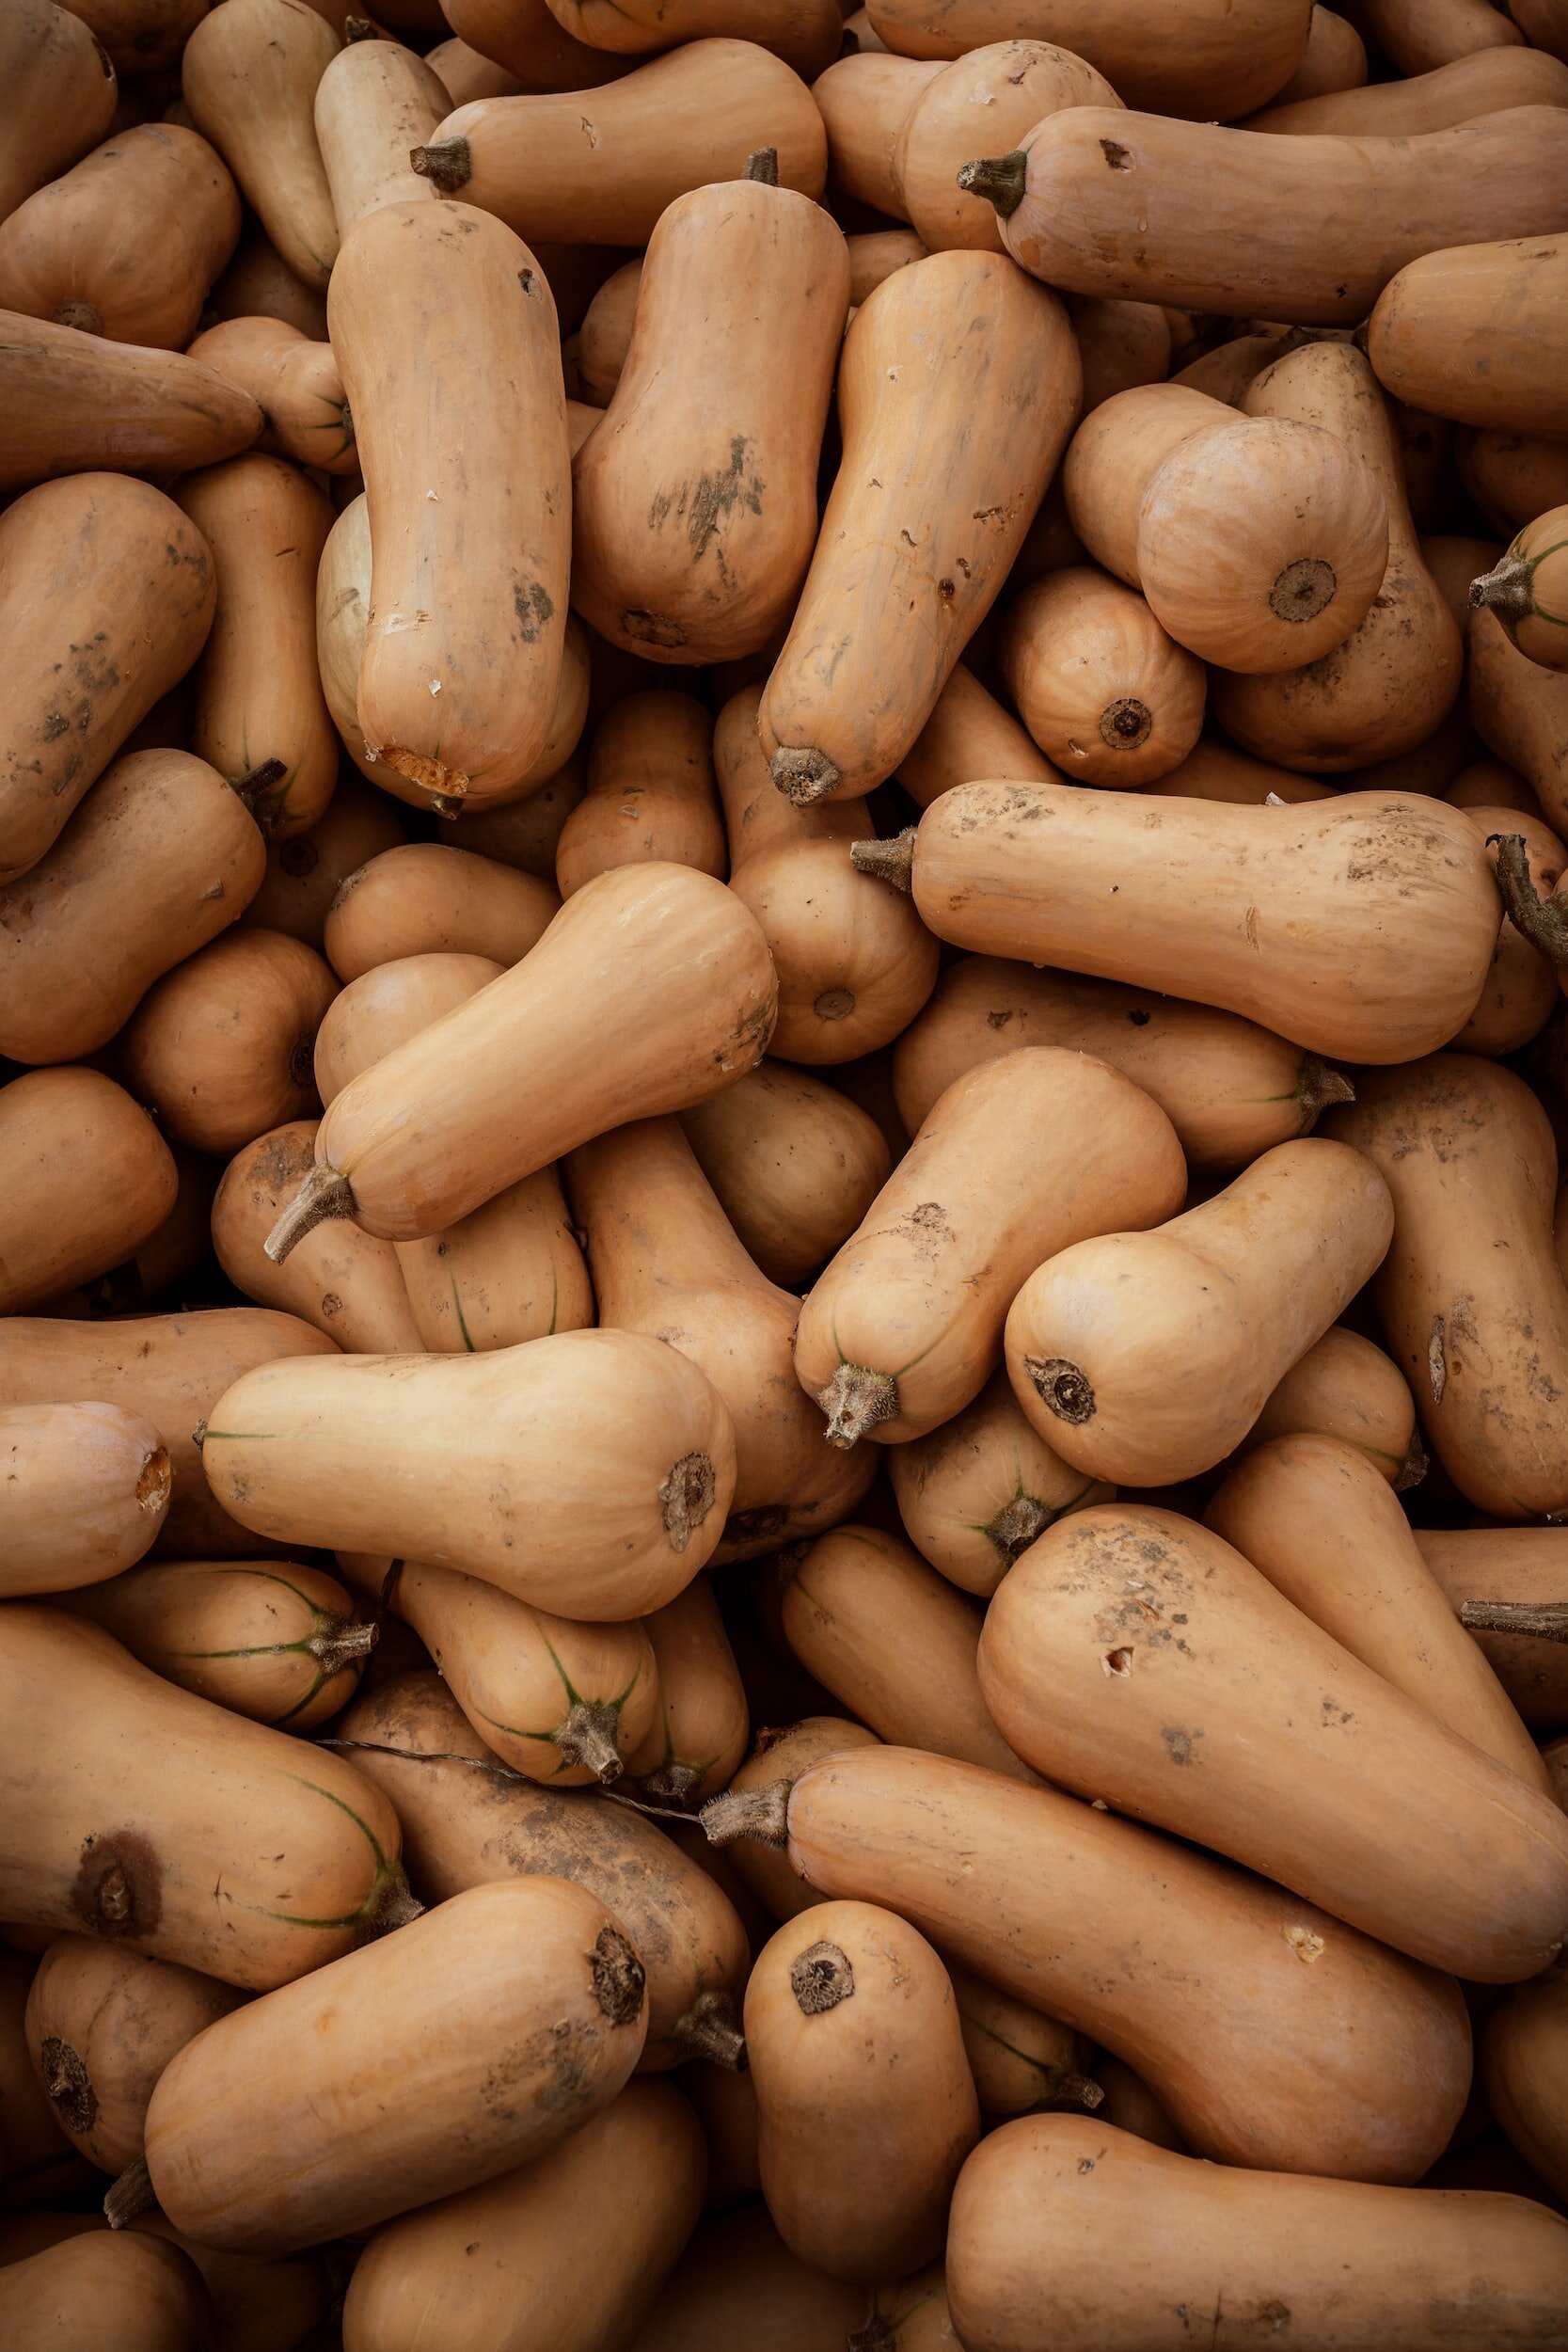
Squash is a versatile and nutritious vegetable that comes in a wide variety of shapes, sizes, and flavors. From the delicate and tender zucchini to the rich and sweet butternut squash, there is a squash variety to suit every palate. Squash is not only delicious but also packed with essential vitamins, minerals, and dietary fiber, making it a healthy addition to any diet. Its vibrant colors and unique textures make it a visually appealing ingredient that can elevate any dish. Whether you're looking to make comforting soups, hearty stews, vibrant salads, or even sweet desserts, squash can be your go-to ingredient.
Growing squash allows you to explore a wide range of varieties that may not be readily available in stores. You can experiment with heirloom or lesser-known varieties, each offering unique flavors and characteristics. This opens up a world of culinary possibilities, as you can tailor your dishes to your preferences and discover new and exciting flavor profiles.
What Kinds of Squash Can You Grow?
Zucchini is a summer squash with a vibrant green color and a smooth texture. It has a mild and delicate flavor, making it a versatile ingredient that can be used in both savory and sweet dishes. Its tender flesh is perfect for grilling, roasting, sautéing, or even spiralizing into zucchini noodles for a healthy pasta alternative.
Butternut squash is a winter squash with a distinct bell-like shape and a rich, sweet flavor. Its flesh is smooth and creamy, making it ideal for roasting, pureeing into soups, or incorporating into casseroles and gratins. The vibrant orange color of butternut squash adds a visually appealing element to any dish.
Acorn squash is another popular winter squash variety, characterized by its small size and distinctive ribbed skin. It has a slightly sweet and nutty flavor, with a tender and creamy texture. Acorn squash is often halved and roasted, and its hollow shape makes it perfect for stuffing with savory fillings such as grains, vegetables, or cheese.
Spaghetti squash is a unique variety that, when cooked, yields long strands of flesh that resemble spaghetti noodles. It has a mild and slightly sweet flavor, making it a versatile substitute for pasta in various dishes. Spaghetti squash can be roasted and then scraped with a fork to create "spaghetti" strands, which can be paired with sauces, used in casseroles, or even enjoyed as a low-carb side dish.
Each squash variety mentioned above has its own suitability for different culinary applications. Zucchini's mild flavor and tender texture make it a great choice for grilling, sautéing, or adding to stir-fries. It can also be used in baking, where its moisture content can contribute to moist and flavorful breads and cakes.
Butternut squash's sweet and creamy flesh is perfect for roasting, which brings out its natural caramelized flavors. It can be pureed to create silky soups or used in casseroles and side dishes. Its versatility also extends to sweet preparations, as butternut squash can be used in pies, muffins, and other desserts.
Acorn squash's hollow shape and slightly sweet flavor make it an excellent vessel for stuffing. The flesh becomes tender when roasted, providing a flavorful base for various fillings. It can also be sliced and roasted to be enjoyed as a standalone side dish or incorporated into salads.
Spaghetti squash's unique characteristic of turning into noodle-like strands when cooked makes it a popular choice for those seeking a low-carb or gluten-free alternative to pasta. The mild flavor of spaghetti squash allows it to pair well with a variety of sauces and toppings, making it a versatile ingredient in pasta dishes.
Where Should You Plant Squash?
Squash plants thrive in full sun, so it is essential to select a growing site that receives at least 6 to 8 hours of direct sunlight daily. Sunlight is crucial for the growth and development of squash plants, as it helps them produce ample foliage and ensures optimal fruiting. Therefore, choose a location in your garden that is not shaded by trees, buildings, or other structures.
In addition to sunlight, squash plants require well-draining soil. They prefer soil that is loose, fertile, and rich in organic matter. Well-draining soil prevents waterlogging, which can lead to root rot and other diseases. To improve drainage, you can amend heavy clay soil with organic matter such as compost or well-rotted manure. This helps create a looser soil structure, allowing water to flow through and preventing excess moisture retention around the plant's roots.
Squash plants can spread and occupy a significant area, so ensure that you have sufficient space for the plants to grow and sprawl without overcrowding other crops or plants. Adequate spacing allows for good air circulation and helps prevent the development of fungal diseases.
Starting Squash Plants from Seed
This method involves directly sowing squash seeds into the soil or starting them indoors and later transplanting the seedlings. Sowing seeds directly in the garden is a simple and cost-effective approach. On the other hand, starting seeds indoors allows for earlier planting and a head start on the growing season.
Squash seeds should be planted when the soil has warmed up and all chances of frost have passed. This is typically in spring when the soil temperature reaches around 60°F (15°C) or higher. Ensure that the soil is well-draining and enriched with organic matter. Remove any weeds or debris and break up clumps of soil. Plant squash seeds about 1 inch (2.5 cm) deep into the soil. Space the seeds 2 to 3 feet (60 to 90 cm) apart in rows, or follow the spacing guidelines specific to the variety you are planting. You may also plant three seeds in a hill formation. After planting the seeds, thoroughly water the area to ensure good seed-to-soil contact and proper moisture for germination. Keep the soil consistently moist but not waterlogged as the seeds germinate and the seedlings emerge. Once the seedlings have emerged and developed their first set of true leaves, thin them out if they are planted too closely together. Thin the seedlings to the desired spacing, typically leaving the healthiest and strongest ones.
Using seedlings from a nursery offers the advantage of a shortened time to harvest, as the plants are already established. It can be particularly beneficial in areas with a shorter growing season or for gardeners who prefer a more convenient option. Seedlings provide a head start in the growing process, allowing you to harvest squash earlier than if you were to start from seeds, but buying seedlings can be more expensive compared to starting from seeds, and seedlings may experience some level of transplant shock when moved from the controlled environment of the nursery to your garden. This shock can temporarily slow down growth and require extra care during the transition.
How to Grow Squash Vertically
Vining squashes, such as some varieties of zucchini or winter squash, tend to spread out and take up a lot of garden space. By providing support or trellises, you can train the vines to grow vertically, saving valuable space in your garden. When vining squash plants are trained upwards, they allow for better airflow around the foliage, reducing the chances of diseases caused by excessive moisture and promoting overall plant health. Growing vining squash vertically makes it easier to locate and harvest the fruits. The squash hangs down from the trellis, making them more visible and accessible.
To provide support for vining squash, you can use trellises, stakes, or cages. Install the support structure at the time of planting or when the plants are young to avoid disturbing the roots later. As the vines grow, gently train them to climb the support structure, securing them with garden ties or soft twine if needed. Be sure to choose sturdy supports that can handle the weight of the developing fruits.
Watering Squash Plants
Squash plants have high water needs, and lack of moisture can lead to stunted growth and poor fruit development. Aim to provide about 1 to 1.5 inches (2.5 to 3.8 cm) of water per week, either through rainfall or irrigation. Fluctuating moisture levels can cause stress to the plants and lead to issues like blossom end rot or fruit cracking. Water the plants deeply, ensuring the moisture reaches the root zone. Mulching around the plants can help retain soil moisture and reduce water evaporation.
Mulching Squash Plants
A layer of mulch helps retain soil moisture by reducing water evaporation. This is especially important during hot and dry periods when water availability is crucial for healthy plant growth. Mulch acts as a natural weed barrier, preventing weed growth and competition with squash plants for nutrients and water. This reduces the need for frequent weeding, saving time and effort. Mulch helps regulate soil temperature by keeping it cooler in hot summer months and providing insulation during cooler periods. This creates an ideal environment for root development and overall plant growth.
Squash Pests and Diseases
Squash bugs: These insects feed on the leaves, stems, and fruits of squash plants, causing wilting, yellowing, and decline. They can be identified by their flat, shield-shaped bodies and dark brown or gray color.
Squash vine borers: The larvae of these pests bore into the stems of squash plants, causing wilting, dieback, and eventual plant death. Adult vine borers are clear-winged moths.
Cucumber beetles: These beetles can transmit diseases and damage leaves, flowers, and fruits of squash plants. They are typically yellowish-green with black stripes or spots.
Organic pest control methods can help manage squash pests effectively while minimizing the use of synthetic pesticides. Consider the following approaches:
Row covers: Use lightweight fabric row covers to physically exclude pests from reaching the plants. Cover the plants soon after planting and secure the edges to prevent pests from entering.
Beneficial insects: Encourage the presence of natural predators and beneficial insects in your garden, such as ladybugs, lacewings, and parasitic wasps. These insects prey on squash pests and help control their populations.
Squash plants are susceptible to several diseases that can affect their overall health and productivity. Here are some common diseases that may affect squash:
Powdery mildew: This fungal disease appears as a white, powdery coating on the leaves, stems, and fruits of squash plants. It can cause leaf yellowing, stunting, and reduced fruit production.
Bacterial wilt: This disease is caused by bacteria that clog the water-conducting tissues of squash plants, leading to wilting and eventual death. It is often transmitted by cucumber beetles.
To prevent and manage squash diseases, consider the following measures:
Crop rotation: Avoid planting squash in the same area of the garden year after year. Rotate your crops to different locations to reduce the buildup of disease-causing pathogens in the soil.
Proper sanitation: Remove and destroy any infected plant debris to prevent the spread of diseases. This includes removing and disposing of infected plant parts, fallen leaves, and fruits.
Disease-resistant varieties: Select squash varieties that have resistance or tolerance to common diseases prevalent in your area. This can help reduce the risk of infection and improve plant health.
How to Harvest Squash
When it comes to harvesting squash, there are a few signs that indicate the fruits are mature and ready to be picked. Look for squash with firm skin and vibrant color. Depending on the variety, the skin may be tough and resistant to scratching or denting. Additionally, the stem connecting the squash to the vine should be dry and starting to wither.
To harvest squash properly, use a sharp knife or pruning shears to cut the fruit from the vine, leaving a small stem attached. Avoid pulling or twisting the squash, as this can damage the plant and reduce the quality of the fruit. Handle the squash with care to prevent bruising or puncturing.
How to Cure Squash
Curing is particularly important for certain squash varieties, such as winter squash. After harvest, allow these varieties to cure in a warm and well-ventilated area for a period of time, typically about 1 to 2 weeks. This process toughens the skin, enhances flavor, and extends their storage life. During curing, the squash should be kept in a single layer, allowing air circulation around each fruit.
How to Store Squash
Storing squash properly is essential to maintain their quality and extend their shelf life. For summer squash and other soft-skinned varieties, it is best to use them within a few days of harvest. Store them in a cool and dry place, such as the refrigerator's vegetable crisper, to slow down deterioration. Winter squash, on the other hand, can be stored for several months when stored correctly. Keep them in a cool (50-55°F or 10-13°C), dry, and well-ventilated area. Avoid storing winter squash near fruits that produce ethylene gas, such as apples, as this can cause premature ripening and spoilage.
Growing your own squash can be a rewarding experience that provides you with fresh, flavorful, and nutritious produce. By following proper harvesting and storage techniques, you can enjoy your homegrown squash for an extended period, adding versatility and delicious flavors to your meals. Start your own squash garden, explore different varieties, and savor the many culinary possibilities that squash has to offer.


Keeping Pests at Bay: 7 Effective and Eco-Friendly Ways to Control Garden Pests
First things first: this is going to be an unpopular opinion, but pests in your garden aren’t always a bad thing. Pests like to frequent areas that support a wide variety of plant life - so if your garden doesn’t have pests, you’re probably not a part of the ecosystem, which should always be your goal. But we all know that once these insects and animals have discovered your garden, they can be difficult to manage. Your garden can quickly become a one-stop grocery shop for all your wildlife neighbors. And while I’m all for sharing the bounty, these critters often take more than their fair share.
First things first: this is going to be an unpopular opinion, but pests in your garden aren’t always a bad thing. Pests like to frequent areas that support a wide variety of plant life - so if your garden doesn’t have pests, you’re probably not a part of the ecosystem, which should always be your goal. But we all know that once these insects and animals have discovered your garden, they can be difficult to manage. Your garden can quickly become a one-stop grocery shop for all your wildlife neighbors. And while I’m all for sharing the bounty, these critters often take more than their fair share.
I have lost entire crops to squash bugs and cabbage moths, squishing potato beetles is not my favorite pastime and the near-surgical process of extracting squash bugs from the vine left my stomach turning.

I’d much rather prevent pests from ballooning out of control in the first place than be forced to take matters into my own hands and cause a loss of life - no matter how small. The reality is that every living thing needs to eat. Who am I to decide that these small creatures should live or die? But when you’ve put hours of time and effort into growing a garden, it can be frustrating when pests and diseases start attacking your plants. The good news is that there are many natural ways to control garden pests without chemicals that are harmful to our health and the environment.
How do pests damage vegetable gardens?
The effects of pests in the garden are endless. For example, caterpillars, grasshoppers, and beetles can chew on leaves, causing visible holes and damage to the plant's structure.
Aphids, spider mites, and whiteflies can suck sap from plant stems and leaves, causing them to wilt and potentially die.
Fruit flies and corn borers can bore into fruits and vegetables, causing them to rot or become infested with larvae.
Mosquitoes and ticks can spread diseases to plants, such as viruses and bacteria that can cause wilting, yellowing, and stunted growth.
Moles and voles can dig up roots, causing damage to the plant's underground structure and potentially killing the plant.
Cutworms and wireworms can eat plant roots, causing the plant to wilt and potentially die.
Grubs and nematodes can tunnel in soil, damaging the plant's root system and preventing it from absorbing nutrients and water properly.
Now I know this sounds like a spooky horror story where your garden is going to be teeming with unfriendly visitors, but the reality is your individual microclimate will dictate which of these unpleasant companions you’ll find. You’ll most likely end up dealing with 1-5 of these in your backyard garden each year and get a sense for what your area is most susceptible to. But just to give you a head start, it’s a good idea to read up on some of the various methods you can employ to prevent garden damage caused by pests.
Why shouldn’t you use pesticides in your vegetable garden?
Pesticides can be harmful to human health if they are ingested or come into contact with the skin. Exposure to pesticides has been linked to cancer, birth defects, and other health problems. They can have negative impacts on the environment, including contaminating soil and water, killing beneficial insects and wildlife, and contributing to the development of pesticide-resistant pests. Pesticides can kill beneficial soil organisms, such as earthworms and microorganisms, which play a vital role in maintaining soil fertility and health, as well as harm bees and other pollinators such as birds, which are essential for the production of many fruits and vegetables.
Insects
My two main methods of preventing insect damage in the garden are companion planting and birds. Companion planting involves growing certain plants that have compounds which are known to deter pests. Here’s a few plants to consider:
Basil: May repel flies, mosquitoes, and aphids
Chrysanthemums: Contain a natural insecticide called pyrethrum, which can repel and kill a variety of insects, including ants, roaches, and spider mites.
Lavender: Has a strong fragrance that can repel mosquitoes, flies, and moths.
Marigolds: Contain a natural insecticide called pyrethrin, which can repel mosquitoes, flies, and other insects.
Mint: Has a strong scent that can repel ants, flies, and mosquitoes.
Rosemary: Has a strong scent that can repel mosquitoes and other insects.
Bird “Strike zone”
Birds can be a natural and effective way to reduce bugs in the garden. Many bird species, including chickadees, nuthatches, and titmice, are known for their insect-eating habits and can help control the populations of harmful bugs in the garden. Birds can consume large numbers of pests in a single day. For example, chickadees can eat up to 500 insects per day. Birds can help control the spread of pests, such as aphids and caterpillars, by eating them before they can reproduce and lay eggs. Some bird species, such as hummingbirds, can also help pollinate plants while they feed on nectar, leading to better fruit and vegetable yields.
To attract birds to your garden, you can provide food, water, and shelter. Planting native plants that produce berries or seeds can provide a food source, while birdhouses, birdbaths, and nesting boxes can provide shelter and water. By encouraging birds to visit your garden, you can create a natural and effective pest control system that benefits both your garden and the environment.

How to attract beneficial insects for natural pest control
One more important note: Insects aren’t all bad. Attracting beneficial insects is a natural and effective way to control pest populations in the garden. It is important to encourage these beneficial insects by planting a variety of flowers that bloom at different times and can provide a steady food source and attract a diverse range of beneficial insects. You may also want to provide nesting sites, such as hollow stems or brush piles, that can attract beneficial insects such as native bees and ladybugs, and a water source such as a birdbath or shallow dish. Planting specific plants together can attract beneficial insects and deter harmful pests. For example, planting dill, fennel, or parsley can attract beneficial insects such as hoverflies and lacewings, which prey on aphids.
Rodents
Rodents and deer can decimate an entire garden very quickly. You’ll want to be proactive if you know that you have a large population of these creatures nearby.
Preventing rodent damage in the garden with physical barriers
Using physical barriers, such as mesh screens or fences, can prevent rodents from accessing your garden. This is especially important in the case of deer. Deer are capable of jumping over a six-foot fence, so a fence should be at least eight feet tall. You can also try installing motion-activated sprinklers in your garden, which will spray water when it detects a deer approaching. Try to create movement and sound in the garden that may startle deer away such as scarecrows, loud wind chimes or hanging reflective objects like CDs or aluminum foil to create movement.
Companion planting for pest prevention in the garden
Certain plants are known to repel rodents. Planting these around your garden can help to keep rodents away. You can try growing Mint (including peppermint, spearmint, and pennyroyal), lavender, alliums including garlic and onions, marigolds, daffodils and catnip (which will hopefully attracts your neighborhood cats to the area)
Natural predators: Encouraging natural predators, such as cats, owls, and snakes, can help to keep rodents away. Garden snakes, also known as garter snakes, can be particularly beneficial to your garden ecosystem as they feed on insects and other pests. To encourage garden snakes, create areas where snakes can hide, such as brush piles, rock piles, or old logs. This will give them a safe place to rest and hide from predators. Snakes need water to survive, so provide a shallow water source like a birdbath or small pond. Minimize disturbance in your garden by avoiding heavy foot traffic or loud noises. Snakes need to regulate their body temperature by basking in the sun. Provide a sunny spot in your garden where snakes can bask and warm themselves.

Other garden pest prevention methods
Crop rotation
Crop rotation is an effective method of pest management that involves planting different crops in a specific order or sequence to reduce the buildup of pests in the soil. To use crop rotation to prevent pests in your garden, it’s important to understand the life cycle of pests: Different pests have different life cycles and prefer to feed on certain types of plants. Rotate your crops so that plants from the same family are not planted in the same section of your garden in consecutive years. For example, if you grew tomatoes in a particular bed one year, rotate to a different family the next year, such as peas, beans, or lettuce.
Row covers
Row covers are a physical barrier that can be used to protect plants from pests, while also providing some protection from frost, sun and wind. There are different types of row covers available, including lightweight, medium weight, and heavyweight. Lightweight covers are ideal for pest prevention, while medium and heavyweight covers can also provide some frost protection. Place the row cover over the plants and secure it to the ground with stakes, rocks, or other heavy objects to prevent pests from crawling underneath. It's important to ensure good ventilation under the row cover to prevent the buildup of heat and moisture, which can damage plants or promote the growth of fungal diseases. You can use hoops or other supports to keep the cover from touching the plants.
While row covers can help prevent pests, it's important to monitor for any signs of infestation, such as holes or damage to the plants. Lift the covers periodically to check for pests, and remove any that you find.
Row covers should be removed once the plants have matured and are ready to be harvested or when the weather has warmed up enough that pests are no longer a threat. This will allow the plants to pollinate and grow properly.
Sanitation
Good garden hygiene will go a long way. Remove plant debris and weeds after harvest and before planting a new crop. This will help reduce the risk of pests and diseases overwintering in the soil or on plant debris.
What pests do you have in your garden?
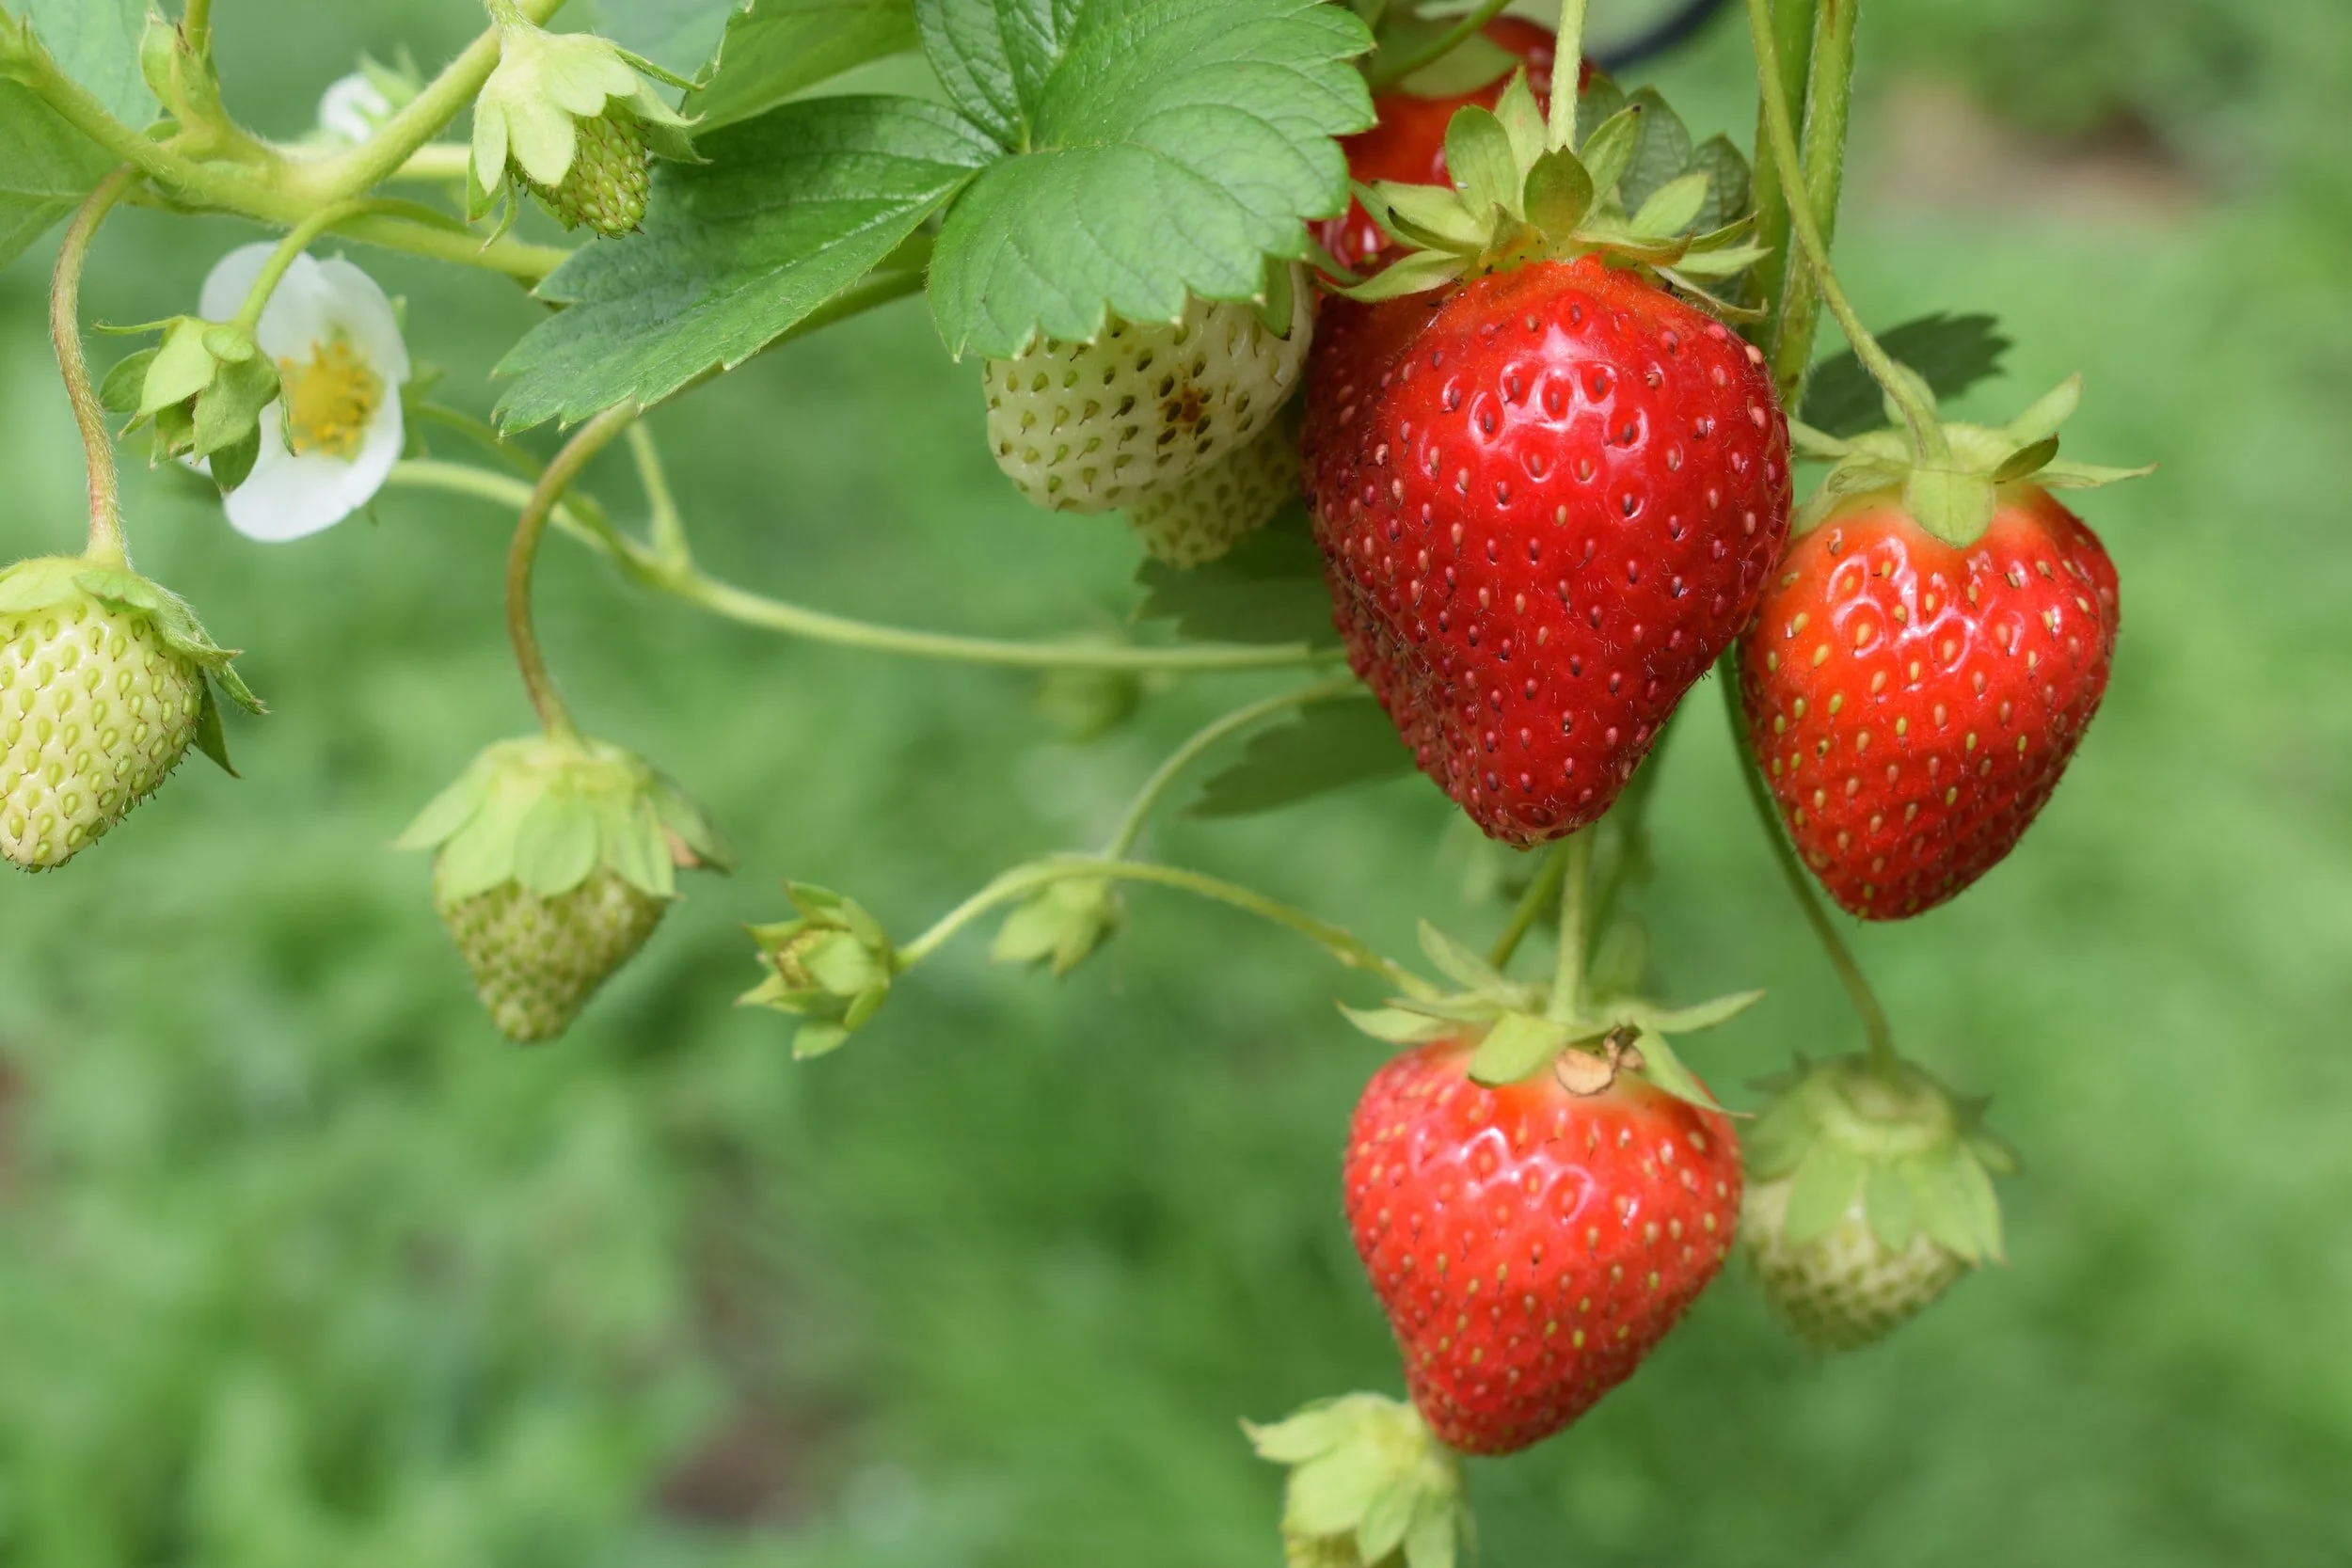
![Step-By-Step Tips For Growing, Harvesting, Storing, and Using Strawberries [Guide]](https://images.squarespace-cdn.com/content/v1/60e85024dc86d643da81c96a/1687194338720-L6UR114XUP30EGDPSO8K/image-asset.jpeg)
Step-By-Step Tips For Growing, Harvesting, Storing, and Using Strawberries [Guide]
Growing strawberries in your backyard is the gateway to gardening. There's nothing quite like the taste of freshly picked strawberries, they just don’t compare to store-bought at all. In this comprehensive guide, we will walk you through the process of growing strawberries, from choosing the right varieties to harvesting the ripe fruits.
Growing strawberries in your backyard is the gateway to gardening. There's nothing quite like the taste of freshly picked strawberries, they just don’t compare to store-bought at all. In this comprehensive guide, we will walk you through the process of growing strawberries, from choosing the right varieties to harvesting the ripe fruits.
What Kind of Strawberries Should You Grow?
When it comes to strawberries, there are several popular varieties to consider. Each variety has its own unique characteristics, including fruit color, size, shape, and flavor. Some popular varieties include 'Albion,' known for its large, bright red berries with a sweet taste, 'Seascape,' which produces firm and flavorful strawberries, and 'Eversweet,' a variety that lives up to its name with its exceptionally sweet fruits. Additionally, consider the plant size and growth habit of each variety to ensure it fits your available space and gardening preferences.
Albion: Albion strawberries are a favorite among gardeners and berry enthusiasts alike. These large strawberries boast a vibrant bright red color that is visually appealing. When you take a bite, you'll experience a burst of sweetness accompanied by a delightful hint of tartness. With their juicy texture and balanced flavor, Albion strawberries are perfect for enjoying fresh or using in various culinary creations. You can typically harvest Albion strawberries in mid to late season, usually from June to July, depending on your specific growing conditions.
Seascape: If you're looking for a strawberry variety with exceptional flavor, Seascape is an excellent choice. These medium to large strawberries feature a deep red color that is visually enticing. When you taste Seascape strawberries, you'll be treated to a sweet and aromatic flavor that is sure to delight your taste buds. Harvest time for Seascape strawberries typically falls in the early to mid-season, typically from May to June.
Eversweet: True to its name, Eversweet strawberries offer an exceptional level of sweetness. These large, round strawberries exhibit a deep red color that hints at their luscious flavor. With each bite, you'll savor the intense sweetness that sets Eversweet strawberries apart. Their juicy texture further enhances the delightful taste experience. Eversweet strawberries are usually ready for harvest in the mid to late season, typically from June to July.
Jewel: Jewel strawberries are a real gem in the world of strawberries. These large berries showcase a bright red color that catches the eye. When you taste a Jewel strawberry, you'll discover a harmonious blend of sweetness and subtle tanginess. Their refreshing flavor profile makes them a popular choice for eating fresh or incorporating into desserts and other culinary delights. Jewel strawberries are typically ready to be harvested in the early to mid-season, usually from May to June.
Ozark Beauty: Ozark Beauty strawberries offer a delightful combination of visual appeal and taste. These medium to large strawberries exhibit a bright red hue that signifies their ripeness. Their round shape adds to their allure. When you bite into an Ozark Beauty strawberry, you'll be greeted with a burst of sweetness and a juicy texture that is truly satisfying. Ozark Beauty strawberries are typically harvested in the mid-season, usually around June.

Can you grow strawberries from seed?
When it comes to growing strawberries, there are two methods: using strawberry crowns or growing from seed. Growing strawberries from seed is uncommon because it requires more time and care compared to using crowns.
Advantages of Growing Strawberries from Seed
Growing from seed offers a wider range of strawberry varieties to choose from compared to the limited options available as crowns. Seeds are generally less expensive than buying established plants or crowns. Starting strawberries from seed allows you to experience the entire growth process, from germination to harvesting.
How to Grow Strawberries from Seed
Start seeds indoors in seed trays or pots using a seed-starting mix. Maintain proper moisture and temperature for germination. Once the seedlings develop a few true leaves, transplant them into individual pots or a prepared garden bed. Follow the same care and maintenance practices as with strawberry crowns, including proper watering, fertilization, and pest control.
Strawberry Crowns
Strawberry crowns are the small plants that are typically sold in nurseries and garden centers. They consist of the roots and a cluster of leaf stems (known as the crown) from which the strawberry plants will grow.
Advantages of Strawberry Crowns
Using crowns allows you to skip the germination and early growth stages, giving you a head start in the growing process. By purchasing specific strawberry varieties as crowns, you ensure the consistency and traits of the variety you desire. Strawberry crowns usually produce fruit sooner than plants grown from seed, allowing you to enjoy your strawberries earlier.
How to Plant Strawberry Crowns
Prepare the soil by loosening it and removing any weeds or debris.
Dig a hole large enough to accommodate the roots and crown of the strawberry plant, making sure the crown is at soil level.
Space the plants according to the recommended guidelines for the specific variety.
Water thoroughly after planting to help the crowns establish.
Whether you choose to grow strawberry crowns or grow strawberries from seed depends on your preferences, time availability, and desired variety selection - but I recommend growing strawberries from crowns.
What are bare root strawberries?
Bare root strawberries are strawberry plants that are sold and shipped without soil around their roots. Instead, the roots are typically wrapped in a moisture-retaining material, such as sphagnum moss or peat moss, to keep them hydrated during transportation.
How To Plant Strawberries
Strawberries thrive in well-draining soil with a slightly acidic pH ranging from 5.5 to 6.5. Start by preparing the soil before planting your strawberry plants. Remove any weeds and incorporate organic matter, such as compost or well-rotted manure, to improve soil fertility and drainage. Strawberry plants can be propagated using runners or purchased as bare-root plants. Plant them at the recommended spacing and depth, ensuring the crown is level with the soil surface.
Strawberries need full sun exposure to thrive and produce an abundance of fruits. Ensure your strawberry patch receives at least 6-8 hours of direct sunlight per day. Consistent moisture is crucial for strawberry plants, but they don't like soggy roots. Water your strawberries deeply, providing enough moisture to reach the root zone, and allow the top inch of soil to dry out between watering sessions. Applying mulch around the plants helps retain moisture, suppress weeds, and prevent direct contact between the fruits and soil.
Taking Care of Strawberry Plants
Regularly monitor your plants for signs of pests or diseases. Remove any yellowing or damaged leaves to promote good airflow and prevent the spread of diseases. Additionally, thinning strawberry runners is crucial to ensure stronger plant development. Pinching off strawberry blossoms during the first year redirects energy towards root growth, resulting in more robust plants and higher yields in subsequent years.
Fertilizing Strawberry Plants
Nitrogen, phosphorus, and potassium are vital nutrients for their growth and fruit development. Organic fertilizers like compost or well-rotted manure are excellent choices for feeding your strawberry plants. Apply fertilizer according to the recommended guidelines and adjust based on soil test results. Consider using a balanced organic fertilizer formulated specifically for strawberries. Remember to follow the manufacturer's instructions and avoid over-fertilizing, as it can lead to excessive leaf growth at the expense of fruit production.
Strawberry Pests and Diseases
Common pests that may affect strawberries include aphids, slugs, and strawberry root weevils. To control pests organically, consider companion planting with beneficial flowers or herbs, using physical barriers like row covers or netting, and introducing beneficial insects like ladybugs or lacewings. Additionally, practicing good garden hygiene, such as removing plant debris and maintaining proper spacing between plants, helps prevent the spread of diseases like gray mold and powdery mildew.

How to stop rabbits from eating strawberry plants in your garden
Rabbits can be notorious garden pests, and their fondness for nibbling on strawberry plants can be frustrating. Here are some effective strategies to help you deal with rabbits eating your strawberry plants:
Create a physical barrier around your strawberry plants to prevent rabbits from accessing them. Use fencing or chicken wire to enclose the strawberry bed, ensuring that the fence extends below ground level to prevent rabbits from burrowing underneath. Make sure the fence is at least two feet high to discourage rabbits from jumping over.
Utilize natural deterrents to make your strawberry plants less appealing to rabbits. Scatter organic materials such as dried blood meal, coffee grounds, or human hair around the plants. The strong scents may deter rabbits from venturing close to your strawberry patch.
Consider using commercial or homemade repellents specifically designed to repel rabbits. These repellents usually contain ingredients with strong scents that rabbits find unpleasant. Apply the repellent on and around the strawberry plants according to the product instructions.
Introduce plants that rabbits find unpalatable or have a repellent effect as companions to your strawberry plants. Some examples include marigolds, garlic, onions, and lavender. The strong scents and tastes of these companion plants may help deter rabbits from approaching your strawberries.
Harvesting and Storing Strawberries
The moment you've been eagerly waiting for has arrived - harvesting your ripe and luscious strawberries! Harvesting strawberries at the right stage of ripeness ensures the best flavor and texture. Strawberries won’t continue to ripen once removed from the plant, so look for fully red berries with a sweet aroma and firmness. Gently pick the strawberries, leaving the stem intact to prevent moisture loss and prolong shelf life. If you have an abundance of strawberries, you can store them in the refrigerator, unwashed, in a single layer to maintain freshness.
Growing your own strawberries is a delightful experience that allows you to savor the incredible flavor of these juicy fruits. With the right varieties, proper care, and attention to detail, you can enjoy a bountiful harvest of homegrown strawberries. By following the steps outlined in this comprehensive guide, you'll be well on your way to growing and enjoying your own delicious strawberries. So, grab your gardening tools, find a sunny spot in your yard, and let the strawberry-growing adventure begin!
![The 6 Best Garden Shoes for Effortless and Enjoyable Gardening [Roundup]](https://images.squarespace-cdn.com/content/v1/60e85024dc86d643da81c96a/7a0407e3-1c98-4d35-818c-ec2b49d9e8a0/merry+people+bobbi.JPG)
The 6 Best Garden Shoes for Effortless and Enjoyable Gardening [Roundup]
Ask gardeners what their favorite shoes to wear in the garden are, and you’ll get a huge array of responses. Many will say that the best way to garden is barefoot, and while there are many benefits to rooting yourself to the soil through your bare feet, there will always be times when a good garden shoe is required to protect our toes from heavy, rough jobs or hot environments. I often go barefoot in the later days of summer when the garden is mostly self-sustaining, but for big garden tasks like moving soil or constructing beds, garden shoes are a necessity.

The Cottage Peach is reader-supported. When you purchase through links on our site, we may earn an affiliate commission at no additional cost to you. All opinions are our own.
Ask gardeners what their favorite shoes to wear in the garden are, and you’ll get a huge array of responses. Many will say that the best way to garden is barefoot, and while there are many benefits to rooting yourself to the soil through your bare feet, there will always be times when a good garden shoe is required to protect our toes from heavy, rough jobs or hot environments. I often go barefoot in the later days of summer when the garden is mostly self-sustaining, but for big garden tasks like moving soil or constructing beds, garden shoes are a necessity.
In this post we will cover my best tips and recommendations for choosing garden shoes that are comfortable and safe, as well as built to last. If you’re wondering what the best shoes for gardening are, look no further!
When choosing shoes to garden in, finding a shoe that is comfortable should be your first consideration - especially if you garden with chronic pain like I do. Uncomfortable shoes can lead to foot pain, blisters, and other problems that could cost you time in the garden. It is important to choose garden shoes that offer good arch support and cushioning. Your garden shoes should also provide good traction to prevent slipping and falling on wet or uneven surfaces, since we often have to garden in all sorts of conditions.
Your garden shoes should also protect your feet from hazards such as sharp tools, thorns, and poisonous plants, which means your one dollar flip flop sandals probably aren’t the best choice for the task.
Garden shoes are often made with durable and waterproof materials that offer protection from all these hazards, like rubber, neoprene or PVC, as they are exposed to water and mud regularly. For heavy duty garden tasks you may want reinforced toes, and thick soles. Garden shoes usually sit higher on your ankle or offer some type of snug fitting liner to keep dirt and rocks from falling in.
The best garden shoes are also built for breathability and durability. Your garden shoes should be breathable to prevent your feet from getting too hot and sweaty, and durable enough to withstand the wear and tear of gardening activities.
When purchasing garden shoes, you should consider the following factors:
Material: Garden shoes should be made from waterproof and durable materials like rubber, neoprene or PVC, as they are exposed to water and mud regularly.
Comfort: Look for garden shoes with comfortable insoles and a good arch support that will allow you to stand or walk for longer periods.
Traction: It is important to have a good grip on the soles of your garden shoes to avoid slipping and falling in wet or slippery conditions.
Size: Ensure you select the right size for maximum comfort and to avoid blisters or injuries.
Breathability: Your garden shoes should have adequate ventilation to allow air to circulate around your feet, preventing sweating and odor.
Style: Consider your style and preference when choosing garden shoes. There are various styles available from clogs, slip-on, to lace-up.
Purpose: If you plan to use your garden shoes for heavy-duty work, consider getting steel-toed shoes for added protection.
Muckster Low by The Muck Book Company
My own mother’s recommendation are these Muckster ll Women's Rubber Garden Shoes. They will keep you protected from mud and puddles while gardening or doing other outdoor activities. Featuring a lightweight, flexible 4mm neoprene bootie, these 100% waterproof rubber garden shoes are designed to adapt to the movements and contours of your feet while you walk, bend and crouch.
The high-traction outsole makes excellent contact with slick surfaces and it also self-cleans to keep out dirt and debris for better grip. Equipped with an Airmesh lining, these women's garden shoes are breathable for improved comfort in warm weather. These versatile women's rubber shoes are a great choice for gardening, walking the dog and running errands.
100% Waterproof
Full Neoprene Bootie Exposed at Ankle for a Comfortable, Flexible Fit
Breathable Mesh Sandwich-fabric Lining Improves Air Circulation
Self Cleaning Rubber Outsole Built for the Lawn and Garden
bioDEWIX™ Footbed Insert Topcover with NYZM™ for Odor Control and Moisture Management
Available in: Green
Women's Ankle Height Garden Boots by Hisea
The most popular choice of our community. Hisea offers waterproof, breathable, and comfortable women's ultra-versatile rain and garden shoes. This shoe is fully waterproof, has durable uppers made of natural rubber, and is insulated to keep your feet warm in the winter and cool in the summer.
4.5mm neoprene booties give you flexibility and shock absorption; natural rubber layers create extra protection, and waterproof design in any situation. Keeping you dry and providing comfort and support for long days.
Breathable H-Airmesh Lining allows air to travel throughout the boots, which keeps your feet much drier than normal boots in the market. Comfort rated from 14 °F/-10°C to 86 °F/30 °C. Making these boots best for year-round use.
Reinforced rubber layers for additional protection to heel and toe. The aggressive anti-slip rubber outsole increases traction. Comfort massage memory foam insoles offer extra arch support, good for all-day long use on your feet.
Available in: Brown, Camo, Black, Green

Patch Ankle Boots by Bogs Footwear
Available in many fun prints and designs with easy on-off handle cutouts. Bogs is partnering with BLOOM to integrate algae-based EVA footbeds across their entire line. Natural rubber, sustainably harvested in Forest Stewardship Council-approved regions. Rubber factories minimize waste by using as much as 40% post-industrial recycled material.
100% Waterproof
BLOOM eco-friendly, algae-based EVA footbed that helps clean polluted water habitats.
Built in heel kick for hands free removal
Crafted with ultra-soft and flexible rubber
BOGS Max-Wick evaporates sweat to keep feet dry
DuraFresh natural bio-technology activates to fight odors
Available in: Many colors and styles
Women's Rugged Wellie Shoes, Slip-On by LLBean
Exceptionally cushioned with rugged traction for wet surfaces, these slip-ons prove you don't need to sacrifice comfort when protecting your feet from rain and mud. LLBean is always a safe bet for comfort and durability.
Waterproof upper is made of vulcanized rubber.
Comfortable synthetic knit lining.
Stretchy goring allows for easy on/off (not waterproof).
EVA pods in the midsole and forefoot for extra cushioning and comfort.
Super-thick sock liner for comfort and support.
Durable VertiGrip rubber outsole for traction on multiple surfaces.
Available in: Black, Yellow, Green, Blue, Sand
Gardener Clogs by Hunter
A green slip-on shoe handcrafted from waterproof vegan rubber, designed for gardening. Updated with the iconic red box logo, the clog has a flexible natural rubber form and Hunter's signature tread providing grip. Lined with neoprene for breathability and comfort, it protects from the elements as well as supporting the foot. The classic Hunter rain boot you know and love has been reinvented for the garden as an easy to clean clog.
Certified vegan
Waterproof
Handcrafted
Hunter red box logo
Natural rubber construction with matte finish
Neoprene lining
Signature calendered tread
Available in: Grey, Green, Black, Clay
Bobbi Ankle Rain Boot by Merry People
The perfect everyday rain boot works hard in the garden too. The Bobbi seamlessly blends fashion and function with natural rubber and a neoprene lining. Our best-selling boots are designed for utmost comfort. Easy to dress up or down, wear from day to night, the Bobbi comes in a range of colors to match your style and individuality.

Durable chunky tread design for extra traction
100% waterproof and tested for sub-freezing temperatures keeping your toes dry and toasty-warm
Enhanced traction sole tested by Intertek Global testing laboratory
Flexible neoprene lining making it easy to slip on and off in style
100% Vegan, not made from any animal products, or tested on animals
Arch support for all day comfort
Available in: Many colors and styles
One last thing: when I asked our Instagram community what shoes they were wearing in the garden, a number of you said cheap tennis shoes. And I totally get this - if you’re on a budget it can be easy to think that it doesn’t make sense to invest in shoes that will just get worn down with all the hard labor of gardening. I think that whether you garden as a hobby or professionally, protecting your feet with the right garden shoes can make all of the difference and allow you to complete all your garden tasks with ease, especially if you are gardening with chronic pain. A good shoe will allow you to stay on your feet for longer, and is possibly the most overlooked way to make gardening with pain more enjoyable.
Sustainability-wise, going for the cheapest option isn’t a great choice either - a new pair of tennis shoes every season that ends up in a landfill is going to do a lot more environmental harm in the long term than one pair that will last you 5-10 years. If budget is a concern, check out secondhand options like Poshmark. I know secondhand shoes can have an ick factor for some, but the great thing about garden shoes is they are often made of easy to clean materials - dunk em in vinegar and water and leave them in the sun and they’ll be good as new.
Investing in high-quality garden shoes will make your gardening experience more comfortable, safe, and enjoyable. What are your favorite shoes to wear in the garden?

Tomato Gardening: Step-by-Step Guide to Growing, Harvesting, Storing, and Enjoying Tomatoes
Growing your own tomatoes is a rewarding experience that allows you to enjoy the unparalleled flavor and freshness of homegrown produce. In this comprehensive guide, we will walk you through every step of the process, from selecting the right tomato varieties to harvesting and storing your ripe tomatoes. Whether you're a seasoned gardener or a beginner, this guide will provide valuable insights on how to successfully grow healthy and abundant tomato plants.
Growing your own tomatoes is a rewarding experience that allows you to enjoy the unparalleled flavor and freshness of homegrown produce. In this comprehensive guide, we will walk you through every step of the process, from selecting the right tomato varieties to harvesting and storing your ripe tomatoes. Whether you're a seasoned gardener or a beginner, this guide will provide valuable insights on how to successfully grow healthy and abundant tomato plants.

What Tomatoes Should You Grow?
When it comes to growing tomatoes, selecting the right variety will come down to personal preference. Consider how you like to cook and eat tomatoes as well as your growing conditions. Popular varieties such as Beefsteak, Roma, Cherry, and Heirloom tomatoes offer a wide range of flavors, sizes, and colors.
Beefsteak Tomato:
Fruit Color: Red (also available in yellow and pink varieties)
Fruit Size: Large, often weighing over a pound
Fruit Shape: Irregular and beefy, with deep ridges and bulges
Flavor: Juicy, rich, and sweet with a classic tomato taste
Plant Size: Indeterminate, reaching heights of 6-10 feet
Roma Tomato:
Fruit Color: Red (also available in yellow varieties)
Fruit Size: Medium-sized, typically 2-3 inches in length
Fruit Shape: Oblong and plum-like, with few seeds and meaty flesh
Flavor: Mild and slightly tangy, with a dense texture perfect for sauces and pastes
Plant Size: Determinate or semi-determinate, usually 3-4 feet tall
Cherry Tomato:
Fruit Color: Red (also available in yellow, orange, and even black varieties)
Fruit Size: Small and bite-sized, ranging from 1/2 to 1 inch in diameter
Fruit Shape: Round and often smooth, though some may have a slight pear shape
Flavor: Bursting with sweetness, tanginess, and a refreshing pop, ideal for salads and snacking
Plant Size: Indeterminate or semi-determinate, growing between 4-6 feet tall
Brandywine Tomato:
Fruit Color: Pink (also available in red and yellow varieties)
Fruit Size: Large and hefty, weighing up to a pound or more
Fruit Shape: Beefsteak-like, with irregular lobes and a flattened appearance
Flavor: Intensely sweet and complex, often described as having a rich, old-fashioned tomato taste
Plant Size: Indeterminate, reaching heights of 5-8 feet
Green Zebra Tomato:
Fruit Color: Green with yellow stripes when ripe
Fruit Size: Medium-sized, around 2-3 inches in diameter
Fruit Shape: Slightly flattened and round, similar to a standard tomato shape
Flavor: Tangy and slightly tart, with a zingy, citrus-like flavor that adds a unique twist to dishes
Plant Size: Indeterminate, typically growing to about 5-6 feet tall
These tomato varieties encompass a range of colors, sizes, shapes, and flavors, allowing you to choose the perfect tomatoes for your culinary needs and garden space. Remember to consider your local climate and growing conditions when selecting tomato varieties for optimal success.
What is the difference between determinate and indeterminate tomato varieties?
Determinate and indeterminate are terms used to describe the growth habit and fruiting pattern of tomato plants.
Key Characteristics of Determinate Tomato Plants:
Compact size: Determinate plants have a bushy and more compact growth habit.
Controlled growth: They have a predetermined height, making them suitable for smaller spaces or container gardening.
Fruit ripening: The fruits on determinate plants tend to ripen within a relatively short period, making them ideal for gardeners who prefer a bountiful harvest at once.
Pruning requirements: Determinate varieties generally require less pruning since their growth is naturally more controlled.
Key Characteristics of Indeterminate Tomato Plants:
Vining growth: Indeterminate plants have a more vine-like growth habit, with continuous stem growth.
Continuous fruiting: Unlike determinate plants, indeterminate varieties produce fruit continuously throughout the growing season until stopped by external factors such as changing temperatures at the end of the season.
Extended harvest period: Indeterminate plants offer a prolonged harvest window, allowing for a steady supply of ripe tomatoes over a more extended period.
Pruning requirements: Indeterminate varieties benefit from pruning to manage plant size, promote airflow, and enhance fruit production. Regular pruning helps focus plant energy on fruit development and prevents excessive foliage.
Choosing between determinate and indeterminate tomato plants depends on your gardening goals and available space. Determinate varieties are suitable for smaller gardens or container growing, providing a concentrated harvest. Indeterminate varieties are ideal for those seeking a continuous supply of tomatoes throughout the season and have more space for sprawling vines.
What’s the difference between heirloom and conventional tomato varieties?

Heirloom tomatoes are known for their rich history, unique flavors, and diverse appearances. Heirloom tomatoes are open-pollinated varieties that have been passed down through generations, often for at least 50 years. They are stabilized through natural pollination, meaning their seeds will produce offspring that closely resemble the parent plant and come in a wide range of sizes, colors, shapes, and flavors. They offer a diverse array of options, from small cherry tomatoes to large beefsteaks. The fruits can be round, oblong, ribbed, or even odd-shaped, and they come in various colors like red, yellow, green, purple, and striped.
Heirloom tomatoes are renowned for their exceptional flavors. They often offer a more complex and nuanced taste compared to conventional tomatoes. Some heirloom varieties have sweet, tangy, or even smoky flavors that are highly sought after by tomato enthusiasts. Heirloom tomatoes are typically grown by home gardeners, farmers' markets, and small-scale producers. They are less commonly found in commercial supermarkets due to their delicate nature and shorter shelf life compared to conventional tomatoes.
Conventional tomatoes, also known as hybrid or commercial tomatoes, are widely grown and distributed. Conventional tomatoes are hybrid varieties developed through controlled cross-pollination to create desirable traits like disease resistance, uniformity, and higher yields. These hybrids are often carefully selected and bred to meet market demands.
Conventional tomatoes tend to have a more standardized appearance, with round or oval shapes and smooth skin. They are often bred for a consistent size, color, and shape to meet the expectations of consumers and facilitate commercial packaging and transportation. Conventional tomatoes are bred to have a longer shelf life and withstand transportation over long distances. This characteristic allows them to be readily available in supermarkets throughout the year, regardless of the local growing season. Conventional tomatoes are widely available in supermarkets, grocery stores, and restaurants due to their suitability for commercial production and distribution. They are often more accessible and affordable compared to heirloom varieties.
Starting Tomato Seeds
Tomatoes need a long time to reach maturity, and if you are in a climate with a short growing season it’s important to start your tomatoes indoors to give them a head start. Begin by gathering your supplies, including seed trays, seed-starting mix, and high-quality tomato seeds. Follow the instructions on the seed packet for optimal planting depth and spacing. As the seedlings emerge, ensure they receive adequate light to prevent leggy growth.
Hardening Off Tomato Seedlings
Before transplanting your tomato seedlings outdoors, they need to be hardened off. This process helps them adjust to the outdoor conditions gradually. Begin by exposing the seedlings to outdoor elements for a few hours each day, gradually increasing the amount of time spent outdoors over the course of a week. Protect them from strong winds and direct sunlight. This gradual transition will prevent shock and ensure their successful adaptation to the garden environment.
Transplanting Tomato Seedlings Outdoors
Wait until all danger of frost has passed and the soil has warmed up before transplanting your tomatoes. Choose a sunny location with well-draining soil for optimal growth. Before planting, prepare the soil by removing weeds and incorporating compost/fertilizer.

How deep to bury tomatoes
Tomatoes should be buried deep - two thirds of the plant should be underground. Remove the bottom set of leaves and dig a hole deep enough to accommodate two thirds of the plant. Water thoroughly after transplanting to settle the soil around the roots.
Taking Care Of Tomato Plants
To ensure healthy growth and optimal fruit production, tomato plants require regular maintenance. Water the plants consistently at the soil, taking care to avoid splashing water on the leaves which can cause blight and aiming for deep watering to encourage deep root development. Mulching around the base of the plants helps retain moisture and suppress weeds. Provide support for indeterminate varieties by using stakes, cages, or trellises. Pruning is optional but can help improve airflow and reduce the risk of diseases. Remove suckers that form in the leaf axils, focusing on maintaining a single or double main stem.
Managing Tomato Pests and Diseases
Common tomato plant pests include aphids, tomato hornworms, and whiteflies. Implement preventive measures such as companion planting, regular inspection, and handpicking to control these pests. Diseases like blight, blossom-end rot, and powdery mildew can also affect tomato plants. Proper gardening practices such as adequate spacing, good air circulation, and watering at the base of the plant can help prevent diseases.
When and How to Harvest Tomatoes
The joy of growing tomatoes culminates in the moment of harvesting ripe, juicy fruits. Look for signs of maturity, including full color, firmness, and a slight give when gently squeezed. Use pruning shears or a sharp knife to harvest the tomatoes, leaving a short stem attached. Avoid pulling or twisting the fruits, as this may damage the plant. Handle them with care to prevent bruising.
Storing and Preserving Harvested Tomatoes
Store fully ripe tomatoes at room temperature away from direct sunlight, but if you need to prolong their shelf life, place them in a cool location. To preserve tomatoes, consider canning, freezing, or drying them. Canned tomatoes can be used in sauces, soups, and stews, while frozen or dried tomatoes retain their flavors for later use.
Troubleshooting Common Tomato Growing Challenges
Despite your best efforts, challenges may arise in your tomato garden, here’s what to do if your tomatoes won’t grow:

Stunted growth
Insufficient sunlight can hinder tomato plant growth. Ensure that your plants are receiving a minimum of 6-8 hours of direct sunlight each day. If they are in a shady area, consider transplanting them to a sunnier location or using reflective materials to redirect sunlight.
Inconsistent or improper watering can affect plant growth. Ensure that the soil is consistently moist but not overly saturated. Water deeply and evenly, allowing the top inch of soil to dry out between watering sessions. Avoid letting the soil become bone dry or waterlogged.
Nutrient deficiencies or imbalances in the soil can stunt plant growth. Test the soil to determine its pH level and nutrient content. Amend the soil with organic matter, such as compost or well-rotted manure, to improve its structure and fertility. Consider applying a balanced organic fertilizer to provide essential nutrients.
Overcrowding can limit the growth of tomato plants. Ensure that there is enough space between plants to allow for proper air circulation and sunlight penetration. Crowded plants can compete for nutrients and water, leading to stunted growth.
Improper or excessive pruning can hinder plant growth. While some pruning is beneficial, especially for indeterminate varieties, avoid removing too many leaves or stems, as this can limit the plant's ability to produce energy through photosynthesis. Prune selectively to promote airflow and remove any diseased or damaged parts.
Extreme temperatures, especially cold snaps, can stunt tomato plant growth. Provide protection during chilly nights with covers or move potted plants indoors temporarily. Additionally, strong winds can damage plants and impede their growth, so consider providing a windbreak if necessary.
Sometimes, stunted growth may be a temporary setback due to environmental factors or transplant shock. Give your plants time to recover and monitor their progress. With proper care, they may start growing vigorously again.
Yellowing leaves
Yellowing leaves can be a sign of nutrient deficiencies, such as nitrogen, magnesium, or iron.
Improper watering practices can lead to yellowing leaves. Overwatering can cause root rot, depriving the plant of oxygen and resulting in yellow leaves that may eventually wilt. Underwatering, on the other hand, can lead to water stress and nutrient uptake issues.
Tomato plants prefer slightly acidic soil with a pH range of 6.0 to 6.8. If the soil pH is too high or too low, nutrient availability may be affected, resulting in yellow leaves.
Certain pests, such as aphids, whiteflies, or spider mites, can cause yellowing leaves as they feed on the plant sap. Some diseases, like early blight or fusarium wilt, can cause yellowing and wilting of tomato leaves.
Extreme temperatures, particularly excessive heat, can cause yellowing of leaves.
No fruit
Tomatoes require proper pollination to set fruit. If there are insufficient pollinators, such as bees, in your area or if the plants are grown indoors, you may need to manually pollinate the flowers. Gently shake the plants or use a small brush to transfer pollen between flowers, ensuring cross-pollination.
Extreme heat can interfere with fruit set in tomatoes. When temperatures exceed 90°F (32°C) during the day or 70°F (21°C) at night, pollen may become unviable, resulting in poor fruit formation. Consider providing shade or using shade cloth to protect the plants from intense heat.
Tomatoes require at least 6-8 hours of direct sunlight per day to promote fruit production. If your plants are shaded by trees, buildings, or other structures, consider moving them to a sunnier location or pruning nearby obstacles to allow more sunlight to reach the plants.
Over-pruning or excessive removal of foliage can limit the plant's ability to produce energy through photosynthesis, which can result in reduced fruit set. Avoid excessive pruning, especially during the early stages of growth, and only remove diseased or damaged leaves when necessary.
Nutrient imbalance: Nutrient deficiencies or imbalances can affect fruit production. Ensure your plants are receiving adequate nutrition by using a balanced organic fertilizer or supplementing with compost or other organic matter. Test the soil to identify any nutrient deficiencies and amend accordingly.
Inconsistent or improper watering can affect fruit formation. Irregular watering, particularly periods of drought followed by heavy watering, can cause blossom-end rot and other fruit development issues. Maintain consistent soil moisture by watering deeply and evenly, allowing the top inch of soil to dry out between watering sessions.
Calcium is essential for healthy fruit development. Calcium deficiency can lead to blossom-end rot, where the bottoms of the fruits become dark and sunken. Ensure adequate calcium levels in the soil by adding amendments like gypsum or crushed eggshells, or by using calcium-fortified organic fertilizers.
By following this tomato growing guide, you are now equipped with the knowledge and skills to successfully grow your own tomatoes at home. From selecting the right varieties to nurturing and harvesting your plants, you have the tools to enjoy the incredible flavors of homegrown tomatoes. Embrace the journey of growing tomatoes and savor the bountiful rewards it brings to your garden and kitchen. Happy tomato growing!

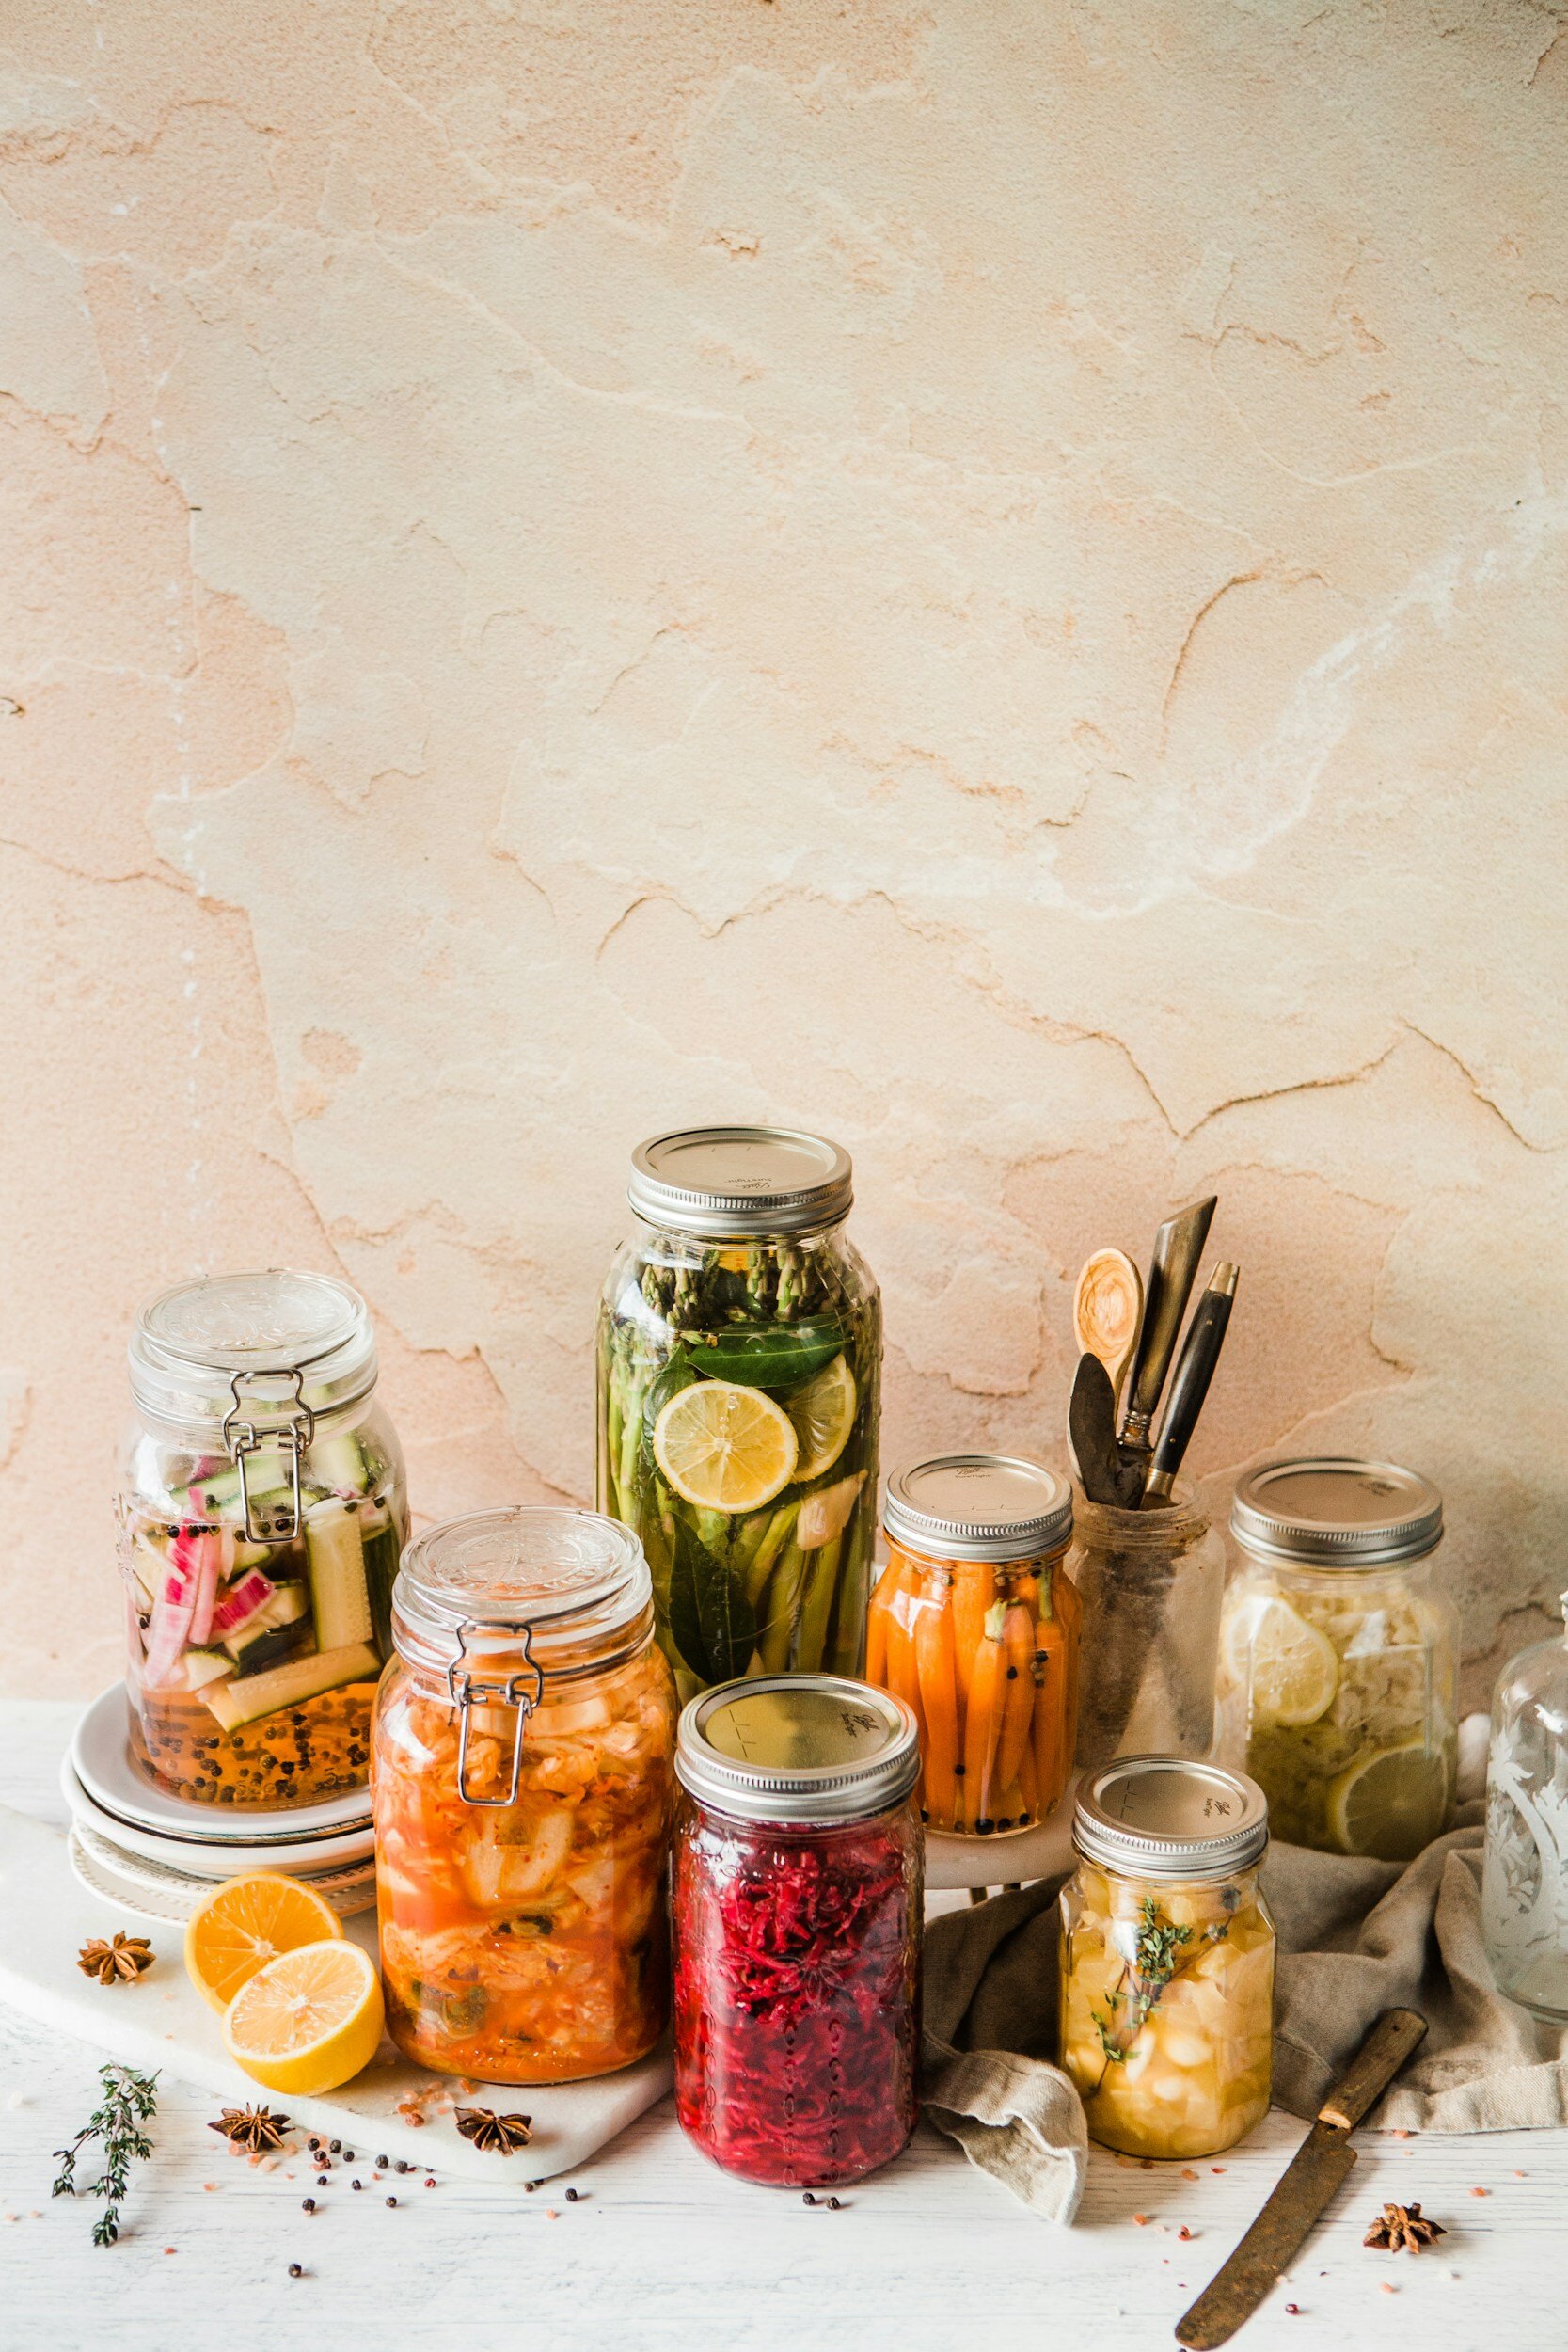
5 Tried-and-Tested Techniques for Preserving Your Garden Harvest
Preserving excess produce not only helps reduce food waste, but it also allows you to save money by avoiding buying produce out of season. With a little planning, you’ll even be able to create heat and serve convenience foods for busy nights when cooking isn’t an option, giving you healthy options to choose from. Additionally, preserving produce allows you to enjoy the fruits of your labor long after the growing season has ended. It's also a great way to ensure that you always have healthy, homegrown ingredients on hand for your favorite recipes.
One of the best things about gardening is the daily access to fresh, nutritious fruits, vegetables, and herbs. However, in the height of summer it is easy to become overwhelmed by a harvest that is more than you can consume, so it's important to learn how to preserve excess produce for later use.

There are many different methods of preserving fruits, vegetables, and herbs, but today we’ll be covering canning, freezing, dehydrating, pickling, and fermenting. These preservation methods allow you to enjoy your homegrown produce all year round and reduce food waste. Food waste is a problem for several reasons. Firstly, it contributes to environmental issues such as greenhouse gas emissions, as uneaten food in landfills decomposes and produces methane gas. Secondly, it wastes valuable resources such as water, energy, and labor used in producing, transporting, and preparing the food. Thirdly, it contributes to food insecurity, as there are many people who do not have access to enough food. Finally, it is a waste of money for individuals and businesses, as they are essentially throwing away the money they spent on the food. By reducing food waste, we can help address these issues and create a more sustainable food system.
Preserving excess produce not only helps reduce food waste, but it also allows you to save money by avoiding buying produce out of season. With a little planning, you’ll even be able to create heat and serve convenience foods for busy nights when cooking isn’t an option, giving you healthy options to choose from. Additionally, preserving produce allows you to enjoy the fruits of your labor long after the growing season has ended. It's also a great way to ensure that you always have healthy, homegrown ingredients on hand for your favorite recipes.
This post will give you a broad overview of the different ways to preserve foods, but if you’re interested in diving deeper into the specifics, let me know in the comments which method you’d like to learn more about.
Canning Homegrown Food
Canning is a popular method of preserving fruits, vegetables, and even meats. Canning is a great way to preserve high-acid fruits such as berries, peaches, and apples, as well as tomatoes and some types of pickles. Low-acid foods such as green beans, corn, and meat require pressure canning to prevent the growth of harmful bacteria.
The basic process involves heating the food in a jar to kill bacteria and create a vacuum seal. This prevents spoilage and allows the food to be stored for long periods of time. To get started with canning, you will need a few pieces of equipment, including a water bath canner or pressure canner, canning jars, and lids.
To prepare fruits and vegetables for canning, it's important to start with fresh, ripe produce. Wash and trim the produce, removing any stems, leaves, or bruises. Follow a trusted recipe for the type of food you are canning, as different foods require different processing times and methods. The best resource for this is The National Center for Home Food Preservation. Once the food is packed into the jars, process them in a water bath canner or pressure canner according to the recipe instructions.
To store canned foods, keep them in a cool, dry place away from direct sunlight. Check the seals on the jars regularly to ensure they are still airtight. Canned foods can last for up to one year, but it's important to use them within a reasonable timeframe to ensure optimal flavor and quality.
Click here for my full guide to learn how to water bath can food.
Freezing Your Garden Produce

Freezing is a convenient and easy method of preserving fruits, vegetables, and herbs. Freezing is an excellent method for preserving vegetables that you plan to cook later, as well as fruits such as berries, peaches, and mangoes. Most vegetables and fruits can be frozen, but some may require blanching (briefly boiling and then cooling in ice water) before freezing to prevent enzyme action and maintain color and flavor.
The basic process involves blanching the produce to stop enzyme activity, then freezing it in airtight containers or bags. Freezing can preserve the flavor and nutrients of the produce for up to six months or longer, if you vacuum seal your bags.
To get started with freezing, you will need a few pieces of equipment, including a large pot for blanching, a colander, airtight containers or bags, and a freezer. A vacuum sealer is optional.
To prepare fruits and vegetables for freezing, start with fresh, ripe produce. Wash and trim the produce, removing any stems, leaves, or bruises. Blanch the produce by dipping it in boiling water for a brief period, then transferring it to ice water to stop the cooking process. Drain the produce in a colander, then pack it into airtight containers or bags, removing as much air as possible.
To store frozen foods, keep them in a freezer at 0°F or below. To thaw frozen foods, move them to the refrigerator to thaw slowly. Avoid thawing at room temperature or in the microwave, as this can lead to uneven thawing and loss of texture.
Click here for my full guide to learn how to ferment food.
Dehydrating Herbs and More
Dehydrating is a method of removing moisture from fruits, vegetables, and herbs to create shelf-stable, dried foods. Dehydrating is a great way to preserve fruits such as apples, bananas, and mangoes, as well as vegetables such as tomatoes, peppers, and zucchini. Herbs and spices can also be easily dried and stored.
The basic process involves slicing the produce, arranging it on a dehydrator tray, and allowing it to dry at a low temperature for several hours. You can also dehydrate at a low temperature in your oven, but this will take longer and use more energy.
To get started with dehydrating, you will need a dehydrator and a knife or mandoline for slicing the produce.

To prepare fruits, vegetables, and herbs for dehydrating, start with fresh, ripe produce. Wash and trim the produce, removing any stems, leaves, or bruises. Slice the produce into even pieces, then arrange it on a dehydrator tray. Follow the instructions for your specific dehydrator model, as drying times and temperatures may vary.
To store dehydrated foods, keep them in airtight containers or bags in a cool, dry place away from direct sunlight. Dehydrated foods can last for up to a year or longer, but it's important to use them within a reasonable timeframe to ensure optimal flavor and quality.
Click here for my full guide to learn how to dehydrate food.
Pickling Garden Picks
Pickling is a method of preserving fruits and vegetables in a brine made from vinegar, salt, and spices. The acidity of the vinegar helps to prevent spoilage and enhance flavor. Pickling is a great way to preserve cucumbers, beets, carrots, green beans, and other vegetables. Fruits such as peaches and pears can also be pickled.
To get started with pickling, you will need a few pieces of equipment, including a large pot for boiling the brine, canning jars, and lids.
To prepare fruits and vegetables for pickling, start with fresh produce. Wash and trim the produce, removing any stems, leaves, or bruises. Follow a trusted recipe for the type of food you are pickling, as different foods require different brine ratios and processing times. Once the food is packed into the jars, pour the hot brine over the top, leaving a small amount of headspace.
To store pickled foods, keep them in a cool, dry place away from direct sunlight. Pickled foods can last for several months, but it's important to use them within a reasonable timeframe to ensure optimal flavor and quality.

Fermenting for Health
Fermenting is a method of preserving fruits, vegetables, and even dairy products by allowing beneficial bacteria to grow and multiply. The bacteria convert sugars and starches into lactic acid, which gives fermented foods their tangy flavor and helps to prevent spoilage. Fermenting is a great way to preserve vegetables such as cabbage, carrots, and cucumbers, as well as fruits such as lemons and limes. Fermented foods such as sauerkraut, kimchi, and pickles are also great sources of beneficial probiotics.
To get started with fermenting, you will need a few pieces of equipment, including a fermentation crock or jar, weights, and an airlock.
To prepare fruits, vegetables, and herbs for fermenting, start with fresh produce. Wash and trim the produce, removing any stems, leaves, or bruises. Follow a trusted recipe for the type of food you are fermenting, as different foods require different salt ratios and processing times. Pack the food into a fermentation crock or jar, adding salt and any desired spices or seasonings. Place weights on top to keep the food submerged in the brine, then attach an airlock to allow gas to escape during fermentation.
To store fermented foods, keep them in a cool, dark place, such as a basement or refrigerator. Fermented foods can last for several months or longer, but it's important to use them within a reasonable timeframe to ensure optimal flavor and quality.
Growing and preserving your own food can feel overwhelming as you are getting started, and it can be difficult to know which preservation method is best for you. Each method has its own set of benefits and considerations, and the best method for you will depend on the type of food you are preserving, your energy levels and your personal preferences. Because of my chronic pain, I tend to avoid intensive projects like canning. My favorite method of preserving food is to freeze in vacuum sealed bags or jars in our chest freezer.