
BACKYARD GARDENING MADE SIMPLE

Perennials for the Sun: A Guide to Choosing the Right Plants for Your Garden
In planning your garden, it’s fair play to go to your local nursery and grab whatever you like the look of. However, if you’re interested in garden design and the best shot at successful and happy plants, incorporating some strategy and thought in choosing your flowering perennial plants will go a long way.

The Cottage Peach is reader-supported. When you purchase through links on our site, we may earn an affiliate commission at no additional cost to you. All opinions are our own.
In planning your garden, it’s fair play to go to your local nursery and grab whatever you like the look of. However, if you’re interested in garden design and the best shot at successful and happy plants, incorporating some strategy and thought in choosing your flowering perennial plants will go a long way.
What is a Perennial Plant?
First, let’s talk about what a perennial plant is not. You know when you go to a garden center in the spring and there are plants already blooming with bright flowers and you’ve been starving for color all winter and you Must. Buy. Them. All? Those are annual plants, plants that will die in the fall of the year you put them in the ground. You get the instant satisfaction of pretty colors in your yard, but you’ll have to do it all over again the next spring, and the one after that.
Perennial plants may die back to the ground in fall or winter (some don’t), but their roots are still alive, and, year after year, each spring the plant will come back bigger, stronger, and with more blooms. These are the plants we use to build a garden that will become more lush and beautiful every year.
What are the Benefits of Perennial Plants?
Aside from lasting years, there are other benefits to planting perennials. Many perennial flowers will bloom all summer, and they are beneficial to birds and other creatures in our yards, as they create habitats and dependable sources of food.
While the upfront cost of the plant may be higher than for an annual plant, the lifetime cost will not be. This is true not only because we spread that cost over years, but because one perennial plant can easily be separated as it matures and become two, or ten, or twenty plants over time.
How Do You Divide Perennial Plants?
Most perennials are happy to be divided, and in fact, some must be divided in order to thrive. Talk of green thumbs can cause people to believe plants are delicate and complicated. The truth is, the vast majority are hardy and can take a bit more roughness than you might imagine.
There are two basic ways I divide a perennial plant. The first is to use a sharp-edged shovel. Pressing straight down on the shovel with my foot, I can separate the roots belowground. It’s then easy to dig out only the section I want to move. The other way I divide a plant is to dig the whole thing up. Some plants’ roots will easily separate into pieces once they’re out of the ground. Others will need to be split with a shovel, as above.
Bulbs are perennials which need to be dug up and separated. When the plant is scooped out of the ground, you will find that the bulb has multiplied, with smaller bulbs attached to it which are very easy to take off with your fingers and replant elsewhere.
Where Should I Plant My Perennials?
When making a garden, a good mantra is, “right plant, right place”. If we can find just the right plants for different spots in our yard, they will thrive with very little input from us.
In order to put the right plant in the right place, you need to become familiar with the land. Where does the sun shine all day? Where is it shady in the afternoon? Is there an area with dappled light? Does it feel much warmer near the wall of your house? When it rains, where do puddles form?
The land you live on is not all one climate. There are microclimates – pockets and hilltops, large empty areas, windbreaks, and spots near a building or fence. To learn more about this concept, I recommend the book Gaia’s Garden, by Toby Hemenway. It may take a couple of reads to really understand the many things that create different conditions in different areas of our property, but in the meantime, you’ll have the basic idea and can start planting. You’ll see what fails and what is happy, and over time you’ll learn more from your real life experience than you ever could from a book.
Once you’ve gotten to know the land, it’s time to research which plants will do best in the conditions of whatever areas you choose garden. There are plants that want only full sun and some that want full sun but will tolerate partial shade. There are plants that will only grow in full shade, drought-tolerant plants, and plants that like to keep their feet wet – they don’t want to live in a dry spot. You can find out the needs of each plant with a simple Google search.
You’ll also want to research how big the plants will get, keeping in mind the amount of space you have available to plant, and when they will bloom, so you don’t end up with everything blooming in June and there being no flowers in the garden for the rest of the season.
What Color Perennial Flowers Should I Choose?
You should choose whatever colors appeal to you. There are no rules! It can be good to pay attention to how many of each color you purchase, though, so you don’t end up with a garden that is all one color. (Unless that’s the look you’re going for – it can be gorgeous!)
How Many of Each Plant Should I Buy?
With so many perennials available, it can be tempting to buy just one of lots of different kinds. A lot of new gardeners start out that way, and it can be a good way to learn.
To make a cohesive garden, though, consider limiting the number of varieties you choose, and instead get more than one plant of those varieties. Large swaths of the same flower make a garden look intentional and full. It can also be a good idea to plant the same variety in different parts of the garden to provide balance. If you only have a few though, I recommend planting them near each other.
Three is generally a magic number in design, and that holds true in the garden. If you can afford more than three, stick with an odd number for the most attractive outcome.
What Full-Sun Perennials Should I Buy?
If you’re lucky enough to have some sunny spots in your garden, you’ll find many more options are available to you. There are plenty of shade perennials to make beautiful shade gardens (we’ll cover those next month), but your choices in a sunny spot are almost endless.
Below, I’ll save you a bit of trouble and list some of the best perennials to plant in the sun.
The first thing to check out is the plant’s growing zone. You can find out your growing zone with the USDA’s Plant Hardiness Zone Map. Plants outside of your zone will not grow in your area. Because I live in Zone 6b, my favorites may not be appropriate if you live in a very cold or very warm climate.
Remember also to look at size, whether it can tolerate partial shade even though it does best in the sun, what colors the blooms are, and what the bloom time is.
12 Full-Sun Perennials for Your Garden
Here’s some of my favorite full-sun perennials. I’m also including some important information that will help you to determine if they are the right plants for you.

‘Proud Berry’ Coralberry
Zones 3-7
The Coralberry is a shrub, growing 4’ tall and 4’ wide. It has berries of the most amazing pink, which unfortunately are not edible for humans. (The birds would thank you, though.) The berries hang onto the plant into the winter months, a nice pop of color under a light snow.
It prefers full sun, but will handle a bit of shade. It blooms in late summer, and the flowers develop into berries in the fall. It’s branches with berries are beautiful in a flower arrangement.
Pyromania Solar Flare Red Hot Poker
Zones 5-9
This plant grows 3’6” high and 2’6” wide, with bright yellow flowers of an uncommon shape. It blooms all summer and makes a great cut flower.
‘Curtain Call Deep Rose’ Japanese Anemone
Zones 4-8
This Anemone is happy in sun or part-shade. It grows to 18” tall and 18” wide, with pink flowers. The flowers bloom in late summer and early fall.
Red Creeping Thyme
Zones 5-10
Growing only 6” tall, this plant makes a beautiful magenta-red groundcover. Each plant will spread to about 10” wide, but over time they will spread even further. Planted short distances away from each other, they will form a large mat. Creeping Thyme works well on rock walls and between paving stones as well.

Mango Tango Anise Hyssop
Zones 6-9
This sun-loving plant grows 18” high and 16” wide. It can handle dry conditions and prefers a spot with good drainage. It’s peach and orange flowers bloom from mid-summer to early fall.
Prince of Orange Oriental Poppy
Zones 3-7
Vivid, orange, ruffled petals surround a dark center on this bright and happy plant. It prefers full sun, and grows 2’6” tall and 2’ wide. It blooms from late spring through early summer.
West Country Manhattan Lights Lupine
Zones 4-9
This variety blooms in part-sun and sun, and grows 3’ tall and 2’ wide. I love the classic blue Lupine, but what makes this one a favorite is its yellow and burgundy-purple flowers, which bloom in spring and early summer.
Beyond Midnight Bluebeard
Zones 5-9
This Caryopteris shrub variety produces tall blue flowers. It blooms from late summer to early fall, just as many flowers are checking out for the year, and grows 2’6” tall and 2’6” wide.
It needs full sun and good drainage to thrive. Soggy soil will cause root rot, killing your plant.

‘Denim ‘n Lace’ Russian Sage
Zones 4-9
This is a completely different plant to the sage we use as an herb. Its leaves are toxic and should not be eaten.
Denim and Lace provides beautiful wands of purple-blue flowers, on a plant that will grow to be 2-3’ high and 2-3’ wide. It prefers full sun, and blooms throughout summer to fall.
Decadence Deluxe ‘Pink Lemonade’
Zones 4-9
This is a Baptisia, sometimes known as False Indigo. Baptisia is available in a variety of colors, but Pink Lemonade is among my favorites. With its yellow and raspberry flowers, you’re getting two colors for the price of one.
It is a large plant, growing 4’ tall and 4’ wide, and almost looks like flowers in a vase, as it is narrow on the bottom and very full on top. It blooms from late April through June.
Dulce ‘Spearmint’ Coral Bells
Zones 4-9
This plant grows 10” high and 2 ½’ wide, and produces flowers in mid- to late summer which are light pink on the bottom and darker pink nearer the top. It is happy in sun or shade. It’s green leaves have a bit of a silver tint to them, providing interest even when the plant is not in bloom.
Delicious Candy Echinacea
Zones 4-8
This is a vivid pink flower. It grows 4’ wide and 6’ tall, a really sizable plant. They can handle part-shade, but will not produce as many flowers as they would in the sun. Echinacea is a medicinal plant. Blooms in mid-to-late summer.
Do you have Enough Plants for a Full-Sun Perennial Garden?
I first want to acknowledge that buying plants can be an expensive endeavor. Making a garden is not something that has to be done in one swoop. We can buy plants as we can afford them, and some years from now we’ll have the garden we imagined. And remember, gardening friends will be happy to give you splits of their plants, and some plants are easily grown by seed.
If you were to purchase everything on this list, you would have purple, yellow, raspberry, pink, red, orange, and burgundy flowers. Between them all, they would provide at least one blooming plant from late spring to winter. But remember, you may want to consider choosing fewer varieties and getting more of the ones you do choose.
Whatever you choose, keep in mind that gardening isn’t about perfection. It’s about playing in the dirt, connecting to nature, and expressing your creativity. Whatever you think is beautiful, is beautiful.
What is your favorite full-sun perennial to grow?


Spring Gardening: 7 Cold Hardy Plants to Grow in March
The ground is attempting to thaw, which means mud season has officially arrived and with it my itch to garden and grow has returned in earnest. I’ve just gotten my new elevated garden beds from Gardener’s Supply Co built over the old garden bed and spread a thick layer of clover seed beneath with dreams of a carpet of clover to rest on come warmer days and now I can’t think how I could wait another two months for our last frost to start planting them. So we’re going to plant out a small cold hardy garden in the first two beds here just to tide us over until we can start planting the majority of our crops in May.

The Cottage Peach is reader-supported. When you purchase through links on our site, we may earn an affiliate commission at no additional cost to you. All opinions are our own.
Are you wondering if March is too early to start a garden? This post explains what plants can survive in the cold, what is a winter hardy plant, what are the easiest plants to grow in winter and more.
The ground is attempting to thaw, which means mud season has officially arrived and with it my itch to garden and grow has returned in earnest. I’ve just gotten my new elevated garden beds from Gardener’s Supply Co built over the old garden bed and spread a thick layer of clover seed beneath with dreams of a carpet of clover to rest on come warmer days and now I can’t think how I could wait another two months for our last frost to start planting them. So we’re going to plant out a small cold hardy garden in the first two beds here just to tide us over until we can start planting the majority of our crops in May.
This will be the smallest planting we do all year, and so I committed to really savoring the sensory experience of it and slowing down to enjoy the process. All I need to bring with me are my seeds, my favorite trowel and gloves. And I’ll be bundling up because while these plants I’m growing may be cold hardy, I most certainly am not! So sweaters and hats and layers galore. I love the lack of urgency and the sense of hope I get from planting the first cold hardy garden of the season. Soon green things will push up out of the earth and remind us that we are all connected to the life that grows beneath our feet.
We have a short growing season here in New England, but that won’t stop me from planting cold hardy vegetables that can thrive in these colder temperatures. My garden is just a few short steps from the back door, overlooking 70+ acres of my neighbors fields and surrounded by the buzz of life beginning to stir - a blue heron in the distance, a mouse skittering through the undergrowth.
Out back the trees are still in their deep sleep and the sun is trying its hardest to break through the seemingly endless layer of gray clouds that has graced the sky for the past four months now. I can still see my breath as I exhale, and this too is a reminder to be mindful. I breathe the same air as these trees that rest around me, and thank them for how clean and fresh it feels within my lungs. This grounds me in my purpose to bring myself and my body closer to the living things that are all around us.
What is a winter garden?
A winter garden is just a garden that you grow using only plants that can thrive in winter! There are many fun varieties of cold hardy vegetables and perennial plants that have unique characteristics that help them to survive in colder climates. For instance, kale, brussels sprouts and other brassica plants produce a form of antifreeze when exposed to cold temperatures that actually causes the plants to taste sweeter. I enjoy winter kale far more than summer kale - not to mention, there’s no cabbage moth pests in the winter chewing through every leaf before I have a chance to harvest it.
What plants can survive in the cold?
Now I’ll preface this by saying that what can grow in my garden in March may not be the same as what can grow in your garden. If you are in California for example I’m afraid this post won’t be much help to you as you do not suffer from the same deep cold winters we have here in the northeast. But in grow zone 6B many plants can survive the chill of late winter - as a matter of fact, some plants like lettuce and spinach require a colder temperature in order to germinate. This is why you’ll begin to see signs of life in the form of things like wild onion grass even this early in the season when the trees are still sleeping. And since we’re all about low-energy gardening tips and tricks here, I’ll also only focus on what is the easiest plants to grow in winter. No seed starting, forcing rhubarb or chilling your garlic seed in the freezer to trick it into sprouting earlier here. I want to focus just on plants that can go straight into the ground in March.
Winter plants for the garden:
Here is everything I will be planting in my cold hardy garden using my elevated beds from Gardener’s.
Snap peas (germination temp 40+ F)
Pansies (germination temp 45+F but we are planting these from established plants from the nursery not seeds)
Lettuce (germination temp 35+F)
Radish (germination temp 50+F)
Spinach (germination temp 40+F)
Chives (transplanting this from another spot, these grow well at temps above 40F)
Calendula (this one is more of an experiment as while it is cold-hardy once established, it probably won’t germinate until soil temps reach 60 degrees fahrenheit)
What is a winter hardy plant?
A winter hardy plant means any plant that can survive average winter temperatures, including cold hardy vegetables and cold hardy perennials. Most winter hardy plants do not produce much throughout the winter due to the lack of sunlight but by surviving these cold conditions they are able to establish themselves faster in the spring which means they will be the first to yield a harvest since they will mature before anything else in your garden.
What can I plant in pots for winter?
Some plants that won’t survive the winter outdoors can be transplanted into pots for the winter and brought indoors. You can do this successfully with most herbs including rosemary and sage. You can also overwinter pepper plants (which are perennial in warmer climates) by cutting off all of the foliage except for the main Y shaped stem, moving into pots and storing in your basement. They will go dormant and then can be transplanted back into your garden beds after your last frost date.
When I was deciding what to plant in early spring, I was happy that everything I wanted to grow would thrive in my elevated garden beds - which meant I didn’t have to worry about hurting my back while gardening. With my arthritis, it’s important that the way I garden is accessible and gentle on my body while still providing me with opportunities to stretch and strengthen my joints. I found prepping the elevated raised beds to be the easiest it has ever been, since I didn’t even need to weed the planting area prior to starting. It feels like a true luxury to stand over my raised beds in the garden and I was able to save more of my limited energy for actually enjoying being in the garden instead of just trying to finish as quickly as possible before my energy ran out. The beds are quite deep and so they can support the largest root structures of some of the plants I’ll be growing with no problem.
I had honestly begun to dread spring garden prep last year. I found myself crying in frustration more than once trying to wrangle the wildness of my in-ground beds into shape for planting. It is really shocking how much harder it is to work the earth when your back is in pain and your energy reserves are lower. While I do greatly appreciate the physical benefits of working out via the garden, and weeding has always been the best way to let out any pent up aggression, my body has been telling me for a couple of years now that this isn’t the right way to go about it for me anymore. I feel lighter knowing that I won’t have these dark moments in the garden where I really have to push myself beyond my limits anymore and can just be present and enjoy the process of gardening again. A part of me felt worried I wouldn’t be taken seriously as a gardener if the majority of my plants were grown in what is effectively a giant container garden. Especially with our full acre to work with, I knew I wanted to take a hybrid approach. So we have perennials like asparagus and rhubarb in-ground since those don’t require much maintenance year-to-year and then larger crops like garlic in ground as well. And of course borders of wildflowers fill up a lot of space too. Eventually it is my dream to add a greenhouse to carry us through the endless winters. But these elevated beds have taken such a weight off my shoulders (and my back!) and gave me back my peace in the garden, and I would not trade that feeling for anything.
If you’re looking for winter garden ideas, I hope that you’ve found this post helpful. Don’t forget to check out this post on cold frame gardening to extend your growing season even further + Let me know in the comments what you are planting in your winter garden this year.
![Make This Easy + Natural Botanical Hand Salve [Recipe]](https://images.squarespace-cdn.com/content/v1/60e85024dc86d643da81c96a/b57698b0-de70-4101-afaf-7af57788237d/Herbal+Face+Steam+Recipe+by+The+Cottage+Peach-1.jpg)
Make This Easy + Natural Botanical Hand Salve [Recipe]
Although it felt for a moment as though we would never see spring again, suddenly I am waking up to to-do lists filled with seed starting tasks and dirt under my fingernails once more. But what is more inevitable than spring for a gardener? Calluses and dry skin galore from all that time spent working with our hands in the soil. It doesn’t seem to matter what gloves I wear, there is no point in the growing season where I have the hands of a model between the short, practical nails and the constant need to moisturize. Anyone who has struggled with gardener’s hands knows the eternal search for the perfect balm - some are too greasy, some seem to evaporate off your skin within seconds and have no effect, but to find the elusive, perfect hand balm is to discover the holy grail of the gardener’s toolbox.
The Cottage Peach is reader-supported. When you purchase through links on our site, we may earn an affiliate commission at no additional cost to you. All opinions are our own.
Although it felt for a moment as though we would never see spring again, suddenly I am waking up to to-do lists filled with seed starting tasks and dirt under my fingernails once more. But what is more inevitable than spring for a gardener? Calluses and dry skin galore from all that time spent working with our hands in the soil. It doesn’t seem to matter what gloves I wear, between the short, practical nails and the constant need to moisturize there is no point in the growing season where I have the hands of a model! Anyone who has struggled with gardener’s hands knows the eternal search for the perfect balm - some are too greasy, some seem to evaporate off your skin within seconds and have no effect, but to find the elusive, perfect hand balm is to discover the holy grail of the gardener’s toolbox.
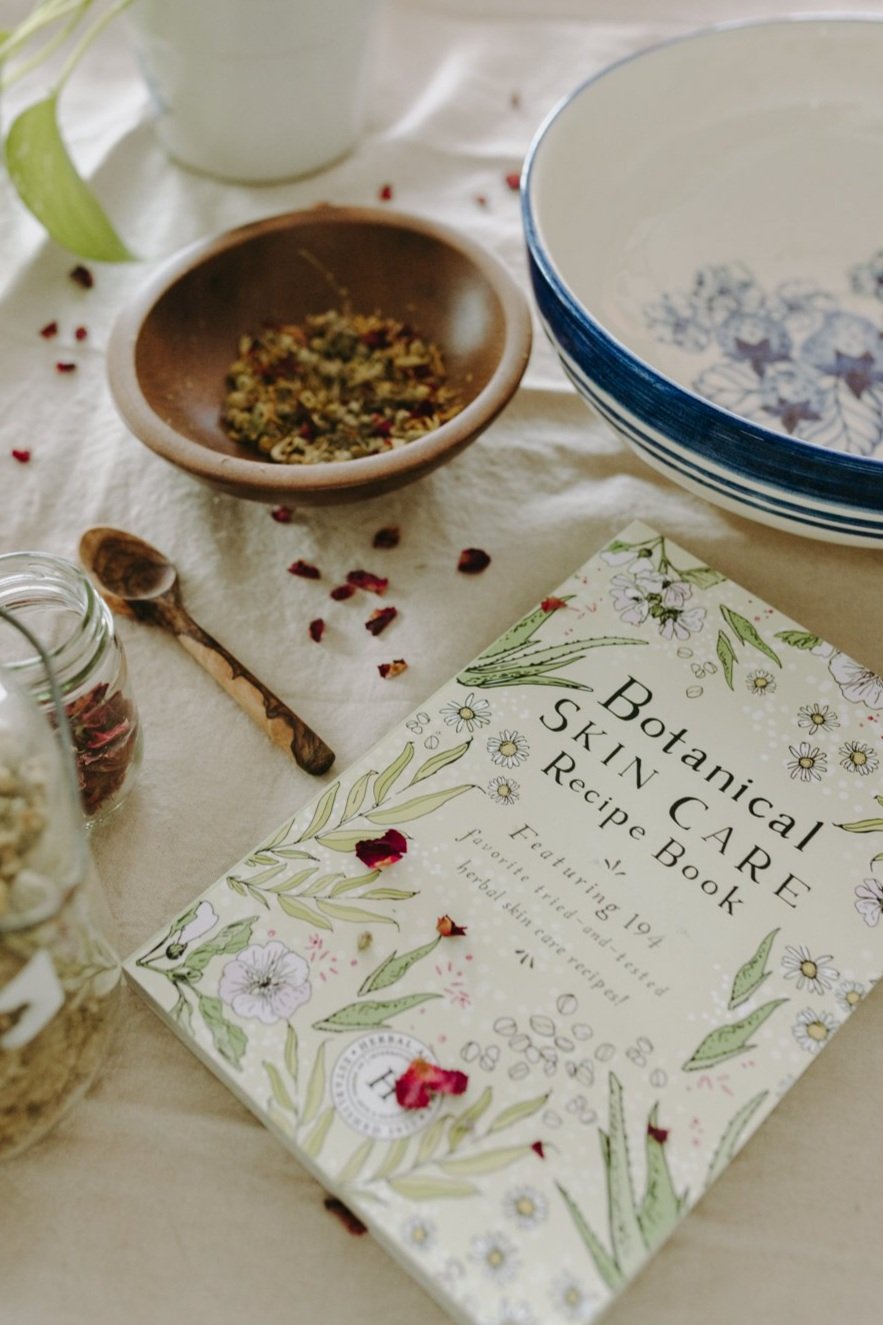
So while I have been enjoying this time of growth and watching my little sprouts join the world and reach upward with their new leaves, the experience would be infinitely better if I had the benefit of a hand salve recipe that would support my skin through this intense part of the growing season. Whenever I find myself with a skin concern I always turn to Herbal Academy’s Botanical Skincare book because it has at least one of every common type of skincare product you could need, with easy to find ingredients and no complicated recipe processes that would leave me wondering if I had actually made the thing I was trying to make. Most of the recipes are so simple they fit on a single page, but don’t let the fact that the recipes are simple fool you into thinking these recipes are “just ok”. In fact, I believe their power lies in their simplicity. We don’t need a hundred different ingredients to achieve most of the desired effects and in the case of skincare I do believe less is actually more. The beautiful illustrations just keep me motivated to discover more.
Since my psoriasis diagnosis I’ve had to become extra careful about what I put on my skin, and so many commercial products available today have harsh ingredients that aggravate my skin condition. I like to be able to pronounce everything I am putting on my body if possible, and going with homemade skincare products helps me do this.
You really don’t need many supplies to make your own homemade hand cream in your kitchen either. As long as you have measuring cups and a repurposed container to store your finished natural calendula hand salve in, a double boiler can be made if you do not have one by placing a mason jar inside of your pot sitting on top of the lid of the jar to keep it from coming into direct contact with the heat source. It’s also a good idea to dedicate a stirring spoon that you don’t need anymore to the task as it may come into contact with ingredients that are not food safe. This spoon can be reused for all of your future skincare DIY projects - trust me, once you start making your own DIY lotion recipes you won’t be able to stop! You can of course purchase all the supplies needed - Mountain Rose Herbs is my supplier of choice for quality ingredients - but what could be more satisfying than creating homemade hand lotion recipes with plants you grew yourself? Growing calendula is easy and will add beauty to your garden before you harvest and dry for your homemade skincare projects. Once you get the hang of the process, these recipes also make one of kind gifts for birthdays, holidays and just-because presents that everyone will enjoy.
I’ll get into all of the details for how to make your own DIY lotion recipe at home below, but first let's talk a bit about the individual ingredients we will be using in this recipe. You’ll only need a few ingredients for this project, but if you feel like substituting something for one listed below there’s no harm in making the recipe your own. You’ll be able to mix up a batch in just a few minutes, and be well on your way to a calming self care ritual that is affordable, natural and zero-waste.
Calendula Flower
This wondrous flower is full of useful properties!
Vulnerary – assists in promoting healing of tissues
Anti-inflammatory – eases inflammation
Hemostatic – helps to stanch bleeding
Topical analgesic – assists in relieving pain
Astringent – promotes tightening and toning of tissues
Antiseptic – helps to prevent or stop microbial growth
Diaphoretic – assists the body during illness by promoting perspiration.
Lymphagogue – assists in stimulating the lymphatic system
*The above information was taken from Calendula Monograph by the Herbal Academy, The Herbal Handbook by David Hoffmann, and Herbal Medicine From the Heart of the Earth by Sharol Tilgner
Licorice root
Licorice root may have potent antioxidant, anti-inflammatory, and antimicrobial effects.
Plantain leaf
Plantain is high in vitamin A, allantoin, apigenin, aucubin, baicalein, linoleic acid, oleanolic acid, sorbitol and tannin which all promote wound healing, speed up cell regeneration and have skin-softening effects.
Beeswax
Beeswax hydrates, conditions, soothes, and calms the skin. It exfoliates, repairs damage, promotes the skin's regeneration, diminishes the appearance of the signs of aging, soothes itchiness and irritation, and creates a hydrating, long-lasting protective barrier against environmental pollutants.
In the case of our salve recipe, it will also help bind our liquid ingredients together in a more solid spreadable form. It is a popular ingredient in homemade salve recipes for that reason.
Sesame Oil
Sesame oil is rich in Vitamin B and E, which help soothe skin rashes and fade scars. It is also very effective in treating skin conditions like inflammation, eczema, athlete's foot, psoriasis, and redness. The natural anti-tanning properties of Sesame oil make it an excellent barrier against the sun's harmful rays.
HOW TO MAKE CALENDULA INFUSED OIL
There are many ways to make an infused oil but my favorite is a simple folk method - this means we won’t be making any exact measurements. You’ll find that many herbalists employ a folk method for their skincare concoctions since accuracy in dosing is not generally a requirement unless taken internally.
To make an infused oil using the folk method, all you need to do is fill your mason jar about halfway with your plant ingredients, then cover at least an inch above the herbs with your oil of choice. I usually end up filling the jar almost all the way to the top. Tap lightly on a solid surface to make sure there are no air bubbles trapped in the oil and place the infusing oil jar in a cool dark place such as a closet or pantry (somewhere out of direct sunlight) for about six weeks. You can regularly shake the jar to redistribute the oil, and you may notice that after the first day or two much of the oil has been absorbed into the dried herbs and you will need to add more to keep the flowers completely covered in oil. This is normal and to be expected. I have more detailed instructions available here.
The calendula + friends oil used in the recipe below is made more precisely, with 1 cup sesame oil, 1/4 cup calendula, 1/8 cup licorice root and 1/8 cup plantain leaves. You can do a hot infusion to speed up the infusion process as well. For the full recipe be sure and grab the Botanical Skincare Recipe Book here.
So are you wondering when I’m going to tell you how to make hand lotion at home? Let’s get to it! This recipe comes from the Botanical skincare course from Herbal Academy and its corresponding book of recipes - you can see my full review of this in depth course here.
Calendula + Friend Salve Recipe from the Botanical Skincare book by Herbal Academy:
This nourishing and richly moisturizing calendula salve recipe is perfect for dry, cracked hands that have been in the soil all day!
Ingredients
1 cup calendula + friends infused oil
2-4 tbsp beeswax
Directions
Place infused oil and beeswax in a double boiler over low heat (or a glass or ceramic bowl or canning jar over a small saucepan of simmering water) until beeswax has melted and ingredients are thoroughly combined.
Dip a clean spoon in to the formula and place it into the refrigerator so the salve will cool quickly and you can determine if its consistency is what you desire. If the sample is too soft, add a little more wax to the warm salve; the sample is too hard, add a little more of the infused oil.
While warm, pour individual portions into appropriate containers and allow to cool at room temperature.
Once cool put the lids on and label.
Store in a cool, dark place for up to 1 year.
Will you try this recipe? Learn herbalism with Herbal Academy by clicking here


![The Power of Nature: How To Make Infused Oregano Oil for Your Health and Wellness [Recipe]](https://images.squarespace-cdn.com/content/v1/60e85024dc86d643da81c96a/1682625337753-AFI1M6MRRMDQ5CBNY2TX/unsplash-image-Fl2Ki3_GZIU.jpg)

Acupressure For Pain And Anxiety: Pranamat ECO Honest Review
When my arthritis spread to my spine last year, it was crippling. I lost sleep every night tossing and turning, completely unable to relax. This vicious cycle of pain leads to stress which releases cortisol, causing even more pain and discomfort. This wasn’t the kind of pain that would go away if I took enough anti-inflammatory pills, it was all encompassing to the point where I’d give up on sleep at 3 or 4 in the morning and just go lie on the couch until the sun rose. It’s hard for me to even type this, remembering how much time I spent crying and wishing for the pain to stop. It felt like my identity had been stripped away and all that was left was my pain. From the outside, I looked “too young to be sick”, but inside I was suffering.
In dark times like this, you learn very quickly that your vulnerability will be exploited by anyone who thinks they can turn your pain into profit. I’ve always been a conscious consumer and didn’t want to fall into any of these traps. But I’ve also always leaned towards the holistic side of things and wanted to find options for pain relief that aligned with my desire for natural alternatives while still providing proof of their effectiveness.
As you’ll see, the benefits of acupressure mats are widely studied and there is plenty of research to back up their claims. So I decided to give it a try. And what I found was life-changing. Or in my case, life-giving.
How does acupressure work?
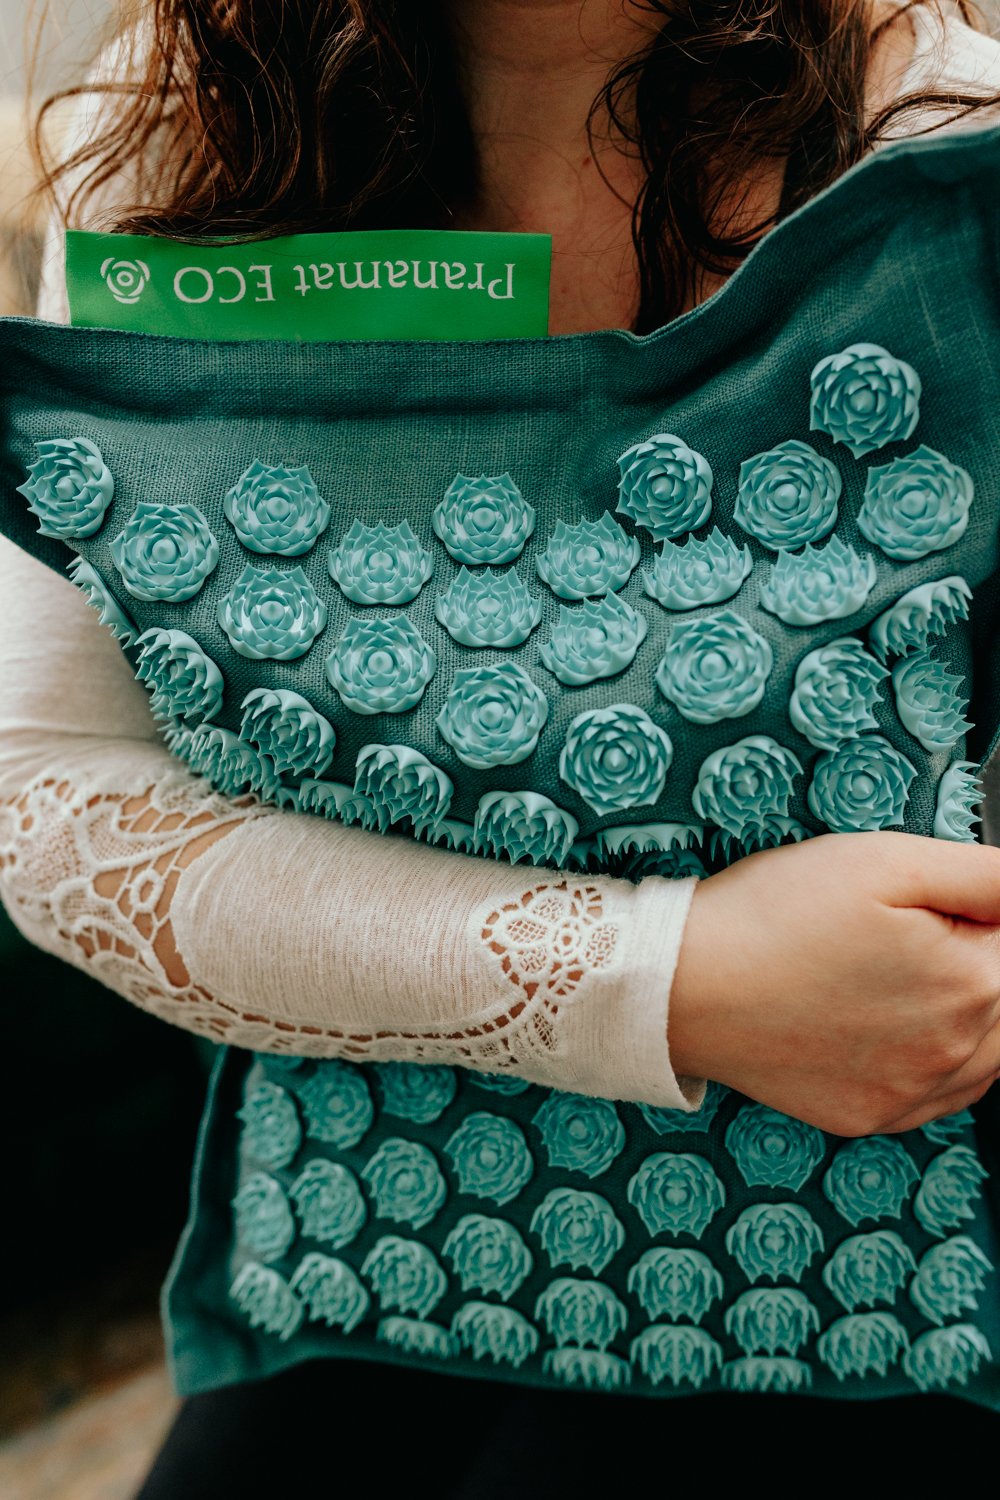
The 10,000+ plastic spikes on the Pranamat ECO lotus flowers help to stimulate blood flow, increasing circulation, releasing muscle tension, opening narrowed blood vessels caused by tension that may result in headaches, spreading soothing heat, kick-starting cell regeneration required for healing and encouraging the body to suppress cortisol (the stress hormone) and release endorphins (a natural painkiller), resulting in a euphoric feeling.
What is acupressure vs acupuncture?
Both acupressure and acupuncture are holistic and drug-free approaches to health. Acupressure uses targeted non-invasive pressure points on the surface of the skin while acupuncture uses extremely thin needles set into the skin. Acupressure can be done at home to deliver an at home massage every day while acupuncture must be performed by a licensed practitioner.
How often should you do acupressure?
Pranamat recommends using your acupressure mat at least once a day for twenty minutes. You can start off at 5 or 10 minutes until you get used to the sensation since it can be quite intense!
Does acupressure Work for joint pain?
Yes, acupressure mats are excellent for relieving joint pain, and if you’re wondering if acupressure for back pain is effective, it is! The effectiveness of Pranamat ECO is clinically-evidenced. Two studies were funded by the European Union in 2014. In this study, 97% observed total muscle relaxation, improved posture, and a stronger-feeling spine, 93% observed a total elimination or significant reduction of back pain and 92% reported that they would continue to use Pranamat ECO.
The first part of the study consisted of rigorous laboratory testing. The team of doctors came to the conclusion that use of the Pranamat ECO acupressure mat:
Significantly increases the intensity of blood flow in the circulation of the skin;
Accelerates cell metabolism;
Reduces inflammation of the muscles and joints;
Reported elimination or dramatic reduction in pain.
In the second part of the study, they showed that after 30 days of using the Pranamat ECO acupressure mat patients experienced:
Improved oxygenation of tissues;
Improved muscle-tone;
Increased cell metabolism;
Improved physical and emotional health.
It’s clear that there are many acupressure benefits for both mental and physical health.
What is Pranamat ECO made from?
The inner padding of the Pranamat ECO acupressure mat is made from sustainable coconut fiber as a supportive filler that is naturally resistant to dust, mold and odor. The removable exterior is made of sustainable linen and uses bespoke natural dyes. All materials used in the Pranamat ECO are natural and ethically sourced, custom-made and have passed rigorous quality tests. The STANDARD 100 certificate independently awarded by OEKO-TEX® guarantees that Pranamat ECO is free from harmful substances and safe for intensive skin contact.
Is Pranamat ECO sustainable?
Pranamat ECO is the only acupressure mat made using energy from only renewable sources and all materials are zero waste and sourced locally. The coconut fiber filler is a by-product from the food industry. The 10,000+ pointed spines on the lotus flowers designed to increase blood and lymph flow from the very first minute of use are made from recyclable plastic that uses less energy and fresh water and produces fewer emissions. This recycled plastic is completely smooth and non-porous and utilizes special heat adhesion technology to attach the lotus flowers to prevent any exposure to toxic glues, acetone or chemical fumes. Even the packaging and user guide are made with recycled and biodegradable materials.

Is Pranamat ECO ethically manufactured?
This acupressure mat is produced by hand using ethical production methods in a creative, egalitarian and diverse work environment in Latvia.
Does acupressure help anxiety?
Yes, acupressure mats may help relieve anxiety. Clinical studies have shown that using Pranamat Eco for 30 days helps relieve stress, improves mood and general well-being.
Does acupressure affect blood pressure?
More research is needed, but one study suggests acupressure mats lower your blood pressure by stimulating blood circulation and relaxation.
How big is the Pranamat ECO?
The surface of the Pranamat ECO acupressure mat is larger than most acupressure mats, allowing it to cover your entire back. This acupressure mat measures 28.7 × 17.7 inches.
How fast does acupressure work?
I noticed the benefits of this acupressure mat within the first few minutes of the first massage, starting with a sensation of warmth in the skin. About ten minutes in, a deep sense of calm and peace rolls over me and quiets my mind.
Pranamat ECO Acupressure Mat Review
I’ll be honest; using the Pranamat Eco can be an intense experience at first. When I laid down on the acupressure mat for the first time, the tingling sensation was very strong and I had to take some deep breaths to settle in. At first, my skin felt very hot as the spikes pressing into my back increased my circulation, but after the first two or three minutes this heat transforms into a soothing warmth. If you’re nervous about using the mat directly on your skin the first time, you can try it while wearing a thin cotton t-shirt at first just to get used to it. But once the initial surprise subsides, you will find your mind and body relaxing dramatically. I suffer from back and joint pain due to my chronic illness as well as generalized anxiety, and the near-immediate effects I felt were a release of the muscle tension I hold all day every day in my body and a quieting of my mind. Usually my thoughts are going off in a million directions every minute, but after using the Pranamat ECO acupressure mat for twenty minutes I felt clear headed and calm. The more than I use my acupressure mat, the faster I am able to settle into that calm headspace. The initial sensation is less intense over time as your body adjusts (which doesn’t dull the benefits at all!) so I can truly lean into the experience right away.
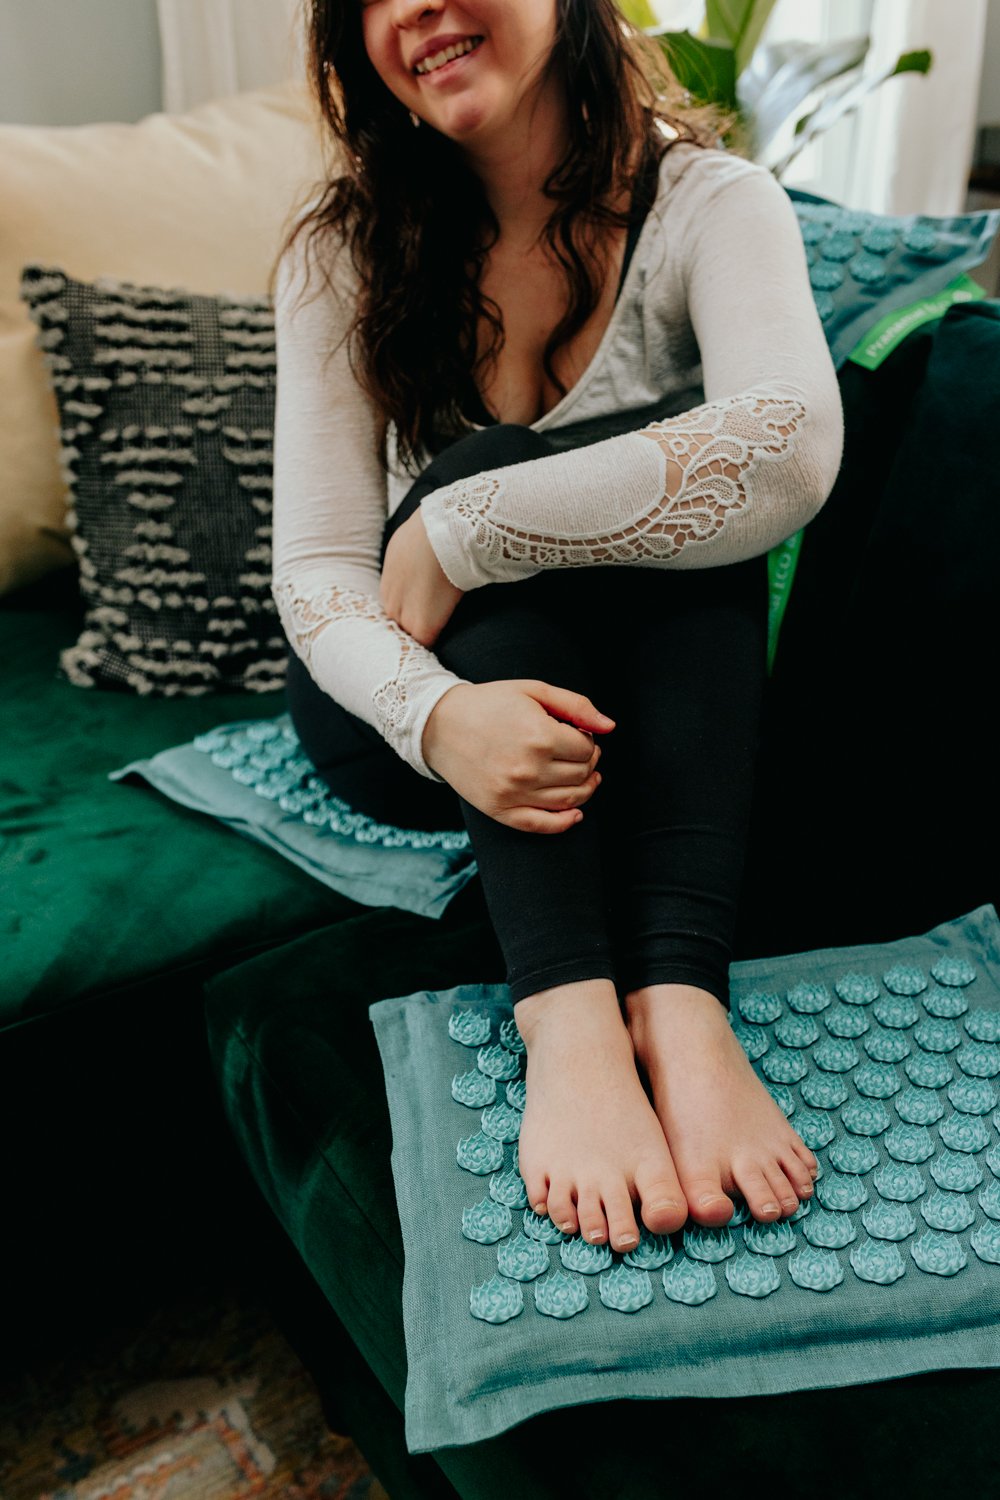
I use my Pranamat ECO at night just before going to bed to combat insomnia so I can sleep deeply without interruption. Since acupressure has such a calming effect on my sleep routine, I am more energized and ready to take on the day the next morning.
I also like to keep my mat nearby while I’m working all day or reading in the evenings so that I can get a quick massage while I work or read. You can use this acupressure mat while laying down or place it in your desk chair. I also use the foot mat while sitting at my desk or cooking dinner to relieve foot pain and recharge.
Here’s the thing…there’s a lot of cheap knock-offs of the Pranamat ECO - and I’ve tried them! They don’t compare. It’s like the difference between sleeping on an air mattress and an actual bed. I wanted to share this because while it may seem like a simple thing to replicate (just add spikey bits to a piece of foam and fabric) there’s more going on in the construction of this mat than meets the eye, from the density of the inner coconut fiber mat to the thickness and shape of the lotus spikes. Most important to me is the fact that Pranamat has been awarded the STANDARD 100 certificate by OEKO-TEX®, which guarantees that Pranamat ECO is free from harmful substances - so important for a product that comes in intensive contact with your skin.
USE code 'thecottagepeach
for The best offer on Pranamat + a 5 year warranty and 30 day free trial!
Individual results may vary. Products mentioned and texts written on this website are not intended to diagnose, treat, cure or prevent any disease and do not replace medical advice. Advice on the treatment or care of an individual patient should be obtained through consultation with a physician or trained healthcare practitioner with access to examine the patient and/or is familiar with the patient's medical history.


Caraway Home Non-toxic Cookware Review
I know, these days it feels like you can’t make it to lunchtime without learning that another household product that you’ve been using every day for your whole life is actually full of toxic chemicals. But this one is a big one, so I hope you’ll stick with me: There’s a very good chance if you have non-stick pots and pans that aren’t ceramic, they could be contaminating your food with toxic chemicals while you cook.
The Cottage Peach is reader-supported. When you purchase through links on our site, we may earn an affiliate commission at no additional cost to you. All opinions are our own. Products in this post were gifted.
I know, these days it feels like you can’t make it to lunchtime without learning that another household product that you’ve been using every day for your whole life is actually full of toxic chemicals. But this one is a big one, so I hope you’ll stick with me: There’s a very good chance if you have non-stick pots and pans that aren’t ceramic, they could be contaminating your food with toxic chemicals while you cook.
Here’s what Caraway Home has to say about toxins in your cookware potentially leaking into your food:
A popular material that has been used in the past in such non-stick cookware is Teflon. This synthetic chemical is also known as polytetrafluoroethylene (PTFE). Teflon is often used to coat a variety of products, including cookware, due to its frictionless qualities that provide a non-stick surface.
The issue with this material is that it uses perfluorooctanoic acid (PFOA) during its production. This chemical has been linked to numerous health conditions, including cancer, thyroid disorders, and more. Other chemicals, such as per-and polyfluoroalkyl substances (PFAS), are found in this material and can cause similar health issues as PFOA.
When cooking with non-stick cookware that has these chemicals, you run the risk of accidentally ingesting it. This can happen if the coating gets scratched, as it could flake off while in use and get consumed.
Additionally, when Teflon is heated over 570°F, it begins to break down, releasing the toxic chemicals into the air, which can then be consumed.
Now, most of us aren’t heating our pans to 570°F, but I’d wager that your pots and pans probably have a few nicks, chips and scratches in them - I know ours do. And while this exposure is happening in tiny amounts, there is still the potential for a negative compounding effect when you cook with Teflon coated products on a daily basis that can’t be ignored.
We’re all cooking from home more than we used to
Since the cost of, well, everything, just keeps going up, I know we aren’t the only ones trying to cook more from scratch to combat rising food costs and control our budgets. With more people cooking at home in recent years, the safety of our cookware is taking center stage. After all, what’s the point in spending extra on organic, locally grown produce if all the health benefits are going to be tainted by toxins leaching into your finished recipe? And maybe now that you’re cooking more food at home you’re noticing that that dented and scratched fry pan you’ve had since college isn’t really giving you the results you expect in the kitchen. The last thing we need with rising food prices is to waste perfectly good food simply because it cooked unevenly and burned on an old fry pan.
Is Caraway Home Cookware Easy To Clean?

Caraway home cookware is easier to clean than traditional pots and pans, since the ceramic coating forms a naturally slick frictionless surface that resists stuck on messes. The finish feels almost polished; it is so smooth. Personally, as someone with chronic illness and fatigue, I dreaded lifting clunky heavy cookware in the sink to scrub it forever, so finding a cookware set that is easy to clean makes a huge difference in how draining it is for me to wash and dry my dishes. It also reduces the amount of water and soap I need to use to clean my pots and pans - another win for the environment since any way we can reduce our consumption of packaged products like soaps is a small way we can help the earth.
The ceramic coating also cooks more evenly, meaning you are less likely to ruin your recipe by overcooking certain areas. Less burned food means less food waste too, making this an eco-friendly option for reducing food waste in the kitchen.
Is Caraway Home Cookware Really Non-Toxic?
Yes! Ceramic cookware is totally safe. Caraway home even offers access to their full testing reports showing the safety of their products. It really makes you wonder - if something as simple as ceramic is more effective than these leading companies using toxic products to coat their pans, why do Teflon coated pans even exist? I think we’ll be seeing the end of this kind of toxic cookware in our lifetime, now that so many better options like Caraway Home are available for cooking.
Is the Caraway Home Cookware Set Durable?
If you’re worried because the word ceramic makes it sound like this cookware may break easily, rest assured that ceramic cookware isn't actually made 100% of clay. The ceramic in these pots and pans is a durable multi-layered coating that is put on top of a metal core. We are far from gentle with our pots and pans and our cookware set still looks as good as the day that we bought it. Now, it’s still recommended that you treat your ceramic cookware with care. But that’s easy to do when you no longer have to aggressively scrub your pots and pans in order to remove burnt food residue!
What pots and pans are included in the Caraway Home Cookware Set?
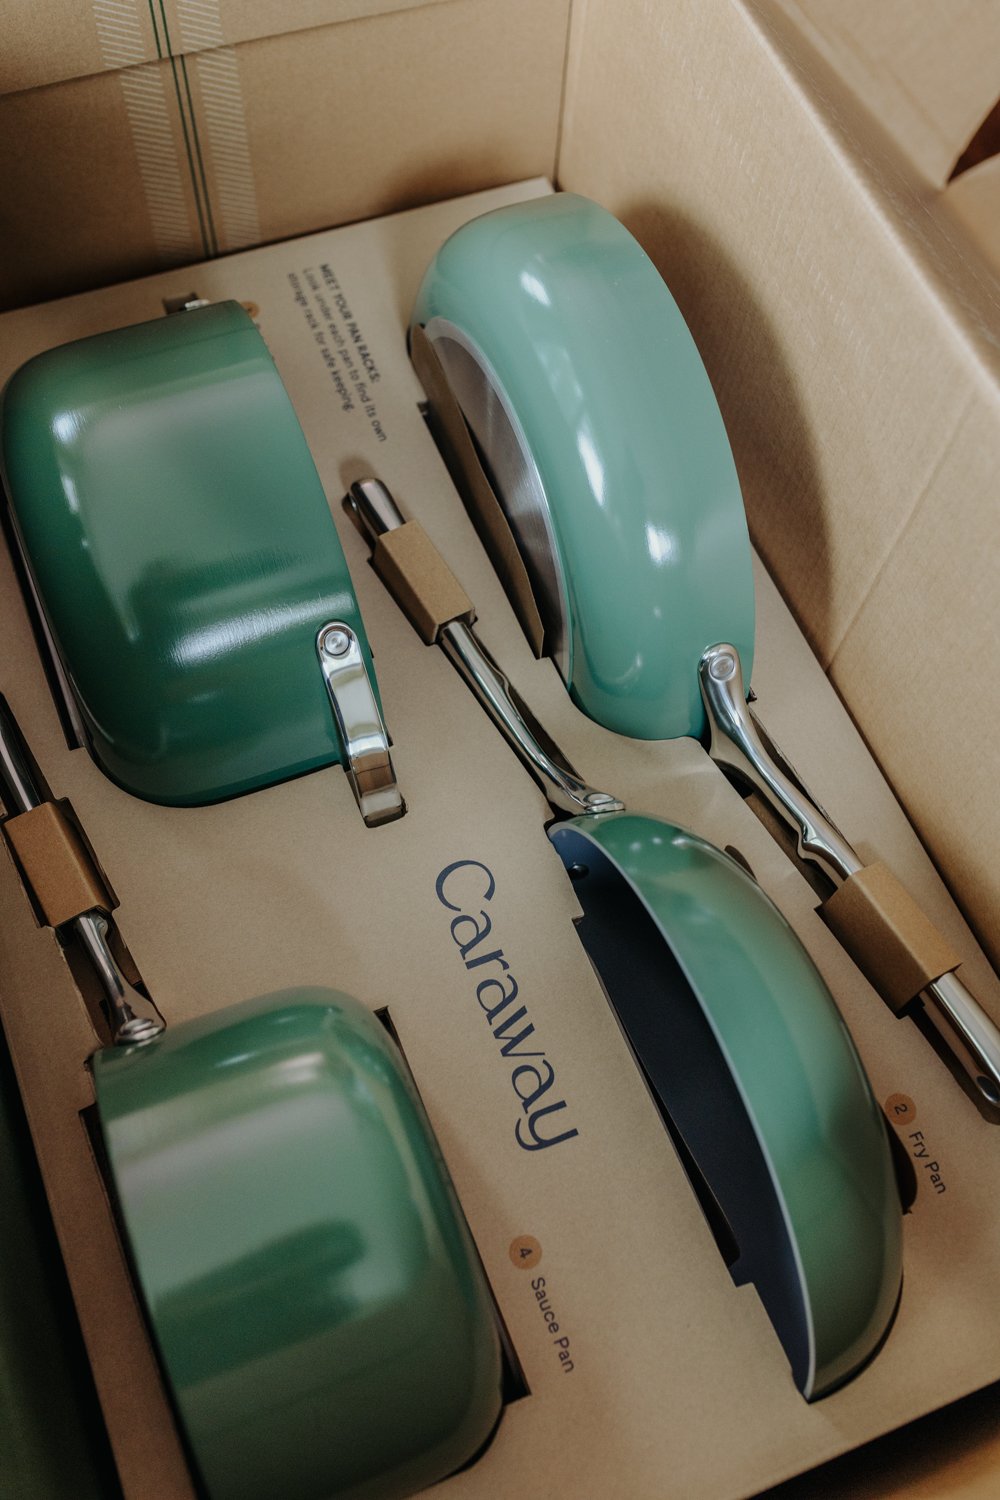
When you purchase the full set, you will receive the 10.5” fry pan, the 3 quart sauce pan, the 4.5 quart saute pan and the 6.5 quart dutch oven. You can also buy each piece individually if you want to build your collection over time. They just released minis of the fry and sauce pans too, which are perfect for smaller kitchen projects like easy-over eggs and gravy.
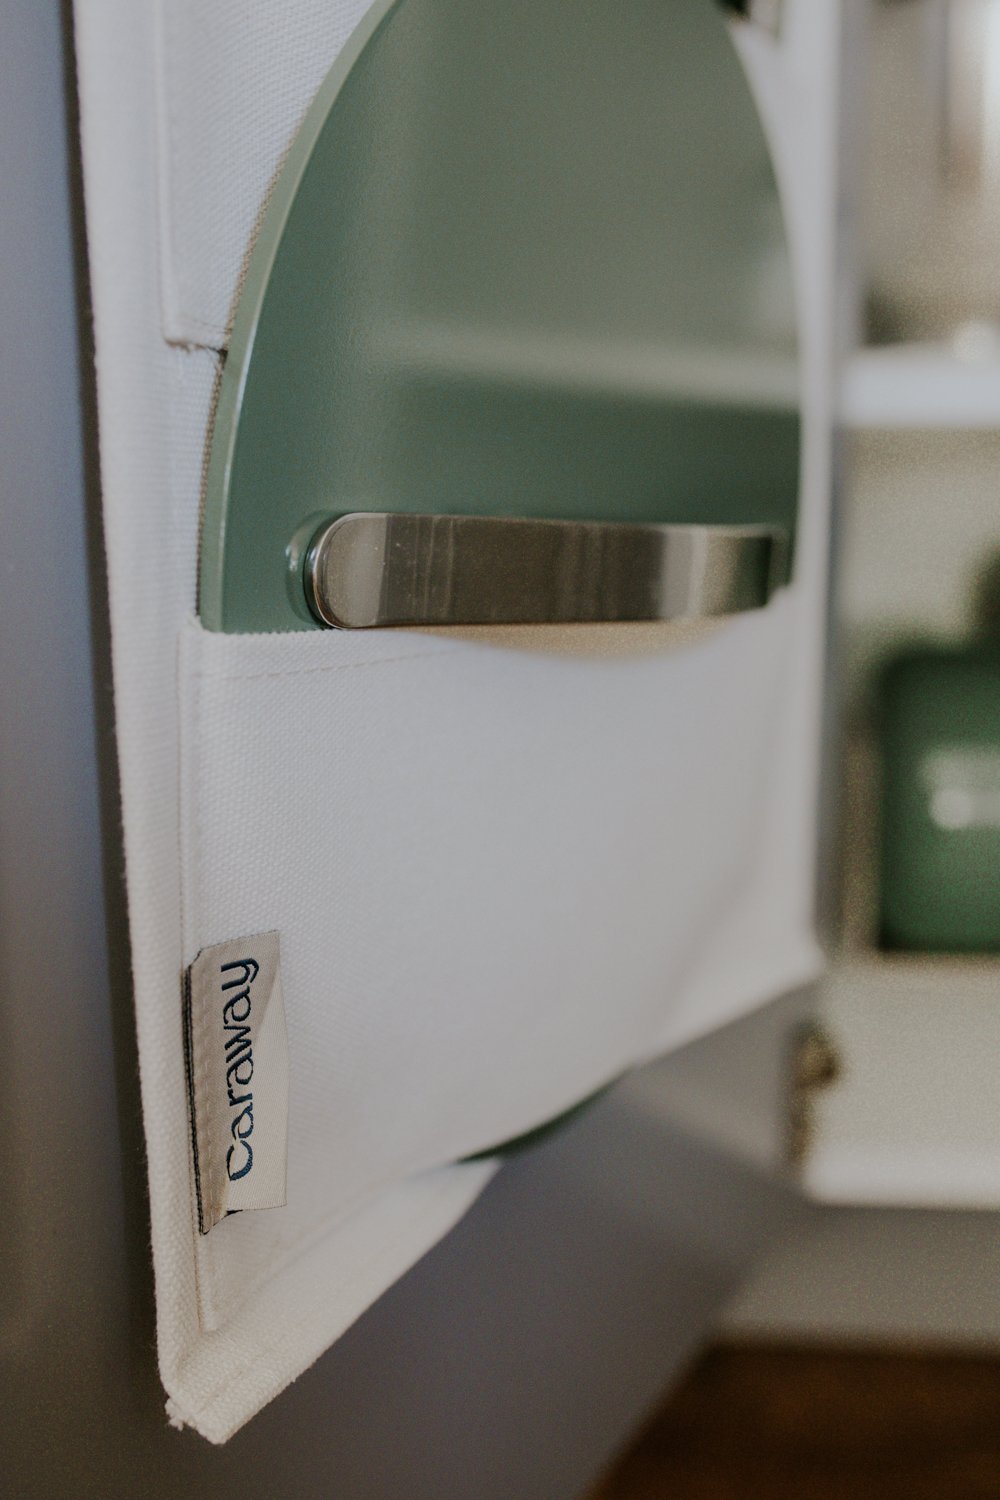
You can choose from a rainbow of colors to match your kitchen decor including cream, navy, sage, perracotta and marigold. I went with the sage for our kitchen since green is my favorite color and I love how earthy and neutral it is at the same time.
The full set also includes their custom magnetic pan rack and canvas lid holder, eliminating the frustration of trying to keep your pots and pans organized and separate while providing a beautiful system that can even be displayed on your countertop if you want. The canvas lid holder can be affixed anywhere - inside a cabinet door, on the side of your fridge or even on the outside of your end wall cabinet or walls.
Can you use Caraway Home Cookware on an induction stovetop?
Yes - Caraway pots and pans are cooktop agnostic, which means they will work on any type of stove - gas, electric, or induction! This was a big reason I wanted to make the switch, since once our electric range dies we plan to switch to an induction range for the environmental benefits, safety features and ease of cooking.
Caraway Home Cookware Review
After testing the Caraway Home Cookware set in my own kitchen (remember, we eat mostly from scratch vegetarian meals so we cook for almost every single meal) I can confidently say that Caraway offers the best non toxic cookware in 2022. These are really the best non-stick, non-toxic pans you can get.

We tested our pots and pans by cooking a wide array of dishes, from eggs for breakfast to skillet dinners. We even put them directly into the oven (they are oven-safe up to 550F), and found they were easier to clean and resulted in a more even cooking than the competition. That combined with the peace of mind I get knowing that my cookware isn’t contaminating my food has made these one of my top choices for cooking. The non-toxic frying pan gets the most use by far, since we can make such a huge variety of dishes with it. While the pans aren’t necessarily lighter than their competition, since it’s so easy to clean dishes are piling up in the sink far less often than they once did and I’m able to easily grab a pan for dinner than I already used once that day for breakfast without the dreaded sinking feeling you get when you remember you forgot to soak it in the sink.
I wasn’t sure I’d need them, but the magnetic pan rack and canvas lid holder have been an unexpected plus, since I no longer have to move a million other pans out of my way to get to the one I need. They slide easily from the rack with little additional effort, and easily fit into our space so I didn’t have to rearrange the entire kitchen to make them work. One small note - depending on the style of your cabinets, if there is a shelf that is flush with the front of the cabinet box that you are looking to hang your lid holder on you won’t be able to fully close the cabinet door. We solved this by trimming down the shelf, but there’s many other places you could hang your lid holder such as the end of a wall cabinet or on the side of your refrigerator.
Overall, if you’re ready to replace your toxic non-stick pots and pans with something safer I’d definitely recommend the Caraway Home Cookware Set. They also have a full line of bakeware including baking sheets, loaf pans and muffin tins, as well as a super cute tea kettle which I think would make the perfect housewarming gift. We’ll be using our set for years to come, and adding on to the collection as needed. I have a collection of recipes coming up that feature these pots and pans to get you inspired to get in the kitchen and get cooking! I’ll add those to the post below as they are published.
Click here to get your Caraway Home Non-Toxic Non-Stick Cookware Set today.


![Make This Safe Oil Lamp With a Mason Jar and Olive Oil [Tutorial]](https://images.squarespace-cdn.com/content/v1/60e85024dc86d643da81c96a/4b41f060-48ac-4a43-9513-da483e392f3b/December+2022+The+Cottage+Peach-8.jpg)
Make This Safe Oil Lamp With a Mason Jar and Olive Oil [Tutorial]
February’s of my childhood often are filled with dim memories of snow storms and subsequent power outages, leading to inevitable candlelight dinners cooked over the fireplace. The warmth and flicker of the various fires we had lit both small and large reign in my recollection of those times. I can still smell the matches burning off after being extinguished, the light smoke wafting through the air to settle on clothing and blankets. Despite the bitter weather outside and the temporary lack of electricity, we were never cold. We had hats, sweaters, blankets, and each other.
Nowadays like many others in this community I find solace in the light of a candle. The eternal dance of flame is grounding and comforting, a reassuring hand when things feel like they may never warm back up again. I’ve experimented with candle making of all kinds - dipped beeswax tapers, pillars and hand poured jars of soy wax to name a few. So it was about time to try my hand at perhaps the easiest DIY flame source you can create - the DIY mason jar oil lamp.
The Cottage Peach is reader-supported. When you purchase through links on our site, we may earn an affiliate commission at no additional cost to you. All opinions are our own.

While the days may be slowly but surely lengthening, we are still very much in the winter season here in New England. February’s of my childhood often are filled with dim memories of snow storms and subsequent power outages, leading to inevitable candlelight dinners cooked over the fireplace. The warmth and flicker of the various fires we had lit both small and large reign in my recollection of those times. I can still smell the matches burning off after being extinguished, the light smoke wafting through the air to settle on clothing and blankets. Despite the bitter weather outside and the temporary lack of electricity, we were never cold. We had hats, sweaters, blankets, and each other.
Nowadays like many others in this community I find solace in the light of a candle. The eternal dance of flame is grounding and comforting, a reassuring hand when things feel like they may never warm back up again. I’ve experimented with candle making of all kinds - dipped beeswax tapers, pillars and hand poured jars of soy wax to name a few. So it was about time to try my hand at perhaps the easiest DIY flame source you can create - the DIY mason jar oil lamp.
Olive oil lamps are ubiquitous at archaeological sites across the Mediterranean region. Unsurprisingly, the most common oil used in the Mediterranean region was olive oil. In 2022, a 2300 year old olive oil lamp was unearthed in the West Bank. Clay lamps that used oil as a fuel source appeared during the Bronze Age around the 16th century BC and were ubiquitous throughout the Roman Empire. Thanks to all this evidence, there’s reason to believe that oil lamps appeared at the very dawn of human history. But we don’t need to go back in time to make our own DIY oil lamp. In fact, this simple mason jar craft can be made in minutes using items you may already have at home.
How oil lamps work:
Floating wicks come in a pack with the floating portion separated from the wick. You’ll place the wick in the hole in the center of the floating disk piece with half the wick on each side of the disk. This way, when you place the wick in the oil lamp, the oil will be drawn up through the wick and be vaporized and burned by the flame.
Are oil lamps expensive?
Not at all. Since one tablespoon of oil can burn for two hours in your lamp, it is much cheaper than most candles. This is a great addition to your emergency supplies, as well as being a beautiful addition to your table. For storm prep, all you need to make sure you have is a pack of the floating wicks, some olive oil, a mason jar and water and you can keep your home safely lit without electricity during a power outage.
Are oil lamps safe?
The danger of oil lamps comes from the possibility of spilling. If the lamp were tipped over while burning, the spilled oil would all catch fire all at once on whatever surface it spilled onto. Thankfully, olive oil has a very high flash point which means it’s not super flammable. Plus, we’ll only be using a small amount of oil - the rest of the liquid in our mason jar will be water. If our DIY oil lamp tipped over, it should extinguish itself immediately. That said - it’s always important to practice fire safety around any type of open flame. Always burn within sight, keep away from pets and children and away from any flammable materials. Never move your oil lamp while still burning. I assume no responsibility for any damage that may occur due to misuse of your diy olive oil lamp.

How to make a DIY Mason Jar Olive Oil Lamp:
The options are endless when you make your own olive oil lamp, and you’ll find inspiration below for different ways to turn your lamp into beautiful mason jar decor. But let's cover the basics first!
Supplies:
Mason jar (any size, I used a pint jar)
Floating wicks
Olive oil
Water
Decorative items to submerge in the water
Instructions:
Fill your mason jar until there is about half an inch of empty space at the top
Add any decorative items that you can submerge in the water - just be sure not to choose anything that will float too close to the surface and disrupt the flow of oil to the wick.
Pour olive oil into the mason jar on top of the water until the oil layer is about a quarter inch thick
Gently place the floating wick on top of the oil surface, light and enjoy your olive oil lamp.
Ideas for how to decorate your mason jar olive oil lamp:
Christmas mason jar olive oil lamp
Red holly berries, pinecones, cranberries, vintage ornaments and evergreen clippings are great for the holiday season. Choose materials in natural shades of green, red and brown and play with mixing different textures.
Fall mason jar olive oil lamp
Fall foliage in bright oranges, reds and yellows can be suspended in the water. Better yet, replace the mason jar with a hollowed out mini pumpkin!
Winter mason jar olive oil lamp
Birch bark from fallen branches, acorn caps, evergreen clippings and even twigs will capture the chill months of winter in a cozy fashion.
Spring mason jar olive oil lamp
Fresh crocus blooms, dandelions, tulips, eggs and apple blossom branch clippings will all celebrate the season of growth and fertility.
Summer mason jar olive oil lamp
Embrace the season of abundance with fresh herbs from the garden like mint and basil, cherry tomatoes, sunflowers, lavender, fresh fruit and berries.
Beachy mason jar olive oil lamp
Bring the beach bonfire to you with sand, seashells and seaglass (responsibly sourced if you can’t obtain them yourself of course)
Citrus mason jar olive oil lamp
Exactly what it sounds like - but no need to dump a few lemons in chaotically. Shake things up with different shapes, sizes and a variety of citrus fruits including lemons, oranges or clementines (sliced or whole) and a bit of green with sliced cucumber rounds or fresh leaves.
Floral mason jar olive oil lamp
Celebrate whatever is growing most abundantly in your flower beds at the moment and suspend your favorite cut flower in your lamp - try hydrangea, poppies, bleeding heart, sweet pea, roses, peonies or lilies. You can leave them whole, or just use the petals.
Crystal mason jar olive oil lamp
Place your favorite crystals in your oil lamp - just be sure not to use crystals that can dissolve in water - As a general rule of thumb (with some exceptions), crystals ending with “ite” tend to dissolve in water. Try crystals like Clear Quartz, Rose Quartz, Amethyst, Smokey Quartz, Citrine, Agate, Carnelian, Rutilated Quartz, Jasper, Tiger's Eye, Aventurine or Moonstone.
Mason jar decor is one of my favorite ways to update our home decor, because we always have the jars on hand and they are such a great blank slate from which you can creatively experiment with little effort.