
BACKYARD GARDENING MADE SIMPLE
![Taste the Freshness: Garden to Table Garlic Scape Pesto [Recipe]](https://images.squarespace-cdn.com/content/v1/60e85024dc86d643da81c96a/1685124491791-T2P2WL9T6HWQJGW63DLT/PXL_20220617_153907513.PORTRAIT%281%29.jpg)
Taste the Freshness: Garden to Table Garlic Scape Pesto [Recipe]
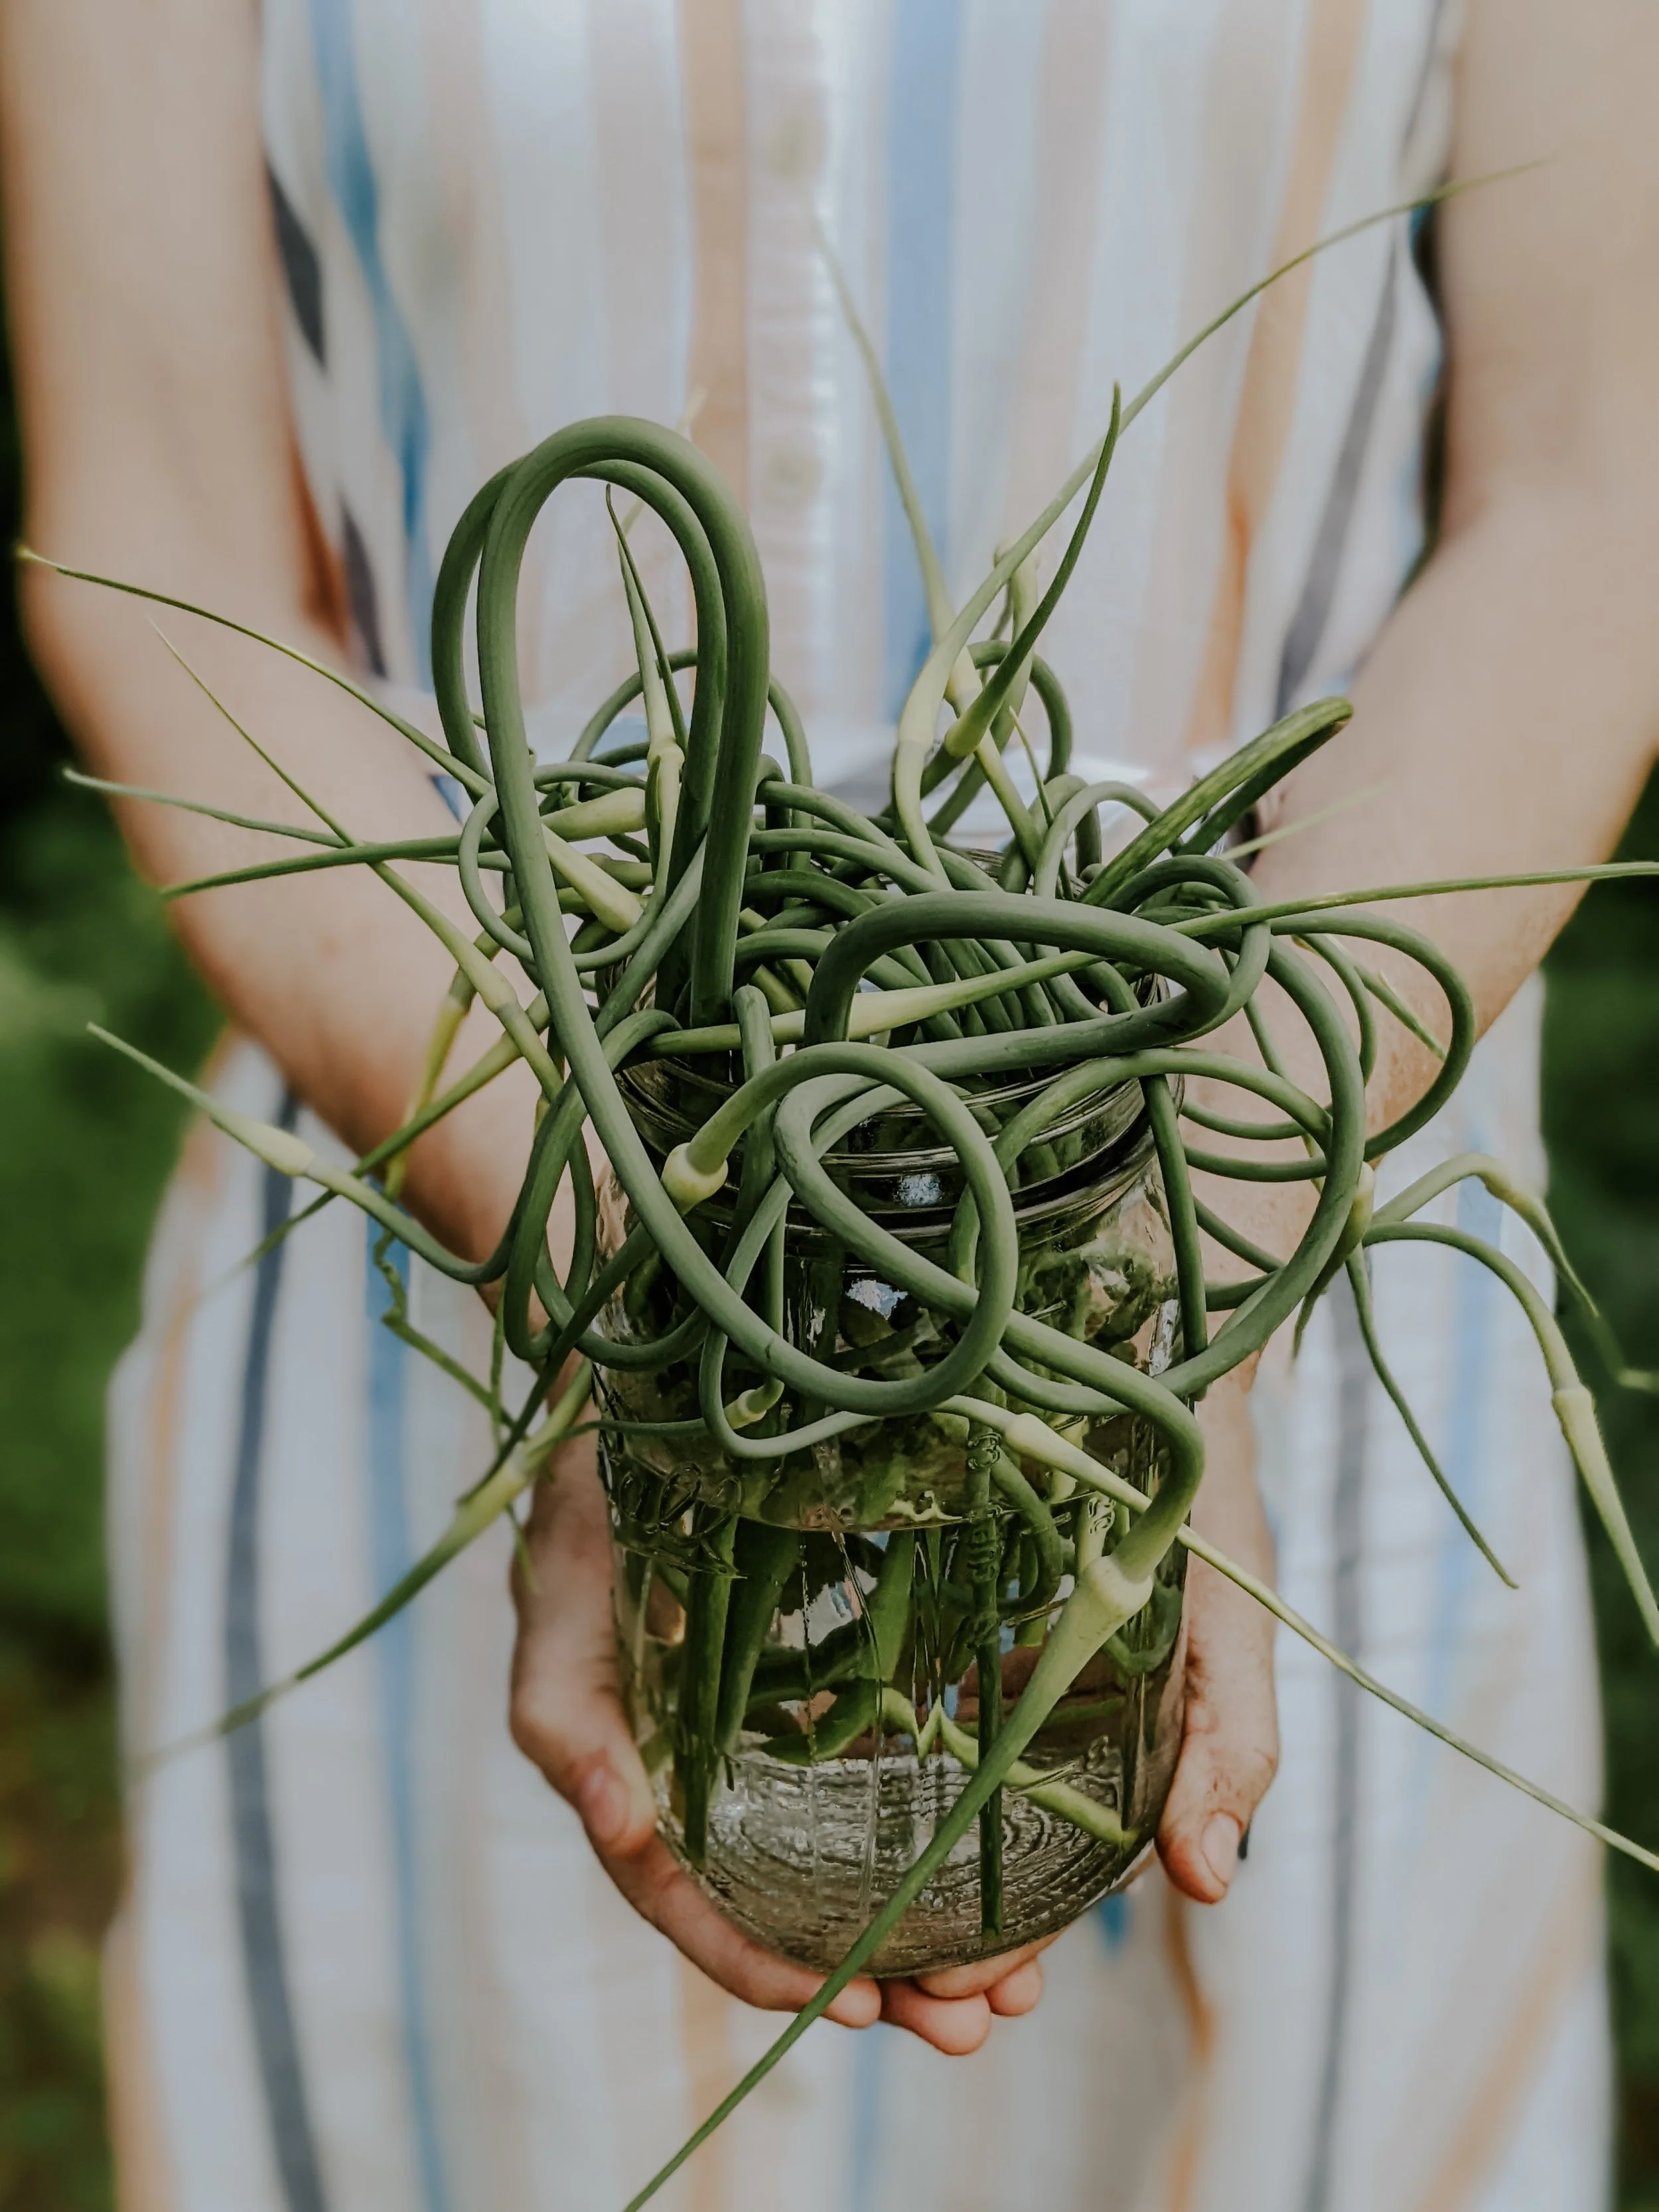
One of the first ways I know that June has arrived is in the appearance of garlic scapes. Tiny white cloves planted way back in October have been waiting for this day to send their shoots high into the sky, the flowering stalks both otherworldly and beautiful as they twist and turn, narrow green tendrils dancing in the breeze that has yet to turn into the humid and stagnant air of full summer.
Garlic scapes aren’t something you can find in the grocery store, and while you may be able to find a single stall at your local farmers market that has them, their inventory will be short-lived. The season for scapes is small, a window of just a couple of weeks that adds to their novelty. Just another excellent excuse to grow them yourself as a side-effect of your garlic harvest.
June is the beginning of abundance in the garden, when our little acre reminds us she can support us with a never ending harvest of many kinds. I find myself taking breakfast, lunch and dinner outside as often as possible, breathing in the fresh air and listening to the birdsong while I ask myself how I got so lucky. Our little patch of earth has so much history hidden in its roots, but when summer begins again it is clear she knows precisely what she is doing when it comes to helping living things thrive.
Our neighbors grew up in our house, so we’ve been lucky enough to learn bits and pieces of what the land has accomplished in the past. This is how I know that the stone foundation of my home originally held up a beautiful chicken barn, and that rabbits were raised on the back lot. As we add our own stories to this history, I wonder too at the echoes of a less happy time before our even our neighbors came here, a time when lands were taken from the Wampanoag. How many feet have tread this earth before us and called it theirs? How much pain was inflicted on this very spot? Only the land remembers now.
One of the first ways I know that June has arrived is in the appearance of garlic scapes. Tiny white cloves planted way back in October have been waiting for this day to send their shoots high into the sky, the flowering stalks both otherworldly and beautiful as they twist and turn, narrow green tendrils dancing in the breeze that has yet to turn into the humid and stagnant air of full summer.
Garlic scapes aren’t something you can find in the grocery store, and while you may be able to find a single stall at your local farmers market that has them, their inventory will be short-lived. The season for scapes is small, a window of just a couple of weeks that adds to their novelty. Just another excellent excuse to grow them yourself as a side-effect of your garlic harvest.
There are two types of garlic you can plant; hard-neck or soft-neck. Soft-neck garlic does not produce scapes, so if you’re interested in trying this delicacy you’ll need to plant hard-neck varieties only. Hardneck varieties of garlic are divided into eight groups: Porcelain, Rocambole, Purple Stripe, Glazed Purple Stripe, Marble Purple Stripe, Asiatic, Turban, and Creole. Porcelain is considered the hardiest type of hardneck garlic and is highly recommended for novice gardeners in cold climates, producing big, beautiful bulbs with satiny white wrappers with a strong flavor. As I mentioned, you’ll need to do some planning ahead if you want to grow garlic. It needs to be overwintered, so you’ll plant it just before your first frost in the fall and then wait until the following summer to harvest the bulbs.
In the meantime, scapes offer a taste of what is to come - a preview of your garlic harvest that can help you to tolerate the long wait required when growing garlic. To me, it is a promise the land provides. Good things we grow are always worth the wait. And garlic scapes are one of the very best things of all.
I do like to devise as many ways as possible to extend our enjoyment of garlic scapes, and thankfully they are a versatile plant that makes it easy to preserve. I’ve tried just about every method imaginable, but by far my favorite way to use scapes is to make my garlic scape pesto recipe. This liquid gold is quickly scooped up by everyone who tries it, useful as more than just a pasta topping. It also stores incredibly well in this form, locking in the deliciously grassy and mild garlic flavor so that we can enjoy it as long as possible.
What are garlic scapes?
Garlic scapes are the flowering head of the hard-neck garlic plant.They are edible, and you want to cut them off the plant before they have a chance to flower so that your garlic bulbs can put their energy into the root instead, allowing the bulb to grow larger.
What month do you cut garlic scapes?
Garlic scapes are harvested in June, about a month before you harvest the garlic bulb. Garlic scapes twist into a corkscrew shape as they grow and ripen. You will know they are ready to pick when the scape has made almost one full twist. The flowering head should still be compact and small. You can pick them when they are smaller as well, you’ll just get a smaller yield. If you pick them later than this, they will be very tough to chew.
How do you cut garlic scapes for pesto?
The easiest way to cut garlic scapes is to snap them off at their natural breaking point with your fingers. You do not need clippers to harvest garlic scapes. Grab the scape close to the base where it meets the leafy part of the garlic bulb (leave the leafy bits intact) They will break off easily in your hand.
What part of garlic scapes do you eat?
You can eat the entire garlic scape. Some people prefer to remove the flowering head at the end, as it can get a little tough depending on how late you harvest them. For garlic scape pesto, it shouldn’t really matter since you are blending it up so I like to use the entire scape.
Do garlic scapes need to be cooked?
No, garlic scapes may be eaten raw or cooked.
What do garlic scapes taste like?
Garlic scapes are like the garlic cloves' more subtle, mild cousin. A light green crunch makes them a super fresh addition to salads and stir-fries.
What is the best thing to do with garlic scapes?
My favorite way to use garlic scapes is to make garlic scape pesto. It’s easy and freezes well. You can also chop it up and mix with cream cheese or butter for a flavorful spread, add to salads and stir fries and enjoy as a garden snack. I even put a little dollop with my cracker and cheese boards.
What does garlic scape pesto taste like?
Garlic scape pesto tastes like mild garlic with less spicy heat and a little bit of grassiness. You can control the acidity and flavor profile with the addition of high quality oils, cheese and nuts.
How long does garlic scape pesto last in the fridge?
With proper storage, garlic scape pesto can last up to 2 weeks in the fridge.
Can I freeze garlic scape pesto?
Yes, garlic scape pesto is an excellent way to preserve the fresh flavors of early summer for the whole year. You can freeze garlic scape pesto by filling an ice cube tray and placing in the freezer for individual portions, or freeze tablespoon size portions on a baking sheet, remove once fully frozen and place in a Stasher bag. I like to fill four ounce mason jars and freeze - just remember to leave room at the top of the jar as the pesto will expand slightly as it freezes.
Can you freeze garlic scapes raw?
Yes, garlic scapes may be frozen raw with no blanching required to enjoy all year long. They may also be dehydrated or dried and ground into a powder.
Are garlic scapes as healthy as garlic?
Yes, garlic scapes are healthy. Garlic scapes contain manganese, vitamin B6, vitamin C, and selenium.
What to use garlic scape pesto on
Garlic scape pesto is a super versatile ingredient to have in your fridge. Of course, it can be used on pasta, but one of my favorite ways to use it is as a spread on sandwiches or grilled cheese. You can also toss your vegetables in the pesto before roasting.
To make this garlic scape pesto recipe, you will need a food processor, blender or immersion blender to grind the scapes into a fine paste. I will break the scapes into smaller pieces before blending. They’re a pretty dry thing to put in a blender, so you’ll need to scrape down the sides a couple of times as you go. If you don’t have a blender you can finely chop the garlic scapes, but the effect will be slightly different and crunchier.
Supplies
Blender or immersion blender
Measuring cup
Tablespoon
Spatula
Jars for storage
Ingredients
2 cups garlic scapes (chopped)
1 cup sunflower seeds
1 cup basil
1 cup parmesan (grated)
1 cup olive oil
3 tbsp lemon juice
Salt and pepper to taste
Instructions
Grate the parmesan
Add all the ingredients to the food processor and blend until smooth
Taste and adjust the seasoning to your liking
Transfer to jars and store in the fridge for up to two weeks
Garlic Scape Pesto
Ingredients
- 2 cups garlic scapes (chopped)
- 1 cup sunflower seeds
- 1 cup basil
- 1 cup parmesan
- 1 cup olive oil
- 3 tbsp lemon juice
- Salt and pepper to taste
Instructions
- Grate the parmesan and roughly chop the garlic scapes
- Add all the ingredients to the food processor and blend until smooth
- Taste and adjust the seasoning to your liking
- Transfer to jars and store in the fridge for up to two weeks



Have you tried scapes?


Conserve Water and Create a Sustainable Garden Using Drought-Tolerant Plants and Rainwater Harvesting
Other than soil health, access to water in your garden is a crucial ingredient in growing food successfully, and with changing weather patterns and increased frequency of droughts due to climate change posing significant challenges to water resources, water conservation becomes even more critical in regions prone to drought to ensure the availability of water during dry periods.

The Cottage Peach is reader-supported. When you purchase through links on our site, we may earn an affiliate commission at no additional cost to you. All opinions are our own.
Other than soil health, access to water in your garden is a crucial ingredient in growing food successfully, and with changing weather patterns and increased frequency of droughts due to climate change posing significant challenges to water resources, water conservation becomes even more critical in regions prone to drought to ensure the availability of water during dry periods.
According to the United Nations, about 2.2 billion people worldwide lack access to clean drinking water, and around 4.2 billion people experience severe water scarcity during at least one month of the year, and agriculture is the largest consumer of freshwater globally, accounting for around 70% of total water usage. Plus, energy is required to extract, treat, and distribute water, while water is necessary for energy production, such as cooling thermoelectric power plants. The water-energy nexus refers to this interdependence of water and energy resources. Conserving water can help reduce energy consumption and greenhouse gas emissions.
What is water conservation in the garden?
There are many ways you can collect rainwater and conserve water in the garden. You can adopt water-wise landscaping techniques, such as sustainable landscape design, collecting and using rainwater for non-potable purposes, drip irrigation, ollas and xeriscaping - the practice of designing landscapes to reduce or eliminate the need for irrigation by incorporating drought tolerant plants.
What are the benefits of including drought-tolerant plants and rainwater harvesting systems in your garden design?
By utilizing plants that don’t require heavy watering and can survive drying out a bit, you can reduce runoff (precipitation that does not soak into the soil but instead moves on the surface and is lost to evaporation), conserve water, save money on water bills, reduce maintenance, and support a healthy ecosystem. This is a great passive way to increase the sustainability of your garden with little effort - all it takes is a bit of planning. Use the list of drought tolerant plants below to start planning.
How do rainwater barrels work?
A rainwater harvesting system utilizing barrels most commonly works by capturing rain coming down your gutters off of your roof. The water can then be accessed through a spigot or hose connected directly to the barrel. You can scale this concept up with an actual collection tank, and even hook it into your home’s greywater system.
What is the best rainwater harvesting barrel?
I use this 50 Gallon Capacity Flat Back Rain Barrel. It allows us to utilize natural resources and is linkable to other barrels for increased capacity using separately sold linking kit. This rain barrel collection system is resistant to rust, mold, mildew, and rotting and has a high quality brass spigot for hose hook-up, plus an included overflow spout helps drain excess water away. There is a screen to keep out debris, insects, animals, and children. It is made off BPA-free, FDA approved resin in the USA and it is 22" L x 23" W x 30" H. It is sturdy and built to last.
What are some other ways to conserve water in the garden?
The concept of using ollas as an irrigation system goes back thousands of years and has been used in countless cultures around the world. An olla watering system is basically any type of unglazed clay pot that is buried beneath the soil with only a small amount sticking up above the surface and filled with water. You can tell that a pot is unglazed because it will be that classic terracotta red color with no shiny finish, glaze or paint. The water then leeches out of tiny holes or “pores” in the unglazed clay and is pulled through the soil to the roots of your thirsty plants using a process called soil moisture tension. This functions much the same way as osmosis, in that the water is trying to equalize to a certain level of moisture within the soil. This means your soil will never become overwatered either - if the soil is moist, the water stays in the pot until it is needed. You can grab premade ollas here or Click here for full instructions on how to make your own.
DROUGHT TOLERANT PLANTS
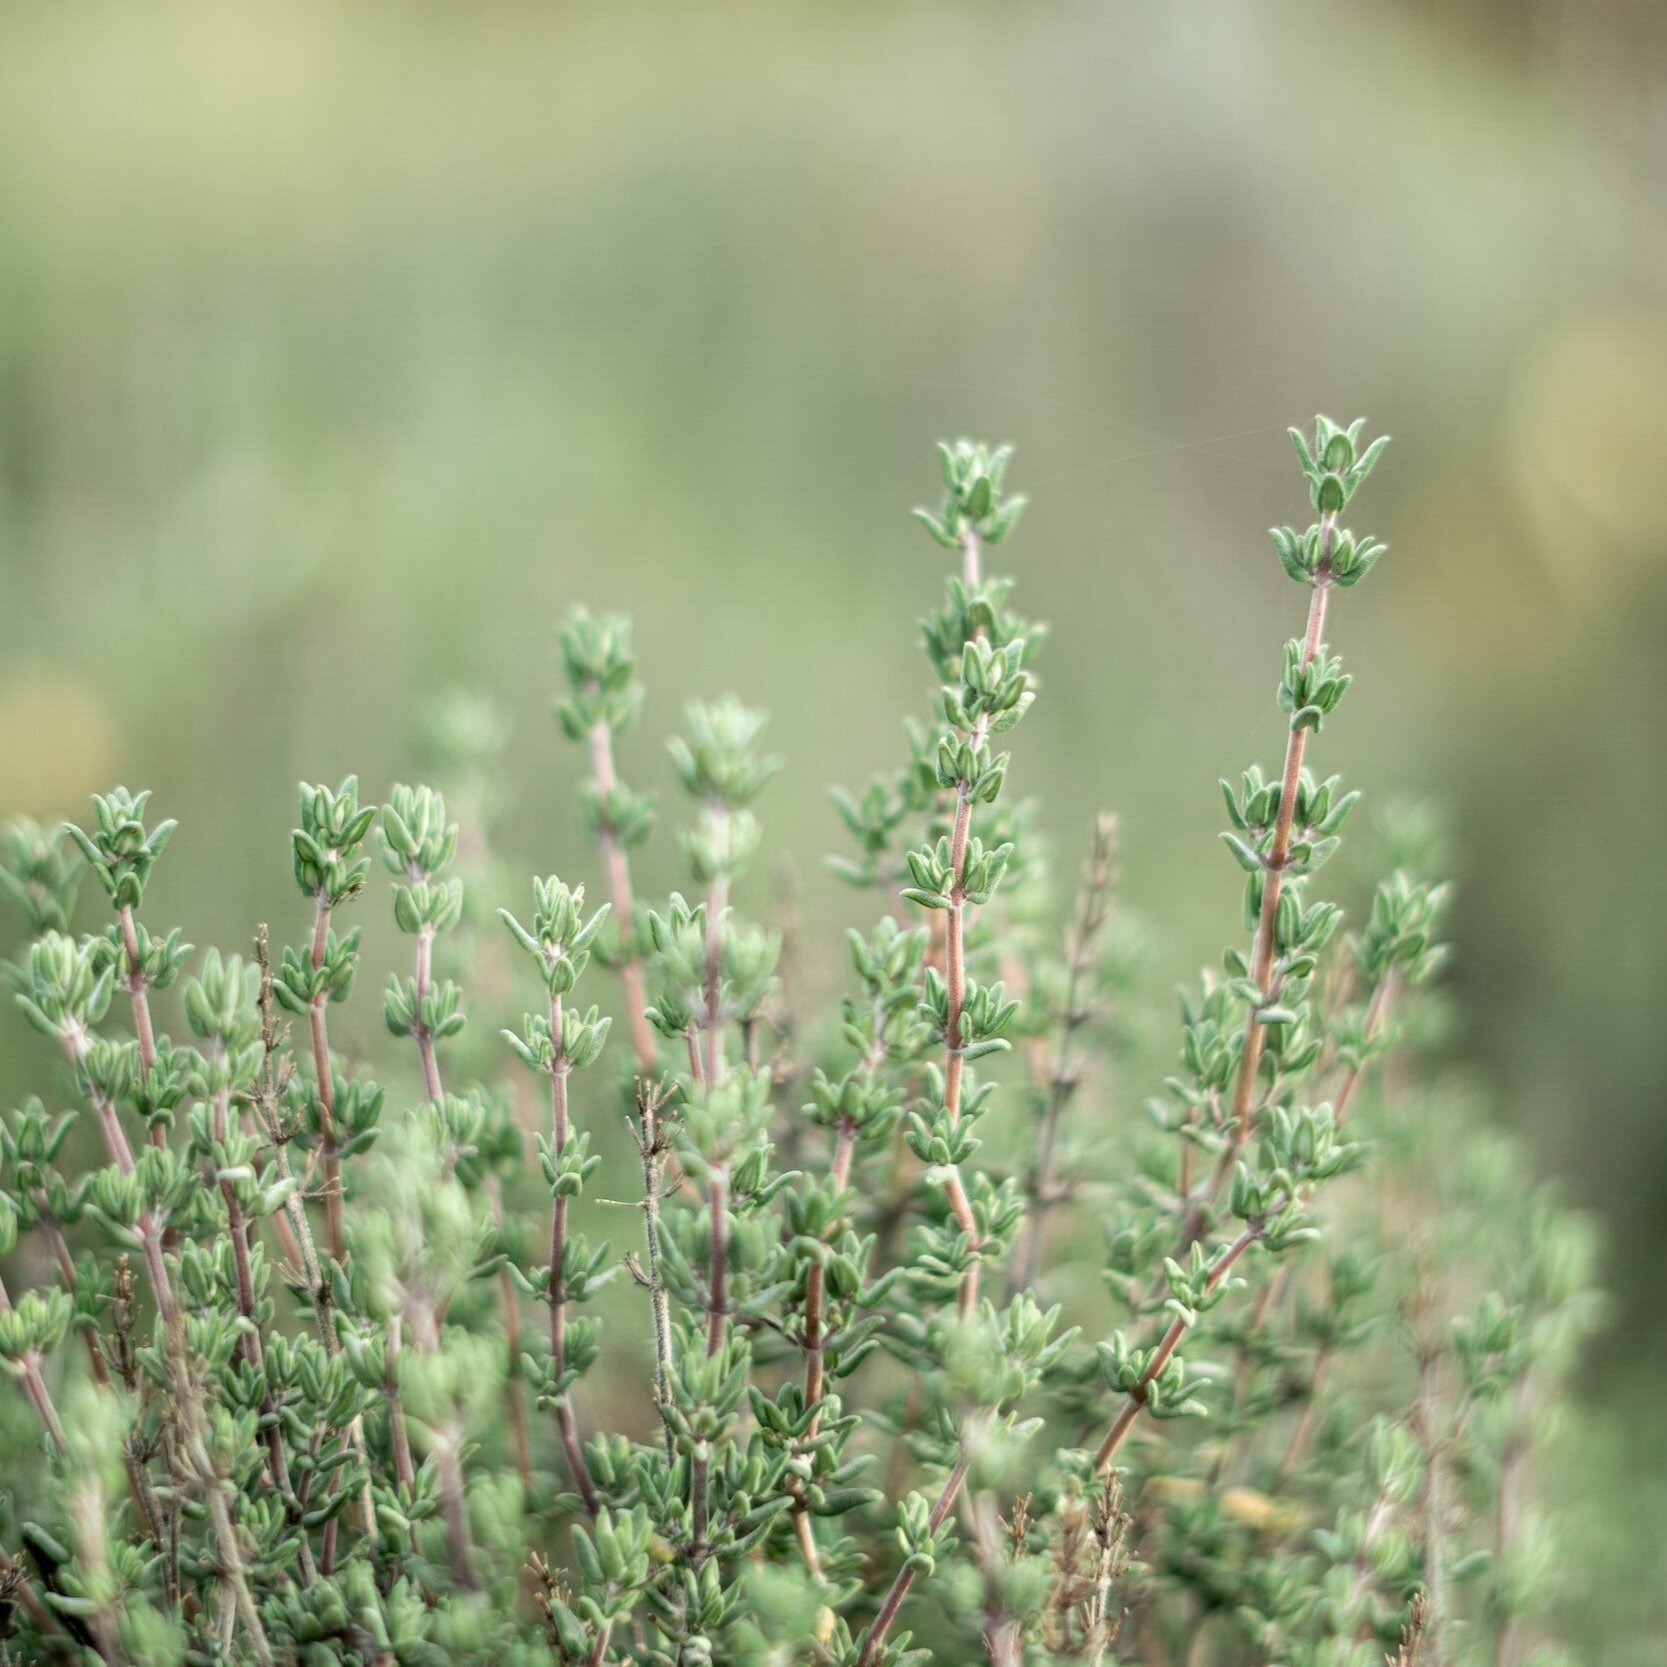
Thyme
Appearance: Small, fragrant leaves on low-growing, spreading stems.
Size: Typically 4 to 8 inches tall and spreading up to 12 inches.
Uses: Culinary herb, medicinal properties, ground cover.
Olive Tree
Appearance: Evergreen tree with gray-green foliage and small, white flowers.
Size: Can reach up to 30 feet tall, but some cultivars are smaller.
Uses: Edible olives and oil, ornamental tree.
Fern-leaf Yarrow
Appearance: Feathery, fern-like leaves and clusters of yellow flowers.
Size: Typically 2 to 4 feet tall and wide.
Uses: Ornamental plant, cut flowers, attracts beneficial insects.
Hummingbird Mint
Appearance: Aromatic foliage with spikes of tubular flowers in various colors.
Size: Varies by species, typically 2 to 4 feet tall and 1 to 2 feet wide.
Uses: Ornamental plant, attracts pollinators, herbal tea.
Zinnia
Appearance: Showy, daisy-like flowers in a wide range of colors and sizes.
Size: Varies by cultivar, but generally 1 to 3 feet tall and wide.
Uses: Ornamental plant, cut flowers, attracts butterflies.
Aloe vera
Appearance: Rosettes of fleshy, spiky leaves with tall flower stalks.
Size: Typically 1 to 2 feet tall and wide.
Uses: Medicinal gel from the leaves, ornamental plant.

Purple Coneflower
Appearance: Large, showy flowers with cone-shaped centers and drooping petals.
Size: Usually 2 to 4 feet tall and 1 to 2 feet wide.
Uses: Medicinal herb, ornamental plant, attracts pollinators.
Beardtongue
Appearance: Tubular flowers in various colors, on tall stems with narrow leaves.
Size: Ranges from 1 to 4 feet tall, depending on the species.
Uses: Ornamental plant, some species used in traditional medicine.
Blanket Flower
Appearance: Brightly colored daisy-like flowers on long stems.
Size: Varies by species, typically 1 to 3 feet tall and wide.
Uses: Ornamental plant, attracts pollinators.
Yarrow
Appearance: Feathery foliage with flat-topped clusters of flowers in various colors.
Size: Generally 1 to 3 feet tall and wide.
Uses: Medicinal herb, ornamental plant, attracts beneficial insects.
Stonecrop
Appearance: Succulent leaves and clusters of star-shaped flowers.
Size: Varies by species, but generally low-growing and spreading, ranging from a few inches to 2 feet in height.
Uses: Ornamental plant, ground cover, some species have medicinal properties.
Rosemary
Appearance: Aromatic, needle-like leaves on woody stems with small blue flowers.
Size: Can grow 2 to 4 feet tall and wide.
Uses: Culinary herb, aromatic properties, traditional medicinal uses.

Agave
Appearance: Large succulent with sharp, spiky leaves arranged in a rosette shape.
Size: Can grow up to 6 feet tall and wide.
Uses: Edible flower stalks, medicinal properties in traditional herbal remedies.
Yucca
Appearance: Sword-like leaves forming a clump with tall flower spikes.
Size: Typically 2 to 3 feet tall and wide.
Uses: Edible flowers and fruit, soap-making from root fibers.
Prickly Pear Cactus
Appearance: Thick, succulent pads with spines and showy flowers.
Size: Various species, but commonly 3 to 6 feet tall and wide.
Uses: Edible fruit (prickly pear), medicinal properties in traditional medicine.
Lavender
Appearance: Fragrant, grayish-green foliage with spikes of purple flowers.
Size: Typically 1 to 3 feet tall and wide.
Uses: Culinary herb, essential oil production, herbal medicine.
Sage
Appearance: Gray-green leaves with purple-blue flowers on upright stems.
Size: Typically 1 to 2 feet tall and wide.
Uses: Culinary herb, medicinal properties in traditional medicine.
Rockrose
Appearance: Evergreen shrub with showy, papery flowers in various colors.
Size: Varies by species, generally 2 to 5 feet tall and wide.
Uses: Ornamental plant, aromatic properties in potpourri.
Maximizing Water Conservation in the Garden
If you’ve already implemented drought tolerant plants into your sustainable garden design and set up a rainwater harvesting system, the next thing you should consider is if there is anywhere that you can add mulch to your garden.
Mulch acts as a protective layer over the soil, reducing evaporation and slowing down water loss. It helps to keep the soil consistently moist by preventing water from quickly evaporating under the sun and wind. Mulch creates a barrier that inhibits weed growth. Weeds compete with garden plants for water, so by suppressing their growth, mulch helps reduce water loss by minimizing competition for moisture. It acts as an insulating layer, moderating soil temperature fluctuations. It keeps the soil cooler during hot weather, reducing water evaporation, and warmer during colder periods, promoting root health and water absorption, and helps to prevent soil erosion by reducing the impact of heavy rainfall on the soil surface. It absorbs and disperses the force of falling water, preventing runoff and allowing water to infiltrate the soil more effectively.
Organic mulches, such as compost, break down over time and improve the soil structure. This enhances the soil's water-holding capacity, allowing it to retain moisture for longer periods and reducing the need for frequent watering, and when water is applied to the garden, mulch helps to slow down the flow and absorption of water, preventing runoff. This allows the plants to utilize more of the water provided, reducing water waste.
To maximize the water-saving benefits of mulch, it is essential to apply an adequate layer (2 to 4 inches) around plants, leaving space around the stem to prevent moisture-related issues. Additionally, selecting organic mulch materials, such as wood chips, straw, or compost, provides the added advantage of improving soil health over time.
I encourage you to take action in the fight against climate change by incorporating these elements into your landscape design to save water, reduce your environmental impact, and create a healthier ecosystem!


Breathe Easy: Natural Herbal Seasonal Allergy Remedies to Relieve Your Symptoms
Probably the worst thing about beautiful June? Itchy noses distracting us from our garden tasks. Seasonal allergies are here to stay on our homestead, so I find myself turning to herbal remedies to relieve some of my symptoms.

The Cottage Peach is reader-supported. When you purchase through links on our site, we may earn an affiliate commission at no additional cost to you. All opinions are our own.
Probably the worst thing about beautiful June? Itchy noses distracting us from our garden tasks. Seasonal allergies are here to stay on our homestead, so I find myself turning to herbal remedies to relieve some of my symptoms.
What are seasonal allergies?
Seasonal allergies, also known as hay fever or allergic rhinitis, are an allergic reaction to airborne substances such as pollen, mold spores, and other allergens that are present in the environment during certain seasons.
Seasonal allergy symptoms
Symptoms of seasonal allergies can include sneezing, runny nose, congestion, itchy or watery eyes, and throat irritation. These symptoms can affect a person's quality of life and ability to function normally. Seasonal allergies are a common condition, affecting millions of people worldwide. The severity of symptoms can vary depending on individual sensitivity to specific allergens and the amount of exposure to them.
Seasonal allergy causes
Seasonal allergies are caused by an overreaction of the immune system to certain airborne substances that are present in the environment during certain seasons. When a person with seasonal allergies inhales these allergens, the immune system mistakes them as harmful and produces an antibody called immunoglobulin E (IgE) to fight them off. This triggers the release of histamine and other chemicals in the body, leading to the classic symptoms of seasonal allergies, such as sneezing, runny nose, congestion, itchy or watery eyes, and throat irritation.
Some common allergens that can trigger seasonal allergies include:
Tree, grass, and weed pollen
Mold spores
Dust mites
Pet dander
What months have seasonal allergies?
Seasonal allergies are more common during certain seasons, depending on the type of allergen. For example, tree pollen is more prevalent in the spring, while grass pollen is more common in the summer. Mold spores are more prevalent in the fall, especially in damp or humid areas.
How do you know if you have seasonal allergies?
Here are some common signs and symptoms of seasonal allergies:
Sneezing: You may experience frequent sneezing, especially in the morning or during the day.
Runny nose: You may have a runny nose with clear, watery discharge.
Congestion: You may experience nasal congestion, making it difficult to breathe through your nose.
Itchy or watery eyes: You may experience red, itchy, or watery eyes.
Throat irritation: You may experience throat irritation or a sore throat.
Fatigue: You may feel tired or have a decreased energy level.
How do you cure seasonal allergies?
There is no known cure for seasonal allergies, but there are several treatments and lifestyle changes that can help to manage the symptoms. Here are some strategies that may be effective in treating seasonal allergies:
Avoid allergens: Try to avoid exposure to the allergens that trigger your symptoms. For example, stay indoors during peak pollen hours, use an air purifier, and keep windows closed.
Over-the-counter medications: Antihistamines, decongestants, and nasal sprays can help to alleviate symptoms such as sneezing, itching, and congestion.
Prescription medications: In severe cases, your healthcare provider may prescribe stronger medications, such as prescription-strength antihistamines, nasal corticosteroids, or allergy shots (immunotherapy).
Natural remedies: Some natural remedies such as honey, garlic, stinging nettle, butterbur, and Ginkgo biloba may help to reduce inflammation and alleviate symptoms. However, it is important to talk to your healthcare provider before using any natural remedies, as they may interact with other medications or have side effects.
Lifestyle changes: Eating a healthy diet, staying hydrated, getting enough sleep, and reducing stress can also help to boost your immune system and reduce allergy symptoms.
Can allergies make you feel sick and tired?
Yes, seasonal allergies may mimic many of the symptoms found with common illnesses.
Do allergies get worse at night?
Allergy symptoms can be worse at night for some people, depending on the type of allergen and the individual's sensitivity to it.
Here are some reasons why allergies may get worse at night:
Increased exposure to allergens: Allergens such as dust mites, pet dander, and mold spores can accumulate in bedding, carpets, and other surfaces in the bedroom. This can increase exposure to these allergens at night, triggering symptoms such as sneezing, itching, and congestion.
Reduced airflow: Sleeping in a closed room with little ventilation can lead to reduced airflow and increased humidity, which can exacerbate allergy symptoms.
Nasal congestion: Allergies can cause nasal congestion, making it difficult to breathe through the nose at night. This can lead to snoring or sleep apnea, which can further disrupt sleep and exacerbate allergy symptoms.
Circadian rhythm: The body's circadian rhythm, which regulates sleep and wake cycles, can also play a role in allergy symptoms. Some studies suggest that the immune system may be more active at night, which can worsen allergy symptoms.
Remedies for seasonal allergies
These natural remedies for seasonal allergies aren’t foolproof, but considering the low cost and ease of which you can make them they are certainly worth a try.

Garlic
Garlic has been traditionally used in some cultures as a natural remedy for seasonal allergies. Currently there is limited scientific evidence to support its effectiveness in reducing allergy symptoms.
Raw garlic: Eating raw garlic may help to reduce allergy symptoms. You can mince a clove of garlic and swallow it with water or mix it into food like salad dressing, hummus or soup.
Garlic supplements: You can take garlic supplements in the form of capsules or tablets. Make sure to follow the dosage instructions on the label.
Garlic tea: You can make garlic tea by steeping a few cloves of crushed garlic in hot water for several minutes. Strain the mixture and drink the tea.
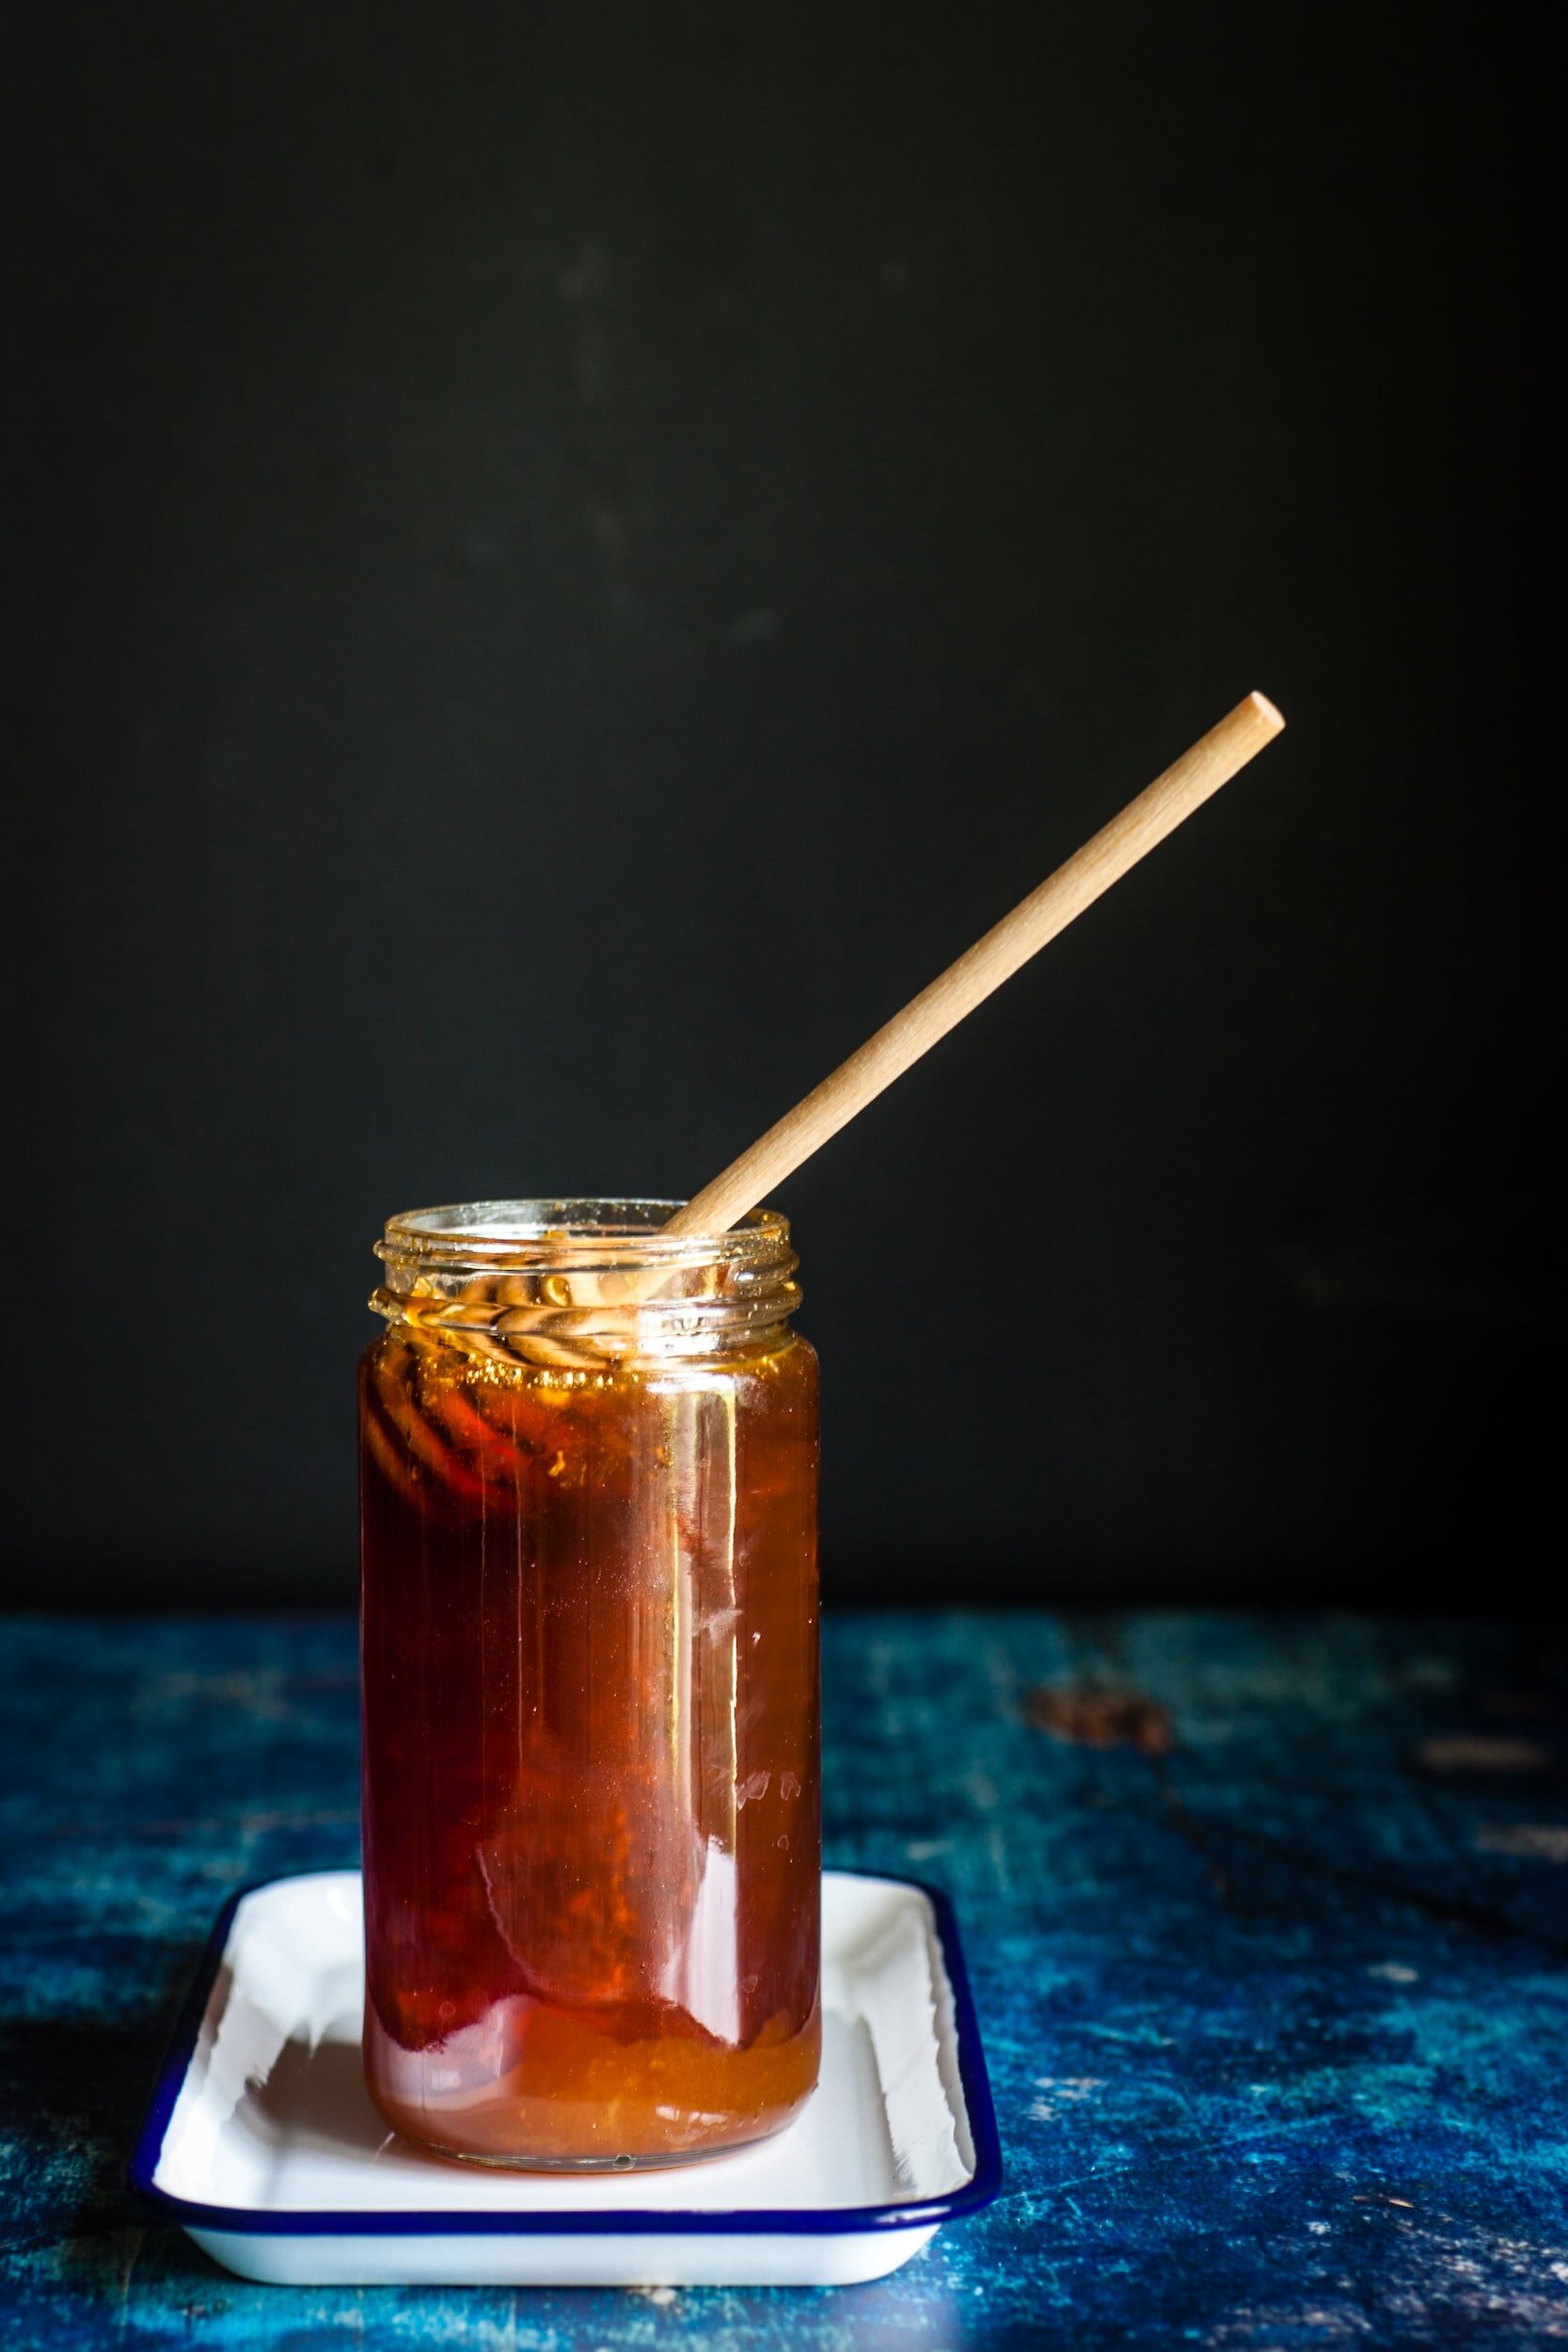
Honey
Honey may help to alleviate allergy symptoms by exposing the body to small amounts of allergens, similar to immunotherapy.
If you would like to try using honey to alleviate seasonal allergies, it is recommended to use raw, locally sourced honey. Here are a few ways to use honey:
Honey and lemon: Mix a tablespoon of raw honey with the juice of half a lemon in a cup of warm water. Drink this mixture daily.
Honey and tea: Add a teaspoon of honey to your favorite herbal tea to sweeten it and potentially alleviate allergy symptoms.
Honey on toast: Spread a teaspoon of honey on a slice of whole grain toast for a healthy breakfast.
Stinging Nettle
Stinging nettle (Urtica dioica) has been used as a natural remedy for seasonal allergies due to its anti-inflammatory properties. It may help to reduce inflammation in the body and alleviate allergy symptoms. Here are a few ways to use stinging nettle:
Stinging nettle tea: Steep 1-2 teaspoons of dried stinging nettle leaves in hot water for 5-10 minutes. Strain the mixture and drink the tea. You can drink up to 3 cups of stinging nettle tea per day.
Stinging nettle capsules: You can take stinging nettle capsules or tablets, following the dosage instructions on the label.
Stinging nettle tincture: A tincture is a concentrated liquid extract of stinging nettle. Follow the dosage instructions on the label.

Ginkgo Biloba
Ginkgo biloba is an herb that has been used in traditional medicine for a variety of health conditions, including seasonal allergies. Although the evidence for its effectiveness in reducing allergy symptoms is limited, some people have reported benefits from using ginkgo biloba. Here are a few ways to use ginkgo biloba:
Ginkgo biloba capsules or tablets: You can take ginkgo biloba capsules or tablets, following the dosage instructions on the label. It is recommended to start with a low dose and gradually increase it over time.
Ginkgo biloba tea: Steep a teaspoon of dried ginkgo biloba leaves in hot water for 5-10 minutes. Strain the mixture and drink the tea.
Ginkgo biloba tincture: A tincture is a concentrated liquid extract of ginkgo biloba. Follow the dosage instructions on the label.
Butterbur
Butterbur (Petasites hybridus) is a plant that has been used in traditional medicine for a variety of health conditions, including seasonal allergies. Butterbur may help to reduce inflammation and relieve allergy symptoms, although more research is needed to fully understand its effectiveness. Here are a few ways to use butterbur:
Butterbur capsules or tablets: You can take butterbur capsules or tablets, following the dosage instructions on the label. It is recommended to use a product that is labeled as "PA-free," meaning it does not contain pyrrolizidine alkaloids, which can be toxic to the liver.
Butterbur tea: Steep a teaspoon of dried butterbur leaves in hot water for 5-10 minutes. Strain the mixture and drink the tea. However, butterbur tea may not be safe as it may contain pyrrolizidine alkaloids.
Turmeric
Turmeric (Curcuma longa) is a spice that has been used in traditional medicine for a variety of health conditions, including seasonal allergies. Turmeric contains a compound called curcumin, which has anti-inflammatory properties and may help to reduce allergy symptoms. Here are a few ways to use turmeric:
Turmeric tea: Mix a teaspoon of ground turmeric with hot water and a squeeze of lemon juice. You can also add honey to sweeten it.
Turmeric capsules or tablets: You can take turmeric capsules or tablets, following the dosage instructions on the label. Look for products that contain standardized amounts of curcumin.
Turmeric milk: Mix a teaspoon of ground turmeric with warm milk and honey. This can be a soothing and comforting bedtime drink.

Red Clover
Red clover (Trifolium pratense) is a herb that has been used in traditional medicine for a variety of health conditions, including seasonal allergies. Red clover contains compounds that may help to reduce inflammation and relieve allergy symptoms. Here are a few ways to use red clover:
Red clover tea: Steep a teaspoon of dried red clover flowers in hot water for 5-10 minutes. Strain the mixture and drink the tea. You can drink up to 3 cups of red clover tea per day.
Red clover capsules or tablets: You can take red clover capsules or tablets, following the dosage instructions on the label.
Red clover tincture: A tincture is a concentrated liquid extract of red clover. Follow the dosage instructions on the label.
Find these herbs and more by tapping here to visit my favorite online herb shop!
Do you struggle with seasonal allergies? I hope some of these natural remedies can help! If you want to learn more about how herbalism you can enroll in my favorite online herbal school by clicking here.

![The Power of Nature: How To Make Infused Oregano Oil for Your Health and Wellness [Recipe]](https://images.squarespace-cdn.com/content/v1/60e85024dc86d643da81c96a/1682625337753-AFI1M6MRRMDQ5CBNY2TX/unsplash-image-Fl2Ki3_GZIU.jpg)
![Make This Easy + Natural Botanical Hand Salve [Recipe]](https://images.squarespace-cdn.com/content/v1/60e85024dc86d643da81c96a/b57698b0-de70-4101-afaf-7af57788237d/Herbal+Face+Steam+Recipe+by+The+Cottage+Peach-1.jpg)
![Elevate Your Drinks with Homemade Lavender Simple Syrup for Lavender Lattes and Mocktails [Recipe]](https://images.squarespace-cdn.com/content/v1/60e85024dc86d643da81c96a/1656014505449-DRB2M71VCU9EODGEHOND/PXL_20220620_150019269.PORTRAIT.jpg)
Elevate Your Drinks with Homemade Lavender Simple Syrup for Lavender Lattes and Mocktails [Recipe]
Indulging in a perfectly crafted beverage can transport us to a world of relaxation and bliss. Imagine sipping a fragrant lavender latte or savoring a refreshing lavender cocktail. Lavender adds a touch of elegance and tranquility to any drink, and creating your own lavender simple syrup allows you to infuse your beverages with the enchanting essence of this versatile herb. In this blog post, we will guide you through the process of growing and harvesting lavender, explore its aromatherapy benefits, delve into the various ways you can use lavender simple syrup, and provide a step-by-step recipe for creating this aromatic syrup hat will elevate your lattes, mocktails and cocktails to a whole new level.

Indulging in a perfectly crafted beverage can transport us to a world of relaxation and bliss. Imagine sipping a fragrant lavender latte or savoring a refreshing lavender cocktail. Lavender adds a touch of elegance and tranquility to any drink, and creating your own lavender simple syrup allows you to infuse your beverages with the enchanting essence of this versatile herb. In this blog post, we will guide you through the process of growing and harvesting lavender, explore its aromatherapy benefits, delve into the various ways you can use lavender simple syrup, and provide a step-by-step recipe for creating this aromatic syrup hat will elevate your lattes, mocktails and cocktails to a whole new level.
Growing and Harvesting Lavender
Lavender, with its beautiful purple blooms and soothing fragrance, is a delightful addition to any garden. To grow lavender, choose a sunny spot with well-draining soil. Plant the lavender seedlings or cuttings in the spring, ensuring they have enough space to grow and thrive. Lavender is challenging to grow from seed successfully - I recommend getting a few healthy plants from your local garden center and then propagating additional plants from cuttings. Once established, lavender thrives on a bit of neglect and should not require much in the way of watering as it is a drought tolerant plant.
Harvesting lavender is a task that requires careful timing. Wait until the flower buds have formed and are showing color but haven't fully opened. This is when the lavender's essential oils are at their peak. Plan your harvest for the early morning, before the sun can dry out the essential oils in the plant blooms. Using pruning shears or scissors, carefully snip the flower stems, leaving a few inches of green foliage on the plant to encourage regrowth.
Drying Lavender and Aromatherapy Benefits
After harvesting, it's time to dry your lavender. Gather small bundles of lavender stems and secure them with a rubber band or twine. Hang them upside down in a cool, dry place with good air circulation. This process allows the lavender to dry naturally while retaining its fragrance and vibrant color. Once the lavender is fully dried, you can gently remove the buds from the stems and store them in an airtight container.
Aside from its culinary applications, lavender is renowned for its aromatherapy benefits. The calming and soothing properties of lavender promote relaxation, reduce stress, and improve sleep quality. Infusing your drinks with lavender can add a touch of serenity to your day and enhance your overall well-being.
Using Lavender Simple Syrup in Your Favorite Drink
Lavender simple syrup is a versatile ingredient that can elevate a wide range of beverages. Here are a few easy ways to incorporate it into your drink repertoire:
Lavender Latte: Add a touch of sophistication to your morning routine by infusing your latte with lavender syrup. Combine freshly brewed espresso or strong coffee with steamed milk and a splash of lavender syrup. Top it off with a sprinkle of dried lavender buds for a visually stunning and aromatic treat.
Lavender Lemonade: On a hot summer day, there's nothing quite as refreshing as a lavender-infused lemonade. Mix freshly squeezed lemon juice, water, and lavender syrup to taste. Serve it over ice and garnish with a sprig of fresh lavender for an invigorating twist on a classic beverage.
Lavender Cocktail or Mocktail: Impress your guests with a sophisticated lavender cocktail. Combine lavender syrup, your choice of spirit (such as vodka or gin), a splash of fresh lemon juice, and ice in a shaker. Shake vigorously, strain into a chilled glass, and garnish with a lavender sprig or lemon twist. Sip and savor the floral notes of this elegant libation. For a simple mocktail, click here for my recipe.
Making Lavender Simple Syrup: A Step-by-Step Guide
To create your own lavender simple syrup, you’ll only need three ingredients. Just follow these easy steps:
Ingredients:
1 tablespoon dried lavender buds
1 cup sugar
1 cup water
Instructions:

In a small saucepan, combine the dried lavender buds, sugar, and water.
Place the saucepan over medium heat and bring the mixture to a gentle boil, stirring occasionally to dissolve the sugar. Let it boil for one minute.
Remove the saucepan from the heat and allow the mixture to steep for about an hour. This allows the lavender to infuse its delicate flavor and aroma into the syrup.
After steeping, strain the syrup through a fine-mesh sieve or cheesecloth into a clean jar or bottle.
Store the lavender simple syrup in the refrigerator for up to two weeks, or use immediately in your favorite beverages.
Homemade lavender simple syrup opens up a world of creative possibilities for your drinks. From lavender lattes to lavender-infused cocktails and mocktails, this fragrant syrup adds a touch of elegance and relaxation to every sip. By growing and harvesting your own lavender, you can create a truly unique syrup that captures the essence of this versatile herb. Whether you're seeking a moment of tranquility or looking to impress your guests, lavender simple syrup is a must-have ingredient in your drink repertoire. So, gather your lavender, embark on the journey of crafting this unique syrup, and enjoy the enchanting flavors and aromas that lavender brings to your favorite beverages.
![Refreshing Watermelon, Basil, and Feta Salad: A Summertime Favorite [Recipe]](https://images.squarespace-cdn.com/content/v1/60e85024dc86d643da81c96a/f7b99577-5747-42ab-af4c-ce5bfa039407/PXL_20220627_175610264.jpg)
Refreshing Watermelon, Basil, and Feta Salad: A Summertime Favorite [Recipe]
When it comes to capturing the essence of summer, few flavors can rival the vibrant combination of watermelon and basil. These two versatile ingredients have the power to elevate your meals, whether you prefer sweet or savory dishes. The unique blend of the sunshine sweetness of watermelon, the earthy aroma of basil, and the tang of lime juice creates a refreshing sensation that is perfect for the summer season. In this article, we will explore the joy of growing watermelon and basil in your garden, delve into the benefits of light and refreshing meals, and indulge in the nostalgia that these flavors evoke.

When it comes to capturing the essence of summer, few flavors can rival the vibrant combination of watermelon and basil. These two versatile ingredients have the power to elevate your meals, whether you prefer sweet or savory dishes. The unique blend of the sunshine sweetness of watermelon, the earthy aroma of basil, and the tang of lime juice creates a refreshing sensation that is perfect for the summer season. In this article, we will explore the joy of growing watermelon and basil in your garden, delve into the benefits of light and refreshing meals, and indulge in the nostalgia that these flavors evoke.
Growing Watermelon and Basil in Your Garden
Imagine strolling through your garden on a warm summer day, plucking a juicy watermelon and fragrant basil leaves straight from the vine. By growing these two ingredients in your own backyard, you not only gain access to the freshest produce but also experience the joy of nurturing and cultivating your own food.
Watermelons are a delight to grow, with their sprawling vines and large, vibrant fruits. To cultivate watermelons, you'll need a sunny spot in your garden with well-drained soil. Start by sowing the seeds or transplanting seedlings after the last frost. Ensure you provide enough space for the vines to spread out and trellis them if needed. Regular watering, fertilizing, and protection from pests will help you achieve a bountiful harvest.
Basil, on the other hand, is an aromatic herb that thrives in warm weather. Choose a location that receives at least six hours of sunlight daily and has well-drained soil. Basil can be grown from seeds or transplants, and with regular pruning, it will continue to flourish throughout the summer. Pinching off the flowers will encourage the plant to focus its energy on producing more leaves, allowing you to enjoy the distinct aroma and flavor of fresh basil in your recipes.
As the temperature rises and the sun shines brighter, our bodies crave lighter and more refreshing meals. Watermelon and basil offer the perfect combination of flavors to satisfy these cravings while providing numerous health benefits.
Watermelon is not only a delicious and hydrating fruit but also a nutritious addition to your diet. With its high water content, it helps keep you hydrated during the hot summer months. Moreover, watermelon is an excellent source of vitamins A and C, which support healthy skin and a robust immune system. Additionally, it contains lycopene, a powerful antioxidant known for its potential to reduce the risk of certain diseases. Incorporating watermelon into your meals can contribute to your overall well-being while tantalizing your taste buds.
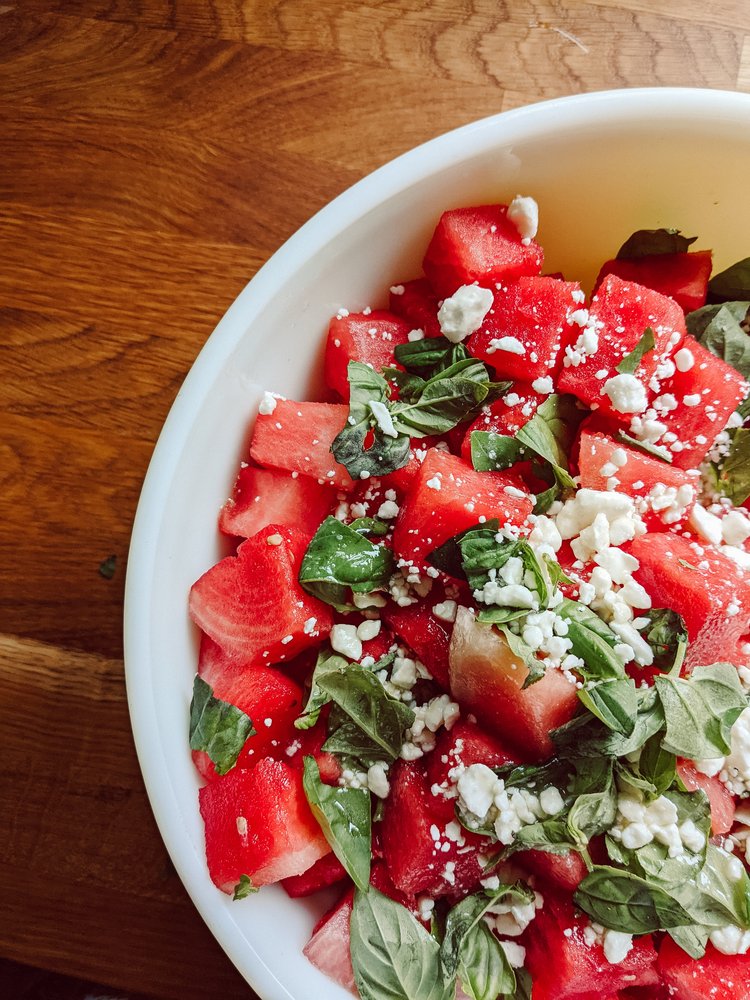
Watermelon Feta Salad
Ingredients
- 5 cups cubed watermelon
- ⅓ cup crumbled feta cheese
- ⅓ cup torn mint or basil leaves
- Sea salt
- 2 tablespoons extra-virgin olive oil
- 3 tablespoons lime juice
- ½ garlic clove, minced
- ¼ teaspoon sea salt
Instructions
- Cube your watermelon and roughly chop your basil.
- Combine the salad ingredients in a bowl.
- In a small mason jar, add all the dressing ingredients and shake until well combined.
- Pour over the salad and enjoy!
Notes
This salad is best eaten fresh.
Basil, often referred to as the "king of herbs," brings its unique aroma and taste to any dish it graces. Beyond its delightful flavor, basil also offers several health benefits. It is rich in vitamins A, K, and C, as well as essential minerals like potassium and magnesium. Basil contains compounds with anti-inflammatory and antibacterial properties, which may promote overall health. Consuming basil can aid digestion, reduce inflammation, and provide a fresh burst of flavor to your summer meals.
One of the most remarkable aspects of watermelon and basil is their versatility. They can be incorporated into an array of recipes, ranging from light salads to refreshing beverages - watermelon can even be grilled!
Watermelon's natural sweetness lends itself beautifully to both sweet and savory plates, and basil's aromatic profile complements a wide range of dishes.
Summer is a season synonymous with nostalgia. The scents and flavors we associate with this time of year have the power to transport us back to cherished memories. Watermelon and basil evoke the essence of summer like no other flavors.
The juiciness of watermelon and the distinct aroma of basil can transport us to carefree childhood days, enjoying picnics and poolside gatherings. These flavors remind us of the simple pleasures of summer and evoke a sense of joy and relaxation. By incorporating watermelon and basil into our meals, we can recreate these cherished moments and celebrate the spirit of summer.
I’ll admit I was skeptical about combining the crisp sweetness of watermelon with salty crumbly feta and basil, but it’s safe to say it was love at first bite and it took everything in me to share the bowl with my family instead of finishing it off myself!
I think the secret is the lime juice in the dressing - the acidity really ties together all these different flavors to create a light and refreshing snack or side salad for your summer time meals.
This watermelon salad is a versatile addition to any summer meal. It pairs well with grilled meats, seafood, or as a refreshing side dish for picnics and barbecues. The combination of juicy watermelon, fragrant basil, and salty feta cheese creates a refreshing and tantalizing experience for your taste buds. Whether you're hosting a summer gathering or simply looking to elevate your daily meals, this watermelon salad is a delightful choice. Embrace the vibrant flavors of the season and enjoy the harmonious balance of sweetness, herbaceousness, and tanginess that this salad brings.

Refreshing Lavender Lemon Mocktail: An easy Non-Alcoholic Beverage [recipe
When it comes to enjoying a flavorful and refreshing beverage, mocktails offer a fun alternative to traditional cocktails. With their vibrant colors and enticing flavors, mocktails allow everyone to partake in the celebration, regardless of whether they consume alcohol or not. In this blog post, we will explore the world of mocktails and guide you through the process of creating a sensational Lavender Lemon Mocktail. From growing and harvesting lavender to the therapeutic benefits of this aromatic herb, we'll cover it all. Join us on this journey as we combine the delicate essence of lavender with the tangy zing of lemon to craft an easy non-alcoholic mixed drink that will captivate your taste buds.

When it comes to enjoying a flavorful and refreshing beverage, mocktails offer a fun alternative to traditional cocktails. With their vibrant colors and enticing flavors, mocktails allow everyone to partake in the celebration, regardless of whether they consume alcohol or not. In this blog post, we will explore the world of mocktails and guide you through the process of creating a sensational Lavender Lemon Mocktail. From growing and harvesting lavender to the therapeutic benefits of this aromatic herb, we'll cover it all. Join us on this journey as we combine the delicate essence of lavender with the tangy zing of lemon to craft an easy non-alcoholic mixed drink that will captivate your taste buds.
The origins of mocktails can be traced back to the early 20th century when the temperance movement gained momentum. This movement aimed to promote the abstention from alcoholic beverages, primarily driven by concerns over the negative social and health effects associated with alcohol consumption.
During the Prohibition era in the United States (1920-1933), the production, sale, and distribution of alcoholic beverages were banned. As a result, bartenders and mixologists had to find creative ways to cater to their patrons who still desired the experience of enjoying a well-crafted drink without the alcohol content.
During this time, mocktails, also known as "temperance drinks" or "soft cocktails," emerged as a popular alternative. Bartenders began experimenting with combinations of fruit juices, syrups, sodas, and other non-alcoholic ingredients to create flavorful and visually appealing beverages that could mimic the complexity and presentation of cocktails.
Mocktails became particularly popular in establishments such as speakeasies, where people gathered in secret to socialize and enjoy a drink in the midst of Prohibition. These non-alcoholic concoctions allowed individuals to partake in the convivial atmosphere while adhering to the restrictions imposed by the law.
Over the years, mocktails continued to evolve and gain popularity, especially as the culture of responsible drinking and wellness-conscious lifestyles became more prevalent. Today, mocktails have become a prominent feature in bars, restaurants, and social events, catering to a diverse range of preferences and dietary choices.
Mocktails offer an array of benefits, including providing non-drinkers and designated drivers with enjoyable and sophisticated beverage options. They also allow individuals to explore new flavors, experiment with creative combinations, and enjoy the social aspect of cocktail culture without the effects of alcohol.
In recent years, the mocktail trend has experienced a surge in popularity, with mixologists and bartenders showcasing their creativity by developing elaborate and innovative mocktail recipes. These non-alcoholic creations have become an integral part of the beverage industry, reflecting a shift towards inclusivity and providing a broader range of options for individuals seeking enjoyable alternatives to alcoholic drinks.
Whether enjoyed by those who prefer non-alcoholic beverages or by those choosing to moderate their alcohol consumption, mocktails have undoubtedly established themselves as a vibrant and enticing category within the world of mixed drinks, offering a refreshing and satisfying experience for all.
Growing and Harvesting Lavender
Before we delve into the recipe, let's start by understanding how to grow and harvest lavender, the star ingredient of our mocktail.
Lavender thrives in well-draining soil and plenty of sunlight. Plant lavender in your garden or in pots during the spring, and ensure it receives at least six hours of direct sunlight per day. As lavender grows, prune it to encourage bushier growth.
To harvest lavender, wait until the buds have developed color but haven't fully opened. Plan to harvest in the early morning, as this is when the essential oils are at their peak. Using sharp shears, cut the flower stems, leaving a few inches of green foliage on the plant to support regrowth. It's best to harvest lavender in the morning when the essential oils are most concentrated.
Drying Lavender and Aromatherapy Benefits
Once you have harvested your lavender, it's time to dry it. Gather small bundles of lavender stems and secure them with twine or a rubber band. Hang the bundles upside down in a cool, dry place with good air circulation. This process allows the lavender to dry naturally while retaining its color and fragrance. After about two to four weeks, the lavender will be fully dried and ready to use.
Aside from its fragrant floral flavor, lavender offers numerous aromatherapy benefits. The calming and soothing properties of lavender have been cherished for centuries. Its aroma promotes relaxation, reduces stress and anxiety, and aids in improving sleep quality. Incorporating lavender into your mocktail not only adds a pleasant taste but also enhances the overall experience with its therapeutic effects.
Mocktails vs. Cocktails: Understanding the Difference
Mocktails are non-alcoholic beverages that mimic the flavors and presentation of cocktails, making them suitable for everyone to enjoy. While cocktails typically include alcoholic spirits, mocktails rely on creative combinations of ingredients, such as fruit juices, syrups, and carbonated beverages, to deliver a captivating taste experience without the alcohol content. Mocktails offer a refreshing and elegant alternative for those who choose not to consume alcohol or prefer lighter options.
Do Mocktails Have Alcohol?
No, mocktails are specifically designed to be alcohol-free. This makes them a popular choice for individuals who want to abstain from alcohol or simply prefer non-alcoholic beverages.
Here's a step-by-step guide on how to make a mocktail:
Choose a Base: Start by selecting a suitable base for your mocktail. This can be a fruit juice, a flavored syrup, a non-alcoholic spirit, or a combination of these ingredients. The base will serve as the foundation of your mocktail, providing flavor and body.
Add Flavor Enhancers: To enhance the taste and complexity of your mocktail, consider adding flavor enhancers such as fresh fruits, herbs, spices, or bitters. These ingredients will elevate the flavor profile and add a touch of uniqueness to your creation. Experiment with combinations that complement your chosen base.
Sweeten to Taste: Depending on the ingredients used, you may need to add sweetness to balance the flavors. Use simple syrup, flavored syrups, agave nectar, honey, or other sweeteners of your choice. Start with a small amount and gradually adjust to achieve the desired level of sweetness.
Incorporate Texture: To add texture and visual appeal to your mocktail, consider including elements such as crushed ice, sparkling water, soda, or tonic water. These ingredients can provide a refreshing effervescence and a pleasing mouthfeel.
Mix and Shake: Once you have gathered all your ingredients, it's time to mix or shake them together. If your mocktail contains fruit juices or other ingredients that need blending, use a blender or a mixing glass to combine them thoroughly. For mocktails with added carbonation, gently stir to incorporate the bubbles without losing fizz. Alternatively, if your mocktail includes herbs or muddled ingredients, you can use a shaker to shake them with ice, allowing the flavors to meld.
Garnish and Serve: A garnish adds visual appeal and can enhance the aroma of your mocktail. Consider using fresh fruits, herbs, citrus twists, or even edible flowers to garnish your creation. Use your imagination to make your mocktail visually striking. Serve your mocktail in an appropriate glassware, such as a highball glass, Collins glass, or a stemmed glass, depending on the style of your mocktail.
Crafting the Lavender Lemon Mocktail
Now, let's dive into creating our Lavender Lemon Mocktail. Here's what you'll need:
Ingredients:
1 oz lavender simple syrup (click here for the recipe)
1 oz fresh lemon juice
1 oz seltzer or sparkling water
Ice cubes
Sliced lemon, for garnish
Lavender sprigs, for garnish
Instructions:
In a cocktail shaker, combine the lavender simple syrup, fresh lemon juice, and seltzer.
Add ice cubes to the shaker, ensuring they cover the liquid ingredients.
Secure the shaker lid tightly and shake vigorously for about 15 seconds. This will chill the mocktail and blend the flavors together.
Prepare a glass by adding a few ice cubes.
Strain the mocktail mixture into the glass, discarding any ice or solids left in the shaker.
Garnish the mocktail with a slice of lemon and a sprig of lavender for an exquisite visual appeal.
Serve your Lavender Lemon Mocktail immediately and enjoy.
Crafting a Lavender Lemon Mocktail allows you to experience the enchanting flavors of lavender in a non-alcoholic mixed drink. By growing and harvesting lavender, you can infuse your mocktail with the delicate essence of this versatile herb. The therapeutic benefits of lavender further enhance the overall enjoyment of this refreshing beverage. The combination of lavender simple syrup, fresh lemon juice, and sparkling water will transport your taste buds to a realm of exquisite flavors and invigorating aromas.
Mocktails offer a wide range of flavors, from fruity and tropical to herbal and citrusy. They often feature a combination of fresh fruit juices, flavored syrups, sparkling water, and creative garnishes. Mocktails allow everyone to enjoy the art of mixology, exploring unique combinations and experimenting with various ingredients to create tantalizing and visually appealing drinks. With vibrant colors, invigorating flavors, and a touch of elegance, mocktails bring a sense of celebration and enjoyment to any summer gathering. Whether it's a zesty Virgin Mojito, a tangy Watermelon Cooler, or a refreshing Berry Spritzer, these alcohol-free concoctions offer a burst of summer flavors and are perfect for sipping by the pool, at picnics, or during outdoor gatherings.
So, raise a glass and toast to the vibrant world of non-alcoholic mixed drinks, where every sip is a refreshing journey of taste and a celebration of the season.
Freezing food for preservation is a method that has been practiced for centuries, although the widespread use of home freezers is a more recent development. Before the invention of mechanical refrigeration, people used natural methods to freeze and preserve food. In colder regions, they took advantage of winter temperatures by storing food in ice houses or caves. Ice was collected during the winter and used to create insulated storage areas where food could be kept frozen.