
BACKYARD GARDENING MADE SIMPLE
![How to Grow and Harvest Basil for the Best Vegan Pesto - A Complete Guide [Recipe]](https://images.squarespace-cdn.com/content/v1/60e85024dc86d643da81c96a/60e4900a-b65c-48c5-ac22-48542e4c6197/PXL_20220706_174104891.jpg)
How to Grow and Harvest Basil for the Best Vegan Pesto - A Complete Guide [Recipe]
Pesto, a beloved Italian sauce, has gained popularity worldwide for its vibrant flavors and versatility. Traditionally made with ingredients like Parmesan cheese and pine nuts, pesto has become a staple in many kitchens. However, for those following a vegan lifestyle or looking to explore plant-based alternatives, a vegan basil pesto is a perfect choice. In this comprehensive guide, we'll delve into the art of making a vegan basil pesto, covering everything from growing and harvesting basil to the step-by-step process of creating the perfect vegan pesto sauce.

Pesto, a beloved Italian sauce, has gained popularity worldwide for its vibrant flavors and versatility. Traditionally made with ingredients like Parmesan cheese and pine nuts, pesto has become a staple in many kitchens. However, for those following a vegan lifestyle or looking to explore plant-based alternatives, a vegan basil pesto is a perfect choice. In this comprehensive guide, we'll delve into the art of making a vegan basil pesto, covering everything from growing and harvesting basil to the step-by-step process of creating the perfect vegan pesto sauce.
The Beauty of Basil
Basil, a fragrant and versatile herb, takes center stage in pesto. It is one of my favorite herbs to grow, and I grow at least 40 plants each summer, so I can make pesto in bulk and freeze it to get us through the winter. We go through a lot of pesto, but most people probably want at least 10 basil plants growing in their garden for using fresh and preserving. It is a great plant to grow on your deck, since the aroma is thought to repel mosquitos. Basil's history as a culinary herb is rich and diverse, with origins dating back to ancient times. Basil plants thrive in warm climates and can be easily grown in a garden or even in pots indoors. The process of growing basil is rewarding and relatively simple. Choose a sunny spot, provide well-drained soil, and water consistently. Harvesting basil involves picking the fresh leaves as needed, stimulating further growth. The distinct flavor profile and aromatic qualities of basil add a delightful character to vegan pesto.
How to grow and harvest basil
Growing and harvesting basil is a rewarding and relatively simple process. Whether you have a garden plot or a few pots on a windowsill, basil can thrive in various environments. Here's a quick step-by-step guide on how to grow and harvest basil:
Select the Right Variety: Choose a basil variety that suits your needs and growing conditions. Common varieties include Genovese basil (traditional basil used in pesto), Thai basil (with a hint of licorice flavor), and lemon basil (citrusy aroma). Consider factors such as taste preference and climate suitability.
Prepare the Soil: Basil prefers well-drained soil with a pH level between 6 and 7. If growing in a garden bed, loosen the soil and remove any weeds. Amend the soil with organic matter like compost to improve its fertility and drainage.
Planting Basil
Seeds: If starting from seeds, sow them indoors 6-8 weeks before the last frost date or directly in the garden after the danger of frost has passed. Plant the seeds ¼ inch deep and 10-12 inches apart. Once the seedlings have grown a few inches tall, thin them to allow proper airflow and prevent overcrowding.
Transplants: Alternatively, you can purchase young basil plants from a nursery and transplant them into your garden or containers. Ensure the plants are spaced 10-12 inches apart - nurseries often plant multiple seeds per cell pack, so if you see more than one stem, you'll want to separate those.
Provide Adequate Sunlight: Basil loves sunlight and requires at least 6-8 hours of direct sunlight each day. Place your basil plants in a sunny location, such as a south-facing window or a spot in the garden that receives ample sunlight.
Watering and Caring for Basil
Water: Basil requires consistent moisture, but be careful not to overwater. Water the plants deeply whenever the top inch of soil feels dry. Avoid wetting the foliage to prevent diseases.
Mulch: Applying a layer of organic mulch around the basil plants helps retain moisture, suppress weeds, and regulate soil temperature.
Fertilization: Basil is a relatively low-maintenance herb, but you can give it a boost by applying a balanced organic fertilizer once or twice during the growing season.
Pruning and Harvesting Basil
Pruning: Regularly pinch back basil plants just above a leaf node to encourage bushier growth and prevent flowering. This will help maintain a steady supply of fresh leaves.
Harvesting: Once the basil plants have grown to a height of 6-8 inches, you can start harvesting. Use clean, sharp scissors or pruners to cut entire stems just above a leaf node. This will encourage new growth from the lower nodes. Avoid removing more than one-third of the plant at a time to ensure its continued vitality.
To maximize your basil harvest regularly harvest the leaves, even if you don't immediately need them, to prevent flowering and encourage continuous leaf production. Harvest in the morning when the essential oils are at their peak for the best flavor and aroma.
If you have an abundance of basil leaves, consider preserving them by drying, freezing, or making basil-infused oils or pesto.
Going Vegan: Ingredients and Substitutions
To create a vegan basil pesto, it's essential to identify suitable substitutes for the traditional non-vegan ingredients. Traditional pesto includes Parmesan cheese, but for a vegan version, nutritional yeast or vegan Parmesan can be used as alternatives. These ingredients offer a cheesy flavor and texture that mimic the original. Additionally, pine nuts, a common pesto ingredient, can be replaced with various nuts such as cashews, almonds, or walnuts. These nuts not only provide a rich and creamy texture but also offer nutritional benefits. Other essential ingredients in vegan pesto include garlic, olive oil, and lemon juice, which add depth and brightness to the sauce.
The Perfect Vegan Pesto Recipe
Here's how to create the best vegan basil pesto:
Gather the ingredients: You'll need fresh basil leaves, nuts of your choice, garlic cloves, nutritional yeast or vegan Parmesan, lemon juice, olive oil, and salt.
Add the basil leaves, nuts, garlic, and nutritional yeast or vegan Parmesan to a food processor.
Process until the ingredients are well combined and finely chopped.
Slowly drizzle in the olive oil while the food processor is running until the mixture reaches a smooth and creamy consistency.
Add lemon juice and salt to taste, giving the pesto a final pulse to incorporate the flavors.
Taste and adjust the seasoning as needed.
Transfer the vegan basil pesto to a jar or container and store it in the refrigerator for up to a week, or freeze up to 2 months.
Flavorful Variations and Additions
While classic basil pesto is delightful on its own, there are endless possibilities for customization. Here are a few flavorful variations and additions you can explore:
Sun-Dried Tomato Pesto: Add sun-dried tomatoes to the basic recipe for a tangy and intense flavor.
Roasted Red Pepper Pesto: Blend roasted red peppers with the pesto ingredients for a smoky and sweet twist.
Herb-Infused Pesto: Experiment with incorporating other fresh herbs like parsley, cilantro, or mint to add complexity and unique flavors.
Greens Galore: Combine basil with other greens like spinach or arugula to create a vibrant and nutritious pesto variation.
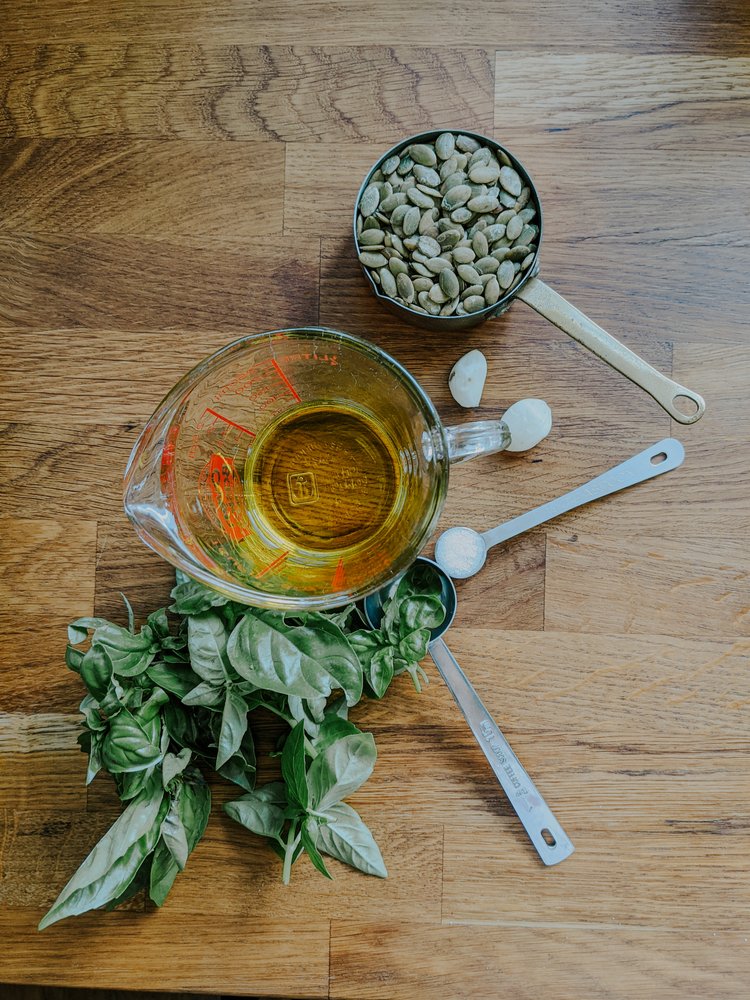
Basil Pesto - Vegan + Nut Free
Ingredients
- 1/2 cup toasted pumpkin seeds
- 2 tablespoons lemon juice
- 2 garlic cloves
- 1/4 teaspoon salt
- 2 cups basil
- 1/3 cup olive oil, more for a smoother pesto
Instructions
- In a food processor, combine pumpkin seeds, lemon juice, garlic, salt, pepper, and pulse.
- Add the basil and pulse. With the food processor running, drizzle in the olive oil and pulse until combined.
Serving and Enjoying Vegan Basil Pesto
Once you've prepared the vegan basil pesto, here are some delicious ways to enjoy it:
Toss it with cooked pasta for a simple and satisfying meal.
Spread it on sandwiches or wraps for a burst of flavor.
Use it as a sauce for pizzas, bruschetta, or crostini.
Serve it as a dip for fresh vegetables or as a topping for roasted vegetables.
Incorporate it into marinades for grilled tofu, tempeh, or vegetables to infuse them with a savory herbaceous taste.
The Health Benefits of Vegan Basil Pesto
In addition to its delightful taste, vegan basil pesto offers several health benefits:
Basil is rich in antioxidants, vitamins A and K, and essential minerals like calcium and iron.
Nuts or seeds used in the pesto provide healthy fats, protein, and essential nutrients.
Olive oil, a key ingredient, is known for its heart-healthy properties and contains monounsaturated fats.
By choosing plant-based ingredients, vegan basil pesto becomes a wholesome addition to a balanced diet, supporting overall health and well-being.
Is pesto vegan?
Vegan pesto can be easily made by substituting non-vegan ingredients with suitable alternatives. Traditional pesto contains dairy products like Parmesan cheese, but using nutritional yeast or vegan Parmesan achieves a similar cheesy flavor without animal-derived ingredients.
My favorite vegan pesto recipe (no nuts)
Ingredients
1/2 cup toasted pumpkin seeds
2 tablespoons lemon juice
2 garlic cloves
1/4 teaspoon salt
2 cups basil
1/3 cup olive oil, more for a smoother pesto
Instructions
In a food processor or blender, combine pumpkin seeds, lemon juice, garlic, salt, pepper, and pulse. You can also use an immersion blender. Add the basil and pulse. With the food processor running, drizzle in the olive oil and pulse until combined.
Vegan basil pesto opens up a world of flavor for both herb enthusiasts and those embracing a plant-based diet. By following our detailed guide, you can master the art of making this vibrant and aromatic sauce. The versatility of vegan pesto allows you to unleash your creativity and explore endless possibilities. So, gather your fresh basil, blend up some delicious vegan pesto, and savor the incredible flavors that this plant-based delight has to offer. Enjoy the abundance of nutrients and the mouthwatering experience of the best vegan basil pesto recipe.
![Grow More In Small Spaces With Metal Garden Arch Trellises From Gardener’s Supply Co. [Review]](https://images.squarespace-cdn.com/content/v1/60e85024dc86d643da81c96a/86bbc20e-068d-49f8-a464-49304ac4408f/Wood+raised+garden+beds-1.jpg)
Grow More In Small Spaces With Metal Garden Arch Trellises From Gardener’s Supply Co. [Review]
If you’re like me, you’re probably always trying to come up with new ways to increase your garden space and grow the most food possible. By growing vertically using arch trellises, I’ve added beauty to my garden while maximizing the use of space. Trellis arches can transform your garden into a lush, green paradise, increase your garden space to create a visually stunning display, and are an essential tool for any gardener looking to maximize their green thumb. But not all arches are made equal - a DIY cattle panel trellis may save you a few dollars, but won’t allow you to grow the wide variety of heavier plants you might be hoping to add to your garden and certainly won’t last as long as something specially designed for that specific purpose.

The Cottage Peach is reader-supported. When you purchase through links on our site, we may earn an affiliate commission at no additional cost to you. All opinions are our own.
If you’re like me, you’re probably always trying to come up with new ways to increase your garden space and grow the most food possible. By growing vertically using arch trellises, I’ve added beauty to my garden while maximizing the use of space. Trellis arches can transform your garden into a lush, green paradise, increase your garden space to create a visually stunning display, and are an essential tool for any gardener looking to maximize their green thumb. But not all arches are made equal - a DIY cattle panel trellis may save you a few dollars, but won’t allow you to grow the wide variety of heavier plants you might be hoping to add to your garden and certainly won’t last as long as something specially designed for that specific purpose.
When I was planning my new raised garden bed design, I knew I wanted to add arches to pull everything together visually and create more opportunities to grow vining plants easily in the smaller space. Switching from gardening in ground, I lost some pretty significant square footage and knew I could make up for a lot of it by using trellises. Gardener’s Supply Co generously provided me with three of their 2’ x 4’ Arch Trellises for Planter Boxes, the perfect fit to go alongside their elevated garden beds, and suddenly my dreams were coming to life in front of my eyes.
A trellis arch can make your garden feel fuller, more defined, and more peaceful. They create shade in which you can rest, cool off and enjoy the fruits of your labors. These arches are constructed with sturdy metal that can easily support large plants such as squash and cucumbers - or go the other direction and plant delicate flowers. There’s even enough space to grow tomatoes.
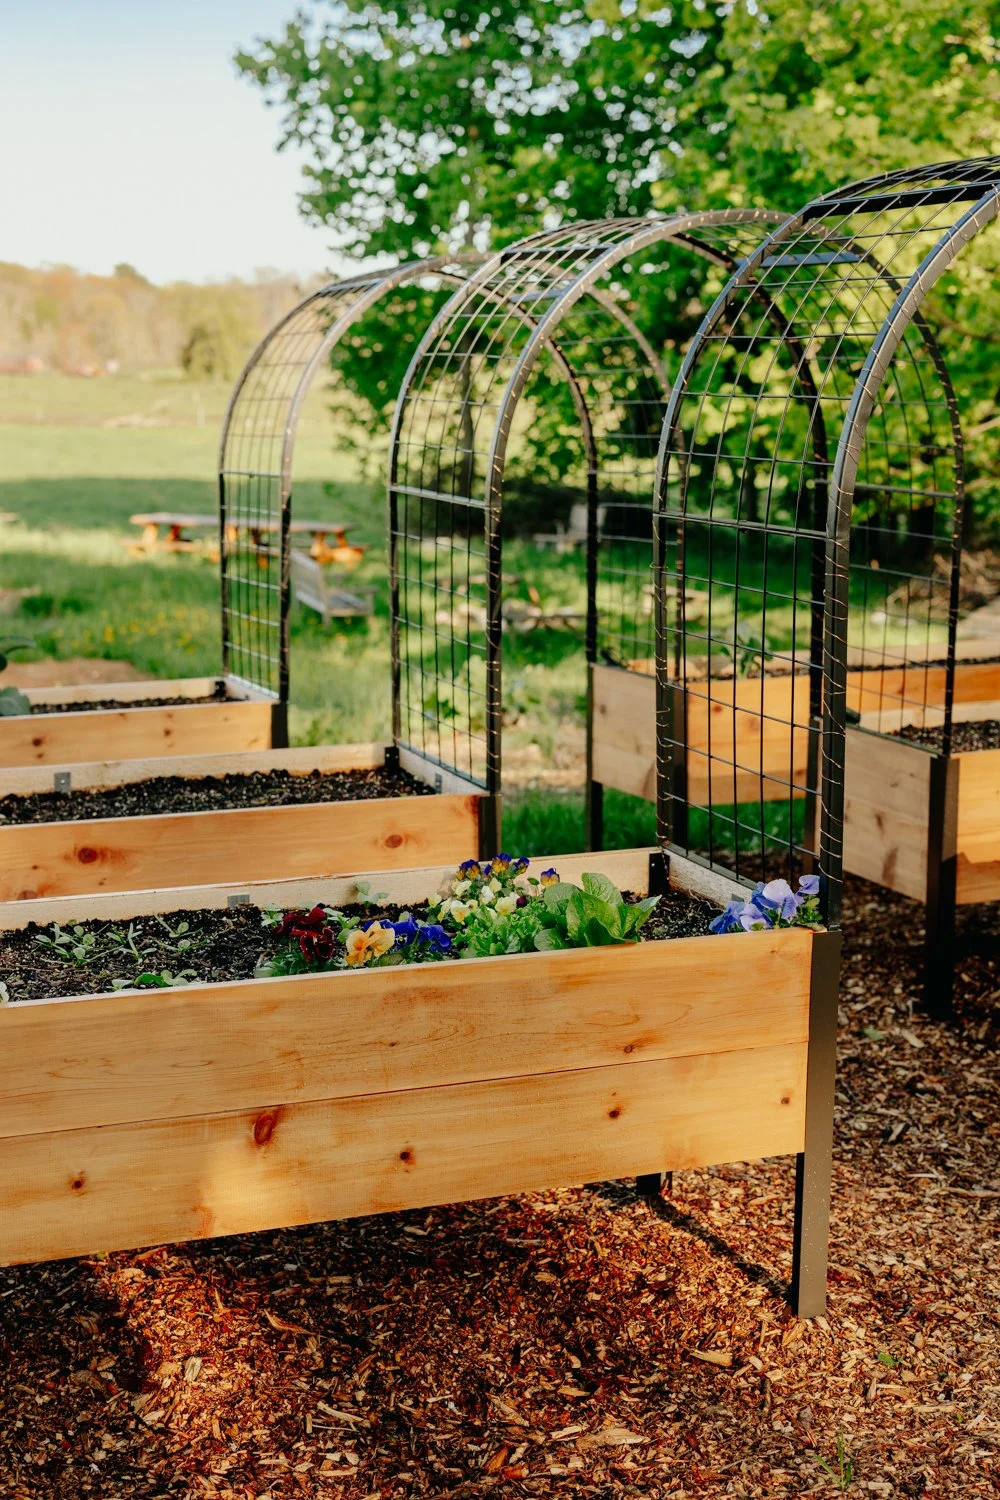
After we built our raised beds, installing the arches was quick and easy. Once assembled, the trellis feet slide right into the hollow corners of the planter boxes. No additional hardware is required for wobble-free trellises that are built to last. These arch trellises fit the 2' x 4' Elevated Planter Box lengthwise offering shade to your plants below or you can use them as seen in my own garden to span between two elevated raised beds, creating a natural tunnel for your garden sanctuary.
What is vertical gardening?
Vertical gardening is the concept of taking plants (vegetables, herbs or fruits that are most often grown in the ground horizontally) and training or containing them within a structure you’ve made or purchased for the specific purpose of growing them upright instead.
Benefits of vertical Gardening
Physical limitations
If bending, kneeling or lifting is something that is hard for you to do, vertical gardening allows you to reduce the amount of physical effort involved in your everyday garden tasks. There is usually little to no weeding involved, and watering systems can be set up to automatically keep your plants hydrated. Harvesting is a breeze because you won’t be digging through a tangle of branches or vines looking for produce and everything will be highly visible.
Space constraints
Have you always wanted to start a garden but your postage stamp of a yard won’t accommodate your dreams? Look up instead! I bet you have a lot of unused vertical space you didn’t even think of, whether that’s a wall on the side of your house or an unused corner of your front steps. Vertical gardens use very little square footage and don’t require an existing lawn area, and therefore fit in areas where you normally would not be able to grow fruits or vegetables.
Grow more
Maybe you have space but you’re looking to maximize your yield. Vertical gardening can help with this too by allowing you to grow more efficiently. One sprawling vining squash plant can easily take up a 3 square foot area grown horizontally - squash grown vertically can take up less than a third of the amount of space!
Reduce pests and disease
How many pests and diseases thrive in shady, damp spots in your garden? Let’s use squash as an example again - squash is susceptible to powdery mildew when grown horizontally. You can all but eliminate this problem in your garden by growing vertically, since your plants will have better air circulation and stay drier.
The best materials for trellises
There are several materials that can be used to make trellises. Here are some of the most common ones, along with their pros and cons:
Wood: Wood is a popular material for trellises due to its natural look and durability. It can be stained or painted to match the surrounding environment. However, wood can be susceptible to rot, and it requires maintenance to keep it looking good.
Metal: Metal trellises are durable and can be made from a variety of metals, including wrought iron, aluminum, and steel. They are strong and can withstand heavy plants, and do not require maintenance. However, it’s important to choose finished or painted metal to prevent rust.
PVC: PVC is a lightweight and affordable material that is easy to work with. It is resistant to rot and moisture, making it ideal for outdoor use. However, PVC trellises may not be as sturdy as those made from metal, and can take away from the beauty of the garden.
Bamboo: Bamboo is a renewable resource that is lightweight and easy to work with. It has a natural look that complements many types of plants. However, bamboo can be brittle and is not as strong as metal.
Rope: Rope trellises can be made from natural fibers, such as jute or hemp, or synthetic materials, such as nylon. They are flexible and can be shaped into a variety of designs. However, rope can be difficult to work with, will stretch out and is not as strong as metal.
Plastic: Plastic trellises are lightweight and easy to clean. They come in a variety of colors and designs, making them ideal for use in gardens or as decorative accents. However, plastic can become brittle over time, and is not as strong as metal.
How to build a garden trellis
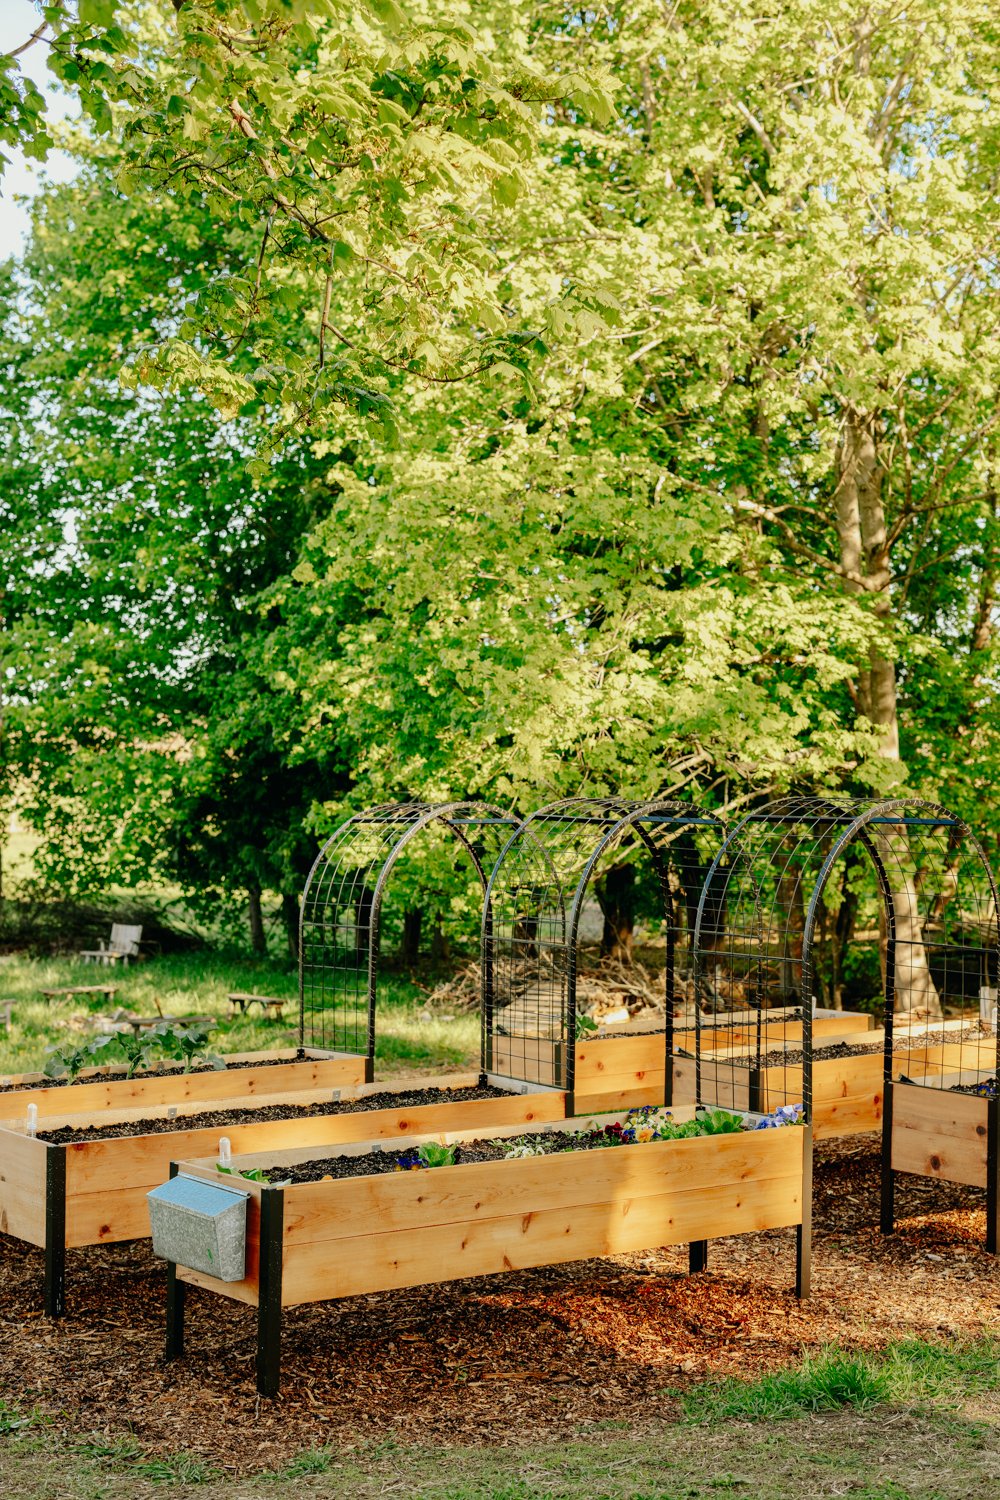
These arch trellises came in 5 pieces - 3 curved panels and 2 straight panels. Once these were connected using the provided screws and allen wrench, we just removed the end caps on the top of our elevated planter legs and inserted the legs into the corners.
This is easier with two people. All in all this only took us about 10 minutes per arch. It required no special tools and was easy enough for someone with no building experience to do.
The metal on the frame is very thick and doesn’t bend or flex at all. The interior metal that makes up the grid pattern is thinner, more like a rounded wire, but still rigid and durable. With the powder coating these should hold up for many years to come and not require any maintenance.
These arch trellises are durable enough to stay out all year long, but if we want to store them in the winter, we can just pull the arches straight up to remove them from the beds and put them indoors until spring.
Gardener’s Supply Co Arch Trellis Honest Review
Design: The arches are powder coated black, which will really allow my plants to be the focal point as they wind their way up the grid pattern overhead. I personally love the combination of the warm wood tones and deep black with the greens of the natural landscape. The grid pattern is wide enough to accommodate a large variety of sizes of vining plants easily, without being so wide that smaller vines will struggle to latch on. I also like the height and width on these - I’m shorter at 5’2” but there is still plenty of room overhead for taller friends and the spacing between the beds is ideal for creating a cozy atmosphere without feeling cramped. I think I can even fit a little table for two underneath for garden-to-table dining!

Material: Metal is my favorite material for garden trellises. It is strong, durable and resistant to harsh weather conditions. Powder finishes are stronger and more durable than paint coats, guaranteeing superior, longer-lasting protection.
Assembly: These arches are very easy to assemble in about 10 minutes. It helps to have a second person, but it’s not strictly necessary until you reach the part where you mount the trellis on the garden bed. The instructions were clear and all the necessary hardware was included. Installing into our existing raised beds really was as simple as sliding the feet of the trellis into the opening, so there was no fussing with alignment or mounting hardware.
Stability: I’m confident that these garden trellises will be able to withstand the strong winds that come off the back fields throughout the seasons and support the weight of any heavier plants without the need for additional support or anchoring to maintain its stability.
Maintenance: Since these garden trellises are powder coated, no maintenance is necessary - and since I deal with a lot of fatigue due to my arthritis, I’m happy to have one less garden task to add to my list.
Functionality: These arches add tons of vertical gardening space, allowing me to grow more food without bending or kneeling. Since the air flow is so great, my plants are less susceptible to diseases. Another unexpected benefit is the shade that they provide. This area of the garden always has lots of sun, and having a nice shady spot to rest in between garden tasks means I can spend more time enjoying nature.
There’s nothing more peaceful than taking a nice break from the late afternoon sun in the shade of my garden arches. To start growing your garden with these trellises today, click here to shop and learn more at Gardener’s Supply Co.

![Why You Need Gardener's Supply Co.'s Raised Beds for Your Garden [Review]](https://images.squarespace-cdn.com/content/v1/60e85024dc86d643da81c96a/774518e8-4fcc-4554-a194-5a5f7605e7e9/Wood+raised+garden+beds-8.jpg)
Why You Need Gardener's Supply Co.'s Raised Beds for Your Garden [Review]
These no-bend garden boxes keep plants hydrated via a series of innovative, connected reservoirs that deliver water to roots on demand. Four generous 5-gallon reservoirs extend the time between watering and create more even moisture throughout the bed. And, since water is drawn primarily from the bottom instead of applied from the top, less water is lost to evaporation too! 10" planting depth accommodates a wide variety of crops, from tomatoes to root-crops like carrots.

The Cottage Peach is reader-supported. When you purchase through links on our site, we may earn an affiliate commission at no additional cost to you. All opinions are our own.
Gardening with chronic illness
I’ve been gardening for most of my life in one form or another, but around ten years ago I was diagnosed with psoriatic arthritis, and since then I’ve had a whole decade to come up with the best gardening hacks to and gardening tools for gardening with chronic pain and low energy.
Psoriatic arthritis often confuses people who don’t have it - its cousins rheumatoid and osteoarthritis are far more common, so there’s a misconception that psoriatic arthritis isn’t as serious or doesn’t have as much of an impact on quality of life as these more well known forms of arthritis. The fact is that psoriatic arthritis is more than a skin condition. I experience severe joint pain and fatigue, just like someone with rheumatoid arthritis or osteoarthritis. I just get the added “bonus” of sensitive dry skin too. While exercise can help with my symptoms, it can also make them worse if I push myself too hard. I’ve had to learn my physical limitations by testing them, and they are a lot lower than someone living without an autoimmune disease. The idea that arthritis is an “old person's” condition is so pervasive that people often think it can’t really be that bad, especially since I don’t look sick and I’m not old. But invisible illnesses like arthritis and other autoimmune conditions can dramatically change your life, no matter your age or outward appearance.
I’ve hit breaking points with my arthritis while gardening many times. I have sat, covered in dirt and crying because I couldn’t bend over or kneel to clear weeds from an in-ground garden bed. I thought the solution was to just scoot along on my butt, but quickly discovered that even though this was easier on my joints it was still physically exhausting and left me too fatigued to finish. I have lost the hand strength to grip a shovel or rake on more than one occasion. I have felt scared that someday even the little things I do could be beyond my ability if I’m not careful. Gardening is rooted in my soul, a part of my identity, and I don’t know what I’d do without it at this point. Gardening and nature in general have brought me out of the darkest moments in my life. Tending to plants gives me purpose and fulfills my need to nurture.
This is the reason I sit here day after day and type these words to you: I grew from these challenges, and I want to show you how you can too. Now these hard times that I faced are just more proof that I know I can trust myself to stand up for my needs and prioritize them. They solidified my identity and brought me closer to knowing myself. Most of this came from mindset (we are hard-wired to see the negative first, but that can be overcome) but after that mindset shift, in order to make real concrete change I invested in gardening tools that would make it possible for me to continue doing what I love. The biggest change I made in the garden to support my body came in the form of 6 new elevated garden beds from Gardener’s Supply Company.
No-Bend, Self-Watering Elevated Planter Box
These no-bend garden boxes keep plants hydrated via a series of innovative, connected reservoirs that deliver water to roots on demand. Four generous 5-gallon reservoirs extend the time between waterings and create more even moisture throughout the bed. And, since water is drawn primarily from the bottom instead of applied from the top, less water is lost to evaporation too! 10" planting depth accommodates a wide variety of crops, from tomatoes to root-crops like carrots.
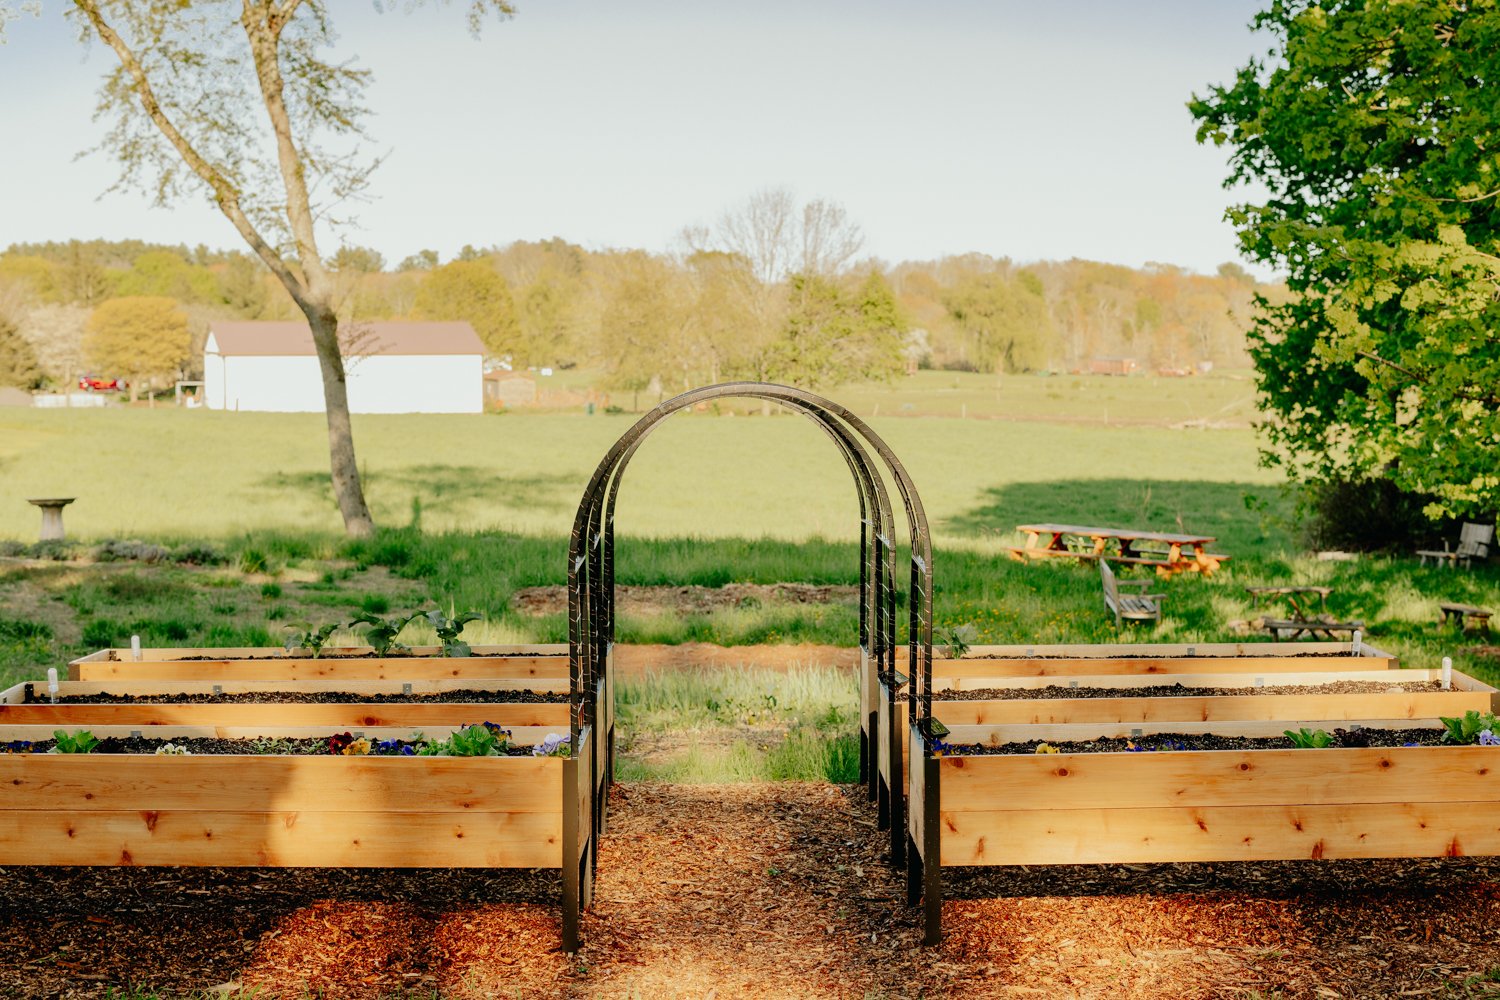
The height of the planter box has other advantages too: fewer weeds, reduced maintenance, and fewer critters nibbling at your prize plants. The sturdy aluminum legs won't buckle or sag, and the wood is naturally rot-resistant and safe for your organic crops. Best of all, it allows me to garden at table-height, eliminating the bending and kneeling that makes gardening difficult on my joints.
They are made of durable cedar wood with metal legs, and I like that the natural materials blend in seamlessly with the environment.

Benefits of raised beds
Able to grow a large variety of fruits and vegetables
Less weeds
Easier to maintain
Control of soil quality and composition
Reduces pests
Depending on the size, raised beds can be a disadvantage for growing larger crops. They aren’t well suited for growing things like corn or potatoes for example. But you’d be surprised how large a plant you can fit - for example, I am growing squash plants along the edges of my beds and trailing them down the side of the planter box.
The best materials for raised beds
Raised beds can be made from many different materials, including metal, wood and plastic. Many people do not want to grow in plastic containers due to concerns of chemicals leaching into the soil (although it’s unlikely that your plants would absorb enough of these chemicals to actually make it into your food). Metal containers can be durable if well constructed, but can be susceptible to rust and don’t always fit into the natural look of your garden since they can be a bit industrial. Wood is a natural and renewable material, and made out of rot-resistant trees such as cedar or cypress such as these beds they will last you a very long time and can even be treated to extend their lifespan. Wood garden beds will blend right into the natural surroundings.
How to build raised beds
Assembling the elevated garden beds from Gardener’s is a little involved, but you don’t need to be a construction expert or have any fancy tools to put them together. I was able to build a single bed in about an hour, and each one after that went a little bit faster. The instructions spell everything out step by step, and with a little patience you’ll have your beds assembled in no time! I do recommend having a second person to help you, since the beds are fairly large and need to be turned on their side for some steps of assembly. We organized all the pieces on the lawn near where the beds would be placed, then worked through each section step by step. You build the exterior of the box first and then each of the four self watering trays sits on top of the metal rail inside. Because these are elevated off of the ground, they are technically container gardens - it’s important to account for the fact that you will need potting soil (made with no actual dirt), not garden soil to fill these beds to provide proper drainage and weight requirements. I filled mine with Coast of Maine’s Bar Harbor Blend Organic Potting Soil (more to come on why I chose this amazing company)
How to maintain raised beds
These raised beds are made from durable and high quality cedar, which will last a long time. You can extend their life even further by sealing the beds. Use a food safe sealer, especially on the interior of the beds, like this one recommended by Gardener’s Supply. The exterior is stained using a finish similar to this one from Gardener’s in “Lakeside Cedar”. With this simple step done, you’re ready to fill your beds and plant.
Since we have harsh winters, I will probably use a firewood cover to protect them when not in use. This firewood cover hack should work for many different raised bed shapes and sizes!
My Honest Review of the Gardener’s Supply Co. Elevated Planter Boxes
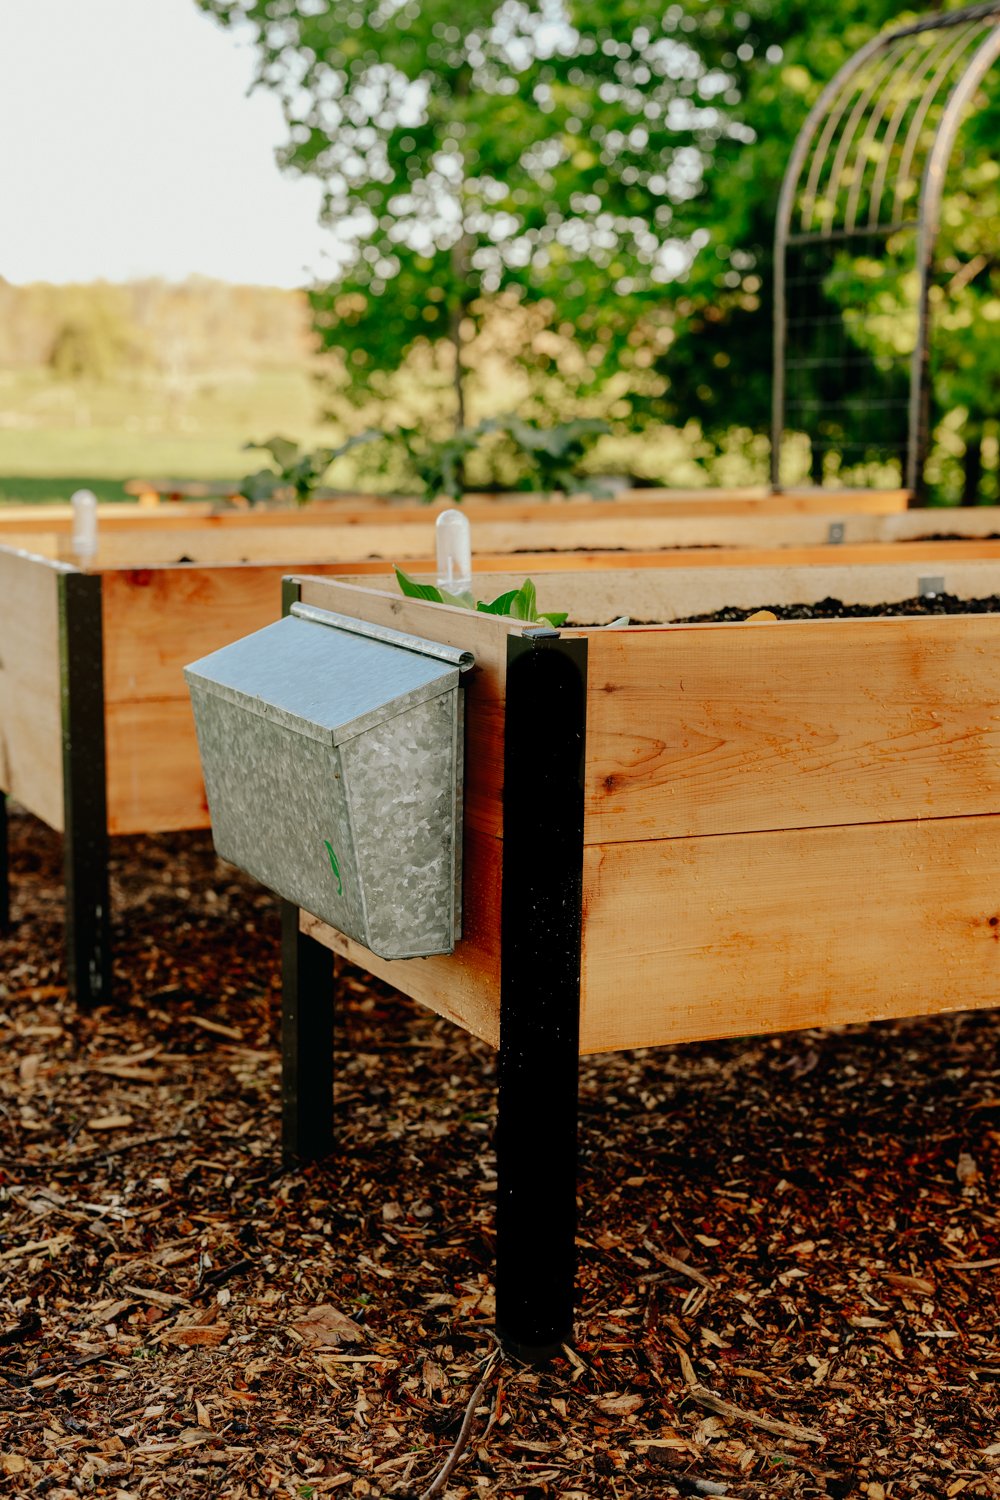
These elevated garden beds from Gardener’s are well constructed, and built to last. I strongly recommend them, especially if you garden with chronic pain like I do. The design is really beautiful and fits in nicely with the natural landscape. I really like the contrast of the black metal legs with the warm wood tones. Best of all, they empower me to do what I love - garden! - without pain from bending and kneeling, and eliminate garden tasks like weeding that drain my limited energy.
Constructing the beds was probably the only area that I can see being a downside for some. It’s not complicated, but it is time consuming and requires that you have a helping hand in order for things to go smoothly. Building boxes and keeping everything square and level can be deceptively challenging, and we encountered a few areas where I wish we had thought to build ours on a flat level surface such as a driveway in order to help everything line up correctly.
I think we will have these garden beds for a long time to come. They are rock solid and make the space feel so much more intentional and cohesive. My garden truly feels like a sanctuary now that I am always finding myself drawn to spending time in.
Toolbox
This galvanized toolbox was such a pleasant surprise. I’m always forgetting my tools - either leaving them in the house which means trips back and forth that drain my limited energy, or leaving them outside to get ruined in the rain! With this box that problem is totally eliminated, and the metal stays pretty cool to the touch too.

Self-watering reservoir
You can get these elevated garden beds without the self-watering insert, but keep in mind that any bed lifted off of the ground is going to dry out much faster than an in-ground garden bed. Without a self-watering reservoir you may need to water every single day. These reservoirs are designed specifically for elevated garden beds and planter boxes, with a 5-gallon reservoir that reduces time between waterings & spreads moisture more evenly for healthier plants. It reduces the need for daily watering, creates more even moisture throughout the bed, and promotes deeper water absorption as roots reach the reservoir. And since you'll mostly be watering from the bottom instead of the top, less water will be lost to evaporation. When combined with additional inserts, it can elevate almost any size elevated raised bed into a self-watering one. These inserts are made from durable, thick plastic (food grade of course) and installation couldn’t have been simpler. The trays simply rest on the metal rail on the inside of the beds and are connected with flexible tubing. The water level indicator leaves nothing to chance, so I always know when it’s time to add more water. I’ve also noticed they serve double-duty as a rainwater collection system, since they fill naturally during heavy rain storms.
What I’m growing in my raised beds
Since these raised garden beds are a generous 10” deep, I am able to grow everything that I would normally grow in my in-ground garden in these beds. Here’s the list of everything I’ll be growing in these raised beds this year:

BASIL
BELL PEPPERS
BROCCOLI
BRUSSEL SPROUTS
CARROTS
CHERRY TOMATOES
CHIVES
CUCAMELON
CUCUMBERS
EGGPLANT
FORGET-ME-NOTS
GREEN BEANS
KALE
LETTUCE
Birdhouse Gourd
PANSIES
PARSLEY
RADISH
SNAP PEAS
SPINACH
SQUASH (SUMMER, BUTTERNUT, ACORN)
STRAWBERRIES
SWISS CHARD
VIOLAS
Are you team raised beds, or in ground? Let me know why in the comments!
![The Power of Nature: How To Make Infused Oregano Oil for Your Health and Wellness [Recipe]](https://images.squarespace-cdn.com/content/v1/60e85024dc86d643da81c96a/1682625337753-AFI1M6MRRMDQ5CBNY2TX/unsplash-image-Fl2Ki3_GZIU.jpg)
The Power of Nature: How To Make Infused Oregano Oil for Your Health and Wellness [Recipe]
Oregano is probably one of the safest, most widely studied, accessible and effective herbs for any beginner herbalist to begin experimenting with. Not only can you easily grow an abundance in your own backyard, it’s readily available at nearly every grocery store if you can’t grow it yourself. And truly all you need to make an infused oregano oil is oregano, and olive oil.

The Cottage Peach is reader-supported. When you purchase through links on our site, we may earn an affiliate commission at no additional cost to you. All opinions are our own.
Last fall, I woke up with a deep earache - an ear infection the likes of which I had not experienced since I was a child. As a result, I found myself standing in front of the bathroom mirror with my head tipped to one side dripping a mysterious oil from a jar into my ear. Anyone walking by probably would’ve died laughing, but no one was laughing when a few days later I happened to have my yearly physical and asked my doctor to see if the infection had fully cleared as I expected - and it had.
Oregano oil is so trusted and well understood that even this western medicine professional said to me “I’m not surprised that it worked, because oregano is very anti-bacterial”
Oregano is probably one of the safest, most widely studied, accessible and effective herbs for any beginner herbalist to begin experimenting with. Not only can you easily grow an abundance in your own backyard, it’s readily available at nearly every grocery store if you can’t grow it yourself. And truly all you need to make an infused oregano oil is oregano, and olive oil.
Benefits of oregano oil
So what is oregano oil good for? According to the NIH, “Essential oils of oregano are widely recognized for their antimicrobial activity, as well as their antiviral and antifungal properties…recent investigations have demonstrated that these compounds are also potent antioxidant, anti-inflammatory, antidiabetic and cancer suppressor agents.”
Oregano oil is high in compounds that are potent antioxidants, such as carvacrol, thymol, and triterpenes. Antioxidants may protect your cells against free radicals, which may play a role in heart disease, cancer and other diseases. Free radicals are molecules produced when your body breaks down food or when you're exposed to tobacco smoke or radiation.
Oregano oil is also excellent for fighting against fungal and bacterial infection thanks to its antifungal and antimicrobial properties (that’s why it helped me with my ear infection!)
It is known that oregano oil may help with acne, asthma, psoriasis and wound healing. And the best way to get these oregano oil health benefits is through infusing your oregano in olive oil to extract the essential oils packed within.
What is oil of oregano?
Oil of oregano and oregano infused oil are the same thing. They are both, however, different from oregano ESSENTIAL oil, which is much more concentrated and not safe for consumption. Oil of oregano is a more diluted oregano oil that is safe for all applications.
Oregano oil uses
So how can you use oregano oil? The simplest application is to just incorporate it into your salad dressings and cooking. This infused oil is entirely edible and adds beautiful depth of flavor to your dishes while also imparting the health benefits listed above.
Oregano oil for colds
In a lab environment (in-vitro) oregano was shown to kill certain cold and flu viruses. We know that this doesn’t always translate to the same effect inside of the body, but while there is limited evidence outside of a lab environment to support the use of oregano oil for colds it may help with a cough much the same way that Vicks vaporub does - minus the petroleum.
Oregano oil for skin
For certain types of acne caused by a buildup of bacteria, using infused oregano oil as a face moisturizer allows you to experience the antimicrobial effects of oregano oil and help reduce the appearance of blemishes. If you plan to use it in this application, choose a non-comedogenic carrier oil for your infusion so you don’t end up just clogging your pores more.
Oregano oil for ear infections
You’ve probably figured this out by now, but oregano oil is great for ear infections. To use, I just dipped my pinkie into the jar of infused oil and allowed one drop to fall into my ear. I did this 3x a day for 5 days until the pain was gone.
Homegrown VS Store Bought Herbs
Store bought herbs don't just look different, they ARE different. So why are homegrown herbs better for you?
Think about the difference between a bagged, pre-chopped salad and the lettuce you picked up from the farmers market.
They're both still lettuce, but one is darker, fresher, and much more flavorful.
That flavor directly translates to compounds in the plant that are nutritionally dense. It tastes better because it's better for you! The older the produce is, the more those nutrients break down.
Herbs are the same way. When you get store bought herbs, there is almost no way to guarantee their freshness or quality. Yes, even dried herbs can be fresh! It's likely that if you're seeing faded colors or a lot of dust in your herbs indicating it's begun to break down, the beneficial compounds within the herbs themselves are not potent anymore.
Growing your own herbs (here’s my favorite place to get oregano seeds) or buying from a small herbalist shop is the best way to ensure the quality of your final herbal preparation. It also eliminates the great amount of waste and emissions involved in packaging and shipping herbs, since even though many herbs like oregano grow all over the country, when you purchase them from a large store they often come from overseas. If you can’t grow your herbs yourself or find a small local shop, Find these herbs and more by tapping here to visit my favorite online herb shop!
What Type of Oil is Best for Infusing Herbs?
You can use many different oils to infuse herbs depending on your preference, budget and intended use. I used olive oil for this herbal oil infusion, but sweet almond oil, grapeseed oil and apricot oil also will work as carrier oils safe for topical use. Olive oil is by far the cheapest and most easy to find, and has a longer shelf life, but sweet almond oil is affordable as well and has no smell, plus it includes vitamin E and K. Both are good options that I use regularly! I haven’t tried grapeseed or apricot oil myself.
Best Container for Herbal Infusions
When infusing herbs in oil, you should always choose a plastic free container to avoid leaching any dangerous chemicals into your oil. I like to use a glass mason jar to infuse my oil since we always have so many extra on hand and they are durable and cheap, but if you don’t have somewhere dark you can store a clear jar, then a tinted glass jar or bottle is best to keep out sunlight, since UV rays can reduce the effectiveness and longevity of your infused oils.
How to make oregano oil
There are many ways to make an infused oil but my favorite is a simple folk method - this means we won’t be making any exact measurements. You’ll find that many herbalists employ a folk method for their skincare concoctions since accuracy in dosing is not generally a requirement unless taken internally.

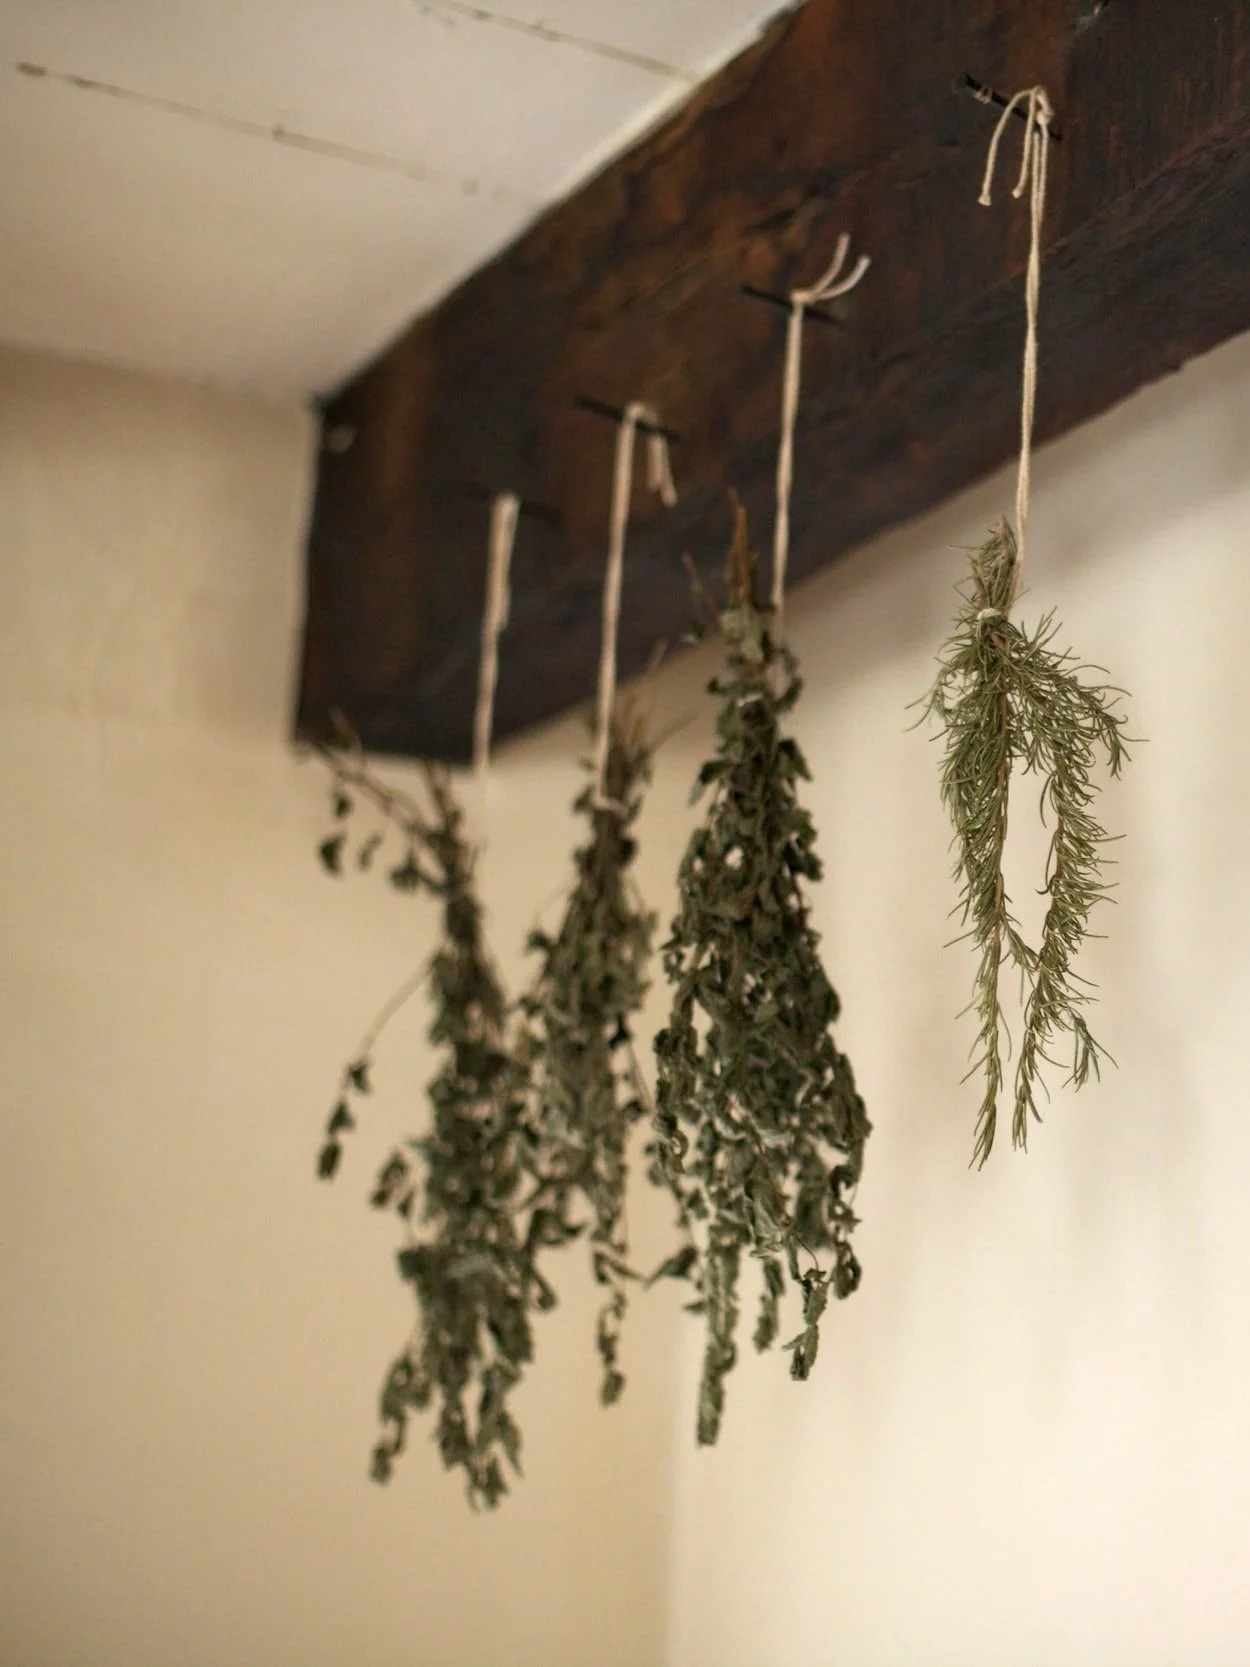
To make an infused oil using the folk method, all you need to do is fill your mason jar about halfway with dried oregano, then cover at least an inch above the herbs with your oil of choice. I usually end up filling the jar almost all the way to the top. Tap lightly on a solid surface to make sure there are no air bubbles trapped in the oil and place the infusing oil jar in a cool dark place such as a closet or pantry (somewhere out of direct sunlight) for about six weeks. You can regularly shake the jar to redistribute the oil, and you may notice that after the first day or two much of the oil has been absorbed into the dried herbs and you will need to add more to keep the flowers completely covered in oil. This is normal and to be expected.
If you would rather not wait a full six weeks to have ready-to-use infused oil, you can speed up the infusion process using your stove top. Place your jar in a double boiler on your stove and simmer as low as possible for up to 3 hours. Your oil will be ready to use as soon as it cools, or you can wait a couple of weeks to allow your infusion to develop and grow stronger. You can also simmer your jar in a slow cooker for 3 hours the same way.
Some herbalists allow their oil to infuse on a sunny windowsill - personally I am against this method in most cases as it causes the oil to be exposed to large amounts of ultraviolet light which can break down the beneficial compounds. It may be fine if you plan to immediately move the jar to dark storage once it is done, or if you allow it to infuse only a couple of weeks on the windowsill before moving to a darker spot to finish infusing.
Will you try this easy and fast oregano oil recipe?

![Make This Easy + Natural Botanical Hand Salve [Recipe]](https://images.squarespace-cdn.com/content/v1/60e85024dc86d643da81c96a/b57698b0-de70-4101-afaf-7af57788237d/Herbal+Face+Steam+Recipe+by+The+Cottage+Peach-1.jpg)

Unlocking the Culinary Potential of Your Garden With Edible Flowers
When starting a cut flower garden with edible flowers, you may not know in advance if you’ll actually enjoy the flavor of the flowers you are growing - most of us have never eaten flowers before! Often, they taste a lot like they smell. But in the case of nasturtiums for example, they can have an unexpected heat. Go into your garden planning with a mindset of experimentation and you are sure to be amazed, even if your flowers end up being more for the birds and bees than your plate. There’s no such thing as a flower failure. And don’t forget that many of your favorite vegetables and fruits like snap peas and strawberries start off as flowers that can be eaten and adorned too. If you’re new to gardening, these experiments will give you the experience you need to grow confident in all your future gardening endeavors. If you’re already a gardening expert, edible flowers offer the opportunity to bring something new and unexpected into your regular gardening routine, a colorful surprise to enjoy all summer long.
The Cottage Peach is reader-supported. When you purchase through links on our site, we may earn an affiliate commission at no additional cost to you. All opinions are our own.
Edible cut flower gardens can bring so much joy to your kitchen. I love topping a fresh salad with spice nasturtiums, or pressing pansies into shortbread cookies. I’m a firm believer that adults need opportunities to play too - and growing flowers that we can eat is the perfect way to incorporate that playful energy into our days. Outside of garnishes and baking, they can make an excellent cup of tea, or folded into fresh churned butter you can add color to your breakfast toasts and more. The options are endless when it comes to what you can do with edible flowers. Playing with texture, scent and color can turn an otherwise basic recipe into something really special to share with friends and family this summer and beyond. My favorite cakes have been topped with sage leaves and calendula blossoms, and you can make a mocktail truly unique with just a few sprigs of lavender.
Health Benefits of Flowers
There is a growing body of evidence to suggest that fresh flowers inside can have a positive impact on mental health. Here are a few of the key benefits:
Boosts mood: Research has shown that flowers can have an immediate impact on mood, making people feel happier and more relaxed.
Reduces stress: Flowers have been shown to have a calming effect, reducing feelings of anxiety and stress.
Improves memory: Studies have found that having fresh flowers in the home can improve memory, particularly in older adults.
Increases creativity: Flowers have been found to stimulate the mind and increase creativity, making them a great addition to workspaces or creative spaces.
Promotes well-being: Fresh flowers have been shown to promote a sense of well-being, helping people to feel more balanced and centered.
Provides a connection to nature: Flowers are a reminder of the beauty and abundance of nature, providing a connection to the natural world and promoting feelings of peace and calm.
When starting a cut flower garden with edible flowers, you may not know in advance if you’ll actually enjoy the flavor of the flowers you are growing - most of us have never eaten flowers before! Often, they taste a lot like they smell. But in the case of nasturtiums for example, they can have an unexpected heat. Go into your garden planning with a mindset of experimentation and you are sure to be amazed, even if your flowers end up being more for the birds and bees than your plate. There’s no such thing as a flower failure. And don’t forget that many of your favorite vegetables and fruits like snap peas and strawberries start off as flowers that can be eaten and adorned too. If you’re new to gardening, these experiments will give you the experience you need to grow confident in all your future gardening endeavors. If you’re already a gardening expert, edible flowers offer the opportunity to bring something new and unexpected into your regular gardening routine, a colorful surprise to enjoy all summer long.
Overall, fresh flowers inside have been shown to have a positive impact on mental health, helping people to feel happier, more relaxed, and more connected to the world around them. Whether you enjoy having fresh flowers in your home, workspace, or creative space, the mental health benefits are undeniable.
Below are some of my favorite flowers for a cut garden bed. They all have a good vase life and are easily started by seed. There are many, many other edible flowers not included on this list, so I encourage you to do some research of your own.

Calendula
Calendula prefers partial shade, and grows 10-12” tall. For the longest vase life, pick the flowers when they’ve just opened, and pick often to encourage more blooms.
The leaves and flowers of Calendula are edible. The leaves are bitter, and best used in salad. The flowers are rich in antioxidants and are used in salads, or as a garnish.
Both the leaves and flowers can be used to make tea. Pick fully open blooms, and if you’d like, leaves. You can use them fresh, or save some for later. For storage, let them dry indoors until they are crunchy and save them in an airtight container.
Calendula has been used externally to treat rashes, burns, and wounds for hundreds of years. Its dried flowers are said to boost the immune system.
Zinnia
Zinnia prefers full sun, and its height depends upon which variety you are growing. To determine when they should be picked, use the wiggle test: hold the stem about 8” down from the flower and shake it gently. If the stem bends, it is not ready. If it stays perpendicular, it’s ready for harvesting. Harvest often for more blooms.
Zinnia is used in salads and as a garnish. Fresh or dried flowers can be used to make tea. They can also be used to make a simple syrup for use in cocktails (or mocktails).
Zinnia have been used medicinally for their antifungal, antioxidant, antibacterial, and antimalarial qualities.

Flower Sunspot Sunflower
Unsurprisingly, Sunspot Sunflowers grow in full sun. They are a dwarf variety, growing only 2-3 feet tall.. For the longest vase life, they should be picked when they are just starting to fully open.
Sunflower seeds are packed with nutrition and are a source of protein. The seeds are ready for harvesting when the back of the sunflower has begun to brown. At that point, they will be dry enough to remove from the flower. Alternatively, they can be kept on the flower in a dry space.
Sunflower petals can be used in soups or salads, or as a garnish. Dried petals can be used to make tea.
Sunflower seeds support the immune system, and are linked to lower cholesterol and blood pressure. They have antioxidant, antimicrobial, and anti-inflammatory properties.
Dried Sunflower petals are used in salves, facial scrubs, and soap, among other things.
Snapdragons
Snapdragons grow in full sun. Their height varies depending on variety. They should be picked while still closed for the longest vase life. They should be picked often to encourage blooms.
Snapdragon leaves and flowers are edible and anti-inflammatory, but some varieties can be bitter. It is used to make tea, in salads, or as a garnish.
The leaves and flowers of Snapdragons have been used for a wide variety of symptoms and diseases, from watery eyes to liver disorder.

Lisianthus
Lisianthus grow in full sun, reaching between one and three feet tall. They should be picked when one or more flowers on the stem are open. They are also used in dried flower arrangements.
Lisianthus flowers are edible, but are quite bitter.
Lisianthus has been used for its antibacterial and antifungal properties.
Pincushion
Pincushion grows in full sun, and is 6-12 inches tall and 9-24 inches wide. They are used in fresh and dried floral arrangements. Pincushion flowers should be picked when they are still in bud for the longest vase life.
Pincushion is used in tea, salads, and garnishes.
Pincushion has been used to treat inflammation, and to treat coughs, sore throat, and fever. Externally, it is used for skin conditions such as eczema and rashes.
China Aster
China Aster grows in full sun, reaching 3 feet tall. Flowers should be picked when they are halfway open for the longest vase life.
China Aster flowers and leaves can be used fresh or dried, in salads and tea. To make tea for storage, dry your flowers upside down until they crumble easily, then put them in an airproof container.
China Aster has been used to treat earaches, headaches, and toothaches.

Gomphrena (Globe Amaranth)
Gomphrena grow in full sun and are about 2 feet tall. When harvesting, their stems should be cut at the base of the plant. They are beautiful in fresh and dried arrangements.
Gomphrena’s fresh flowers are not appetizing due to their texture, but can be used as a garnish or to make tea.
Gomphrena has been used for a wide variety of medicinal purposes, from diabetes and high blood pressure to respiratory disorders.
Verbena (Common Vervain)
Verbena grows in full sun, reaching 1-5 feet tall. They are annual or short-lived perennials. Harvest when half of the flowers have opened.
Verbena is used in fruit salads, desserts and for tea.
Verbena is used externally to treat burns, arthritis, and itching, and internally for insomnia, epilepsy, and anxiety.
Stock
Stock grows in full sun or partial shade, and is from 1-3 feet tall. For longer vase life, flowers should be picked when they are a third to halfway open. They are excellent for use in dried flower arrangements.
Stock is a member of the cabbage family. Its flowers and pods are edible and are used in salads and tea, but its leaves, stems, and roots are not edible. Their flavor is a bit peppery.
Stock has been used as an expectorant and as an aphrodisiac.
What edible flowers do you grow?
![Preserving the Beauty of Peonies: Strategies for Prolific Blooms and Healthy Plants [Guide]](https://images.squarespace-cdn.com/content/v1/60e85024dc86d643da81c96a/4b2f4d11-b3bf-47b3-9c63-22245a84d175/Flowers+May+2022-6.jpg)
Preserving the Beauty of Peonies: Strategies for Prolific Blooms and Healthy Plants [Guide]
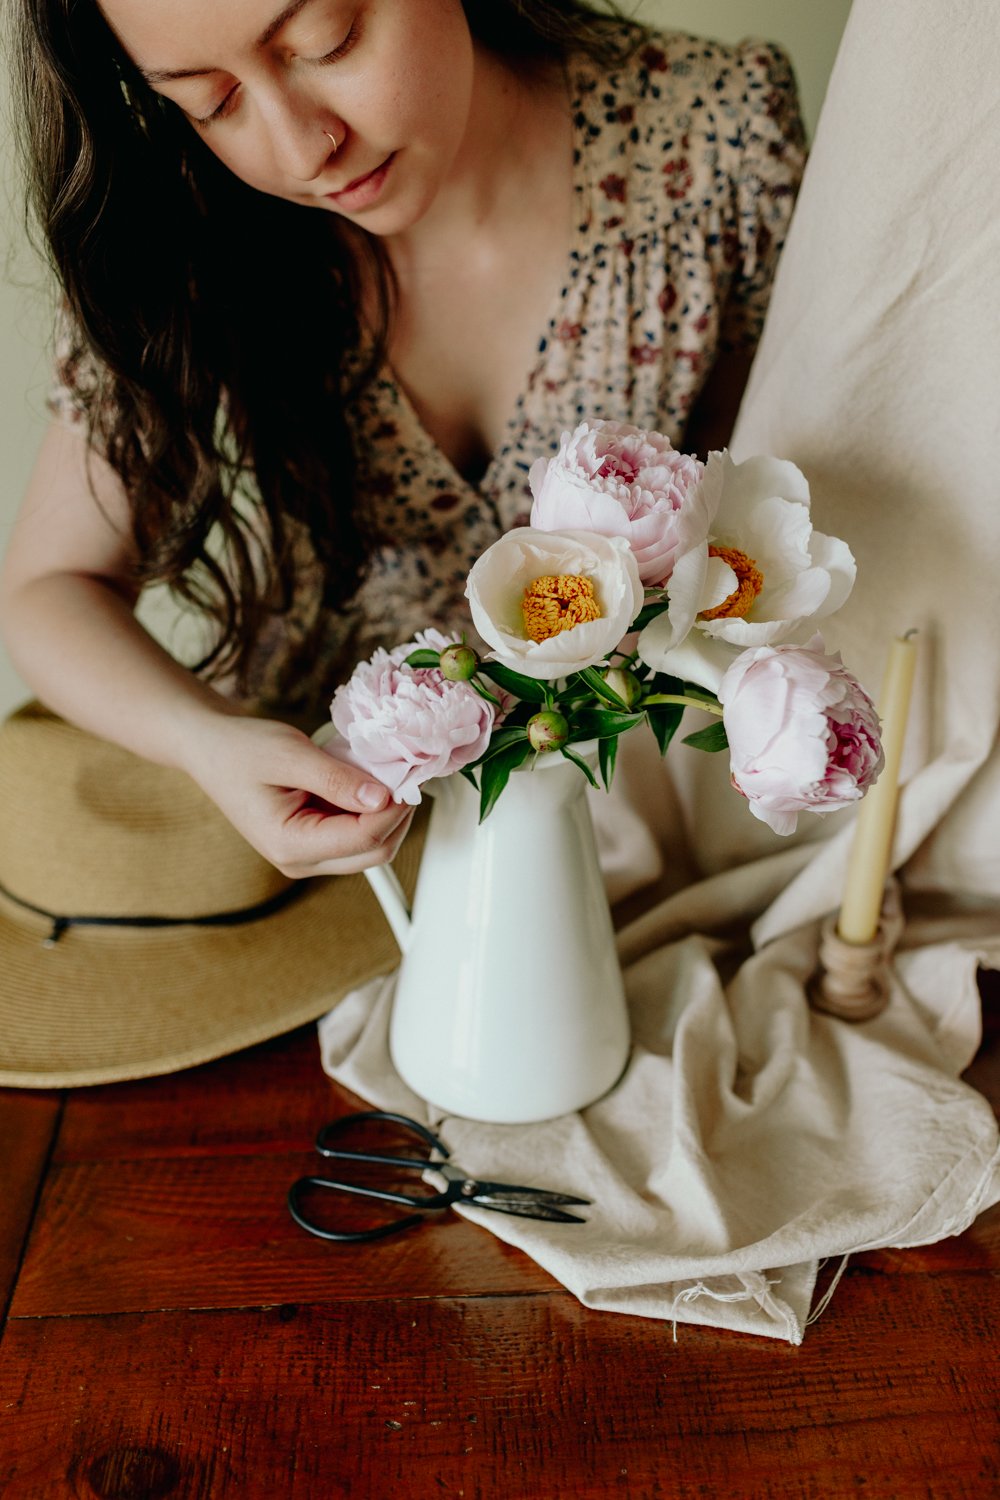
May is for three things; asparagus, rhubarb and peonies. These are the first true signs that spring is really here to stay after a long, cold and dark winter. Our pink double peonies live just outside my bedroom window, and in May I begin checking on them daily for signs of life. Almost overnight they can burst into a beautiful display of fragrance and color, ready for picking.
The Cottage Peach is reader-supported. When you purchase through links on our site, we may earn an affiliate commission at no additional cost to you. All opinions are our own.
May is for three things; asparagus, rhubarb and peonies. These are the first true signs that spring is really here to stay after a long, cold and dark winter. Our pink double peonies live just outside my bedroom window, and in May I begin checking on them daily for signs of life. Almost overnight they can burst into a beautiful display of fragrance and color, the many petaled blooms soon overrun with my least favorite garden visitor (ants).
Double peonies seem like they have hundreds of petals all packed in close together, and the denseness of them even in full bloom always amazes me.
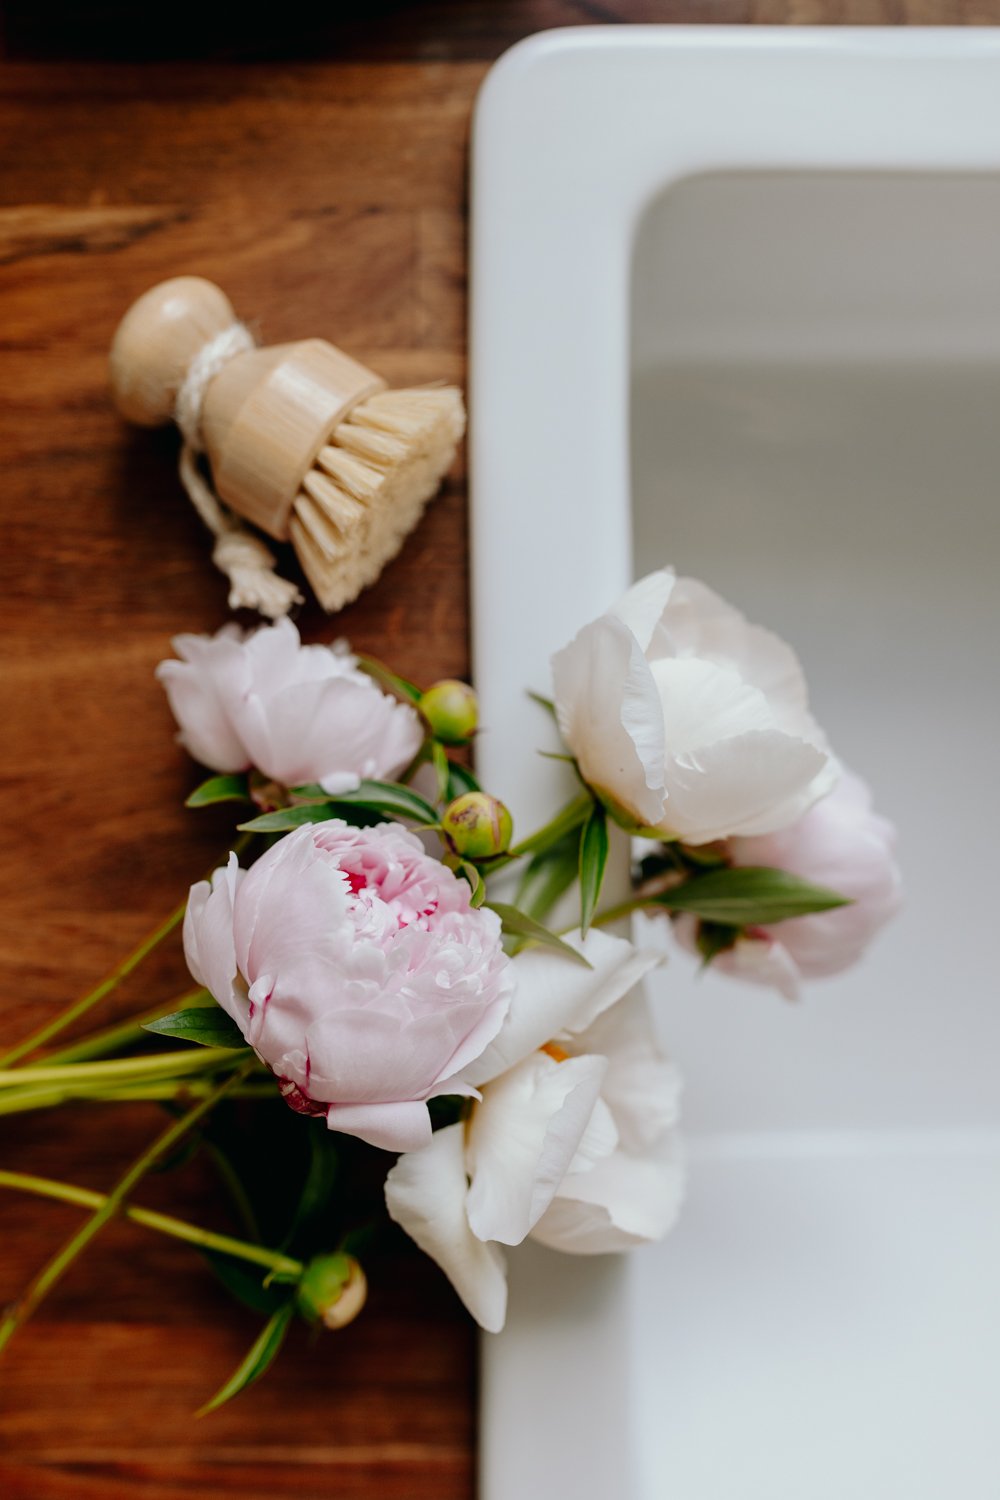
We also have a huge patch of white single peonies that I am tempted to bury my face in every year. This plant is so well established now that we have more blooms than I even know what to do with at times. The single peonies are a lot more delicate, with five to ten thin petals bending off the pollen bearing stamen in all directions in a wild display that somehow feels chaotic and classic all at once. Just writing this I can practically smell them again!
Each spring I bring fresh cuttings inside and the diverse texture stands alone in a vase with no need to add fillers or greenery. But, these beautiful blooms are short-lived and leave me wanting more every time. Thankfully I have a trick for extending the life of my peonies and enjoying fresh cut peony flowers in my home up to a month after they would normally be blooming. But before we delve into that, let’s make sure you are set up for success in growing peonies of your own. That way, even if you do not have peony plants blooming in your garden this spring, you can get them in the ground come fall and save this post for next year.
Where do peonies grow?
Peonies are hardy to Zone 3 and grow well as far south as Zones 7 and 8. Peonies even relish cold winters, because they need chilling for bud formation.
How to grow peonies
If you’re wondering how to plant peonies, you’ve come to the right place! Peonies are most commonly grown from a bare-root tuber. While you can grow peonies from seed, it will take five to six years before they bloom, so generally you’ll be starting with a tuber. You’ll want to plant your peony tuber in an area that gets full sun, in well draining soil. They will rot in water logged soil. The most important thing about planting your peonies is orienting the tuber correctly in the hole. Peony tubers have a top! You should plant your peonies in late fall - September or October.
Space peonies 3 to 4 feet apart - they can get very big and bushy!
Dig down two feet to loosen the soil. Then backfill until your hole is only about 2 inches deep and place the tuber so that the “eyes” face upward and the roots are about two inches below the soil surface.
You can enrich sandy or heavy soil with compost and incorporate about one cup of bone meal into the soil, but it’s not necessary.
Water immediately after planting.
There are six peony flower types to choose from: anemone, single, Japanese, semi-double, double, and bomb. Peonies come in many shades of pink, purple, red, white, and yellow. I love to grow pink double peonies because they are so fluffy with all the extra showy petals! But a simple white peony is such a classic too.
A final note; choose your location wisely, because peonies do not like to be transplanted. They are unlikely to bloom for 2-3 years after transplant.
Grow peonies in pots
You can grow peonies in pots, but you’ll need a very large container with excellent drainage. The planting depth should be the same as when you are planting peonies in the ground - only about an inch or two below the surface. Peonies grown in pots should be allowed to almost dry out before watering. They will also need to be protected from deep freezes in the winter.
How tall do peonies grow?
There are two common types of peonies, so if you’re wondering how big peonies can grow, it’s important to know which type you’re looking at. Herbaceous peonies grow best in zones three through seven and can grow to be two to three feet tall and two to four feet wide. These are the typically bushy type peonies seen in most gardens. Tree peonies grow best in zones three through nine and resemble small shrubs, growing as tall as seven feet. We’re talking about herbaceous peonies in today's post, but let me know in the comments if you grow tree peonies in your yard!
How long do peonies take to grow?
Peonies are slow growers and can typically take up to three years to fully mature. If you grow tubers from an established plant you may see one or two blooms in the first year. Growing peonies from seed can take six or seven years and isn’t typically recommended. The older your peony plant is, the more bushy and bloom filled it will be.
How much sun do peonies need?
Peonies love the sun, although they are sensitive to extreme temperatures. Peonies grow best in areas with six to eight hours of direct sunlight. It’s also important to make sure you’re spacing your peonies at least 2 feet apart in order to increase air circulation around the plants and reduce the risk of fungal disease.
Do peonies attract ants?
While it’s a myth that peonies need ants in order to bloom it is true that peony buds secrete a sweet, sugary nectar that attracts ants. Scientists have yet to figure out the true purpose of this symbiotic relationship, but it’s fun to imagine the possibilities!
Should peonies be cut back in the fall?
Since peony plants start from tubers, you want them to store as much energy as possible underground over the winter. This is why you should always cut back your peony plants as close to the ground as possible in the fall after the foliage has completely died back or yellowed after a hard frost. This advice only applies to herbaceous peonies - tree peonies should be cut back immediately after they bloom.
Should you mulch peonies?
It’s not necessary to mulch established peony plants, but you can apply a thin layer of straw mulch in late fall on plants that are less than two years old.
How do you winterize peonies?
To winterize peonies, simply cut back to the ground. If the plants are less than two years old, you can add a thin layer of straw mulch to protect them when the ground freezes.
Should you deadhead peonies?
Cutting off your peony blooms or deadheading will allow your peony plant to redirect its energy into the roots and grow bigger. And with the tip below, you’ll want to cut off all your peony blooms right away so you can save them for later anyway!
How to make peonies last longer
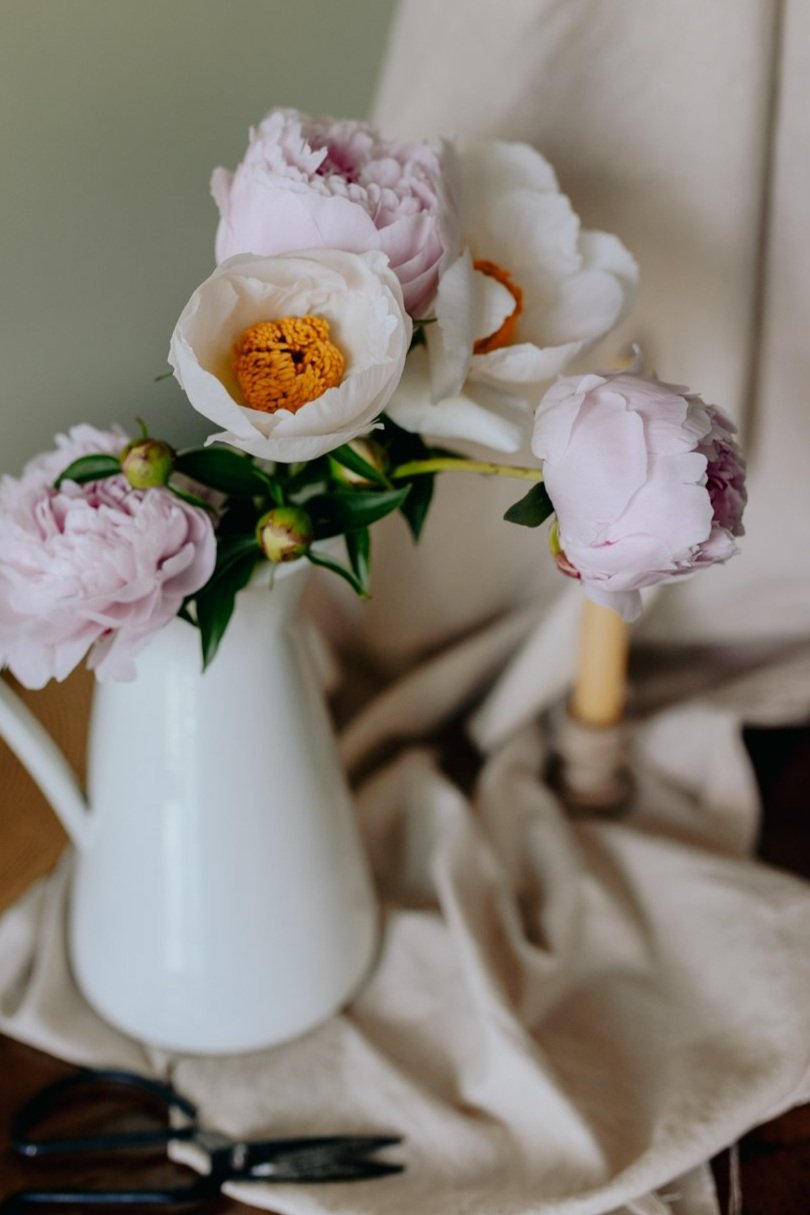
Did you know that you can make your short-lived peony blooms last for a month or longer? Peonies are strongly associated with spring, but you can have fresh peony flowers into early summer with this trick. The key is timing your cuttings correctly and using cold storage. If we cut our peony blooms before they have a chance to open, then suspend their growth by convincing them to go dormant using cold temperatures, you can effectively pause their bloom cycle and restart it again when you want fresh flowers for your table in June or even early July.
Time your cutting perfectly: This is key. The bud should still be closed, but squishy and only slightly firm like a marshmallow. If your peonies aren’t white, the petal color should be showing through.
Cut the stem at a steep angle using your sharpest clippers just above a set of leaves.
Remove all of the leaves and place in a plastic Ziploc bag. You can wrap in a damp newspaper, Stasher bag if it’s large enough, or plastic wrap. But you’ll have to keep the newspaper damp at all times.
Place the bag in the coolest part of your refrigerator, close to the back.
When you're ready to use your flowers, take them out of the fridge and place in tepid water. As they warm back up, the petals will open revealing perfect fresh blooms! This can take a day or so.
The hardest part of this process is knowing when to pick the flowers. If you struggle with your blooms not opening or opening while still in the fridge, you’ve picked them at the wrong time. Keep an eye out over on Instagram as I’ll be sharing a post showing the correct stage for harvesting as soon as my peonies bloom this season!

Adding herbal and aromatherapy elements to your bathing ritual has been a long standing tradition in cultures around the world, but there’s just something extra rewarding about it when you grow those flowers and herbs yourself. So head out to the garden and clip a few sprigs of whatever calls to you - we’ll go over some of the easiest ways to include plants in your shower routine.
Learning about how different herbs can provide different benefits for the skin and body can bring you closer to nature and yourself, as well as offering a ton of ways you can support yourself through a self care ritual not rooted in consumerism (hard to find these days). You’re probably familiar with using fragrant botanicals like eucalyptus and lavender in your spa shower routine, but here’s a few more herbs and flowers you should consider including next time you’re looking for a soothing sensory experience in the shower: