
BACKYARD GARDENING MADE SIMPLE

10 Perennial Plants That Will Thrive in Your Shady Garden
Beautiful shade gardens are a bit trickier than sunny gardens simply because there’s a much wider variety of perennials that grow in full sun than perennials that grow in shade. It can be done, though, and I’m here to help you do it.

The Cottage Peach is reader-supported. When you purchase through links on our site, we may earn an affiliate commission at no additional cost to you. All opinions are our own.
Choosing the Best Flowering Perennial Plants for Your Shade Garden
Beautiful shade gardens are a bit trickier than sunny gardens simply because there’s a much wider variety of perennials that grow in full sun than perennials that grow in shade. It can be done, though, and I’m here to help you do it.
One way to make a garden is to fly by the seat of your pants – go to the garden center, pick what looks pretty to you, make sure they like the shade, then figure out where to put them when you get home. I did plenty of that myself in my early years of gardening, and still do sometimes. As I’ve become more experienced, though, I’ve come to appreciate the role of planning in garden design.
What is a Perennial Plant?
First, let’s talk about what a perennial plant is not. You know when you go to a garden center in the spring and there are plants already blooming with bright flowers and you’ve been starving for color all winter and you Must. Buy. Them. All? Those are annual plants, plants that will die in the fall of the year you put them in the ground. You get the instant satisfaction of pretty colors in your yard, but you’ll have to do it all over again the next spring, and the one after that.
Perennial plants may die back to the ground in fall or winter (some don’t), but their roots are still alive, and, year after year, each spring the plant will come back bigger, stronger, and with more blooms. These are the plants we use to build a garden that will become more lush and beautiful every year. Another great thing about perennials is that as they grow we can divide them, creating many plants from the one purchase.
How Do You Divide Perennial Plants?
As I explained in this post, most perennials are happy to be divided. There are two basic methods I use to I divide a perennial plant. The first is to use a sharp-edged shovel. Pressing straight down on the shovel with my foot, I can separate the roots belowground. It’s then easy to dig out only the section I want to move. The other way I divide a plant is to dig the whole thing up. Some plants’ roots will easily separate into pieces once they’re out of the ground. Others will need to be split with a shovel or gardening knife.
The benefits of making a plan for your garden
A little planning will ensure you choose plants that will thrive in your yard’s conditions. Maybe your shady area has one end that gets partial sun, you have a pile of rocks to plant around, or the area tends to be dry. Choosing the right plant for the right spot sets your plants up for success.
Planning your garden also allows time to think about what size each plant will grow to be, what its watering needs are, what types of foliage you’d like to see near each other, how much maintenance will be needed, and what color the flowers will be.
You can also take the time to learn which plants might have edible or medicinal uses, making your garden both beautiful and useful.
**Please note that many plants which are edible for humans may be toxic to cats and dogs.**
How Many plants Should you Buy?
It’s tempting to buy one of each of the perennial plants you like, and that can be a good way to experiment and learn how different plants grow. As far as garden design goes, though, it’s better to choose fewer varieties of plants and get more of each of the ones you choose.
Large swaths of the same plant have a bigger impact that a collection of different plants. They also make your garden look lush and intentional. Additionally, you might want to put the same variety of plants in different areas of the garden to provide balance.
Three is generally a magic number in design, and that holds true in the garden. If you can afford more than three, stick with an odd number for the most attractive outcome.
What Perennial Flowers for Shade Should you Buy?
As this is your very own garden, you should choose the plants you find most beautiful. While you’re looking, pay attention to what color flower each plant will produce. Maybe you want a garden where all the flowers are different shades of one color, or a garden with a certain palette of colors. Or maybe you want a riotous mix of every color you can find.
Pay attention also to the foliage of the plants. Perennials that grow in shade sometimes have flowers which do not bloom for as long or as strikingly as sun-loving perennials do. The good news is each plant has a unique foliage color and shape, and they can be combined in ways that look good even when the plants are not flowering.
When choosing what perennial plants to buy, there are a few other things to think about. It’s important to look up each plant’s growing zone. You can find your own growing zone with the USDA’s Plant Hardiness Zone Map. Plants outside of your zone will not grow in your area. Because I live in Zone 6b, my favorites may not be appropriate if you live in a very cold or very warm climate.
Also find out each plant’s size, whether it can tolerate partial sun, and what its bloom time is. You probably don’t want to end up with a garden that only has flowers in June!
The Best Flowering Shade Perennials
Of course it’s not possible to determine what the ‘best’ plants are. You can research yourself to find what you think are the best perennials for your shady garden, and buy what you like. To save you a bit of work, though, I’ll tell you what some of my favorite shade perennials are.
Here’s a list of 10 flowering perennials that grow in the shade, along with some information that will help you decide if they are the right plants for you:

Geranium
Zones 3-8
Geranium flowers are available in a multitude of colors and sizes. Many of the varieties will be quite happy in full shade. Others can handle partial shade. The plants will spread, making shorter varieties a great groundcover, and they don’t spread so aggressively as to become a problem. They can also be divided.
Geraniums range greatly in size, anywhere from 4-48” tall and 6-36” wide, and can bloom from spring to fall. Geranium flowers and leaves are edible, and are also used for medicinal purposes.
Barrenwort
Zones 5-9
Barrenwort has colorful foliage, and in mid- to late spring, tiny flowers in pink, orange, red, white, or yellow appear.
It grows well in full shade, but in partial shade it will produce more, and brighter, blooms. Varieties range from 6-15” high and 6-24” wide.
Bleeding Heart
Zones 3-9
A particular favorite, Bleeding Heart flowers come in many colors – classic pink, white, yellow, wine, violet, and red. In ideal conditions, they can grow to 3’ tall and 6’ wide. Blooms will appear in spring and if you cut the plant back after the flowers are spent, the plant may bloom again later in the summer.
Astilboides Tabularis
Zones 5-7
This is what to choose if you’d like an impressive plant with giant, umbrella-like leaves. It produces creamy white flowers from May-July, and the plant grows 4’ tall and 3’ wide, with some of its leaves measuring 24” across. Perfect for full shade, it can handle partial shade as well.
Astilbe
Zones 3-8
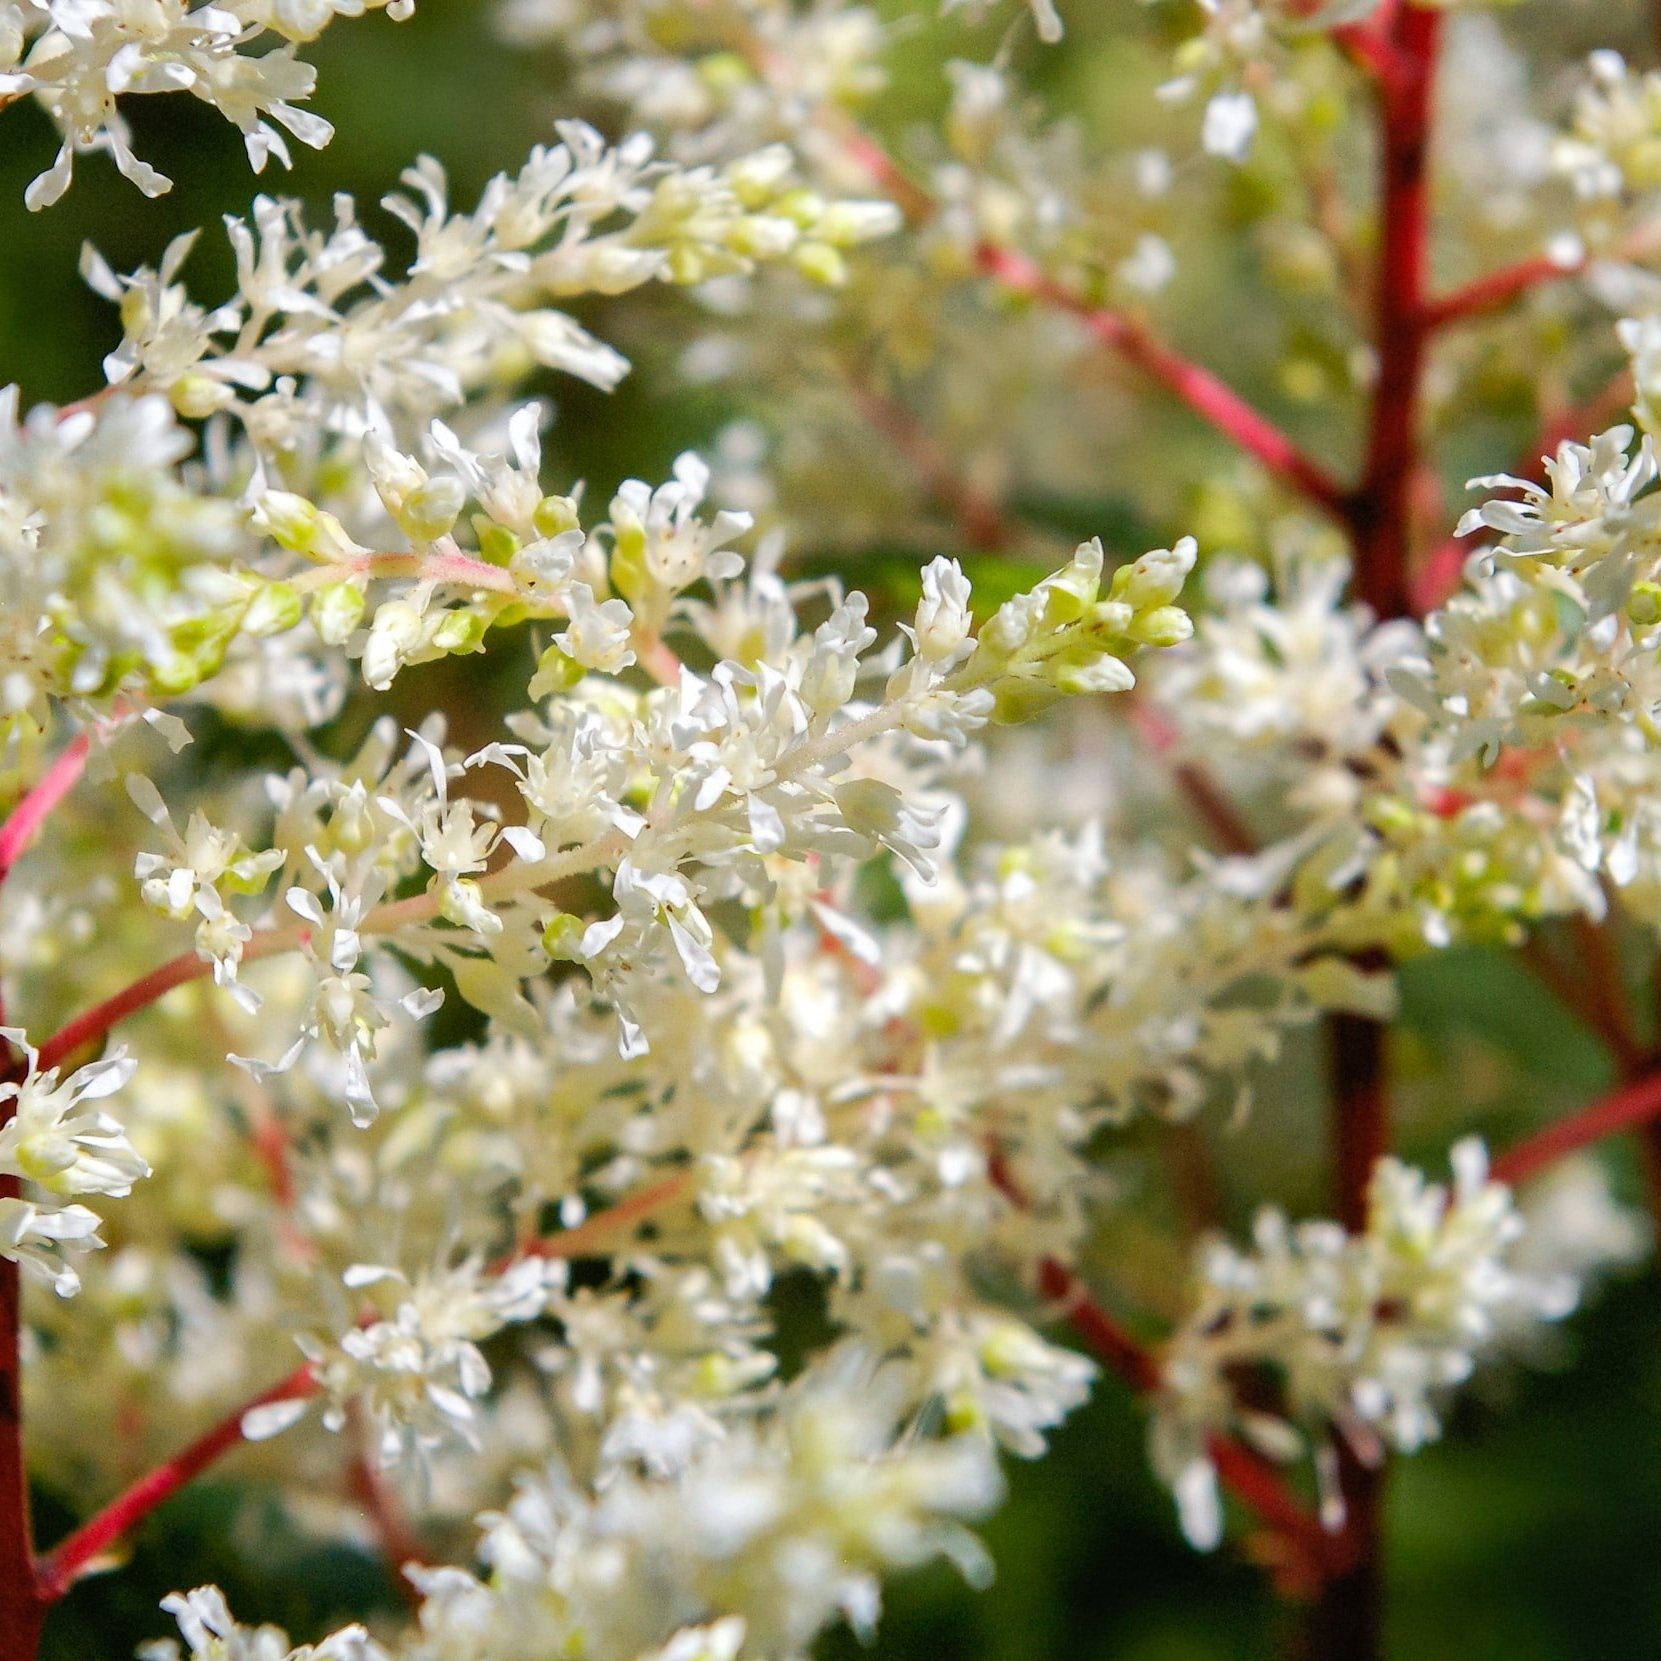
Astilbe plants produce gorgeous, fluffy flowers in white, pink, red, purple, or peach. Early-blooming varieties will flower in May or June, while late-bloomers begin to flower in July. By choosing more than one variety, you can set yourself up for color over the whole summer.
The varieties measure from 1-4’ tall, making them a good choice whether you’re looking for a tall shade perennial or something a bit smaller. It prefers partial shade, although it will grow in full shade, producing fewer blooms.
Astible is edible, and also used medicinally.
Hosta
Zones 3-9
There’s a certain variety of Hosta that seems to be everywhere, from shopping centers to yards, and honestly I don’t like the look of it at all. Luckily for me, there’s a huge number of Hosta varieties, each sporting different foliage colors and size.
A favorite of mine is the Filigree White Hosta, because it emerges with leaves that are white with green veins, which then progress to green as the season goes on. It grows to 24” tall and 24” wide, and produces lavender-colored flowers in mid-summer.
You may be surprised to learn that all parts of a Hosta plant are edible. Early spring shoots can be cooked as you would asparagus, a plant to which the Hosta is related. The leaves will taste better when they’re younger, and can be used in place of lettuce or spinach. The flowers are great as a garnish or tossed into a salad for a bit of color.

Dolce ‘Silver Gumdrop’ Coral Bells
Zones 4-9
With silvery leaves, this plant is beautiful whether it’s flowering or not. It blooms in mid-summer, its pink flowers growing about 20-24” above the plant itself, which is 6” tall and 16” wide.
It grows well in both shade and partial shade.
Fringe Cups
Zones 4-7
Blooming in April and May, with flowers that are first white, then pink, then red, Fringe Cups grow about 3’ tall and 2’ wide, with 2’ of that height coming from the flowers, which grow high about the foliage. Their leaves color up in the fall, and they are happy in partial shade.
‘Jack Frost’ Heartleaf Brunnera
Zones 3-8
Jack Frost produces blue flowers in mid- to late spring, but it’s best quality is its striking, variegated leaves. It grows 15” tall and 15” wide, and does well in both shade and partial shade.
Oxalis Oregana
Zones 6-9
This plant makes a beautiful groundcover, spreading through rhizomes underground. It grows up to 8” tall, and produces small pink or white flowers from early spring to summer.
The most exciting things about Oxalis Oregana, though, is that the underside of its clover-shaped leaves are purple or pink. I love a good surprise! Walking through a patch of plants, your movement will ripple the leaves, allowing you to see both colors.
The flowers are edible, as are the leaves, which should be cooked before eating. The plant also has medicinal uses.
Is That Enough Plants for a Perennial Shade Garden?
I first want to acknowledge that plants are not cheap. Making a garden is not something that has to be done in one swoop. We can buy plants as we can afford them, and some years from now we’ll have the garden we imagined. And remember, gardening friends will be happy to give you splits of their plants, and some plants are easily grown by seed.
Whether the plants I listed are enough for your shade garden will, of course, will depend on the size of your garden area and the number of each variety you plant.
If you were to plant all ten of these perennials, you could enjoy white, yellow, pink, red, orange, peach, purple, and blue flowers. You’d have plants of many different sizes, and a wide variety of foliage shapes and colors. Between them all, you’d have at least one plant blooming from spring to fall. But remember, you may want to consider choosing fewer varieties and getting more of the ones you do choose.
Whatever plants you decide on, keep in mind that gardening isn’t about perfection. It’s about playing in the dirt, connecting to nature, and expressing your creativity. Whatever you think is beautiful, is beautiful!


Plant a Sustainable Future: Celebrating Earth Day with DIY Wildflower Seed Balls
Seed bombs are one of my favorite nature craft ideas, because they are simple, fast and easy for anyone to do and the result is a more beautiful planet. Since the seeds do not need to be buried to grow, you can just toss your seed bombs into empty and neglected areas, watch and wait and in a few months you should have some beautiful flowers growing! The patch will likely self-seed and continue to develop and grow with each passing year that goes by.

The Cottage Peach is reader-supported. When you purchase through links on our site, we may earn an affiliate commission at no additional cost to you. All opinions are our own.
One of my most loved books from childhood is Miss Rumphius by Barbara Cooney. Miss Rumphius was inspired by the real life "Lupine Lady," Hilda Hamlin, who spread lupine seeds along the Maine coast. The story follows Miss Rumphius through her younger days into old age as she spreads lupine seeds from her bicycle all the way up until she is lying sick in bed and enjoying the view she has created outside her bedroom window after spreading all these seeds over the years. This imagery has always been powerful to me, but it was made even more so after I read The Well-Gardened Mind by Sue Stuart Smith this past winter and learned how patients staying in hospital rooms with a nature-facing window recover 37% faster than patients who do not have this visual access to nature at all. This is leading to more hospitals instituting green spaces throughout their campuses as a real, science-backed method of care.
Reading this fact, it got me thinking that even outside of the carefully date driven measurements within a hospital, surely there must be some benefit to our wellbeing in simply going about our days surrounded by natural beauty. It’s not a far stretch when you picture how much more peaceful you feel outside. The sturdy presence of ancient trees combined with swaying branches, birdsong and the thrill of a flower in bloom stimulates our minds and encourages us to be mindful.
I imagine spreading seeds just like The Lupine Lady herself did, bringing beauty to the landscapes I call home and even leaving a legacy in the form of wildflowers throughout the land. It is the kind of quiet hope we all need these days - a flower popping up where there wasn’t one before. An offering to pause and enjoy our surroundings.
With the arrival of Earth Day 2025, I am feeling the pull even stronger than usual to do something to connect with the Earth, celebrate the natural beauty around us and bring awareness to what needs to change in order to protect our home planet. The first Earth Day took place in 1970, marking the beginning of the modern day environmental movement as we now know it. It offers us the opportunity to promote conservation and sustainability, raising awareness of the impacts our decisions have on the environment. On this day, around 1 billion individuals across more than 190 countries take action to raise awareness of the climate crisis and bring about behavioral change to protect the environment through reducing our energy use, carbon footprint and more. It really is a great opportunity to reflect and find new ways to support our one and only home.
So where do seed bombs fit into all of this? Seed bombs are a fun and accessible way to bring a joyful nature activity into your Earth Day celebrations. Seed bombs are simply a collection of biodegradable materials like paper and clay shredded and combined with a variety of wildflower seeds, molded into a ball shape (or any shape you like really) and dried. Once dry, you can drop them on blank areas of earth by roadsides or parks and the ball will naturally break down in the elements, leaving only the seeds behind which will plant themselves and hopefully grow into beautiful flowers to support our pollinators.
As you’ll see, there are as many ways to make seed bombs as there are hands to make them with. But here are some of the main ingredients you can use in a seed bomb DIY:
Newspaper/paper scraps: any paper destined for the recycling bin will do, although you may want to ensure any dyes used were soy-based if you’re concerned about leaching dyes into the soil. Personally I think newspaper is just fine even if you can’t confirm the inks are soy based, but I wouldn’t necessarily use a brightly colored construction paper for this one since the dyes probably aren’t good for the soil.
Clay: if you’re having trouble with your seed bombs sticking together, clay is an excellent binder that can help give them some structural integrity. You don’t need this for a successful seed bomb though.
Topsoil and compost: Compost and topsoil aren’t strictly necessary for a wildflower seed bomb, but they will provide your seeds a little extra boost and may increase germination rates (or how many of your seeds will actually grow into flowers) since you’re effectively coating the seeds which mimics being buried in the ground. The thing about wildflower seeds is that they spread through landing on the surface of soil all the time, so they don’t really need to be buried to grow usually.
Seeds: You won’t need a huge bucket of seeds here since the majority of the mass of the seed ball is made up of the paper, but it is important to choose wildflower seed varieties or herbs and vegetables that are native to your area and will not encourage invasive species to grow.
The importance of choosing native seeds
Why does it matter what seeds you use in your wildflower seed bombs? Because the last thing you want to be doing on Earth Day is actually planting invasive plants that will crowd out native species. An invasive species is an introduced species that becomes overpopulated and harms its new environment. Invasive species adversely affect habitats and bioregions, causing ecological, environmental, and/or economic damage. Not a good thing! On the other hand, native plants will encourage and support your local pollinators by providing a diverse food source and tend to require less care, watering and other maintenance since they are hard-wired to grow well in your climate.
The easiest way to ensure you’re planting native seeds is to buy a seed mix like this one. If you are outside of the USA, try to find a local garden supply company that can help you. Otherwise I’d recommend just choosing three or four flowers you’d like to grow and using trusty Google to confirm they are native to your area. I could give you a list that would cover the major areas, but you’ll learn better from doing a bit of the research yourself!
One last thing; I’m sure you know this, but it has to be said! Never distribute your seed bombs on private property or protected parks. Stick to civic spaces that have long since been neglected or local public areas that could use a bit of rewilding.
What plants are best for seed bombs?
We’ve talked a lot about wildflowers, but did you know that you can also use edible plants such as lettuce, sage, basil, cilantro and even tomato seeds in your seed bomb DIY? I personally used meadow flowers in my mix including black eyed susan, cornflower, marigold, Californian poppies, cosmos and bachelor button. I think using edible flowers and herbs would be so fun - imagine taking your morning walk through the neighborhood and seeing little patches of lettuce and calendula free for the taking for your afternoon snack! I dream of a day when our wild spaces are full of edible free food to share with our communities.

How to make seed bombs step by step
Supplies
Newspaper/paper scraps
Bowl
Water
Parchment paper
Baking sheet/plate
OPTIONAL: clay, compost, topsoil
Instructions:
Making seed bombs is simple. Shred your paper into small pieces and soak in water, or soak whole pieces and then blend in a food processor. Combine your shredded paper with seeds (and compost/clay/topsoil if you’d like) in a bowl. Form into golf ball sized globes and squeeze tightly to compress and remove excess moisture. Place on your parchment paper on the baking sheet or just use a plate and allow to dry for 24 hours before using. You can even place them into a small drawstring bag and give them out as Earth Day gifts to friends and family!
How do you use seed bombs?
Seed bombs are one of my favorite nature craft ideas, because they are simple, fast and easy for anyone to do and the result is a more beautiful planet. Since the seeds do not need to be buried to grow, you can just toss your seed bombs into empty and neglected areas, watch and wait and in a few months you should have some beautiful flowers growing! The patch will likely self-seed and continue to develop and grow with each passing year that goes by.
If you’re looking for nature walk activities to do this Earth Day, I hope you’ll give this seed bomb DIY a try and bring them along with you on your adventure. And remember: every day should be Earth Day, so if you’re reading this and it’s already come and gone, don’t let that stop you from giving it a try and bringing some beauty to our one and only home!

![The Power of Nature: How To Make Infused Oregano Oil for Your Health and Wellness [Recipe]](https://images.squarespace-cdn.com/content/v1/60e85024dc86d643da81c96a/1682625337753-AFI1M6MRRMDQ5CBNY2TX/unsplash-image-Fl2Ki3_GZIU.jpg)
![Make This Easy + Natural Botanical Hand Salve [Recipe]](https://images.squarespace-cdn.com/content/v1/60e85024dc86d643da81c96a/b57698b0-de70-4101-afaf-7af57788237d/Herbal+Face+Steam+Recipe+by+The+Cottage+Peach-1.jpg)
No More Over or Under Watered Plants: A Comprehensive Guide to Watering Your Garden
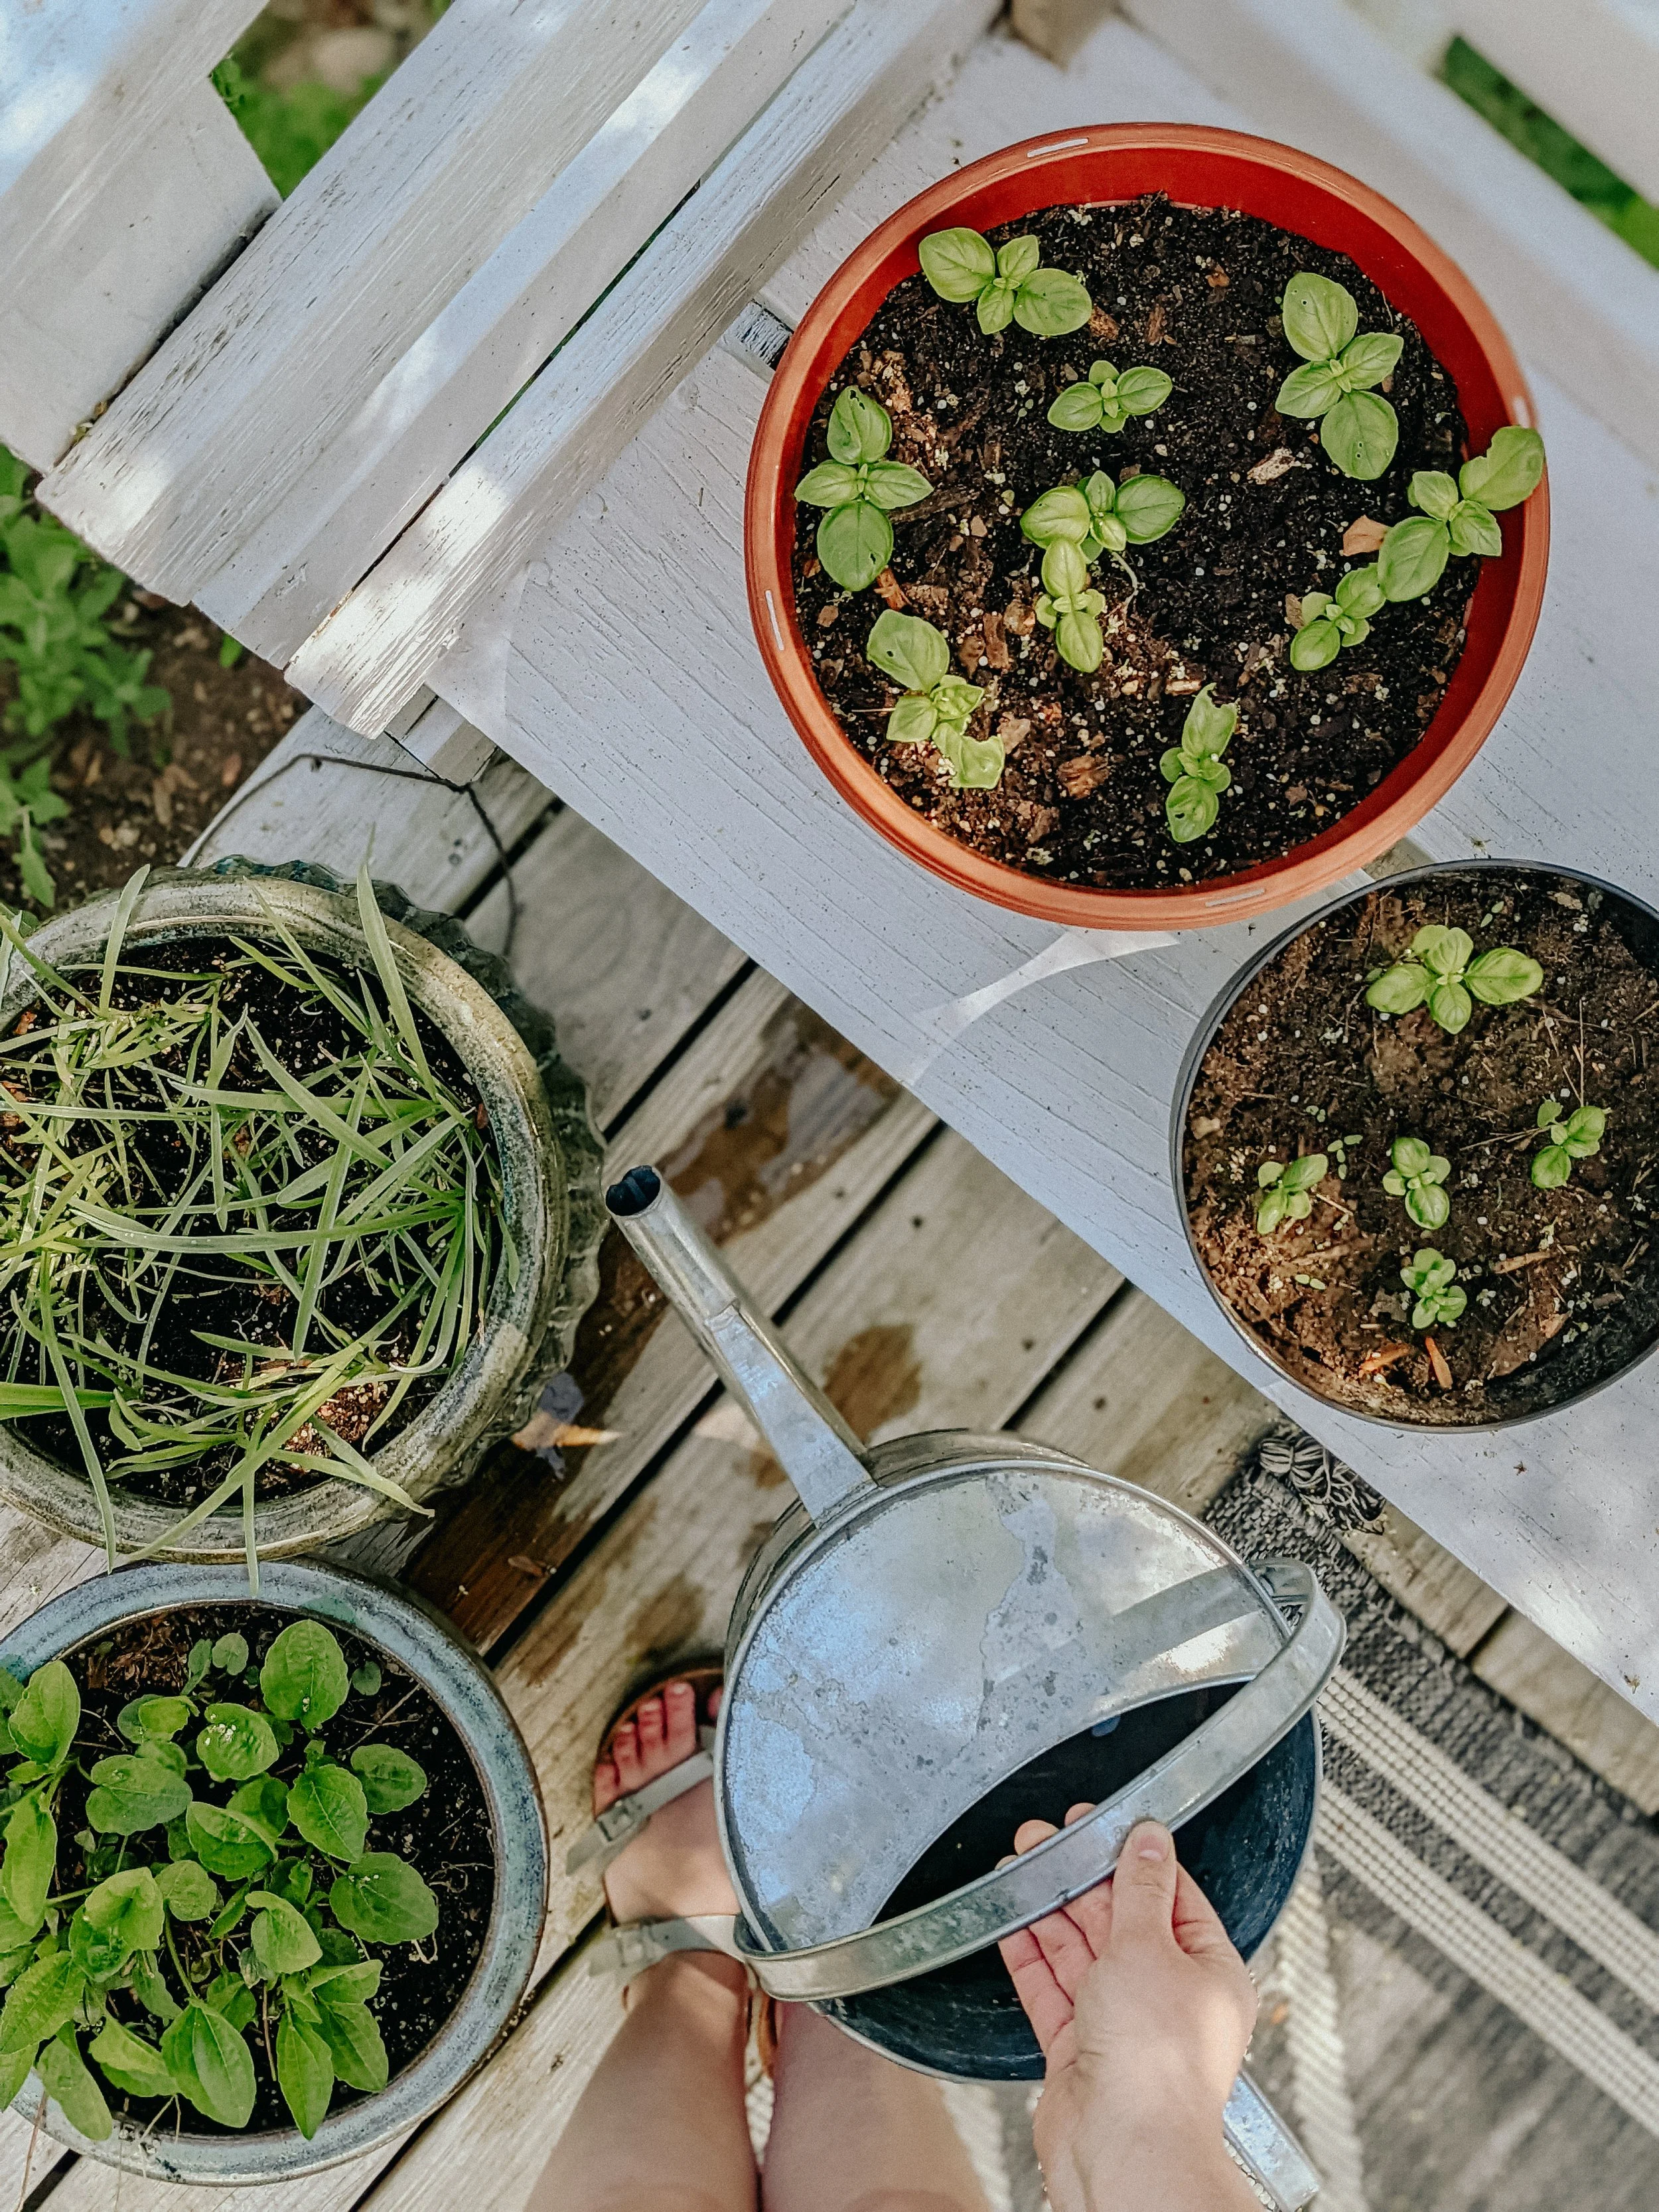
We’ve talked a lot about creating systems in your garden to grow more food even with chronic pain and fatigue, and you can find lots more of my tips on that by clicking here. But I wanted to dive deep into how to water plants with chronic illness today because - at least for me - watering plants has been a huge struggle.
Unwieldy hoses and heavy watering cans plus the time required just standing there combined with the fact that skipping a day of watering in the hot and dry season because you aren’t feeling well isn’t really an option leads to this being a constant source of stress. The good news is that there are many different ways to water your plants no matter your budget or energy levels.
The Cottage Peach is reader-supported. When you purchase through links on our site, we may earn an affiliate commission at no additional cost to you. All opinions are our own.
We’ve talked a lot about creating systems in your garden to grow more food even with chronic pain and fatigue, and you can find lots more of my tips on that by clicking here. But I wanted to dive deep into how to water plants with chronic illness today because - at least for me - watering plants has been a huge struggle. Unwieldy hoses and heavy watering cans plus the time required just standing there combined with the fact that skipping a day of watering in the hot and dry season because you aren’t feeling well isn’t really an option leads to this being a constant source of stress. The good news is that there are many different ways to water your plants no matter your budget or energy levels.
How to Water Plants
Knowing how and when to water your plants in your garden sounds scarier than it is, I promise! While some plants may have more specific watering requirements, as a general rule you want to keep the soil consistently damp throughout the germination process, and then once your plants are established you’ll wait for the soil to begin to dry out during the growing season.
Utilize mulching to prevent water loss due to surface evaporation
Concentrate your watering at the base of the plant
Confirm the soil isn’t already damp first
Water in the morning, so excess moisture can evaporate in the sun
When to water plants
Water infrequently but deeply in the morning to encourage resilient plants - 1” of water once per week. A 10-foot soaker hose (the kind with a spray nozzle) will release 6 gallons of water per foot in an hour’s time. For 1” of water coverage, you’ll need to run the hose for about 45 minutes.
How to water in-ground gardens
The best hack for watering in-ground gardens is mulch. Mulch will hold that moisture in so it doesn’t evaporate from the soil in hot dry weather. Once your plants are established (usually a couple of weeks after transplanting or about a month after direct sowing) in ground gardens are pretty self-sustaining in terms of water. During heat waves I will water once a day, but other than that as long as we’re getting some rain once a week or so I won’t water established in ground gardens much at all. Of course your plants will tell you if they are thirsty too by drooping, and if you don’t mulch at all things will be very different - this is when you’ll need to watch out for hydrophobic soil (see more info on that below)
How to water raised bed gardens
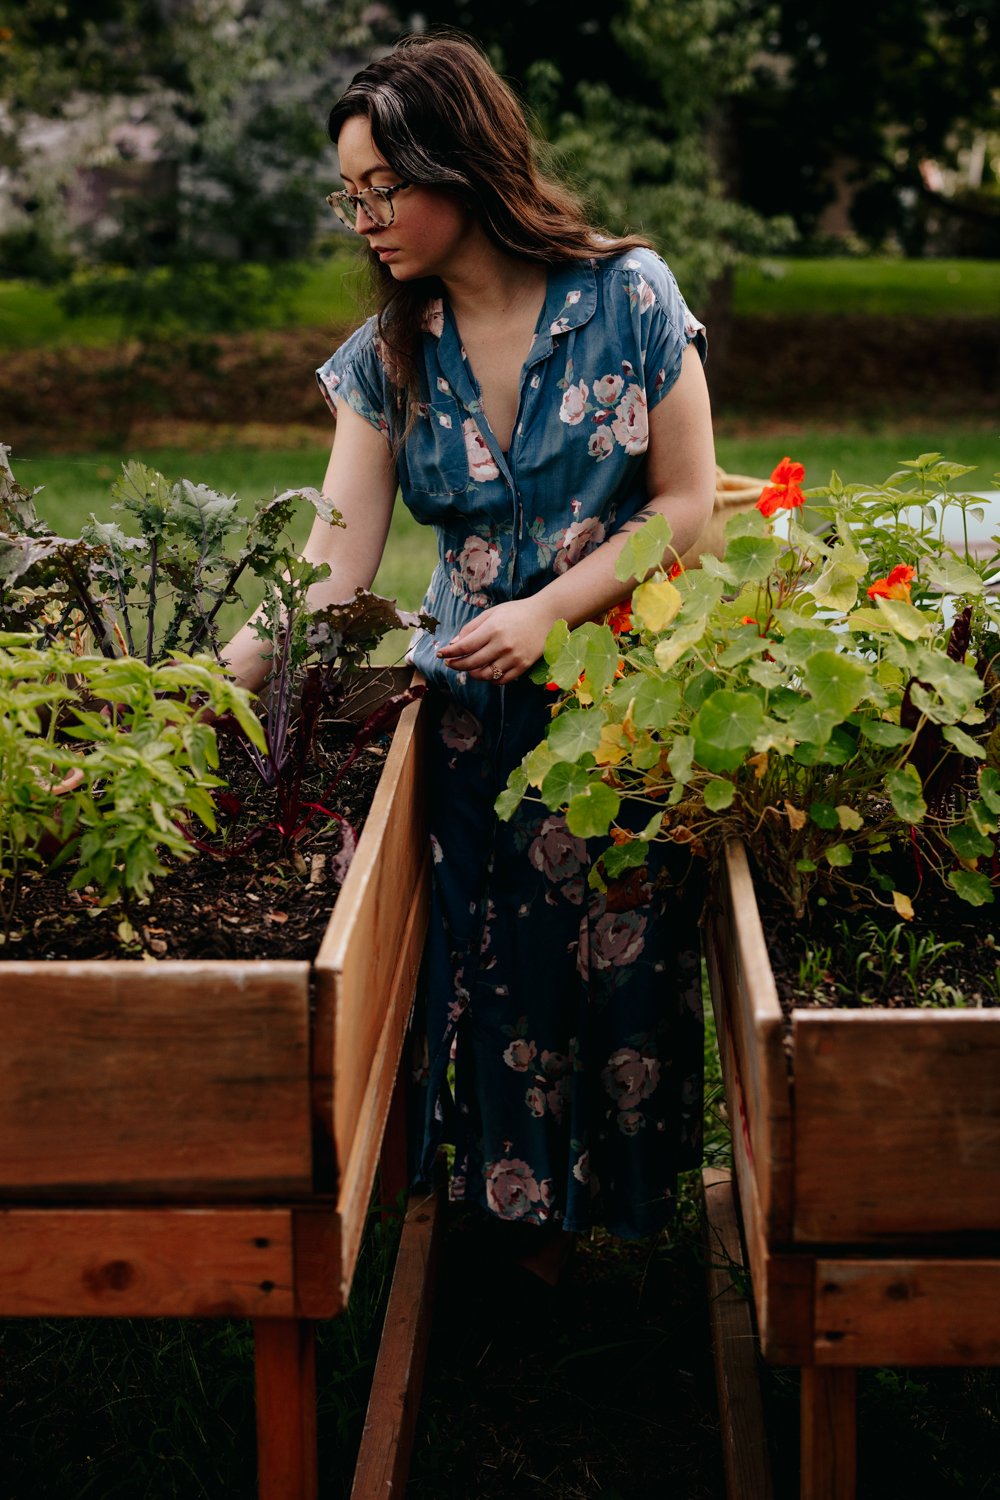
Standard raised bed gardens that are in contact with the soil underneath will need slightly more attention in watering than an in-ground bed since the growing soil is elevated slightly. Drip irrigation or olla watering systems work really well in raised beds, or you can follow the tips listed above. (click here to learn more about ollas)
How to water container gardens
Container gardens are notorious for drying out very quickly. You will need to water container gardens at least once per day - in a heat wave, sometimes twice per day. Raised beds that are elevated off of the ground like mine fall into the container garden category as well and benefit hugely from automatic watering systems like the irrigation trays included with my raised beds or an olla watering system.
Is it true that you shouldn’t get leaves wet when watering your plants?
I’m sure you’re wondering how you’re supposed to completely avoid getting the leaves of your plants wet while watering. The fact is, some plants (especially squash) are more susceptible to diseases that thrive in damp environments like powdery mildew. This doesn’t stop the rain from falling on your plants however, so I wouldn’t worry too much about avoiding any water getting on the leaves unless you are having an especially damp season (in which case, don’t water anyway!)
What is hydrophobic soil?
Hydrophobic soil occurs when a waxy residue builds up on the soil particles resulting in it repelling water rather than absorbing it. This can happen if you do not water consistently, or you don’t use mulching to protect the surface layer of your soil from drying out. You can tell that soil has become hydrophobic because the water will bead up and not soak into the earth normally. You can also confirm your soil is hydrophobic by digging down an inch or two beneath the soil after watering. The surface may look damp, but underneath the soil will be completely dry.
How to fix hydrophobic soil
The easiest way to correct hydrophobic soil is to amend it with nutrient rich compost. However, you most likely won’t be fixing the soil that is hydrophobic - you’re really just slowly replacing the soil that has gone “bad” by mixing in fresh new soil that can encourage better absorption.
My favorite low energy watering techniques

Water your garden with Ollas
Olla (pronounced oya) means “pot” in Spanish, but the concept of using ollas as an irrigation system goes back thousands of years and has been used in countless cultures around the world. An olla self watering system for plants is basically any type of unglazed clay pot that is buried beneath the soil with only a small amount sticking up above the surface and filled with water. You can tell that a pot is unglazed because it will be that classic terracotta red color with no shiny finish, glaze or paint. The water then leeches out of tiny holes or “pores” in the unglazed clay and is pulled through the soil to the roots of your thirsty plants using a process called soil moisture tension. This functions much the same way as osmosis, in that the water is trying to equalize to a certain level of moisture within the soil. This means your soil will never become overwatered either - if the soil is moist, the water stays in the pot until it is needed.
Olla pots reduce wasted water by about seventy percent, since most of the moisture is held underground and not lost to surface evaporation. This is a huge savings over traditional watering methods and means you can significantly reduce your water consumption in our drought-prone climate. This will lower your water bill as well as make your garden more environmentally friendly! They are also perfect for watering plants on vacation.
Olla pots also help you to grow happier and healthier plants. The root systems in your plants will also be healthier, as they reach out towards the underground water the roots will become larger and sturdier, keeping your plants from falling over. Most importantly, plants that are watered at the soil level are less prone to infection with certain fungal diseases that thrive in damp environments, since the leaves of your plants will not get wet as often. Because of the soil moisture tension phenomenon, your plants will also never be overwatered.
You can click here for my favorite ready-made ollas you can buy or click here for instructions on how to DIY your own.
Water your garden with drip irrigation
Drip irrigation combined with a timer will give you the most hands-off automatic watering for plants. You can truly just set it and forget it, leaving you free to focus your energy on garden tasks you enjoy. These systems run the gamut from complex DIY builds to custom built configurations, but for a ready made option I recommend this Garden Row Snip-n-Drip Soaker System. With this system you can easily create a customized watering system for rows of plants. The kit includes everything you need to water up to four 25' rows, and only takes about an hour to set it up at the beginning of the season. This way you can apply water just where you want it — and not where you don't. You can customize this convenient soaker hose system to suit your vegetable garden or any garden planted in rows. No special tools are required — just use scissors to cut the hoses to the sizes you need. Snap the fittings in place and you're ready to water. The weeping action of soaker hoses delivers water right to the roots, with minimal loss due to evaporation and runoff. Soaker hoses use up to 80% less water than sprinklers!
Water your garden with rainwater
Rainwater collection is an excellent option especially in drought prone areas. This is the rain barrel we use in our garden - the authentic oak barrel texture is molded into each plastic rain barrel and will not fade, rot or risk insect infestation. The unique flat back design allows the rain barrel to sit flush against any wall and is equipped with a durable brass spigot with hose hook-up as well as a screen to keep out debris and insects. Manufactured from rotomolded polyethylene, this rain barrel is impact resistant and UV stabilized to eliminate fading. Don’t forget a stand to elevate your rain barrel so you can have good water pressure to your hose and fill up your watering can easily.
Water your garden with sprinklers
Sprinklers are a great hands-off watering method. Try this Hi-Rise Lifetime Brass Sprinkler. In an age of plastic, one-season sprinklers, you'll appreciate these no-nonsense sprinklers built to last a lifetime, made of coated steel and solid brass. The jet nozzle creates a 360° spray of fine droplets without the need for failure-prone moving parts. Spiked base has a foot tread to make placement easy, and a second fitting so you can connect two sprinklers end-to-end with a feeder hose.
I hope these tips on how to water your garden were helpful. Gardening with chronic pain or fatigue doesn’t have to be harder with a little planning. How do you water your garden? Let me know in the comments!

Make Gardening Manageable with These Must-Have Tools for Low Energy Gardeners
April brings with it the arrival of the height of gardening preparations, and the demand it takes on our bodies as we assemble new gardens, pull lawn furniture from storage and shovel mulch means that I am ending my days sore and tired. I’ve been gardening for most of my life in one form or another, but ten years ago I was diagnosed with psoriatic arthritis, and since then I’ve had a whole decade to come up with the best gardening hacks to and gardening tools for gardening with chronic pain and low energy.
The Cottage Peach is reader-supported. When you purchase through links on our site, we may earn an affiliate commission at no additional cost to you. All opinions are our own.
April brings with it the arrival of the height of gardening preparations, and the demand it takes on our bodies as we assemble new gardens, pull lawn furniture from storage and shovel mulch means that I am ending my days sore and tired. I’ve been gardening for most of my life in one form or another, but ten years ago I was diagnosed with psoriatic arthritis, and since then I’ve had a whole decade to come up with the best gardening hacks to and gardening tools for gardening with chronic pain and low energy.
Psoriatic arthritis often confuses people who don’t have it - its cousins rheumatoid and osteoarthritis are far more common, so there’s a misconception that psoriatic arthritis isn’t as serious or doesn’t have as much of an impact on quality of life as these more well known forms of arthritis. The fact is that psoriatic arthritis is more than a skin condition. I experience severe joint pain and fatigue, just like someone with rheumatoid arthritis or osteoarthritis. I just get the added “bonus” of sensitive dry skin too. While exercise can help with my symptoms, it can also make them worse if I push myself too hard. I’ve had to learn my physical limitations by testing them, and those limits are a lot lower than someone living without an autoimmune disease. The idea that arthritis is an “old person's” condition is so pervasive that people often think it can’t really be that bad, especially since I am young and don’t look sick. But invisible illnesses like arthritis and other autoimmune conditions can dramatically change your life, no matter how old you are.
I’ve hit breaking points with my arthritis while gardening many times. I have sat, covered in dirt and crying because I couldn’t bend over or kneel to clear weeds from an in-ground garden bed. I thought the solution was to just scoot along on my butt, but quickly discovered that even though this was easier on my joints it was still physically exhausting and left me too fatigued to finish. I have lost the hand strength to grip a shovel or rake on more than one occasion. I have felt scared that someday even the little things I do could be beyond my ability if I’m not careful. Gardening is rooted in my soul, a part of my identity, and I don’t know what I’d do without it at this point. Gardening and nature in general have brought me out of the darkest moments in my life. Tending to plants gives me purpose and fulfills my need to nurture.
This is my why. The reason I sit here day after day and type these words to you: I grew from these challenges, and I want to show you how you can too. Now these hard times that I faced are just more proof that I know I can trust myself to stand up for my needs and prioritize them. They solidified my identity and brought me closer to knowing myself. Most of this came from mindset (we are hard-wired to see the negative first, but that can be overcome) but after that mindset shift, in order to make real concrete change I invested in a few gardening tools that would make it possible for me to continue doing what I love.
The key to low energy gardening:
These tools won’t give you superpowers. I could give you all my best vegetable gardening tips and tricks but you’ll still find the key to low energy gardening is planning and pacing yourself. This means working in short blocks of time, around the times of day when you know you have the most energy (mornings are hardest for me) and being strategic about resting when needed by encouraging rest through your outdoor garden seating arrangements. They also may not fully address all of the limiting factors you may experience. I hope however that they can serve as a jumping off point from which you will feel inspired to find what feels good for you. I have chosen these tools either because they are specifically comfortable to handle with chronic pain, or they speed up whatever task they are designed to be used for.
Tools used for gardening

Weeding tools
Gardener's Lifetime Taproot Weed Extractor
Remove stubborn taproots and other deep-rooted weeds with less effort! Insert the prongs of this weed extractor vertically, right at the root, until the tubular section rests on the ground. Then, pull the handle towards you, and the weed will pop right out.
Gardener's Lifetime Half-Moon Hoe
Also called a swan-neck hoe, this popular tool cuts weeds just below the soil surface. The ergonomic design lets you stand up straight while working, minimizing back strain, and the curved blade lets you work in tight spaces between plants and rows. To give it extra strength and durability, the wooden handle is bolted into the deep socket
Gardener's Lifetime Cape Cod Weeder
Used by generations of New England gardeners, Cape Cod Weeders slice weeds just below the soil line and are great for working in tight spaces This Lifetime Cape Cod Weeder is hand-forged from the finest high-carbon Swedish boron steel with a pointed, self-sharpening tip. Unlike flimsy tools that are stamped from thin stainless steel, this weeder is ready for a lifetime of use by serious gardeners. To give it extra strength and durability, a 4" metal tang extends into the handle, which is securely fastened with a welded socket.
Best raised garden beds
Self-Watering Elevated Planter Box, 2' x 8'
These no-bend garden boxes keep plants hydrated via a series of innovative, connected reservoirs that deliver water to roots on demand. Four generous 5-gallon reservoirs extend the time between waterings and create more even moisture throughout the bed. And, since water is drawn primarily from the bottom instead of applied from the top, less water is lost to evaporation too! 10" planting depth accommodates a variety of crops, from tomatoes to root-crops like carrots.
The height of the planter box has other advantages too: fewer weeds, reduced maintenance, and fewer critters nibbling at your prize plants. The sturdy aluminum legs won't buckle or sag, and the wood is naturally rot-resistant and safe for your organic crops.
Garden seating ideas
Garden seating is going to be so important if you have low energy or chronic pain. I like to have one main large work table outside that I can sit at for tasks I know will take longer like transplanting seedlings or just organizing a harvest. This is an inviting spot where I can rest while still feeling productive. It’s also a good idea to scatter around various benches and chairs throughout your garden space or at least keep a folding camp chair handy that you can collapse onto periodically in between weeding, watering and harvesting. Always keep water and sunscreen handy - I like to keep my harvest basket stocked with these essentials plus my clippers too, so I’m not walking back and forth just gathering everything. This way you don’t have to go inside every time you need a break, wasting more energy with the walk to and from the house as well as interrupting the flow state of gardening that gives us the most mental clarity.

Deep Seat Garden Kneeler
The extra-wide base makes it much more stable than narrower models, with sturdy sides that lock in place so you can raise and lower yourself with confidence. Easily flips from kneeler to padded bench. Sides fold in for compact storage. Holds up to 250 lbs. Weighs just 9 pounds, so it’s easy to carry.
Bamboo Garden Stool and Basket Combo
Versatile, heirloom-quality, all-in-one basket, stool, and seat. Carry tools and plant starts out to your garden, harvest veggies to bring inside, sit on it to weed and tend or keep potatoes and onions (or bath items, dog toys, and more!) neatly corralled.
Beautifully made from bamboo, a strong and highly renewable resource, it can support up to 250 lbs. as a seat. Quality joinery gives you the confidence to step up or sit down and go about your work. Flipped over, it feels solid in your hands plus the handles are wide and smooth — making it ultra comfortable to carry.
Deluxe tractor scoot with bucket basket
This go-anywhere, do-anything, super-stable rolling scoot lets you work from a comfortable seated position and is perfect for gardening, washing tires, painting baseboards and more. Super-sturdy; holds up to 400 lbs. Bucket Basket holds a 3-1/2 gal. Tubtrug or 5-gal. pail and carries up to 40 lbs.; perfect for tossing weeds or gathering the harvest. Handle extends for pulling, retracts & locks for support. Storage tray holds hand tools and supplies.
Best garden hose
Low energy garden irrigation is going to have to be a whole post in itself, because there are as many ways to water a garden as there are gardeners in the world. I will say that watering has turned out to be one of the biggest physical challenges to gardening for me. Since it often needs to be done daily, and cannot be timed around when I’m feeling best in the week, and winding/unwinding hoses is a special kind of torture to those of us with limited energy. Hoses are a low energy gardener’s number one enemy. I have two solutions to suggest:
Hoselink Retractable Garden Hose
The Retractable Garden Hose Reel is a wall-mounted unit featuring a high-quality spring-loaded hose that automatically rewinds on command. Its specially designed ‘stop-anywhere’ locking mechanism secures the hose at any length, eliminating excess hose to prevent kinks and tangles. To lengthen, simply walk the hose out further and stop wherever you want.
Olla Watering System
You can use ollas like these and never have to water your garden the hard way again, while reducing wasted water lost to evaporation by 60-70%.
Indoor gardening hacks
If starting a full outdoor garden is too much for you I have one last gardening tip to share: consider indoor gardening. There are so many options available now that will actually allow you to grow your own fruits and vegetables inside of your house. My favorite is the Smart Garden from Click&Grow - both stylish and functional tower garden options that bring nature to you. You can read more about my thoughts on the Click&Grow here!

Perennials for the Sun: A Guide to Choosing the Right Plants for Your Garden
In planning your garden, it’s fair play to go to your local nursery and grab whatever you like the look of. However, if you’re interested in garden design and the best shot at successful and happy plants, incorporating some strategy and thought in choosing your flowering perennial plants will go a long way.
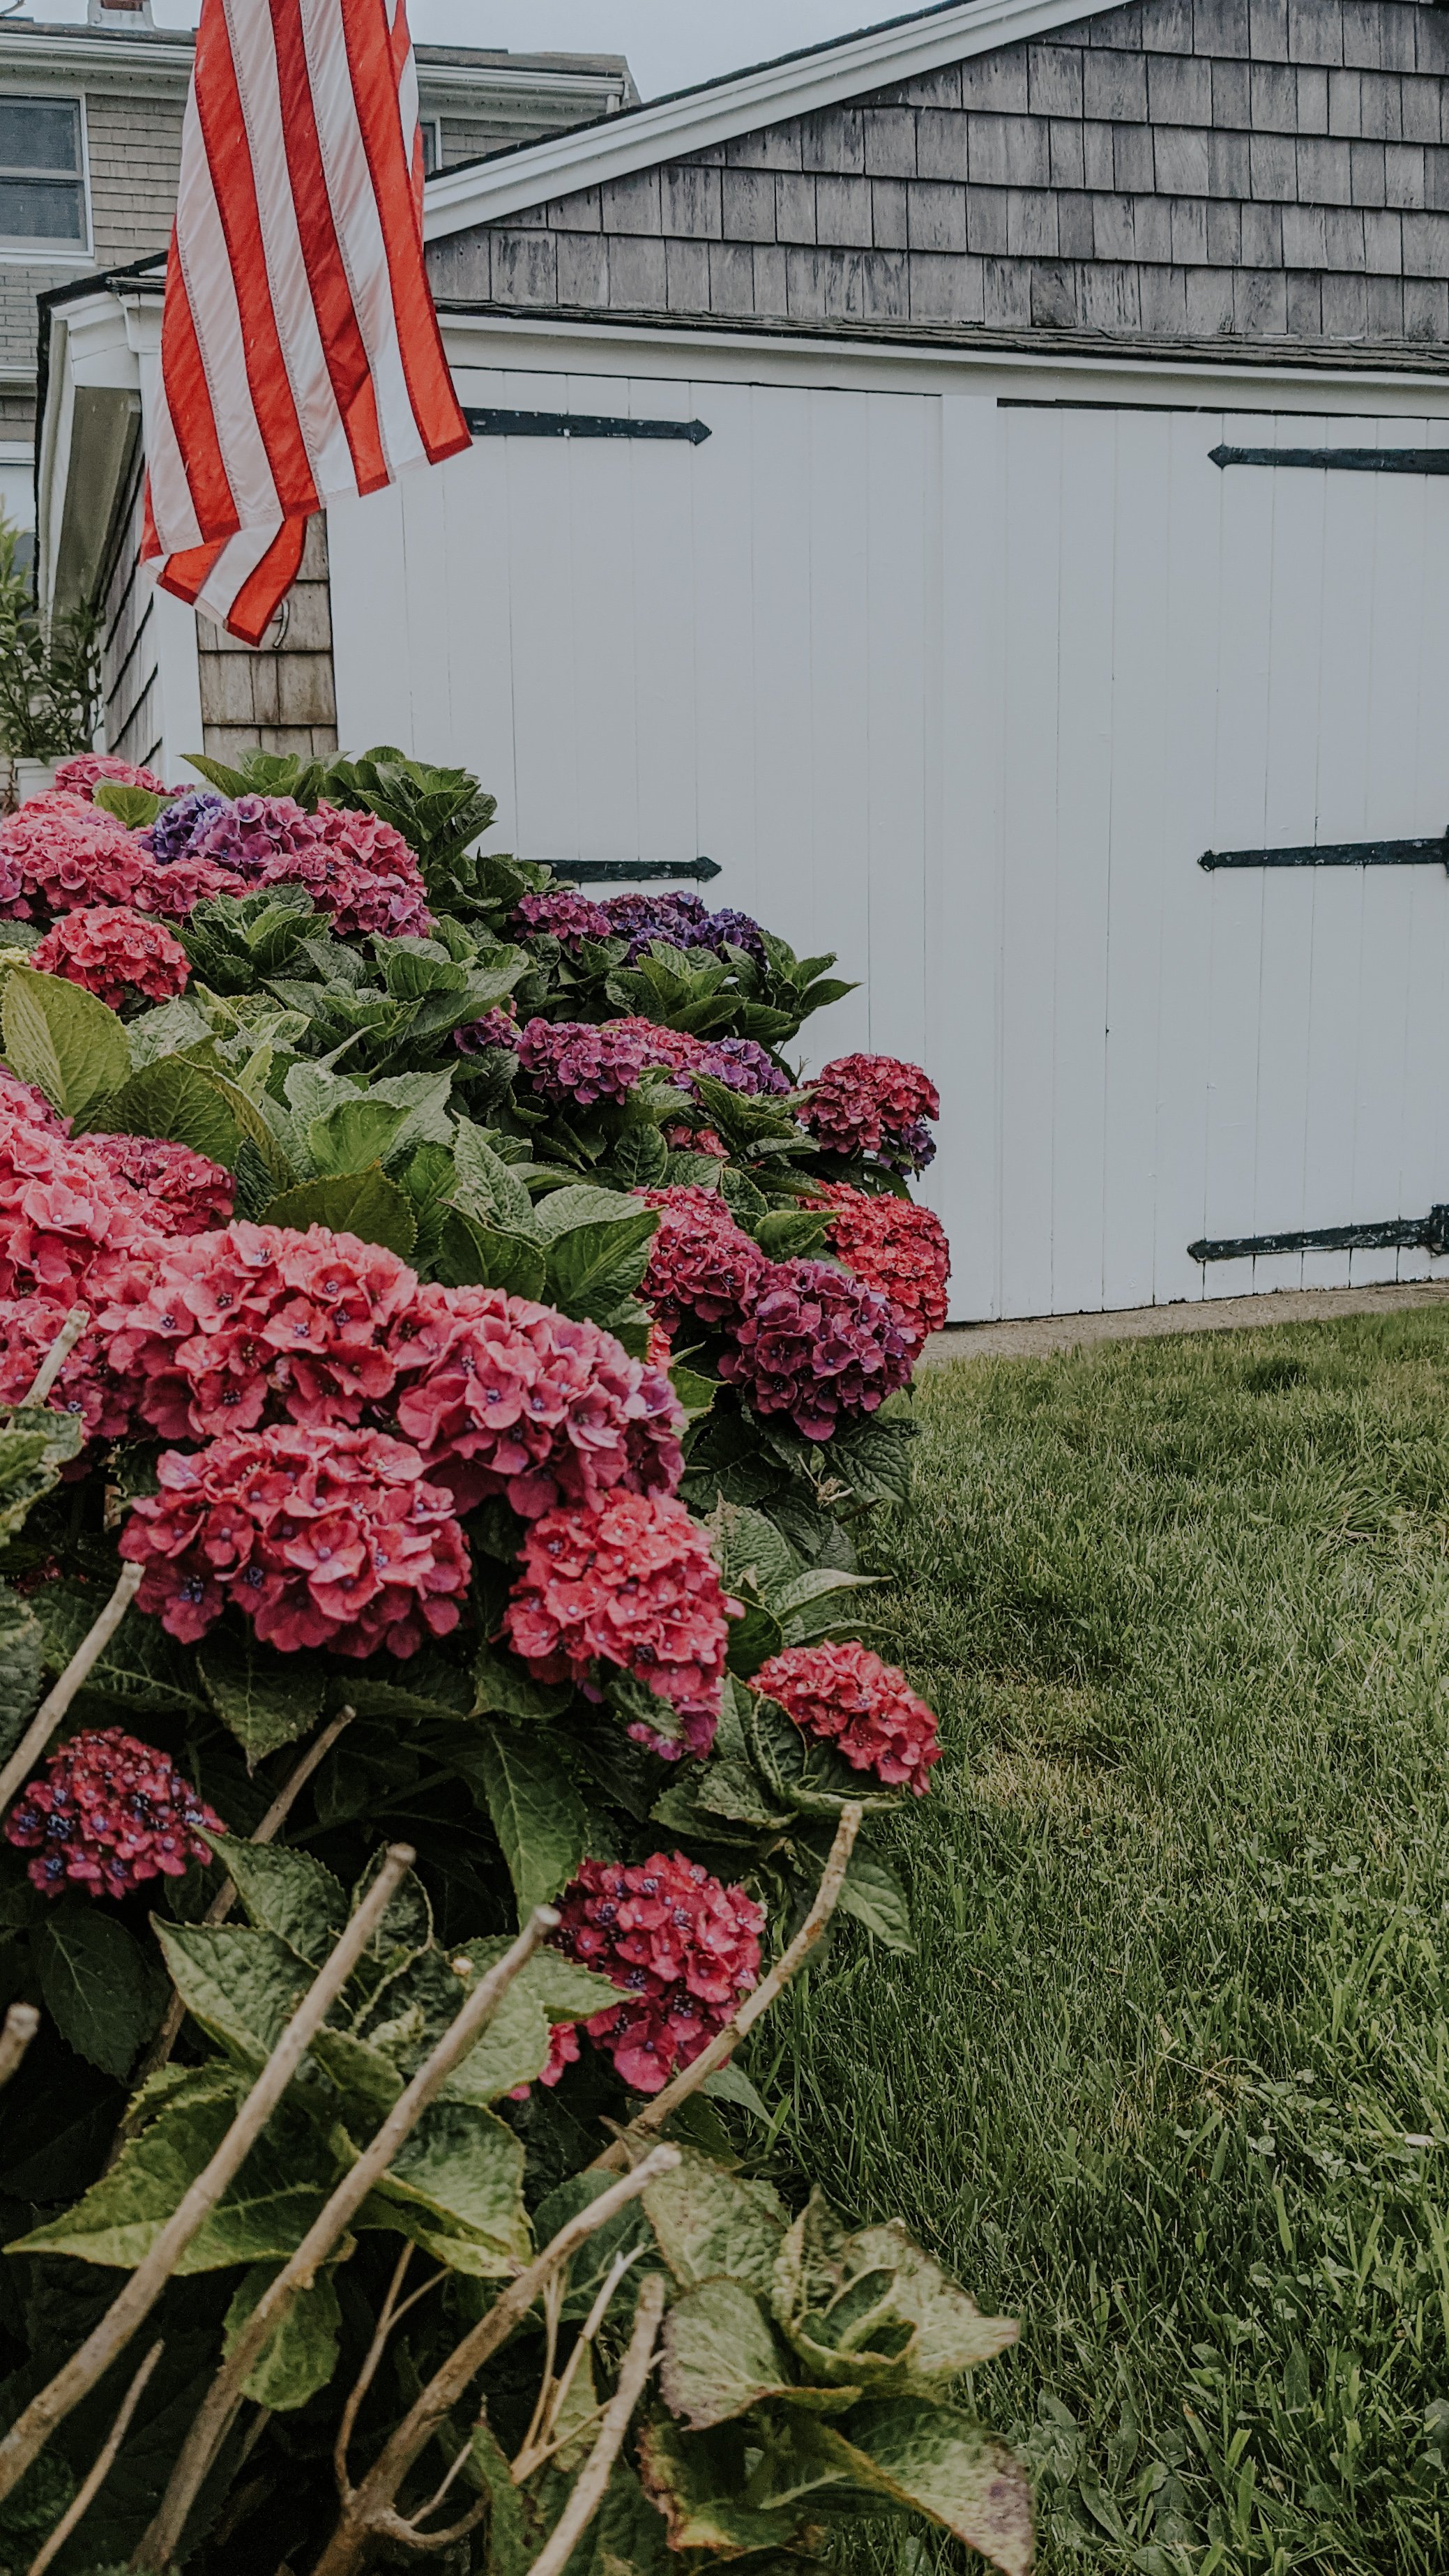
The Cottage Peach is reader-supported. When you purchase through links on our site, we may earn an affiliate commission at no additional cost to you. All opinions are our own.
In planning your garden, it’s fair play to go to your local nursery and grab whatever you like the look of. However, if you’re interested in garden design and the best shot at successful and happy plants, incorporating some strategy and thought in choosing your flowering perennial plants will go a long way.
What is a Perennial Plant?
First, let’s talk about what a perennial plant is not. You know when you go to a garden center in the spring and there are plants already blooming with bright flowers and you’ve been starving for color all winter and you Must. Buy. Them. All? Those are annual plants, plants that will die in the fall of the year you put them in the ground. You get the instant satisfaction of pretty colors in your yard, but you’ll have to do it all over again the next spring, and the one after that.
Perennial plants may die back to the ground in fall or winter (some don’t), but their roots are still alive, and, year after year, each spring the plant will come back bigger, stronger, and with more blooms. These are the plants we use to build a garden that will become more lush and beautiful every year.
What are the Benefits of Perennial Plants?
Aside from lasting years, there are other benefits to planting perennials. Many perennial flowers will bloom all summer, and they are beneficial to birds and other creatures in our yards, as they create habitats and dependable sources of food.
While the upfront cost of the plant may be higher than for an annual plant, the lifetime cost will not be. This is true not only because we spread that cost over years, but because one perennial plant can easily be separated as it matures and become two, or ten, or twenty plants over time.
How Do You Divide Perennial Plants?
Most perennials are happy to be divided, and in fact, some must be divided in order to thrive. Talk of green thumbs can cause people to believe plants are delicate and complicated. The truth is, the vast majority are hardy and can take a bit more roughness than you might imagine.
There are two basic ways I divide a perennial plant. The first is to use a sharp-edged shovel. Pressing straight down on the shovel with my foot, I can separate the roots belowground. It’s then easy to dig out only the section I want to move. The other way I divide a plant is to dig the whole thing up. Some plants’ roots will easily separate into pieces once they’re out of the ground. Others will need to be split with a shovel, as above.
Bulbs are perennials which need to be dug up and separated. When the plant is scooped out of the ground, you will find that the bulb has multiplied, with smaller bulbs attached to it which are very easy to take off with your fingers and replant elsewhere.
Where Should I Plant My Perennials?
When making a garden, a good mantra is, “right plant, right place”. If we can find just the right plants for different spots in our yard, they will thrive with very little input from us.
In order to put the right plant in the right place, you need to become familiar with the land. Where does the sun shine all day? Where is it shady in the afternoon? Is there an area with dappled light? Does it feel much warmer near the wall of your house? When it rains, where do puddles form?
The land you live on is not all one climate. There are microclimates – pockets and hilltops, large empty areas, windbreaks, and spots near a building or fence. To learn more about this concept, I recommend the book Gaia’s Garden, by Toby Hemenway. It may take a couple of reads to really understand the many things that create different conditions in different areas of our property, but in the meantime, you’ll have the basic idea and can start planting. You’ll see what fails and what is happy, and over time you’ll learn more from your real life experience than you ever could from a book.
Once you’ve gotten to know the land, it’s time to research which plants will do best in the conditions of whatever areas you choose garden. There are plants that want only full sun and some that want full sun but will tolerate partial shade. There are plants that will only grow in full shade, drought-tolerant plants, and plants that like to keep their feet wet – they don’t want to live in a dry spot. You can find out the needs of each plant with a simple Google search.
You’ll also want to research how big the plants will get, keeping in mind the amount of space you have available to plant, and when they will bloom, so you don’t end up with everything blooming in June and there being no flowers in the garden for the rest of the season.
What Color Perennial Flowers Should I Choose?
You should choose whatever colors appeal to you. There are no rules! It can be good to pay attention to how many of each color you purchase, though, so you don’t end up with a garden that is all one color. (Unless that’s the look you’re going for – it can be gorgeous!)
How Many of Each Plant Should I Buy?
With so many perennials available, it can be tempting to buy just one of lots of different kinds. A lot of new gardeners start out that way, and it can be a good way to learn.
To make a cohesive garden, though, consider limiting the number of varieties you choose, and instead get more than one plant of those varieties. Large swaths of the same flower make a garden look intentional and full. It can also be a good idea to plant the same variety in different parts of the garden to provide balance. If you only have a few though, I recommend planting them near each other.
Three is generally a magic number in design, and that holds true in the garden. If you can afford more than three, stick with an odd number for the most attractive outcome.
What Full-Sun Perennials Should I Buy?
If you’re lucky enough to have some sunny spots in your garden, you’ll find many more options are available to you. There are plenty of shade perennials to make beautiful shade gardens (we’ll cover those next month), but your choices in a sunny spot are almost endless.
Below, I’ll save you a bit of trouble and list some of the best perennials to plant in the sun.
The first thing to check out is the plant’s growing zone. You can find out your growing zone with the USDA’s Plant Hardiness Zone Map. Plants outside of your zone will not grow in your area. Because I live in Zone 6b, my favorites may not be appropriate if you live in a very cold or very warm climate.
Remember also to look at size, whether it can tolerate partial shade even though it does best in the sun, what colors the blooms are, and what the bloom time is.
12 Full-Sun Perennials for Your Garden
Here’s some of my favorite full-sun perennials. I’m also including some important information that will help you to determine if they are the right plants for you.
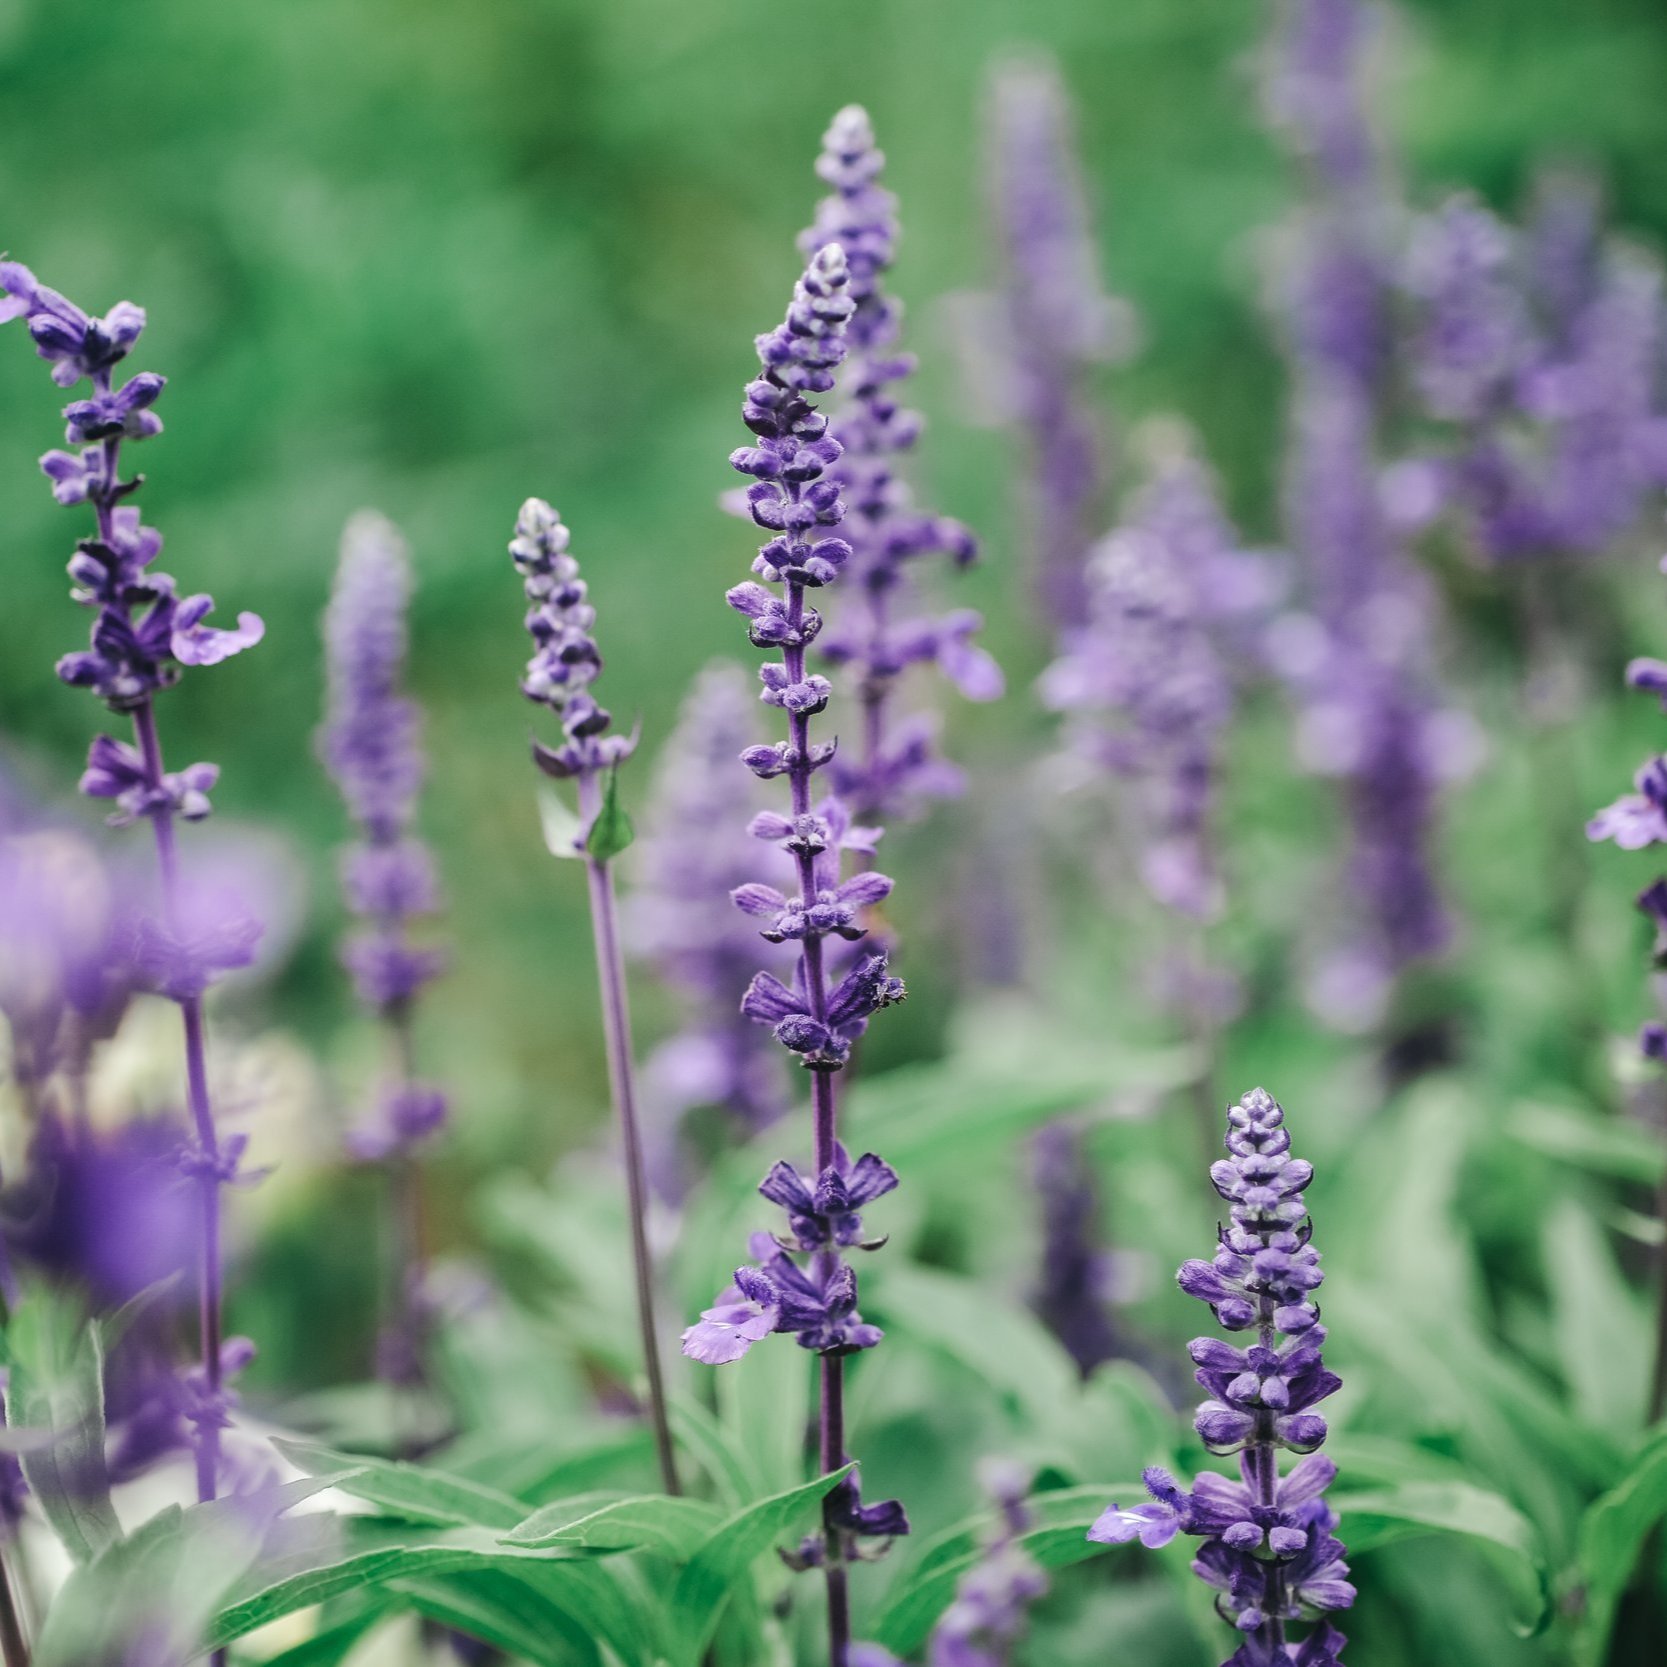
‘Proud Berry’ Coralberry
Zones 3-7
The Coralberry is a shrub, growing 4’ tall and 4’ wide. It has berries of the most amazing pink, which unfortunately are not edible for humans. (The birds would thank you, though.) The berries hang onto the plant into the winter months, a nice pop of color under a light snow.
It prefers full sun, but will handle a bit of shade. It blooms in late summer, and the flowers develop into berries in the fall. It’s branches with berries are beautiful in a flower arrangement.
Pyromania Solar Flare Red Hot Poker
Zones 5-9
This plant grows 3’6” high and 2’6” wide, with bright yellow flowers of an uncommon shape. It blooms all summer and makes a great cut flower.
‘Curtain Call Deep Rose’ Japanese Anemone
Zones 4-8
This Anemone is happy in sun or part-shade. It grows to 18” tall and 18” wide, with pink flowers. The flowers bloom in late summer and early fall.
Red Creeping Thyme
Zones 5-10
Growing only 6” tall, this plant makes a beautiful magenta-red groundcover. Each plant will spread to about 10” wide, but over time they will spread even further. Planted short distances away from each other, they will form a large mat. Creeping Thyme works well on rock walls and between paving stones as well.
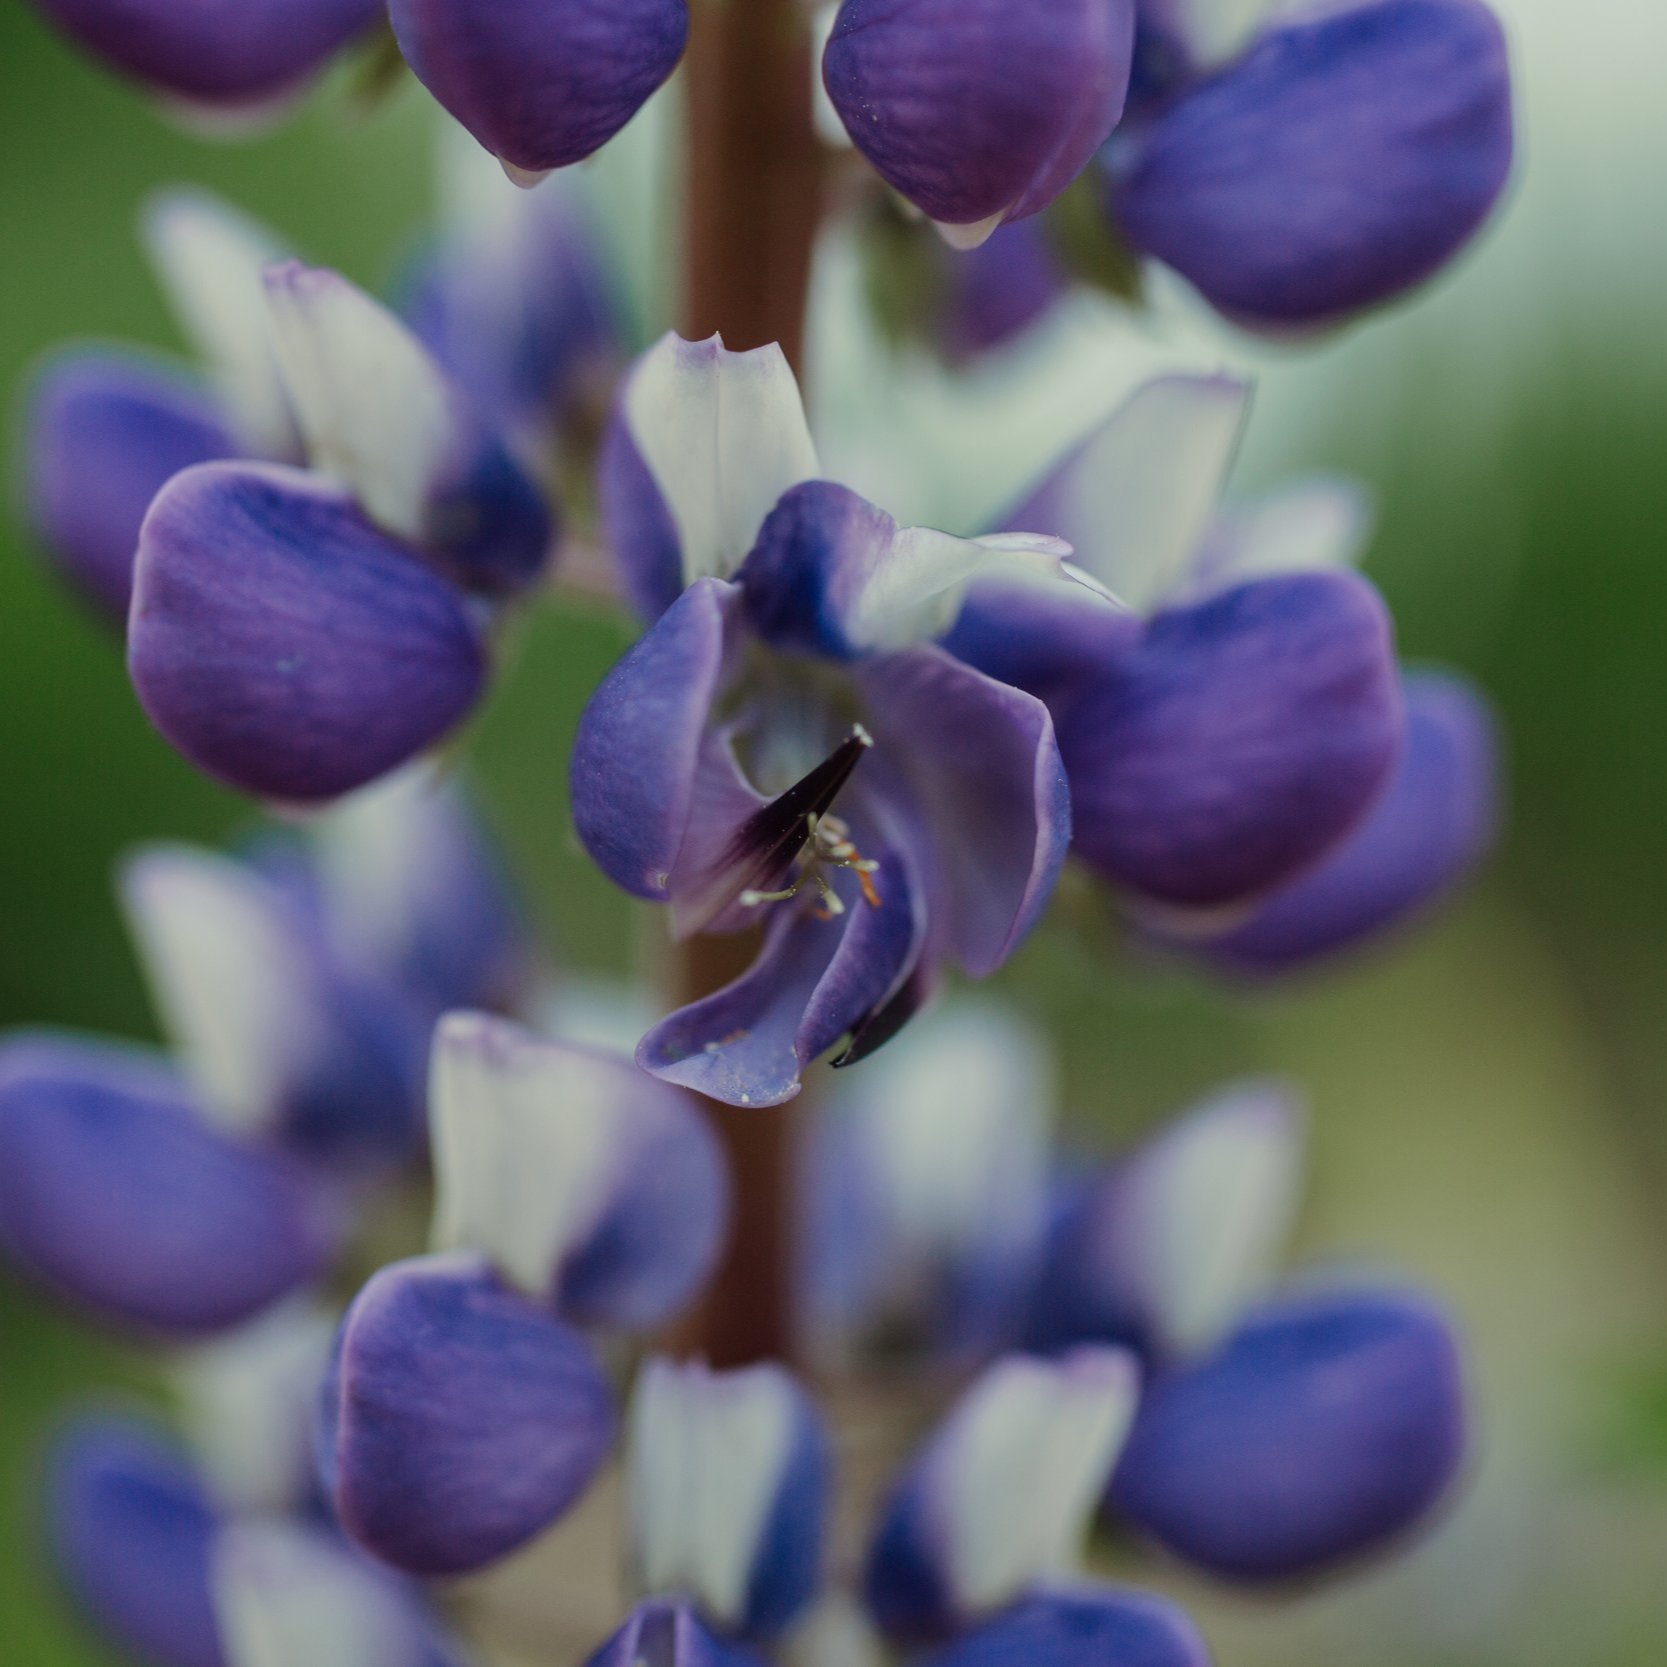
Mango Tango Anise Hyssop
Zones 6-9
This sun-loving plant grows 18” high and 16” wide. It can handle dry conditions and prefers a spot with good drainage. It’s peach and orange flowers bloom from mid-summer to early fall.
Prince of Orange Oriental Poppy
Zones 3-7
Vivid, orange, ruffled petals surround a dark center on this bright and happy plant. It prefers full sun, and grows 2’6” tall and 2’ wide. It blooms from late spring through early summer.
West Country Manhattan Lights Lupine
Zones 4-9
This variety blooms in part-sun and sun, and grows 3’ tall and 2’ wide. I love the classic blue Lupine, but what makes this one a favorite is its yellow and burgundy-purple flowers, which bloom in spring and early summer.
Beyond Midnight Bluebeard
Zones 5-9
This Caryopteris shrub variety produces tall blue flowers. It blooms from late summer to early fall, just as many flowers are checking out for the year, and grows 2’6” tall and 2’6” wide.
It needs full sun and good drainage to thrive. Soggy soil will cause root rot, killing your plant.

‘Denim ‘n Lace’ Russian Sage
Zones 4-9
This is a completely different plant to the sage we use as an herb. Its leaves are toxic and should not be eaten.
Denim and Lace provides beautiful wands of purple-blue flowers, on a plant that will grow to be 2-3’ high and 2-3’ wide. It prefers full sun, and blooms throughout summer to fall.
Decadence Deluxe ‘Pink Lemonade’
Zones 4-9
This is a Baptisia, sometimes known as False Indigo. Baptisia is available in a variety of colors, but Pink Lemonade is among my favorites. With its yellow and raspberry flowers, you’re getting two colors for the price of one.
It is a large plant, growing 4’ tall and 4’ wide, and almost looks like flowers in a vase, as it is narrow on the bottom and very full on top. It blooms from late April through June.
Dulce ‘Spearmint’ Coral Bells
Zones 4-9
This plant grows 10” high and 2 ½’ wide, and produces flowers in mid- to late summer which are light pink on the bottom and darker pink nearer the top. It is happy in sun or shade. It’s green leaves have a bit of a silver tint to them, providing interest even when the plant is not in bloom.
Delicious Candy Echinacea
Zones 4-8
This is a vivid pink flower. It grows 4’ wide and 6’ tall, a really sizable plant. They can handle part-shade, but will not produce as many flowers as they would in the sun. Echinacea is a medicinal plant. Blooms in mid-to-late summer.
Do you have Enough Plants for a Full-Sun Perennial Garden?
I first want to acknowledge that buying plants can be an expensive endeavor. Making a garden is not something that has to be done in one swoop. We can buy plants as we can afford them, and some years from now we’ll have the garden we imagined. And remember, gardening friends will be happy to give you splits of their plants, and some plants are easily grown by seed.
If you were to purchase everything on this list, you would have purple, yellow, raspberry, pink, red, orange, and burgundy flowers. Between them all, they would provide at least one blooming plant from late spring to winter. But remember, you may want to consider choosing fewer varieties and getting more of the ones you do choose.
Whatever you choose, keep in mind that gardening isn’t about perfection. It’s about playing in the dirt, connecting to nature, and expressing your creativity. Whatever you think is beautiful, is beautiful.
What is your favorite full-sun perennial to grow?

Spring Gardening: 7 Cold Hardy Plants to Grow in March
The ground is attempting to thaw, which means mud season has officially arrived and with it my itch to garden and grow has returned in earnest. I’ve just gotten my new elevated garden beds from Gardener’s Supply Co built over the old garden bed and spread a thick layer of clover seed beneath with dreams of a carpet of clover to rest on come warmer days and now I can’t think how I could wait another two months for our last frost to start planting them. So we’re going to plant out a small cold hardy garden in the first two beds here just to tide us over until we can start planting the majority of our crops in May.

The Cottage Peach is reader-supported. When you purchase through links on our site, we may earn an affiliate commission at no additional cost to you. All opinions are our own.
Are you wondering if March is too early to start a garden? This post explains what plants can survive in the cold, what is a winter hardy plant, what are the easiest plants to grow in winter and more.
The ground is attempting to thaw, which means mud season has officially arrived and with it my itch to garden and grow has returned in earnest. I’ve just gotten my new elevated garden beds from Gardener’s Supply Co built over the old garden bed and spread a thick layer of clover seed beneath with dreams of a carpet of clover to rest on come warmer days and now I can’t think how I could wait another two months for our last frost to start planting them. So we’re going to plant out a small cold hardy garden in the first two beds here just to tide us over until we can start planting the majority of our crops in May.
This will be the smallest planting we do all year, and so I committed to really savoring the sensory experience of it and slowing down to enjoy the process. All I need to bring with me are my seeds, my favorite trowel and gloves. And I’ll be bundling up because while these plants I’m growing may be cold hardy, I most certainly am not! So sweaters and hats and layers galore. I love the lack of urgency and the sense of hope I get from planting the first cold hardy garden of the season. Soon green things will push up out of the earth and remind us that we are all connected to the life that grows beneath our feet.
We have a short growing season here in New England, but that won’t stop me from planting cold hardy vegetables that can thrive in these colder temperatures. My garden is just a few short steps from the back door, overlooking 70+ acres of my neighbors fields and surrounded by the buzz of life beginning to stir - a blue heron in the distance, a mouse skittering through the undergrowth.
Out back the trees are still in their deep sleep and the sun is trying its hardest to break through the seemingly endless layer of gray clouds that has graced the sky for the past four months now. I can still see my breath as I exhale, and this too is a reminder to be mindful. I breathe the same air as these trees that rest around me, and thank them for how clean and fresh it feels within my lungs. This grounds me in my purpose to bring myself and my body closer to the living things that are all around us.
What is a winter garden?
A winter garden is just a garden that you grow using only plants that can thrive in winter! There are many fun varieties of cold hardy vegetables and perennial plants that have unique characteristics that help them to survive in colder climates. For instance, kale, brussels sprouts and other brassica plants produce a form of antifreeze when exposed to cold temperatures that actually causes the plants to taste sweeter. I enjoy winter kale far more than summer kale - not to mention, there’s no cabbage moth pests in the winter chewing through every leaf before I have a chance to harvest it.
What plants can survive in the cold?
Now I’ll preface this by saying that what can grow in my garden in March may not be the same as what can grow in your garden. If you are in California for example I’m afraid this post won’t be much help to you as you do not suffer from the same deep cold winters we have here in the northeast. But in grow zone 6B many plants can survive the chill of late winter - as a matter of fact, some plants like lettuce and spinach require a colder temperature in order to germinate. This is why you’ll begin to see signs of life in the form of things like wild onion grass even this early in the season when the trees are still sleeping. And since we’re all about low-energy gardening tips and tricks here, I’ll also only focus on what is the easiest plants to grow in winter. No seed starting, forcing rhubarb or chilling your garlic seed in the freezer to trick it into sprouting earlier here. I want to focus just on plants that can go straight into the ground in March.
Winter plants for the garden:
Here is everything I will be planting in my cold hardy garden using my elevated beds from Gardener’s.
Snap peas (germination temp 40+ F)
Pansies (germination temp 45+F but we are planting these from established plants from the nursery not seeds)
Lettuce (germination temp 35+F)
Radish (germination temp 50+F)
Spinach (germination temp 40+F)
Chives (transplanting this from another spot, these grow well at temps above 40F)
Calendula (this one is more of an experiment as while it is cold-hardy once established, it probably won’t germinate until soil temps reach 60 degrees fahrenheit)
What is a winter hardy plant?
A winter hardy plant means any plant that can survive average winter temperatures, including cold hardy vegetables and cold hardy perennials. Most winter hardy plants do not produce much throughout the winter due to the lack of sunlight but by surviving these cold conditions they are able to establish themselves faster in the spring which means they will be the first to yield a harvest since they will mature before anything else in your garden.
What can I plant in pots for winter?
Some plants that won’t survive the winter outdoors can be transplanted into pots for the winter and brought indoors. You can do this successfully with most herbs including rosemary and sage. You can also overwinter pepper plants (which are perennial in warmer climates) by cutting off all of the foliage except for the main Y shaped stem, moving into pots and storing in your basement. They will go dormant and then can be transplanted back into your garden beds after your last frost date.
When I was deciding what to plant in early spring, I was happy that everything I wanted to grow would thrive in my elevated garden beds - which meant I didn’t have to worry about hurting my back while gardening. With my arthritis, it’s important that the way I garden is accessible and gentle on my body while still providing me with opportunities to stretch and strengthen my joints. I found prepping the elevated raised beds to be the easiest it has ever been, since I didn’t even need to weed the planting area prior to starting. It feels like a true luxury to stand over my raised beds in the garden and I was able to save more of my limited energy for actually enjoying being in the garden instead of just trying to finish as quickly as possible before my energy ran out. The beds are quite deep and so they can support the largest root structures of some of the plants I’ll be growing with no problem.
I had honestly begun to dread spring garden prep last year. I found myself crying in frustration more than once trying to wrangle the wildness of my in-ground beds into shape for planting. It is really shocking how much harder it is to work the earth when your back is in pain and your energy reserves are lower. While I do greatly appreciate the physical benefits of working out via the garden, and weeding has always been the best way to let out any pent up aggression, my body has been telling me for a couple of years now that this isn’t the right way to go about it for me anymore. I feel lighter knowing that I won’t have these dark moments in the garden where I really have to push myself beyond my limits anymore and can just be present and enjoy the process of gardening again. A part of me felt worried I wouldn’t be taken seriously as a gardener if the majority of my plants were grown in what is effectively a giant container garden. Especially with our full acre to work with, I knew I wanted to take a hybrid approach. So we have perennials like asparagus and rhubarb in-ground since those don’t require much maintenance year-to-year and then larger crops like garlic in ground as well. And of course borders of wildflowers fill up a lot of space too. Eventually it is my dream to add a greenhouse to carry us through the endless winters. But these elevated beds have taken such a weight off my shoulders (and my back!) and gave me back my peace in the garden, and I would not trade that feeling for anything.
Adding herbal and aromatherapy elements to your bathing ritual has been a long standing tradition in cultures around the world, but there’s just something extra rewarding about it when you grow those flowers and herbs yourself. So head out to the garden and clip a few sprigs of whatever calls to you - we’ll go over some of the easiest ways to include plants in your shower routine.
Learning about how different herbs can provide different benefits for the skin and body can bring you closer to nature and yourself, as well as offering a ton of ways you can support yourself through a self care ritual not rooted in consumerism (hard to find these days). You’re probably familiar with using fragrant botanicals like eucalyptus and lavender in your spa shower routine, but here’s a few more herbs and flowers you should consider including next time you’re looking for a soothing sensory experience in the shower: