
BACKYARD GARDENING MADE SIMPLE
![Make This Easy + Natural Botanical Hand Salve [Recipe]](https://images.squarespace-cdn.com/content/v1/60e85024dc86d643da81c96a/b57698b0-de70-4101-afaf-7af57788237d/Herbal+Face+Steam+Recipe+by+The+Cottage+Peach-1.jpg)
Make This Easy + Natural Botanical Hand Salve [Recipe]
Although it felt for a moment as though we would never see spring again, suddenly I am waking up to to-do lists filled with seed starting tasks and dirt under my fingernails once more. But what is more inevitable than spring for a gardener? Calluses and dry skin galore from all that time spent working with our hands in the soil. It doesn’t seem to matter what gloves I wear, there is no point in the growing season where I have the hands of a model between the short, practical nails and the constant need to moisturize. Anyone who has struggled with gardener’s hands knows the eternal search for the perfect balm - some are too greasy, some seem to evaporate off your skin within seconds and have no effect, but to find the elusive, perfect hand balm is to discover the holy grail of the gardener’s toolbox.
The Cottage Peach is reader-supported. When you purchase through links on our site, we may earn an affiliate commission at no additional cost to you. All opinions are our own.
Although it felt for a moment as though we would never see spring again, suddenly I am waking up to to-do lists filled with seed starting tasks and dirt under my fingernails once more. But what is more inevitable than spring for a gardener? Calluses and dry skin galore from all that time spent working with our hands in the soil. It doesn’t seem to matter what gloves I wear, between the short, practical nails and the constant need to moisturize there is no point in the growing season where I have the hands of a model! Anyone who has struggled with gardener’s hands knows the eternal search for the perfect balm - some are too greasy, some seem to evaporate off your skin within seconds and have no effect, but to find the elusive, perfect hand balm is to discover the holy grail of the gardener’s toolbox.
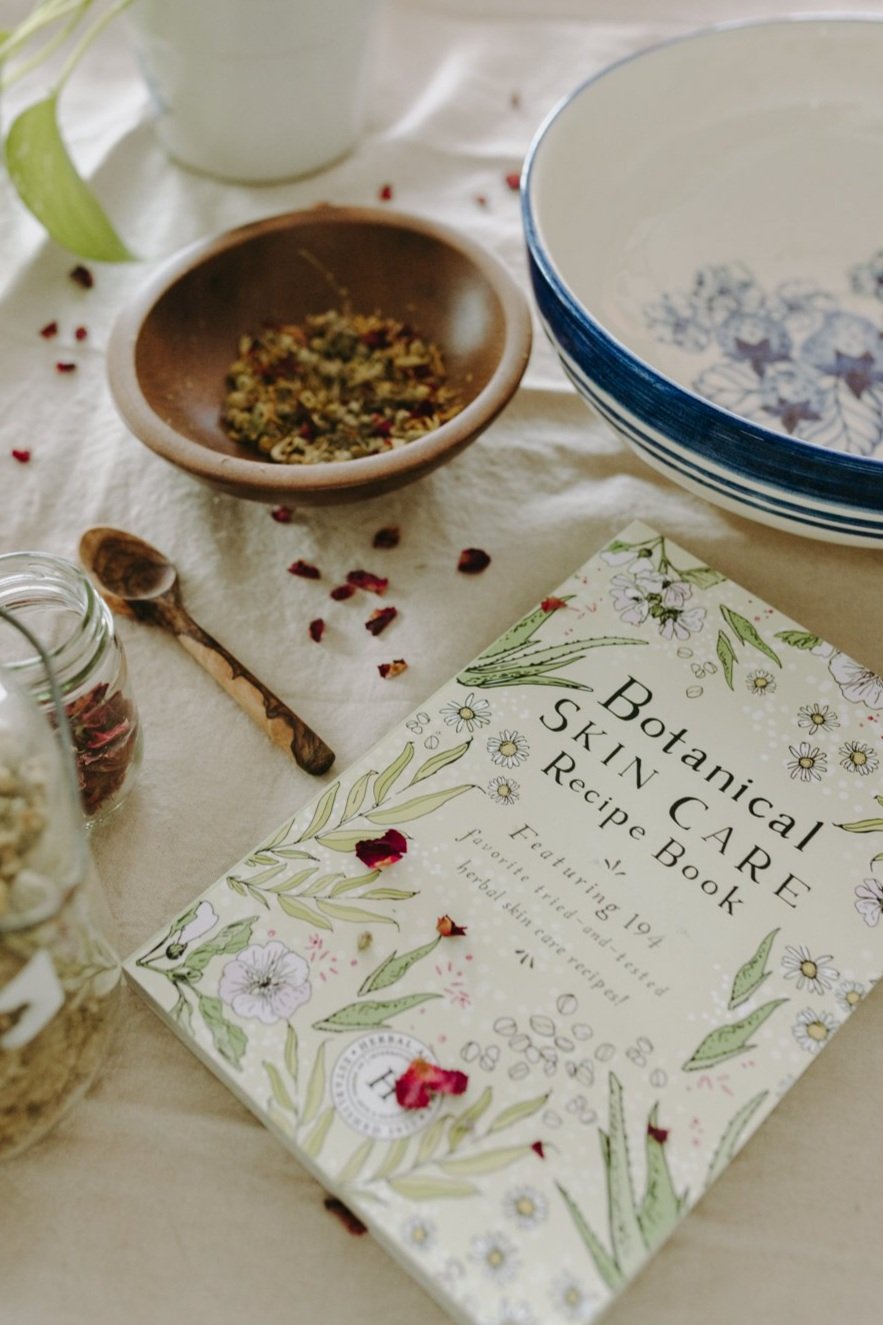
So while I have been enjoying this time of growth and watching my little sprouts join the world and reach upward with their new leaves, the experience would be infinitely better if I had the benefit of a hand salve recipe that would support my skin through this intense part of the growing season. Whenever I find myself with a skin concern I always turn to Herbal Academy’s Botanical Skincare book because it has at least one of every common type of skincare product you could need, with easy to find ingredients and no complicated recipe processes that would leave me wondering if I had actually made the thing I was trying to make. Most of the recipes are so simple they fit on a single page, but don’t let the fact that the recipes are simple fool you into thinking these recipes are “just ok”. In fact, I believe their power lies in their simplicity. We don’t need a hundred different ingredients to achieve most of the desired effects and in the case of skincare I do believe less is actually more. The beautiful illustrations just keep me motivated to discover more.
Since my psoriasis diagnosis I’ve had to become extra careful about what I put on my skin, and so many commercial products available today have harsh ingredients that aggravate my skin condition. I like to be able to pronounce everything I am putting on my body if possible, and going with homemade skincare products helps me do this.
You really don’t need many supplies to make your own homemade hand cream in your kitchen either. As long as you have measuring cups and a repurposed container to store your finished natural calendula hand salve in, a double boiler can be made if you do not have one by placing a mason jar inside of your pot sitting on top of the lid of the jar to keep it from coming into direct contact with the heat source. It’s also a good idea to dedicate a stirring spoon that you don’t need anymore to the task as it may come into contact with ingredients that are not food safe. This spoon can be reused for all of your future skincare DIY projects - trust me, once you start making your own DIY lotion recipes you won’t be able to stop! You can of course purchase all the supplies needed - Mountain Rose Herbs is my supplier of choice for quality ingredients - but what could be more satisfying than creating homemade hand lotion recipes with plants you grew yourself? Growing calendula is easy and will add beauty to your garden before you harvest and dry for your homemade skincare projects. Once you get the hang of the process, these recipes also make one of kind gifts for birthdays, holidays and just-because presents that everyone will enjoy.
I’ll get into all of the details for how to make your own DIY lotion recipe at home below, but first let's talk a bit about the individual ingredients we will be using in this recipe. You’ll only need a few ingredients for this project, but if you feel like substituting something for one listed below there’s no harm in making the recipe your own. You’ll be able to mix up a batch in just a few minutes, and be well on your way to a calming self care ritual that is affordable, natural and zero-waste.
Calendula Flower
This wondrous flower is full of useful properties!
Vulnerary – assists in promoting healing of tissues
Anti-inflammatory – eases inflammation
Hemostatic – helps to stanch bleeding
Topical analgesic – assists in relieving pain
Astringent – promotes tightening and toning of tissues
Antiseptic – helps to prevent or stop microbial growth
Diaphoretic – assists the body during illness by promoting perspiration.
Lymphagogue – assists in stimulating the lymphatic system
*The above information was taken from Calendula Monograph by the Herbal Academy, The Herbal Handbook by David Hoffmann, and Herbal Medicine From the Heart of the Earth by Sharol Tilgner
Licorice root
Licorice root may have potent antioxidant, anti-inflammatory, and antimicrobial effects.
Plantain leaf
Plantain is high in vitamin A, allantoin, apigenin, aucubin, baicalein, linoleic acid, oleanolic acid, sorbitol and tannin which all promote wound healing, speed up cell regeneration and have skin-softening effects.
Beeswax
Beeswax hydrates, conditions, soothes, and calms the skin. It exfoliates, repairs damage, promotes the skin's regeneration, diminishes the appearance of the signs of aging, soothes itchiness and irritation, and creates a hydrating, long-lasting protective barrier against environmental pollutants.
In the case of our salve recipe, it will also help bind our liquid ingredients together in a more solid spreadable form. It is a popular ingredient in homemade salve recipes for that reason.
Sesame Oil
Sesame oil is rich in Vitamin B and E, which help soothe skin rashes and fade scars. It is also very effective in treating skin conditions like inflammation, eczema, athlete's foot, psoriasis, and redness. The natural anti-tanning properties of Sesame oil make it an excellent barrier against the sun's harmful rays.
HOW TO MAKE CALENDULA INFUSED OIL
There are many ways to make an infused oil but my favorite is a simple folk method - this means we won’t be making any exact measurements. You’ll find that many herbalists employ a folk method for their skincare concoctions since accuracy in dosing is not generally a requirement unless taken internally.
To make an infused oil using the folk method, all you need to do is fill your mason jar about halfway with your plant ingredients, then cover at least an inch above the herbs with your oil of choice. I usually end up filling the jar almost all the way to the top. Tap lightly on a solid surface to make sure there are no air bubbles trapped in the oil and place the infusing oil jar in a cool dark place such as a closet or pantry (somewhere out of direct sunlight) for about six weeks. You can regularly shake the jar to redistribute the oil, and you may notice that after the first day or two much of the oil has been absorbed into the dried herbs and you will need to add more to keep the flowers completely covered in oil. This is normal and to be expected. I have more detailed instructions available here.
The calendula + friends oil used in the recipe below is made more precisely, with 1 cup sesame oil, 1/4 cup calendula, 1/8 cup licorice root and 1/8 cup plantain leaves. You can do a hot infusion to speed up the infusion process as well. For the full recipe be sure and grab the Botanical Skincare Recipe Book here.
So are you wondering when I’m going to tell you how to make hand lotion at home? Let’s get to it! This recipe comes from the Botanical skincare course from Herbal Academy and its corresponding book of recipes - you can see my full review of this in depth course here.
Calendula + Friend Salve Recipe from the Botanical Skincare book by Herbal Academy:
This nourishing and richly moisturizing calendula salve recipe is perfect for dry, cracked hands that have been in the soil all day!
Ingredients
1 cup calendula + friends infused oil
2-4 tbsp beeswax
Directions
Place infused oil and beeswax in a double boiler over low heat (or a glass or ceramic bowl or canning jar over a small saucepan of simmering water) until beeswax has melted and ingredients are thoroughly combined.
Dip a clean spoon in to the formula and place it into the refrigerator so the salve will cool quickly and you can determine if its consistency is what you desire. If the sample is too soft, add a little more wax to the warm salve; the sample is too hard, add a little more of the infused oil.
While warm, pour individual portions into appropriate containers and allow to cool at room temperature.
Once cool put the lids on and label.
Store in a cool, dark place for up to 1 year.
Will you try this recipe? Learn herbalism with Herbal Academy by clicking here

![The Power of Nature: How To Make Infused Oregano Oil for Your Health and Wellness [Recipe]](https://images.squarespace-cdn.com/content/v1/60e85024dc86d643da81c96a/1682625337753-AFI1M6MRRMDQ5CBNY2TX/unsplash-image-Fl2Ki3_GZIU.jpg)

Acupressure For Pain And Anxiety: Pranamat ECO Honest Review
When my arthritis spread to my spine last year, it was crippling. I lost sleep every night tossing and turning, completely unable to relax. This vicious cycle of pain leads to stress which releases cortisol, causing even more pain and discomfort. This wasn’t the kind of pain that would go away if I took enough anti-inflammatory pills, it was all encompassing to the point where I’d give up on sleep at 3 or 4 in the morning and just go lie on the couch until the sun rose. It’s hard for me to even type this, remembering how much time I spent crying and wishing for the pain to stop. It felt like my identity had been stripped away and all that was left was my pain. From the outside, I looked “too young to be sick”, but inside I was suffering.
In dark times like this, you learn very quickly that your vulnerability will be exploited by anyone who thinks they can turn your pain into profit. I’ve always been a conscious consumer and didn’t want to fall into any of these traps. But I’ve also always leaned towards the holistic side of things and wanted to find options for pain relief that aligned with my desire for natural alternatives while still providing proof of their effectiveness.
As you’ll see, the benefits of acupressure mats are widely studied and there is plenty of research to back up their claims. So I decided to give it a try. And what I found was life-changing. Or in my case, life-giving.

When my arthritis spread to my spine last year, it was crippling. I lost sleep every night tossing and turning, completely unable to relax. This vicious cycle of pain leads to stress which releases cortisol, causing even more pain and discomfort. This wasn’t the kind of pain that would go away if I took enough anti-inflammatory pills, it was all encompassing to the point where I’d give up on sleep at 3 or 4 in the morning and just go lie on the couch until the sun rose. It’s hard for me to even type this, remembering how much time I spent crying and wishing for the pain to stop. It felt like my identity had been stripped away and all that was left was my pain. From the outside, I looked “too young to be sick”, but inside I was suffering.
In dark times like this, you learn very quickly that your vulnerability will be exploited by anyone who thinks they can turn your pain into profit. I’ve always been a conscious consumer and didn’t want to fall into any of these traps. But I’ve also always leaned towards the holistic side of things and wanted to find options for pain relief that aligned with my desire for natural alternatives while still providing proof of their effectiveness.
As you’ll see, the benefits of acupressure mats are widely studied and there is plenty of research to back up their claims. So I decided to give it a try. And what I found was life-changing. Or in my case, life-giving.
How does acupressure work?
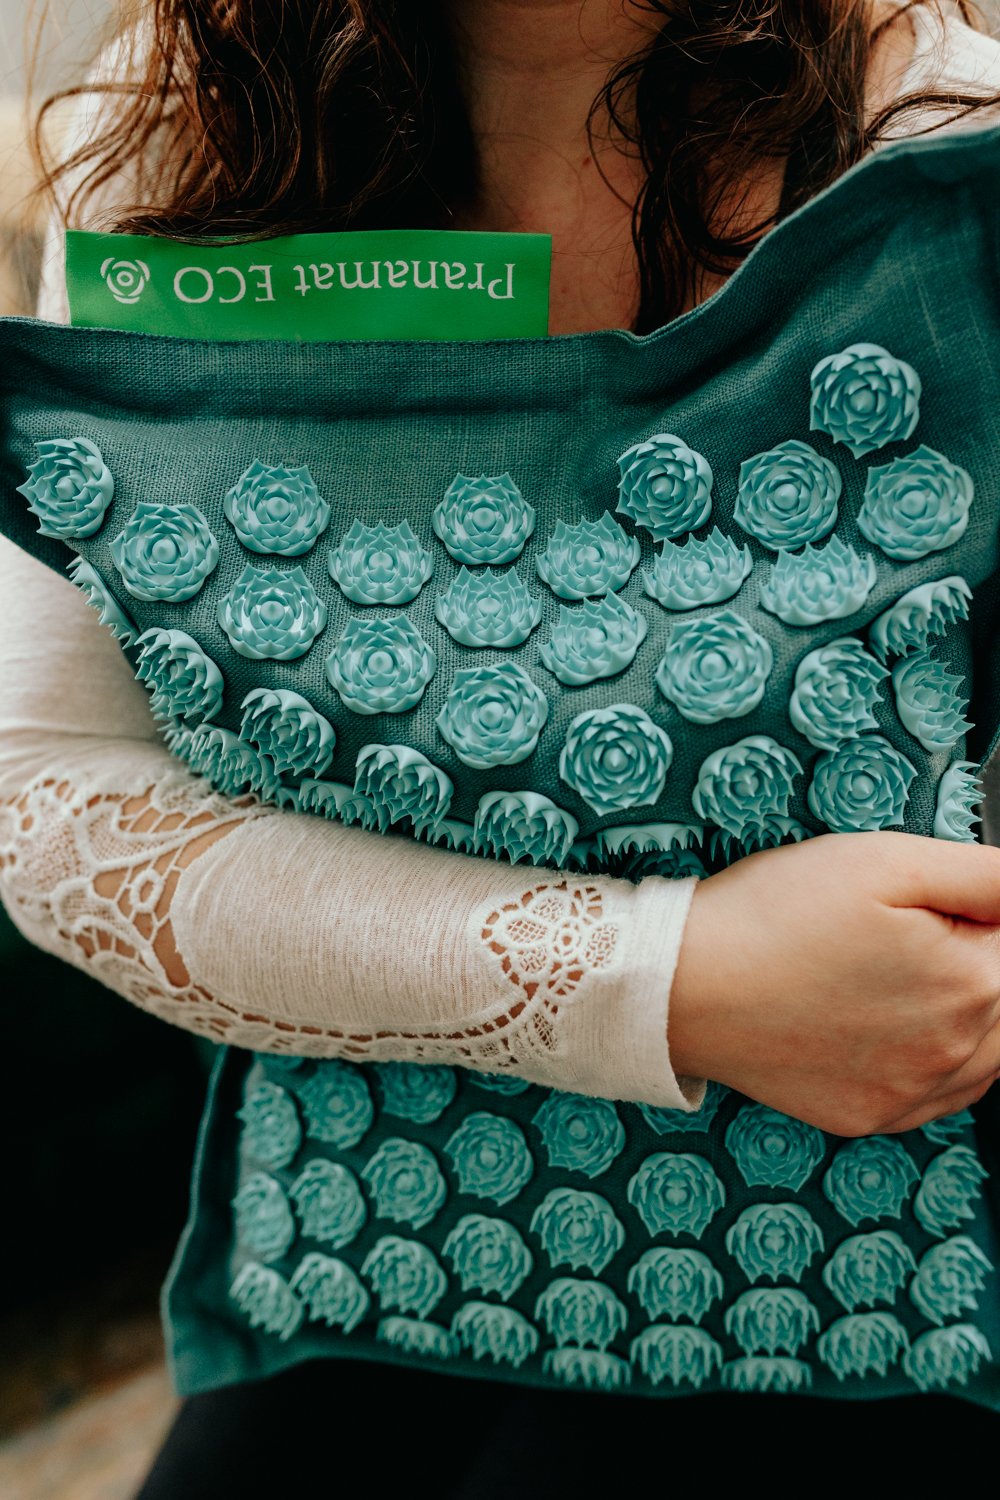
The 10,000+ plastic spikes on the Pranamat ECO lotus flowers help to stimulate blood flow, increasing circulation, releasing muscle tension, opening narrowed blood vessels caused by tension that may result in headaches, spreading soothing heat, kick-starting cell regeneration required for healing and encouraging the body to suppress cortisol (the stress hormone) and release endorphins (a natural painkiller), resulting in a euphoric feeling.
What is acupressure vs acupuncture?
Both acupressure and acupuncture are holistic and drug-free approaches to health. Acupressure uses targeted non-invasive pressure points on the surface of the skin while acupuncture uses extremely thin needles set into the skin. Acupressure can be done at home to deliver an at home massage every day while acupuncture must be performed by a licensed practitioner.
How often should you do acupressure?
Pranamat recommends using your acupressure mat at least once a day for twenty minutes. You can start off at 5 or 10 minutes until you get used to the sensation since it can be quite intense!
Does acupressure Work for joint pain?
Yes, acupressure mats are excellent for relieving joint pain, and if you’re wondering if acupressure for back pain is effective, it is! The effectiveness of Pranamat ECO is clinically-evidenced. Two studies were funded by the European Union in 2014. In this study, 97% observed total muscle relaxation, improved posture, and a stronger-feeling spine, 93% observed a total elimination or significant reduction of back pain and 92% reported that they would continue to use Pranamat ECO.
The first part of the study consisted of rigorous laboratory testing. The team of doctors came to the conclusion that use of the Pranamat ECO acupressure mat:
Significantly increases the intensity of blood flow in the circulation of the skin;
Accelerates cell metabolism;
Reduces inflammation of the muscles and joints;
Reported elimination or dramatic reduction in pain.
In the second part of the study, they showed that after 30 days of using the Pranamat ECO acupressure mat patients experienced:
Improved oxygenation of tissues;
Improved muscle-tone;
Increased cell metabolism;
Improved physical and emotional health.
It’s clear that there are many acupressure benefits for both mental and physical health.
What is Pranamat ECO made from?
The inner padding of the Pranamat ECO acupressure mat is made from sustainable coconut fiber as a supportive filler that is naturally resistant to dust, mold and odor. The removable exterior is made of sustainable linen and uses bespoke natural dyes. All materials used in the Pranamat ECO are natural and ethically sourced, custom-made and have passed rigorous quality tests. The STANDARD 100 certificate independently awarded by OEKO-TEX® guarantees that Pranamat ECO is free from harmful substances and safe for intensive skin contact.
Is Pranamat ECO sustainable?
Pranamat ECO is the only acupressure mat made using energy from only renewable sources and all materials are zero waste and sourced locally. The coconut fiber filler is a by-product from the food industry. The 10,000+ pointed spines on the lotus flowers designed to increase blood and lymph flow from the very first minute of use are made from recyclable plastic that uses less energy and fresh water and produces fewer emissions. This recycled plastic is completely smooth and non-porous and utilizes special heat adhesion technology to attach the lotus flowers to prevent any exposure to toxic glues, acetone or chemical fumes. Even the packaging and user guide are made with recycled and biodegradable materials.

Is Pranamat ECO ethically manufactured?
This acupressure mat is produced by hand using ethical production methods in a creative, egalitarian and diverse work environment in Latvia.
Does acupressure help anxiety?
Yes, acupressure mats may help relieve anxiety. Clinical studies have shown that using Pranamat Eco for 30 days helps relieve stress, improves mood and general well-being.
Does acupressure affect blood pressure?
More research is needed, but one study suggests acupressure mats lower your blood pressure by stimulating blood circulation and relaxation.
How big is the Pranamat ECO?
The surface of the Pranamat ECO acupressure mat is larger than most acupressure mats, allowing it to cover your entire back. This acupressure mat measures 28.7 × 17.7 inches.
How fast does acupressure work?
I noticed the benefits of this acupressure mat within the first few minutes of the first massage, starting with a sensation of warmth in the skin. About ten minutes in, a deep sense of calm and peace rolls over me and quiets my mind.
Pranamat ECO Acupressure Mat Review
I’ll be honest; using the Pranamat Eco can be an intense experience at first. When I laid down on the acupressure mat for the first time, the tingling sensation was very strong and I had to take some deep breaths to settle in. At first, my skin felt very hot as the spikes pressing into my back increased my circulation, but after the first two or three minutes this heat transforms into a soothing warmth. If you’re nervous about using the mat directly on your skin the first time, you can try it while wearing a thin cotton t-shirt at first just to get used to it. But once the initial surprise subsides, you will find your mind and body relaxing dramatically. I suffer from back and joint pain due to my chronic illness as well as generalized anxiety, and the near-immediate effects I felt were a release of the muscle tension I hold all day every day in my body and a quieting of my mind. Usually my thoughts are going off in a million directions every minute, but after using the Pranamat ECO acupressure mat for twenty minutes I felt clear headed and calm. The more than I use my acupressure mat, the faster I am able to settle into that calm headspace. The initial sensation is less intense over time as your body adjusts (which doesn’t dull the benefits at all!) so I can truly lean into the experience right away.
I use my Pranamat ECO at night just before going to bed to combat insomnia so I can sleep deeply without interruption. Since acupressure has such a calming effect on my sleep routine, I am more energized and ready to take on the day the next morning.
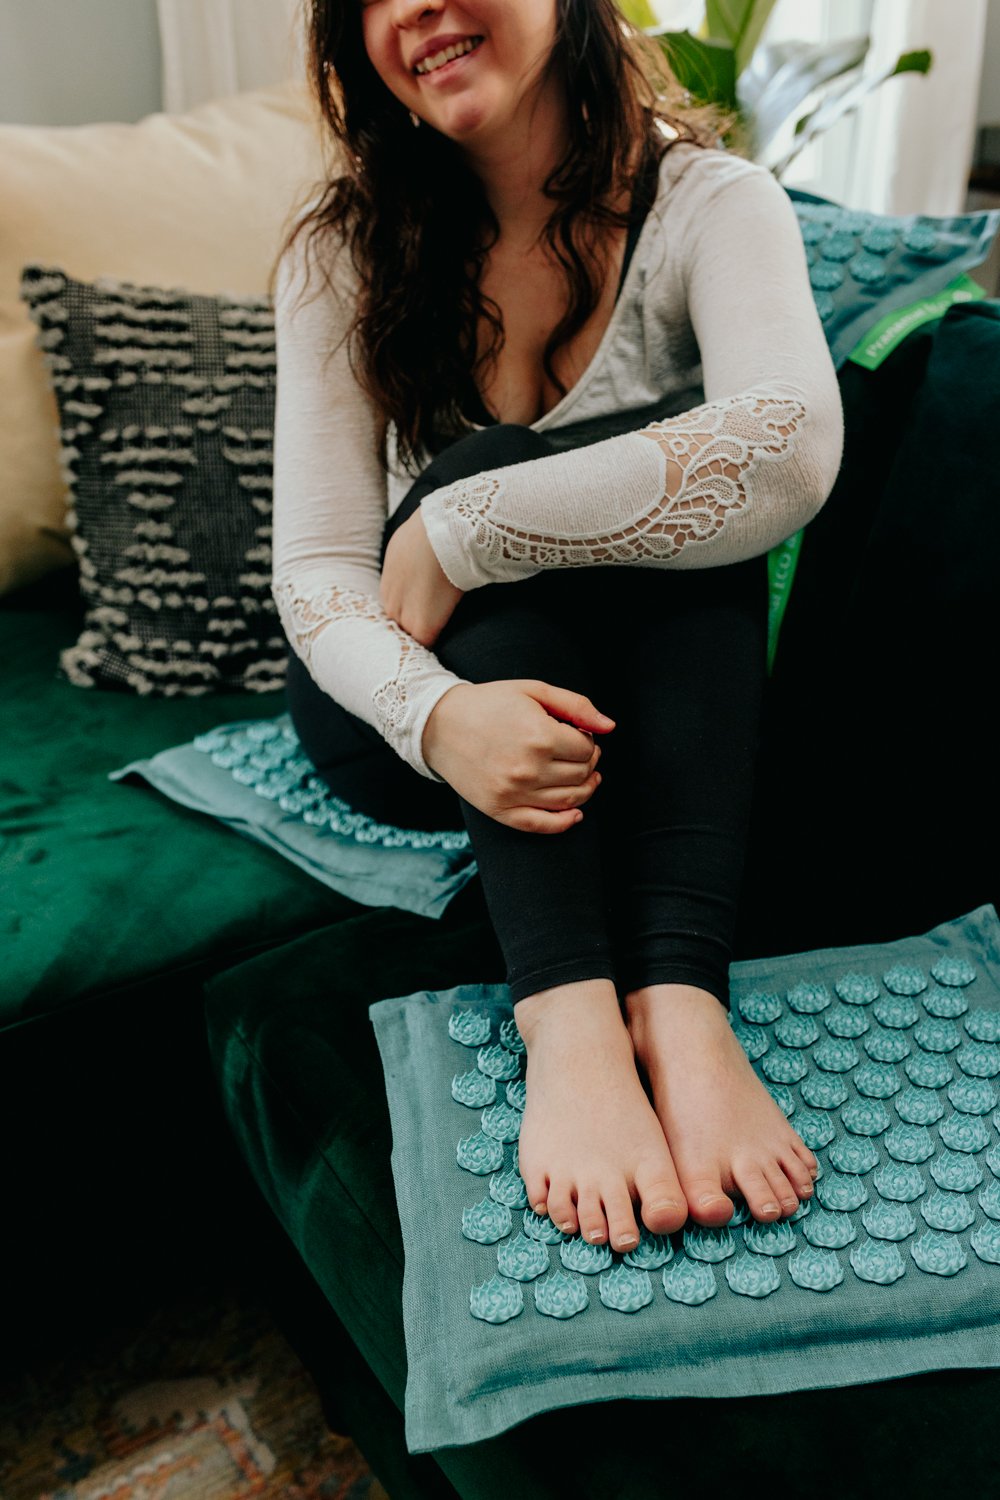
I also like to keep my mat nearby while I’m working all day or reading in the evenings so that I can get a quick massage while I work or read. You can use this acupressure mat while laying down or place it in your desk chair. I also use the foot mat while sitting at my desk or cooking dinner to relieve foot pain and recharge.
Here’s the thing…there’s a lot of cheap knock-offs of the Pranamat ECO - and I’ve tried them! They don’t compare. It’s like the difference between sleeping on an air mattress and an actual bed. I wanted to share this because while it may seem like a simple thing to replicate (just add spikey bits to a piece of foam and fabric) there’s more going on in the construction of this mat than meets the eye, from the density of the inner coconut fiber mat to the thickness and shape of the lotus spikes. Most important to me is the fact that Pranamat has been awarded the STANDARD 100 certificate by OEKO-TEX®, which guarantees that Pranamat ECO is free from harmful substances - so important for a product that comes in intensive contact with your skin.
USE code 'thecottagepeach
for The best offer on Pranamat + a 5 year warranty and 30 day free trial!
Individual results may vary. Products mentioned and texts written on this website are not intended to diagnose, treat, cure or prevent any disease and do not replace medical advice. Advice on the treatment or care of an individual patient should be obtained through consultation with a physician or trained healthcare practitioner with access to examine the patient and/or is familiar with the patient's medical history.


Caraway Home Non-toxic Cookware Review
I know, these days it feels like you can’t make it to lunchtime without learning that another household product that you’ve been using every day for your whole life is actually full of toxic chemicals. But this one is a big one, so I hope you’ll stick with me: There’s a very good chance if you have non-stick pots and pans that aren’t ceramic, they could be contaminating your food with toxic chemicals while you cook.
The Cottage Peach is reader-supported. When you purchase through links on our site, we may earn an affiliate commission at no additional cost to you. All opinions are our own. Products in this post were gifted.
I know, these days it feels like you can’t make it to lunchtime without learning that another household product that you’ve been using every day for your whole life is actually full of toxic chemicals. But this one is a big one, so I hope you’ll stick with me: There’s a very good chance if you have non-stick pots and pans that aren’t ceramic, they could be contaminating your food with toxic chemicals while you cook.
Here’s what Caraway Home has to say about toxins in your cookware potentially leaking into your food:
A popular material that has been used in the past in such non-stick cookware is Teflon. This synthetic chemical is also known as polytetrafluoroethylene (PTFE). Teflon is often used to coat a variety of products, including cookware, due to its frictionless qualities that provide a non-stick surface.
The issue with this material is that it uses perfluorooctanoic acid (PFOA) during its production. This chemical has been linked to numerous health conditions, including cancer, thyroid disorders, and more. Other chemicals, such as per-and polyfluoroalkyl substances (PFAS), are found in this material and can cause similar health issues as PFOA.
When cooking with non-stick cookware that has these chemicals, you run the risk of accidentally ingesting it. This can happen if the coating gets scratched, as it could flake off while in use and get consumed.
Additionally, when Teflon is heated over 570°F, it begins to break down, releasing the toxic chemicals into the air, which can then be consumed.
Now, most of us aren’t heating our pans to 570°F, but I’d wager that your pots and pans probably have a few nicks, chips and scratches in them - I know ours do. And while this exposure is happening in tiny amounts, there is still the potential for a negative compounding effect when you cook with Teflon coated products on a daily basis that can’t be ignored.
We’re all cooking from home more than we used to
Since the cost of, well, everything, just keeps going up, I know we aren’t the only ones trying to cook more from scratch to combat rising food costs and control our budgets. With more people cooking at home in recent years, the safety of our cookware is taking center stage. After all, what’s the point in spending extra on organic, locally grown produce if all the health benefits are going to be tainted by toxins leaching into your finished recipe? And maybe now that you’re cooking more food at home you’re noticing that that dented and scratched fry pan you’ve had since college isn’t really giving you the results you expect in the kitchen. The last thing we need with rising food prices is to waste perfectly good food simply because it cooked unevenly and burned on an old fry pan.
Is Caraway Home Cookware Easy To Clean?
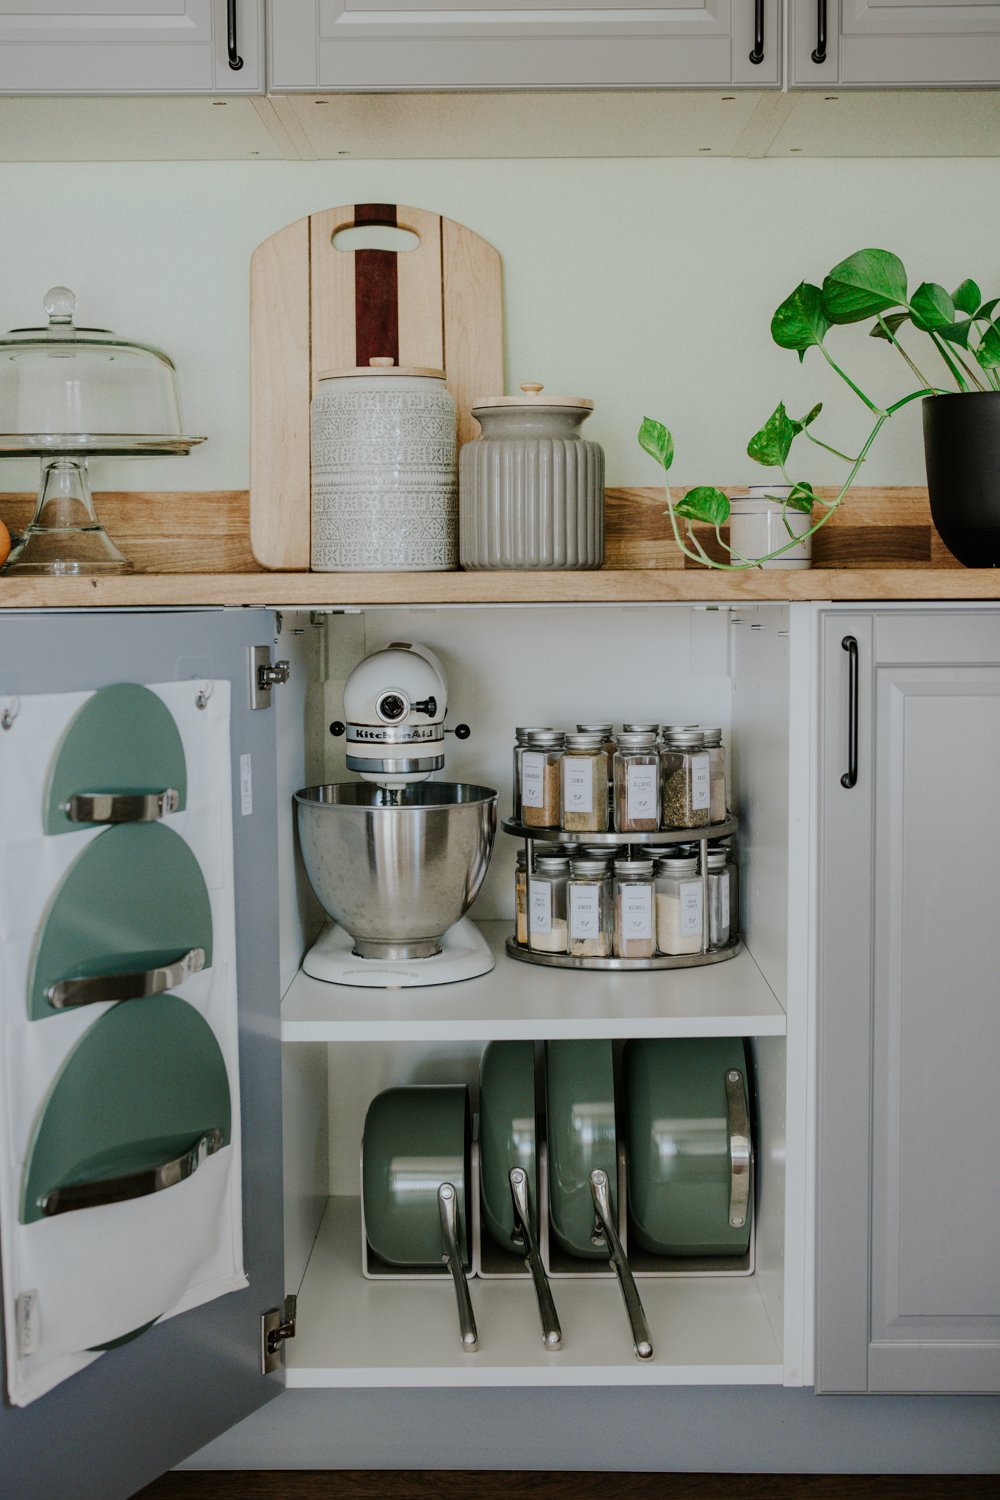
Caraway home cookware is easier to clean than traditional pots and pans, since the ceramic coating forms a naturally slick frictionless surface that resists stuck on messes. The finish feels almost polished; it is so smooth. Personally, as someone with chronic illness and fatigue, I dreaded lifting clunky heavy cookware in the sink to scrub it forever, so finding a cookware set that is easy to clean makes a huge difference in how draining it is for me to wash and dry my dishes. It also reduces the amount of water and soap I need to use to clean my pots and pans - another win for the environment since any way we can reduce our consumption of packaged products like soaps is a small way we can help the earth.
The ceramic coating also cooks more evenly, meaning you are less likely to ruin your recipe by overcooking certain areas. Less burned food means less food waste too, making this an eco-friendly option for reducing food waste in the kitchen.
Is Caraway Home Cookware Really Non-Toxic?
Yes! Ceramic cookware is totally safe. Caraway home even offers access to their full testing reports showing the safety of their products. It really makes you wonder - if something as simple as ceramic is more effective than these leading companies using toxic products to coat their pans, why do Teflon coated pans even exist? I think we’ll be seeing the end of this kind of toxic cookware in our lifetime, now that so many better options like Caraway Home are available for cooking.
Is the Caraway Home Cookware Set Durable?
If you’re worried because the word ceramic makes it sound like this cookware may break easily, rest assured that ceramic cookware isn't actually made 100% of clay. The ceramic in these pots and pans is a durable multi-layered coating that is put on top of a metal core. We are far from gentle with our pots and pans and our cookware set still looks as good as the day that we bought it. Now, it’s still recommended that you treat your ceramic cookware with care. But that’s easy to do when you no longer have to aggressively scrub your pots and pans in order to remove burnt food residue!
What pots and pans are included in the Caraway Home Cookware Set?
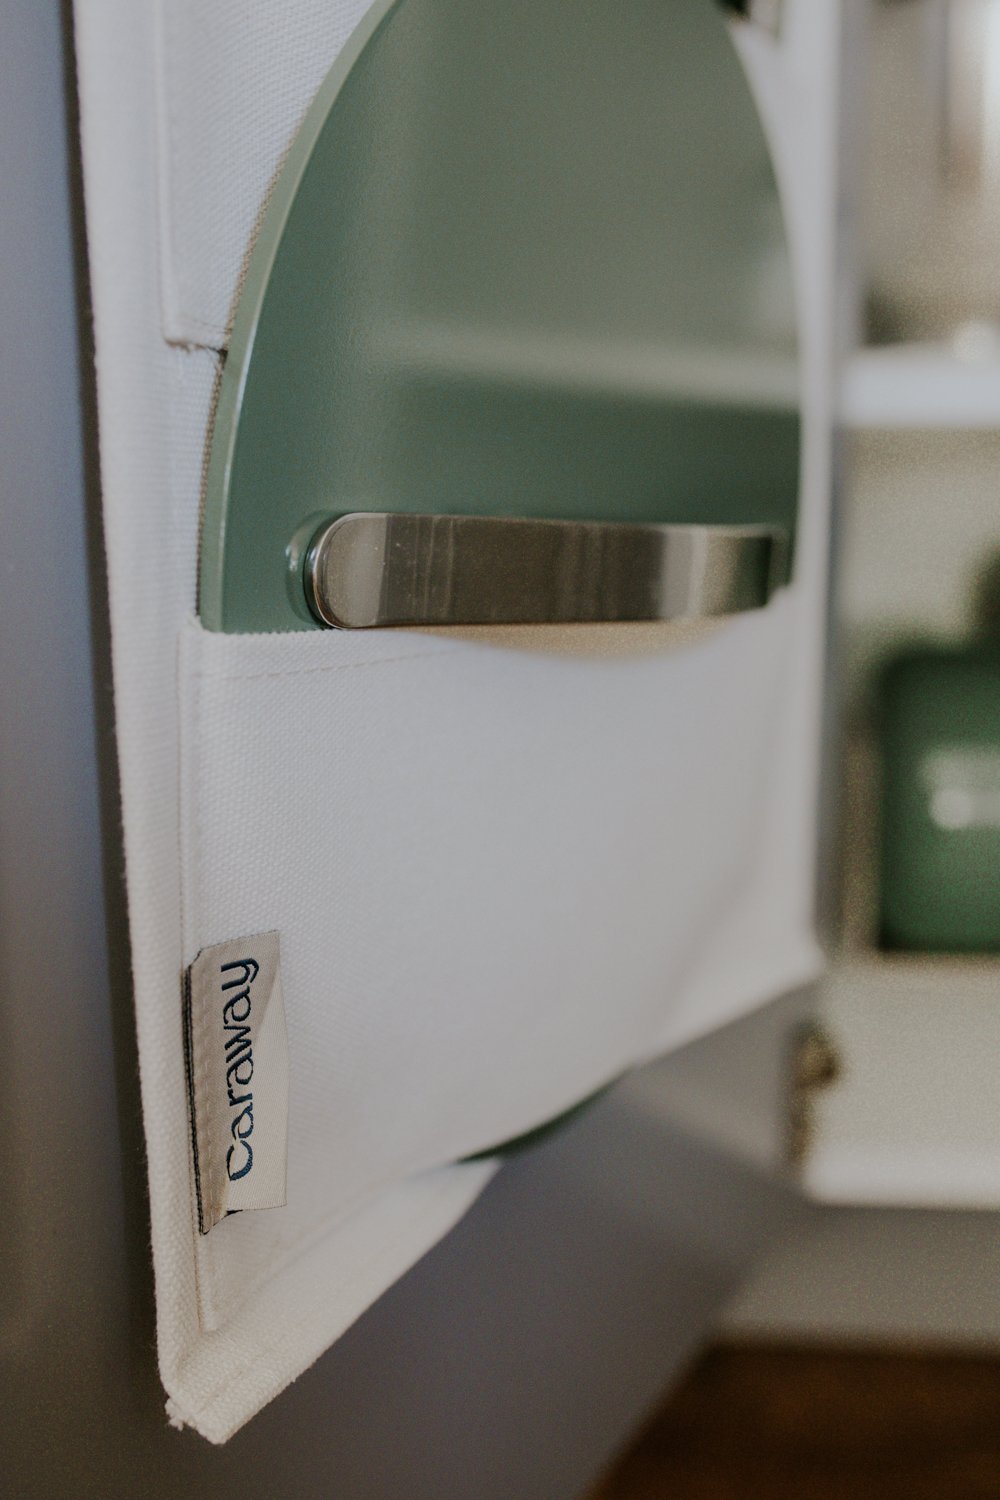
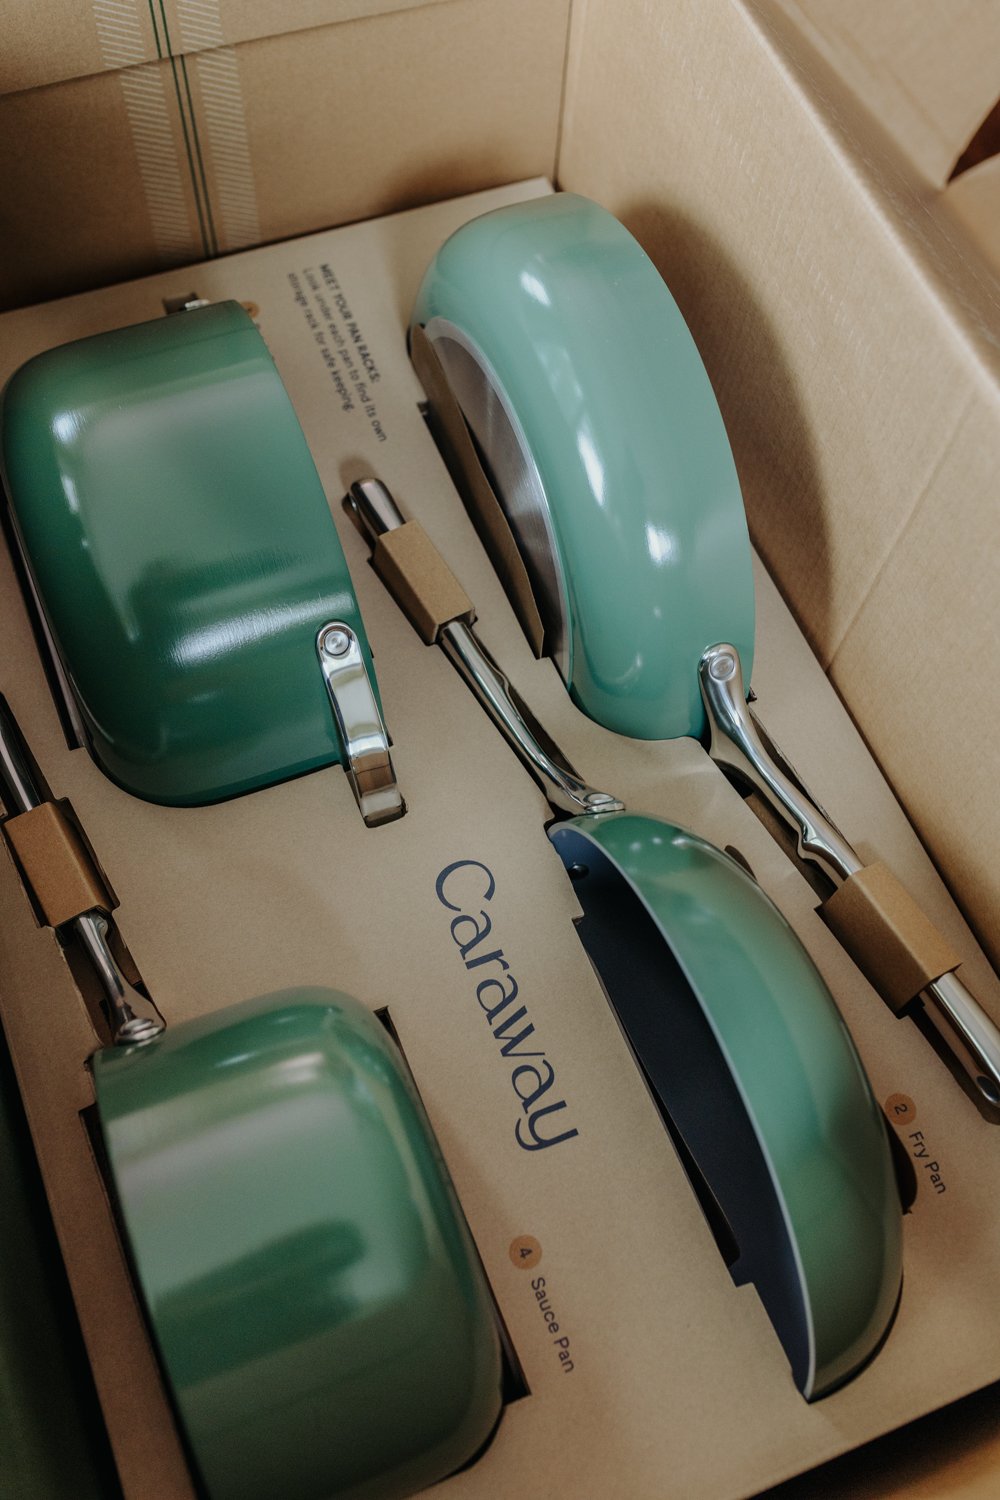
When you purchase the full set, you will receive the 10.5” fry pan, the 3 quart sauce pan, the 4.5 quart saute pan and the 6.5 quart dutch oven. You can also buy each piece individually if you want to build your collection over time. They just released minis of the fry and sauce pans too, which are perfect for smaller kitchen projects like easy-over eggs and gravy.
You can choose from a rainbow of colors to match your kitchen decor including cream, navy, sage, perracotta and marigold. I went with the sage for our kitchen since green is my favorite color and I love how earthy and neutral it is at the same time.
The full set also includes their custom magnetic pan rack and canvas lid holder, eliminating the frustration of trying to keep your pots and pans organized and separate while providing a beautiful system that can even be displayed on your countertop if you want. The canvas lid holder can be affixed anywhere - inside a cabinet door, on the side of your fridge or even on the outside of your end wall cabinet or walls.
Can you use Caraway Home Cookware on an induction stovetop?
Yes - Caraway pots and pans are cooktop agnostic, which means they will work on any type of stove - gas, electric, or induction! This was a big reason I wanted to make the switch, since once our electric range dies we plan to switch to an induction range for the environmental benefits, safety features and ease of cooking.
Caraway Home Cookware Review
After testing the Caraway Home Cookware set in my own kitchen (remember, we eat mostly from scratch vegetarian meals so we cook for almost every single meal) I can confidently say that Caraway offers the best non toxic cookware in 2022. These are really the best non-stick, non-toxic pans you can get.

We tested our pots and pans by cooking a wide array of dishes, from eggs for breakfast to skillet dinners. We even put them directly into the oven (they are oven-safe up to 550F), and found they were easier to clean and resulted in a more even cooking than the competition. That combined with the peace of mind I get knowing that my cookware isn’t contaminating my food has made these one of my top choices for cooking. The non-toxic frying pan gets the most use by far, since we can make such a huge variety of dishes with it. While the pans aren’t necessarily lighter than their competition, since it’s so easy to clean dishes are piling up in the sink far less often than they once did and I’m able to easily grab a pan for dinner than I already used once that day for breakfast without the dreaded sinking feeling you get when you remember you forgot to soak it in the sink.
I wasn’t sure I’d need them, but the magnetic pan rack and canvas lid holder have been an unexpected plus, since I no longer have to move a million other pans out of my way to get to the one I need. They slide easily from the rack with little additional effort, and easily fit into our space so I didn’t have to rearrange the entire kitchen to make them work. One small note - depending on the style of your cabinets, if there is a shelf that is flush with the front of the cabinet box that you are looking to hang your lid holder on you won’t be able to fully close the cabinet door. We solved this by trimming down the shelf, but there’s many other places you could hang your lid holder such as the end of a wall cabinet or on the side of your refrigerator.
Overall, if you’re ready to replace your toxic non-stick pots and pans with something safer I’d definitely recommend the Caraway Home Cookware Set. They also have a full line of bakeware including baking sheets, loaf pans and muffin tins, as well as a super cute tea kettle which I think would make the perfect housewarming gift. We’ll be using our set for years to come, and adding on to the collection as needed. I have a collection of recipes coming up that feature these pots and pans to get you inspired to get in the kitchen and get cooking! I’ll add those to the post below as they are published.
Click here to get your Caraway Home Non-Toxic Non-Stick Cookware Set today.


![Make This Safe Oil Lamp With a Mason Jar and Olive Oil [Tutorial]](https://images.squarespace-cdn.com/content/v1/60e85024dc86d643da81c96a/4b41f060-48ac-4a43-9513-da483e392f3b/December+2022+The+Cottage+Peach-8.jpg)
Make This Safe Oil Lamp With a Mason Jar and Olive Oil [Tutorial]
February’s of my childhood often are filled with dim memories of snow storms and subsequent power outages, leading to inevitable candlelight dinners cooked over the fireplace. The warmth and flicker of the various fires we had lit both small and large reign in my recollection of those times. I can still smell the matches burning off after being extinguished, the light smoke wafting through the air to settle on clothing and blankets. Despite the bitter weather outside and the temporary lack of electricity, we were never cold. We had hats, sweaters, blankets, and each other.
Nowadays like many others in this community I find solace in the light of a candle. The eternal dance of flame is grounding and comforting, a reassuring hand when things feel like they may never warm back up again. I’ve experimented with candle making of all kinds - dipped beeswax tapers, pillars and hand poured jars of soy wax to name a few. So it was about time to try my hand at perhaps the easiest DIY flame source you can create - the DIY mason jar oil lamp.
The Cottage Peach is reader-supported. When you purchase through links on our site, we may earn an affiliate commission at no additional cost to you. All opinions are our own.

While the days may be slowly but surely lengthening, we are still very much in the winter season here in New England. February’s of my childhood often are filled with dim memories of snow storms and subsequent power outages, leading to inevitable candlelight dinners cooked over the fireplace. The warmth and flicker of the various fires we had lit both small and large reign in my recollection of those times. I can still smell the matches burning off after being extinguished, the light smoke wafting through the air to settle on clothing and blankets. Despite the bitter weather outside and the temporary lack of electricity, we were never cold. We had hats, sweaters, blankets, and each other.
Nowadays like many others in this community I find solace in the light of a candle. The eternal dance of flame is grounding and comforting, a reassuring hand when things feel like they may never warm back up again. I’ve experimented with candle making of all kinds - dipped beeswax tapers, pillars and hand poured jars of soy wax to name a few. So it was about time to try my hand at perhaps the easiest DIY flame source you can create - the DIY mason jar oil lamp.
Olive oil lamps are ubiquitous at archaeological sites across the Mediterranean region. Unsurprisingly, the most common oil used in the Mediterranean region was olive oil. In 2022, a 2300 year old olive oil lamp was unearthed in the West Bank. Clay lamps that used oil as a fuel source appeared during the Bronze Age around the 16th century BC and were ubiquitous throughout the Roman Empire. Thanks to all this evidence, there’s reason to believe that oil lamps appeared at the very dawn of human history. But we don’t need to go back in time to make our own DIY oil lamp. In fact, this simple mason jar craft can be made in minutes using items you may already have at home.
How oil lamps work:
Floating wicks come in a pack with the floating portion separated from the wick. You’ll place the wick in the hole in the center of the floating disk piece with half the wick on each side of the disk. This way, when you place the wick in the oil lamp, the oil will be drawn up through the wick and be vaporized and burned by the flame.
Are oil lamps expensive?
Not at all. Since one tablespoon of oil can burn for two hours in your lamp, it is much cheaper than most candles. This is a great addition to your emergency supplies, as well as being a beautiful addition to your table. For storm prep, all you need to make sure you have is a pack of the floating wicks, some olive oil, a mason jar and water and you can keep your home safely lit without electricity during a power outage.
Are oil lamps safe?
The danger of oil lamps comes from the possibility of spilling. If the lamp were tipped over while burning, the spilled oil would all catch fire all at once on whatever surface it spilled onto. Thankfully, olive oil has a very high flash point which means it’s not super flammable. Plus, we’ll only be using a small amount of oil - the rest of the liquid in our mason jar will be water. If our DIY oil lamp tipped over, it should extinguish itself immediately. That said - it’s always important to practice fire safety around any type of open flame. Always burn within sight, keep away from pets and children and away from any flammable materials. Never move your oil lamp while still burning. I assume no responsibility for any damage that may occur due to misuse of your diy olive oil lamp.

How to make a DIY Mason Jar Olive Oil Lamp:
The options are endless when you make your own olive oil lamp, and you’ll find inspiration below for different ways to turn your lamp into beautiful mason jar decor. But let's cover the basics first!
Supplies:
Mason jar (any size, I used a pint jar)
Floating wicks
Olive oil
Water
Decorative items to submerge in the water
Instructions:
Fill your mason jar until there is about half an inch of empty space at the top
Add any decorative items that you can submerge in the water - just be sure not to choose anything that will float too close to the surface and disrupt the flow of oil to the wick.
Pour olive oil into the mason jar on top of the water until the oil layer is about a quarter inch thick
Gently place the floating wick on top of the oil surface, light and enjoy your olive oil lamp.
Ideas for how to decorate your mason jar olive oil lamp:
Christmas mason jar olive oil lamp
Red holly berries, pinecones, cranberries, vintage ornaments and evergreen clippings are great for the holiday season. Choose materials in natural shades of green, red and brown and play with mixing different textures.
Fall mason jar olive oil lamp
Fall foliage in bright oranges, reds and yellows can be suspended in the water. Better yet, replace the mason jar with a hollowed out mini pumpkin!
Winter mason jar olive oil lamp
Birch bark from fallen branches, acorn caps, evergreen clippings and even twigs will capture the chill months of winter in a cozy fashion.
Spring mason jar olive oil lamp
Fresh crocus blooms, dandelions, tulips, eggs and apple blossom branch clippings will all celebrate the season of growth and fertility.
Summer mason jar olive oil lamp
Embrace the season of abundance with fresh herbs from the garden like mint and basil, cherry tomatoes, sunflowers, lavender, fresh fruit and berries.
Beachy mason jar olive oil lamp
Bring the beach bonfire to you with sand, seashells and seaglass (responsibly sourced if you can’t obtain them yourself of course)
Citrus mason jar olive oil lamp
Exactly what it sounds like - but no need to dump a few lemons in chaotically. Shake things up with different shapes, sizes and a variety of citrus fruits including lemons, oranges or clementines (sliced or whole) and a bit of green with sliced cucumber rounds or fresh leaves.
Floral mason jar olive oil lamp
Celebrate whatever is growing most abundantly in your flower beds at the moment and suspend your favorite cut flower in your lamp - try hydrangea, poppies, bleeding heart, sweet pea, roses, peonies or lilies. You can leave them whole, or just use the petals.
Crystal mason jar olive oil lamp
Place your favorite crystals in your oil lamp - just be sure not to use crystals that can dissolve in water - As a general rule of thumb (with some exceptions), crystals ending with “ite” tend to dissolve in water. Try crystals like Clear Quartz, Rose Quartz, Amethyst, Smokey Quartz, Citrine, Agate, Carnelian, Rutilated Quartz, Jasper, Tiger's Eye, Aventurine or Moonstone.
Mason jar decor is one of my favorite ways to update our home decor, because we always have the jars on hand and they are such a great blank slate from which you can creatively experiment with little effort.
Now that you know how to make your own DIY mason jar light, you know the options are endless to modify and customize your lamp to your own style and personality!
![Make Bread with NO Kneading Required [Recipe]](https://images.squarespace-cdn.com/content/v1/60e85024dc86d643da81c96a/0ae84a1b-0ddf-419f-a7e4-0d9087a8d8bd/PXL_20230120_190120755.PORTRAIT.jpg)
Make Bread with NO Kneading Required [Recipe]
Dear fresh baked bread,
I knew I first loved you before I had ever actually experienced you myself. From the moment I read Heidi for the first time as a child, I absorbed the imagery of a goatherd enjoying bread and cheese on the mountainside wrapped in a simple cloth with great excitement. Fresh bread became an elusive Thing that I knew I someday wanted to acquire, though it still did not occur to me in the era of Fruit Roll-Ups and Poptarts that fresh bread was something just anyone could make. Fresh bread had nooks and crannies to hold copious amounts of butter, a tough outer crust giving way to a soft and springy interior. Fresh bread was the stuff of dreams.
The Cottage Peach is reader-supported. When you purchase through links on our site, we may earn an affiliate commission at no additional cost to you. All opinions are our own.
Dear fresh baked bread,
I knew I first loved you before I had ever actually experienced you myself. From the moment I read Heidi for the first time as a child, I absorbed the imagery of a goatherd enjoying bread and cheese on the mountainside wrapped in a simple cloth with great excitement. Fresh bread became an elusive Thing that I knew I someday wanted to acquire, though it still did not occur to me in the era of Fruit Roll-Ups and Poptarts that fresh bread was something just anyone could make. Fresh bread had nooks and crannies to hold copious amounts of butter, a tough outer crust giving way to a soft and springy interior. Fresh bread was the stuff of dreams.
As I entered my teenage years, you became a real presence in my life, but I still saw your production as the domain of a skilled artisan with decades of experience. If I didn’t know better, I would have thought bread could only be made in the dark hours of morning, in a warm and quiet bakery commanded by a flour dusted, apron-clad master. Still, we were overjoyed at the discovery of another local bakery and enthusiastically paid for our loaves to be mixed, shaped and baked by another’s hand.
That all changed with no-knead bread. Simple to make and requiring just a handful of ingredients, suddenly my mother was filling our home with the unmistakable scents of that elusive bakery on a weekly basis. You materialized as a crusty, rustic loaf just like the ones I imagined from the books of my childhood. No knead dutch oven bread shattered my limiting belief that bread was reserved for an elite group of bakers and transformed fresh bread from a special treat into a daily occurrence. This easy bread opened the floodgates into a whole new world - one of yeast and gluten and eventually, sourdough.
And here is where we hit a rough patch in our love story. Beloved by the masses, sourdough and I just weren’t compatible. Like a mismatched couple, we disagreed a lot. I tried so hard to love you…but…I thought sourdough was too fussy. My dough rebelled, turning a toxic, angry pink color in my fridge. I tried again, only to lose my next starter to neglect once more. Sourdough and chronic illness aren’t very good friends. I couldn’t adhere to a regular baking schedule, and my dough couldn’t accept my inconsistency. When I could muster the energy (and courage!) to bake it, it failed more often than not, with texture issues I endlessly tried to remedy with more or less rise time, different kneading methods, and different ratios of water. Spending hours (days!) preparing a loaf of bread only to have it come out inedible was completely deflating. I was thoroughly turned off from baking bread by this experience. I slipped back into my limiting belief that bread - REAL bread, the bread I loved - could only be produced by a master (who was willing to waste hundreds of pounds of flour in the process of learning)
To be honest, I forgot about no knead bread for a few years. My mom’s baking phase had sputtered out, and I moved into my own place, and suddenly there wasn’t any fresh bread to be had any more. So thoroughly discouraged by my sourdough baking experience, I said to myself and others that I “just wasn’t a very good baker” and “didn’t enjoy baking bread”. I’ve always been the sort of person who picks the most complex project to learn how to knit, which often leads to an all-or-nothing mentality that can completely make or break my experience in learning anything new. This is a dangerous gamble that has led me to abandon more projects than I care to admit. I became aware that I have little patience for the hours of practice mastery requires. This was something I was determined to change about myself, little by little. I knew that to avoid discouragement I needed to start small.
“How about sandwich bread?” A small voice in my mind said.
“I do like sandwiches” I replied warily.
The first few loaves were just ‘meh’ - but ‘meh’ was infinitely better than ‘inedible brick of flour and water’...so I kept going.
The next batch was just a little bit better.
And the batch after that, near perfection.
Suddenly I had it - I had grasped onto a strand of knowledge, of understanding, that could carry me through the more complex recipes I wanted to try. I had started small, understood the principles, waited for it to click into place, and now there was a framework for taking the next step, and the one after that.
I could have danced across the kitchen with a loaf in each arm. I may have done just that.
Rolls came next. Dainty and cute, perfectly portioned and held under the tension of a glutenous web. Packed tightly together in a round pie tin they rose and baked under my supervision. In my excitement I could not wait for them to cool to begin pulling them apart at the seams, glazing the tops with honey and spreading thick pats of butter along the inside. It was the best roll I have had in my 30 years of life.
“But what about the no knead bread?” that little voice said.
I still had not remembered. But one fateful day when the relentless rain outside had my arthritic joints aching (a fact that I resented at 30, my bones protesting like that of an 80 year old) I found myself facing a conundrum - I wanted fresh bread, but kneading it was going to prove problematic.
I sometimes just stuff everything into my grandmother’s stand mixer when this is the case. It works just fine. But for some reason, today was different. Today I remembered the artisan no knead bread.
It’s an easy bread to bake, I promise. It won’t tire you out, or leave you disappointed. As far as bread recipes go, there is no mistaking this one for a flop. You can make no knead yeast bread at home this morning, and enjoy it with lunch tomorrow. This is a rustic loaf that goes well with soup, toasted and slathered with butter and then soaked into the soup itself to lap up all those deep flavors. I also enjoy it with a fried egg on top for breakfast, or transformed into french toast. The toppings you can add to bread are just about endless. Turn it into dessert with a layer of hazelnut spread, or cinnamon sugar and thick pats of fresh butter. Made into a grilled cheese with basil pesto and sliced tomato and a drizzle of balsamic vinegar it is the perfect small lunch for one.
The recipe we have always used in my house comes from Jim Lahey, owner of Sullivan Street Bakery. It was published in the New York Times and became one of the most popular recipes they ever published. Typically I try and share my own spin on things, but in this case the original stands so well on it’s own, no modification is needed.
Let’s get started.
No knead bread recipe from NYT Cooking:
3⅓ cups/430 grams all-purpose or bread flour, plus more for dusting
Generous ¼ teaspoon instant yeast
2 teaspoons kosher salt
Cornmeal or wheat bran, as needed
In a large bowl combine flour, yeast and salt. Add 1½ cups/345 grams water and stir until blended; dough will be shaggy and sticky. Cover bowl with plastic wrap. Let dough rest at least 12 hours, preferably about 18, at warm room temperature, about 70 degrees.
Dough is ready when its surface is dotted with bubbles. Lightly flour a work surface and place dough on it; sprinkle it with a little more flour and fold it over on itself once or twice. Cover loosely with plastic wrap and let rest about 15 minutes.
Using just enough flour to keep dough from sticking to work surface or to your fingers, gently and quickly shape dough into a ball. Generously coat a cotton towel (not terry cloth) with flour, wheat bran or cornmeal; put dough seam side down on towel and dust with more flour, bran or cornmeal. Cover with another cotton towel and let rise for about 2 hours. When it is ready, dough will be more than double in size and will not readily spring back when poked with a finger.
At least a half-hour before dough is ready, heat oven to 450 degrees. Put a 6- to 8-quart heavy covered pot (cast iron, enamel, Pyrex or ceramic) in oven as it heats. When dough is ready, carefully remove pot from oven. Slide your hand under towel and turn dough over into pot, seam side up; it may look like a mess, but that is OK. Shake pan once or twice if dough is unevenly distributed; it will straighten out as it bakes. Cover with lid and bake 30 minutes, then remove lid and bake another 15 to 30 minutes, until loaf is beautifully browned. Cool on a rack.
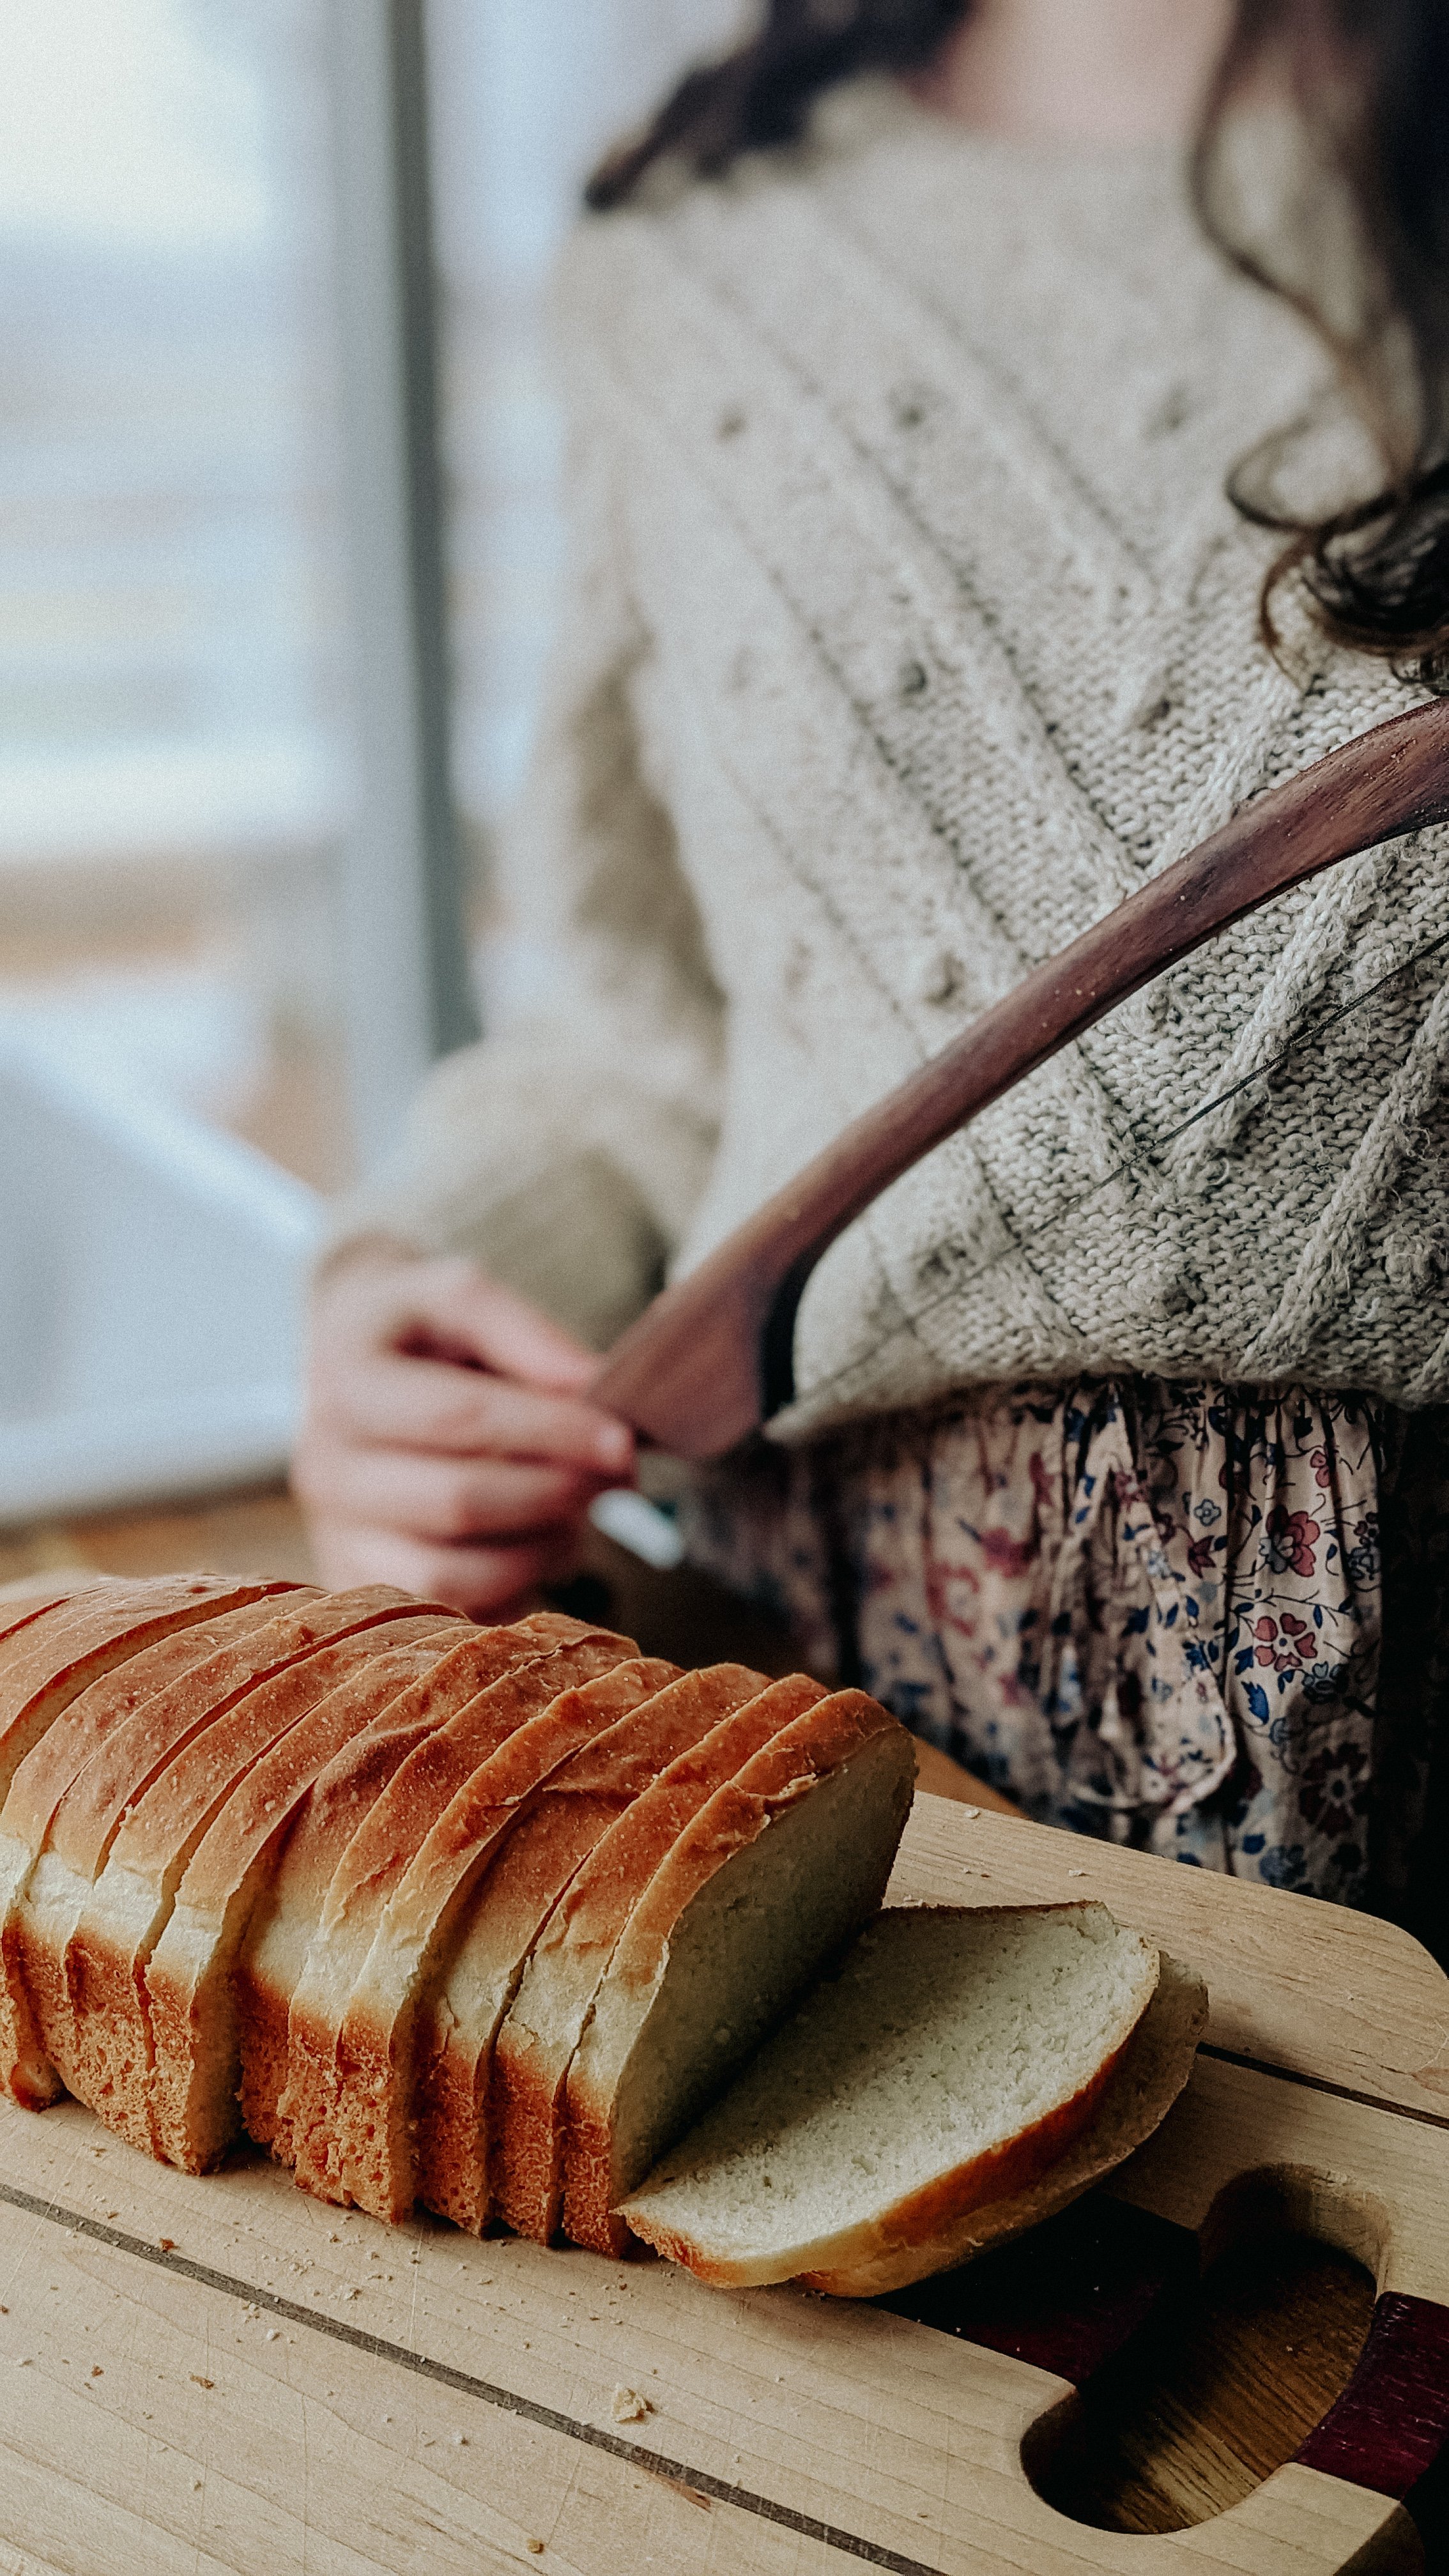
Are you nervous about baking break for the first time? I hope you’ll give this recipe a try if so. It really is fool-proof! Click here for the link to my favorite bread knife seen in the photo above.




Grow Food Outdoors All Year Long With Cold Frame Gardening
Living with arthritis as a gardener, I have formed a close bond with the land in order to better support my body. My immune system requires careful tending, and I find myself craving dark leafy greens, hearty soups and protein rich comfort foods as the weather turns cold. But in a cruel twist of fate, when my body craves these deeply nutritious foods most, the bitter cold of our New England winters do not accommodate a growing season which would allow me to cultivate all of the produce I wish to grow deep in December.
So how do we ask the land to sustain us through its deep hibernation? The answer may be found in the form of a simple wooden box called a cold frame.
As cold and snowy weather descends upon us here in the Northeast, I find my achy joints actively calling out for more attention. Living with arthritis as a gardener, I have formed a close bond with the land in order to better support my body. My immune system requires careful tending, and I find myself craving dark leafy greens, hearty soups and protein rich comfort foods as the weather turns cold. But in a cruel twist of fate, when my body craves these deeply nutritious foods most, the bitter cold of our New England winters do not accommodate a growing season which would allow me to cultivate all of the produce I wish to grow deep in December.
So how do we ask the land to sustain us through its deep hibernation? The answer may be found in the form of a simple wooden box called a cold frame.
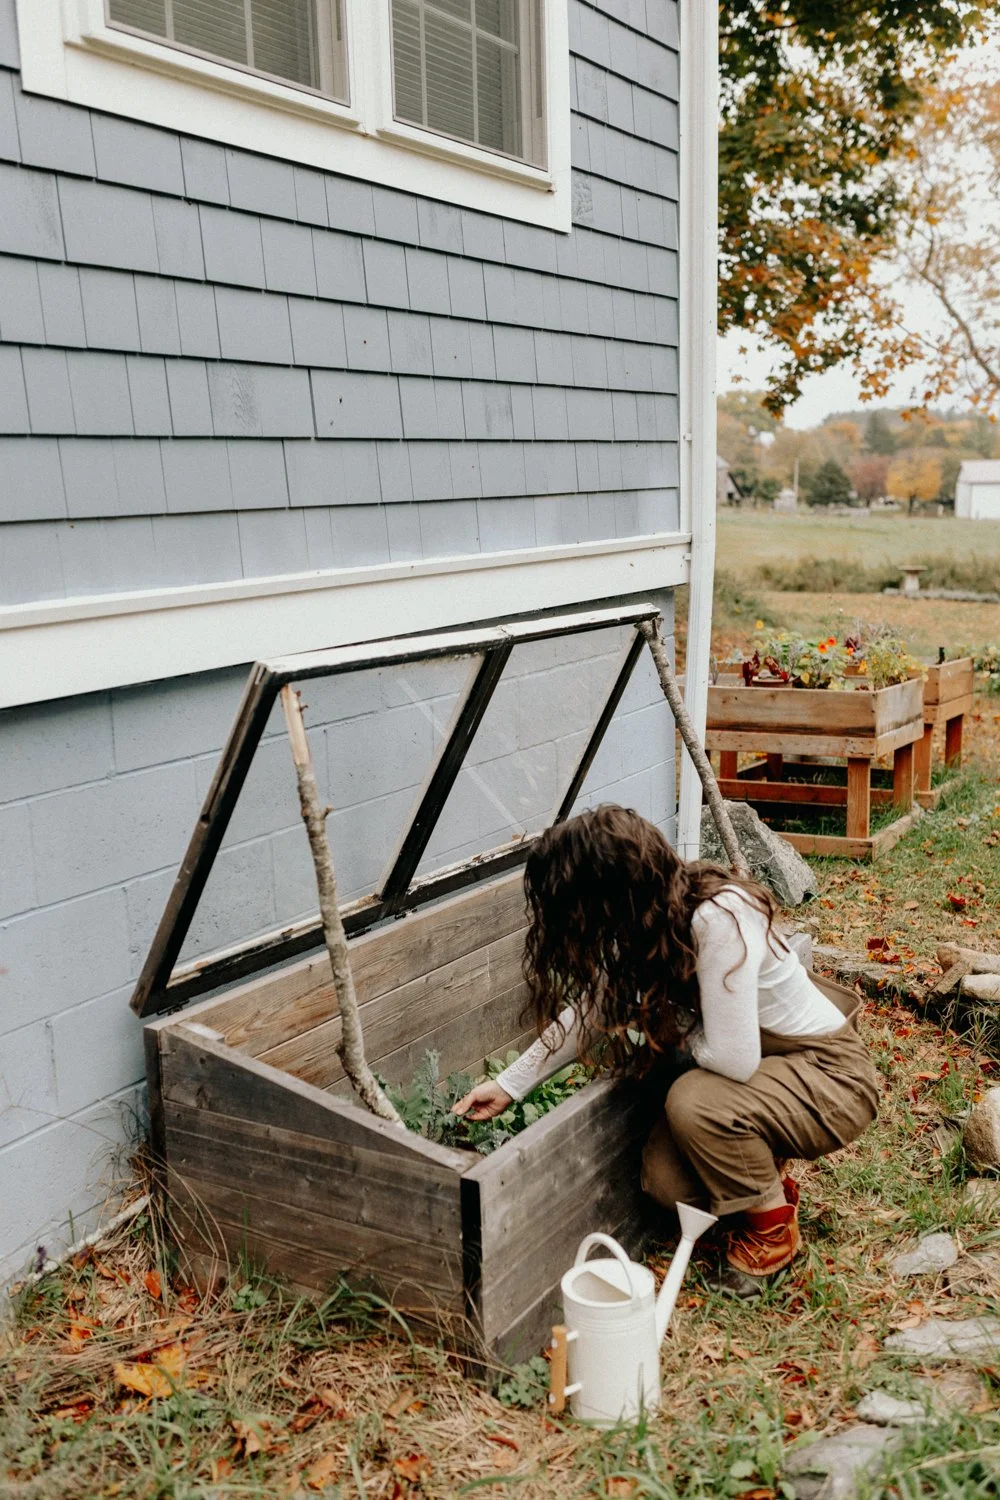
This rustic frame set into the earth, snuggled up against the sunny south wall of our home provides us ample opportunities to tend, grow and gather even in the darkest days of winter. It can feel like pure magic to enjoy a diverse variety of produce even as we are cozy in our blankets beside the fire.
How does a cold frame work?
A cold frame works by creating something like a mini-greenhouse, trapping warm air through solarization inside of the box and insulating the plants within from the worst that winter has to offer. We control the temperature inside of the cold frame with a simple vent - the hinged lid can be propped open with different sized sticks to allow excess heat to escape on warmer days, but for the most part in our deep New England winters the lid stays firmly shut until we trudge through the knee deep snow to harvest.
Like many things in life, we cannot expect to circumvent nature entirely for our own benefit. Nothing in nature blooms all year. Try to plant delicate heat loving peppers, for example, and you will be met with disappointment. Similarly, the plants enjoy a slower season in winter, much the way we humans do. If you’re not convinced, I’d ask you to consider this: if the trees can take a break, so can you.
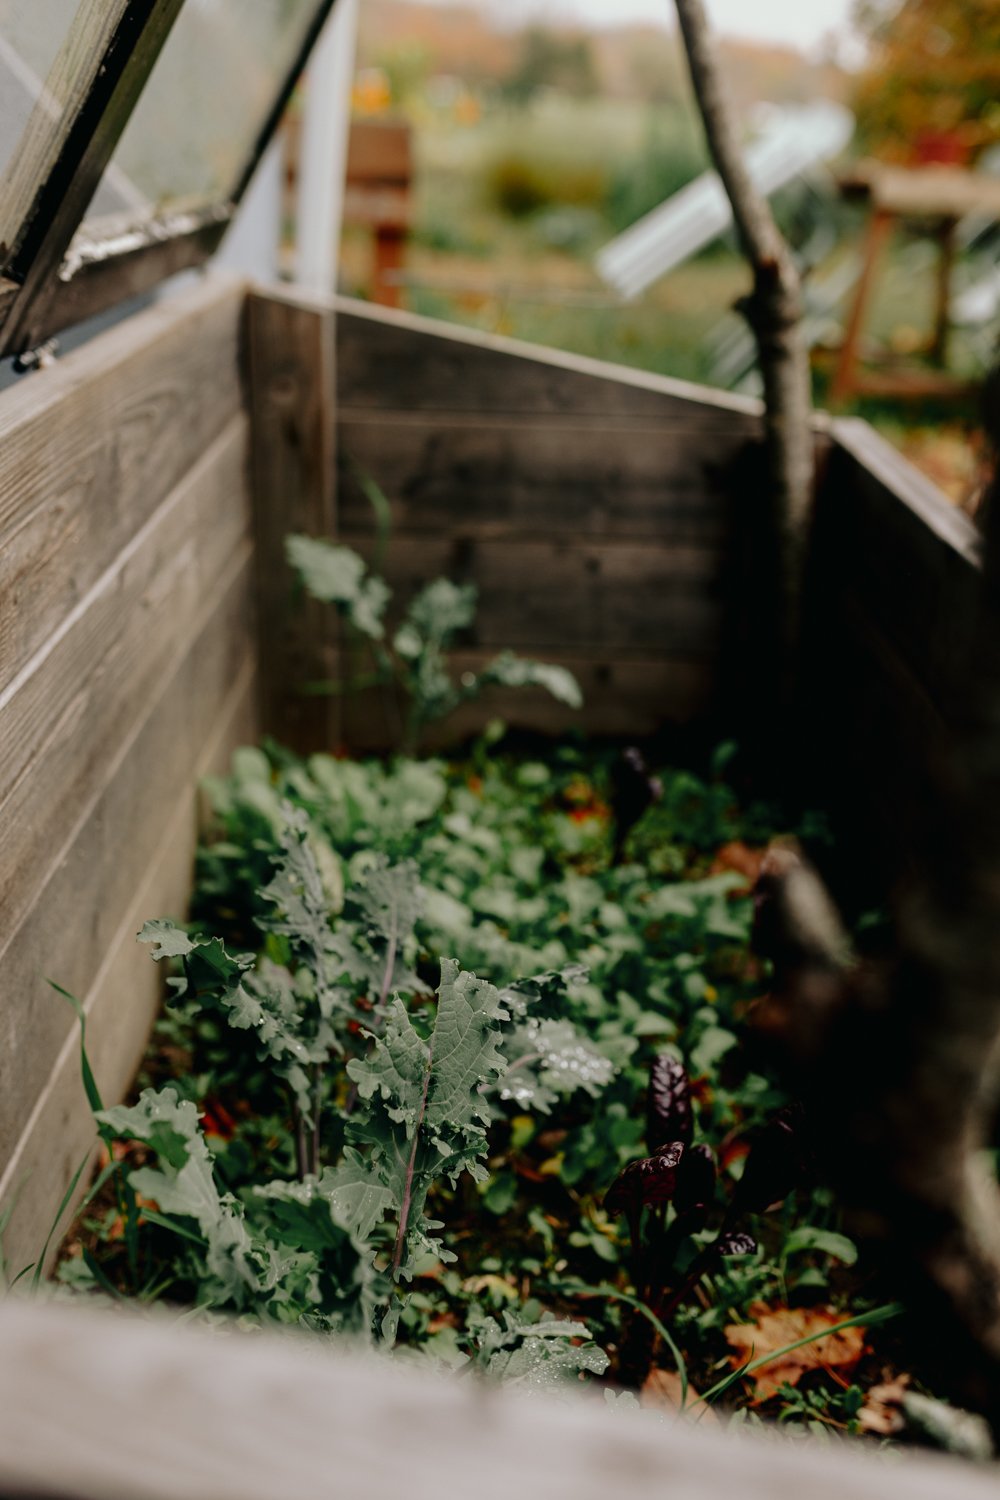
A cold frame is a lesson in slowing down and radically accepting things as they are. Your kale, radishes and lettuce will grow and thrive at a slower pace than you can expect in warmer seasons. The harvests are fewer, but more rewarding for the mere fact that they exist at all. And while a cold frame requires a certain amount of upkeep and planning in the beginning, this slowed down nature means that watering and weeding becomes virtually unnecessary in the coldest months.
Now, if you live in a climate that does not experience a cold winter season you may think a cold frame is unnecessary. Although, they continue to be useful even into the spring season here in New England since they make the perfect protected nursery in which to harden off your summer seedlings each spring. And if you can easily build one for cheap or free using reclaimed materials, why not give it a try?
Where should you put a cold frame?
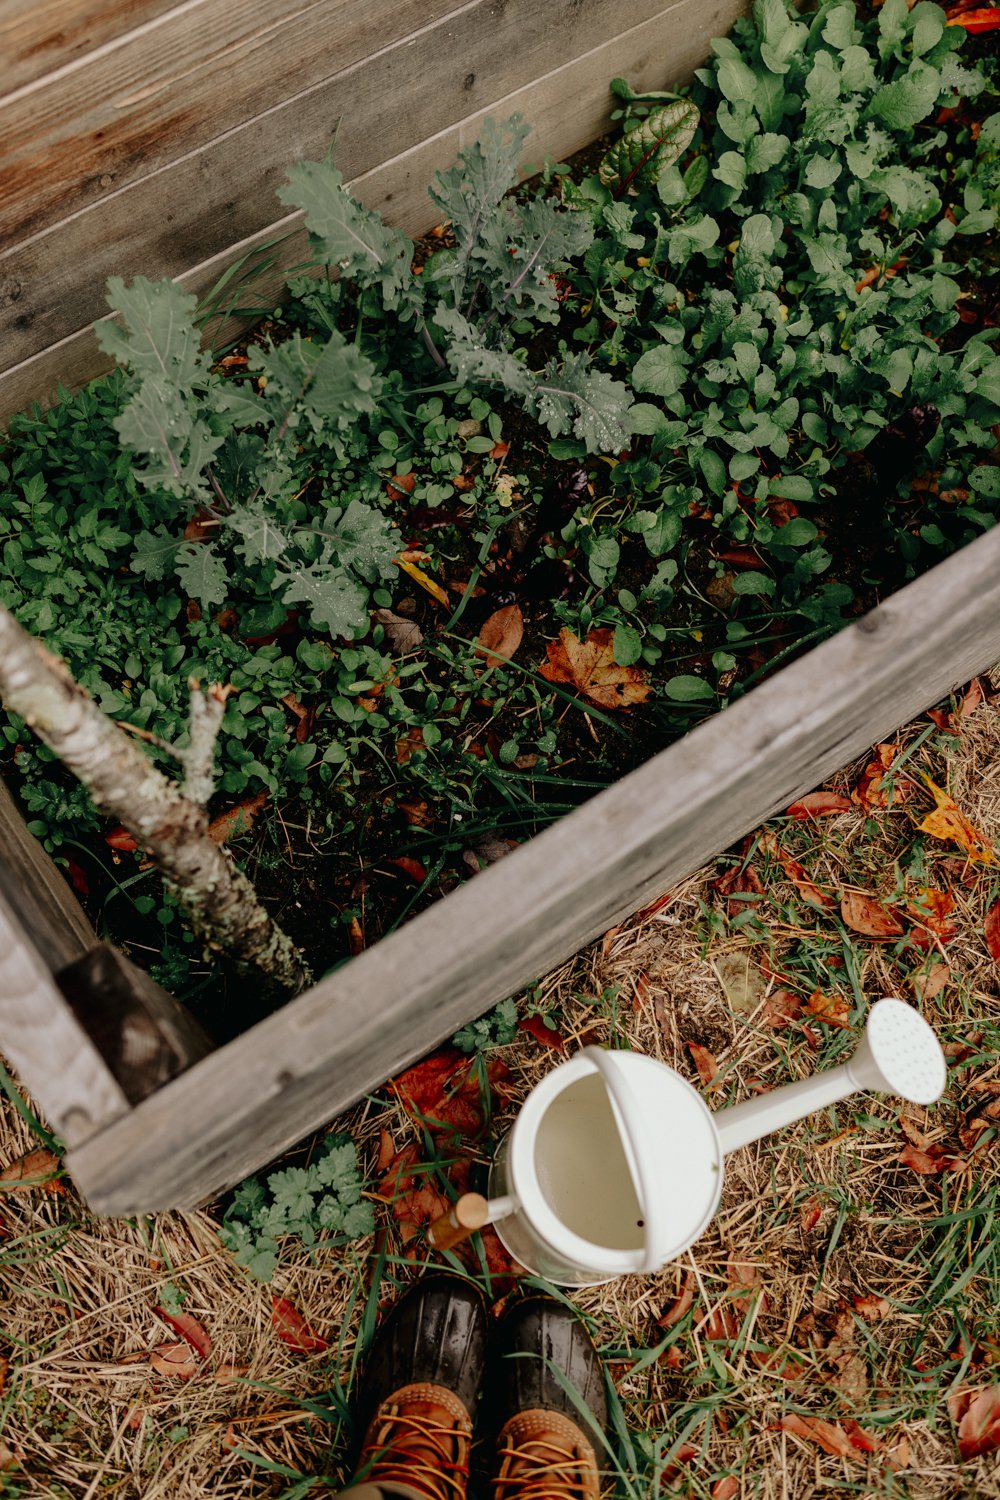
You’ll want to choose a location for your cold frame that is protected from north winds and generally sunny. This means the best spot for your cold frame will have no shade from any trees, and preferably be placed with the back wall of the cold frame up against the south side of your house, shed or barn. If you don’t have a spot like this available, then anywhere without shade will do. You’ll just need to spend some extra effort properly insulating your box from the winds.
Speaking of howling winds, so long as it is protected from those north winds we discussed you shouldn’t worry yourself too much about creating something airtight. Your cold frame is not a greenhouse, and so we don’t expect it to function quite the same. Build your frame to be thick and sturdy, but don’t worry about every little seam and crack.
How to build a cold frame
If you have the time and physical ability, building a cold frame yourself is absolutely the most economical solution. Purchasing one ready-made can cost you anywhere from $60-$500 and quality issues on the low end of that budget will prevent you from getting many years of use out of it. Meanwhile, if you build one yourself it can be done for far less than the low end of that range and produce an end result that will be sturdy enough to continue providing shelter to your winter crop for years to come. While old windows can be fragile and prone to breaking, when they can be found for free I still find it a better option than a new piece of corrugated plexiglass.
We built our cold frame just as the first leaves began dusting the earth, making their final descent from the branches above. Pulling out the old wooden windows and reclaimed lumber from our basement, I didn’t really have a plan. This is the nature of projects on our little homestead - in order to put to rest my fears and limiting beliefs, I have a tendency to turn a blind eye to the specifics and figure things out as I go. “I’m just going to build a big rectangle, the size of the two windows combined, and stick the windows on top” I confidently told myself. It’s safe to say I don’t have a ton of confidence when it comes to building things, but I was betting that between the two of us, we could figure it out. A chill wind traveled across the field. I adjusted my hat over my cold ears and set to work.
This method of trial and error has generally served me quite well on this journey, and I’ve found it to be essential to growing plants in particular. A fussy Nasturtium in Georgia, for example, is going to have very different needs that one planted in Vermont. So why overwhelm ourselves with tips and tricks from every gardener in the land when we could simply plant, observe, expect failure and experiment until things go right?
You can use many different materials to build a cold frame - but the very best materials are the ones you already have. Our little pile of scrap lumber provided nearly everything we needed to create a sloped box on which to mount our hinges and old wooden windows.
The result was…lopsided. For some reason, the box wasn’t sitting level on the earth, the wood having twisted under tension at some point, unnoticed by our novice eyes. The old windows we used for a lid were chipping questionably safe paint flakes every time we opened and closed the hinges. But it was finished, and it was free, and so - in the ground it went. I packed straw around the exterior to fill in the gaps where the frame didn’t meet the soil and added extra in the space between the wall and the cold frame, set my plants in the earth and held my breath that I would discover an abundance of fresh food beneath the glass in a couple of months.
I suppose I shouldn’t have led with such an obvious spoiler, but the cold frame did work, and an abundance we did have, regardless of our lack of building skills. And so as its lessons compounded the cold frame became something more than a simple box to grow in. The weathered wood shines like a beacon, a reminder to ourselves that we can accomplish more than we think, and done is better than perfect.
What Can you grow in a cold frame?
Kale
Swiss Chard
Spinach
Radishes
Lettuce
Beets
Carrots
Arugula
Kohlrabi
Scallions
Parsley
Mustard
Best cold frames to buy
Don’t want to build your own cold frame? There are many pre-made options available that are built to last. I suggest looking for a cold frame that has a rot-resistant cedar base and shatterproof polycarbonate lid. If you already have raised beds, then a plant protection tent may be the best option for you as you can simply convert your raised beds into a cold frame for the winter months and then remove the tent structure in the summer heat. Here’s my recommendations for the best pre-made cold frames and tent frames you can buy:
The 3-Season Garden Protection Tent from Gardener’s Supply makes it easy to access plants within your raised bed and includes two covers and durable powder-coated steel frame. This tent provides 70% light transmission, 40" of head room at the peak, and has roll-up end windows for ventilation. A second cover protects against ravenous summer bugs and scorching sun. Three zippered doors on each cover provide easy access for tending and harvesting. Tie-downs secure the covers to the steel frame. Click to Shop
The Cedar Cold Frame from Gardener’s Supply is an attractive cold frame with a narrow footprint. The base is made from rot-resistant lumber with aluminum corners. The top is made with polycarbonate panels that diffuse light so plants don't "cook," and there are adjustable braces to hold panels at various intervals for ventilation. Click to Shop

Adding herbal and aromatherapy elements to your bathing ritual has been a long standing tradition in cultures around the world, but there’s just something extra rewarding about it when you grow those flowers and herbs yourself. So head out to the garden and clip a few sprigs of whatever calls to you - we’ll go over some of the easiest ways to include plants in your shower routine.
Learning about how different herbs can provide different benefits for the skin and body can bring you closer to nature and yourself, as well as offering a ton of ways you can support yourself through a self care ritual not rooted in consumerism (hard to find these days). You’re probably familiar with using fragrant botanicals like eucalyptus and lavender in your spa shower routine, but here’s a few more herbs and flowers you should consider including next time you’re looking for a soothing sensory experience in the shower: