
BACKYARD GARDENING MADE SIMPLE

Stovetop Elderberry Syrup Recipe
A pot of elderberry syrup simmering on the stovetop is a welcome sight and essential addition to our herbal apothecary. You won’t have any trouble getting your children to try this sweet and fruity syrup when they feel a cold coming on either, since it tastes just like candy!

The Cottage Peach is reader-supported. When you purchase through links on our site, we may earn an affiliate commission at no additional cost to you. All opinions are our own.
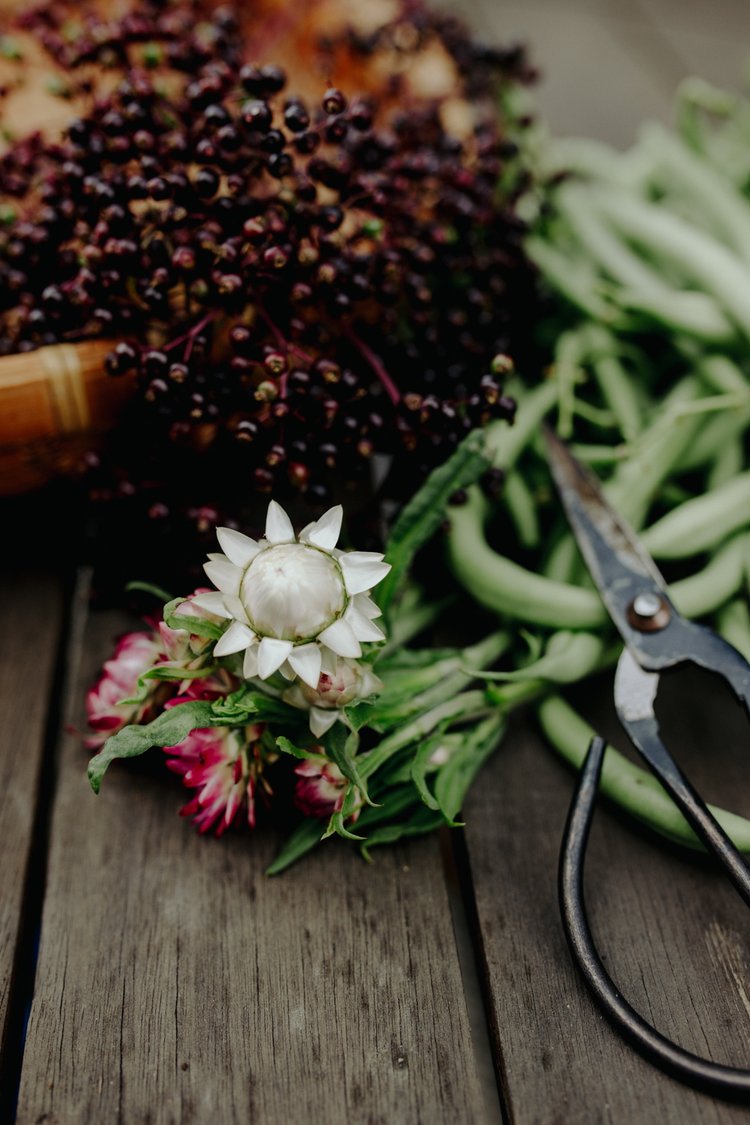
Elderberry season is drawing to a close, and my freezer is filled up with this useful fruit. I spent the late summer months periodically checking for ripeness, clipping each branch back as the berries and stems turned from green to deep purple. Elderberries can be a challenge to remove, leaving your hands stained purple with the juice. That’s why I place my bunches directly into the freezer after harvesting, whole - this way you can easily remove the frozen berries in one fell swoop and preserve them at peak freshness for winter cold remedies, sweet syrups and more. A pot of elderberry syrup simmering on the stovetop is a welcome sight and essential addition to our herbal apothecary. You won’t have any trouble getting your children to try this sweet and fruity syrup when they feel a cold coming on either, since it tastes just like candy!
What Are Elderberries?
Elderberries are edible, small, dark fruits which grow wild in much of North America and other areas of the world. The bushes they grow on are attractive, making them a great addition to a yard or garden.
The bark, leaves, and roots of elderberry plants are toxic to humans and pets. But beginning in June, elderberry bushes produce eye-catching white blossoms in flat, disc-shaped clusters of tiny flowers. These clusters grow as big as 10” in diameter. They are beautiful and fragrant, and are also edible. The flowers can be eaten raw or cooked.
Of course, you don’t want to harvest all of the flowers, because then your bush would not produce any berries.
In fall, the elderberries themselves are ready to harvest. They should not be eaten raw, as raw elderberries may cause nausea, vomiting, and digestive problems. Cooking the berries removes their toxic properties.
What Do Elderberries Taste Like?
Raw elderberries should not be eaten, but we’re not missing much. Some people call them flavorless, while others find them bitter and tart. They’re much tastier when cooked with other fruits or sweeteners.
Uses of Elderberry
Elderberries can be used to make medicinal syrup, cordial, jelly, sauces, and wine. Dried elderberries are tasty in baked goods, and also make a soothing tea.
Benefits of Elderberry Syrup
Elderberry has a very long history of use as a medicinal plant, dating back as far as ancient Egypt, where it was used to help heal burns. It has also been used as a diuretic. Indigenous peoples used elderberry to treat rheumatism and fever.
Elderberry syrup provides significant antioxidant effects. The antioxidants in elderberries boost the immune system, and along with the berries’ abundance of vitamins A, B, and C, help to fight off infections.
The syrup is also high in fiber, B vitamins, iron, and magnesium, and is an anti-inflammatory.
Elderberry Syrup for Colds, Coughs, and Flu
First, a note: People who have auto-immune issues may want to avoid elderberries, as boosting the immune system is only likely to make symptoms worse.
Both elderberry syrup and elderberry tea are good methods of delivery for elderberries’ many health benefits. Elderberry tea with a bit of honey and lemon juice is particularly soothing.
Studies have shown that elderberry syrup may help to treat fevers, headaches, coughs, body aches, and other symptoms of the flu and upper respiratory infections.
Growing Elderberries
Elderberry plants are different varieties of the Sambucus tree. They are perennial, meaning you plant them once and they continue to grow each year. They can grow as tall as 12’, so they need a large area. They may tolerate partial shade, but won’t produce as many berries there, so it’s best to plant them in full sun. They do fine in both wet and dry soils.
Elderberry bushes provide a small harvest after the second year of planting. In their third year, they are mature, and can produce a 10-12 pound harvest.
Elderberry plants will spread through suckers, but are easily controlled by mowing them down when they appear. Propagating elderberries is easily done through cutting or ground layering.
Propagating elderberry bushes by hardwood cutting
To propagate an elderberry by cutting, check your plant for new buds, which will likely appear in February. Not every cutting will take root, so plant more than one to increase your likelihood of success.
Choose branches about the thickness of a pencil, with two sets of buds, and cut above and below each set. Cut the branch at an angle on one end to make it easier to push into the soil.
Plant directly into the ground or into a pot. If you use a pot, you can cover the branch with a baggie, misting regularly to keep the soil moist. Alternatively, you can place your cuttings in water until they begin to develop roots.
Elderberry branches take 8-10 weeks to root. If successful, you will see growth in the spring.
Propagating elderberry bushes by ground layering
By layering branches, we can force them to develop roots while still attached to the parent plant. This way they will continue to receive food and water without effort on their part.
Instructions for ground layering elderberry plants:
Choose a flexible branch that is growing close to the ground.
Remove any leaves that are on the area you want to layer.
Make a small cut on the side of the branch that will touch the soil, about 1/3 of the way through the branch.
Cover that area in soil, and if necessary peg the branch to the ground.
As the branch grows, you can stake the end of it into an upright position, being careful not to disturb its new roots.
Once a good root system develops, you can cut the branch off of its parent and move it to your desired spot.
Harvesting Elderberries
Elderberry flowers should be picked on a warm, dry day. Snip behind the flowers to remove the entire cluster in one piece.
Clusters of berries should also be cut as one piece. Snip with pruning shear or snips where the base of the berries meets the stem.
To make it easier to remove the berries from the plant, spread the clusters of berries on a cookie sheet and freeze them for two hours before using your hands to loosen from the branches.
Eating Elderberry Flowers
Elderberry flowers can be eaten raw or cooked. They are the only part of the elderberry plant that is non-toxic.
The raw flowers are crunchy, with a subtle floral taste. They are one of the sweetest-tasting flowers, and are sometimes described as tropical or pear-like.
Fresh elderberry flowers can be added to a salad or used to make a dressing. Fresh or dried elderberry flowers can be used to make tea.

Preserving Elderberry Flowers and Fruit
How to dry elderberry flowers:
To dry elderberry flowers, spread them in a single layer in a dark dry place, or hang them by their stems in a cool, dark location.
How to dry elderberries:
Remove the berries from their stems and spread them in a single layer. Unless you live in a particularly dry and sunny environment, use a dehydrator or oven for best results.
Drying elderberries in a dehydrator:
Either remove the berries from the plant completely, or cut off the larger stems.
Spread the berries in a single layer on your dehydrator trays.
Run the machine for 12 hours at 135 degrees Fahrenheit.
Drying elderberries in the oven:
Spread the berries in a single layer on a parchment-covered cookie sheet, and place in the oven at your lowest setting (no more than 175 Fahrenheit). Cook for 12 hours, stirring occasionally.
How To Store Dried Elderberries
Store your dried elderberries in an airtight container in a cool, dark place. A Ball mason jar is a good option. For longer-term storage, you can vacuum seal the jar.
Making Elderberry Syrup
Elderberry syrup can be made with just four ingredients: dried berries, water, ginger, and honey.
Supplies:
Mesh strainer
Jar
The Best Elderberry Syrup Recipe
Stovetop Elderberry Syrup
Ingredients
- 1 cup dried elderberries
- 6 cups water
- ¼ ounce grated ginger
- 1 ½ cups raw honey
Instructions
- Bring the berries and water to a boil. Simmer for 30 minutes.
- Strain the berries, and return the liquid to the heat.
- Add ¼ ounce grated ginger. Simmer gently for 45-60 minutes, or until 2-3 cups of liquid remain.
- Remove from heat and allow to cool to room temperature.
- Stir in 1 ½ cups of raw honey.
Notes
To store your elderberry syrup, pour your syrup into an airtight bottle, label it, and refrigerate. Use within 2 months.
Storing Elderberry Syrup
Pour your syrup into a bottle, label it, and refrigerate. Use within 2 months.
Using Elderberry Syrup:
For medicinal use:
Take 2 teaspoons every 3 hours at the first signs of a virus.
Other uses:
Elderberry syrup can be used as a cordial, mixed with seltzer or water, or as a shrub for cocktails.
It can also be added to yogurt, pancakes or oatmeal for a tasty treat.

![The Power of Nature: How To Make Infused Oregano Oil for Your Health and Wellness [Recipe]](https://images.squarespace-cdn.com/content/v1/60e85024dc86d643da81c96a/1682625337753-AFI1M6MRRMDQ5CBNY2TX/unsplash-image-Fl2Ki3_GZIU.jpg)
![Make This Easy + Natural Botanical Hand Salve [Recipe]](https://images.squarespace-cdn.com/content/v1/60e85024dc86d643da81c96a/b57698b0-de70-4101-afaf-7af57788237d/Herbal+Face+Steam+Recipe+by+The+Cottage+Peach-1.jpg)

The garden tools I need to have in my shed
The planting of seeds by humans is believed to date back tens of thousands of years. Even before that, people cultivated food forests by protecting useful plants and eliminating those which provided them with no benefits.
In ancient times, a hole might be dug with a stone or stick, and water carried from a river in an animal bladder.
All that to say, it’s not the tools that make the garden. In the past, I have gardened quite happily with one shovel and a hand cultivator/hoe, but there’s no denying that having the right tool for the job makes the work of gardening easier and more enjoyable.
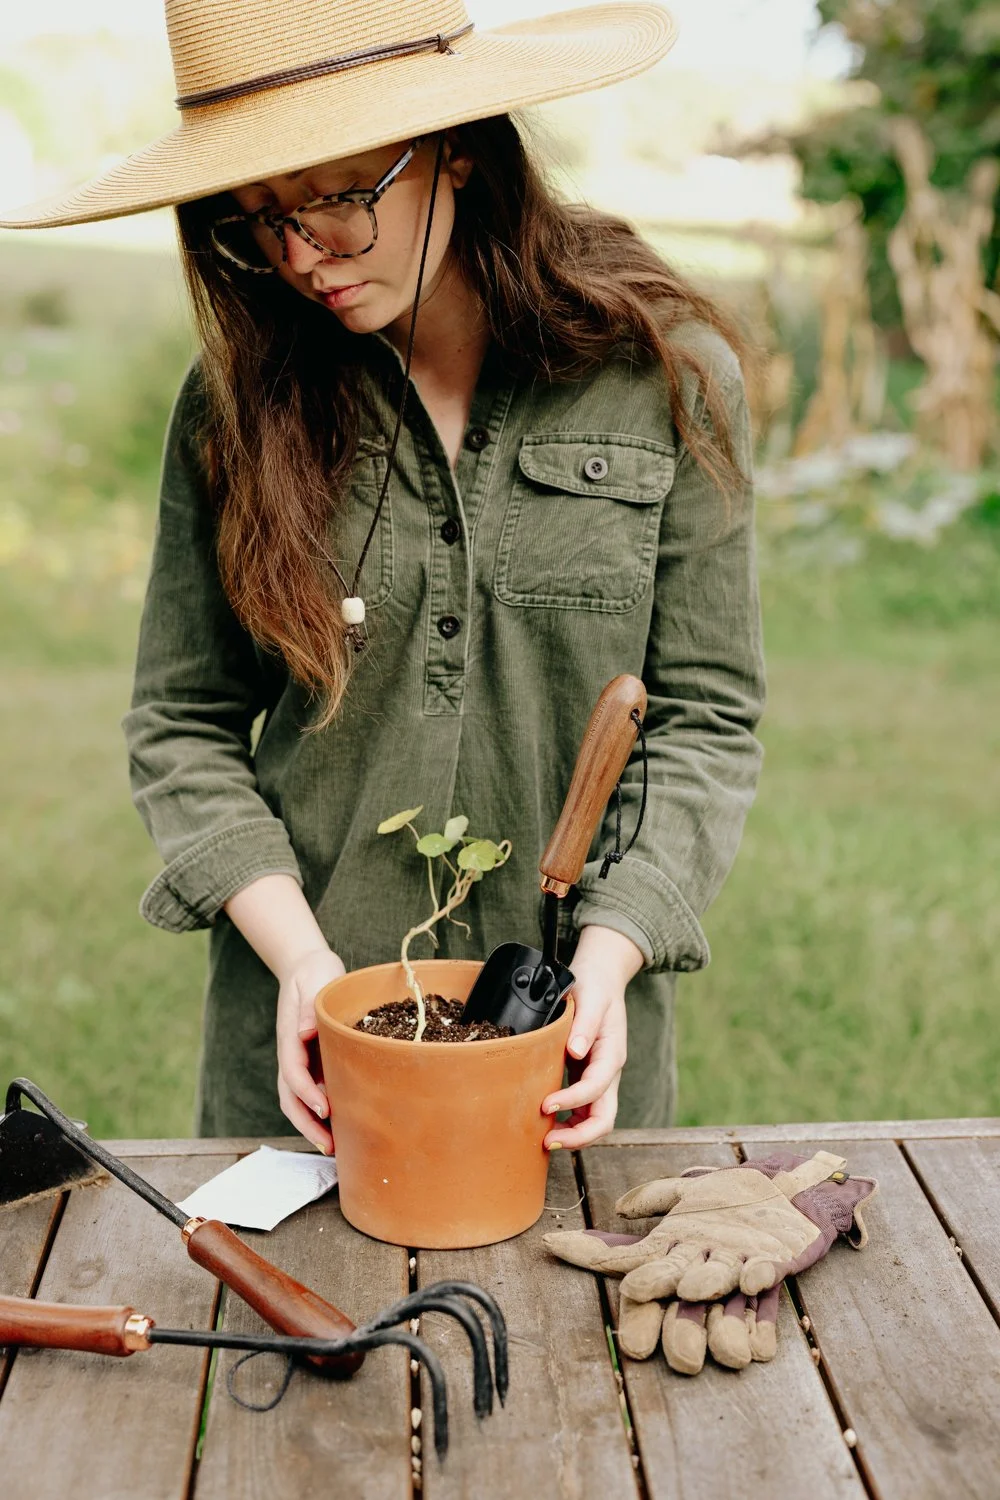
The Cottage Peach is reader-supported. When you purchase through links on our site, we may earn an affiliate commission at no additional cost to you. All opinions are our own.
What Tools Do You Need to Garden?
The planting of seeds by humans is believed to date back tens of thousands of years. Even before that, people cultivated food forests by protecting useful plants and eliminating those which provided them with no benefits.
In ancient times, a hole might be dug with a stone or stick, and water carried from a river in an animal bladder.
All that to say, it’s not the tools that make the garden. In the past, I have gardened quite happily with one shovel and a hand cultivator/hoe, but there’s no denying that having the right tool for the job makes the work of gardening easier and more enjoyable.
Are Garden Tools Expensive?
Garden tools are available at all price points. There will always be an endless chorus of marketers telling you this tool or that is better than the other, but remember you’re digging soil and planting seeds - not building a spaceship. You want something durable, but not necessarily fancy.
In some cases there is a real difference in quality between the cheaper and more expensive options. If you have a bit of money to spend on tools, the choice becomes, in which cases is an investment in a pricier tool a good financial decision?
But no matter what your budget is, there are sources other than the hardware store or internet from which to acquire tools. Just about every garage or estate sale has some which, while not brand new, have stood the test of time and have years of life still in them. Better yet, many older relatives have amassed a collection over the years and would be happy to pass them on to someone a bit more spry. Often these older tools are better made than what you’d find today. If they’re in rough shape, it’s easy enough to sharpen a hoe or replace a shovel handle.
These options not only save money, they mean less is produced and less ends up in a landfill.
My Favorite Gardening Tools
As I said, in the past I have gardened with two simple tools. But at this point, our gardening has expanded enormously, and we’re lucky enough to be able to carefully spend on tools which make our work easier and are durable enough to last a lifetime. Barebones Living is a favorite among gardeners because they check all these boxes - plus, they are a certified B Corp dedicated to protecting the environment. You can find my favorite selections from Barebones below:
Seed Starting Tools
One of the foundations of economizing in our gardening is seed starting. It saves so much money as compared to buying plants!
There are many cheap and accessible ways to start seeds. Egg cartons, newspaper, or even toilet paper rolls can be used to hold your soil.
How to Make Seed Pots From Toilet Paper Rolls
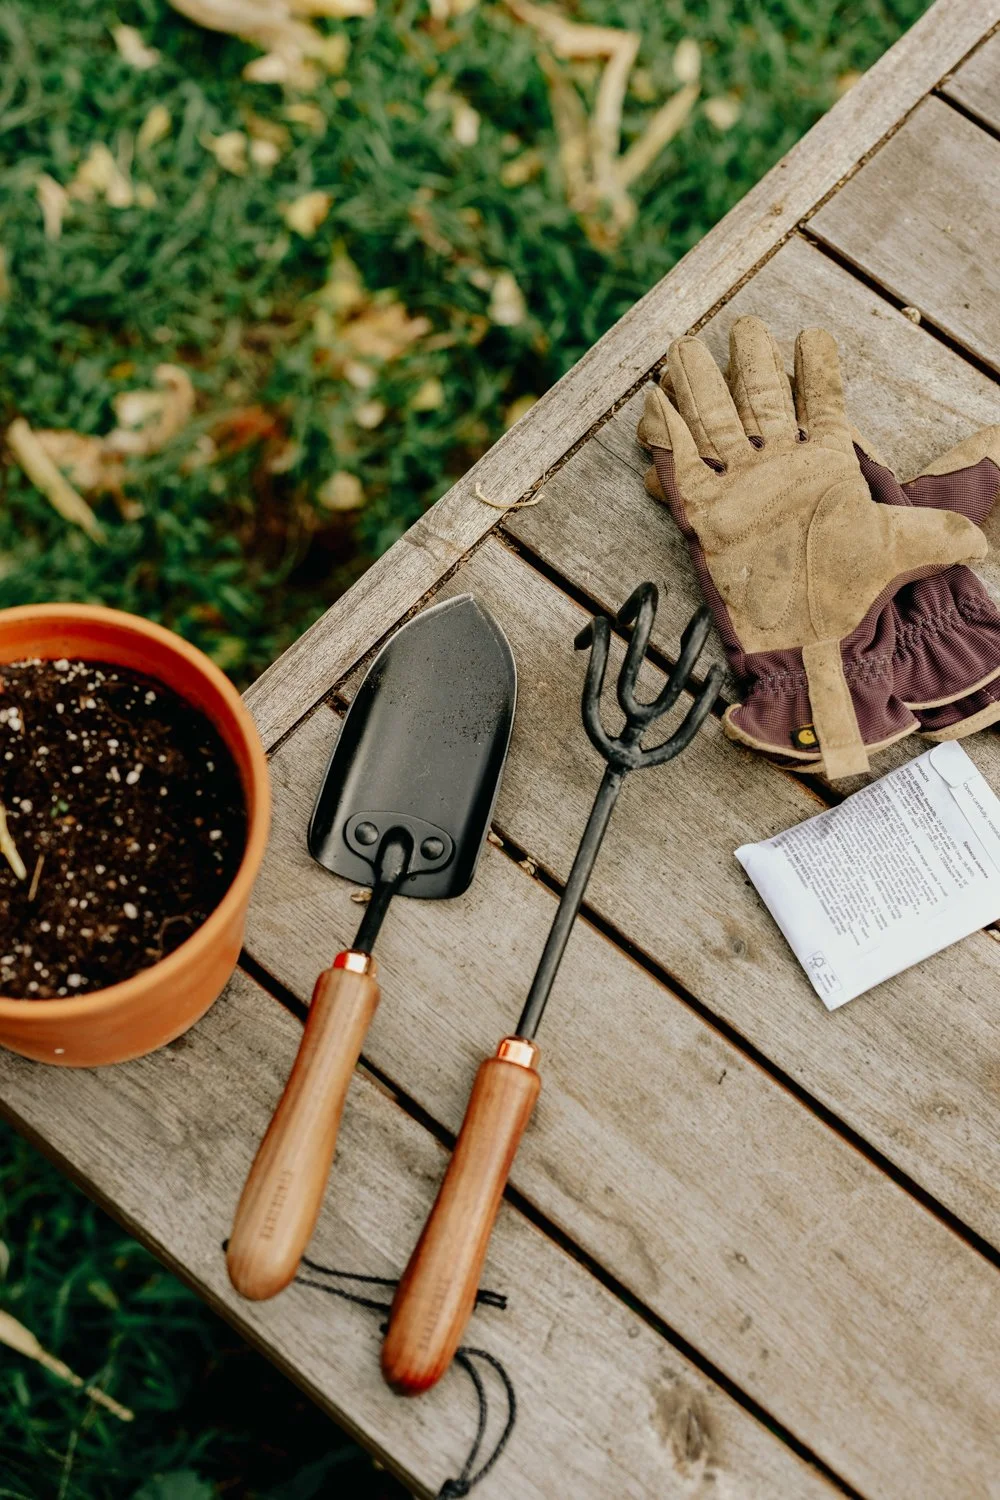
Step one is to rummage through your recycling for TP rolls. Better yet, skip the recycling bin and save them up throughout the year for use in the spring.
Once you have your empty rolls, just cut four 1 1/2” slits in one end of the tube and fold them over themselves to create a bottom. Fill with soil and your seeds and get growing!
Using a Soil Blocker to Start Seeds
These days, we use a soil blocker when starting seeds. It’s a simple tool that allows me to work a bit more quickly, which is helpful for those times when I’m not feeling well enough for a longer project.
Blocks are also great for the plants themselves. Because each block is planted directly into the garden, the roots are not damaged and the plants aren’t likely to experience any transplant shock, giving them a stronger start on life.
One potential drawback of this tool is that it might be difficult for someone with arthritis or other pain in their hands to squeeze the handle that releases the blocks from the mold, so that’s something to keep in mind.
How to Use a Soil Blocker
Soil blocking is really easy once you get the hang of it. You might read in a catalog or hear from another gardener that you need a fancy soil blend designed for soil blocking, and I’m sure it would be nice to have, but I’ll take the giant $15 bag of soil from Lowes please and thank you. I’m not about to ship $50 worth of soil to my house - call me lazy, or a bad gardener, but I never have and everything grows just fine.
Just take your soil, mix water in until it’s just a little drier than mud and get pressing. The trick is to really firmly compact the soil into the mold with your hand as hard as you can. The blocker will form a small divot on top into which you can plop your seed. Cover with a bit of loose soil, and that’s all there is to it!
Tools for Planting
There are endless options for digging a hole, and I’m sure you’re familiar with most of them. A shovel or spade is best for larger holes, but one tool I particularly like for planting seeds and seedlings is the Japanese Hori Hori knife.
Like any knife, it’s best to find one which has a full, or integrated, tang, which will make it much more durable. With a full tang, the metal extends the whole length and width of the handle.
Why Use a Hori Hori Knife for Planting?
A Hori Hori has multiple uses, including weeding and cutting roots and small branches, but in the case of planting, there are two things that make it the right tool for the job.
One is that the point is sharp, but wide enough that, with a twist of the wrist, you can cut a hole rather than just a slash in the soil. The second is that most Hori Hori knives are marked to show you the depth of your hole, which is really helpful when planting seeds.
Tools for Weeding
I’ve used hand cultivators and spades, Hori Hori knives, standing hoes, and shovels to weed over the years. I still prefer a shovel for very large weeds, but the tool I use most often to weed is this Japanese Weeding Hoe.
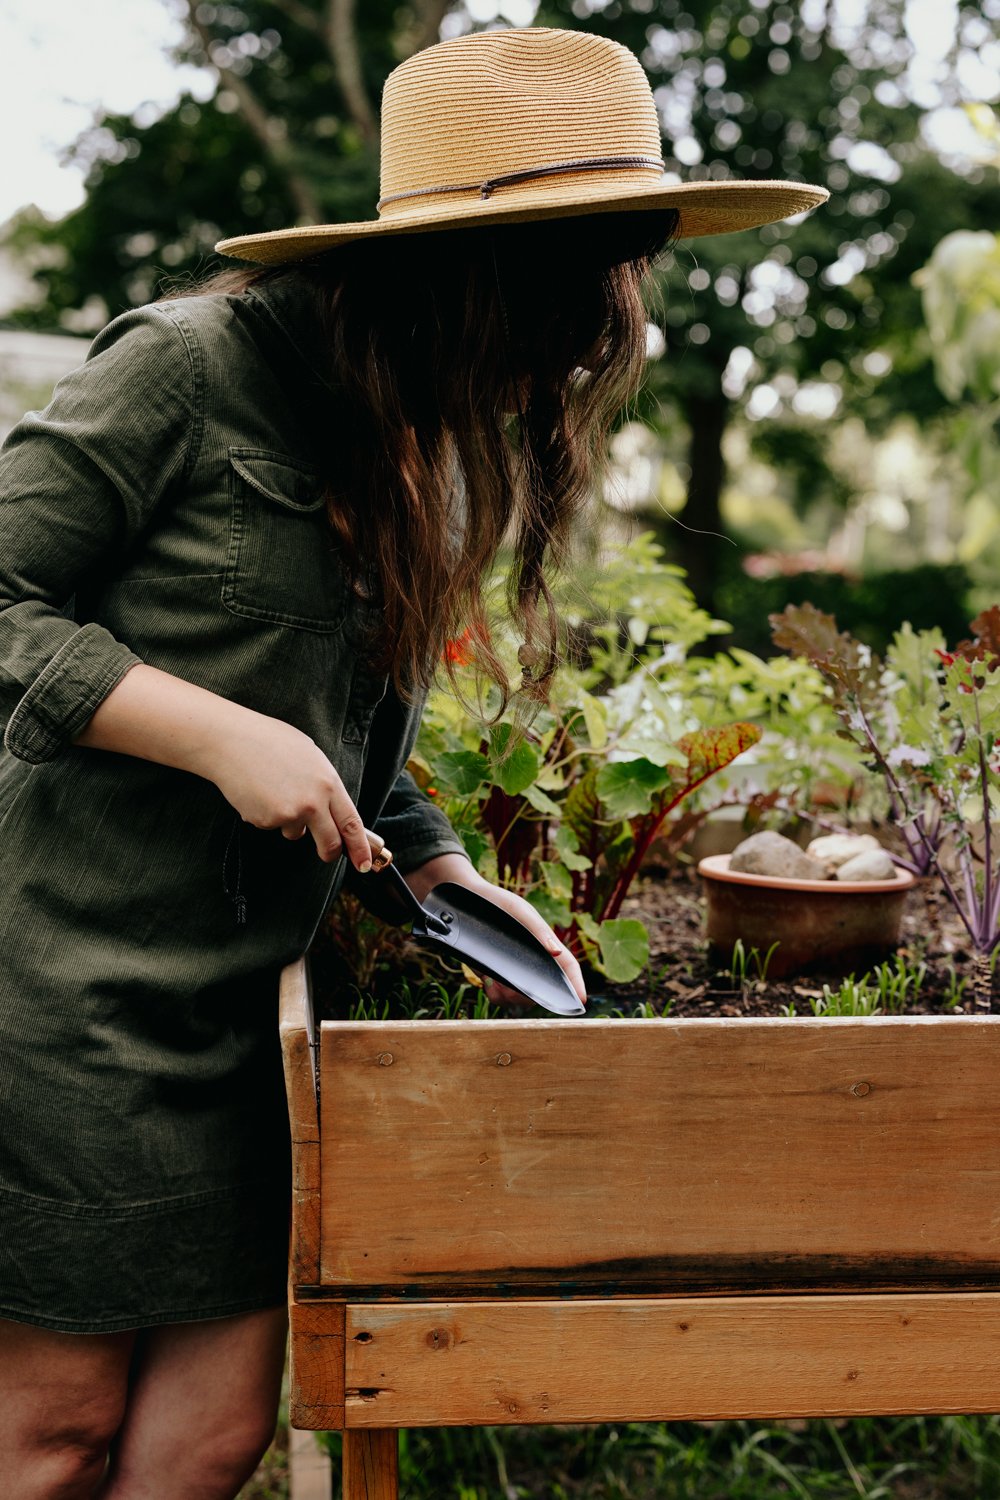
This hoe is very sharp. I use it to loosen the soil under and around the weed so I can easily pull it up and not lose any roots. The blade is also narrow enough to use around things I have planted without fear of damaging them.
Tools for Watering Plants
Not rocket science here, any container or hose will do, but I do have my favorites. I have some difficulties with most hoses, which basically come down to the fact that I have a chronic illness. Most hoses are quite heavy and tend to kink. So aside from it being difficult for me to pull them out or coil them back up because of the weight, I have to walk back and forth any number of times to straighten up the hose so the water can flow through it, which quickly exhausts me.
I’ve found two hoses that solve these problems for me.
Hoses That Make Gardening More Accessible
The Flexi Hose is a lightweight, expandable hose which does not kink. It’s available in lengths up to 150 feet and has solid brass connectors. We’ve had ours for three or four years now, and are very happy with it.
A more serious option if you’re looking to invest in a dedicated system is a Hoselink retractable hose reel. For me, this hose was worth every penny. Even with a lighter hose like the Flexi Hose, it can be difficult for me to pull the hose where I need it and then get it coiled back up. The Hoselink solves that problem by automatically retracting the hose when I give it a small tug. It still takes a bit of effort for me to pull it out to its full length, but it does not leave me fatigued the way other hoses do.
It comes with a wall bracket, and can be mounted on a pole or the side of your house. The longest length available for the Hoselink is 82 feet. I’d love a longer one, but it is definitely the hose to choose if you have a larger budget.
Pruning Tools
Like a lot of gardeners, I am fiercely loyal to my favorite pruners – the Felco F2 Classic hand pruners.
Aside from being able to cut through fairly large branches, they are comfortable to use, have a thumb mechanism for one-handed opening and closing, and are easy to sharpen. On top of that, each of the pruner’s components is replaceable, meaning one pair, with some care, can last a lifetime.
How to Care for Garden Tools
It’s no use spending money on tools only to let their condition deteriorate over the years. Caring for your tools will make them last longer and be more pleasant to use.
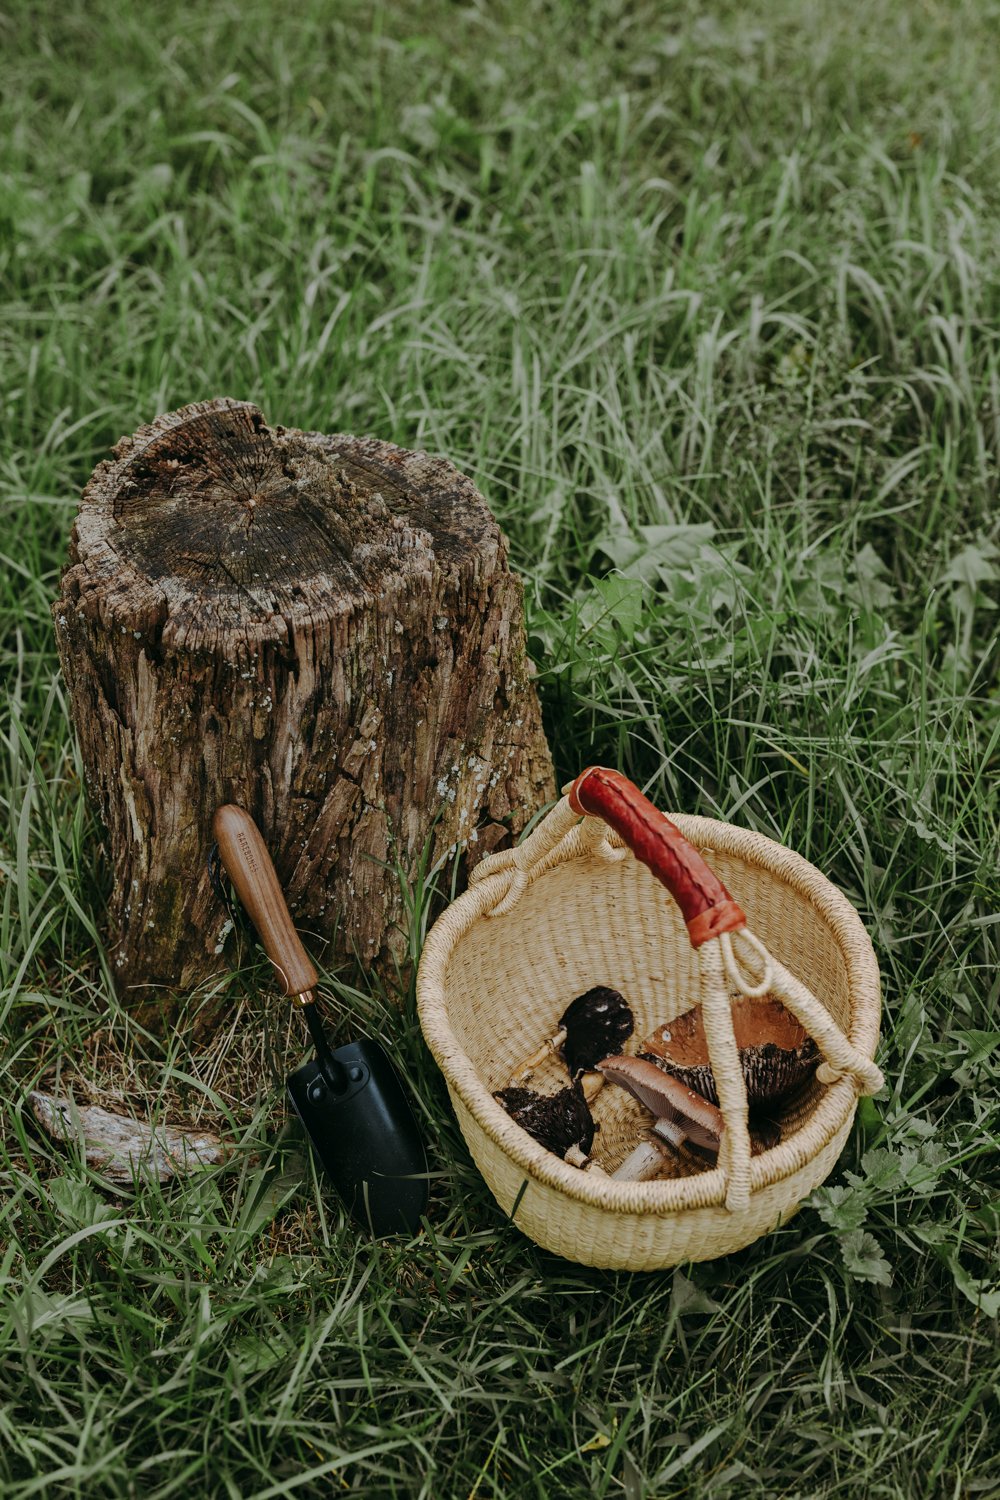
Clean Your Tools
Give your tools a quick scrub or hose-down after using them. Be sure they are dry before putting them away.
In the case of pruners, it’s important to wipe them down with rubbing alcohol after each use. If you are pruning more than one tree, wipe them after you finish with each one, to avoid potentially spreading disease from one tree to the next.
Store Your Tools
It can be a pain to schlep everything back in when you’re tired out from gardening, but leaving tools outside is a recipe for disaster. Store them in a dry place, and hang longer tools so as not to dull their blades.
Sharpen Your Tools
Some tools come with their own sharpeners, but for those that don’t there are a wide variety available. Keeping your tools sharp will cut down on frustrations from them not working as well as they should when you need them.
Oil Your Tools
It’s a good idea to apply a lubricating oil to wooden handles and metal blades. This doesn’t need to be done every time you use a tool, but it’s great to do in the spring and fall. It will keep metal from rusting and wood from splitting.
Click here to shop my favorite gardening tools at Barebones Living


Easy Vegan Applesauce Recipe
WHY GO APPLE PICKING?
Aside from experiencing the perfect day, why go apple picking at a farm instead of buying apples at the grocery store? Taste is one reason. An apple from the grocery store is likely to be a year old.
Store-bought apples last so long because waxes and chemicals are applied by producers. Insecticides and fungicides are put on the apples to protect them from insects and bad bacteria, allowing the apples to stay ‘fresh’ when kept in cold storage.
In contrast, an apple picked from a tree on a sunny, cool day is a food unto itself.

The Cottage Peach is reader-supported. When you purchase through links on our site, we may earn an affiliate commission at no additional cost to you. All opinions are our own.
When I was a child, my parents got a group of friends together to go apple picking, and a tradition was born. For over 20 years we traveled to Honey Pot Hill Orchard in Stowe, Massachusetts. Honey Pot has 186 acres of orchard land, and has been run by the same family since 1926. Its trees are planted on rolling hills with wide lanes between them, and have orchard ladders leaning against them just waiting to be climbed.
We traveled the orchard in a pack, balancing on each other’s shoulders to reach the perfect apple far overhead, steadying ladders, and filling increasingly heavy bushel bags with more apples than they could reasonably hold.
We ran down hills and took pictures and laughed and smelled the unique-to-orchards, sweet aroma of fallen apples fermenting in the grass beneath the trees.
At the end of the day, we made our way through the hills to the farm store for a gallon of cider to drink and a gallon of cider to bring home, and to the bakery window where we bought bags and bags of cinnamon-sugar coated cider donuts.
We’d plop ourselves down on a grassy hill nearby to munch and drink and watch the people standing in the long line for donuts. Every visit was the perfect day.
Why Go Apple Picking?
Aside from experiencing the perfect day, why go apple picking at a farm instead of buying apples at the grocery store? Taste is one reason. An apple from the grocery store is likely to be a year old.
Store-bought apples last so long because waxes and chemicals are applied by producers. Insecticides and fungicides are put on the apples to protect them from insects and bad bacteria, allowing the apples to stay ‘fresh’ when kept in cold storage.
In contrast, an apple picked from a tree on a sunny, cool day is a food unto itself.
More importantly, we need farms and orchards. If we just buy fruits and vegetables from a grocery store, we may lose the remaining farms we have.
The majority of a farm’s income comes from seasonal activities. Apple picking with cider and donuts, pumpkin picking with hay rides and corn mazes, vegetable farms transformed in winter to sell Christmas trees and wreaths, these are the ways a farm survives.
When we fill a bushel bag and grab a gallon of cider, we are benefiting both the farm and ourselves, our environment and our culture.
Why Pick a Lot of Apples?
Nutrition and taste, of course, but also because apples are so versatile.

We can eat apples fresh, use them in pie or cake, make applesauce, or slice them into rings and dehydrate them for a crispy snack. We can make apple butter, add slices to a grilled cheese sandwich, and use them to create stamps for painting projects.
They can speed up the ripening of other fruits if we’re feeling impatient, help reduce inflammation when used as a face mask, and can even be used to make spooky shrunken heads to keep the kids entertained.
What Kinds of Apples Store Longest?
If you buy a few apples at the grocery store, you might keep them in a bowl on your counter or, to make them last a bit longer, store them in your refrigerator.
But if you have a large quantity that you want to eat over the course of a few months, a different storage solution is required.
The first two steps in storing apples that will last are done at the orchard. First, choose apple varieties that are crisp and tart, with thick skin.
Apple varieties that store well:
Granny Smith
Honeycrisp
Northern Spy
McIntosh
Fuji
Winesap
The second thing that should be done at the tree if you want to store apples long-term is to harvest them properly. Apples should be twisted from the branch, not pulled, and they need to be handled very carefully, like eggs, so they don’t develop bruises.
Choosing Which Apples to Store:
Once you’re back home, you want to choose the best of your apples to store.
Choose apples with stems. An apple without a stem is easier for microorganisms to enter, where they will cause the apple to decay.
Choose apples with no blemishes, soft spots, or bruises. A bruised apple will cause the apples around it to rot. Like they say, one rotten apple spoils the bunch.
Where to Store Apples
Traditionally, apples were stored, along with other fruits and vegetables, in a root cellar. Most people don’t have a root cellar these days, but we can look at what is valuable about a root cellar and mimic those conditions as best we can.
The fact that root cellars are dark and cold is what allows for a longer shelf-life for apples. Apples like a temperature above 32 degrees and below 38 degrees best. But we don’t need to have the ideal spot and temperature to keep apples for months.
An unheated basement, an attached garage where the temperature doesn’t fall below 32 degrees, or a closet in a cool room are all good spots to store your apples to extend their shelf-life.
How to Store Fresh-Picked Apples

Wrap each apple lightly in paper.
Gently layer the apples in a small wooden crate or cardboard box. Be careful not to bruise the apples or let them sit in direct contact with each other.
You’re going to want to check on your apples once a week to make sure there aren’t any that are bruised or rotting, so make it easy on yourself by spreading them out into a few different containers.
Alternatively, if you plan to store lots of apples regularly, you can purchase an apple storage rack.
Other Ways to Store Apples Long-Term
Apples can be frozen, although they will lose their crisp texture and will be better suited for use in apple pie or apple butter than for eating directly.
To freeze apples, cut them up, toss them with lemon juice, and pat them dry with a clean cloth. You can then put them directly into a freezer bag, or you can flash freeze them on a cookie sheet and move them to a freezer bag once they have frozen. Flash freezing minimizes the chance the fruit will stick together in a solid block.
Apples can also be canned using a water bath.
Why Make Homemade Applesauce?
Making homemade applesauce allows you to control both the taste and the texture of the sauce. Like your applesauce to be very smooth? Puree it. Like your applesauce lumpy? Just skip the puree.
Cinnamon, strawberries, maple syrup, vanilla bean, orange peel, even cayenne pepper – the flavoring options for applesauce are endless.
Making applesauce can also be an even longer-term way to store apples.
The Secret To Making the Best Applesauce
The number one best thing you can do to make the perfect applesauce is to use more than one kind of apple. Using two or more varieties adds a depth of flavor which you will not find at the store. Experiment with different variety combinations to find the ones you love the most.
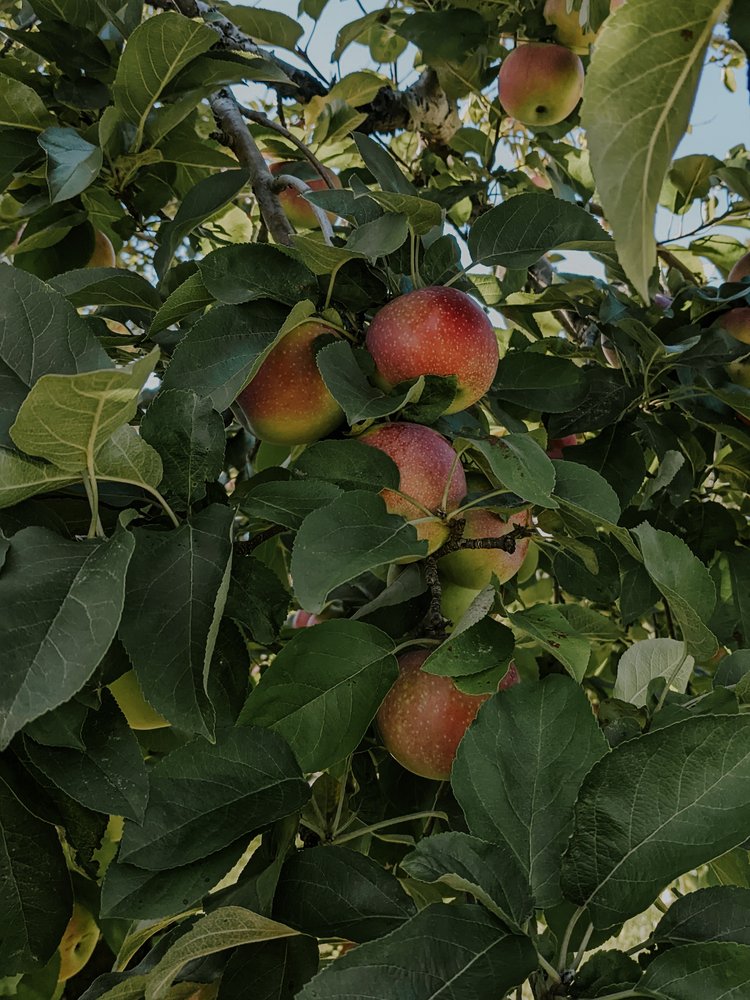
Easy Vegan Applesauce
Ingredients
- 8 Apples (or as many or few as you’ve got)
- 1-2 TBSP Sugar (optional - I prefer raw sugar for this recipe)
- Splash of water (depending on your preferred thickness)
- Cinnamon, strawberries, maple syrup, vanilla bean, orange peel, even cayenne pepper – the flavoring options for applesauce are endless.
Instructions
- Cut the apples into chunks, peeled or not, depending on what you like.
- Put the cut up apples in a pot.
- At this point you can add a small splash of water to keep them from sticking to the pot before their juice starts to flow. Alternatively, you can watch them very carefully and stir them while they heat up.
- When the apples have made some juice, add sugar to taste.
- Cook on medium-high heat, stirring occasionally.
- If you find your apples are sticking to the bottom of the pan, turn down the heat and/or add a splash of water.
- When the apples are soft enough to break with the back of a spoon, remove the pot from the heat. For 8-10 apples, this might take about 10 minutes from when they begin to boil. For greater quantities, it will take a bit longer.
- Taste the sauce again and stir in more sugar if you’d like.
- If you want a smooth applesauce, puree it with an immersion blender.
- If you’d like a chunky applesauce, you can leave it as is, or smash it a bit with a fork or potato masher.
Notes
You can let your applesauce cool and store it in the fridge in an airtight container or jar.
If you’d like to extend its storage life, though, applesauce is the perfect food for a beginner to try canning.
Nutrition Facts
Calories
104.09Fat
0.36Sat. Fat
0.06Carbs
27.5Fiber
4.44Net carbs
23.06Sugar
21.21Protein
0.5Sodium
3.4Cholesterol
0How Many Apples Do I Need to Make Applesauce?
The great thing about this recipe is, it’s more of a formula. There is no set number of apples you need to make applesauce. You can make it with one apple or a hundred. (If you have a big enough pot!)
In general, it takes 8 medium-sized apples to fill a jar the size of the bigger jar (not the huge jar) available at the grocery store.
Easy Homemade Applesauce Recipe
This applesauce recipe is easy, vegan, and a great beginner recipe for kids and adults. I think it’s the best applesauce recipe, because it is so simple, and requires only 1 or 2 ingredients (depending on whether you want to sweeten it).
It gives you a base from which you can create your very own, favorite applesauce.
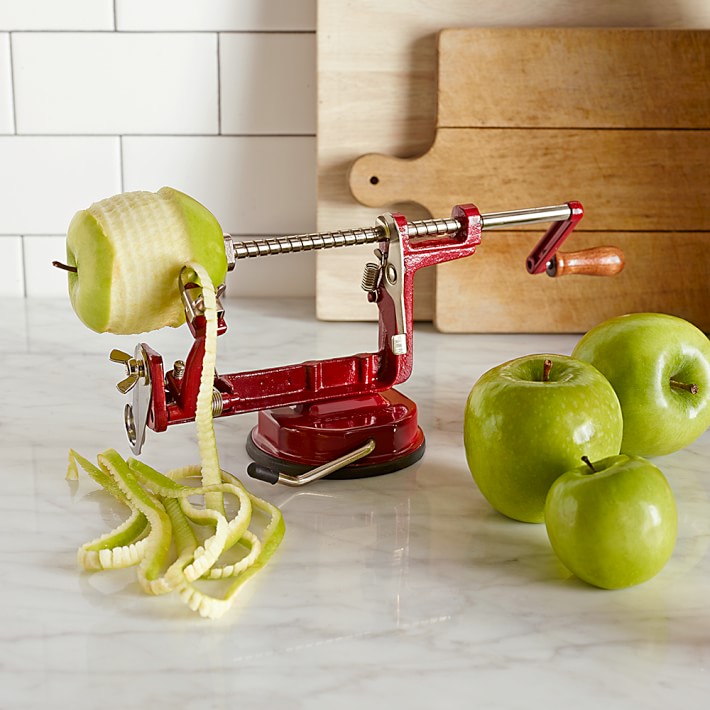
You can leave them unpeeled or peel your apples before chopping. Add your apples to the sauce pan and cook until soft.

How to Store Applesauce
You can let your applesauce cool and store it in the fridge in an airtight container or jar.
If you’d like to extend its storage life, though, applesauce is the perfect food for a beginner to try canning.
Ways to Use Applesauce
Applesauce can be used to flavor muffins, cakes, and breads.
It can also be used to replace oil in baking recipes, where it will add a bit of moistness to your bake.
Applesauce is a delicious and nutritious snack or dessert.
As the Brady Bunch taught us, applesauce is the perfect side dish for pork chops.
Warm applesauce is a nice topping for a sundae.
Applesauce on oatmeal is absolutely yum.
Traditionally, latkes are eaten with applesauce and sour cream.


DIY Biodegradable Leaf Confetti Craft Project
My favorite thing to do during the fall season is to find different ways to celebrate this transitionary season through leaves. Although leaves can feel like a celebration all on their own as they sprinkle down from above, I love a good DIY craft project, so I wanted to take it one step further and create some DIY biodegradable leaf confetti!
The Cottage Peach is reader-supported. When you purchase through links on our site, we may earn an affiliate commission at no additional cost to you. All opinions are our own.
I'm so glad I live in a world where there are Octobers.”― L. M. Montgomery, Anne of Green Gables
October in New England is always a special time. I don’t take for granted that we have easy access to the premiere fall leaf peeping destinations in the entire country, with the Berkshires in Massachusetts, and the White Mountains of New Hampshire nearby. While the first fallen leaf is met with a small sense of panic, soon I find myself easing into the simple, predictable rhythm of fall and smiling with each elm, oak and maple leaf I see. The maple leaves, with their bright and bold hues of yellow, orange and red, are my favorites. Although, to be honest it’s not one singular leaf that calls to me but the copious amounts of leaves as a whole, listing about as they fall through the cool autumn air and accumulate in crunchy, delicious smelling piles in every corner of the land. We are lucky to be surrounded by healthy deciduous trees on all sides, and each autumn season I look forward to counting them fall to the ground. I pick them up distractedly on my walks, feeling the endless ridges of the veins beneath my fingertips - a plastic free, all nature fidget toy if you will.
The sound of each crunch underfoot is a reminder that nothing lasts, tomorrow is not promised and summer has reached its end. That all things return to the earth, and only belong to us for a short while. I will miss the greenery dotting each branch and limb as winter draws closer and bare branches dominate the landscape. But all things must be born anew in the spring, and without the falling leaves, this would not happen as it should. If the leaves never left the trees, we would take them for granted all summer long instead of appreciating their friendly shade and whispers in the breeze.
And what about the vivid memories of the sound of leaves being raked into a mountainous leaf pile by a grown up for you to pounce in and bury yourself and breathe deeply of the decomposing earth as a child? I can’t think of a more calming memory than the hush that fell over me with my small body tucked in among the maples and elm and oak. I remember a sense of wonder that I could now touch something which had lived fifteen or twenty or thirty feet above my head all summer, an impossible distance overcome by mere gravity. If I could sleep in that childhood leaf pile made for me with love, I would.
Why You Should Leave Leaves
Perhaps my neighbors shake their heads at our laziness (although I think not, we have great neighbors) when they notice that we do not rake our leaves into those large paper hardware store bags and remove them each fall. A green lawn may be nice for some, but what fallen leaves can do for the earth and the insects that inhabit it is even better. So we choose to intentionally leave the leaves overwinter - you’ll find that they break down quite readily by spring time, and in the meantime offer a whole host of invisible benefits you may not be aware of. The cycle of leaves is an important part of nature’s ecosystem, here’s why:
Helps suppress weeds - many weeds make their start in very early spring, before the plants you actually want to grow have a chance to establish themselves. Leaving your leaves creates a protective barrier that blocks sunlight which can slow the growth of unwanted plants.
Provides valuable nutrients - the soil is full of microorganisms which are essential for healthy plant growth, but microorganisms need to eat too! As leaves break down, they compost and return vital nutrients to the soil which are then taken up by these microorganisms and plants to help them grow.
Protects overwinter insects - have you ever wondered where all those creepy crawly insects invading your personal space all summer go during the colder months? Well, it’s safe to say a fair number of them are hiding out in the local leaf pile, hunkered down and waiting for warmer days. Without dry and warm habitats like leaf piles, many insects have no place to safely weather cold winter conditions. Leaves also offer food, shelter, nesting and bedding materials to a variety of wildlife. When we disturb these micro insect ecosystems, it can have many unintended consequences for the environment.
Insulates trees, shrubs and other plants - especially in colder climates, winter can cause real damage to your trees, shrubs and other plants which aren’t as cold hardy. A freeze can cause instant plant death or shock that can severely impact growth and productivity of your plants. Leaves provide a natural blanket which protects these plants from the elements.
All this to say, I have a lot of feelings about leaves! My favorite thing to do during the fall season is to find different ways to celebrate this transitionary season through leaves. Although leaves can feel like a celebration all on their own as they sprinkle down from above, I love a good DIY craft project, so I wanted to take it one step further and create some DIY biodegradable leaf confetti!
Confetti is so fun and great for celebrations like baby showers, engagements, weddings and birthdays, but more often than not it is made of shiny plastics and other materials that do not break down after they are thrown away. Not to mention the packaging involved. Biodegradable confetti allows you to have all the fun of regular confetti without the negative environmental impact, so you can enjoy your celebration without any guilt.
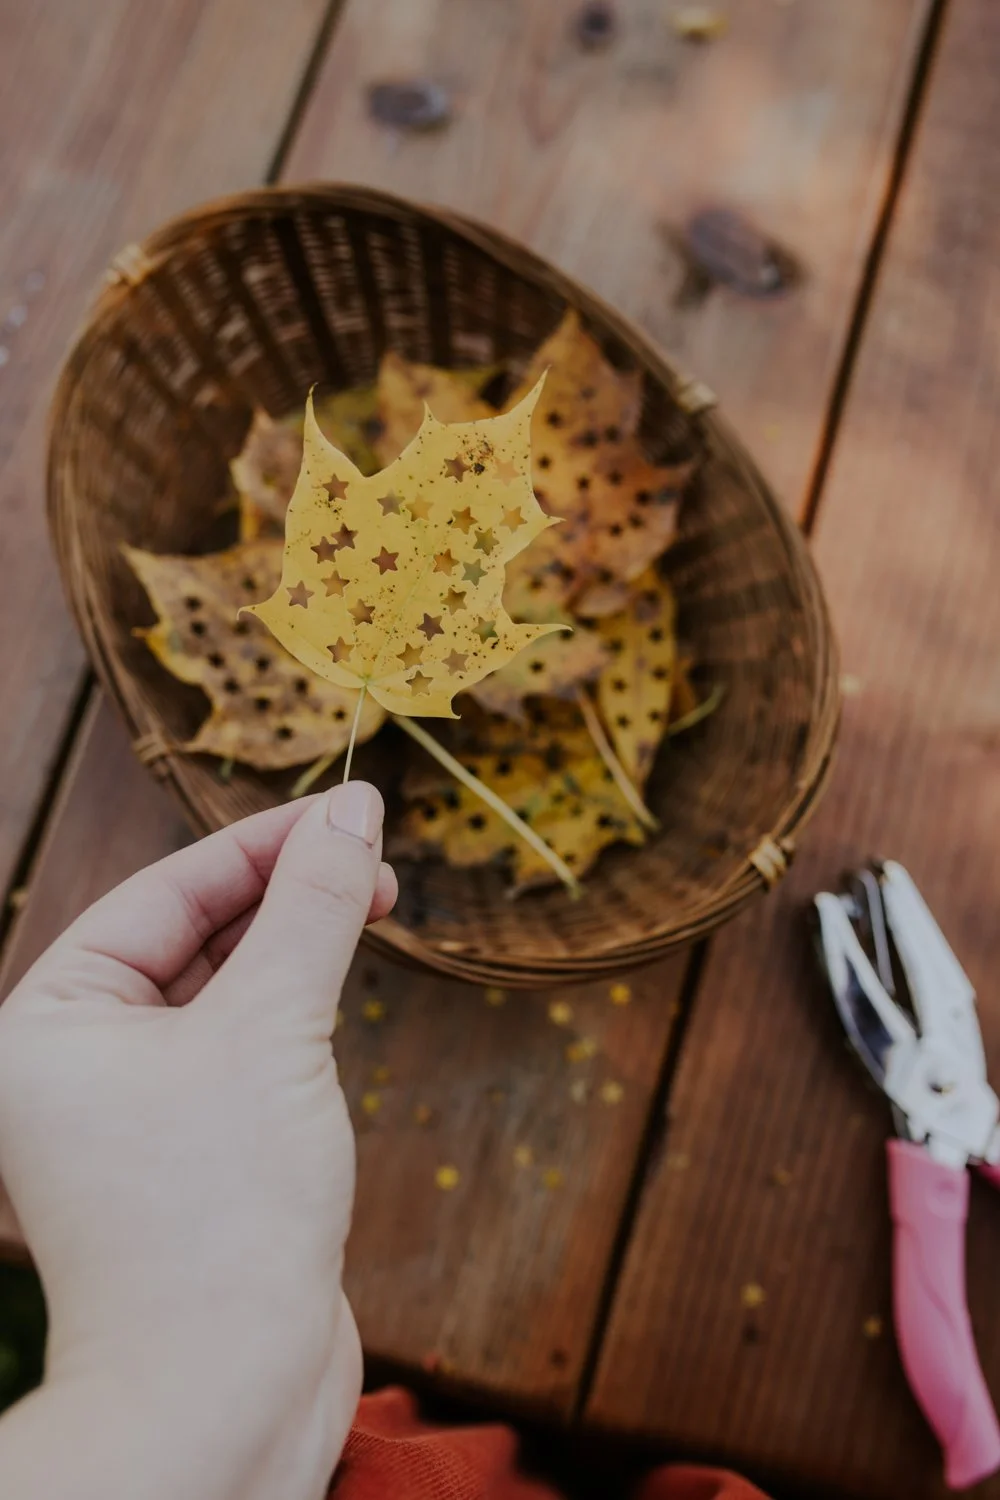
Now, you can probably figure out that there are two ways to go about doing this - one would be to just literally gather a basket of whole, small leaves and sprinkle them as you see fit. And that totally works as ready made confetti, or a delightful prank to pull on someone that’s not quite so messy as a pie to the face. But this is a celebration right?! So let’s make it extra special with a confetti diy using different shapes created with a paper hole punch.
For this project I grabbed a heart and star shaped hole punch, but any shape will do - circles, stars, even a tiny leaf would be so cute! They make all different sizes of hole punches, you could use a larger hole punch that is normally used for scrapbooking too. Here are a few options for hole punches that should work well for this project if you don’t have one already:

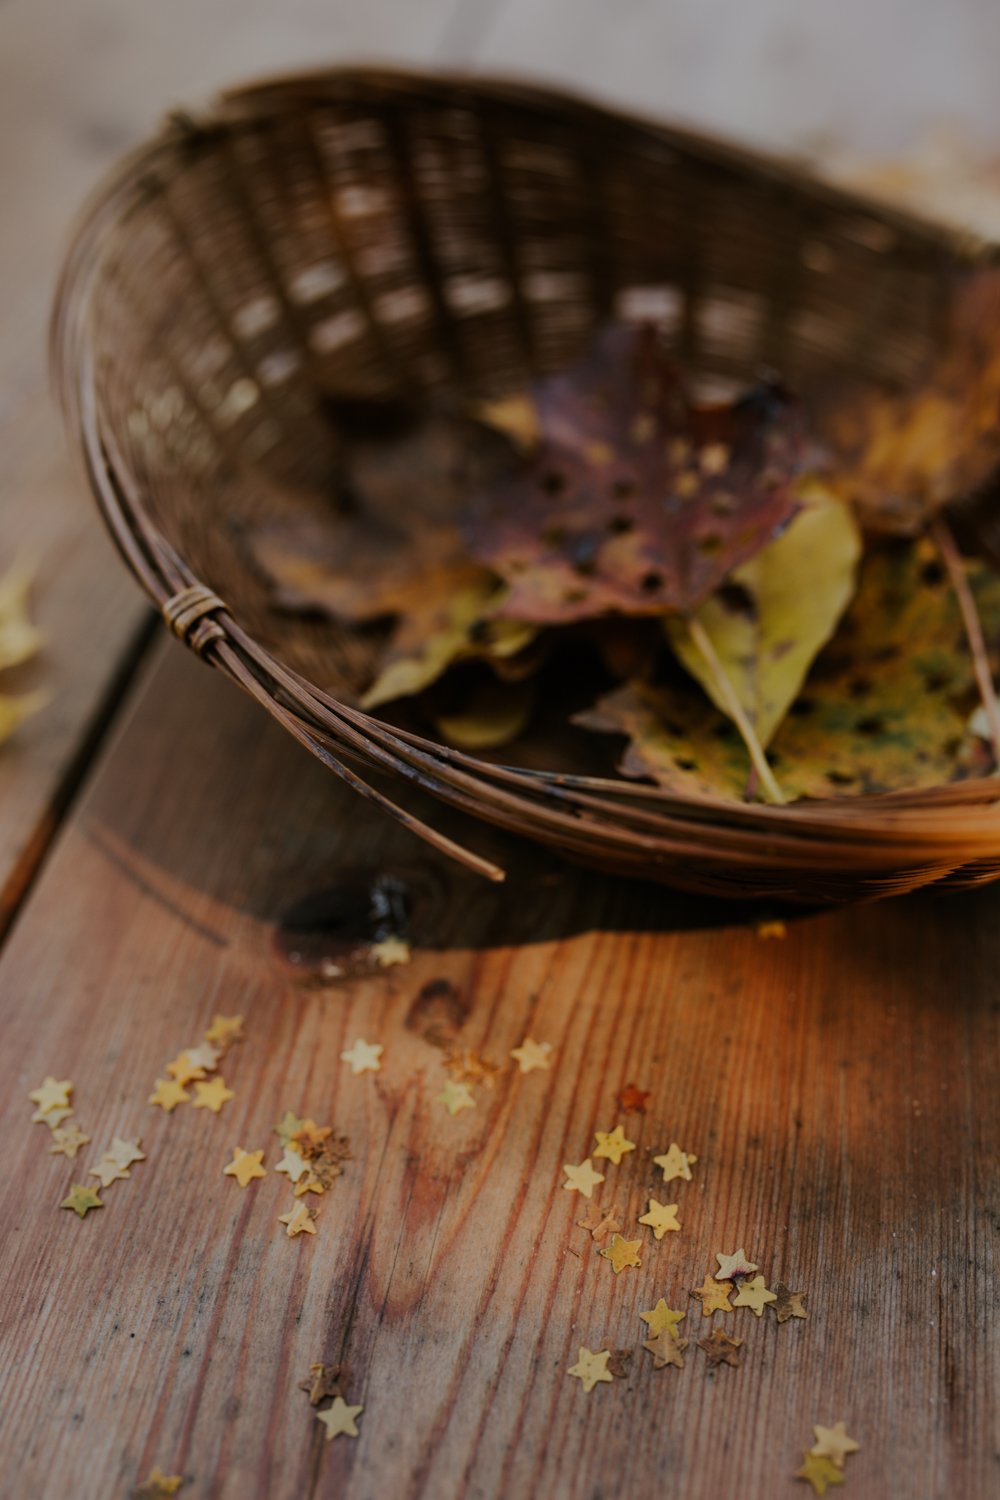
You’re going to want to collect your leaves first. Make sure to select leaves with the brightest colors that are flat and fully dried without being crumpled or so crispy that they just fall apart in your hand. If you’re unsure which leaves will work best, grab a few different ones before you really get started collecting and just test them out with your hole punch. The hole punch should be able to cut through them quickly and easily without breaking the leaf - just like paper.
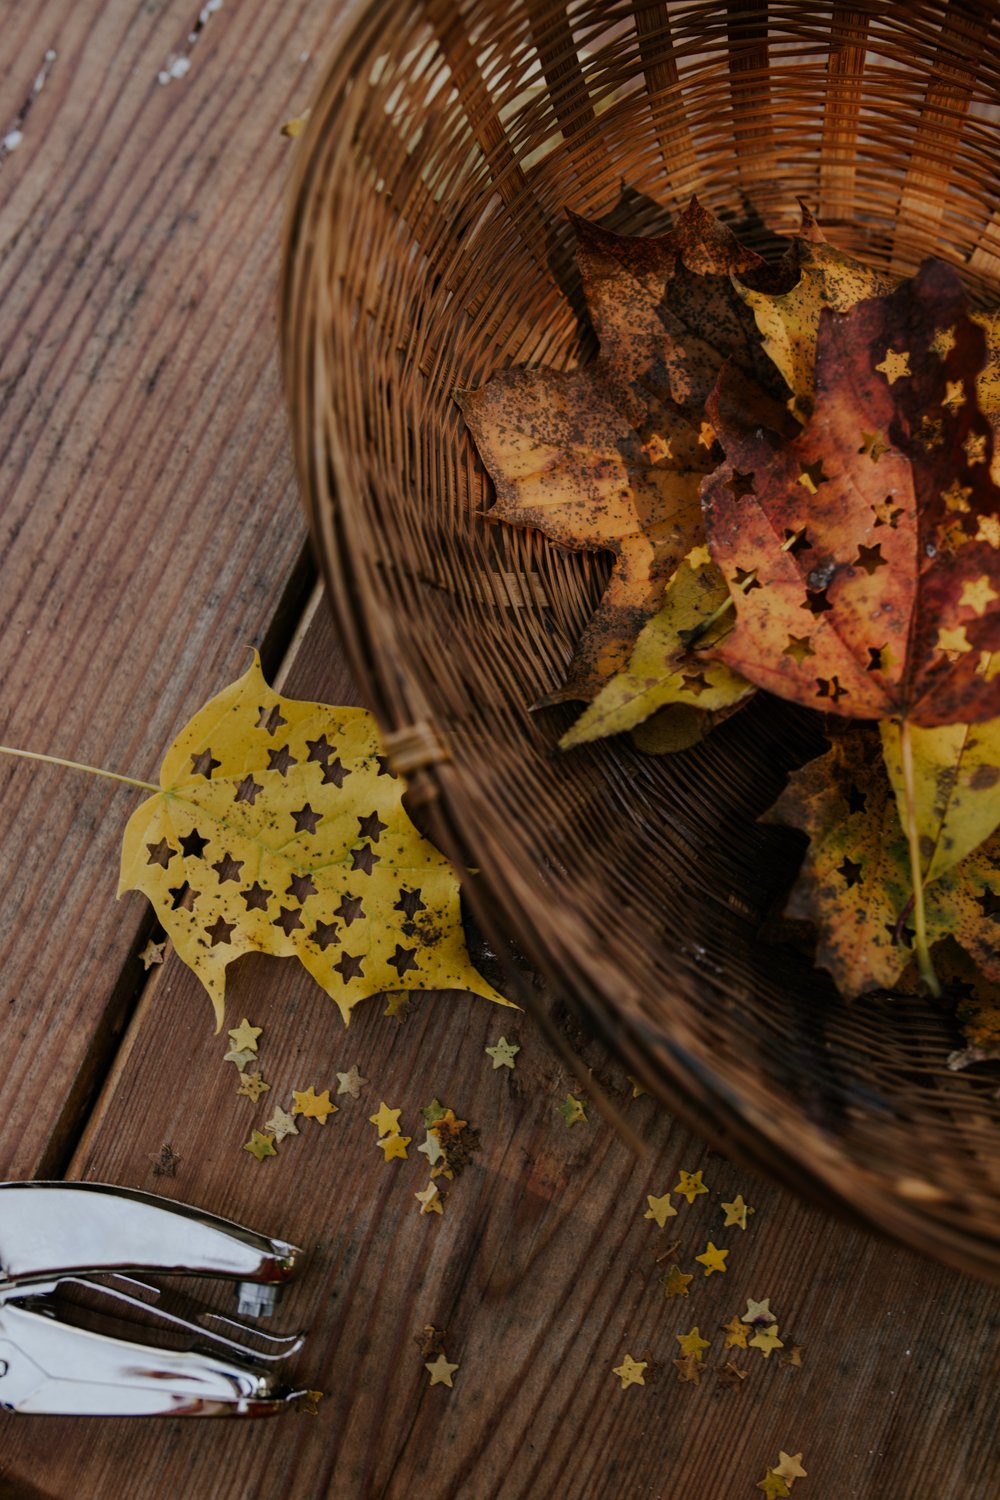
Once you have a good amount of leaves filling your basket, find a nice spot to sit and get punching. This can be a really great mindfulness opportunity. Pay close attention to the sensation of the leaves in your hands, the sound of the hole punch snapping shut and opening, the smell of earth wafting up from the basket and the feel of the confetti in your hand. Who would have thought this simple confetti craft could have so many benefits?
After you’re finished creating your confetti, you can even create a simple paper cone to help you to toss your new confetti in the air! I like to do this by cutting a circle shape out of paper and then cutting a pie shaped wedge out of the circle before wrapping it in on itself and securing with washi tape. Fill up your paper cone and get ready to celebrate!
How to make biodegradable confetti instructions

Supplies:
Leaves, flat and dry with bright colors
A basket or some other kind of container for collecting the leaves
A large metal scrapbooking hole punch (½-2” wide)
One sheet of paper
Washi tape
Instructions:
Collect leaves in a basket. Look for leaves that are flat and dry with bright colors. Working around each leaf from the outside edges in, use your hole punch to punch out confetti shapes from the leaves until you run out of usable leaf. Continue punching out the confetti from the leaves until you have enough confetti to fill a cone (about one cup). For the paper cone, cut a large circle out of the piece of paper. Then, cut a pie shaped wedge out of the circle. Wrap the circle around itself to form a cone shape and secure it with washi tape. Fill the cone with the biodegradable leaf confetti and enjoy!


Stovetop Pumpkin Oatmeal Recipe
Now that you’ve grown some delicious pumpkins, harvested and cured them. What can you do with a sugar pumpkin besides make the classic pumpkin pie? Pumpkin puree is infinitely useful in baking, but for a simple recipe you can make on your stovetop, let's make some pumpkin oatmeal
The Cottage Peach is reader-supported. When you purchase through links on our site, we may earn an affiliate commission at no additional cost to you. All opinions are our own.
Nothing says fall quite as loudly as bright orange pumpkin. Pumpkin spice lattes give it a good try, but everything leads back to the pumpkin patch. Just about every fall activity – from hay rides to apple picking, cider donuts to corn mazes - includes the squash we call a pumpkin.

By decorating the steps of our houses and carving jack-o’-lanterns, we all pay homage to, as the Charlie Brown special puts it, The Great Pumpkin.
Indigenous peoples used a variety of squashes for eating and making utensils, containers, and musical instruments. In fact, the word squash comes from the Narragansett tribe in what is now called Rhode Island. Humans have eaten squash as far back as prehistoric times.
Are Pumpkins Fruit?
The short answer is yes.
Encyclopedia Britannica defines fruit as, “the fleshy or dry ripened ovary of a plant, enclosing the seed or seeds.” So not only are pumpkins fruit, but so are avocados, peppers, and tomatoes, among others we call vegetables.
Fruits come from the parts of a plant that flower, while vegetables are the stems, roots, leaves, and bulbs of the plants themselves.
And get this – a pumpkin is technically a berry!
There is a difference between what we call things in common usage and how they’re defined in botany.
To most of us, a berry is a small, juicy, bright fruit without a stone or pit. In botany, however, a berry is a fleshy fruit developed by the ovary of one flower. Some of what we call berries do not meet that definition. For example, raspberries are formed by many ovaries, not one.
Botanically, pumpkins, watermelon, tomatoes, cucumbers, bananas, and grapes are all berries, while strawberries and blackberries are not berries at all.
When it comes to eating, though, the words berry, fruit, and vegetable have developed their own meanings, so unless you’re playing a trivia game or want to impress someone with your knowledge of botany, the common usages are just fine to use.
Why Grow Pumpkins?
I grow pumpkins for food and carving, but also for fun. One small seed produces a sprawling monster of a plant and then, at just the perfect time, there are pumpkins in my yard! Magic.
Growing pumpkins is a great project to do with kids, who generally find it as much fun as I do. Pumpkin plants grow easily and dependably, so are not likely to disappoint.
On a more practical note, every part of a pumpkin is edible, and it’s a source of food that can be stored throughout the winter’s lean times. Pumpkins are loaded with nutrients, including vitamin C, beta-carotene, magnesium, and potassium.

Carving Pumpkins vs. Eating Pumpkins
Any pumpkin or gourd can be carved or eaten, but there are a couple of main differences between the pumpkins we carve and the pumpkins we eat.
The pumpkins we carve are referred to as field pumpkins. They have thinner skin and stringy, watery flesh.
The pumpkins we eat are called sugar pumpkins or pie pumpkins. They are generally smaller, have thicker skin, and are more consistently round. Their flesh is not fibrous or stringy, and they have more flesh overall than a carving pumpkin.
Carving pumpkins:
The difference in the types of flesh translates to a difference in flavor. Carving pumpkins generally taste bland and are a little bitter.
Because thin skin is an attribute in a carving pumpkin, when choosing a carving pumpkin pick it up and compare it to others of the same size. The lighter pumpkin will have thinner skin.
Eating Pumpkins:
Sugar pumpkins taste rich and buttery, much like a butternut squash. (In fact, you can use butternut squash to make a pumpkin pie!) Their texture is smooth.
Because they are fleshier, a single sugar pumpkin will yield about as much as a can of the pureed pumpkin you can get at the grocery store.
Varieties of Pumpkin
All pumpkins are squash. There are hard-skinned squash and tender squash, and pumpkins are hard-skinned; a hard-skinned squash is also called a gourd.
While all pumpkins are gourds, not all gourds are pumpkins. Those that are not pumpkins are still edible, but generally have little flesh, and what they do have is bitter, so we use them as ornaments.
When choosing which pumpkins to grow, if you are interested in keeping them throughout the winter months you should look for one that is known as a ‘good keeper’.
Another fun option to grow is a giant pumpkin. Those are the ones you see at county fairs, grown just to see how big you can get them.
Varieties of carving pumpkins:
Gold Fever pumpkins are round and medium orange and weigh from 15-18 pounds.
Gold Rush pumpkins are large, round, jack-o-lanterns that grow from 20-35 pounds.
Howden pumpkins are a classic jack-o’-lantern, slightly taller than they are wide, with dark orange skin. They can grow to between 18-26 pounds.
Jack o’ Lantern pumpkins are great for carving as well as cooking. They grow from 7-10 pounds.
One Too Many pumpkins are a great choice if you want something different from the usual orange pumpkin. They have white and red skin. They grow to about 20 pounds.
Tom Fox pumpkins are deep orange and have fat, dark green stems. They grow to between 12-24 pounds.
Varieties of sugar pumpkins:
New England Pie pumpkins are dark orange and grow to 4-6 pounds. They’re not as sweet as some pumpkins, but they are a classic for pies.
Sweet Sugar Pie pumpkins are very meaty, with dark orange skin. They grow to 6-8 pounds, and are delicious for pies and canning.
Cinderella pumpkins are a great one for kids, as the carriage in the Disney movie is based upon their shape. They are mild and sweet, and can be 15-35 pounds.
Blue doll pumpkins don’t look like your typical pumpkin on the outside, with greenish-blue skin. But inside the pumpkin is dark orange and delicious. They grow to 20-24 pounds.
Lakota pumpkins are pear-shaped, with some combination of orange and green skin, making them a great choice for decoration and eating. They are sweet, and taste like butternut squash. They grow to about 7 pounds.
Dickinson pumpkins are used to make the Libby’s canned pumpkin pie filling you find at the grocery store. They are beige, and weigh 10-40 pounds.
Varieties of giant pumpkin:
Atlantic Giant pumpkins have pinkish orange skin. They grow to at least 300 pounds. The largest grown was over 1,400 pounds!
Big Max pumpkins are oblong with skin in shades of orange to pale salmon. They can grow from 100-300 pounds.
Prizewinner pumpkins have the classic pumpkin color and shape, with glossy skin. They can grow to weigh between 100-300 pounds.
Wyatt’s Wonder pumpkins have intense orange skin which doesn’t fade. They grow to 200 pounds or more.
When to Grow Pumpkins

Pumpkins are generally planted from early May through June, depending on the variety. I usually end up planting in mid-June, here in zone 6.
How to Grow Pumpkins
Pumpkins grow on a sprawling vine which can take up quite a bit of space. Pumpkin seeds can be put directly into the ground.
Choose a sunny spot (fruits like sun) and form small mounds of soil 2-5 feet apart. Plant 3 seeds on each mound. Pumpkins are planted on mounds because the soil in a mound warms more quickly, which helps with germination.
I’ll be honest, though, I don’t bother with mounds. I just plant the seeds in the flat soil and haven’t had a problem with germination. That may be because I plant at the later end of the planting range.
Bury your seeds about as deep as the seed is long. Keep the soil moist until your pumpkin plants sprout.
Once the pumpkins form, you can slip a piece of cardboard under them so they are not in contact with the soil, making them less likely to rot.
As your pumpkins are coloring up, check to see if the bottom is also turning orange. If not, gently rotate the bottom side towards the sun.
When to Harvest Pumpkins
It’s best to leave pumpkins on the vine for as long as possible, but they should be harvested before overnight temperature in the 30s kick in. A frozen pumpkin will immediately rot.
When deciding if a pumpkin is ripe, first check the color. A small amount of green remaining is ok, but not too much.
Tap the pumpkin with your finger. It should feel solid and have a hollow sound. Just like watermelon and fresh baked loaves of bread, a hollow sound means it’s done. Next, push your fingernail into the skin. If it doesn’t puncture the skin, the pumpkin is ripe.
How to Harvest Pumpkins
The first thing to know is you should never carry a pumpkin by its stem. Instead, carry it from the bottom.
You may want to wear gloves when harvesting pumpkins, as the vines and stems are prickly. You can easily wipe the prickles off of the stem with a gloved hand.
Use Felcos or a sharp knife to harvest; the stem of a pumpkin is quite dense. Cut the pumpkin with a stem of at least 2 inches, as a longer stem extends the storage life of the pumpkin.
How to Store Pumpkins
To make a pumpkin last months, it should be cured before being stored. A pumpkin is cured by setting it in a hot, dry place. This allows the rind to harden.
Once your pumpkin is cured, it’s ready for storage. Store pumpkins in a cool, dark place with good airflow. The ideal temperature for storing pumpkins is 55 degrees. They should never be stored at 45 degrees or below.
Place the pumpkins on something that keeps them from touching the floor, and arrange them so they do not touch each other.
Stovetop pumpkin oatmeal recipe
Making pumpkin oatmeal on the stove is as simple as toasting your spice in your sauce pan, adding your sweetener, liquid and oats and simmering everything for about thirty minutes - until it is nice and soft. Then you can curl up with your warm bowl of cozy and enjoy all that fall has to offer this season! Find the full pumpkin oatmeal recipe below:

Stovetop Pumpkin Oatmeal
Ingredients
- ¼ teaspoon ground nutmeg
- ½ teaspoon ground cinnamon
- ⅛ teaspoon ground ginger
- ¼ cup packed brown sugar
- 1 cup pumpkin puree (make this yourself by roasting your sugar pumpkin face down in the oven at 350 for 45 minutes, scooping out the flesh and blending or mashing with a fork)
- 4½ cups almond or coconut milk
- 1½ cups oats
- ¾ teaspoon salt
- Craisins (optional)
Instructions
- In a large saucepan over low heat, toast the nutmeg, cinnamon and ginger, stirring occasionally until fragrant, about 2 minutes.
- Stir in brown sugar, then add pumpkin and stir to combine. Add milk, raise heat and bring mixture to a simmer.
- Stir in oats, and simmer over medium heat until tender but not mushy, about 25 to 30 minutes.
- Stir in salt.
- Serve with raisins, applesauce, apples, pecans or maple syrup if desired.
Nutrition Facts
Calories
713.65Fat
56.5Sat. Fat
48.56Carbs
52.66Fiber
5.42Net carbs
47.26Sugar
21.14Protein
9.87Sodium
478.25Cholesterol
0
Bat Houses You Can Build Or Buy
When I was young, we had a playroom in our attic. One afternoon, we noticed there were bats hanging upside-down on one of the window screens. There were two big bats, and a little baby bat.
With the glass between us, we were able to safely look them over, and we learned something unexpected – bats are cute!
They stayed quite a while, sleeping all day and disappearing at night. We actually felt a little sad when they left for good, and so we bought a bat house kit.
The Cottage Peach is reader-supported. When you purchase through links on our site, we may earn an affiliate commission at no additional cost to you. All opinions are our own.
Bat Houses
When I was young, we had a playroom in our attic. One afternoon, we noticed there were bats hanging upside-down on one of the window screens. There were two big bats, and a little baby bat.

With the glass between us, we were able to safely look them over, and we learned something unexpected – bats are cute!
They stayed quite a while, sleeping all day and disappearing at night. We actually felt a little sad when they left for good, and so we bought a bat house kit.
Bat Facts
Bats have flown over the earth for more than 50 million years. Unlike birds, their fellow flyers, they are mammals, and are in fact the second largest order or mammals, with more than 1,400 species.
Bats are nocturnal, and have wings where their forelegs might have been, making them the only mammals that can truly fly. (Flying squirrels don’t actually fly, they just glide small distances.) They are more agile fliers than most birds.
Bats pollinate night-blooming flowers, and are the primary pollinator of agave, which is the main ingredient in tequila.
The world’s smallest bat is the Bumblebee Bat, which is about an inch by ¾ of an inch when full-grown. The largest is the Giant Golden-crowned Flying Fox, which has a wingspan up to 6 feet. The
Mexican Free-tail Bat is the fastest bat, and can travel up to 100mph. Mexican Free-tails gather in a cave in New Mexico to give birth, with a population of up to 20 million!
There are 10 or 12 bat species that regularly use bat houses. The two most common are Little Brown and Big Brown bats. Neither is a vampire bat.
Bat Get a Bad Rap
In North America, bats are closely associated with vampires, and this stigma often overshadows the many beneficial qualities of bats. In fact, of the 1,400 species of bats, only 3 are vampire bats that drink blood.

They are also stigmatized because people fear they’ll catch rabies from a bat. Bats, like most mammals, can carry rabies, but the fact is that the vast majority do not. So while we should still see a doctor if there’s any chance we’ve been bitten by a bat, catching rabies isn’t something we need to worry about very much.
What Good Are Bats?
When you’re sitting in your backyard and see bats flying overhead, know that on that night, a colony of hundreds of bats will consume hundreds of thousands of insects. Imagine how many million bats around the world consume!
Bats are the top predator for insects that fly at night, eating pests like flies, termites, flying ants, June beetles, and moths. They also do us the great service of eating mosquitoes. In agriculture, the more bats we have, the less pesticide is needed.
Aside from eating pests, bats who feed on nectar also pollinate plants like bananas, cloves, and peaches. And those who feed on fruit disperse seed through their guano, spreading plants to the surrounding areas.
What Do Bats Sound Like?
To our ears, bats don’t sound like much of anything, but the sounds they do make are clicking noises. Bats make these noises using their vocal cords, their nostrils, and their tongues. Some species of bats also make clicking sounds by flapping their wings.
These clicking noises are ultrasonic, in a frequency 3 times higher than what we can hear with our human ears.
We know what bats sound like because of the use of bat detectors, which use an ultrasonic microphone and convert the sounds to a frequency humans can hear.
And so we know that if the noises are slowed down, they sound like the chirps of a bird, and that different species of bat have different calls, just as birds do.
Bats use these noises to echolocate, and presumably to communicate with each other. Their echolocation skills allow them to sense something as fine as a human hair.
What is a Bat House?
A bat house is built and secured somewhere high in order to provide bats with a space to live that mimics the roosts they would choose in the wild.

Many bat species roost under the bark of dead trees (and if you have a dead tree it is safe to leave standing, you can leave it up to provide a natural bat house).
Because this is the environment they choose in nature, bat houses are made to be narrow and tight. They are generally made from rough wood, so the bats can hang on without slipping, just as they would be able to between bark and the trunk of a tree.
Bat houses are often painted in dark colors, and the sides caulked, to recreate the warm and snug area they would naturally choose to raise babies.
Why Have a Bat House?
More than half of the bat species in North America are endangered.
Some of the main problems in maintaining bat populations are a fungal disease called White Nose Syndrome and the very long gestational period bats experience. The common vampire bat, for example, carries its young for 209 days! Most bat moms only give birth to one pup a year.
But human activity bears the majority of responsibility for their population decline: the destruction of natural habitats, windmills, climate change, pesticide use, hunting for sport and meat, and stigmas which lead to their being killed.
Having a bat house is an easy way to do our small part towards helping them have what they need to survive. A bat house provides a safe, warm place for mothers to bear their young.
Bat houses also provide bats who have been ‘evicted’ from people’s homes an alternative spot to roost.
DIY: How to Build a Bat House
A bat house is fairly simple to make. There are tons of plans and instructions online. The government of Massachusetts provides this free plan to build a four-chamber bat house: https://www.mass.gov/doc/build-a-four-chamber-bat-house/download
Their site details some key elements for a successful bat house. They recommend:

Using exterior plywood or cedar.
Using rough wood.
Not using pressure treated wood.
Using exterior grade screws to assemble.
Making your house at least 24” tall and at least 14” wide.
Making a bigger box is better.
Adding a 6” x ½” vent on each side for airflow.
Caulk all seams.
Cover the roof with shingles or metal for a more durable bat house.
Provide a landing pad of 3-6” just below the entrance.
The overall goals to keep in mind when building a bat house are warmth and tight spaces, as these will provide the right environment for babies.
To help maintain a good temperature, bat houses can be painted, but it is not required.
What Are the Best Bat Houses I Can Buy?
Bat houses are readily available to buy online at Amazon, Home Depot, Lehman’s, and Etsy. Here’s a few top picks for handmade bat houses from Etsy:
DIY Bat House Kits
Bat house kits are easy to assemble, and most can be completed in under an hour. Building one is a great project to do with kids.
When shopping for a bat house kit, choose one that is made with quality materials.
A bat house kit should come with everything you need, with the exception of tools like a drill or caulking gun. The necessary wood will be included and cut to size.
Bat Conservation & Management https://batmanagement.com/ is committed to the conservation and study of bats. They conduct research and surveys and work to educate people about bats. On their site, they sell a variety of bat house kits you can assemble yourself or buy premade. Their designs are backed by many years of experience and study.
Where Should I Hang a Bat House?
First, look for a place that is away from windows, doors, patios, or decks. Bats’ droppings make quite a mess.
Choosing the location for your bat house can make all the difference as to whether bats will move into it or not.
Bats scout for new roosts at night while they feed. Here is what you can do to make them more likely to choose yours:
Do not put your bat house on a tree. Bats can find houses more easily on a building or pole.
Put your bat house near a water source.
Install your house at least 12-20’ from the ground.
Make sure the location gets at least 6 or 7 hours of sunlight.
Consider placing it under your eaves, but only after making sure your house is bat-proof.
Bat houses should be a good distance away from wires and tree branches so there’s nothing to impede the bats’ flight.
Face your bat house to the south or southeast to catch as much warmth from the sun as possible.
In cooler climates, paint the house black to increase heat absorption from the sun.
While you can install a bat house at any time of year, you are more likely to get bats if you install it in spring or early summer.
How to Attract Bats to Your Bat House
One way to attract bats to your bat house is to grow night-scented flowers. These flowers often attract moths and other bugs which bats find tasty.
Night-Scented flowers:
Evening Primrose
Honeysuckle
Goldenrod
Fleabane
Another way to attract bats is to minimize (or better yet, eliminate) the use of pesticides in your yard. Bats are looking for a place where there’s a plentiful food source, meaning lots of bugs.
Finally, make sure there are no outdoor lights near your bat house.
It can take up to 2 years for bats to find and move into a bat house, so you’ll have to be patient. If no bats have made it their own in 2 years, you can move it to a different location and try again.
Adding herbal and aromatherapy elements to your bathing ritual has been a long standing tradition in cultures around the world, but there’s just something extra rewarding about it when you grow those flowers and herbs yourself. So head out to the garden and clip a few sprigs of whatever calls to you - we’ll go over some of the easiest ways to include plants in your shower routine.
Learning about how different herbs can provide different benefits for the skin and body can bring you closer to nature and yourself, as well as offering a ton of ways you can support yourself through a self care ritual not rooted in consumerism (hard to find these days). You’re probably familiar with using fragrant botanicals like eucalyptus and lavender in your spa shower routine, but here’s a few more herbs and flowers you should consider including next time you’re looking for a soothing sensory experience in the shower: