
BACKYARD GARDENING MADE SIMPLE

How To Get Rid of Pests in Your Garden
How can you deal with garden pests naturally and humanely? Slugs, snails, earwigs and rodents are common garden pests you may find yourself dealing with, but there’s many methods you can try to repel garden pests.

Early this winter I walked into the greenhouse and found that most of the greens, especially the brassicas, had been chewed to bits. I know that this time of year there's kind of only three things that it could be - I had seen a couple of slugs in the greenhouse before and I figured that had to be it.
Beer trap for slugs
With slugs, the best first line of defense is beer traps, so I put some beer traps out, but they didn't end up catching anything. The way that you do the slug beer traps is you just get a shallow dish and you bury it so that it's level with the top of the soil. They're attracted to the yeasty smell of the beer and they're supposed to just fall in and drown. When this didn't work even though I knew I had a couple slugs in there, I started to wonder if it could actually be snails or earwigs.
Snails and earwigs are also attracted by the humid environment of a greenhouse, but they aren't going to fall for the beer trap, so there's a couple other things that you can do if you've got slugs snails or earwigs in your garden. These are the most common pests that you're going to find when you're gardening in the winter because they like cool damp areas - and I had to act quickly because slugs have teeth so they can do a lot of damage really fast!
Beer traps are super effective according to you guys - I haven't really experienced that for myself just because in this particular case it wasn't actually mostly slugs that I was dealing with. The next recommendation for dealing with slugs in your garden is usually salt. The problem with salt is that even though it usually works by dehydrating the slugs, it's kind of a cruel way to take them out and importantly to a lot of gardeners can do some serious damage to your plants and your soil.
Does copper work to stop slugs in the garden?
Copper is really effective against slugs because it actually has the ability to electrocute them and shock them when they touch it so they tend to avoid it. You can get copper tape or copper wire and put it around your plants, it’s just a little bit more costly and time consuming to get it set up.
What I'm going to recommend you do the most is companion planting, which I have to say was probably my biggest mistake in the greenhouse. There are certain plants that I could have put in that would have been okay even though the temperatures are going to drop in there, like chamomile and sage and oregano, that would have repelled these pests in the first place. However, because of how late in the season I discovered this problem I didn't have time to plant those things before the slugs would have taken over and decimated everything.
Because I had a limited amount of time before they destroyed everything and I really couldn't replant what they had already destroyed because of how late in the season it was, I decided to take dramatic action - this isn't something that I normally do, in fact I've never done it before, but I am using an insecticide in my garden.
Natural garden slug repellent
Sluggo is organic approved and it's made of iron phosphate which is something that's harmful to slugs and snails, but pretty much harmless to everything else. It's laced with some kind of bait that attracts the slugs and snails, and it actually works against earwigs too which is great because I'm pretty sure earwigs have been doing the majority of the damage on my plants. It comes in a pellet form that you sprinkle throughout the garden. This is not my first choice and if I could have companion planted instead I definitely would have started there, but in this case with the limited amount of time that I had I didn't really have a choice.
But the fun didn't end there, because as soon as I got this slug/snail/earwing situation under control, I came out to the greenhouse to another horrific discovery! (Can you tell I'm stressed out about this?)
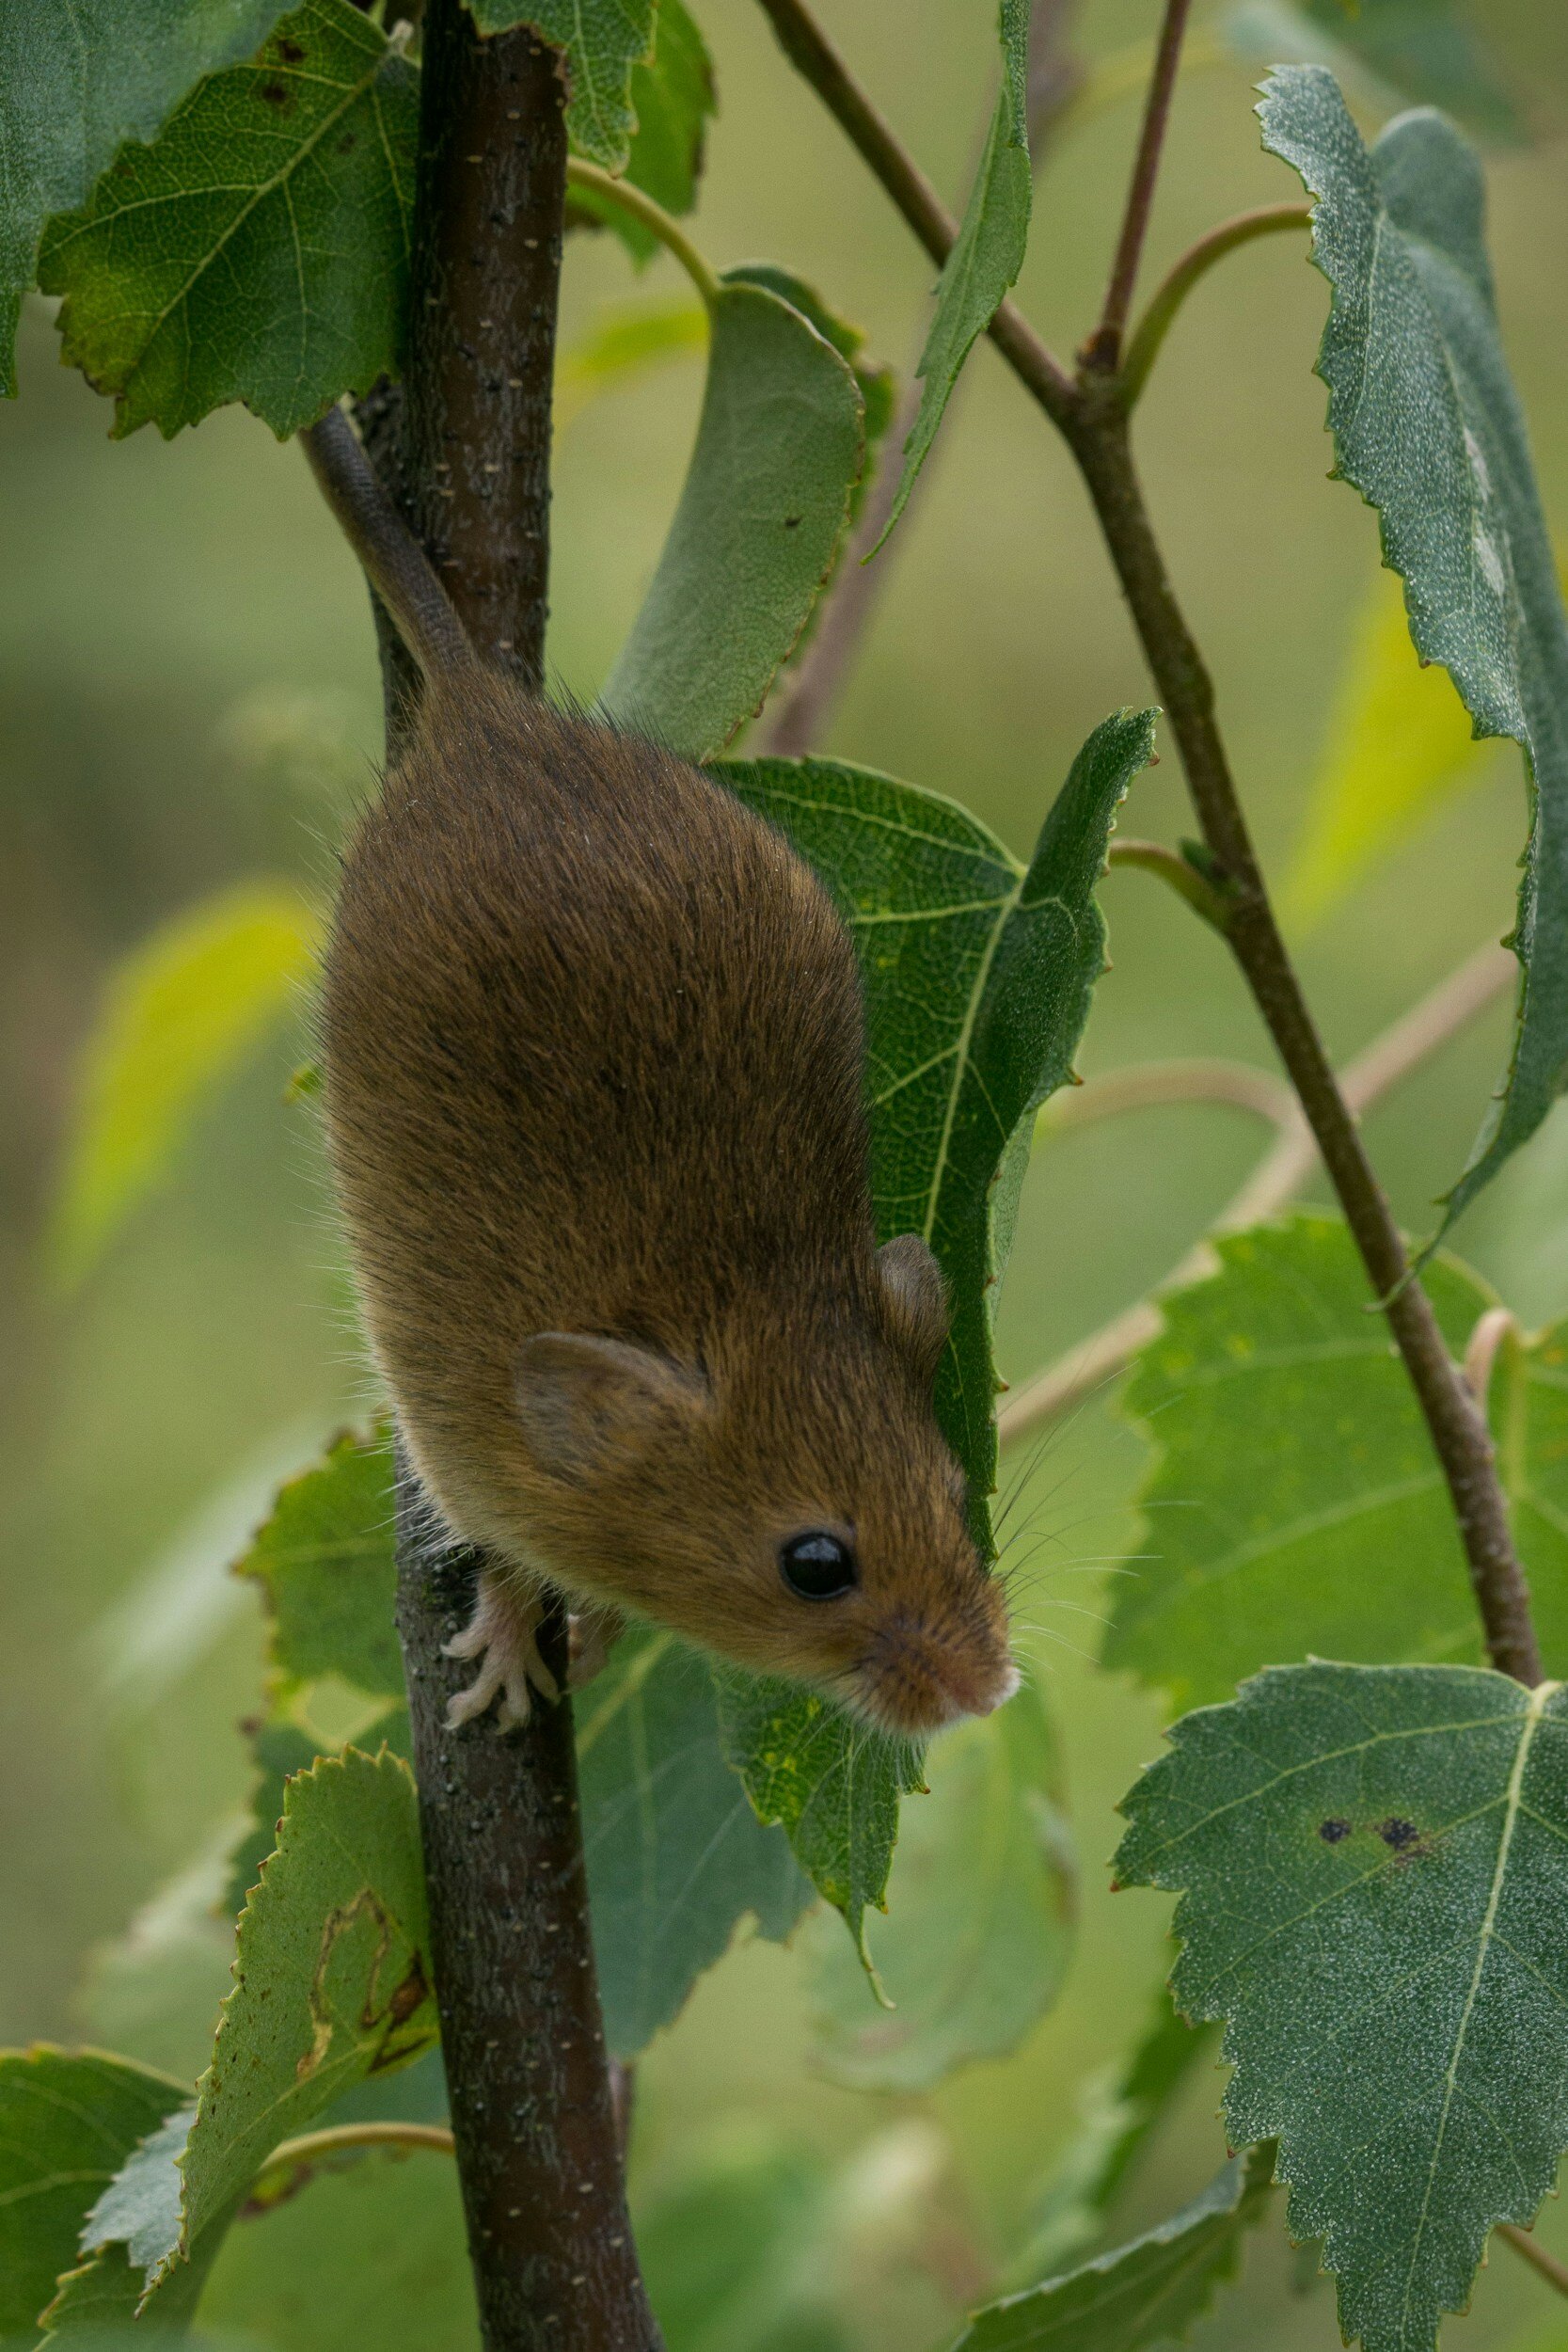
Rodents in the greenhouse
I pulled back the row cover and I noticed that there was a lot of dirt on top of the plants like they had been buried by something, and there was this really weird oily wet fur smell coming from the area. I pulled that row cover back further and that's when I saw the tunnels. Now at this point I didn't know what kind of animal the tunnel was from, and I'm not going to pretend like I didn't know that it was possible for animals to get in here, or that they'd want to because of course they would! It's warm and full of food and this time of year all these little critters are just looking for somewhere to cozy up, so I totally get it and this is my fault for not thinking about the fact that they would start coming in here as early as they did in the season.
At first I thought it wasn't that big of a deal because there were no droppings, they weren't eating any of the plants or even really disturbing them, they had just made a tunnel and left for the day. I'm no stranger to having rodents in the house - we live in the country, and we've got fields and old barns all around us. We've dealt with mice before in the house and the thing that's worked the best for us inside has been peppermint oil. It's all natural, smells pretty good (although it can make your eyes water if you use enough of it) so my first line of defense in the greenhouse while I started making a more permanent plan was to spray with this peppermint oil spray.
I ended up saturating all the wood baseboards and the row covers and the wood chip path in the center, but I wanted to be careful not to get this on the plastic itself because it's an essential oil and it's highly concentrated it can actually melt the plastic, I thought “this has worked in the house, so it's totally going to work here and there's nothing else I need to do” well…it worked for one day, and then I came back out to more tunnels.
There still wasn't a lot of damage, there wasn't anything that indicated to me that it was super gross, it was areas where I could just avoid eating those plants until they had a chance to grow back and make new growth that hadn't been touched by animals, but the tunnels didn't stop and then after a couple more days I did start to notice droppings.
With those droppings I was able to make a positive ID of these rodents, even though I haven't had a chance to see them myself yet because at first I had only seen the tunnels, I was able to determine that it wasn't something small like a field mouse or a chipmunk, but I thought it might still be a mink or a vole. With the droppings I was able to confirm that unfortunately it was the most common rodent pest that we see in our gardens; rats.
The best way to get rid of rats is to prevent them from coming inside in the first place. but unfortunately a lot of the time our gardens are just havens for them. They love the rotting food in your compost, the warm nests they can make under the layers of cardboard that you're using to make new beds, all of these things are going to attract rats to your garden - especially if it's a warm cozy place like a greenhouse.
So why did I hesitate to just do hardware cloth in the first place and why didn't I just take care of this upfront so it didn't happen? Basically when I designed this greenhouse we used wooden boards along the long edges to hold the cattle panel in, but we didn't put any wooden boards along the back or the front wall because they weren't necessary, so there's no exterior frame for us to swoop a piece hardware cloth up against and keep it protected - and realistically they could just climb that hardware cloth and chew through the plastic so it just seemed like an unnecessary expense that wasn't going to provide me any additional benefit.
At the end of the day if they wanted to come in, they were going to come in, so I thought that the best low cost low effort way to prevent them was with peppermint oil. Peppermint oil is known to be super effective against all sorts of rodents but for some reason (and you guys have confirmed this for me in DMs) rats just don't seem to mind it as much as other rodent pests do, so even though I ended up spraying every available surface with peppermint oil to the point that my eyes were watering it didn't have the effect that I had hoped it would on the rats.
Another recommendation I got from you guys was to use lavender oil, Again this just comes back to using scents that we know that they don't like to repel them from coming in in the first place. Whether or not this is effective kind of depends on how determined the rat is.
For our last food-based recommendation you guys recommended I sprinkle chili powder around the outside of the hoop house - this is totally harmless, they just don't like the spiciness! I guess when they're digging through it, it gets up in their nose. I have had a lot of success using this method.
You can also try sprinkling around some cat fur or used cat litter, and the most interesting recommendation that I got from one of you was from a reptile owner who told me that they have found that snake skins are excellent at repelling rats, so if you had a source for some snake skin you could definitely try that as well. Another popular recommendation that I got was Irish Spring soap - I've heard mixed reviews about this one myself so let me know in the comments if you tried this and it's worked for you,
Desperate times call for desperate measures so we're going to get into my least favorite recommendations; traps and poisons.
You can get traps that unalive your rats or you can get traps that are catch and release. With either of these options of course you're dealing face to face with rats themselves and depending on how many rats are present this could be an ongoing issue that continues throughout the whole season.
I will strongly discourage you from using a chemical poison on your rat population, not only because it’s an unpleasant and inhumane death but also because if other wildlife like an owl gets that rat they're going to end up poisoned too.
If you are going to go down this route I would research natural methods. I won't go into them much here since it's not something that I generally advocate for, but some of the ones that you guys recommended to me were sweet potatoes, cornmeal, and baking soda.
Let me know if you've had any luck with the suggestions that we talked about here!

Garden Planning Part 4: What Is Companion Planting?
Companion planting is an age-old practice based on the principle of mutualism, where plants interact positively with each other, promoting growth, health, and pest control. Companion planting is a holistic approach to gardening that recognizes the interconnectedness of plants and their environment. By strategically pairing plants, you can create healthier, more resilient ecosystems that require less intervention and chemical inputs. It's a sustainable and environmentally friendly way to cultivate food and ornamental gardens, rooted in the principles of cooperation and harmony within nature. The goal is to enhance the overall health and productivity of the garden by taking advantage of the interactions between certain plant species.

This is part four of my garden planning guide. For part one all about deciding what to plant, click here. For part two, all about planning your garden layout, click here. For part three, how to start seeds, click here
Companion planting is an age-old practice based on the principle of mutualism, where plants interact positively with each other, promoting growth, health, and pest control. Companion planting is a holistic approach to gardening that recognizes the interconnectedness of plants and their environment. By strategically pairing plants, you can create healthier, more resilient ecosystems that require less intervention and chemical inputs. It's a sustainable and environmentally friendly way to cultivate food and ornamental gardens, rooted in the principles of cooperation and harmony within nature. The goal is to enhance the overall health and productivity of the garden by taking advantage of the interactions between certain plant species.
How companion planting can impact your garden
Companion Planting for Pest Control
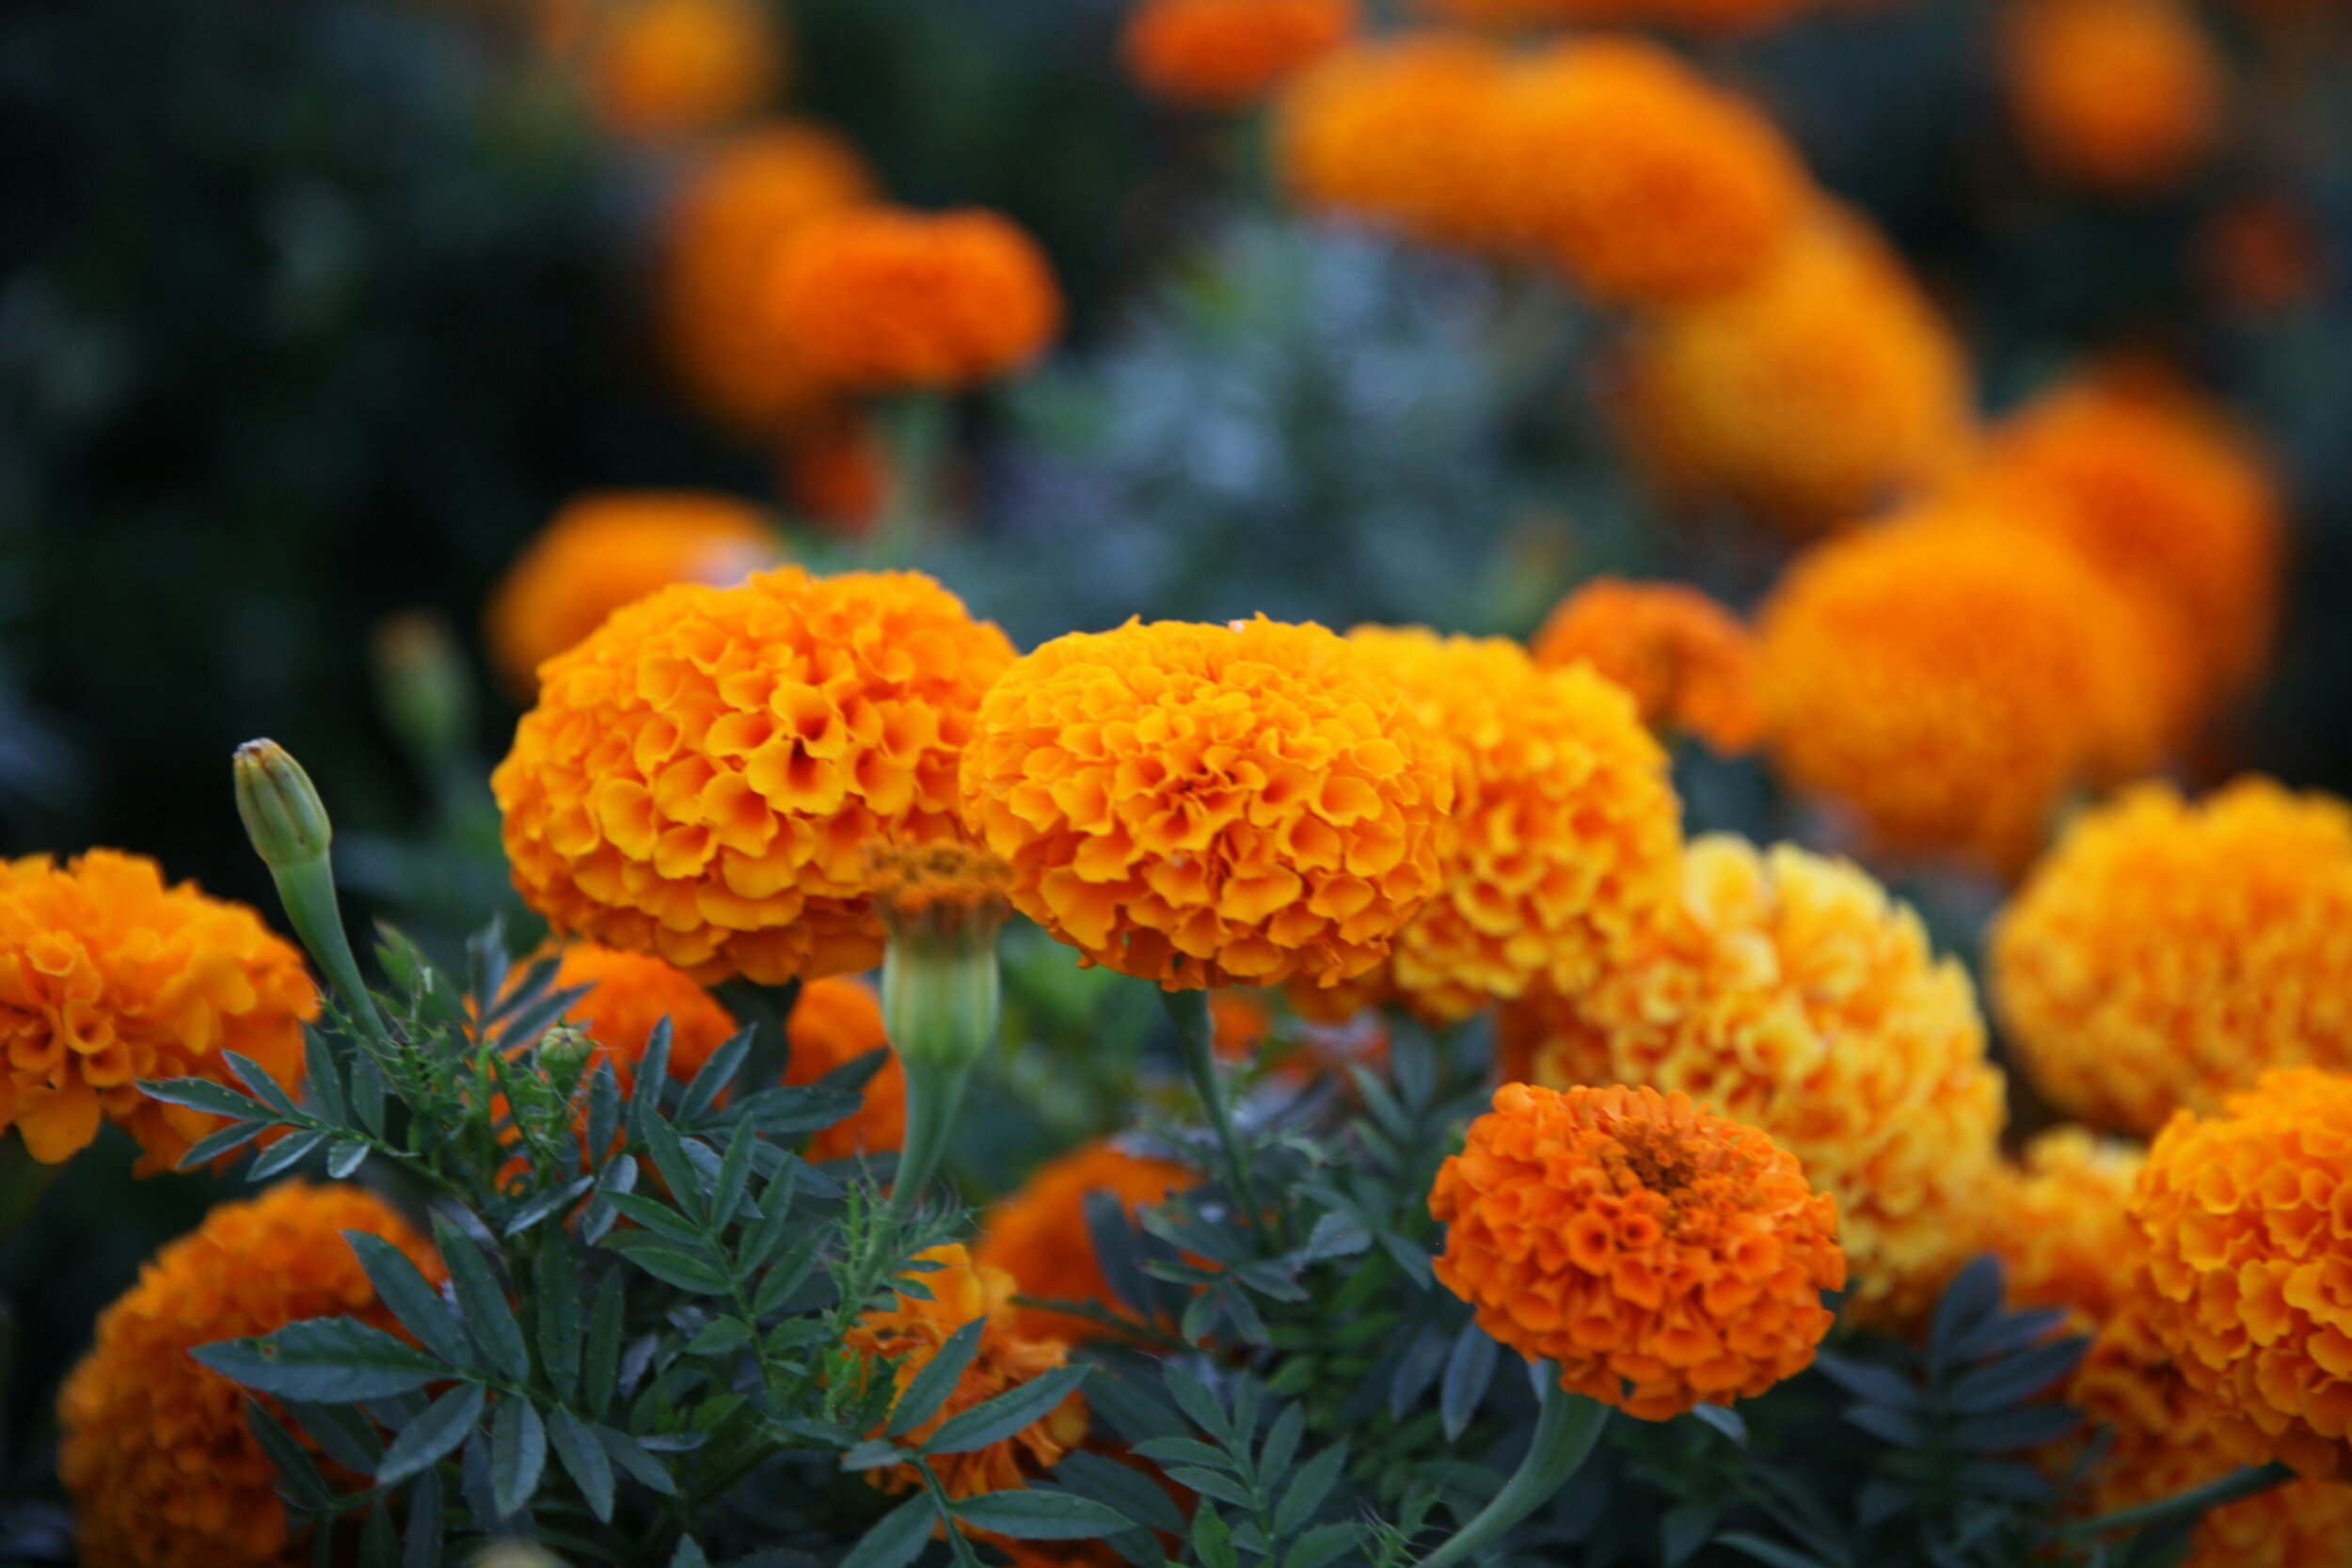
Some plants release natural compounds that repel or deter pests, and planting them alongside susceptible crops can help protect them. Marigolds are renowned for their ability to repel a wide range of pests due to the strong scent emitted by their foliage and flowers. This scent acts as a natural deterrent for many common garden pests, including nematodes, aphids, whiteflies, and even certain types of beetles.
Planting marigolds alongside susceptible crops can create a protective barrier, reducing the likelihood of pest infestations without the need for chemical pesticides. Planting basil alongside tomatoes not only improves the flavor of the tomatoes but also deters tomato hornworms and whiteflies. Similarly, planting onions or chives near carrots can help repel carrot flies, while carrots attract beneficial insects like parasitic wasps and hoverflies, which prey on aphids and other pests. Calendula and yarrow attract predatory insects like ladybugs and parasitic wasps, which feed on harmful insects.
Companion Planting for Soil Health
Companion planting plays a significant role in improving and maintaining soil quality. Some plants possess deep and penetrating root systems that can effectively break up compacted soil, allowing for better air and water penetration. Plants like daikon radishes, with their long taproots, are excellent at aerating the soil. These deep-rooted plants help loosen compacted soil layers, creating channels for air, water, and nutrients to reach deeper soil layers, which is beneficial for the overall health and growth of neighboring plants.
Leguminous plants, such as beans, peas, clover, and alfalfa, have a unique ability to form symbiotic relationships with nitrogen-fixing bacteria in their root nodules. These bacteria take atmospheric nitrogen and convert it into a form (ammonia) that plants can utilize for growth. This process, known as nitrogen fixation, helps enrich the soil with this essential nutrient, benefiting not only the legumes themselves but also neighboring plants. By interplanting nitrogen-fixing legumes with other crops, you can reduce the need for synthetic fertilizers and promote healthier soil fertility.
Certain plants have the remarkable ability to absorb and accumulate toxins, heavy metals, and pollutants from the soil through their roots—a process known as phytoremediation. Sunflowers, for example, are well-known for their ability to absorb contaminants such as lead, arsenic, and radioactive isotopes from the soil, effectively detoxifying it. Once absorbed, these contaminants are stored in the plant's tissues or concentrated in specific structures, making it easier to remediate the soil by removing the contaminated plant material. By incorporating phytoremediative plants into companion planting schemes, you can help rehabilitate polluted or contaminated soil, making it safer and healthier for other plants to grow.
In addition to sunflowers, several other plants are considered "dynamic accumulators" because they accumulate specific nutrients or minerals in their tissues, which can then be recycled back into the soil when the plant decomposes. For instance, comfrey is known for its deep roots and high concentrations of nutrients like potassium, calcium, and phosphorus. When comfrey leaves decompose, they release these nutrients back into the soil, enriching it for neighboring plants. Incorporating dynamic accumulators into companion planting designs can help improve soil fertility and structure over time, creating a more resilient and productive garden ecosystem.
Companion Planting to Maximize Growing Space
One of the primary ways companion planting maximizes space is by utilizing vertical space efficiently. Tall plants, such as corn, sunflowers, or pole beans, can serve as natural trellises or support structures for vining plants like cucumbers, squash, or tomatoes. By allowing these vining plants to climb upward, you can take advantage of vertical space that might otherwise remain unused, effectively doubling or even tripling the yield from a given area of land.

Another approach to space optimization involves creating layered planting arrangements akin to natural ecosystems. Tall plants with a dense canopy, such as corn or sunflowers, can provide shade and shelter for lower-growing plants like lettuce, spinach, or herbs. This canopy-and-understory configuration not only makes efficient use of space but also helps conserve soil moisture by reducing evaporation and minimizing weed growth. Additionally, the cooler microclimate created by the shade of taller plants can be beneficial for cool-season crops in warmer climates or during hot summer months.
Companion Planting as a Succession Strategy
Companion planting also enables you to implement succession planting strategies, where fast-maturing or short-season crops are interplanted with longer-maturing or perennial species. For example, lettuce or radishes can be planted between rows of slower-growing crops like tomatoes or peppers. By the time the larger plants reach maturity and require more space, the shorter crops will have been harvested, allowing for continuous production and efficient use of space throughout the growing season.
Pairing plants with compatible growth habits and complementary resource needs allows for denser planting arrangements without competition for resources. For instance, planting shallow-rooted crops like lettuce or herbs alongside deep-rooted crops like garlic or onions enables efficient use of soil nutrients and moisture without overcrowding or stunting growth. Similarly, interplanting nitrogen-fixing legumes like beans or peas with heavy feeders like corn or squash can provide natural fertilization and improve overall soil fertility while maximizing space utilization.
What is the Three Sisters Planting Method?
The "Three Sisters" technique, deeply rooted in Native American agricultural traditions, exemplifies the concept of companion planting based on complementary nutrient needs and symbiotic relationships among plant species. Corn serves as the backbone of the Three Sisters planting method, providing a tall, sturdy structure for the climbing beans to latch onto. As corn grows, it creates a natural trellis for the beans, allowing them to climb upward and access sunlight without the need for additional support structures. In return, the beans, with their twining vines, help stabilize the corn stalks against strong winds and storms.
Beans, such as pole beans or runner beans, are nitrogen-fixing legumes that have a symbiotic relationship with certain soil bacteria. These bacteria, known as rhizobia, form nodules on the beans' roots and convert atmospheric nitrogen into a form that plants can use for growth. By interplanting beans with corn, the beans enrich the soil with nitrogen, a vital nutrient that corn requires for healthy growth and development. In essence, the beans act as natural fertilizers, reducing the need for synthetic nitrogen inputs and promoting soil fertility.
Squash plays a crucial role in the Three Sisters planting system by serving as living mulch. As the squash plants spread their large, dense leaves across the ground, they create a natural barrier that suppresses weed growth, shades the soil, and conserves moisture. This living mulch helps maintain soil moisture levels, reduces water evaporation, and minimizes weed competition, thus improving overall soil health and reducing the need for manual weed control.
The Three Sisters planting method offers synergistic benefits beyond nutrient sharing and weed suppression. The combination of corn, beans, and squash creates a balanced and self-sustaining ecosystem that mimics the diversity and resilience of natural ecosystems. For example, the dense foliage of the squash plants helps to deter pests and reduce pest pressure on the corn and beans, while the deep root systems of all three plants contribute to soil aeration and nutrient cycling. Beyond its practical benefits, the Three Sisters planting technique holds cultural and spiritual significance for many Native American communities. It reflects a deep understanding of the interconnectedness of all living beings and the importance of harmonious relationships with the land. The practice has been passed down through generations as a sacred tradition, embodying principles of reciprocity, sustainability, and reverence for the natural world.
Companion Planting to Increase Yields
Pairing plants that require cross-pollination can increase yields. Bees and other pollinators are attracted to a variety of flowering plants, so including a diverse array of flowers in your garden can ensure good pollination for crops like tomatoes, cucumbers, and peppers. Many plants rely on cross-pollination for successful fruit production. Cross-pollination occurs when pollen from the male reproductive organs (stamens) of one plant is transferred to the female reproductive organs (pistils) of another plant of the same species. This process introduces genetic diversity and promotes robust fruit set and development.
Incorporating a variety of flowering plants into the garden landscape serves as a natural strategy for attracting and supporting pollinators throughout the growing season. Plants such as lavender, borage, bee balm, sunflowers, and cosmos are known for their prolific blooms and attractiveness to bees and other pollinators. By interspersing these flowers among vegetable crops, you can create an inviting environment that encourages pollinator activity and enhances pollination efficiency.
Pairing crops that require cross-pollination with compatible flowering plants ensures that there are sufficient pollinators present when the crops are in bloom. For example, tomatoes, cucumbers, and peppers all benefit from bee pollination. By planting these crops alongside companion plants that bloom concurrently and attract pollinators, you can increase the likelihood of successful pollination and maximize fruit set and yield.
Plants That Don’t Grow Well Together
Not all plant combinations result in positive interactions, and some plants may be incompatible due to competition for resources or allelopathic effects (where one plant releases chemicals that inhibit the growth of others).
Understanding the potential for both positive and negative interactions between plants is crucial when companion planting. While many plant combinations offer synergistic benefits, it's essential to recognize that not all pairings result in positive outcomes. Plants with high nutrient demands can compete with neighboring plants for soil nutrients. This competition can result in nutrient deficiencies for one or both plant species, hindering their growth and productivity.

Certain plants produce allelochemicals—compounds that inhibit the germination, growth, or development of other plants. These chemicals can be released into the soil through root exudates or leaf litter, creating an inhospitable environment for neighboring plants. For example, black walnut trees release juglone, a toxic compound that can inhibit the growth of many plants, including tomatoes, peppers, and potatoes. Planting susceptible crops near black walnut trees can lead to stunted growth, yellowing of leaves, and overall poor performance.
Some plants have aggressive growth habits or spread rapidly through rhizomes, runners, or seeds. When planted alongside less vigorous species, these invasive plants can overrun the garden, outcompeting and displacing other plants. Mint and bamboo are notorious for their invasive tendencies and should be grown in contained areas or avoided altogether in mixed plantings where they may dominate and crowd out other plants.
Certain plant combinations may attract common pests or serve as breeding grounds for disease vectors, increasing the risk of pest infestations and disease outbreaks for nearby plants. Planting susceptible crops in close proximity to each other can create ideal conditions for pests and diseases to spread rapidly. For instance, planting tomatoes next to potatoes can increase the likelihood of both crops being affected by potato blight.
To mitigate the risks of negative interactions between plants, it's essential to consider factors such as plant compatibility, growth habits, nutrient requirements, and susceptibility to pests and diseases when planning companion planting arrangements. Conducting research, observing plant behavior, and experimenting with different combinations can help you identify harmonious pairings and avoid potential conflicts in the garden. Successful companion planting often involves a combination of experimentation, observation, and adapting practices to the specific conditions of the garden.
Garden Tool Maintenance | The Best Garden Tools For Chronic Pain
I know we're all anxious to get into garden planning, but there's one thing that's just as important to having a successful garden this year as a good plan; the tools that you're going to use to garden. I don’t use many different kinds of garden tools since I like to keep things simple, but the garden tools that I use have to withstand a lot of use, as well as be comfortable enough to use for extended periods of time. I prefer to buy things once, and I’d rather invest a little more in a tool that I will have for a lifetime than continually replace and send old ones to the landfill.

I know we're all anxious to get into garden planning, but there's one thing that's just as important to having a successful garden this year as a good plan; the tools that you're going to use to garden. I don’t use many different kinds of garden tools since I like to keep things simple, but the garden tools that I use have to withstand a lot of use, as well as be comfortable enough to use for extended periods of time. I prefer to buy things once, and I’d rather invest a little more in a tool that I will have for a lifetime than continually replace and send old ones to the landfill.
The reason comfortable garden tools are especially important for me is that I have chronic pain. About ten years ago I was diagnosed with arthritis, and this affects me not just in terms of pain but in terms of weakness that makes gripping things difficult - so having garden tools that are comfortable and easy to grip is essential for me, and I’ve found through a lot of trial and error which ones work best and which ones just make things worse.
But I’ve also realized it’s less about having what you’d think of as a comfortable handle and more about having a garden tool that works so well, it reduces the amount of time you have spend using it - because the reality is that no matter how comfortable a garden tool is, when you have chronic pain you’re going to hit a time limit (or number of available spoons) faster than someone who doesn’t, no matter how “comfortable” that garden tool may be.
Effective garden tools are sharp and sturdy, don’t wobble, and have features that make the task itself easier and faster. They are typically built to last using classic construction methods that withstand the test of time. The only downside is that they usually cost a bit more upfront. I wish I had a workaround for this, but for me personally it is worth the investment in order to be able to continue participating in hobbies that feel essential to my identity like gardening, regardless of my physical limitations.
I'm going to walk you through all the garden tools that I use and I'm also going to tell you my strategy for daily maintenance versus seasonal maintenance, so let's get started!
The Best Garden Trowel
I don't think I have to tell you why a trowel is important, but I will tell you to get one that has a beveled edge almost like a blade to make cutting through soil easier. I like my trowel to have a bit of weight behind it with a solid metal blade and wood handle. This metal and wood trowel is B-Corp certified, sustainably produced and built to last.
The Best Garden Weeder
A Japanese sickle is extremely sharp which makes breaking up weeds by cutting through the roots themselves extremely easy. With my chronic pain and fatigue, weeding is one of the more strenuous garden tasks I have to do, and this greatly eases a lot of the strain I experience. I don't really do any tilling, but this is also great if you do need to kind of loosen up the dirt in some spots. This Japanese sickle has served me well for many years now and the blade is still as sharp as the day I got it.
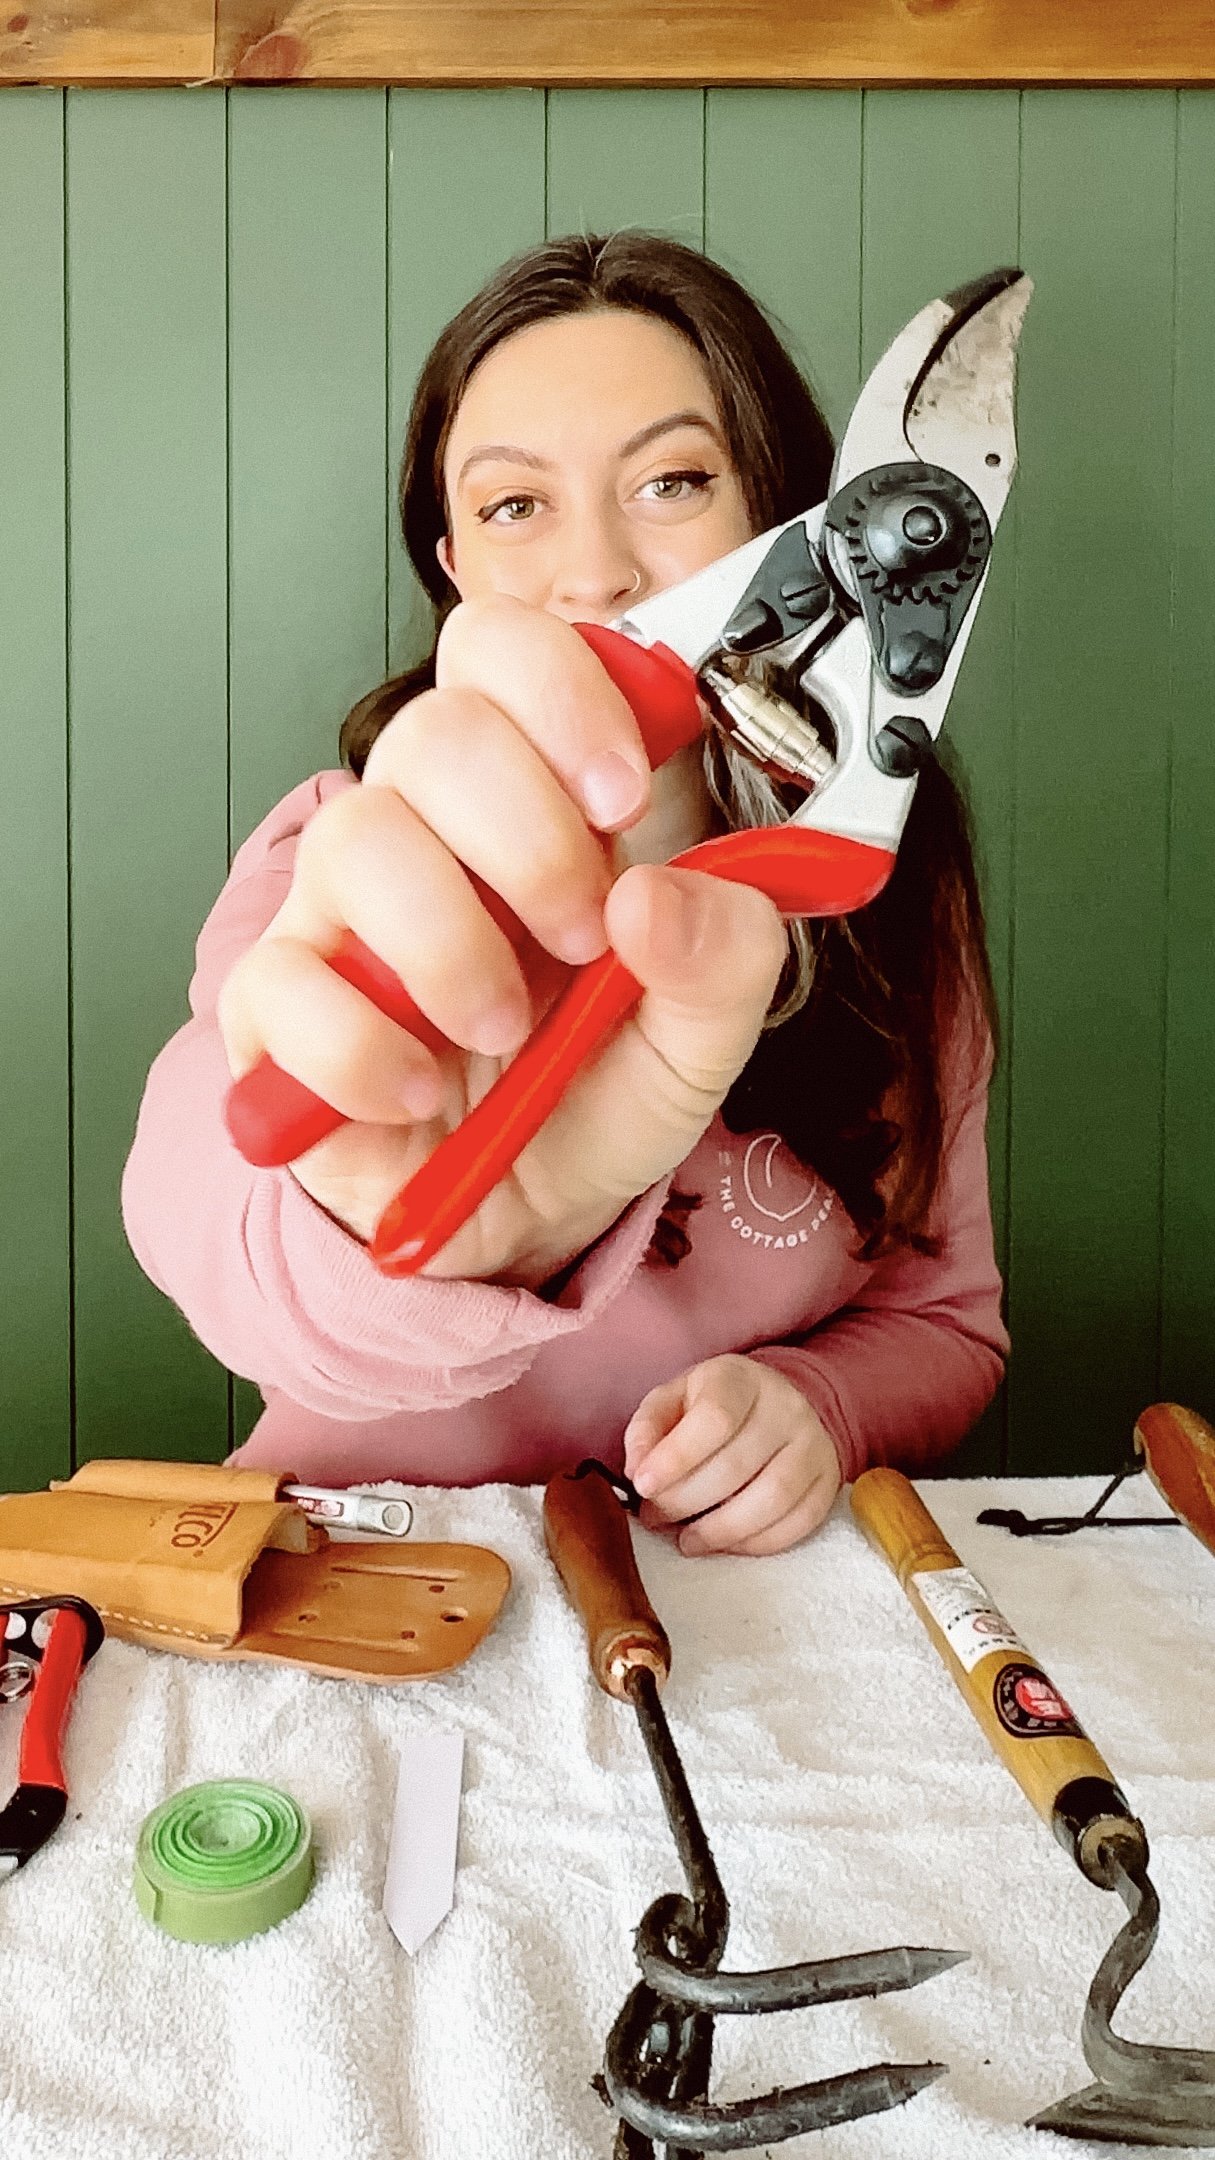
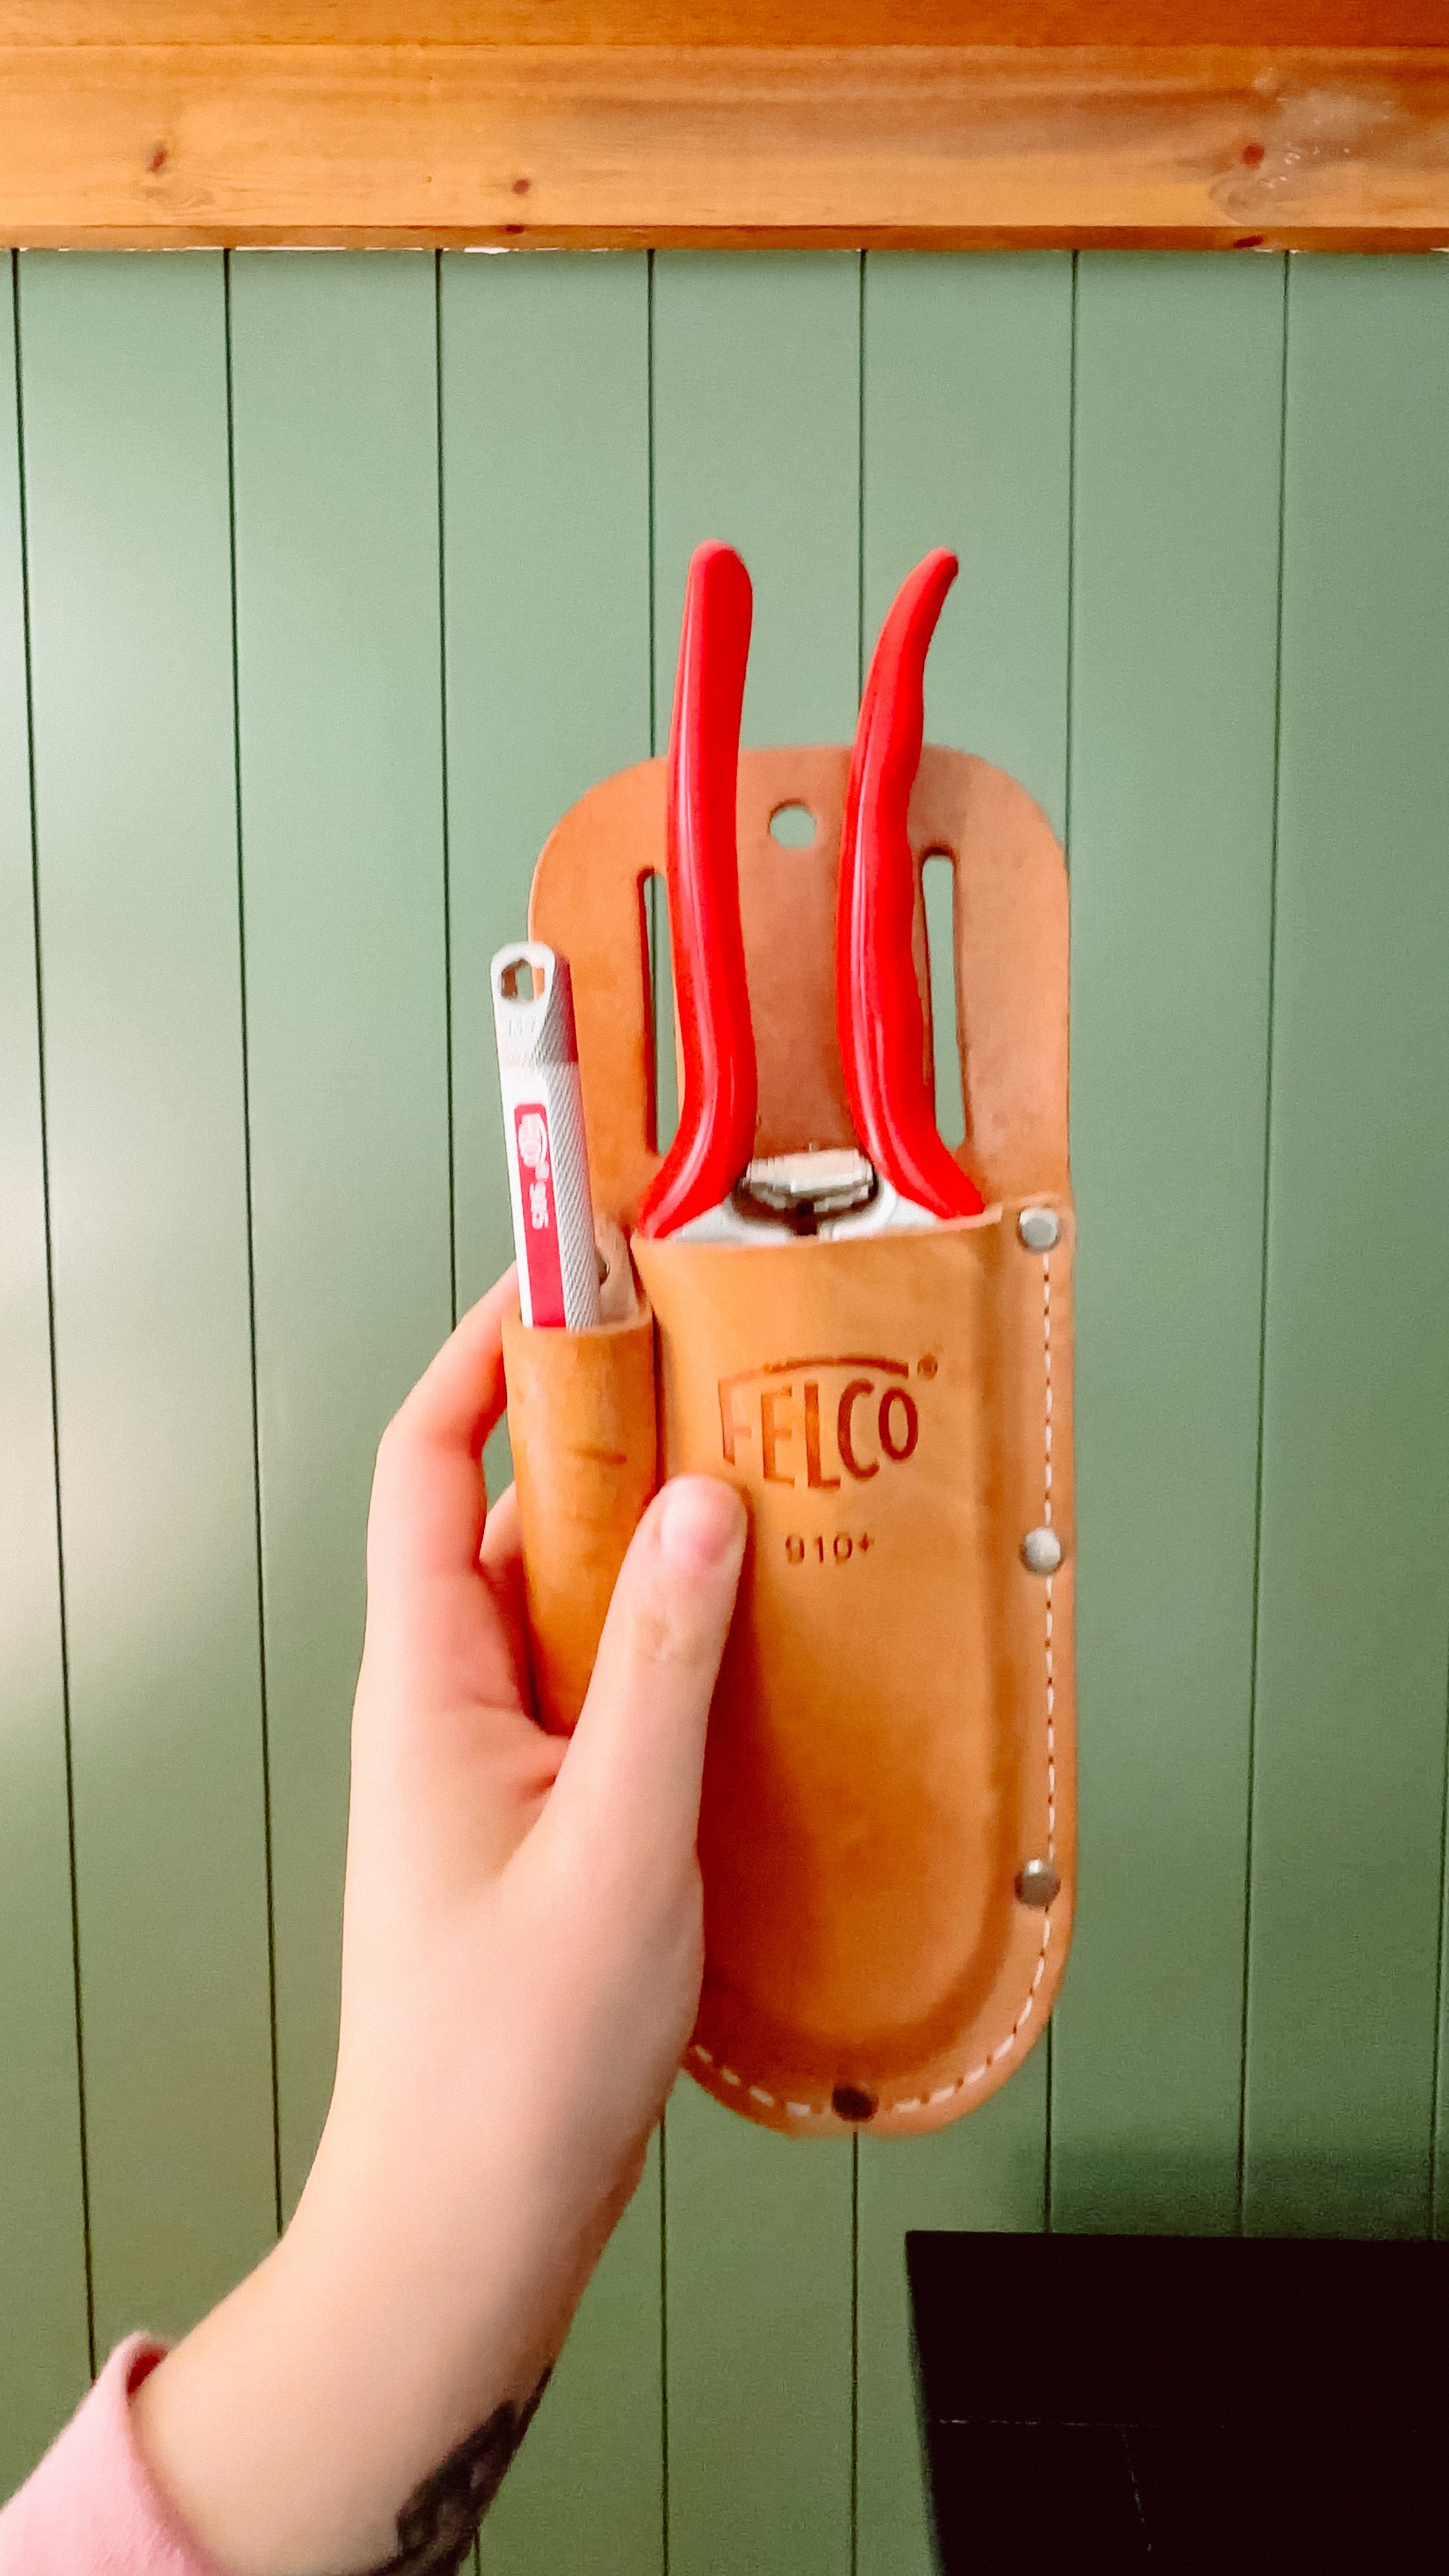
The Best Garden Pruners
Up until recently the Felco 2s were my number one pick for pruning and clipping anything larger, and while I still love them last year Felco reached out to me and offered to send me their Felco 15s. What's really amazing about these pruners is the handle rotates when you squeeze it close, which takes so much of the pressure off of your hand, you would not believe it. The first time I tried them I practically cried because it made such a huge difference in how comfortable the grip was. The ONLY downside is the Felco 15s have a slightly smaller blade than the Felco 2s, so I still keep the Felco 2s around since they're great for larger projects.
The Best Garden Snips
Garden snips get the absolute most use in my garden, since they’re compact and lightweight they are perfect for harvesting and removing dead leaves from vegetable plants, as well as pruning suckers from tomatoes and deadheading flower plants. Many people I know, myself included, swear by these Felco 322 snips for just this purpose.
A couple small things that I consider garden tools you may consider garden accessories:
Plant labels
You don't need to get fancy with these. These thin white plastic ones can be reused again and again with a paint marker and are durable and easy to read from a distance.
Velcro plant tape
If tying tons of knots for trellises is uncomfortable for you like it is for me or just generally time consuming, this velcro plant tape will make all the difference. I love this stuff - you can custom fit it to any size that you need and you can reuse it over and over again.
How to Find Comfortable Garden Tools
When you're looking for a handle that's going to be ergonomic, it’s easy to jump straight for the options with a cushioned handle, but I’m going to caution you against this. Unfortunately in a lot of cases those foam cushions aren't very long lasting and they tend to deteriorate in sunlight. You will have a lot more luck finding comfortable tools if you are able to invest in quality tools built with a specific purpose in mind. But generally speaking, I often find wooden handles to be most comfortable. They just feel slightly “softer” than a metal based handle, and they hold up really well. Most also have a bit of a curve to them so they almost have that hand carved feel.
Daily Garden Tool Maintenance
My general rule of thumb is I'm trying to keep my tools as clean as possible throughout my daily tasks so that I don't really get to this point where they're super dirty. I'm sure most gardeners have also had the humbling moment where you realize that you left a tool outside in the rain, only to find it weeks later impossibly rust. Last year I came up with the solution; I have a container outside that I can keep them in that’s actually connected to my raised beds so I can just drop them and go. I think the most important thing here is reducing that friction and making it super accessible and easy. Something like a mailbox mounted somewhere can be a really great affordable solution for storing your garden tools.
Seasonal Garden Tool Maintenance
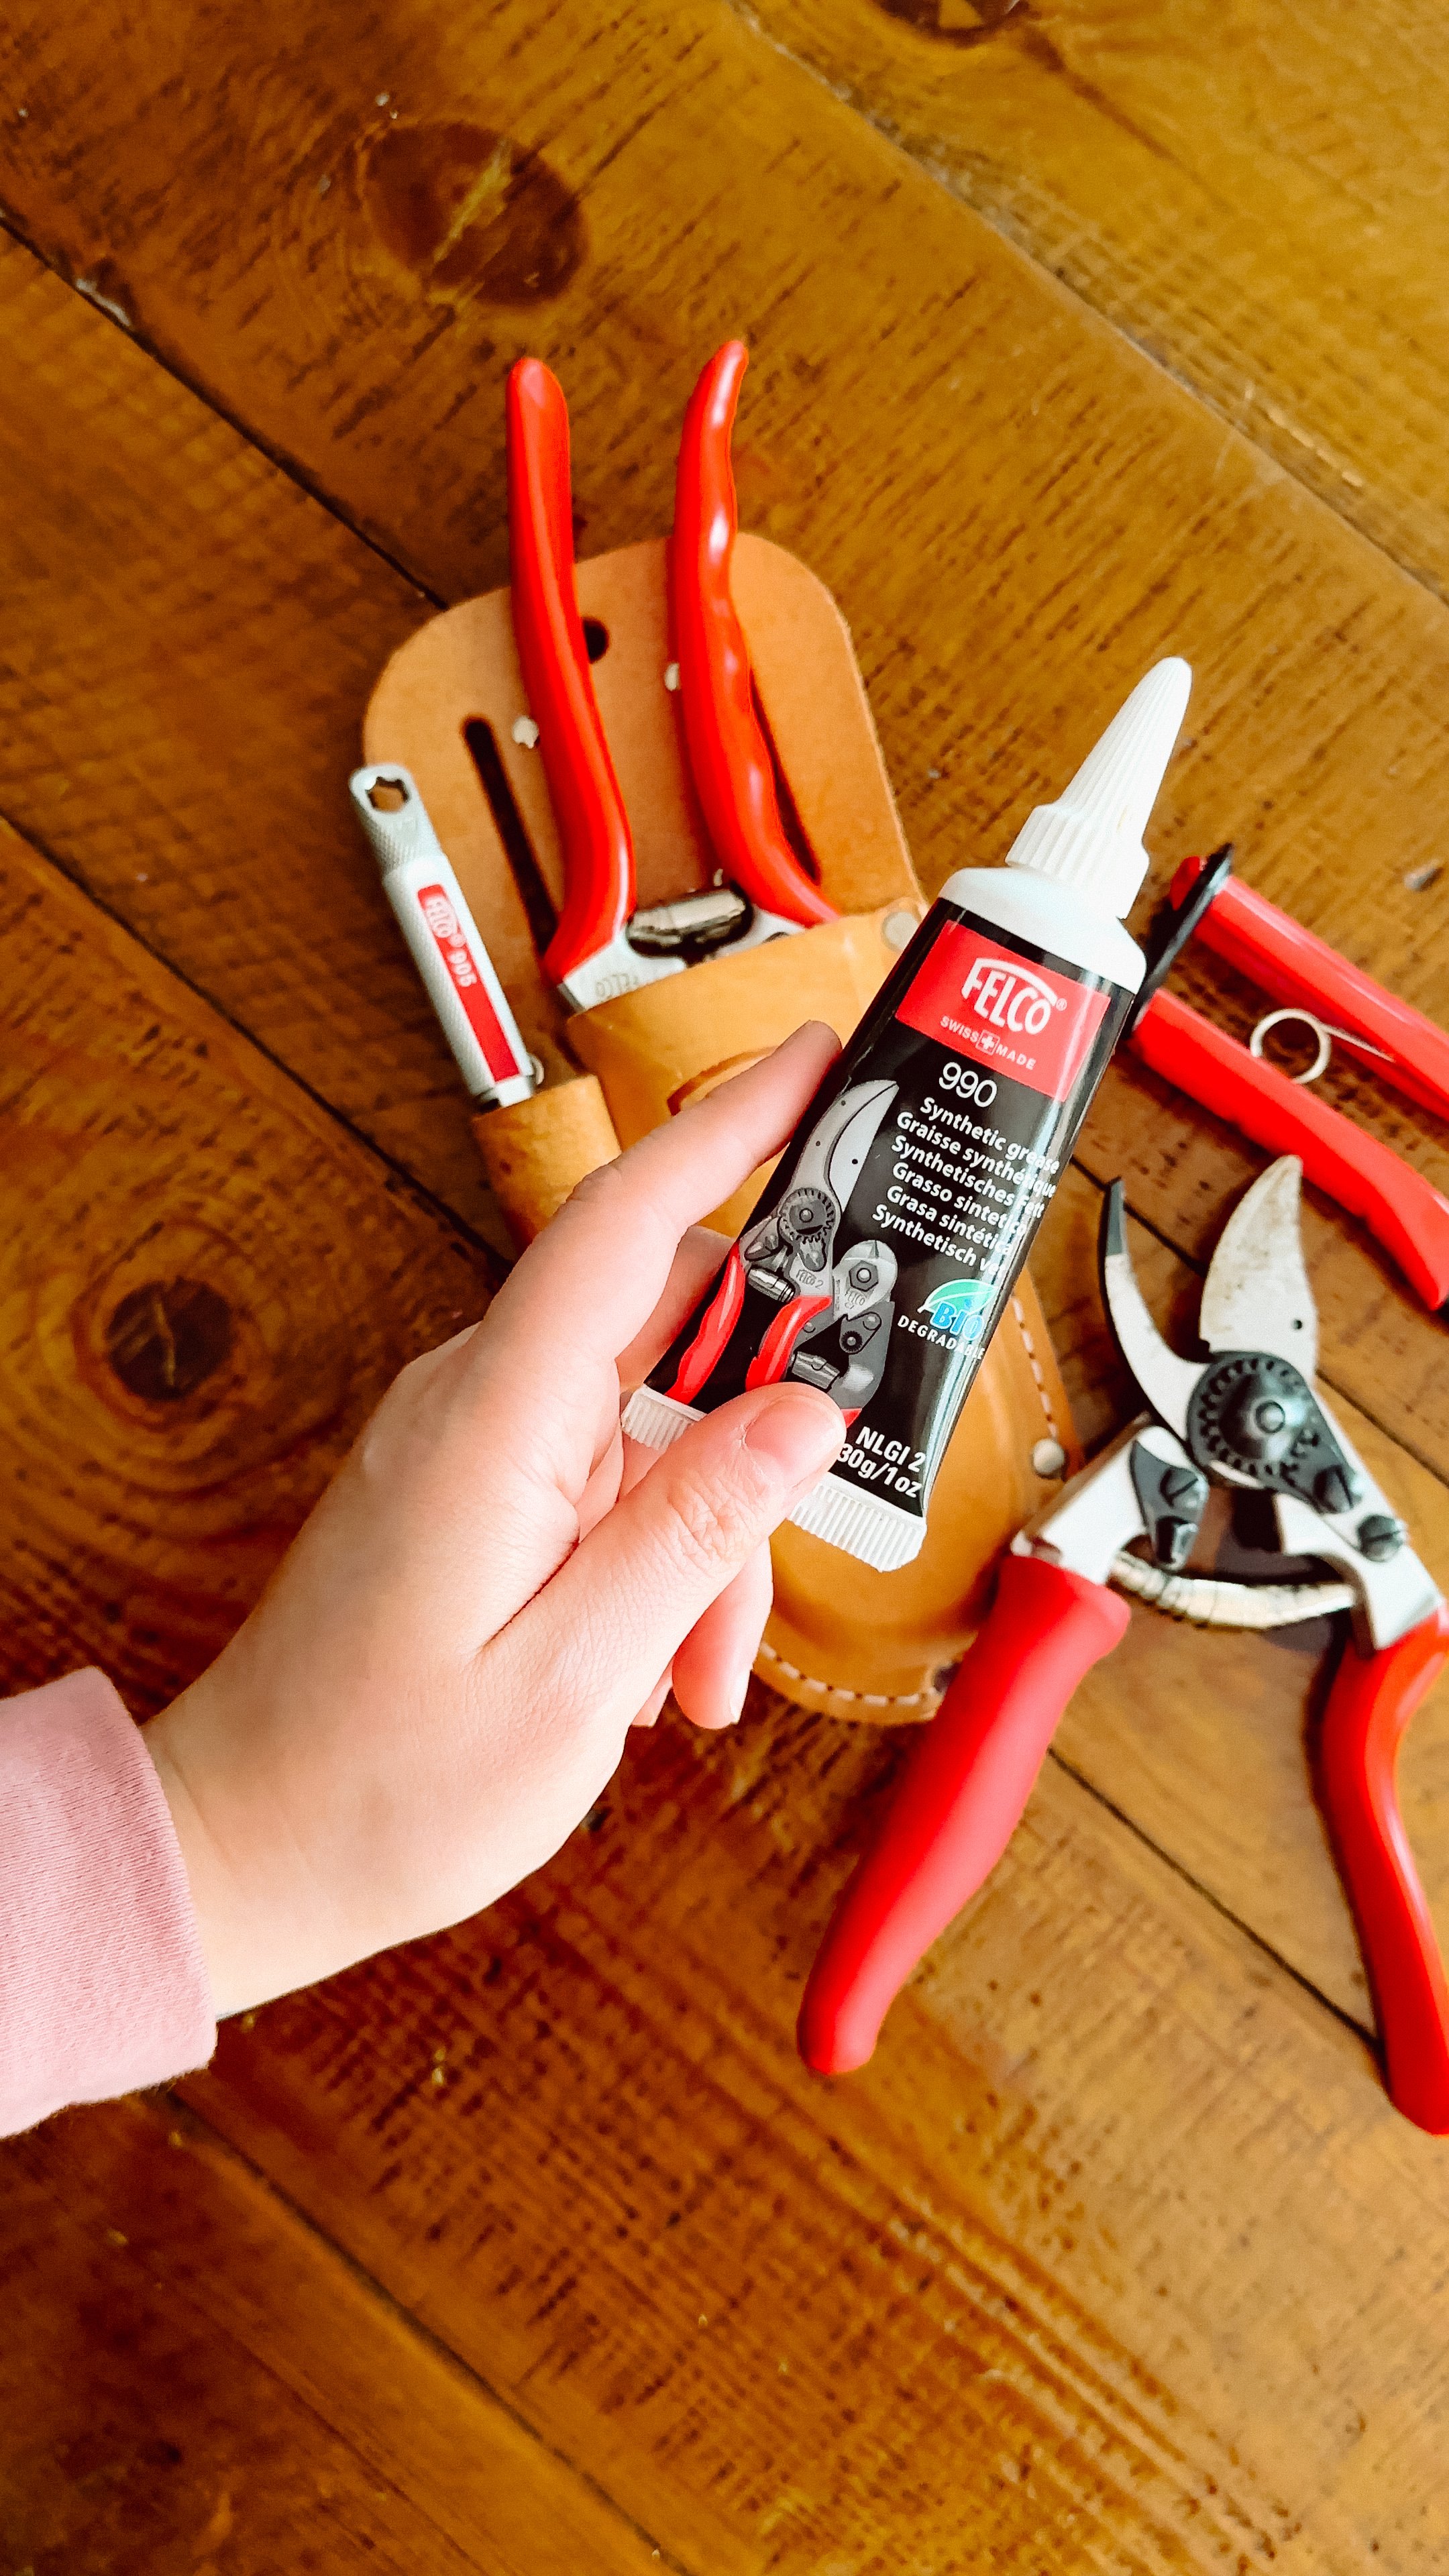
In the winter when things are slow is the perfect time to give all your garden tools a once over and some deep cleaning/TLC. Trowels, hand rakes and hoes generally just get brushed off with a dry rag and any wooden handles oiled with linseed oil. Blades are a little bit trickier and require some additional attention. I always keep a Felco 905 sharpener around for this task, it is a really great all purpose sharpener when you've got tools with blades that you need to maintain. But really a bit of Felco 990 grease, a sharpener and some clean rags are all you’ll need to get started!
Cleaning snips
My harvest snips always have some plant residue buildup on the blades themselves that I want to clean off. In terms of daily maintenance with these, I sanitize the blades with an alcohol wipe pretty much every time that I use them because we don't want to be transferring any diseases from one plant to another. For example last year I had an experience with black rot on my grapes which can transfer to other plants and thankfully when I discovered this I didn't have to panic because I knew I had taken care of sanitizing those blades before using them on any other plants.
For something like these snips where they are really only cutting through really lightweight plant material you're not going to notice a lot of burrs on the blades themselves most of the time, but you can always do a quick sharpen just to give them a fresh edge.
Sharpening and cleaning Felco F2s
If your Felcos aren’t looking super rusty or having trouble opening and closing smoothly, you can usually get away with just a light sharpening. In general, it’s a good idea to take them apart once a year to regrease the internal mechanisms. If you do need to take these apart, never use water, always use some kind of oil based lubricant cleaner. Take a photo before you take them apart so that you know how it goes back together. And of course, we're dealing with a very sharp blade here so make sure that you’re holding with a secure grip and cleaning/sharpening away from your body.
Keeping your garden tools in good shape doesn’t have to be difficult, but it is important to prioritize finding time each winter to keep them working like new. What other garden tools would you like me to cover next?

Garden Planning Part 3: How To Start Seeds Indoors
Wondering how to start seeds for your garden indoors? Here’s exactly what you need and how to do it - from grow lights to seed cells.
The Cottage Peach is reader-supported. When you purchase through links on our site, we may earn an affiliate commission at no additional cost to you. All opinions are our own.
This is part three of my garden planning guide. For part one all about deciding what to plant, click here. For part two, all about planning your garden layout, click here. For part four, how to companion plant, click here.
Today we’ll cover when to start seeds indoors, how to germinate seeds, my favorite seed starting supplies and more.
I love growing my vegetable garden from seeds. What could be more gratifying than watching your plants grow from one tiny seed into a full grown plant ready to harvest? It is so fulfilling to nurture and care for these tiny bits of life and bring them to maturity.
I also love to feel the tie back to my ancestors through this process of growing. I know that not too many generations ago, my relatives would have tended their own little garden to support their family and put food on the table. I have combed through old family photos endlessly searching for evidence of this connection, but so much was lost through time. Considering industrial agriculture is a fairly modern concept though, it’s safe to say that the vast majority of our relatives have grown food at some point in their past. I feel this connection and find my way back to these ancestral roots through the soil.
How to start seeds Indoors
Let’s start with the basics: For many plants, you don’t need even technically need grow lights to start seeds for your garden. You can use winter sowing in milk jugs outdoors, or try starting seeds in egg cartons and even toilet paper rolls. I’ve tried all of these with mixed results. My method of choice used to be soil blocking. Soil blocking is just compressing soil into cubes using a mold and planting directly into that cube without any additional containers. Then you can bottom water those seedlings and build nice strong root structures with zero waste. This method words great for producing strong plants, but it comes with a learning curve that can make it frustrating as you need exactly the right type of soil, and I find it really hurts my hands and is too strenuous.
I’ve been starting seeds using seed cells and trays, but often these are not built to last, and in order to keep plastic out of our landfills and reduce the frustration that comes with cracking cells and flimsy trays, I’ve upgraded my seed starting setup with these extra durable seed starting trays.
Each individual cell in these trays features an air pruning side slot on all four corners to discourage root circling and encourage better root growth. The bottoms of each cell are also open providing air pruning at the lower end of each cell. Large, convenient finger holes in the bottom of each cell make it easy to remove seedlings when you're ready to transplant.
Tap Here To Shop Epic Gardening - Use Code TheCottagePeach5
If you’re growing heat loving crops like peppers and eggplant, you should also grab a heat mat for each tray.
So now that you have your tools, how do you know when to start planting seeds? Start too early, and your plants will outgrow their indoor containers before it is warm enough to move them outdoors. Start your seeds too late, and your plants won’t be mature by your last frost date. That last frost date is exactly where we will start our seed starting journey. This one is easy, I promise; you already know your grow zone from our previous post, so just Google “Last frost date + (your grow zone)” to find out when it’s safe to plant outdoors in your area, since this is the last date when all danger of a freeze has passed.
Next, go back to your list of everything you will be growing and open up Google. Search for each plant name + “when to plant”. For direct sown plants (that means we just put the seed directly into the soil outdoors) this will most often just be “after last frost” (unless it’s a cold hardy plant like spinach or kale which can usually be started a lot earlier) but for plants that need to be started indoors in order to mature before that last frost date, it will say something like “start indoors 8 weeks before last frost” Next to each line write down the planting timing.
The benefit of using a spreadsheet when you are learning how to start seeds is that you can then sort the data in your list by the planting date instead of whatever order you had originally written them down in. This creates a planting schedule for starting plants from seed with just a click of a button. Otherwise you’re going to have to manually organize your list by planting date so you know what dates to do which tasks.
Should you use potting soil or seed starting soil?
Potting soil and seed starting soil are both designed to provide a suitable growing medium for plants, but they have some key differences based on the needs of plants at different stages of growth. Potting soil is a general-purpose mix that is formulated to support the growth of established plants, both indoors and outdoors. It often contains a blend of ingredients such as peat moss, perlite, vermiculite, pine bark, and sometimes added fertilizers. Potting soil may have added nutrients to support the nutritional needs of mature plants. Some formulations include slow-release fertilizers that provide nutrients over an extended period. Potting soil tends to have a coarser texture compared to seed starting soil. This coarser texture helps with drainage, aeration, and provides stability for larger plants.
Seed starting soil is specifically designed for germinating seeds. It typically consists of a lightweight and fine-textured blend, often containing ingredients like peat moss, vermiculite, and perlite. Seed starting soil is often sterile, which helps prevent damping off and other soil-borne diseases that can affect germinating seeds and young seedlings. Seed starting soil is formulated to retain moisture well, providing the consistent moisture levels necessary for seed germination. This helps seeds absorb water and initiate the germination process. Seed starting soil usually has minimal nutrients because seeds initially rely on the nutrients stored within them. As the seedlings grow and develop true leaves, additional nutrients may need to be provided through fertilization. Seed starting soil has a finer texture compared to potting soil. This fine texture allows seeds to make good contact with the soil, facilitating germination.
Use seed starting soil when germinating seeds in trays or small containers. The fine texture and sterile nature help create an ideal environment for germination. Once seedlings have developed a few sets of true leaves, you can transplant them into larger containers with potting soil, which provides the nutrients and structure needed for more mature plants.
What grow light should you use for starting seeds?
Don’t overcomplicate this. Grab some LED strip grow lights like these, and a couple of timers to turn them on automatically. Unless you are going to grow your plants indoors for their entire lifecycle and need them to flower/fruit without sunlight, you do not need to worry about the specific spectrum of light you’re using nearly as much.
How many hours of light do seedlings need?
You should set your grow light timer to give your seedlings 12-18 hours of light per day. I usually set mine for 16 hours.
What is germination?
Germination the development of a plant from a seed or spore after a period of dormancy. Most of the time, your seeds will germinate (or sprout) themselves simply by being activated through the process of hydration. So, you’ll put your seed into the soil at the recommended depth, cover with soil and keep damp, and this increase in the moisture content will trigger the germination of the seed. However, it’s important to check the germination requirements for any seed you haven’t grown before. Some, such as peppers, require a higher temperature in order to germinate successfully. Others like spinach and lettuce prefer a cooler temperature to germinate. Some seeds will just be duds and never germinate - that’s why you’ll often plant multiple seeds in one cell and thin them later, to hedge your bets. You can improve the rate of germination of certain plants like peas, beans, pumpkins and other winter squash by soaking them prior to planting. But, to be honest, since I have fatigue from my arthritis I don’t usually do this step and it’s usually just fine as long as you have quality seeds.
How do you prevent damping off?
Damping off is a common problem when starting seeds, and it is caused by various types of fungi that attack young seedlings, causing them to rot at the soil line. To prevent damping off, you can take several precautions. Start with a high-quality, sterile seed starting mix. Sterilized soil helps eliminate the presence of damping off-causing fungi. Ensure that the containers or seed trays you use are clean and have been properly washed or sterilized before planting. This reduces the chances of introducing harmful fungi. Overwatering can create a favorable environment for damping off fungi. Water the seedlings from the bottom to keep the surface of the soil dry. Use a tray underneath the pots and allow the soil to wick up water as needed. Adequate air circulation helps prevent the buildup of humidity around the seedlings. Use a fan on low speed or open windows to provide ventilation, especially if you are growing seedlings indoors. You should also aim to maintain a moderate humidity level. High humidity can contribute to the growth of damping off fungi. Proper ventilation and spacing between seedlings can help manage humidity levels.
By implementing these practices, you can reduce the risk of damping off and give your seedlings a healthy start. If you notice any signs of damping off, remove affected seedlings immediately to prevent the spread of the fungus.
Thinning seedlings
Thinning seedlings is an important step in the early stages of plant growth to ensure that the remaining seedlings have enough space, nutrients, and sunlight to develop into strong, healthy plants. Allow the seedlings to grow to a height where they have at least two sets of “true leaves”. True leaves are the leaves that follow the initial seed leaves (cotyledons) and have the characteristics of the plant species. Identify the strongest and healthiest seedlings. Look for seedlings with vigorous growth, a good color, and well-developed leaves. This does not necessarily mean the tallest - a short, stocky seedling is a better choice than a thin, leggy one. Instead of pulling out the excess seedlings, which can disturb the roots of neighboring plants, use clean scissors or small pruners to cut the unwanted seedlings at soil level. This ensures minimal disruption to the roots of the remaining seedlings. If you are thinning edible plants like lettuce or carrots, you can eat the thinned seedlings. Thinning can be a way to enjoy some early greens from your garden. Otherwise, just toss them in your compost.
Starting a GArden Checklist
Pick and order your seeds (don’t forget to check out this blog post if you get stuck)
Plan your garden layout (see this post for my tips)
Write down the planting dates for every plant on your list - both the seed starting date and the date to transplant
Gather your supplies; soil, seeds, cell containers to grow in or a soil blocker and trays, a trowel, a tarp to keep your work area clean, and your light source
Work down your list of seeds from the first planting date to the last
Presoak any seeds that require it for germination
Plant your seeds at the recommended depth
Keep the soil moist at all times - you can cover with any clear material to keep the environment damp until the seeds sprout
Build strength in your seedlings stems by gently running your hands across the surface of your plants daily, and keep a fan on to prevent damping off/mold
Harden off your seedlings by bringing them outdoors to a protected spot out of direct sunlight and wind (up against your house will do). Start with one hour for the first few days, then increase it by an hour every day until they are able to stay outdoors for all daylight hours
Transplant your mature seedlings into the garden when it is safe to do so, usually after your average last frost date
What else do you want to know about starting seeds indoors?

Garden Planning Part 2: Designing Your Garden Layout
Planning your first garden can feel intimidating, but I want to show you a simple process that I use in my own garden design that breaks each step down into manageable pieces. This is a project I typically work on over the course of a few weekends here and there - it won’t necessarily take hours to complete, but it’s nice not to rush the process so you can modify and tweak things after giving yourself time to mull it over.
The Cottage Peach is reader-supported. When you purchase through links on our site, we may earn an affiliate commission at no additional cost to you. All opinions are our own.
Planning your first garden can feel intimidating, but I want to show you a simple process that I use in my own garden design that breaks each step down into manageable pieces. This is a project I typically work on over the course of a few weekends here and there - it won’t necessarily take hours to complete, but it’s nice not to rush the process so you can modify and tweak things after giving yourself time to mull it over.
How to decide what to plant in your garden
I cover this in depth in my seed selection post which you can read by clicking here, but the key is to identify what foods your family eats the most of, that will grow well in your particular garden climate. This list is your starting point - all we have to do is assign each plant on the list to a particular spot in your garden layout based on a couple important factors, including what plants grow well together, what plants are natural “enemies”, the location of the sun on the land, and how many of each type of plant you will be growing. But I’ll cover all of that in a minute. First let's decide where your new garden should go.
How to decide where to put a garden
The best time to choose the location of your new garden bed is after about a year of careful observation, because this gives you a full year of seasons to notice and document the weather patterns (if an area tends to flood or dry out quickly for example) as well as the positioning of the sun throughout the spring, summer and fall. But if you’re reading this with the intention of beginning your new garden in a few days, weeks or months don’t fret! Some educated guesses can be made based on just a few days of observations.
First, note the direction of the sun. In a perfect world a north-south orientation is best for low-growing crops, allowing direct sunlight to reach both sides of the bed. For taller crops such as pole beans, cucumbers and tomatoes an east-west orientation works best. The sun rises in the east and sets in the west, so just pay attention to your sunrise and sunset locations and you’ll be able to orient yourself based on that.
Next, throughout the day you’ll want to pay attention to shade and shadows. For instance, is there a tall treeline that means a certain area of the land does not get full sun throughout the day? If you have a choice to plant in full sun, you absolutely should - however, this doesn’t mean that your shady yard is inhospitable to planting. You’ll just need to modify your list of crops you plan to grow to include only those who thrive in lower light conditions.
Finally, notice the slope of the land. Unless your yard is perfectly flat, you probably have areas that will be easier to transform into a garden than others. We’ll talk about what to do if all the land available to you is on a slope next.
QUESTIONS TO ASK YOURSELF WHEN GARDEN PLANNING:
What is the purpose of the garden? Is it for aesthetics, food production, or a combination of both?
What is the climate and soil type of the area? What plants are suitable for this type of environment?
What is the size and shape of the garden space? How much sunlight does it receive? What is the orientation?
What type of plants do you want to grow? Do you prefer perennials or annuals? Do you want to grow edibles or ornamentals?
What is your budget for the garden? How much money do you have to spend on plants, materials, and tools?
How much time and effort are you willing to devote to the garden? Do you want a low-maintenance garden or are you willing to put in the work to maintain it?
What is the style of the garden? Do you want a formal or informal garden? Do you prefer a wild and natural look or a more structured appearance?
What is your level of gardening expertise? Are you a beginner or an experienced gardener?
Raised beds vs in-ground
Now that you’ve picked the location for your garden, it’s time to decide if you want to grow food in the ground or in raised beds. Each method has its pros and cons. I chose to switch to primarily all raised beds this year because fighting weeds in-ground and bending over the soil was not working for my back any more with my arthritis. The downside is that this means I have to pay for the beds themselves as well as the soil/compost to fill them. If you’re on a budget and don’t have the same physical limitations as I do, gardening in ground allows you to benefit from the pre-existing ecosystem within your soil including worms and beneficial bacteria and also means your plants won’t need to be watered as often.
If you’re gardening on a slope, I strongly recommend raised beds. With raised beds that sit on the earth you will be able to actually dig the base of the bed into the soil to make it even, effectively creating a level surface on which to plant. Just be mindful not to locate any plants that are sensitive to root rot at the lowest point of your slope since rainwater will collect most easily there.

How many vegetable plants do you need per person?
This is highly individual depending on your family and what you like to eat. You should definitely prioritize space in your garden for the foods you eat the most. For us, that means we grow a lot more broccoli, green beans and bell peppers than anything else. And no matter how much squash you THINK you will eat, one or two plants per household will probably yield more than you’ll ever be able to finish without sharing with your neighbors and friends. If you know you go through a lot of pesto, it’s a good idea to plant 20-30 basil plants. Refer to the chart below for some common amounts for popular vegetables.
What is companion planting?
Just as there are plants that do not grow well near each other because they compete for resources, there are many plants that get along quite well and actually offer benefits to their neighbors. You can harness this “companion planting” effect to grow more food in an even smaller space. You can also utilize taller, stronger plants to act as trellises for vining plants, prevent weeds by creating a thick overstory that will choke them out, planting certain herbs and flowers as a trap crop to repel pests, and benefit your neighboring plants with the addition of nitrogen fixing varieties such as snap peas or pull nutrients to higher levels for your shallow rooted plants with crops such as root vegetables.
Plants that grow well together:
There are countless companion plant combinations, but here are a few to get you started:
For “trap crops” to keep pests away from your plants or repel them entirely, look into basil, dill, marigold, mint, nasturtium, sage and zinnias.
Grow basil within 12 inches of tomatoes to increase your harvest. Basil also improves the flavor of lettuce.
Growing chives near your carrots will improve their flavor.
Beans like to grow with Beets, carrots, chard, cabbage, corn, cucumbers, peas, and radishes.
Strawberries like to grow with bush beans, chives, lettuce, onions, sage, spinach, and squash.
Plants you shouldn’t plant near each other:
Some plants compete with each other for resources or in the case of sunflowers for example, actively leech compounds into the soil that can cause harm to neighboring plants. Here are just a few common enemies in the garden.
Squash and potatoes
Tomatoes and corn
Zucchini and pumpkin
Asparagus and garlic
What is crop rotation?
Crop rotation means that you intentionally do not plant the same type of plant in the same exact spot each year, you “rotate” it to a new location. For example, nightshades such as tomatoes are prone to microbial diseases that live in the soil. For this reason it is recommended that you do not plant in the same spot for 4 years after the initial planting. Other nitrogen dependent crops such as corn suck so much fertilizer out of the soil that you want to give the earth a break before replanting the same variety in the same spot. This will be more important in your second and following years of gardening, so don’t worry about it too much right now!
how to design your garden layout
Now that you have your final list of plants, your garden location and type and an overall understanding of the basic concepts of companion planting and how many plants you will need, the hard work is done! All we are going to do now is effectively “fill in the blanks”.
All you will need is some paper and a pencil, but if you want to get really crafty with it, print out some graph paper and grab your highlighters too.
Start by drawing out the outline of the shape and size of the garden beds you will be creating. I like to do this to scale with graph paper where each square equals a square foot of the garden. You don’t need to get this precise with it - if you have a 4x4 area or raised garden bed, just draw a nice sized square on your blank paper and add your own grid lines or rows as you see fit.
Now go back to your plant list of everything you plan to grow this season. Assign each plant on the list a letter from A to Z. You should also write down the number of plants for each item on the list next to the plant name.
All you need to do now is just fill in your blank garden squares with the corresponding letter for each plant to assign it a location and the number of plants you will be planting in that square.
That’s really all there is to it! Once this is complete I like to go back and reorganize the plant list based on when I need to start the seeds and transplant into the ground after our last frost, but that’s a conversation for another day.
Need seeds? Tap here to visit my favorite seed company
Click here for part one: Choosing & Organizing Seeds
Click here for part two: Starting Seeds Indoors
Click here for part four: How to Use Companion Planting To Grow More Food

Garden Planning Part 1: How to Decide What to Grow & Organize Your Seeds
We’ve been tucked away and hibernating for what feels like forever now, but all signs point to an end to winter and a new beginning in the form of spring. Spring historically symbolizes rebirth, renewal, a reset button on the weather and by extension our moods and habits. And while tending your vegetable garden may still feel a long way off depending on where you live, now is the best time to start planning a garden.
The Cottage Peach is reader-supported. When you purchase through links on our site, we may earn an affiliate commission at no additional cost to you. All opinions are our own.
We’ve been tucked away and hibernating for what feels like forever now, but all signs point to an end to winter and a new beginning in the form of spring. Spring historically symbolizes rebirth, renewal, a reset button on the weather and by extension our moods and habits. And while tending your vegetable garden may still feel a long way off depending on where you live, now is the best time to start planning a garden bed.
The seed catalogs have been arriving in droves, and I’ve found myself more than once justifying adding another to my collection. For the months of January through April, I treat seed catalogs with the same care as a beloved book, kept in a tidy stack and savoring each page daily as I plan and dream what we will grow this year. Why are seed catalogs so important to me? The truth you may not know if you haven’t had one delivered to your home before is that these catalogs are so much more than places to see and buy seeds - they can serve as a garden planning guide too.
How to use a seed catalog
A seed catalog can seem overwhelming at first. They are packed full of information and item listings, plant descriptions and charts. It’s a good idea to go into your seed catalog reading with an open mind - skim through and see what you are drawn to, while keeping in mind the foods you already know you enjoy eating. Pull out a pen and circle your favorites or write notes in the margins/on a blank piece of paper. This piece takes me less time each year as I have grown as a gardener, but the earlier in your vegetable garden adventure you are, the longer it will take. Give yourself at least a week of casual exploration before moving onto the next stage.
Where to buy garden seeds
It can be trickier than you’d think to identify reputable seed companies. Due to the monopoly created by Monsanto, there are many companies that carry Monsanto owned seeds that may surprise you. This is because Monsanto owns such a large proportion of the world’s food supply seeds (and then “retires” them so no one can access them any more - yes, it’s as bad as it sounds).
In recent years they’ve bought one of the largest garden seed wholesalers in the world, Seminis, which is stocked by companies including Johnny’s and Territorial.
These companies offer a wide variety of high quality seed and their partnership with this Monsanto subsidiary is small and accounts for a tiny fraction of their inventory. But in order to avoid supporting Monsanto when purchasing through these smaller suppliers you’ll want to email them directly to confirm which seeds may originate from a Monsanto subsidiary so you can avoid them.

Tap here to shop My favorite seed company, which has consistently offered the best variety of organic and conventional seed with beautiful packaging, high germination rates, and healthy plants.
How to get free seeds:
Want free seeds? I occasionally give away excess seed from my own garden to newsletter subscribers. Click here to sign up to be the first to know when seeds are available.
Per AltNPS: “Pollinators such as bees and butterflies, play a crucial role in maintaining and improving our ecosystems. They help to grow the plants that we eat every single day, are vital parts of the natural food-chain, and serve as ecosystem barometers due to their sensitivity to climate change.
In the past 5 years, bees and butterflies have declined remarkably. Saving these creatures is imperative to humankind since approximately 75% of the fruits, vegetables, and nuts we eat are courtesy of pollinators. Bees and butterflies also beautify our planet; their important role in plant reproduction perpetuates floral growth and provides aesthetically pleasing landscapes for human enjoyment and faunal habitat.”
There are free seed programs online specially designed to help gardener’s plant more pollinator-friendly gardens. Go to https://altnps.org/seed-packs and fill out the form to have free Milkweed or Black-Eyed Susan seeds sent to your door!
How to choose what to grow: Planning a vegetable garden
At this point, you should have a few plants in mind that you notice you are most excited about growing yourself. Make a list with those plants at the top, then add on to the list by including whatever fruits and vegetables your family eats most. Last, add any plants you’d really like to just experiment with and see what happens.
Next, head to Google and find your growing zone by searching “Grow zone + your zip code”. Write down your zone - this determines your average climate, temperature, and weather pattern. For example, we are in zone 6B in Massachusetts, which means we have short, moderately hot summers and long, deeply cold winters. Not a great climate to try and grow slow to ripen tropical fruits or even peppers in, since both of those categories of plants demand intense heat and long seasons. As much as I might *want* to grow papaya, I know it’s just not going to happen in my grow zone. However, if you live in Florida your papaya plant would thrive.
Using the charts within the catalog or Google again to cross check your list and eliminate any that can’t thrive in your growing zone. If you’re noticing any gaps or your list doesn’t seem long enough, consider adding some beneficial flowering plants to support pollinators in your garden. There are many good reasons to support pollinators in your garden - they are responsible for helping your fruiting plants to grow and thrive.
When should you order seeds for your vegetable garden?
Seeds have an exceptionally long shelf life - most varieties will survive in dormancy for 1-5 years. So it is never too early to start ordering seeds for your vegetable garden. Some gardeners on a budget even take advantage of end of season and holiday sales to stock up on their seeds for next season as early as November of the year before. Of course, the best seeds are free, saved from your best plants grown the year before. There is nothing more rewarding than following the family tree of your garden vegetables and continuing their legacy through seed selection and saving.
Organizing seeds
When you’re thinking about how to plan a vegetable garden, organization should be at the top of your list. Especially once you start saving seeds, a proper labeling and organization system will be the only way you can possibly keep track of everything. Don’t convince yourself that you will just “remember what everything was” next year. Unless it’s a very distinct seed like a nasturtium, it’s unlikely you’ll be able to keep all those tiny parcels straight without a system.
There are as many ways to label and contain seeds as there are gardeners in the world, but here are a few of my favorites, after years of experimenting:
Storing seeds
If you’re planning to create a seed bank where you store your seeds indefinitely for 10+ years, the best thing you can do is store seeds in airtight glass containers in a cool, dry, dark place. However, most seeds in regular rotation will store just fine for up to three years in their paper packets as long as the area of your home where you store them isn’t exceptionally hot or humid. Many gardeners collect TicTac containers to hold their vegetable seeds as they are small and easy to store and label. In the past, I used a plastic photo organizer in combination with paper seed envelopes. While this method allows me to categorize by type (greens in one plastic container, beans in another) and variety (separate envelopes within the ‘greens’ plastic container for lettuce, spinach, kale and chard) while keeping the seeds well protected from external forces that could shorten their lifespan, after a few years I found it frustrating - seeds would fall out all the time, I hated having the dig through each container to find the one I wanted, and packets inevitably ended up just sitting on top of the box waiting to be put away. It was also bulky and heavy to carry out to the garden with me on big planting days and I dropped it more than once.
My favorite method for organizing seeds is the binder method. All you need is a 3 ring binder and these photo sleeve inserts. It’s kind of like how you might have stored your Pokemon or baseball cards as a kid - you can see everything at once, and it’s easy to put away any seed packet you just used. However, this method only works for standard size seed packets - corn and beans won’t fit. And, if you save seeds from your own garden, you’d need to also make your own paper seed packets to contain them first.
In addition to this binder method for my store bought seeds, I also have a mini “seed bank” going. This is a wooden box that custom fits tiny glass bottles in which I store seeds saved from my own garden. There are limitations with this as well when it comes to larger seeds, but overall it’s beautiful and functional for small quantities.
Labeling seeds
This can be as simple or complex as you would like. A sharpie pen on the outside or lid of your chosen container will work just fine. Or get an old school label maker and punch out your labels with that. There are even custom printable labels available on etsy if aesthetics are important to you. The only thing that matters is choosing a system you will actually follow through on and use - because labeling your seeds is vital to an organized system.
What to grow in Your Vegetable garden:
Are you still wondering what to grow in your garden this year? Here’s my list of nearly everything I’m starting from seed for my garden this year. You can tap individual seed packets to shop:
- Alaska Variegated Nasturtium Seeds

- Price: $2.49
- Astro Arugula/Rocket Seeds

- Price: $2.99
- Baby Choi Bok Choy Seeds

- Price: $2.69
- Big Seeded Mache (Corn Salad) Seeds

- Price: $2.29
- Bloomsdale Spinach Seeds

- Price: $2.99
- Bok Choy Choko Seeds

- Price: $2.29
- Buttercrunch Butterhead Lettuce Seeds

- Price: $2.69
- California Giants Blend Zinnia Seeds

- Price: $2.49
- Carnival Blend Carrot Seeds

- Price: $3.49
- Casperita Pumpkin Seeds

- Price: $4.29
- Common Sorrel Seeds

- Price: $2.29
- Danvers 126 Carrot Seeds

- Price: $2.69
- Easter Egg Blend Radish Seeds

- Price: $2.99
- French Breakfast Radish Seeds

- Price: $2.99
- Gai Choy Mustard Seeds

- Price: $2.29
- Green Globe Improved Artichoke Seeds

- Price: $2.29
- Hearts of Gold Cantaloupe/Muskmelon Melon Seeds

- Price: $2.69
- Honey Boat Winter Delicata Squash Seeds

- Price: $3.49
- King Richard Leek Seeds

- Price: $2.69
- Lacinato Dinosaur Kale Seeds

- Price: $2.49
- Lakota Winter Squash Seeds

- Price: $3.49
- Love-Lies-Bleeding Amaranth Seeds

- Price: $2.29
- Marketmore Cucumber Seeds

- Price: $2.69
- Mizuna Mustard Seeds

- Price: $2.29
- Mountain Sweet Yellow Watermelon Seeds

- Price: $3.49


When you’re wondering how to start a garden, come back to this list for inspiration. What Are you growing this year?
Click here for part two: Designing Your Garden Layout
Click here for part three: How To Start Seeds Indoors
Click here for part four: How To Use Companion Planting To Grow More Food