
BACKYARD GARDENING MADE SIMPLE
![Winter Sowing in Milk Jugs - How to Winter Sow Seeds [Tutorial]](https://images.squarespace-cdn.com/content/v1/60e85024dc86d643da81c96a/ce1bff67-74ef-407a-acac-a45d4d9572f3/E9D5DEFD-A4BA-446D-A0E5-83B1594BB789.JPG)
Winter Sowing in Milk Jugs - How to Winter Sow Seeds [Tutorial]
You don't need an expensive grow light setup to start seeds for your garden. In fact, all you need is a humble milk jug, some soil, and seeds to kickstart your gardening journey. This simple and cost-effective method, known as winter sowing, allows you to harness the power of nature to germinate seeds and get a head start on your garden. In this blog post, we'll explore the step-by-step process of winter sowing in milk jugs, making it accessible to even the most novice gardeners.

You don't need an expensive grow light setup to start seeds for your garden. In fact, all you need is a humble milk jug, some soil, and seeds to kickstart your gardening journey. This simple and cost-effective method, known as winter sowing, allows you to harness the power of nature to germinate seeds and get a head start on your garden. In this blog post, we'll explore the step-by-step process of winter sowing using milk jugs, making it accessible to even the most novice gardeners.
Benefits of Winter Sowing
Wondering what is winter sowing? Winter sowing eliminates the need for expensive grow light setups, making it an incredibly budget-friendly option for seed starting. By using the power of natural sunlight and outdoor conditions, winter sowing mimics the seeds' natural environment, promoting healthier and more robust seedlings. This method allows you to get a head start on your cold-hardy spring crops, giving them a longer growing season and increased chances of success. With just a few basic supplies, you can embark on your gardening journey without the need for complex equipment.
How to winter sow seeds
Materials Needed
Milk jug (or any similar plastic container)
Soil
Seeds
Scissors or utility knife
Duct tape
Popsicle stick or other plant marker you can write on
Permanent marker
Step 1: Prepare Your Milk Jug
Start by collecting empty milk jugs or similar plastic containers. Ensure that they are clean and free of any residue. Milk jugs or water jugs are ideal for this method due to their translucent nature, allowing sunlight to penetrate while providing a protective environment for your seeds.
Poke drainage holes in the base of the jug to prevent waterlogging. Adequate drainage is crucial for seedlings' health, preventing root rot and mold formation.
Step 2: Cut and Create a Hinge
Using scissors or a utility knife, carefully cut the milk jug in half, leaving a hinge along the side where the handle is located. This hinge will act as a connection point, allowing you to open and close the jug easily.
The hinged design serves a dual purpose – it provides easy access for planting and labeling while maintaining a protective cover for your seeds.


Step 3: Add Soil and Plant Seeds
Fill the bottom half of the milk jug with high-quality potting soil. Ensure that the soil is moist but not waterlogged. Plant your seeds according to the recommended depth and spacing for each type. This is also the perfect time to label your seeds inside the jug, preventing any labels from washing away during watering.
Choosing the right seeds is crucial for successful winter sowing. Opt for seeds that can withstand cold temperatures, such as self-seeding annuals and perennial plants suitable for your zone. This method is particularly effective for cold-hardy spring crops.
Step 4: Seal and Protect
After planting your seeds and labeling the jug, close the top half of the milk jug and tape it shut. This creates a mini greenhouse effect, trapping warmth and moisture inside. The tape also ensures that the jug remains securely closed, protecting your seeds from potential disturbances.
Remove the lid from the jug so it can vent properly and rain and snow can enter through the opening to keep the soil damp and place the milk jug in a sunny spot, ideally where it is sheltered from strong winds. This provides the optimal conditions for germination while protecting the seeds from harsh weather elements.
Can I use any type of plastic container for winter sowing, or is a milk jug essential?

While milk jugs are commonly used due to their translucent nature, you can experiment with similar plastic containers. Just ensure they are clean, have drainage holes, and provide some transparency for sunlight to reach the seeds.
How many drainage holes should I add to the base of the milk jug?
Adding 3-4 small drainage holes should be sufficient to prevent waterlogging. This ensures proper drainage while maintaining the necessary moisture for seed germination.
What soil should I use for winter sowing?
Using high-quality potting soil is recommended for optimal seed germination. Choose a mix that provides good aeration and drainage to support healthy root development.
Can I winter sow seeds that require warmer temperatures to germinate?
Winter sowing is best suited for seeds that tolerate cold temperatures. It's ideal for self-seeding annuals and plants that are naturally perennial in your zone. If you have warm-weather crops like tomatoes or peppers, consider other seed-starting methods indoors.
How often should I water the seeds inside the milk jug?
Since the jug is sealed, it retains moisture well, but it's essential to prevent the soil from drying out completely. You shouldn’t need to water your milk jugs unless there’s an unusually dry and warm period. Be cautious not to overwater, as drainage holes help avoid waterlogged conditions.
Can you winter sow tomatoes?
Winter sowing is most effective for cold-hardy plants and early spring crops. While it may work for tomatoes, it's best suited for those that can withstand colder temperatures and benefit from a longer growing season.
Where to place winter sowing containers
Choose a sheltered spot for placing the milk jug, such as near a building or behind a windbreak. If necessary, you can also place heavier objects around the jug to provide additional protection from strong winds.
Can I start winter sowing in any climate zone?
Winter sowing is adaptable to various climate zones. However, its effectiveness may vary depending on your specific climate. Adjust the timing and seed selection based on your local frost dates and weather conditions.
What should I do if mold develops inside the milk jug?
If mold appears, open the jug to increase ventilation, and reduce watering frequency. Ensure the soil surface is dry between waterings, and consider applying a dilute hydrogen peroxide solution to the affected areas to combat mold.

Can I reuse the milk jugs for multiple seasons of winter sowing?
While milk jugs are durable, they may degrade over time due to exposure to sunlight and the elements. It's advisable to inspect them before each season and replace any that show signs of damage or wear. Reusing jugs can be cost-effective, but ensure they are in good condition for successful winter sowing.
When to start winter sowing
You can begin winter sowing any time after the winter solstice (December 21st) because that is when daylight hours begin increasing again.
When should I transplant my winter sown seedlings into the ground?
Transplant your winter sown seedlings after your last frost date. Winter sown seedlings are generally much more cold hardy since they are already adapted and require no hardening off.
Best seeds for winter sowing
Winter Sowing Herbs:
Lavender (Lavandula): Lavender is a hardy herb that thrives in cooler temperatures, making it an excellent candidate for winter sowing. It appreciates well-drained soil and full sunlight.
Chives (Allium schoenoprasum): Chives are cold-tolerant and can be easily grown from seeds in milk jugs. They add a mild onion flavor to dishes and are a great addition to any herb garden.
Parsley (Petroselinum crispum): Parsley is a biennial herb that can withstand cold temperatures. Winter sowing provides an early start for this versatile herb, commonly used in culinary applications.
Winter Sowing Flowers:
Calendula (Calendula officinalis): Calendula, or pot marigold, is a self-seeding annual flower that thrives in cooler weather. Its vibrant orange and yellow blooms add beauty to gardens and can be winter-sown for early spring blossoms.
Sweet Alyssum (Lobularia maritima): Sweet Alyssum is a low-growing flower with a sweet fragrance. It's perfect for borders and containers and can be started in milk jugs for a head start on spring blooms.
Bachelor's Button (Centaurea cyanus): Bachelor's Button, or cornflower, is a cold-tolerant annual with striking blue flowers. Winter sowing allows you to enjoy its blooms earlier in the season.
Winter Sowing Vegetables:
Spinach (Spinacia oleracea): Spinach is a cold-hardy leafy green that does well with winter sowing. You can start spinach seeds in milk jugs to get an early harvest of fresh greens.
Radishes (Raphanus sativus): Radishes are quick-growing vegetables that tolerate cooler temperatures. Winter sowing radish seeds allows you to enjoy their crisp and peppery roots in early spring.
Kale (Brassica oleracea acephala): Kale is a cold-resistant leafy green that benefits from winter sowing. It's rich in nutrients and can be harvested early for delicious and nutritious greens.
Arugula (Eruca sativa): Arugula, with its peppery flavor, is an ideal candidate for winter sowing. This quick-growing green thrives in cooler temperatures, making it a perfect addition to your winter-sown vegetable garden. The young leaves are tender and can be harvested for salads or added to sandwiches, providing a burst of freshness.
Bok Choy (Brassica rapa subsp. chinensis): Bok Choy, a type of Chinese cabbage, is well-suited for winter sowing. Its crisp and mild-flavored stalks and dark green leaves are delicious in stir-fries and salads. Starting Bok Choy seeds in milk jugs allows for an early harvest and a continuous supply throughout the growing season.
Broccoli (Brassica oleracea var. italica): Broccoli, a cold-tolerant vegetable, can be successfully grown from seeds in milk jugs. This nutritious and versatile vegetable benefits from an early start, providing you with homegrown broccoli for soups, salads, and side dishes.

Cabbage (Brassica oleracea var. capitata): Cabbage is a hardy and cold-resistant vegetable that can be started in milk jugs for an early crop. Whether you prefer green or red cabbage, winter sowing allows you to enjoy homegrown cabbage in various culinary creations.
Cauliflower (Brassica oleracea var. botrytis): Cauliflower, with its distinctive white head, is a cool-season crop that responds well to winter sowing. This method gives you a jumpstart on the growing season, ensuring a bountiful harvest of this versatile vegetable.
Endive (Cichorium endivia): Endive, known for its slightly bitter flavor, is an excellent choice for winter sowing. Growing endive from seeds in milk jugs provides you with a crisp and flavorful addition to salads and other dishes.
Leek (Allium ampeloprasum): Leeks, with their mild onion flavor, are cold-resistant and suitable for winter sowing. Starting leek seeds in milk jugs allows for an early harvest of these versatile vegetables, perfect for soups, stews, and as a flavorful addition to many recipes.
Lettuce (Lactuca sativa): Lettuce, a staple in salads, benefits from winter sowing. This method provides an early start for various lettuce varieties, ensuring a continuous harvest of fresh and crispy leaves for your salads and sandwiches.
Swiss Chard (Beta vulgaris subsp. cicla): Swiss Chard, with its colorful stems and nutritious leaves, is well-suited for winter sowing. This versatile green can be started in milk jugs, offering an early supply of homegrown Swiss Chard for cooking and salads.
Remember to check the specific requirements of each seed variety, as some may have preferences for soil conditions, sunlight, and watering. Additionally, consider your local climate and adjust the timing of winter sowing based on frost dates in your area.
Winter sowing in milk jugs is a simple yet effective method for starting seeds, even for those with limited gardening experience or resources. By harnessing the power of nature and utilizing everyday items, you can kickstart your garden without breaking the bank. Give winter sowing in milk jugs a try and watch as your seeds sprout into healthy seedlings, ready to be transplanted into your garden come spring. Happy gardening!

Preserving The Garden Harvest: Instructions For Freezing Food
Freezing food for preservation is a method that has been practiced for centuries, although the widespread use of home freezers is a more recent development. Before the invention of mechanical refrigeration, people used natural methods to freeze and preserve food. In colder regions, they took advantage of winter temperatures by storing food in ice houses or caves. Ice was collected during the winter and used to create insulated storage areas where food could be kept frozen.

Freezing food for preservation is a method that has been practiced for centuries, although the widespread use of home freezers is a more recent development. Before the invention of mechanical refrigeration, people used natural methods to freeze and preserve food. In colder regions, they took advantage of winter temperatures by storing food in ice houses or caves. Ice was collected during the winter and used to create insulated storage areas where food could be kept frozen.
The introduction of home refrigerators with freezer compartments in the 1930s and 1940s made freezing food more accessible to households. These early freezers were smaller in size compared to today's models but provided a convenient way to preserve food at home. As technology improved, home freezers became larger and more efficient, enabling people to store a wider variety of foods for longer periods.
Today, freezing is one of the most common methods of food preservation. It allows for the long-term storage of a wide range of foods while retaining their nutritional value, flavor, and texture. Freezing food at home has become a routine practice for many households, providing them with the convenience of having a variety of preserved foods readily available throughout the year.
Is freezing food safe?
Yes, freezing food is generally considered safe when done properly. Freezing slows down the growth of microorganisms, such as bacteria and molds, which can cause food spoilage and foodborne illnesses. It helps to preserve the quality, nutritional value, and taste of many foods.
However, it's important to follow proper freezing practices to ensure safety:
Keep your freezer at or below 0°F (-18°C) to ensure food stays frozen. Use a freezer thermometer to monitor the temperature regularly. Proper packaging is crucial to prevent freezer burn and maintain the quality of frozen food. Use moisture-proof, airtight containers or freezer bags designed for freezing. Remove excess air from the packaging to minimize freezer burn.
Label packages with the name of the food and the date it was frozen to help keep track of the contents and use them within the recommended time frame.
To maintain the best quality, use the "first in, first out" principle. Consume the oldest frozen items first and avoid storing frozen food for excessively long periods. Place newer items behind items that have already been frozen to make it easier to remember which produce needs to be used first.
It's important to note that while freezing can prevent the growth of bacteria, it does not kill bacteria that may have been present in the food before freezing. Therefore, it's crucial to handle and prepare foods properly before freezing to minimize the risk of foodborne illnesses. Additionally, some foods may experience changes in texture or flavor after freezing, so it's important to consider the suitability of certain foods for freezing. If you have any doubts about the safety or quality of a specific food item, it's always best to consult reliable sources or food safety experts for guidance.
Is freezer burn bad for you?
Freezer burn itself is not considered unhealthy or harmful to consume. It refers to the dehydration and oxidation of the food's surface when it is exposed to air inside the freezer. While freezer burn may cause changes in texture, flavor, and appearance, it does not pose a risk to food safety.
However, consuming freezer-burned food may result in a less desirable eating experience. The affected areas of the food can become dry, discolored, and develop a slightly off taste. It's always recommended to trim off the freezer-burned portions before consuming the remaining parts of the food.

How long will frozen foods last?
The storage time for frozen produce can vary depending on the specific type of produce, the quality at the time of freezing, and the storage conditions. Generally, frozen produce can maintain its quality and be safe to eat for an extended period if stored properly.
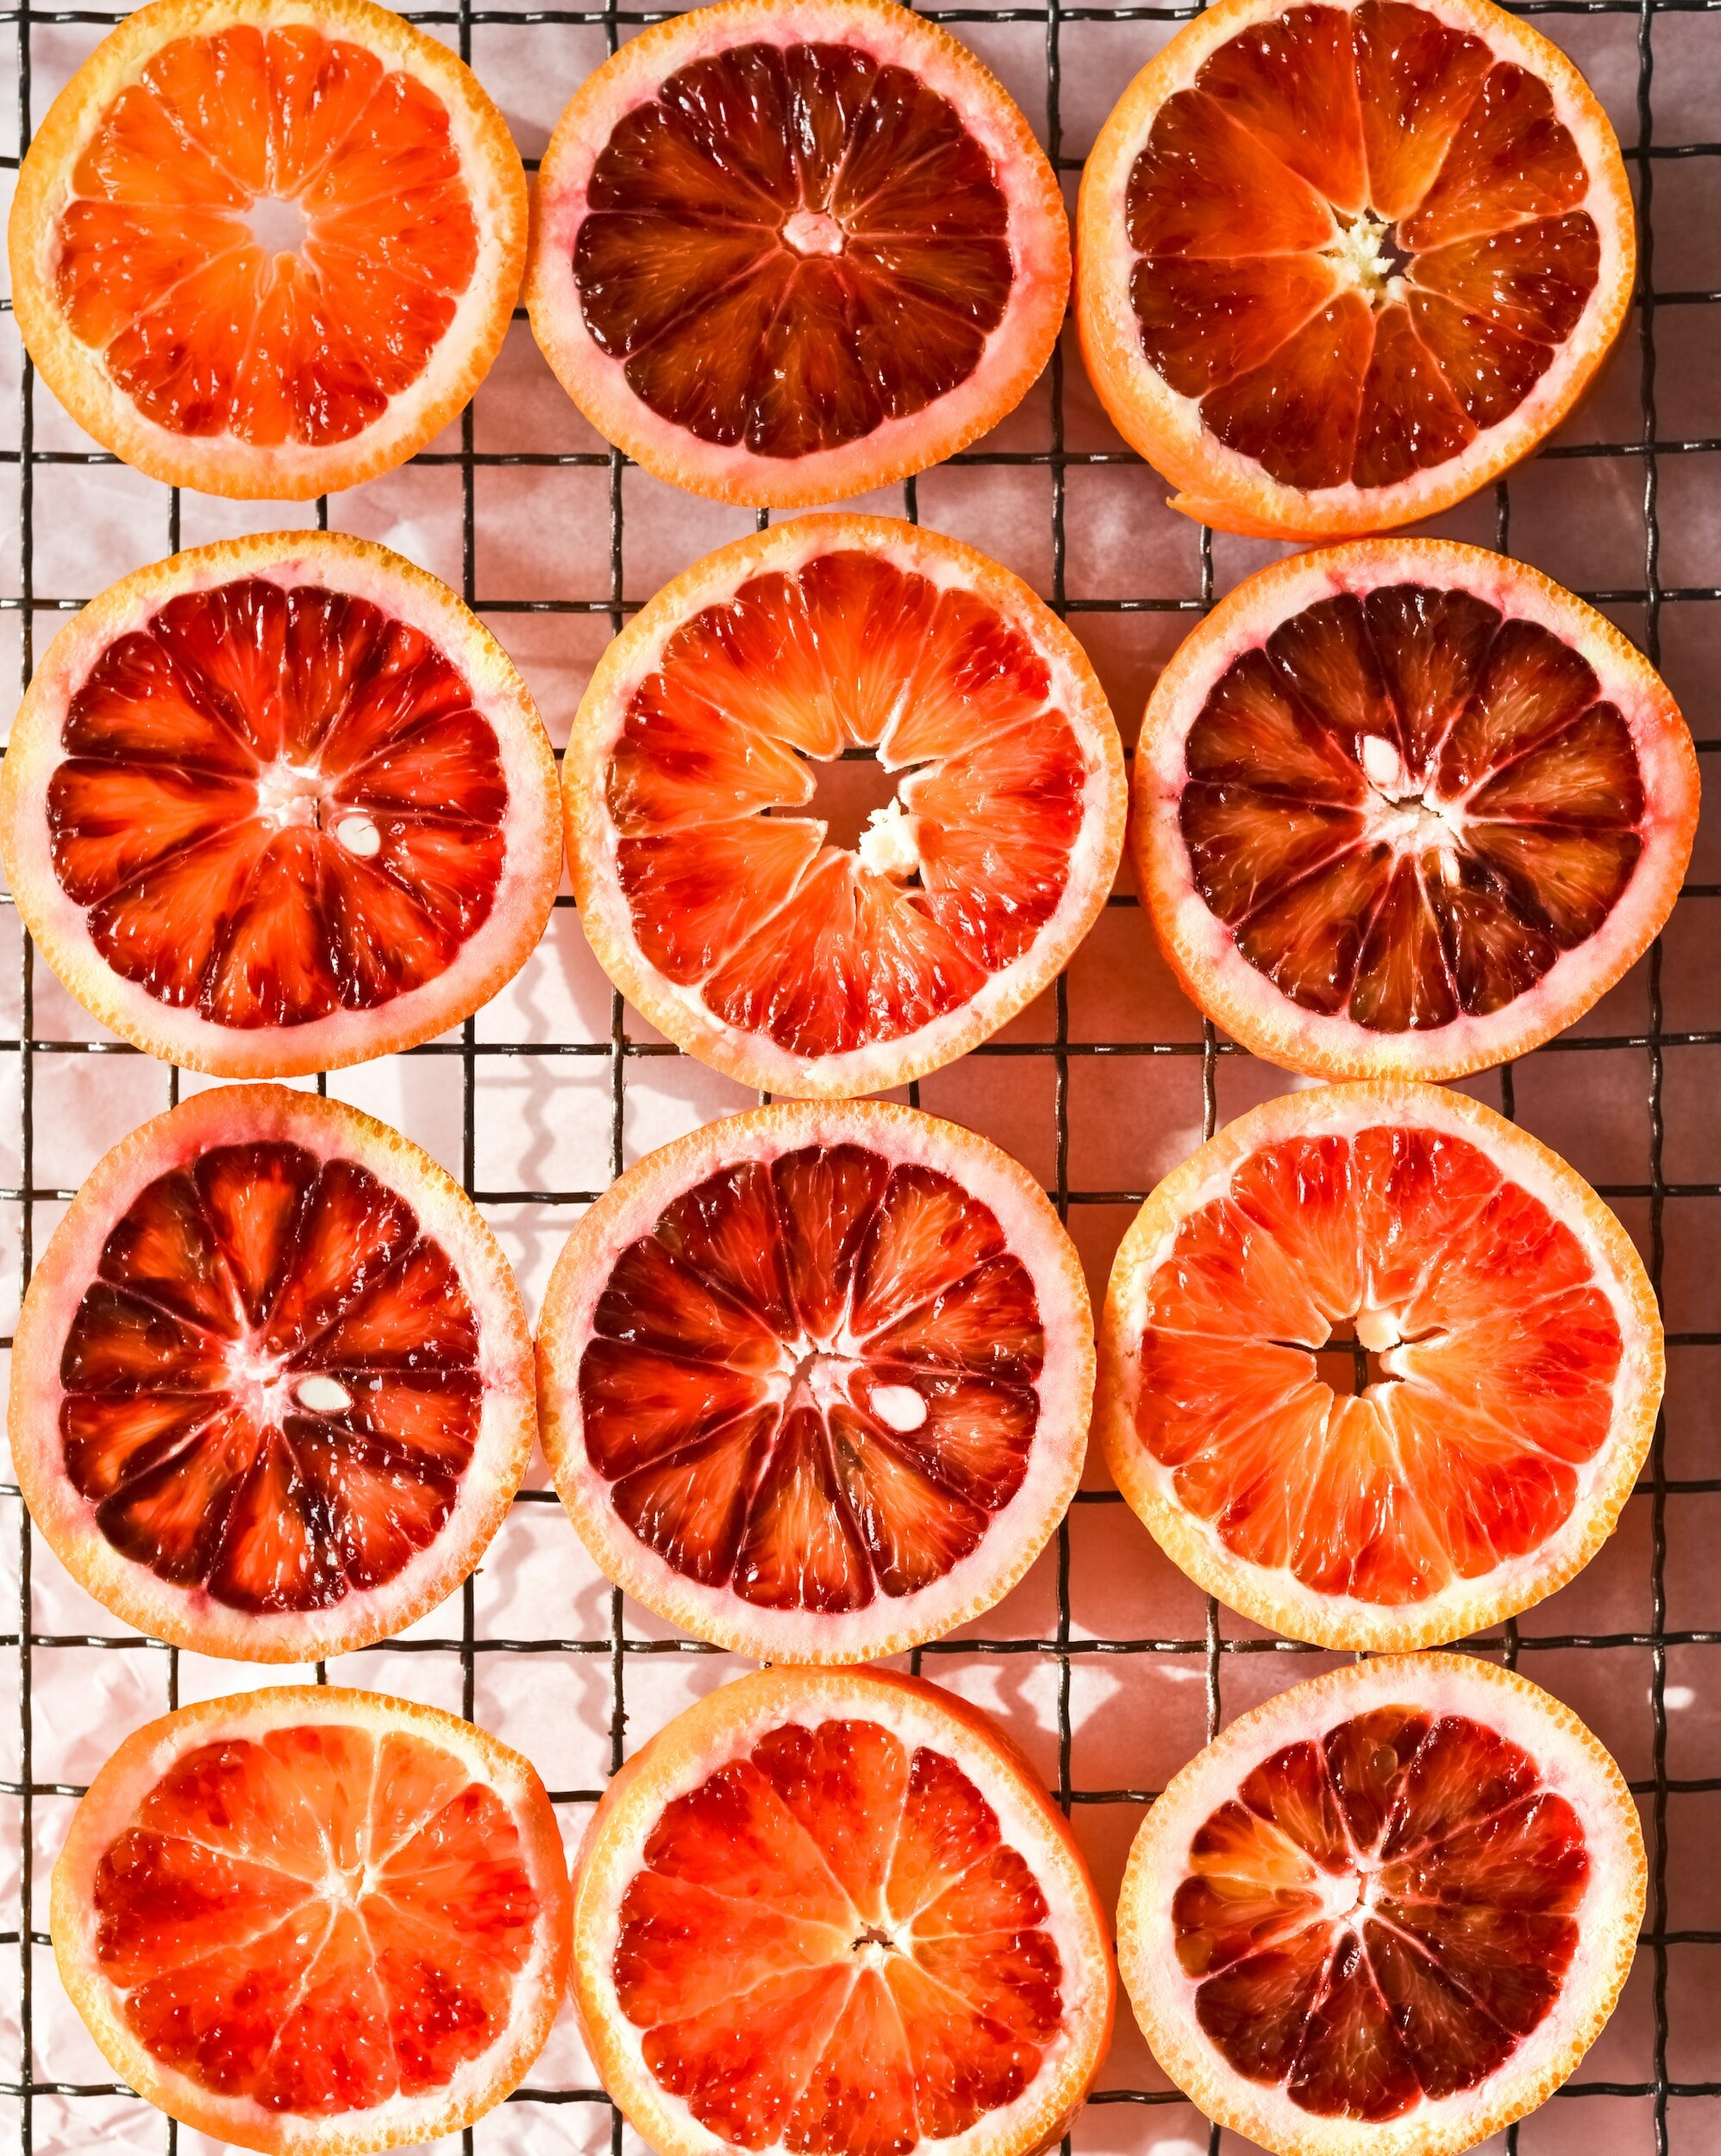
Fruits: Most fruits can be stored in the freezer for 8 to 12 months. However, citrus fruits may have a shorter storage time of around 4 to 6 months.
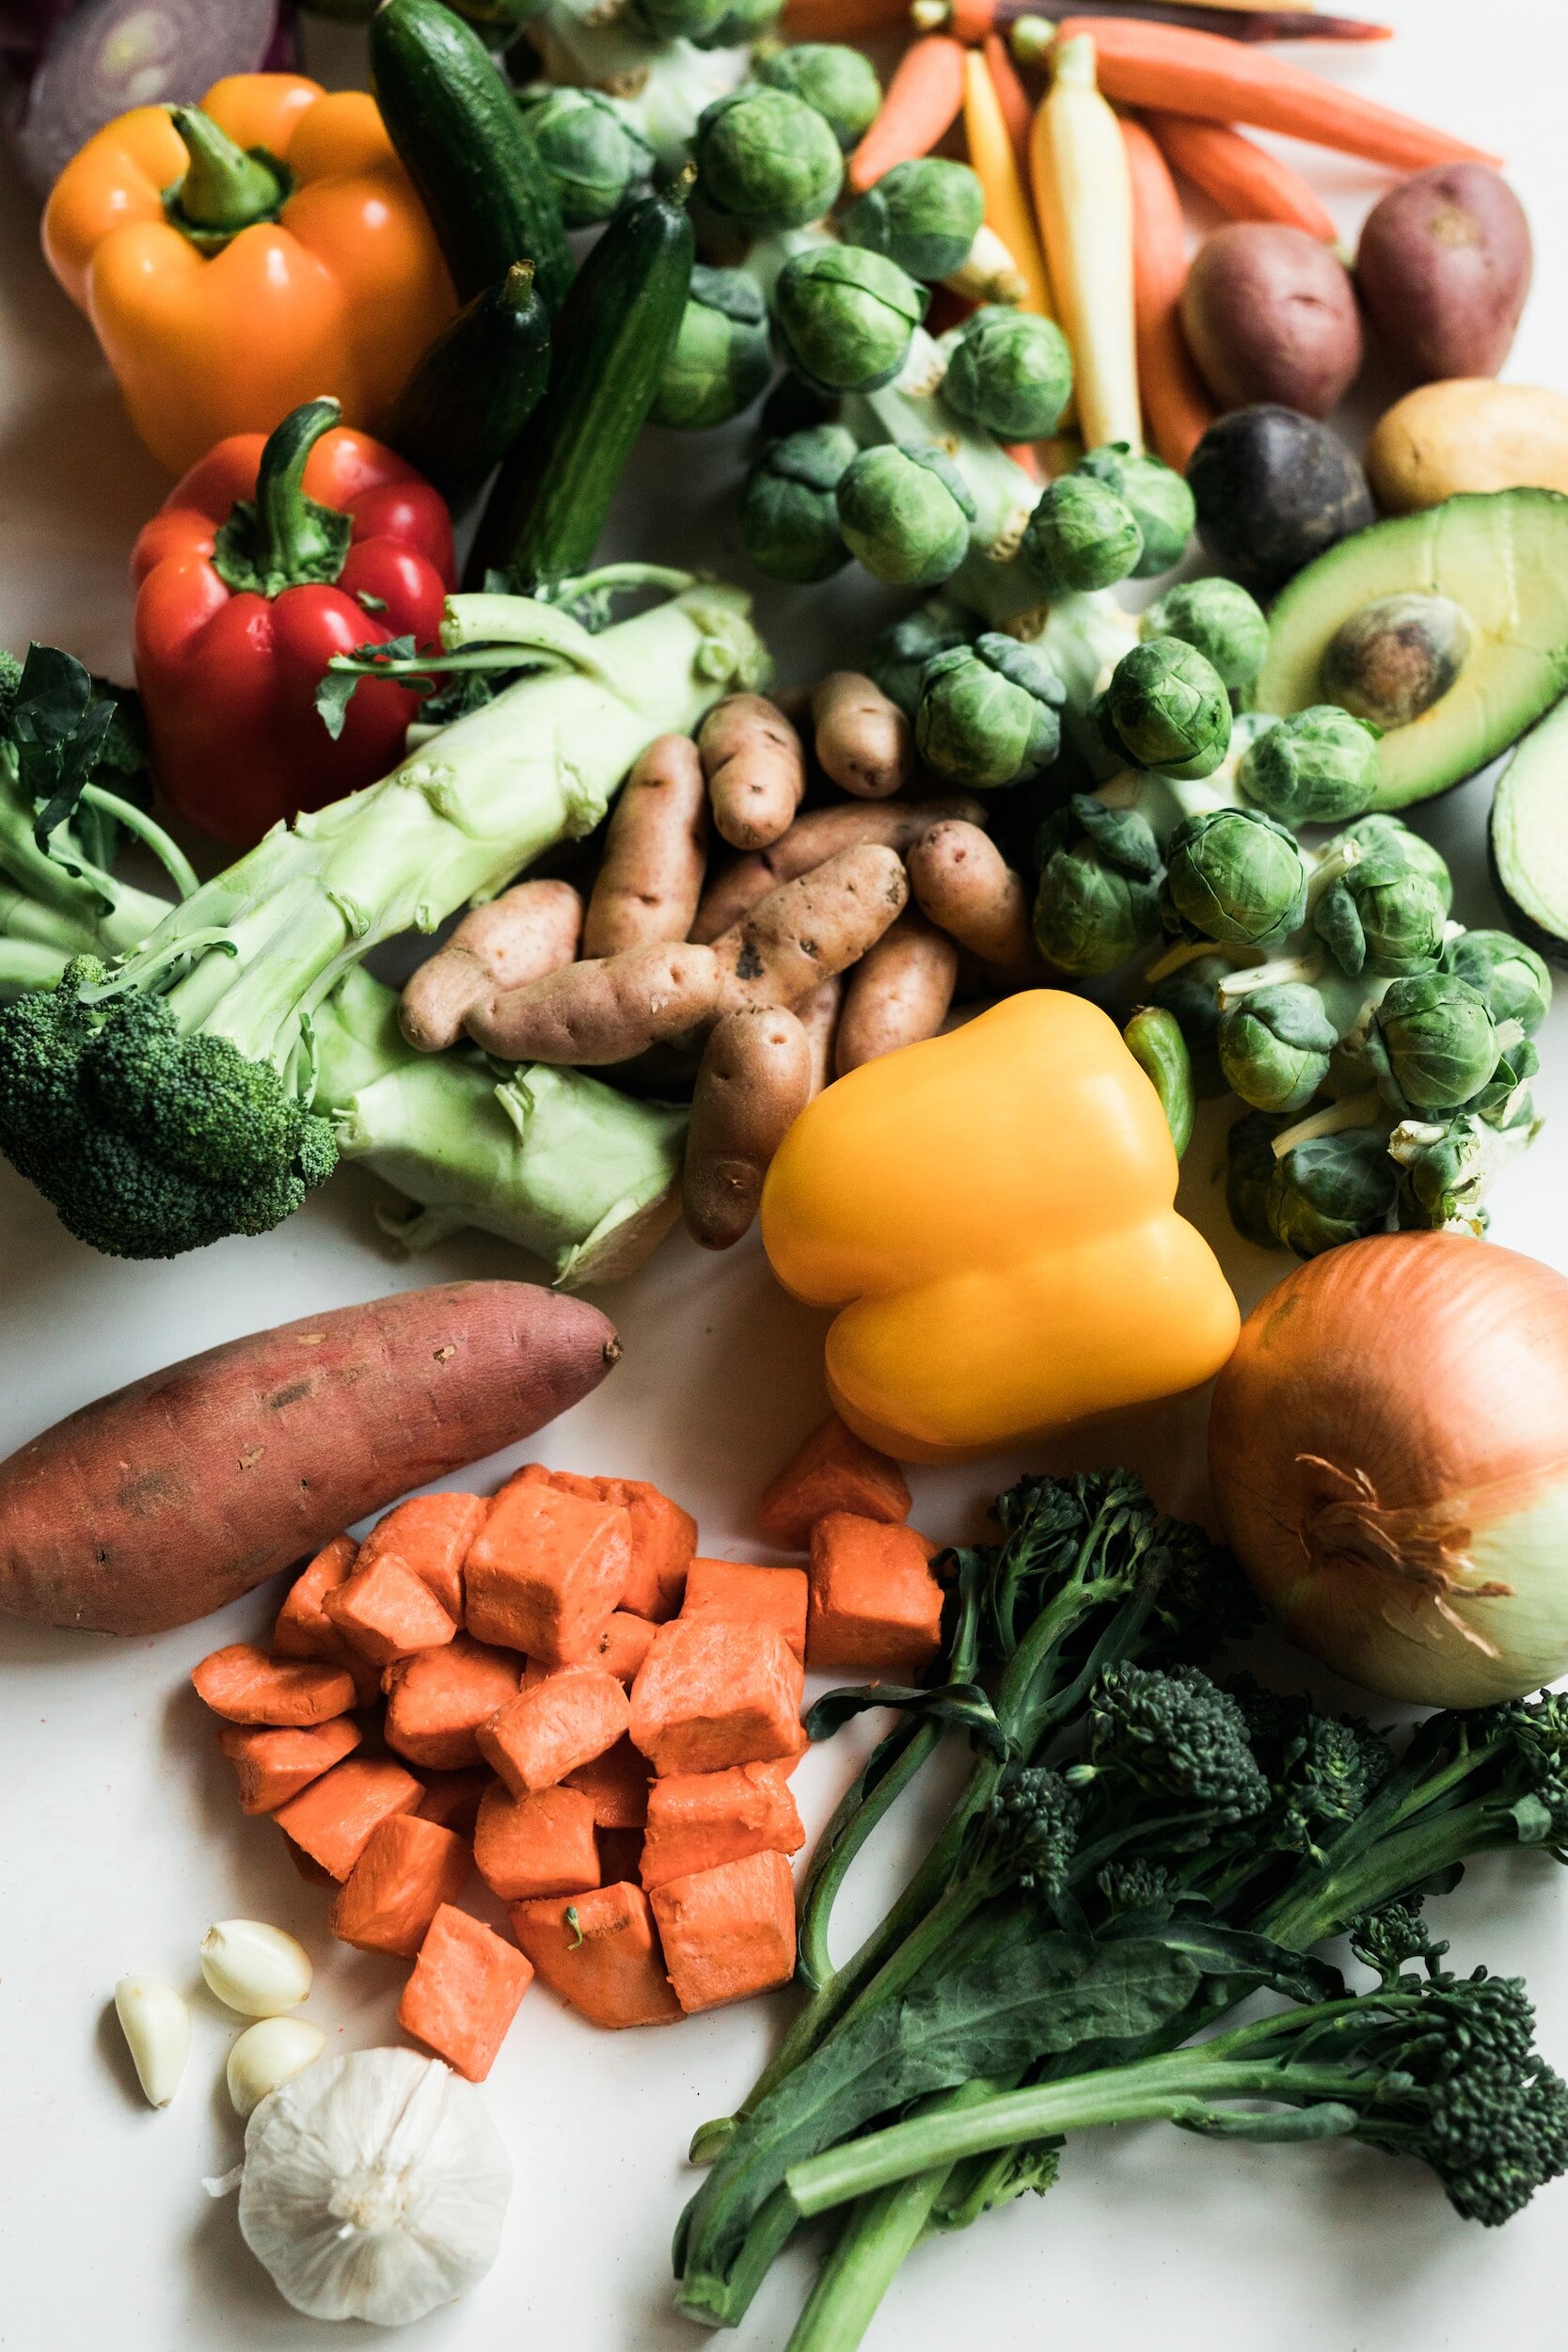
Vegetables: Vegetables can typically be stored in the freezer for 8 to 12 months. Some vegetables with higher water content, such as leafy greens, may have a shorter storage time of around 3 to 6 months.
Berries: Berries, such as strawberries, blueberries, and raspberries, can be stored for 8 to 12 months.

Techniques for freezing food
Freezer Bags or Containers: Transfer the food into freezer-safe bags or containers such as silicone bags or mason jars. Remove excess air from the bags before sealing them to minimize freezer burn.
Tray Freezing: This method is useful for freezing individual items, or small pieces of food that you don’t want getting stuck together. Place the food in a single layer on a tray and put it in the freezer. Once the food is frozen, transfer it to freezer bags or containers for long-term storage.
Vacuum Sealing: Vacuum sealers remove air from the packaging, creating an airtight seal around the food. This method helps to prevent freezer burn and extends the shelf life of frozen food. This is my preferred method for storing frozen food, especially produce we harvest from our garden.
Freezer Paper: Wrap the food tightly in freezer paper, aluminum foil, or plastic wrap. Make sure to label and date the package. This method is suitable for foods with minimal moisture, such as meats or baked goods.
Ice Cube Trays: Ideal for freezing small portions, such as herbs, sauces, or baby food. Pour the liquid or puree into the compartments of an ice cube tray and freeze. Once frozen, transfer the cubes to a freezer bag for storage.
Blanching and Flash Freezing: Some vegetables benefit from blanching before freezing to maintain their texture and color. Briefly blanch the vegetables in boiling water, then plunge them into ice water to stop the cooking process. Drain well, pack into freezer bags or containers, and freeze. Vegetables that benefit the most from blanching include green beans, broccoli, carrots, brussels sprouts, peas, corn, cauliflower, asparagus and spinach.
How to Thaw Frozen Produce
The safest method for thawing frozen produce is to transfer it from the freezer to the refrigerator. This slow thawing process allows the produce to gradually reach a safe temperature without compromising its texture or flavor. Remember to place the frozen package in a leak-proof container or on a plate to catch any potential drips.
If you need to thaw produce more quickly, you can use the cold water thawing method. Place the frozen package in a sealed plastic bag and submerge it in cold water. Change the water every 30 minutes to ensure it stays cold. Note that this method should be used for immediate use of the thawed produce.
Thawed vegetables like peas, carrots, and corn are excellent additions to soups, stews, and sauces. They bring vibrant colors, flavors, and nutrients to your dishes. Thawed fruits like berries, peaches, or rhubarb can be used in baking recipes, such as pies, cobblers, or muffins. For best results, drain excess liquid from the thawed fruits before using them in recipes. Thawed vegetables, such as green beans, broccoli, or cauliflower, can be blanched quickly to revive their vibrant colors and crispness. Use them in salads or as side dishes, either raw or lightly steamed, for added freshness and nutrition. Remember that the texture of thawed produce may differ slightly from fresh produce, but the flavor and nutrients are still present.
Troubleshooting Issues With Freezing Produce
Freezer burn can occur when frozen produce is exposed to air, leading to dehydration and a change in texture and flavor. To prevent freezer burn, make sure to store your produce in airtight containers or freezer bags, removing as much air as possible. Additionally, consider using vacuum-sealed bags for optimal protection. If you notice signs of freezer burn on your produce, simply trim off the affected areas before using them in recipes.
Some vegetables may experience changes in texture after freezing. For example, leafy greens like spinach or lettuce may become wilted or lose their crispness. In these cases, it's best to use them in cooked dishes rather than raw salads. Similarly, root vegetables such as potatoes or carrots may become slightly softer after freezing. They are still safe to consume and can be used in mashed dishes, soups, or stews. Blanching helps preserve the color, texture, and flavor of the vegetables, as well as helps to deactivate enzymes that can cause deterioration during storage. It's recommended to blanch most vegetables before freezing unless they are intended for cooking in recipes where texture changes are not a concern.
Some fruits, especially those with delicate textures, benefit from being frozen in a syrup to maintain their quality. The syrup helps retain moisture and prevents the fruit from becoming mushy. Use a light sugar syrup (made by dissolving sugar in water) or a simple fruit juice syrup. The specific syrup concentration can vary depending on personal preference and the sweetness of the fruit.
Can you refreeze thawed produce?
It's generally recommended to avoid thawing and refreezing produce repeatedly, as it can lead to a loss of quality and potential food safety issues. If you have a large quantity of frozen produce and only need a portion, it's best to thaw and use what you need while keeping the rest frozen.
Freezing is an accessible method of food preservation for just about anyone, and is especially useful during summer harvest season when it can be difficult to keep up with all the produce coming in from the garden. You can even freeze tomatoes whole to process into sauce and can at a later date. Freezing also provides easy access to quick meals for nights when you aren’t able to cook, and prevents food waste.
Read more from this preserving the garden harvest series:
PRESERVING THE GARDEN HARVEST: INSTRUCTIONS FOR PICKLING FOOD
PRESERVING THE GARDEN HARVEST: INSTRUCTIONS FOR FERMENTING FOOD
PRESERVING THE GARDEN HARVEST: INSTRUCTIONS FOR DEHYDRATING FOOD
PRESERVING THE GARDEN HARVEST: INSTRUCTIONS FOR WATER BATH CANNING

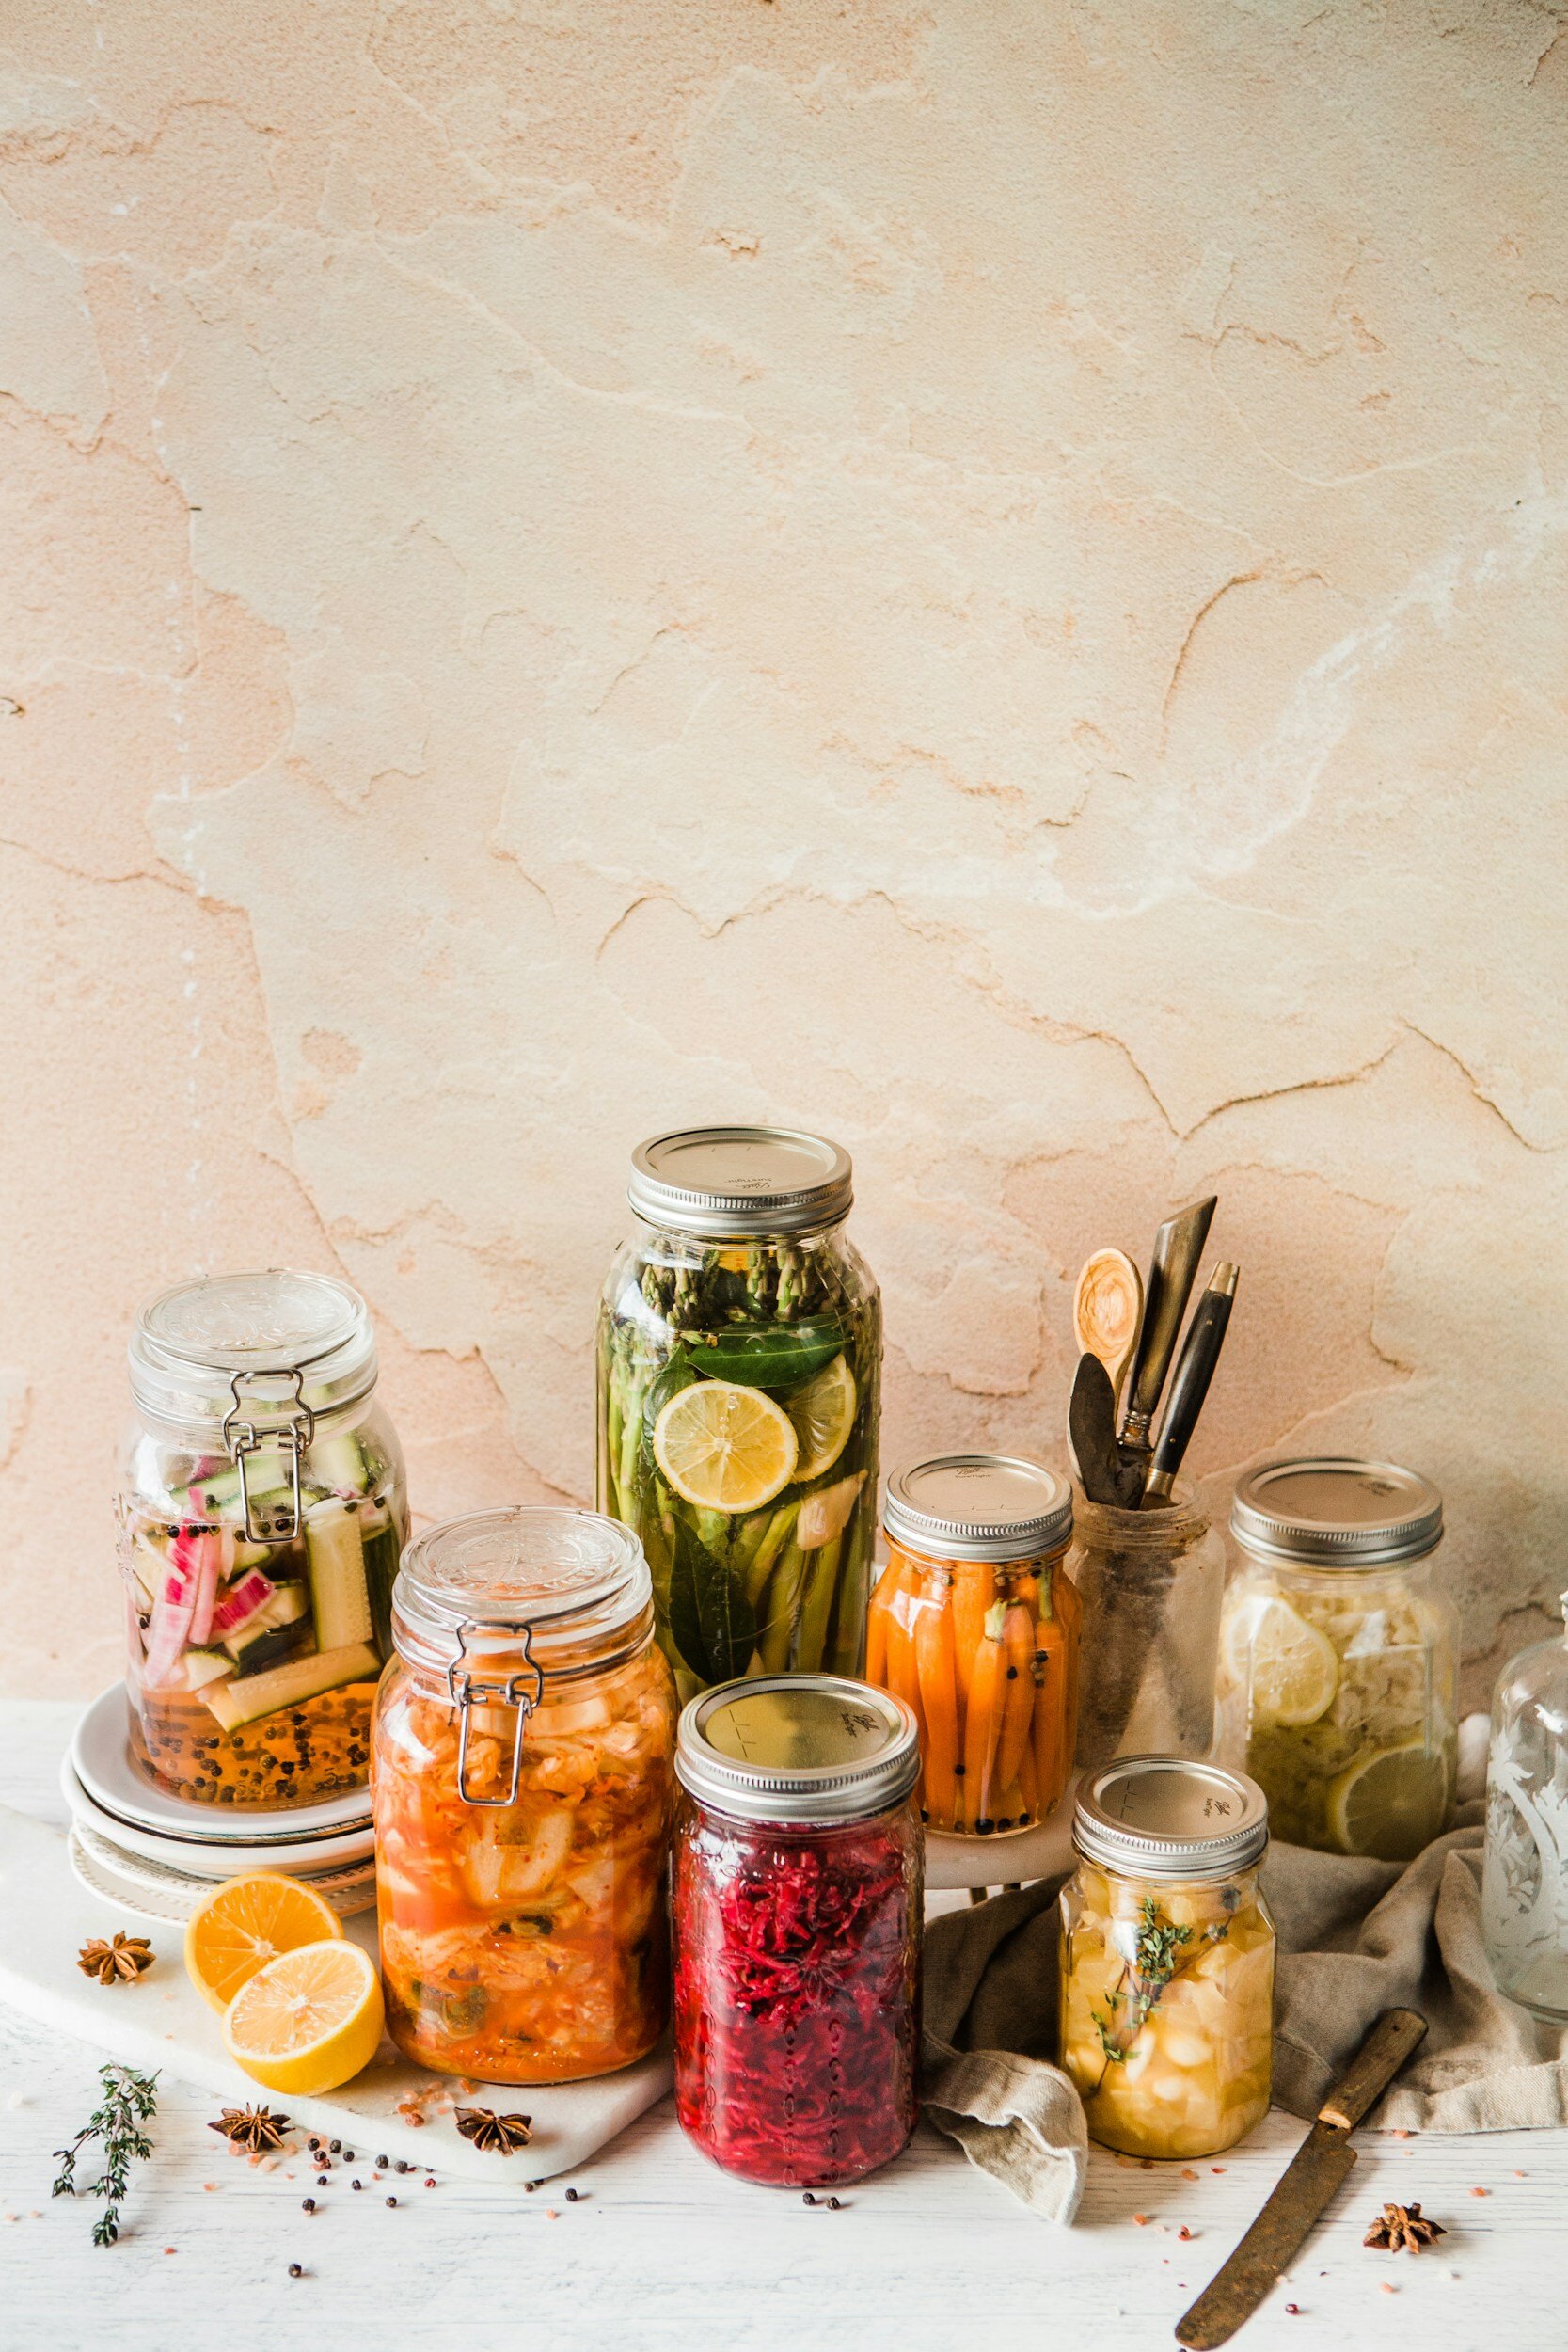
Preserving The Garden Harvest: Instructions For Pickling Food
Throughout history, pickling has been used to preserve a wide variety of foods, including vegetables, fruits, meat, fish, and eggs. In different cultures, specific ingredients and flavorings have been incorporated to create unique pickled dishes. For example, the Chinese developed a method of pickling cabbage that eventually led to the creation of kimchi, a staple in Korean cuisine. In the Middle East, pickled turnips and cucumbers are popular, while in Western cultures, pickles made from cucumbers are widely enjoyed.

Pickling is an ancient method of food preservation that dates back thousands of years. The exact origins of pickling are unclear, as various cultures around the world have independently developed their own pickling techniques. However, pickling has been practiced by civilizations such as the Mesopotamians, Egyptians, Greeks, and Romans.
The preservation of food through pickling was driven by the need to store and consume perishable items for extended periods, especially in times of scarcity or during long journeys. The process of pickling involves immersing food items in a solution or brine made of vinegar, salt, and sometimes spices or herbs. The acidity of the vinegar or the salt concentration in the brine creates an environment that inhibits the growth of spoilage-causing bacteria, molds, and yeasts.
Throughout history, pickling has been used to preserve a wide variety of foods, including vegetables, fruits, meat, fish, and eggs. In different cultures, specific ingredients and flavorings have been incorporated to create unique pickled dishes. For example, the Chinese developed a method of pickling cabbage that eventually led to the creation of kimchi, a staple in Korean cuisine. In the Middle East, pickled turnips and cucumbers are popular, while in Western cultures, pickles made from cucumbers are widely enjoyed.
Before the advent of modern canning techniques, pickling was one of the most common ways to preserve food for long periods. It allowed people to enjoy seasonal produce year-round and provided sustenance during harsh winters or extended periods of travel. Pickled foods were also valuable for sailors and explorers, as they provided a reliable source of nutrition during lengthy voyages.
Over time, pickling techniques have evolved, and different regions have developed their own unique styles and flavors.
Is pickled food safe?
The pickling process involves preserving food in an acidic solution, such as vinegar or brine, which creates an inhospitable environment for harmful bacteria to grow. The acidity and high salt content of pickled food help inhibit the growth of microorganisms that can cause food spoilage and foodborne illnesses. However, it's important to note that the safety of pickled food depends on proper preparation and storage. It's crucial to follow established pickling recipes, maintain hygiene practices, and use fresh, high-quality ingredients. Improperly processed or stored pickled food can potentially pose health risks.
If you are making pickled food at home, it's recommended to follow tested and trusted recipes from reliable sources, such as reputable canning and preserving guides or organizations. This ensures that you are using safe methods and ratios of ingredients to achieve proper acidity levels and prevent the growth of harmful bacteria.
Is pickled food healthy?
Pickled food can have both health benefits and drawbaks. On the positive side, pickled food retains many of the nutritional qualities of the raw ingredients used. For example, fermented pickles are a source of beneficial bacteria that can support gut health and digestion. Additionally, pickled vegetables often maintain their vitamin and mineral content, providing valuable nutrients.
However, pickled foods can be high in sodium due to the use of salt or brine in the pickling process. You should consume pickled foods in moderation and be mindful of your overall sodium intake.
How long will pickled food last?
Homemade pickled foods may have a slightly shorter shelf life than commercially prepared. Refrigerator pickles, which are pickled in a vinegar-based brine and stored in the refrigerator, are usually best consumed within a few weeks to a couple of months. They may retain their quality and flavor for longer, but the texture can gradually change over time. You may can your pickles to extend their shelf life. For fermented pickles, which are pickled through a fermentation process, the shelf life can be more extended. Fermented pickles can last for several months to a year or more when stored properly in a cool, dark place, such as a root cellar or a refrigerator.

What foods can be pickled?
Cucumbers are perhaps the most well-known pickled food, and they can be transformed into dill pickles, bread and butter pickles, or sweet pickles.
Carrots can be pickled to create a tangy and crunchy addition to salads, sandwiches, or relish trays.
Pickled onions are versatile and can be used as a topping for burgers, tacos, salads, or sandwiches to add a tangy kick.
Pickled beets are popular for their vibrant color and sweet-tart flavor. They can be enjoyed on their own or used in salads and side dishes.
Pickled jalapenos add heat and tanginess to dishes like nachos, tacos, and sandwiches.
Various types of peppers, such as bell peppers, banana peppers, or cherry peppers, can be pickled to create flavorful condiments or toppings.
Pickled radishes offer a crisp texture and a tangy taste that complements salads, tacos, or grain bowls.
Hard-boiled eggs can be pickled in a brine solution, resulting in tangy and savory pickled eggs, often enjoyed as a snack or added to salads.
Crisp pickled green beans, also known as dilly beans, make a delightful and refreshing addition to relish trays or as a snack.
Pickled cauliflower florets are not only visually appealing but also provide a tasty and tangy addition to salads, antipasto platters, or relish trays.

How to pickle food
Start by selecting fresh and high-quality vegetables or fruits for pickling. Wash them thoroughly and trim off any unwanted parts. Cut the produce into desired shapes, such as slices, spears, or whole.
In a non-reactive pot, combine vinegar, water, and salt. The ratio of vinegar to water can vary depending on personal preference and the recipe you're using. Generally, a 1:1 ratio of vinegar to water is common. Add salt to taste, and you can also incorporate other flavorings like sugar, spices, or herbs.
Place the pot on the stove and heat the brine mixture until it comes to a boil. Stir occasionally to ensure that the salt is dissolved and the flavors are well combined.
Meanwhile, sterilize glass jars and their lids by boiling them in water for a few minutes or running them through a dishwasher. Once sterilized, pack the prepared vegetables or fruits tightly into the jars, leaving a little space at the top.
At this stage, you can add extra flavorings to the jars, such as garlic cloves, dill sprigs, peppercorns, or chili flakes. These will infuse additional flavors into the pickled food.
Carefully pour the hot brine into the jars, making sure to completely cover the vegetables or fruits. Leave about a 1/2-inch headspace at the top of each jar. If needed, use a clean utensil, such as a chopstick, to release air bubbles and ensure the brine fills all the gaps.
Wipe the jar rims with a clean cloth to remove any spills or brine residue. Place the lids on the jars and tighten them securely. Allow the jars to cool at room temperature. As they cool, you may hear the satisfying "pop" sound indicating a proper seal. Once cooled, store the pickled jars in a cool, dark place like a pantry or cellar. The flavors will continue to develop over time.
Pickled foods need time to develop their flavors. Most pickles are ready to eat after a few days, but the flavors will intensify and improve over several weeks. Keep in mind that some pickles may require longer fermentation periods.
The difference between pickled and fermented food
Pickling is a process of preserving food by immersing it in a brine or vinegar solution. The food is typically cooked or blanched before being submerged in the pickling liquid. Fermentation, on the other hand, is a natural process that occurs when beneficial bacteria, yeasts, or molds break down the sugars or carbohydrates in the food, converting them into acids or alcohol.
Pickling preserves food through the use of acid, typically vinegar, which creates an acidic environment that inhibits the growth of spoilage-causing bacteria. The high acidity of the pickling solution helps preserve the food's texture, color, and flavor. Fermentation, on the other hand, preserves food through the action of beneficial microorganisms. These microorganisms produce lactic acid or alcohol as byproducts, creating an environment that prevents the growth of harmful bacteria.
Pickled foods have a distinct tangy or sour flavor due to the vinegar or acidic brine they are soaked in. The texture of pickled foods can vary depending on the specific food being pickled, but they tend to retain some crunchiness. Fermented foods often have a complex, tangy, or slightly acidic flavor profile. The fermentation process can also introduce unique flavors and aromas. The texture of fermented foods can range from crisp to soft, and they may develop a slightly "fizzy" or effervescent quality.
Pickled foods have a relatively long shelf life due to the high acidity of the pickling solution, which inhibits the growth of spoilage-causing bacteria. They can be stored for several months or even years when properly sealed and stored in a cool, dark place. Fermented foods also have a good shelf life, but the duration may vary depending on the specific food and the fermentation process. Some fermented foods, such as sauerkraut or kimchi, can be stored for several months in the refrigerator or even longer if kept in a cool environment.
Both pickled and fermented foods can offer health benefits. Pickled foods, especially those made with fermented pickling methods like lacto-fermentation, can contain beneficial probiotics that support gut health. Fermented foods are known for their rich content of beneficial bacteria, enzymes, and other compounds that can aid digestion, enhance nutrient absorption, and support overall gut health.
Read more from this preserving the garden harvest series:
PRESERVING THE GARDEN HARVEST: INSTRUCTIONS FOR FREEZING FOOD
PRESERVING THE GARDEN HARVEST: INSTRUCTIONS FOR FERMENTING FOOD
PRESERVING THE GARDEN HARVEST: INSTRUCTIONS FOR DEHYDRATING FOOD
PRESERVING THE GARDEN HARVEST: INSTRUCTIONS FOR WATER BATH CANNING
![Greenstalk Planter Review [Vertical Garden Planter]](https://images.squarespace-cdn.com/content/v1/60e85024dc86d643da81c96a/de0ebf9c-0d8e-4a6b-ba17-06d21ec07075/IMG_2728.JPG)
Greenstalk Planter Review [Vertical Garden Planter]
This honest review of the Greenstalk Planter vertical garden tower has everything you need to know about Greenstalk gardens!

The Cottage Peach is reader-supported. When you purchase through links on our site, we may earn an affiliate commission at no additional cost to you. All opinions are our own.
Vertical gardening is quickly becoming one of my favorite gardening hacks to not only grow more plants in small spaces, but also make gardening more accessible if you have chronic pain. Having grown in a Greenstalk vertical planter for 3+ years now, I can safely say it’s my favorite way to garden - and that these planters are built to last. After multiple seasons left out in the cold northern elements, my vertical planter looks as good as the day I assembled it.
What is vertical gardening?
Vertical gardening is a way to grow plants in a vertical space, such as on a wall or fence. It can be used to grow a variety of plants, including vegetables, herbs, flowers, and even trees. Vertical gardens are a great way to save space, add beauty to your home, and grow your own food.
What are the benefits of vertical gardening?
Increased yield: Vertical gardens can produce more fruits, vegetables, and herbs in a smaller footprint.
Improved plant health: Vertical gardens can reduce the risk of pests and diseases by providing better airflow and drainage. They also minimize or eliminate weeding.
Reduced water usage: Vertical gardens can use up to 90% less water than traditional gardens.
Increased accessibility: Vertical gardens can be used by people with limited mobility or chronic pain.
Improved air quality: Vertical gardens can help to improve air quality by absorbing carbon dioxide and releasing oxygen.

Are vertical gardens high maintenance?
No, most vertical gardens like the planter I use are very low maintenance. With the addition of automated timers for your grow lights and self watering trays you’ll really only have to maintain your garden once or twice a week.
How long do vertical gardens last?
My Greenstalk Planter is super durable - I’ve even heard stories of people having them fall off their decks and they were totally fine! My Greenstalk planter should last for many years, especially if they are properly cared for. You’ll be continually refreshing the plants in your garden as they reach the end of their lifecycle, which can be anywhere from a month for lettuce to six months for larger plants like squash.
How do you start a vertical garden?
To start a vertical garden, you will need to choose a location and purchase the necessary supplies. You can then choose the plants you want to grow and plant them in your vertical garden. The entire process is much faster than planting a traditional garden in the ground. I recommend choosing a spot that is easily accessible from your kitchen, so you can easily grab what you need before you start cooking dinner and have the freshest harvest possible. You’ll also want a spot in full sun if you’re using your vertical garden outdoors. I have this vertical garden outside on my deck to increase my available growing space and yield.
Greenstalk Planter Review
If you had told me I could grow 30 veggie plants, flowers and herbs in 2 square feet of space, I would have thought you were crazy. But the Greenstalk has grow pockets that are a full ten inches deep so my plants can grow as big as they want (and I can grow everything from carrots to peppers, tomatoes, herbs and squash!). It's by far the best way to maximize your garden space and make gardening more accessible if you have chronic pain like me.
The Greenstalk was a breeze to set up. I just filled each individual tier with soil and then my plant starts/seeds. The high-quality, food-grade, UV-resistant, BPA, BPS & PVC-free plastic tiers snap together with built in clips so there's no fiddling with tools or tiny parts trying to line everything up. I also got the spinner base with wheels which allows me to rotate the planter to get the most sun during the day and roll it around if it's ever in my way. Next I attached the self watering kit which is basically a long custom tube that clips to the side of the planter and connects directly to your hose to fill the top reservoir automatically.
I’ve grown with my Greenstalk for 3+ years now, and in that time the only issue I’ve encountered was soil related - NOT planter related. These vertical planters are container gardens, which means it’s extra important to only use potting mix since it is designed to balance drainage and water retention. Raised bed soil or topsoil will be too heavy and dense, and your plants may not thrive. As long as you use standard potting mix and fertilize regularly, you will have a thriving garden in your Greenstalk.
The planters are made from high quality, thick materials that do not wear down when exposed to the elements. Unlike my wood beds, which need to be covered and resealed yearly to protect them from my harsh northern winters, my Greenstalks require no maintence or protection from the elements. And they come in so many gorgeous colors, it’s hard not to want to collect them all.
How does the Greenstalk planter work?
What makes this outdoor vertical garden unique is the patented top water reservoir for easier watering with 4 watering disks to easily distribute water. GreenStalk’s patented watering system delivers fresh water to every tier at the same time so you don’t have to water each pocket by hand. All you do is add water to the top tray up to the fill line and the Greenstalk does the rest utilizing a gravity-fed system to slowly and evenly drip irrigate your planter, which means no need to worry about thirsty plants OR root rot!
After using my Greenstalk all summer, fall AND winter with the optional frost cover, I can't imagine my garden without it. In fact, I'm trying to resist buying a bunch more! If I had a choice, all my garden beds would be at least three feet off the ground, but this setup combined with the self watering bluetooth timer in summer is a GAME CHANGER. Talk about hands off (and weed-free) gardening.
Does Greenstalk have a warranty?
Yes, they include a 5-year warranty on color and functionality of the planter.
What can I grow in the GreenStalk Planter?
There are many different plants that can be grown in the Greenstalk planter, thanks to the super deep 10' pockets. I can grow peppers, tomatoes, cucumbers, squash, lettuce and other greens, herbs and even root crops like potatoes and carrots. strawberries are a really popular choice to grow in a Greenstalk planter as well. And of course I had to add some flowers like petunias, marigolds, and pansies. But these are just some of the many plants you can grow in your Greenstalk! Greenstalk recommends growing larger plants in the GreenStalk Original and smaller plants in the GreenStalk Leaf.
Can I use the GreenStalk Planter indoors?
These Greenstalk planters are basically all-weather outdoor champs. Some folks get creative and bring them indoors, tweaking the lighting and drainage. But with the addition of a frost cover and some careful planning to grow cold loving crops you can continue the outdoor harvesting well into the winter months.
How to store a GreenStalk Planter during the winter months?
Greenstalk planters are made for all climates. They can stay outdoors all year long (yes, really!) or they can be cleaned, stacked, and stored away.
How much does each tier weigh?
One Original Greenstalk with all its green glory and watering action hits the scale at around 30 lbs. If you're eyeing the Leaf Greenstalk, each tier throws down a weight of about 23 lbs.
How much soil do I need for the Greenstalk?
Each Original Tier holds 1 cubic foot of potting mix (about 8 gallons). Each Leaf Tier holds 0.75 cubic feet of potting mix (about 6 gallons).
Do I need special soil to use a GreenStalk?
Any high-quality, lightweight potting mix would work well. Avoid using topsoil, raised bed soil, or garden soil.
How often should I water my Greenstalk?
Watering is all about the season, weather, and the plants you've got growing. When you kick off the planter setup, my tip is to drench the soil using the water reservoir and each little pocket. If you're starting from seeds, give 'em a gentle mist until the plants are holding their own, so you don't go tossing those seeds around. And don't forget to sneak a peek and make sure the soil is staying moist below the top layer.
How long does the water sit in the reservoir?
GreenStalk's patented slow drip watering system allows water to drain through the system within approximately 5 minutes. If used correctly, there will be no sitting water anywhere in the system. The bottom of the GreenStalk includes little “feet” that allow water to drain out and away from the planter.
How do I fertilize my GreenStalk Garden?
You can add granular fertilizers, compost or worm castings when filling the tiers with soil, but the best hack is to add water soluble fertilizer as needed through the GreenStalk’s internal watering system when filling the top water reservoir.
Want more vertical gardening ideas?
I love vertical gardening so much, I literally wrote a book on it. This ebook has everything you need to know to get started with indoor gardening, including DIY vertical gardens you can make, to-do lists so you don’t miss a thing and more. Just click here to grab your copy.
![Gift Ideas For Gardeners [GARDEN GIFT GUIDE]](https://images.squarespace-cdn.com/content/v1/60e85024dc86d643da81c96a/9fad99b7-b5e7-4975-96a5-aeacd3f2d643/Sept+2022+small-17.jpg)
Gift Ideas For Gardeners [GARDEN GIFT GUIDE]
The best gift ideas for gardeners who have everything!
The Cottage Peach is reader-supported. When you purchase through links on our site, we may earn an affiliate commission at no additional cost to you. All opinions are our own.
We’re launching the holiday season with a celebration of our community’s favorite brands - featuring sustainable, timeless tools of the trade for every gardener on your gifting list. So whether you’re looking for gift ideas for gardeners or yourself, you’ll find the best garden gifts here!
FOR THE eco-concious:
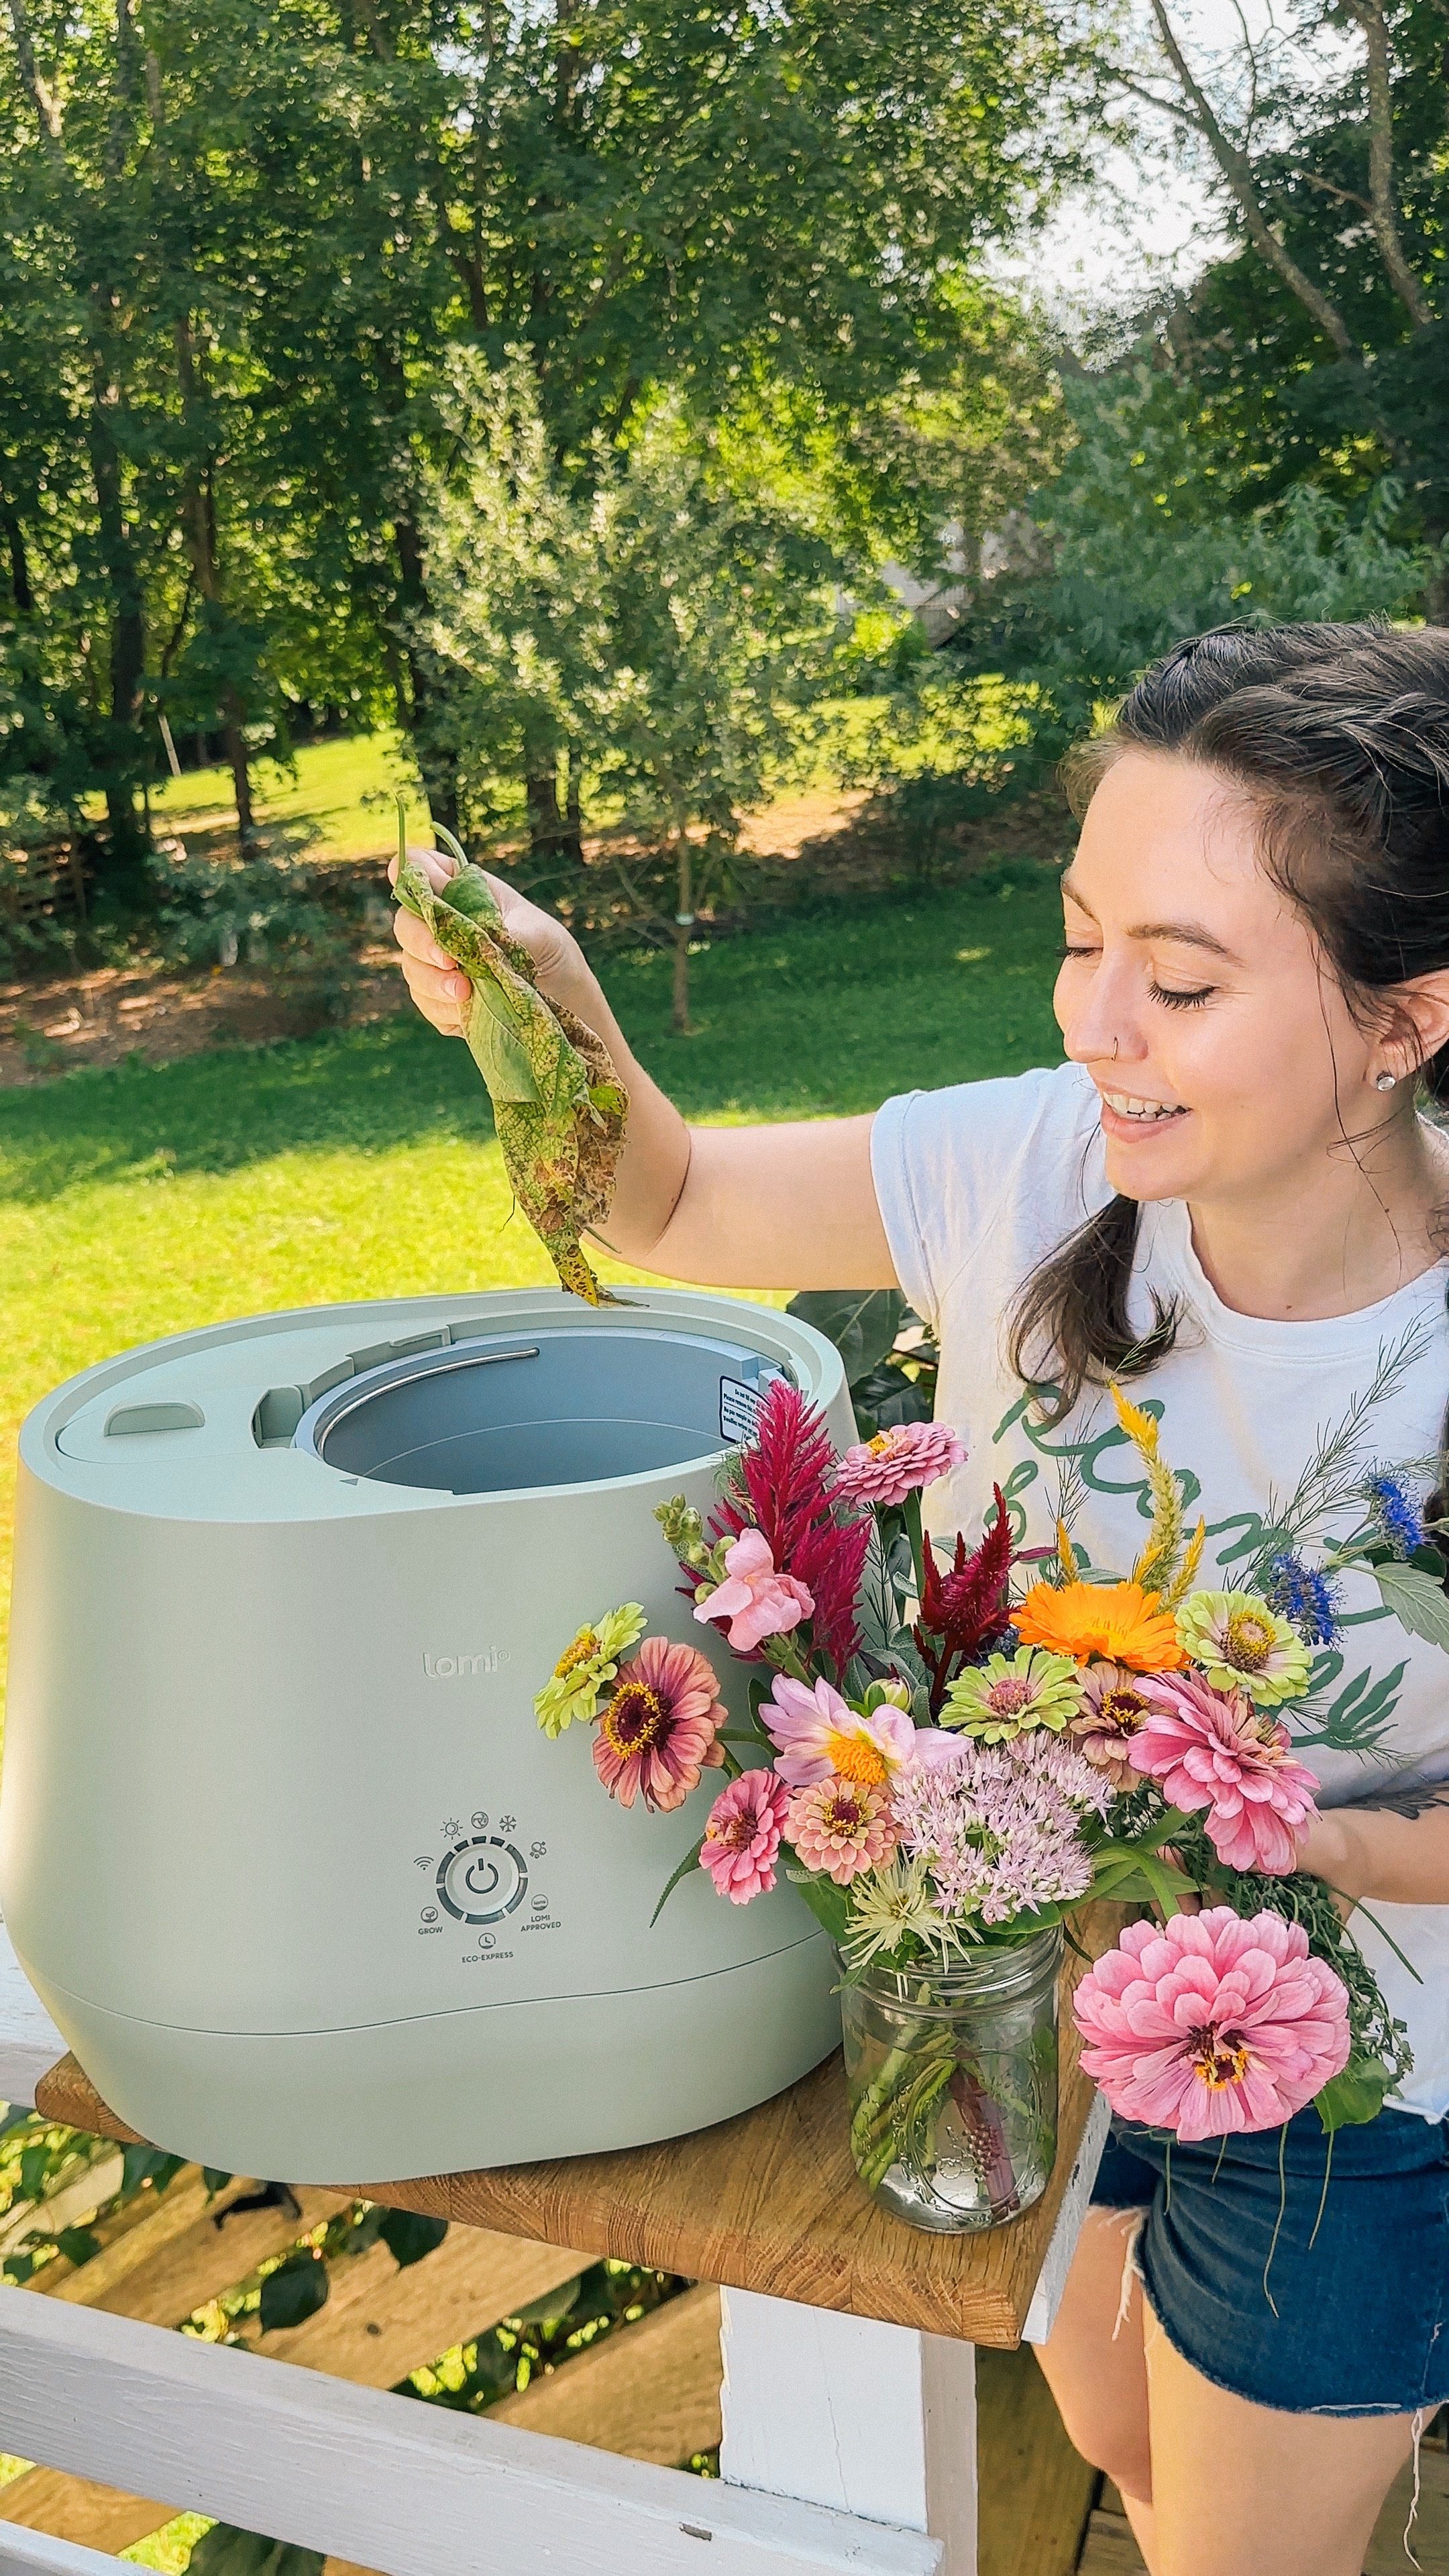
LOMI Bloom COMPOSTer
Lomi Bloom is the best way for anyone who thinks they can’t compost to break down your food waste into a nutrient rich dirt that can then be incorporated into your garden soil or potted plants.
Lomi Bloom accelerates the composting process, creating a valuable dirt that is extremely beneficial to plants, gardens, and lawns.
So how can an electric food composter reduce your carbon footprint? Pela did the research. With the help of third party audits, they found that despite the electricity consumed, Lomi Bloom can produce a net-lower carbon footprint than that same organic waste going to landfill.
Pela's primary goal is to improve the world's health by eliminating waste. They can't do that if the creation of Lomi Bloom negatively impacts the environment. So, they worked hard to ensure Lomi Bloom's production is climate neutral, and is proudly certified as a Climate Neutral company and B Corporation.
Check out my in-depth review of the new Lomi Bloom here.
FOR THE NON-TOXIC HOME COOK:
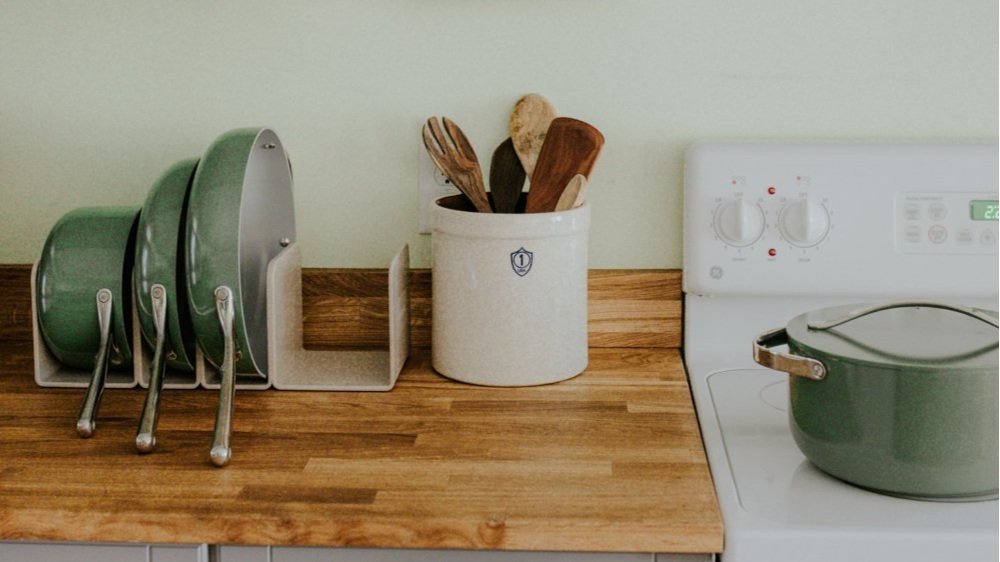
CARAWAY HOME
A popular material that has been used in the past in such non-stick cookware is Teflon. This synthetic chemical is also known as polytetrafluoroethylene (PTFE). Teflon is often used to coat a variety of products, including cookware, due to its frictionless qualities that provide a non-stick surface.
The issue with this material is that it uses perfluorooctanoic acid (PFOA) during its production. This chemical has been linked to numerous health conditions, including cancer, thyroid disorders, and more. Other chemicals, such as per-and polyfluoroalkyl substances (PFAS), are found in this material and can cause similar health issues as PFOA.
When cooking with non-stick cookware that has these chemicals, you run the risk of accidentally ingesting it. This can happen if the coating gets scratched, as it could flake off while in use and get consumed.
The Caraway Home cookware set includes the 10.5” fry pan, the 3 quart sauce pan, the 4.5 quart saute pan and the 6.5 quart dutch oven. You can also buy each piece individually. They just released minis of the fry and sauce pans too, which are perfect for smaller kitchen projects like easy-over eggs and gravy.
Click to read my full Caraway Home review
You can choose from a rainbow of colors including cream, navy, sage, perracotta and marigold. I went with the sage for our kitchen.
The full set also includes their custom magnetic pan rack and canvas lid holder, eliminating the frustration of trying to keep your pots and pans organized and separate while providing a beautiful system that can even be displayed on your countertop if you want.
Click here to activate an exclusive bundle discount
on the full cookware set
just for the cottage peach community!

FOR THE GARDEN OBSESSED:
CLICK & GROW
There are lots of indoor gardening kits you can buy, but here’s why I chose the Click & Grow Smart Garden vertical gardening system:
The Click & Grow Smart Garden uses a water reservoir that only needs to be filled about once a month, and Smart Soil blocks with nutrients and seeds already inside.
The seeds and soil blocks are completely non-GMO and pesticide free, and use a patented nano-material that automatically releases nutrients, oxygen and water your plants need to thrive.
The stylish modern design fits right into most homes, and I liked that the lights are included, and on an automatic timer so I wouldn’t have to fuss with anything or remember to turn it off and on every night.
click for my full review of the Click & Grow indoor gardening system
I also really liked the variety of plants offered by Click & Grow - they have over 75 different plants to choose from right now, including a seemingly endless array of swiss chard, arugula, sorrel, cress, mibuna, pak choi, and multiple varieties of kale and lettuce, bell peppers, strawberries, tomatoes, hot peppers and peas. Or you can start an indoor herb garden with rosemary, celery, mint, dill, parsley, lavender and many different kinds of basil. There’s flower seeds if you want to add some beauty and color. They also have seedless pods available so you can try your hand at growing anything you want.
Click here to shop Click & Grow gardens.
For the gardener who has everything:
Greenstalk
Make gardening accessible and enjoyable with this five-tier vertical planter proudly made in the USA. This vertical garden planter is perfect for growing a wide variety of small and large plants including vegetables, herbs, flowers, root crops, and more. GreenStalk’s patented watering system delivers fresh water to every tier at the same time so you don’t have to water each pocket by hand. No more weeding, no more crawling around on your hands and knees, and no more forgetting to water with the optional self watering system + bluetooth timer!
The 5-Tier GreenStalk Original Vertical Planter includes 30 total planting pockets each with a 10” depth and is made from high-quality, food-grade, UV-resistant, BPA, BPS & PVC-free plastic. They include a 5-year warranty on color and functionality of the planter. What makes this outdoor vertical garden unique is their patented top water reservoir for easier watering with 4 watering disks to easily distribute water.
Check out the different configurations and color combinations here and use code ‘dagny’ to take an additional $10 off!
FOR THE ZERO WASTE ADVOCATE:
PACKAGE FREE
Package Free Shop offers affordable zero waste replacements to items we use every day, from water bottles and food storage to clean laundry cleaning supplies, travel essentials, sustainable hosting and more. They are committed to reducing individual waste and methane emissions and believe it is their responsibility to offer their customers the most sustainable products available. And, as the name suggests, their products are sent to you with as little packaging as possible.
Click here to check out their collection of zero waste essentials

FOR THE OUTDOOR ENTHUSIAST:
BAREBONES LIVING
Barebones Living has everything you need for an outdoor adventure, with heirloom products built to last by a certified B Corp. Their collection includes everything you need for foraging, fire cooking, gardening and camping. They have an extensive range of thoughtfully crafted canvas travel bags, garden tools and knives, lanterns and outdoor furniture in earthy natural styles suited to anyone.
Click here to shop Barebones Living Garden tools


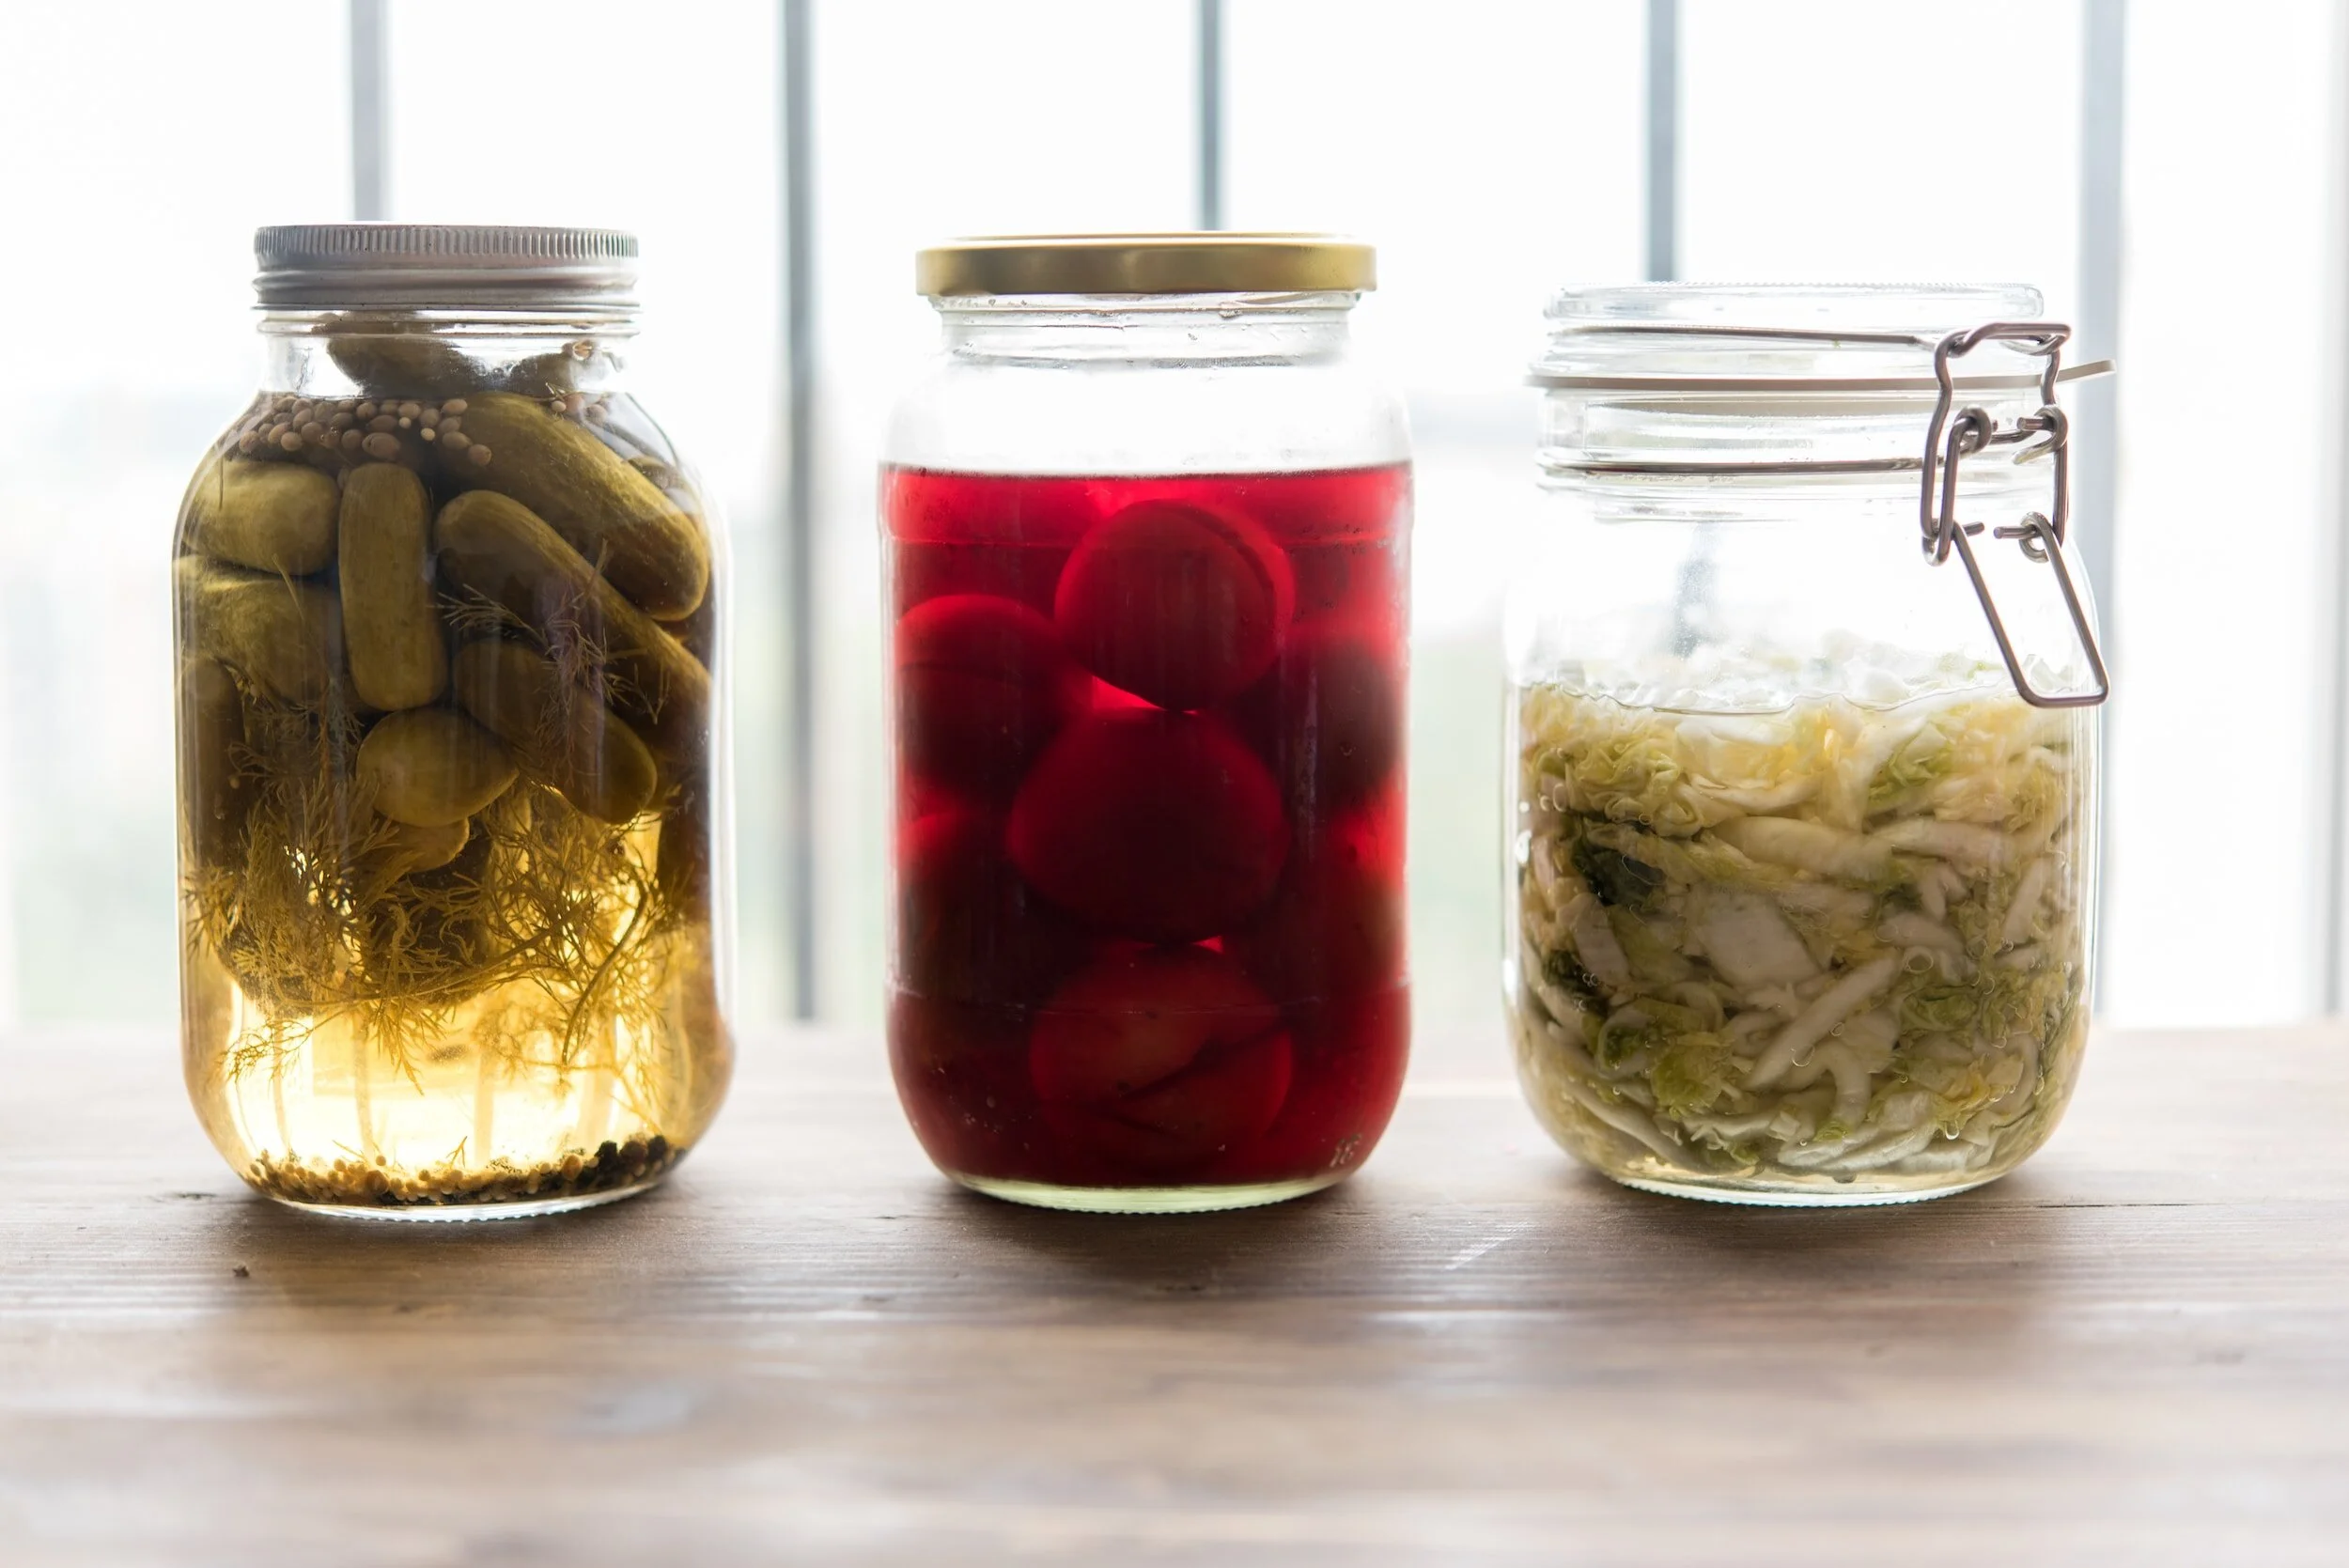
Preserving The Garden Harvest: Instructions For Fermenting Food
Fermenting foods is an ancient preservation technique that has been practiced for thousands of years. The origins of fermentation can be traced back to ancient civilizations such as Mesopotamia, Egypt, and China. People discovered that by allowing certain foods to sit in a controlled environment, they would undergo a natural transformation, becoming more flavorful, longer-lasting, and easier to digest.
Fermenting foods is an ancient preservation technique that has been practiced for thousands of years. The origins of fermentation can be traced back to ancient civilizations such as Mesopotamia, Egypt, and China. People discovered that by allowing certain foods to sit in a controlled environment, they would undergo a natural transformation, becoming more flavorful, longer-lasting, and easier to digest.
In the 19th century, scientists began to unravel the science behind fermentation. Louis Pasteur's discoveries on microorganisms and their role in fermentation laid the foundation for our modern understanding of the process. With the rise of industrialization, traditional fermentation methods started to be replaced by commercial food production methods. However, some fermented foods, such as sauerkraut, pickles, yogurt, and cheese, have maintained their popularity and are still widely consumed today.
In recent years, there has been a resurgence of interest in traditional food fermentation techniques. People have rediscovered the health benefits, unique flavors, and culinary possibilities of fermented foods. Home fermentation has become increasingly popular, with individuals fermenting their own vegetables, kombucha, kefir, and other fermented products.
Today, fermentation continues to be practiced worldwide, with a wide variety of fermented foods and beverages enjoyed in different cultures. From Korean kimchi to Indian dosa to German sauerkraut, fermented foods are celebrated for their taste, nutritional value, and contribution to gut health. The history of fermentation showcases the enduring appeal and importance of this ancient preservation method.
Is fermented food safe?
When prepared and stored properly, fermented foods are generally safe to consume. The fermentation process creates an environment that promotes the growth of beneficial bacteria and inhibits the growth of harmful bacteria. The acidic and/or alcoholic nature of fermented foods also helps prevent the growth of pathogens. However, it is essential to follow proper fermentation practices to ensure the safety of fermented foods. Ensure that all equipment, utensils, and fermentation vessels are thoroughly cleaned and sanitized before use. This helps prevent the growth of harmful bacteria during the fermentation process. Start with fresh, high-quality ingredients. Using fresh produce and ingredients free from spoilage or contamination reduces the risk of harmful bacteria being present in the fermentation.
Salt is commonly used in fermentation to control the growth of undesirable microorganisms. The appropriate concentration of salt or brine in the fermentation process helps create an environment that favors beneficial bacteria. Fermentation occurs within a specific temperature range. It is important to maintain the recommended temperature to promote the growth of beneficial bacteria and inhibit the growth of harmful ones. Different foods require different fermentation times. Follow a reliable recipe or guideline to ensure that the fermentation process is allowed to complete fully. Insufficient fermentation time may result in an incomplete transformation of the food, potentially leaving harmful bacteria present.
After fermentation, store the fermented foods in suitable containers and under proper conditions. Refrigeration or cool storage is often necessary to slow down further fermentation and maintain the quality and safety of the fermented products.
Is fermented food healthy?
During the fermentation process, beneficial bacteria, yeasts, or molds convert carbohydrates into acids, alcohols, or gases. This transformative process enhances the nutritional profile of foods and brings forth various health benefits. Fermented foods are a natural source of probiotics, which are live microorganisms that provide health benefits when consumed in adequate amounts. Probiotics help promote a healthy balance of gut bacteria, which is essential for digestion, nutrient absorption, immune function, and overall gut health.
The beneficial bacteria produced during fermentation aid in breaking down complex carbohydrates and proteins in food, making them easier to digest. This can be particularly helpful for individuals with digestive issues or those who struggle with certain foods.
Fermentation can also enhance the bioavailability of nutrients in food, making them more accessible and easily absorbed by the body. For example, fermentation can increase the availability of vitamins, such as B vitamins and vitamin K, as well as minerals like iron and calcium. The consumption of fermented foods can positively influence the composition and diversity of gut microbiota. A healthy gut microbiome is associated with improved digestion, strengthened immune function, reduced inflammation, and even mental health benefits.
The probiotics present in fermented foods can help support and strengthen the immune system. They stimulate the production of immune cells, regulate immune responses, and help maintain a balanced immune system.
How long does fermented food last?
Fermented vegetables like sauerkraut, kimchi, or pickles can last for several months when stored properly. They should be kept in airtight containers or jars and stored in the refrigerator. Over time, the flavor and texture of fermented vegetables may change, but they can still be safe to consume as long as there are no signs of spoilage, such as foul odors or mold.
Fermented dairy products like yogurt or kefir can last for a few weeks to a couple of months. The shelf life depends on factors such as the specific product, the fermentation process, and whether any additional preservatives are added. It is important to check the expiration date and follow storage instructions provided by the manufacturer.
Fermented beverages like kombucha or water kefir can last for several weeks to a few months when stored in the refrigerator. The exact shelf life can depend on the specific recipe, fermentation time, and the presence of any added ingredients. It is recommended to consume them within a reasonable timeframe for optimal flavor and quality.
Fermented condiments like soy sauce or fish sauce can have a long shelf life, often lasting for months or even years. They typically contain high salt or acid content, which acts as a natural preservative. It is important to store them in a cool, dark place and ensure the containers are tightly sealed.
Fermented grains and legumes, such as tempeh or miso, can have a longer shelf life compared to their non-fermented counterparts. When stored in the refrigerator, they can last for several months.
What foods can be fermented?
Fermentation is a versatile preservation method that can be used in a wide variety of food products, making your homestead more self-sufficient. Vegetables like cabbage (for sauerkraut and kimchi), cucumbers (for pickles), carrots, beets, radishes, green beans, and more. Fruits, including apples (for cider and vinegar), grapes (for wine), berries (for shrubs), and other fruits for fruit-infused vinegars. Milk can be fermented into yogurt, kefir, and cheese, and legumes such as soybeans (for soy sauce, miso, and tempeh), lentils, and chickpeas can be transformed into various fermented bean pastes and condiments. If you’re feeling thirsty, fermented beverages include kombucha (fermented tea), water kefir, milk kefir, traditional fermented beers, and of course wines. Even your sourdough starter is technically a fermented food!
Ways to ferment food
There are countless methods for fermenting foods, depending on the type of food to be fermented. Here are just a few of the more common methods of fermentation:
Vegetable Fermentation: This method involves submerging vegetables in a brine solution or using the vegetables' own juices to create an anaerobic environment. Examples include making sauerkraut, kimchi, and pickles.
Lacto-Fermentation: Lacto-fermentation is a process that relies on beneficial bacteria, specifically Lactobacillus, to convert sugars into lactic acid. It is commonly used for fermenting vegetables, such as cabbage for sauerkraut, or making lacto-fermented beverages like kefir.
Wild Fermentation: This method involves allowing naturally occurring microbes present on the food or in the environment to initiate the fermentation process. Examples include using wild yeasts for sourdough bread or fermenting fruits for natural wines.
Vinegar Fermentation: Fermentation can also be used to make vinegar. This process involves converting ethanol into acetic acid using acetobacter bacteria. It can be done with fruits, grains, or alcoholic beverages.
Dairy Fermentation: Fermentation is used to make various dairy products such as yogurt, kefir, sour cream, and cheese. Bacteria cultures are added to milk, which then ferment and transform the milk into these different products.
Alcohol Fermentation: Fermentation is widely used in the production of alcoholic beverages such as beer, wine, and cider. Yeast is added to sugars, which then convert the sugars into alcohol and carbon dioxide.
What is the difference between pickled and fermented?
Pickling is a process of preserving food by immersing it in a brine or vinegar solution. The food is typically cooked or blanched before being submerged in the pickling liquid. Fermentation, on the other hand, is a natural process that occurs when beneficial bacteria, yeasts, or molds break down the sugars or carbohydrates in the food, converting them into acids or alcohol.
Pickling preserves food through the use of acid, typically vinegar, which creates an acidic environment that inhibits the growth of spoilage-causing bacteria. The high acidity of the pickling solution helps preserve the food's texture, color, and flavor. Fermentation, on the other hand, preserves food through the action of beneficial microorganisms. These microorganisms produce lactic acid or alcohol as byproducts, creating an environment that prevents the growth of harmful bacteria.
Pickled foods have a distinct tangy or sour flavor due to the vinegar or acidic brine they are soaked in. The texture of pickled foods can vary depending on the specific food being pickled, but they tend to retain some crunchiness. Fermented foods often have a complex, tangy, or slightly acidic flavor profile. The fermentation process can also introduce unique flavors and aromas. The texture of fermented foods can range from crisp to soft, and they may develop a slightly "fizzy" or effervescent quality.
Pickled foods have a relatively long shelf life due to the high acidity of the pickling solution, which inhibits the growth of spoilage-causing bacteria. They can be stored for several months or even years when properly sealed and stored in a cool, dark place. Fermented foods also have a good shelf life, but the duration may vary depending on the specific food and the fermentation process. Some fermented foods, such as sauerkraut or kimchi, can be stored for several months in the refrigerator or even longer if kept in a cool environment.
Both pickled and fermented foods can offer health benefits. Pickled foods, especially those made with fermented pickling methods like lacto-fermentation, can contain beneficial probiotics that support gut health. Fermented foods are known for their rich content of beneficial bacteria, enzymes, and other compounds that can aid digestion, enhance nutrient absorption, and support overall gut health.
Troubleshooting issues with fermented food
Fermenting food at home can be a rewarding process, but occasionally, issues may arise. Mold growth on the surface of fermented food is a common issue. If you notice mold, it's essential to discard the entire batch to avoid any potential health risks. To prevent mold growth, make sure to maintain proper hygiene by sterilizing utensils, containers, and your hands before handling the ingredients. Additionally, ensure that the vegetables or fruits you use for fermentation are fresh and free from any visible signs of spoilage.
Fermented foods should have a pleasant aroma and taste. If you detect an off odor, such as a strong rotten smell, or a sour taste that is too intense or unpleasant, it may indicate that the fermentation process went wrong. This could be due to improper temperatures, unsanitary conditions, or the presence of undesirable bacteria. To prevent this, ensure that you follow proper fermentation techniques, maintain a clean environment, and use fresh, high-quality ingredients.
In some cases, excessive gas production during fermentation can cause pressure to build up in the fermentation vessel, leading to leaks or even explosions. To prevent this, use appropriate fermentation vessels designed to release excess gas, such as fermentation lids with airlocks. Burp the fermentation vessel periodically to release accumulated gas and prevent pressure buildup.
If the fermentation process is taking longer than expected or there is no sign of fermentation, it could be due to various factors. One common reason is the absence of beneficial microorganisms or yeasts required for fermentation. Using a starter culture or a small amount of a previously successful batch can help kick-start fermentation. Additionally, ensure that the temperature is within the optimal range for the specific fermentation process.
Fermented foods can undergo texture changes during the fermentation process. Sometimes, vegetables can become softer or lose their crispness. This is a natural part of the fermentation process as the enzymes and beneficial bacteria break down the cell walls. If you prefer a crunchier texture, consider fermenting for a shorter period or using vegetables that are naturally firmer.
Fermentation is a fun way to experiment with bringing different flavors to preserving your garden harvest, with added health benefits. Start small and before you know it you’ll be a fermentation pro!