
BACKYARD GARDENING MADE SIMPLE

Preserving The Garden Harvest: Instructions For Dehydrating Food
Dehydrated foods have gained popularity not only for their extended shelf life but also for their concentrated flavors and nutritional value. They are lightweight, convenient, and can be used in a variety of recipes or enjoyed as healthy snacks.
Dehydrating food is one of the oldest methods of food preservation, with a history that dates back thousands of years. The process involves removing moisture from food, which helps inhibit the growth of bacteria, yeast, and mold, thus extending its shelf life.

History of dehydrating foods
Dehydrated foods have gained popularity not only for their extended shelf life but also for their concentrated flavors and nutritional value. They are lightweight, convenient, and can be used in a variety of recipes or enjoyed as healthy snacks.
Dehydrating food is one of the oldest methods of food preservation, with a history that dates back thousands of years. The process involves removing moisture from food, which helps inhibit the growth of bacteria, yeast, and mold, thus extending its shelf life.
The practice of food dehydration can be traced back to ancient civilizations. Early methods involved air drying, sun drying, and wind drying. Various cultures, such as the Egyptians, Greeks, Romans, and Chinese, utilized these techniques to preserve fruits, vegetables, meats, and fish. Native American tribes in North America had their own methods of dehydrating food. They used the sun and wind to dry meats, fruits, and vegetables, often employing techniques like smoke drying or utilizing drying racks.
With the advent of the Industrial Revolution in the 18th and 19th centuries, advancements in technology led to the development of more efficient food dehydration methods. The invention of the electric food dehydrator in the 20th century further revolutionized the process by providing controlled heat and airflow.
Today, dehydrating food has become more accessible to individuals with the availability of home food dehydrators. These appliances allow for precise temperature control, ensuring optimal results in drying a wide range of foods, including fruits, vegetables, herbs, jerky, and even making fruit leathers.
Is dehydrated food safe?
Yes, when done properly, dehydrated food is safe to consume. Dehydrating food removes moisture, which helps inhibit the growth of bacteria, yeast, and mold that can cause spoilage. It effectively preserves the food and extends its shelf life. However, it's essential to follow proper food safety practices when dehydrating food to ensure its safety. Begin with fresh, high-quality ingredients. Wash fruits, vegetables, and herbs thoroughly before dehydrating to remove any dirt, pesticides, or contaminants. Keep your hands, utensils, and dehydrator clean during the entire process.
Different foods have different optimal drying temperatures and times. It's important to follow guidelines specific to each food type to ensure proper dehydration. Make sure the food is adequately dried to a point where it is crispy, brittle, or leathery, depending on the desired texture. Properly dried food should not feel moist or have any signs of moisture when stored.
Once the food is fully dehydrated, store it in airtight containers or vacuum-sealed bags to protect it from moisture and air. Proper storage helps maintain the quality and safety of the dehydrated food.
Is dehydrated food healthy?
Dehydration primarily affects the water content of food, so many of the nutrients remain intact. However, some heat-sensitive vitamins like vitamin C and certain enzymes may be slightly reduced during the dehydration process. Dehydrated foods are lightweight, compact, and often require no refrigeration. This makes them an excellent choice for on-the-go snacks, camping trips, or emergency food supplies.
How long will dehydrated food last
When properly dehydrated and stored in suitable containers, dehydrated food can have an extended shelf life. Here are some general guidelines:
Dehydrated fruits and vegetables: When stored in airtight containers in a cool, dark, and dry place, dehydrated fruits and vegetables can typically last anywhere from 6 months to 1 year. Some fruits with higher sugar content, like raisins or dried apricots, can have an even longer shelf life.
Dehydrated meats and jerky: Dehydrated meats, such as beef jerky, can last for several months to a year when stored properly. It's important to ensure that the meat is fully dehydrated, free from moisture, and stored in airtight containers or vacuum-sealed bags.
Dehydrated herbs and spices: Properly dried and stored herbs and spices can maintain their quality for up to 1-3 years. Store them in airtight containers away from heat, light, and moisture to preserve their flavor and potency.
To maximize the shelf life of dehydrated food, ensure complete dehydration: Make sure the food is thoroughly dehydrated to remove all moisture. Moisture content is a key factor in determining shelf life. Store dehydrated food in airtight containers, such as glass jars, food-grade plastic containers, or vacuum-sealed bags. This helps to prevent moisture, air, and pests from entering. Keep dehydrated food in a cool, dark, and dry place. Avoid exposure to direct sunlight, heat sources, and humidity, as they can degrade the quality and shorten shelf life. Clearly label containers with the date of dehydration and use the oldest items first. Rotate your stock regularly to ensure you consume the oldest items before they start to lose quality.

What foods can be dehydrated?
Fruits: Apples, bananas, strawberries, blueberries, mangoes, pineapples, apricots, peaches, cherries, and more.
Vegetables: Tomatoes, bell peppers, carrots, onions, mushrooms, green beans, peas, corn, kale, spinach, zucchini, and more.
Herbs and spices: Basil, oregano, thyme, rosemary, parsley, mint, cilantro, dill, garlic, ginger, turmeric, and more.
Meats: Beef, poultry (chicken, turkey), fish, and jerky (made from various meats).
Dairy products: Cheese can be dehydrated to create powdered cheese for extended shelf life.
Snacks: fruit leather, kale chips, and more.
Ways to dehydrate food
Air drying: This is the simplest and most traditional method of dehydrating food. It involves placing sliced or chopped food on drying racks or screens in a well-ventilated area, preferably with good airflow and low humidity. It is a slower process compared to other methods, but it requires no special equipment.
Sun drying: Similar to air drying, sun drying involves placing food in direct sunlight to remove moisture. It is a popular method in regions with hot and dry climates. However, it requires consistent sunlight and protection from pests.
Oven drying: Using your oven is a convenient way to dehydrate food. Set the oven to its lowest temperature (ideally around 140°F or 60°C) and place the sliced or chopped food on baking sheets or wire racks. Keep the oven door slightly ajar to allow moisture to escape. This method is faster than air drying but not as energy-efficient.
Dehydrator: A food dehydrator is a specialized appliance designed for efficient and consistent food drying. It uses low heat and airflow to remove moisture from food. Dehydrators have multiple trays or shelves where you can place the food in a single layer. They often come with adjustable temperature settings and timers for precise control.
Microwave drying: While not as commonly used for dehydrating food, a microwave can be used for small quantities or quick drying. Place the food on microwave-safe plates or trays and use the microwave's defrost or low power setting to dry the food in short intervals, checking frequently to prevent overheating.
Troubleshooting issues with dehydrated food
Inadequate drying: If your food is not fully dehydrated, it may spoil or develop mold during storage. Ensure that you follow the recommended drying time and temperature for each type of food. Adjust the drying time if needed, considering factors like the thickness of the slices, humidity levels, and your specific dehydrator or drying method.

Over-drying: On the other hand, over-drying can result in food that is overly dry and brittle. This may lead to loss of flavor, texture, and nutrient content. To avoid over-drying, monitor the drying process closely and follow the recommended drying times. You can conduct periodic checks to determine the desired level of dryness.
Uneven drying: Sometimes, certain pieces of food may dry faster than others, resulting in uneven dehydration. This can happen if the food pieces are not of uniform size or thickness. To overcome this, try to slice or chop the food into consistent sizes and arrange them on the drying trays accordingly. Rotate the trays during the drying process to ensure even airflow and consistent drying.
Sticking or clumping: If the food pieces stick together or form clumps after drying, it may be due to excess moisture or inadequate spacing during the drying process. Ensure that you space the food pieces evenly on the drying trays, allowing sufficient airflow around each piece. If necessary, separate clumped pieces gently after drying.
Loss of color or flavor: Some foods may experience color or flavor changes during the dehydration process. To minimize these issues, consider pre-treating the food before drying, such as blanching vegetables or soaking fruits in lemon juice or other acidic solutions. Properly storing the dehydrated food in airtight containers or vacuum-sealed bags can also help preserve color and flavor.
How to use dehydrated food
Dehydrated food is incredibly versatile and can be used in a variety of ways. Dehydrated fruits make for delicious and healthy snacks. They can be enjoyed on their own or mixed with nuts, seeds, or granola for a homemade trail mix. Dehydrated vegetables can be used as crunchy and nutritious snacks too. Dehydrated vegetables and meats are perfect additions to soups, stews, and chili. Simply rehydrate them in hot water or broth and add them to your favorite recipes. They will infuse the dishes with concentrated flavors and nutrients. Dehydrated herbs, spices, and vegetables can be ground into powders and used as seasonings to enhance the flavor of your dishes. Sprinkle them on roasted vegetables, pasta, popcorn, or homemade sauces.
Read more from this preserving the garden harvest series:
PRESERVING THE GARDEN HARVEST: INSTRUCTIONS FOR FREEZING FOOD
PRESERVING THE GARDEN HARVEST: INSTRUCTIONS FOR PICKLING FOOD
PRESERVING THE GARDEN HARVEST: INSTRUCTIONS FOR FERMENTING FOOD
PRESERVING THE GARDEN HARVEST: INSTRUCTIONS FOR WATER BATH CANNING


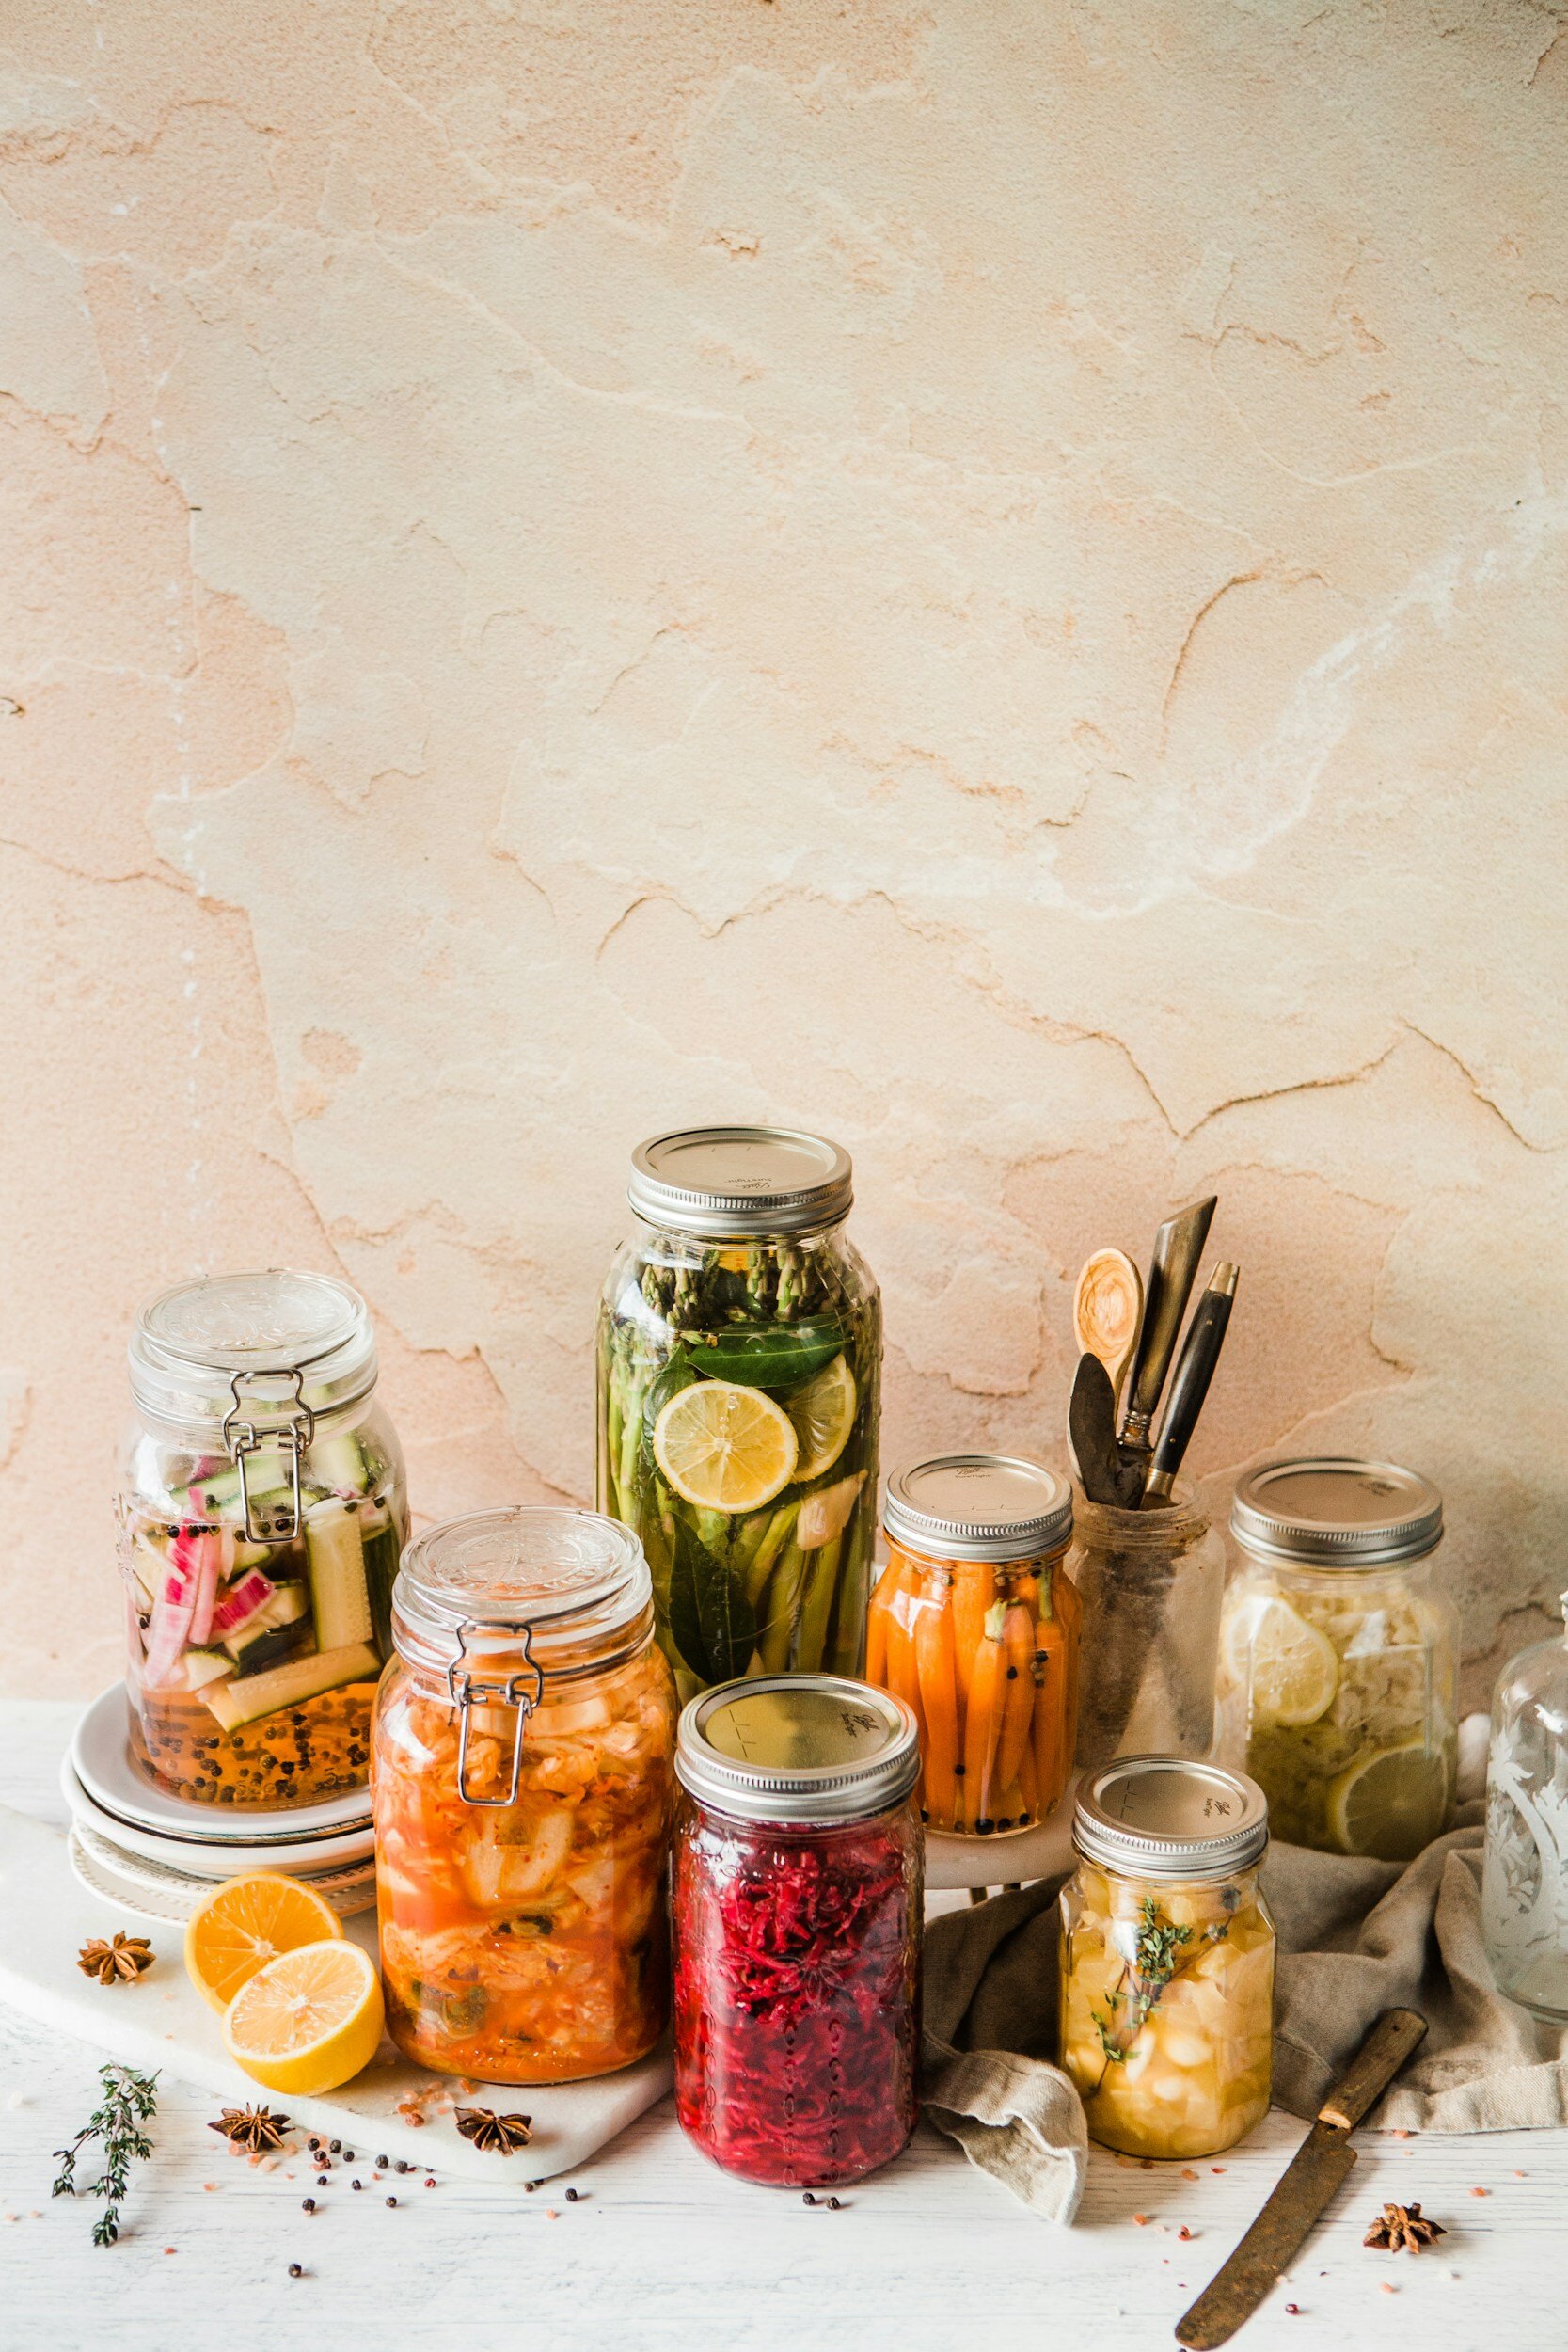

Preserving The Garden Harvest: Instructions For Water Bath Canning
Water bath canning is a home food preservation method that involves processing jars of high acid foods in a large pot of boiling water. The process helps kill any bacteria, yeasts, or molds present in the food and creates a vacuum seal to prevent spoilage. It is a safe and accessible method for canning fruits, jams, jellies, pickles, and other high acid foods. And it doesn’t have to feel intimidating! In this guide, I will show you exactly how to water bath can your garden harvests for long term food storage.
What is water bath canning?
Water bath canning is a home food preservation method that involves processing jars of high acid foods in a large pot of boiling water. The process helps kill any bacteria, yeasts, or molds present in the food and creates a vacuum seal to prevent spoilage. It is a safe and accessible method for canning fruits, jams, jellies, pickles, and other high acid foods. And it doesn’t have to feel intimidating! In this guide, I will show you exactly how to water bath can your garden harvests for long term food storage.
Water bath canning has a long history that dates back to the early 19th century. The method was developed as a way to safely preserve and store food without the need for refrigeration or other modern preservation techniques.
The practice of using heat to preserve food can be traced back even further, with evidence of similar techniques being used by ancient civilizations. However, the specific process of water bath canning as we know it today began to take shape in the 1800s.
One of the key figures in the development of water bath canning was the French confectioner and brewer Nicolas Appert. In 1809, Appert invented a method of sealing food in glass jars, which he called "appertisation." He discovered that by heating food in sealed containers, it could be preserved for long periods without spoiling. His work laid the foundation for modern canning techniques.
In the United States, water bath canning gained popularity in the mid-19th century with the publication of various cookbooks and guides on home canning. One of the most influential figures in promoting canning methods was Maria Parloa, a renowned cookbook author and educator. Her book "The Appledore Cook Book" published in 1872 included detailed instructions for water bath canning.
During World War II, home canning experienced a resurgence as people sought ways to preserve food during rationing and shortages. Government programs and educational campaigns were launched to encourage home canning and provide information on safe canning practices.
Is water bath canning safe?
Yes, when done correctly and following recommended guidelines, water bath canning is a safe method of food preservation. Water bath canning is suitable for high acid foods, such as fruits, jams, jellies, pickles, and some tomato products. The high acid content in these foods creates an environment that inhibits the growth of harmful bacteria, such as Clostridium botulinum, which can cause botulism.
To ensure safety when water bath canning, it is important to follow tested recipes from reliable sources, such as government extension services, reputable canning guides, or trusted cookbooks. These recipes are specifically designed to provide the necessary acid levels and processing times to destroy any potential bacteria and ensure the safety of the preserved food.
Additionally, proper preparation and handling of jars, lids, and equipment are essential. This includes sterilizing jars and lids before filling them, using new lids for each canning session, and carefully following the instructions for filling and sealing the jars. It's also important to monitor and maintain the correct water bath canning temperature throughout the processing time.
WHat’s the difference between Water Bath Canning and Pressure Canning?
Some things like low-acid vegetables and meats can only be pressure canned due to their pH levels or density. These types of foods require the high temperatures and pressure generated in a pressure canner to ensure their safety. On the other hand, water bath canning is a suitable method for preserving high acid foods like fruits, pickles, and jams. The acidity in these foods inhibits the growth of harmful bacteria and makes them safe to can using the water bath method. It's important to note that you cannot substitute water bath canning if a recipe specifically calls for pressure canning. The two methods differ significantly in terms of temperature and pressure, and swapping them can compromise the safety and shelf life of the preserved food. To ensure food safety and quality, always follow the recommended canning method indicated in the recipe and consult reliable canning resources for guidance.
Water bath canning safety tips
Hot Food, Hot Jars
This means that your canning jars should be properly sanitized and preheated before filling them with your prepared hot food. Preheating the jars helps prevent thermal shock and ensures proper sealing of the lids. Additionally, using hot food minimizes the time that the filled jars spend at lower temperatures, reducing the risk of bacterial growth.
Be Clean To Be Safe
Cleanliness is key to prevent any contamination that could compromise the safety and quality of your canned goods. It is essential to have clean hands, clean jars, clean pots, clean utensils (preferably metal), and clean towels. This includes properly washing and sanitizing your hands before handling any food or equipment, thoroughly cleaning and sterilizing your canning jars, using clean pots for heating water, and using metal utensils that are easier to sanitize.
Trust Your Source
When it comes to canning, it is important to trust your source of information and recipes. Canning is a precise process that requires specific pH levels, processing times, and techniques to ensure food safety. It is not recommended to "wing it" or rely on untested recipes. Choose reliable and reputable sources that have a good understanding of the canning process, such as government extension services, trusted canning guides, or reputable cookbooks. Following tested recipes from trusted sources will give you peace of mind knowing that you are preserving your food safely.
Why should you use bottled lemon juice when canning?
Many canning recipes will call for lemon juice to increase the acidity of the recipe when the food itself does not have a high enough acid content to safely can. Bottled lemon juice will ensure you meet the specific acid levels required, since these acid levels can vary in fresh fruit. Vinegar may also be used to increase the acidity of foods. Prepare the recipe as written and do not improvise the amount of acid used.

SUPPLIES NEEDED FOR CANNING
LARGE POT + RACK
This will be your water bath canner. The rack keeps the jars off of the bottom of the pot. There are canning specific pots available to buy but any pot large enough to hold your jars and be covered by at least an inch of water will work.
POT TO PREPARE YOUR FOOD IN
Often the food you are cooking may expand as it boils, so choose a pot much larger than you think you’ll need to allow a lot of extra space. Since we are canning high-acid foods, you should not use aluminum or cast iron as they are reactive. Stainless steel is the best choice, with a thick bottom to prevent sticking and burning.
JAR LIFTER
This tool makes it safe and easy to move your extremely hot and full jars from counter to canner and back again.
WIDE FUNNEL
For filling your jars without making a mess on the outside of the jar or rim.
TOWELS
A stack of very clean dishtowels for spills will make all the difference.
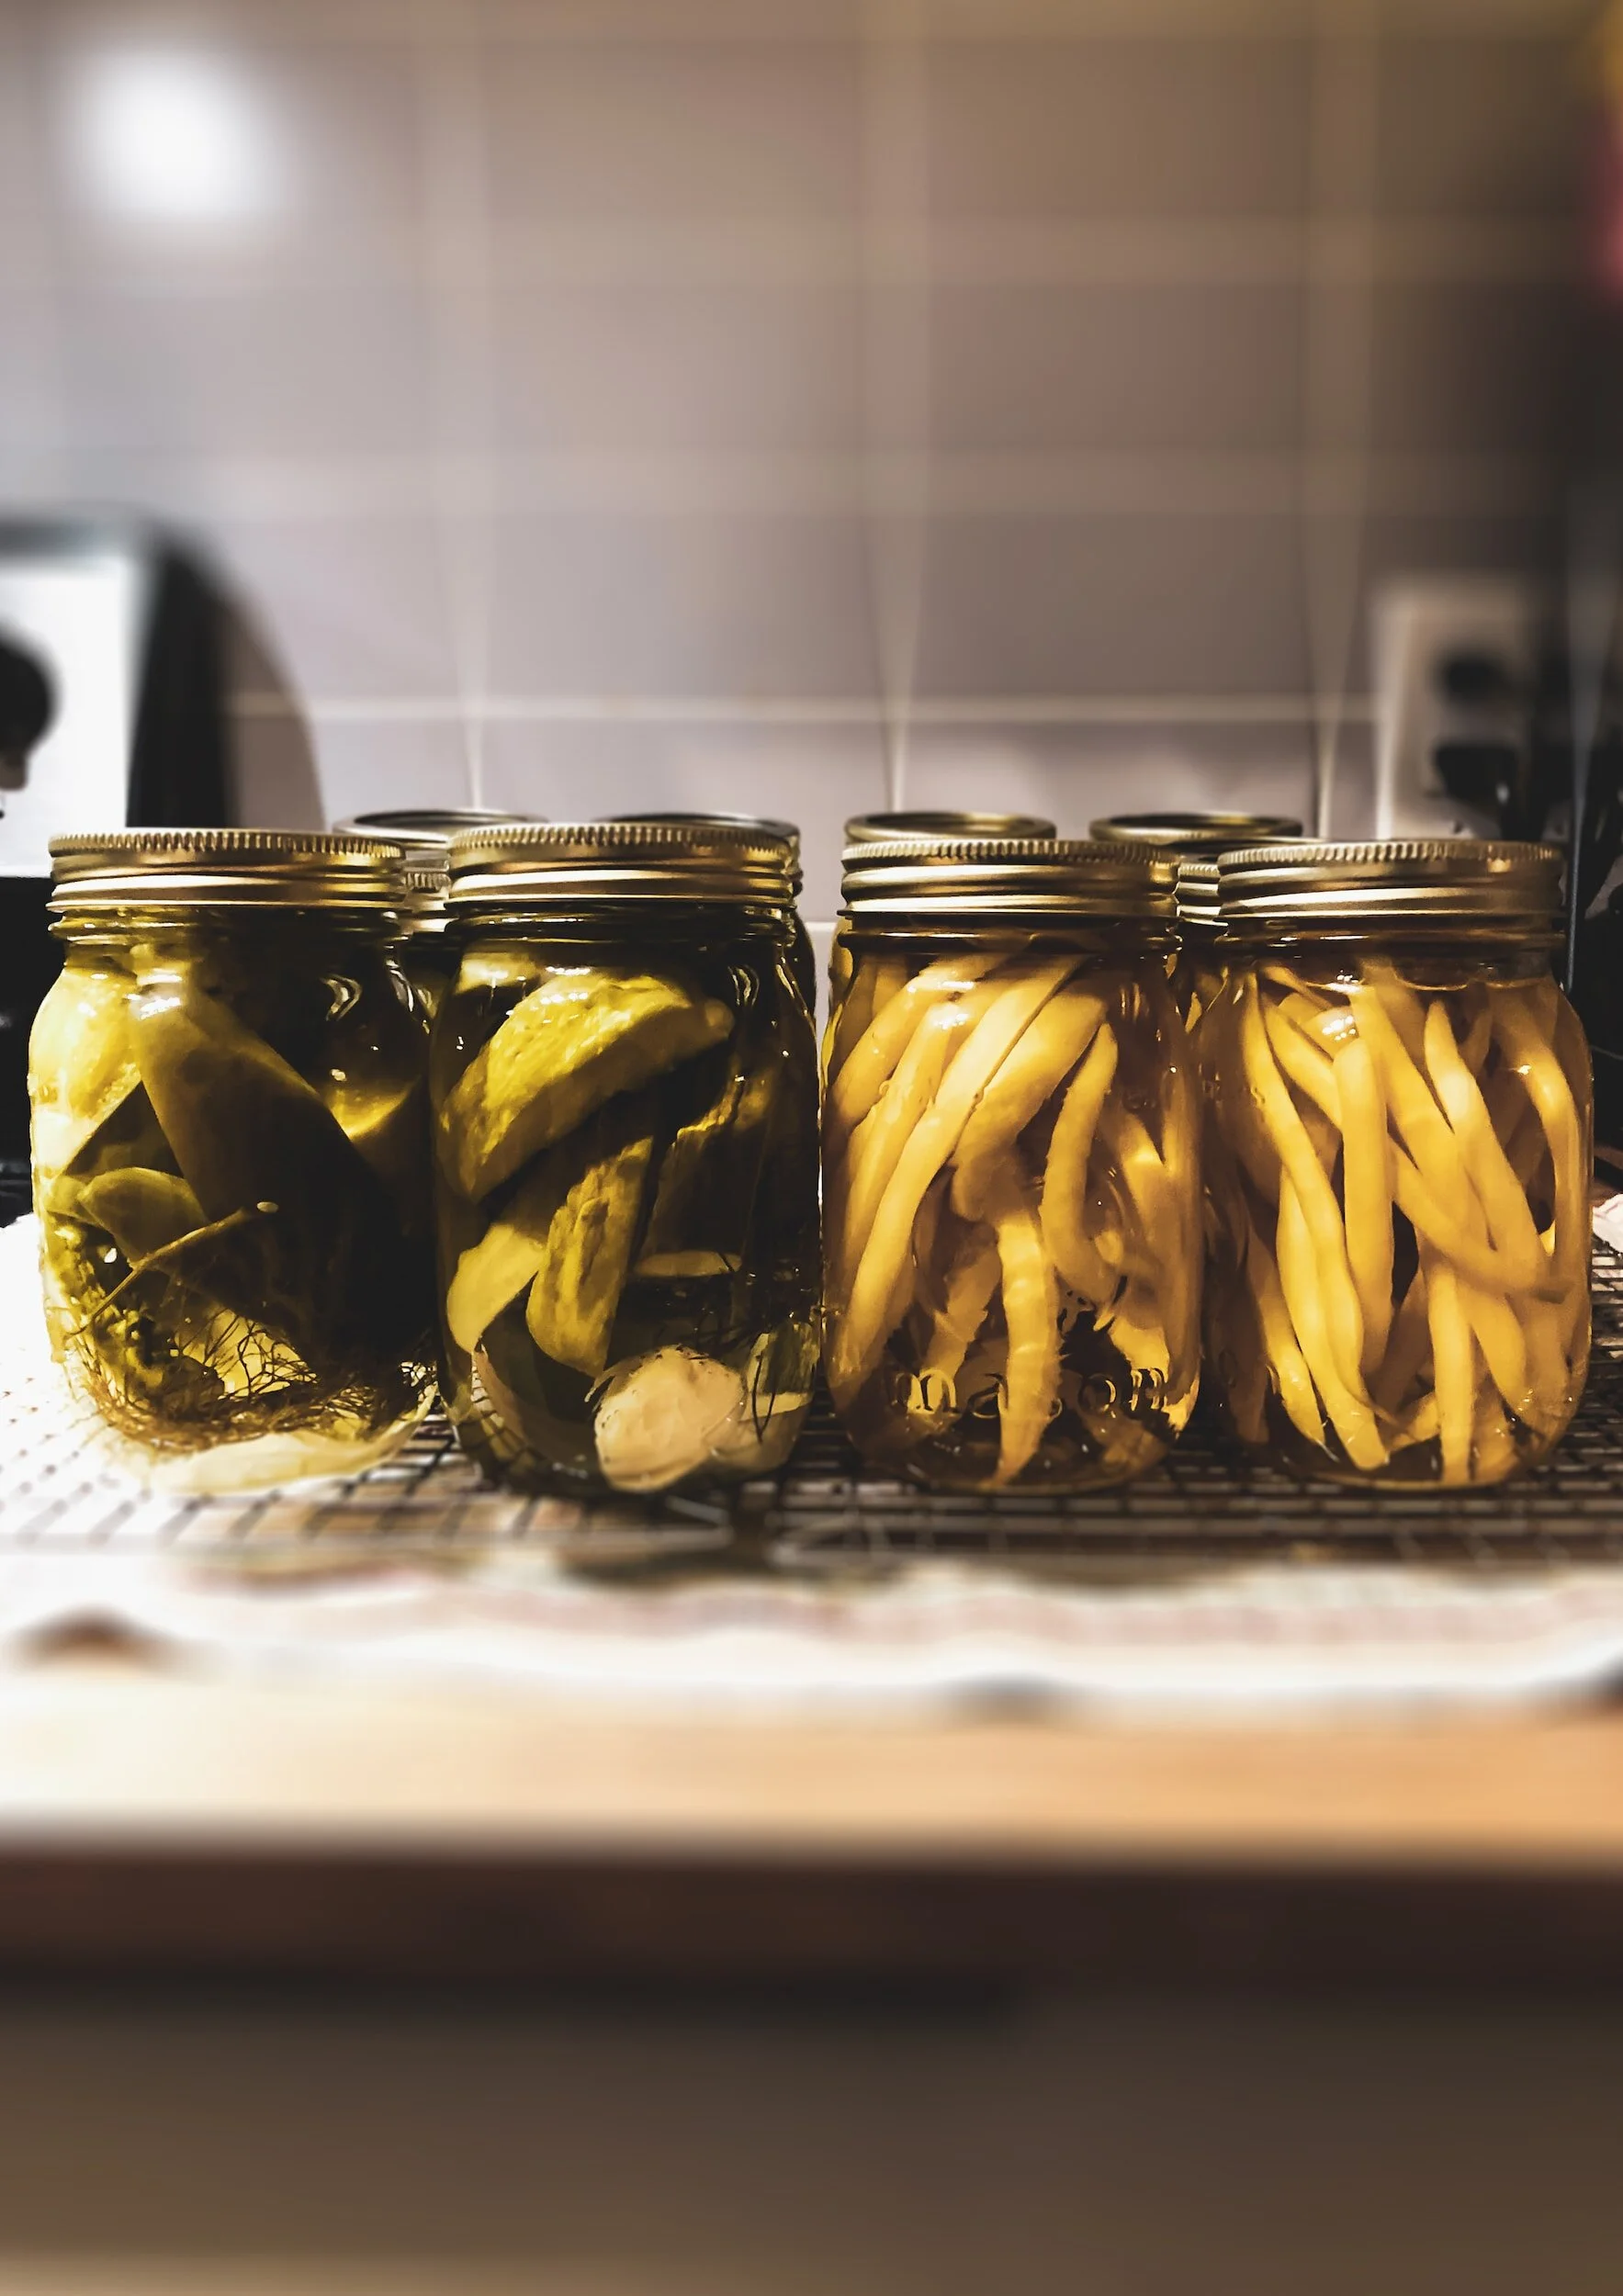
CANNING JARS
An obvious one, but there are many sizes and brands, and each size will require a different processing time. Jars can be used but canning lids usually are not.
TWO PIECE CANNING LIDS
You will have a flat lid which may only be used once and a ring which can be reused for as long as it is not rusty or damaged. Flat lids can be purchased separately from rings and jars, so you can reuse last years jars and rings and just replace the lid.
BASICS OF WATER BATH CANNING
The exact steps you follow will vary depending on the recipe you are using, but the fundamentals will stay the same. Preparation in advance will make all the difference in whether your first canning experience is chaotic or calm.
Set aside your rings and lids, and place your empty jars into your canner. Cover the jars with water, at least one inch above the top. Bring this to a boil and then simmer to sanitize the jars.
While the jars are simmering, prepare your recipe.

Remove the jars from the water and using your wide funnel fill the jars with the prepared food. Leave the appropriate amount of headspace (empty room at the top) specified in your recipe for expansion.
Use a non-metallic tool, such as a bubble remover or a plastic spatula, to gently remove any trapped air bubbles in the jars.
Wipe any food splatter from the rim of the lid with your clean dishtowel and cover the jars with the lids and rings, twisted just finger tight.
Place your full jars back in the water bath, cover it and bring back to a boil. The processing time will depend on the type of food being canned and the altitude of your location. Follow the processing time indicated in the recipe to ensure the food is safely preserved.
Remove the jars from the water bath and place them on a towel-lined area of the countertop where they can cool for 24 hours, so as not to disturb the sealing process. The jar lids will pop as they seal.
After 24 hours has passed, check the seal by removing the ring and holding the jar by its lid. The lid should be on very firmly. If it didn’t seal - your food is still edible, but it is not shelf stable and must be kept in the fridge and eaten right away.
Label your jars with the contents and date and store in a cool dark place. You should not put the rings back on at this point - they aren’t necessary once the jar has formed a proper seal, and could prevent you from noticing a false seal.
High acid canned food is good for about one year when properly stored.
Read more from this preserving the garden harvest series:
PRESERVING THE GARDEN HARVEST: INSTRUCTIONS FOR FREEZING FOOD
PRESERVING THE GARDEN HARVEST: INSTRUCTIONS FOR PICKLING FOOD
PRESERVING THE GARDEN HARVEST: INSTRUCTIONS FOR FERMENTING FOOD
PRESERVING THE GARDEN HARVEST: INSTRUCTIONS FOR DEHYDRATING FOOD

Extend Your Garden Season With These Techniques
With your garden prepped for winter, you may be ready to turn in and take a break from growing for a few months. But if you’re like me and the idea of the garden totally ending breaks your heart, there’s a few different ways we can extend our growing season and keep harvesting fresh food from the garden all year round. I’ll be using all of these methods in my own garden to grow cold loving crops while the snow falls.
With your garden prepped for winter, you may be ready to turn in and take a break from growing for a few months. But if you’re like me and the idea of the garden totally ending breaks your heart, there’s a few different ways we can extend our growing season and keep harvesting fresh food from the garden all year round. I’ll be using all of these methods in my own garden to grow cold loving crops while the snow falls.
How To Use Row Cover
There’s a good chance you have some plants already in the ground that can withstand cooler temperatures and give you harvests well into winter with a little planning. Plants in the brassica family for example have the ability to produce a type of natural anti-freeze that converts into sugars and makes the plants taste even better after a frost. But you can extend their life even further by utilizing frost covers which act as a cozy winter blanket and keep out the wind chill and moisture that causes the most damage to these cold hardy plants. These covers act as a shield against harsh frost, preserving the warmth around the plants and preventing frost damage. It's a simple yet effective measure to safeguard your garden and extend your harvest.
Benefits of Mulch
We aren’t the only ones who benefit from an extra blanket or two in the winter months. A layer of mulch such as wood chips, pine needles or straw around perennial plants acts as insulation, protecting their roots from extreme temperatures. It also helps retain moisture and suppresses weeds, contributing to the overall well-being of your garden beds during the winter months. A good rule of thumb is to use four to six inches of mulch around the plants - just don’t press the mulch up against the plant itself. We are insulating the roots, not the aboveground parts.
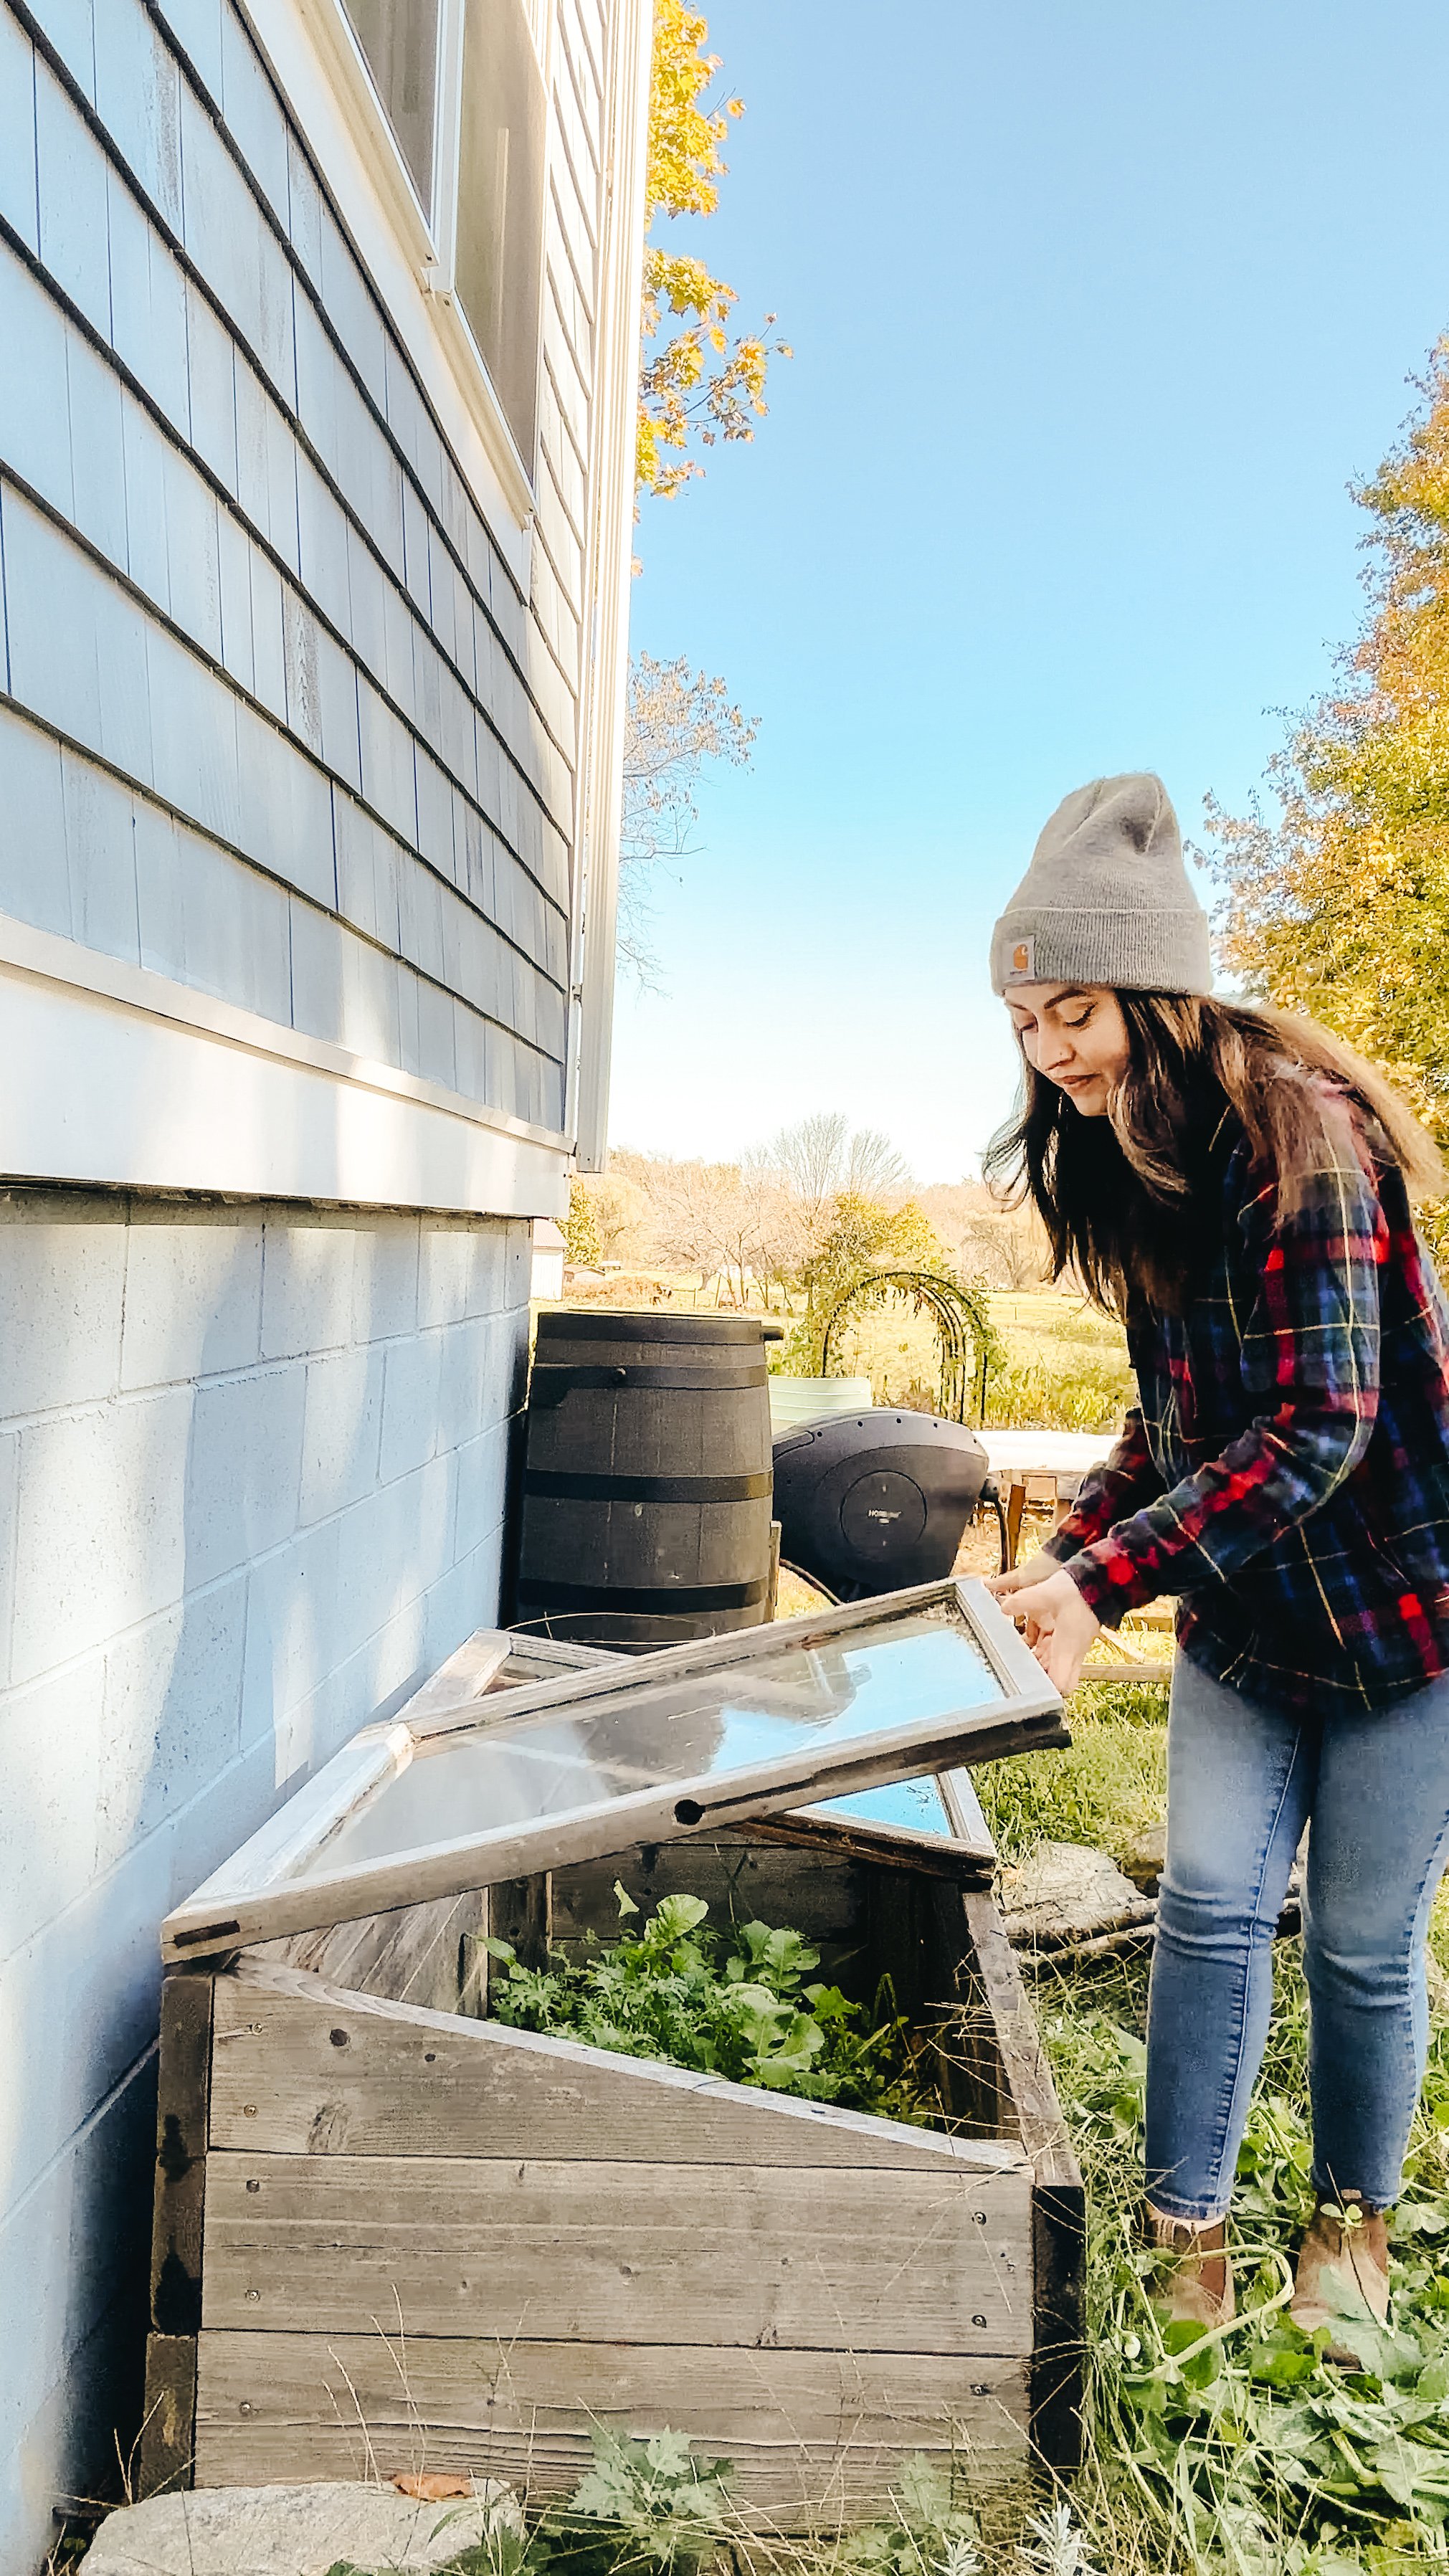
Using cold frames/cloches
A cold frame works by creating something like a mini-greenhouse, trapping warm air through solarization inside of the box and insulating the plants within from the worst that winter has to offer. We control the temperature inside of the cold frame with a simple vent - the hinged lid can be propped open with different sized sticks to allow excess heat to escape on warmer days, but for the most part in our deep New England winters the lid stays firmly shut until we trudge through the knee deep snow to harvest.
If you have the time and physical ability, building a cold frame yourself is absolutely the most economical solution. Purchasing one ready-made can cost you anywhere from $60-$500 and quality issues on the low end of that budget will prevent you from getting many years of use out of it. Meanwhile, if you build one yourself it can be done for far less than the low end of that range, and produce an end result that will be sturdy enough to continue providing shelter to your winter crop for years to come. While old windows can be fragile and prone to breaking, when they can be found for free I still find it a better option than a new piece of corrugated plexiglass.
DIY CATTLE PANEL Hoop House
Hoop houses are used by growers in all types of climates for many different reasons - but the main goal is climate control, whether that is to make the growing area colder using the artificial shade created or warmer by taking advantage of the insulating properties of the covered area to effectively move your grow zone south.
If you’ve never seen a hoop house before, you probably have and just didn’t realize it! The basic idea is that you form some sort of rounded roof structure using metal rods, cattle panel or pvc that bends down and is anchored to the ground and cover that with heavy duty greenhouse plastic that lets light in but keeps wind out and provides some insulation.
You can build your own greenhouse easily in an afternoon with just the help of one other person, and you don’t need any special skills or carpentry experience either. The hardest part is honestly just getting the cattle panel - they are huge, so unless you have a truck you’ll probably need to rent something or have them delivered. Click here for my full guide to build your own DIY cattle panel hoop house.

Cold Tolerant Plants
Of course, with any of these methods you still won’t create tropical conditions for your plants if you live in a colder climate. So it’s important to stick with plants that are known to tolerate temperatures down to about thirty degrees fahrenheit. Here’s a list of everything I’ll be growing this winter:
Gai Choy Mustard
This mustard matures in 40-60 days and grows anywhere from six to ten inches wide and ten to twelve inches tall. This is a head forming traditional Chinese mustard with a mild flavor when it’s young.
Bloomsdale Spinach
This is a dependable, open pollinated variety that matures in 28-45 days and grows about six to eight inches tall with dark green, thick and curly leaves. It’s a prolific grower with tender leaves and rich flavor.
Common Sorrel
This green has been popular in France and England for centuries but for some reason it isn’t as popular in the states. It matures in 60 days with bright green crinkled leaves that have a lemony spinach flavor.
Easter Egg Radish
This blend has red, white, pink purple and bi colored radishes that mature in just 30 days. Easter egg is a mild and crisp radish that forms small one inch globe shaped roots, so if you don’t like the spiciness of other radishes you may want to try this one.
French breakfast radish
These radishes are super mild - almost sweet and mature in 28 days. The root is scarlet with a white tip about 1 inch around and 2 or 3 inches long.
Spanish black radish
This is an extra large medium spicy radish that matures in 60-70 days with a black exterior and white interior. The globes are about 3-4 inches in diameter when mature. Since this is a winter radish it needs shortening day length and cool temps to mature, so this one gets planted later than the other radish varieties I’m growing.

Bok Choy Choko
I can’t live without this for my stir fries and this variety is so good and tender when harvested when it’s only about four inches tall. It matures in around 50 days and has smooth, leafy blades in a cluster with crisp, pale green stems. Choko was bred to be small and heat tolerant.
Big Seeded Mache
Mache can survive temperatures down to ten degrees fahrenheit and matures in 60 days. It’ll grow to be about six inches tall and eight inches in diameter with dark green, spoon shaped soft leaves in a loose rosette.
Tokyo Long White Bunching Scallion
These Japanese scallions are long, slender, mild and mature in 65 days. They are sweet enough to use in pretty much anything from salads, soups, and stir-fry dishes and grow about 16-18 inches tall.
Olesh Tres Fine Endive
This is a mildly bitter flavored green with a really interesting frilly texture that matures in 42-70 days. It grows about six inches wide and tall in rosettes with broad crinkled green leaves.
Ruby Red Swiss Chard
Chard can withstand moderate freezes and matures in 50-60 days, growing about 24 inches tall and eighteen inches wide with dark green crinkled leaves, red veins and stalks. I use this the same way I use spinach
Danvers Carrot
This variety was actually created an hour from where I live way back in the day when growers were looking for a carrot with improved yield, color and uniformity. It matures in about 65 days. It’s a sweet classic carrot that’s resistant to cracks and splits and roots grow about six inches long/
Astro Arugula
I said I would never grow this, but there’s very few foods I actively dislike and I have a personal rule that I re-try foods I hate about once a year in different forms or varieties and since arugula is so cold hardy, I had to bite the bullet with this and try a new type to see if I can learn to love it. Astro matures in 32-55 days and supposedly has more of a mild flavor than other varieties when the plants are young so I’m hopeful.
Mizuna Mustard
This tender Japanese mustard is milder than other varieties and ready to harvest in 30-50 days. It can grow up to a foot tall and wide but it’s usually harvested when it’s smaller.
Rosette Tatsoi
This beautiful leafy green is more flavorful than traditional bok choy and matures in 45 days. It is super cold tolerant down to 15 degrees fahrenheit and can be harvested even in the snow. It grows pretty low and wide with spoon shaped dark green thick leaves in a rosette.
Tendergreen Mustard
This is also called mustard spinach, but it’s not actually mustard OR spinach. It’s super easy to grow, hardy and productive and matures fast in 30 days to be about two feet tall and up to two feet wide with smooth dark green glossy leaves.
Are you team take a break for the winter, or keep growing?


Preparing Your Garden For Winter
There’s always more that can be done to prepare the garden for winter, and some tips will be more specific to your garden setup. But with all this checked off my list, I’m looking forward to a slower season of rest and planning, organizing my seed collection (and let’s be real, buying a lot more) as well as drawing up new garden bed layouts for the spring. What are you doing to prep your garden for the winter months now?

By late October, the summer garden is hanging on by a thread, tattered and browning at the edges. Every day, I step outside and ask myself if this is the day to put it to rest. Admittedly, I probably wait longer than I should because I’m in denial about what’s coming. While some gardeners may be grateful for the period of rest winter offers, I’m just looking for more ways to keep growing even in the cold. I like living somewhere that experiences all four seasons, I just wish winter was just a little bit shorter! But eventually reality catches up with me, and I have to accept that it is time to take the necessary steps to prepare the garden for the winter months.
In my zone, 6b, we experience a long cold winter. We have a good four to five months of temperatures between zero and twenty degrees Fahrenheit. The ground freezes solid, everything dies back, winds pick up from the field and if I don’t take steps to protect it, the elements can do a number on the structures and systems I have in place for my summer garden. But there’s more to winter garden prep than just protecting what is there so it can lie in wait until next season. Now is also the best time to start preparing for any new additions you want to add to your garden for next year. So let’s dive into exactly what I’m doing to prepare my garden for winter.
Clear and compost dead plants
The very first thing I do to prepare the garden for winter is to try and give myself a clean slate. This not only tidies up the space but also helps prevent diseases from overwintering in dead plant material. For plants that remain disease free all season, you can use the “chop and drop” method to compost in place. Simply cut the plant down at the base, breaking apart any larger branches or sections so they can decompose easily, and lay them on the soil in your garden bed. These plants will break down over the winter months, returning nutrients to the soil. However, if you notice any signs of disease on your plants or just aren’t sure, it’s best to pull the entire plant up by the root. For things like powdery mildew, I’m generally not too worried about putting them into my regular compost. But if your tomatoes had blight, you may want to burn the foliage to try and stop it from spreading.
Add frost covers
There’s a good chance you have some plants that can withstand cooler temperatures and give you harvests well into December with a little planning. Plants in the brassica family for example have the ability to produce a type of natural anti-freeze that converts into sugars and makes the plants taste even better after a frost. But you can extend their life even further by utilizing frost covers which act as a cozy winter blanket and keep out the wind chill and moisture that causes the most damage to these cold hardy plants. These covers act as a shield against harsh frost, preserving the warmth around the plants and preventing frost damage. It's a simple yet effective measure to safeguard your garden and extend your harvest.
Look for abandoned tools
In the chaos of summer gardening, I know I’m not the only one who has lost track of a tool or two. It’s too easy to get swept up in the task at hand, exhaust yourself and then say you’ll “clean up later” but every gardener knows that later never comes. Take a quick inventory of your garden tools and do a walkaround for any abandoned tools that may have been left to rust so your valuable equipment doesn't deteriorate in the cold, wet weather. And then maybe make a plan for next year so you have an easily accessible drop point in your garden where you can keep tools without having to remember to walk them back to the shed.
Oil and clean tools
Now that you’ve recovered your neglected tools, it’s a great time to give them some TLC. Clean off any dirt with a dry brush, sharpen the blades and apply a protective coat of oil to prevent rusting and keep your tools in top-notch condition. For your more precious tools (like my Felcos) it’s worth taking the time to learn how to disassemble and oil any interior components. I know it seems like a lot of tiny pieces, but if you spend a bit of time watching how-tos on YouTube, anyone can do it with an hour or two to spare. This small effort pays off when spring arrives, and you can dive straight into gardening without dealing with rusty, malfunctioning tools.
Disconnect hoses

Frozen hoses can lead to burst pipes and costly repairs. To avoid this, disconnect and drain hoses before temperatures plummet. In most modern homes, each exterior spigot should have its own shut off point. Storing them in a shed or garage ensures they stay in good shape, ready for use when the growing season returns.
Make leaf mold
The more leaves you can “leaf” in place, the happier your lawn and neighborhood wildlife will be. But if you must rake up your leaves, you should definitely turn them into leaf mold. Creating a dedicated spot in your yard for leaves to break down will result in a rich, crumbly material that acts as a fantastic soil conditioner, improving the structure and fertility of your garden soil. It's a sustainable way to recycle nature's abundance and enhance your garden's health.
Wrap trees
Especially in very cold climates like mine, young trees or those susceptible to winter damage benefit from being wrapped with burlap or tree wrap. This protective layer shields the bark from harsh winter conditions, preventing sunscald and frost cracks. It's a simple yet effective measure for the long-term health of your trees.
Mulch perennials
We aren’t the only ones who benefit from an extra blanket or two in the winter months. A layer of mulch such as wood chips, pine needles or straw around perennial plants acts as insulation, protecting their roots from extreme temperatures. It also helps retain moisture and suppresses weeds, contributing to the overall well-being of your garden beds during the winter months. A good rule of thumb is to use four to six inches of mulch around the plants - just don’t press the mulch up against the plant itself. We are insulating the roots, not the aboveground parts.
Empty outdoor planters so they don’t crack
Freezing and thawing cycles can cause soil in containers to expand and contract, which can cause your clay or ceramic pots to crack. To avoid this, empty out some or all of the soil from your breakable containers or, if space allows, move them to a sheltered area. This simple step ensures your pots remain intact and ready for planting in the spring.
Prep new garden bed areas with cardboard and compost
If you're planning new garden beds for the next growing season, winter is an excellent time to start preparing the ground using the lasagna method. Lay down untreated cardboard to smother weeds and grass, and top it with compost, leaves or straw. This not only enriches the soil but also creates a weed-free foundation for your future garden.
Cover crops
Sowing cover crops, such as winter rye or clover, during the fall is a smart way to protect and improve your garden soil. These crops prevent soil erosion, suppress weeds, and add organic matter as they decompose. Come spring, you can easily incorporate them into the soil, providing a nutrient boost for your plants.
Cover raised beds
This one is more specific to my raised beds because they are off of the ground. While they are weather resistant on their own being made of cedar, in order to make them last as long as possible I grabbed firewood rack covers that are the exact size of my raised beds. These waterproof covers will protect my beds from the elements - but be aware that they can cause soil to turn hydrophobic if they totally dry out over the winter and aren’t typically necessary with standard raised beds. Because my raised beds also have wicking trays built into them, I’ve disconnected the tubes underneath so water won’t sit stagnant in the beds all winter. The arch trellises are powder coated, so they’ll be just fine out in the elements over the winter.
Watch me prep my own garden over on YouTube!
There’s always more that can be done to prepare the garden for winter, and some tips will be more specific to your garden setup. But with all this checked off my list, I’m looking forward to a slower season of rest and planning, organizing my seed collection (and let’s be real, buying a lot more) as well as drawing up new garden bed layouts for the spring. What are you doing to prep your garden for the winter months now?
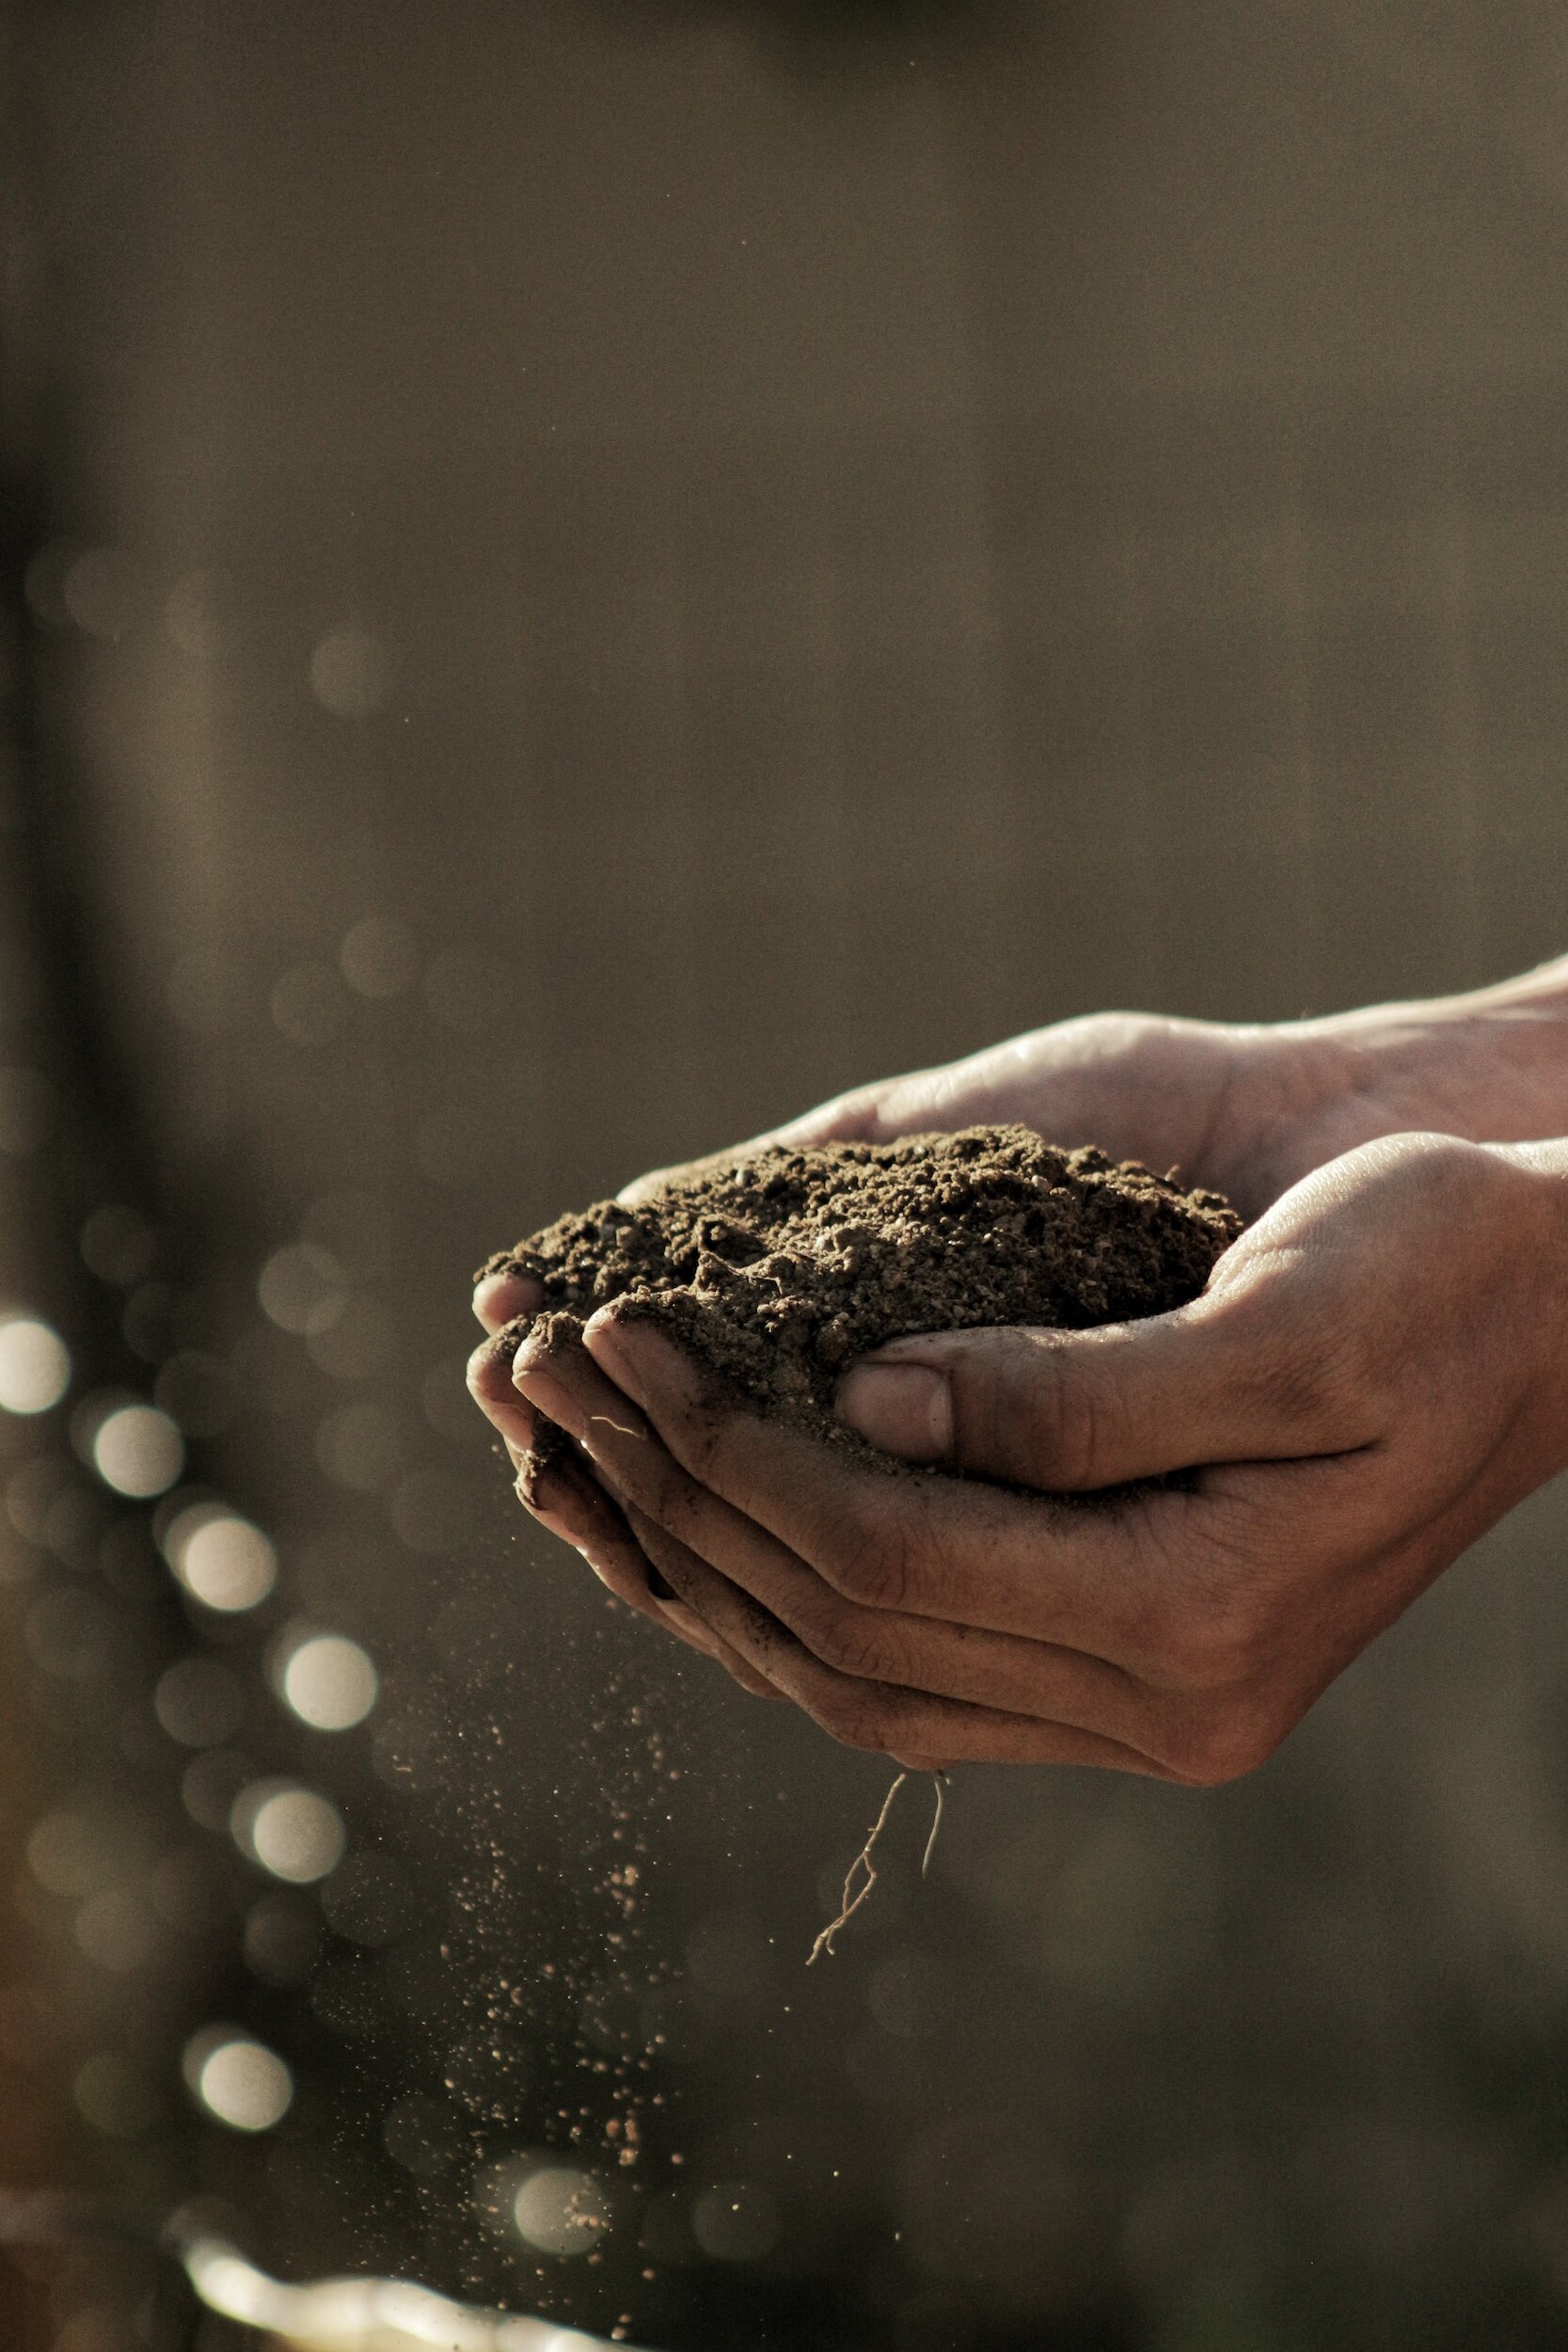
Debunking Soil Myths: Solving The Mysteries Behind Good Soil Health
Knowledge of soil conditions allows gardeners to tailor their gardening practices to the specific needs of their plants. This includes choosing appropriate planting times, selecting suitable varieties, and implementing effective weed control strategies.

What’s so important about garden soil anyway?
Soil provides the foundation for plant growth. Different plants have specific soil requirements in terms of texture, composition, and pH levels. Understanding the soil allows gardeners to choose plants that are well-suited to the conditions, promoting healthier and more robust growth.
Soil serves as a reservoir for essential nutrients that plants need for their growth and development. By understanding soil composition, gardeners can identify nutrient deficiencies or excesses and adjust fertilizer applications accordingly. This ensures that plants receive the right balance of nutrients for optimal health.
Soil influences water retention and drainage. Some soils retain water well, while others drain quickly. Understanding soil characteristics helps gardeners implement appropriate watering practices. Overwatering or underwatering can lead to problems like root rot or dehydration, so a balanced approach is essential.
Knowledge of soil types and structures enables gardeners to implement erosion control measures. Certain plants and groundcovers can help prevent soil erosion, ensuring that valuable topsoil is retained and not washed away during heavy rainfall.
Soil structure, influenced by its texture and organic matter content, plays a role in aeration and root penetration. Gardeners can take steps to improve soil structure, such as adding organic amendments, which enhances the overall health of the soil and facilitates better plant growth.
Knowledge of soil conditions allows gardeners to tailor their gardening practices to the specific needs of their plants. This includes choosing appropriate planting times, selecting suitable varieties, and implementing effective weed control strategies.
What are the Key Factors Impacting Soil Health?
Several key factors influence soil health. The relative proportions of sand, silt, and clay in the soil determine its texture. Different textures impact water retention, drainage, and nutrient availability. The amount of organic material in the soil affects its fertility, structure, and water-holding capacity. Organic matter improves soil structure and provides essential nutrients for plant growth.
The pH level of the soil indicates its acidity or alkalinity. Different plants have specific pH preferences. Soil pH influences nutrient availability, microbial activity, and overall plant health. Essential nutrients, such as nitrogen, phosphorus, potassium, and micronutrients, are crucial for plant growth. Soil testing helps determine nutrient levels, allowing gardeners to adjust fertilizer applications based on plant needs.
Healthy soil is teeming with microorganisms like bacteria, fungi, and protozoa. These microbes play a vital role in nutrient cycling, organic matter decomposition, and disease suppression. A diverse and active microbial community contributes to soil fertility.
Soil structure influences water retention and drainage. Sandy soils drain quickly but may not retain enough water, while clayey soils can retain water but may drain poorly. Ideal soil structure balances water retention and drainage.
Adequate aeration is crucial for root health and microbial activity. Compacted soil restricts air movement, leading to poor aeration. Practices such as tilling and adding organic matter can improve soil aeration. Soil erosion can degrade soil health by removing the topsoil layer. Factors like slope, rainfall, and vegetation cover influence erosion rates. Implementing erosion control measures, such as cover cropping and mulching, helps protect soil.

Biodiversity in the soil includes a variety of plants, microbes, and other organisms. Diverse ecosystems contribute to soil health by enhancing nutrient cycling, pest control, and overall ecosystem resilience.
Exploration of Soil Texture (Sand, Silt, Clay)
Soil is composed of mineral particles, organic matter, water, and air. The relative proportions of three main mineral particles—sand, silt, and clay—determine the soil's texture. Each type of soil particle has distinct characteristics, influencing the soil's properties and its suitability for different plants.
Sand particles are the largest among the three soil types, with diameters ranging from 0.05 to 2.0 millimeters. Sandy soil feels gritty and coarse to the touch. Sand has excellent drainage due to large particles, but water retention is low. It has good aeration, as sand allows air to move freely through the soil, but low fertility, as sand doesn't retain nutrients well. It is suitable for plants that prefer well-draining soil, such as cacti and succulents.
Silt particles are smaller than sand but larger than clay, with diameters ranging from 0.002 to 0.05 millimeters. Silty soil feels smooth and flour-like when dry and slippery when wet. Silt has oderate drainage and retains water better than sand. It compacts more easily than sand and is better at retaining nutrients than sand but not as well as clay. It is suitable for a wide range of plants, but benefits from organic matter to improve fertility and structure.
Clay particles are the smallest among the three, with diameters less than 0.002 millimeters. Clay soil feels smooth and sticky when wet and hard and clumpy when dry. Clay has poor drainage but retains water very well. It easily becomes compacted, but has high fertility. Clay soil is suitable for plants that tolerate or benefit from moisture retention, such as certain vegetables and water-loving plants.
Understanding the soil texture in a particular area helps gardeners make informed decisions about plant selection, watering practices, and soil amendments. Loam is a balanced soil type that contains a mixture of sand, silt, and clay, offering good drainage, aeration, and fertility. Gardeners often aim to improve soil structure by adding organic matter, which benefits all soil types by enhancing water retention, nutrient availability, and overall soil health.
Why You Should Add Organic Matter to Soil
Organic matter is a cornerstone of soil health, influencing nutrient availability, soil structure, water retention, and overall ecosystem dynamics. Organic matter acts as a reservoir for essential nutrients such as nitrogen, phosphorus, and potassium. It has the ability to retain and slowly release these nutrients to plant roots, ensuring a steady supply for optimal growth.
Organic matter improves soil structure by promoting the formation of aggregates. This enhances soil porosity, allowing for better water infiltration and root penetration. Well-structured soil facilitates root development and provides aeration. It also increases the soil's water-holding capacity. It can absorb and retain water, making it available to plants during dry periods. This is especially beneficial in sandy soils with poor water retention.
Organic matter serves as a food source for soil microbes. Microorganisms, including bacteria and fungi, break down organic matter into simpler compounds, releasing nutrients in a form that plants can absorb. This microbial activity contributes to overall soil fertility. It has a buffering effect on soil pH. It helps stabilize soil pH levels, preventing rapid fluctuations. This is important because many plant nutrients are most available within specific pH ranges.
Some components of organic matter, like certain compounds produced during decomposition, can have suppressive effects on soil-borne diseases. This contributes to the overall health of plants in the soil. And the improvement of soil structure through organic matter helps prevent soil erosion. Stable soil structure reduces the risk of topsoil being washed away during heavy rainfall.
Common Myths About Soil
Myth 1: Fertilizer Can Fix Any Soil Issue
While fertilizers are valuable tools for enhancing soil fertility and promoting plant growth, they come with certain limitations that need to be considered. Fertilizers typically provide specific nutrients such as nitrogen, phosphorus, and potassium. However, they may not contain the full spectrum of micronutrients and trace elements that plants need for optimal growth. Over-reliance on specific fertilizers may lead to nutrient imbalances.
Excessive use of fertilizers can lead to overapplication of nutrients. This not only wastes resources but can also have detrimental effects on the environment. Nutrient runoff from fields into water bodies can contribute to water pollution and ecological imbalances. The production, transportation, and application of synthetic fertilizers have environmental implications. The manufacturing process often involves energy-intensive procedures, and the runoff of excess nutrients can contribute to issues like algal blooms and waterway pollution. Continuous reliance on fertilizers without considering soil health and organic matter can create a dependency on external inputs. This may lead to a decline in natural soil fertility and long-term sustainability issues.
Certain fertilizers can influence soil pH. For example, nitrogen-based fertilizers can contribute to soil acidification over time. This can impact nutrient availability and the overall health of the soil. Some fertilizers, especially those containing high concentrations of salts, can lead to salt accumulation in the soil. This can be harmful to plant roots, affecting their ability to take up water and nutrients.
Plants may not utilize all the nutrients provided by fertilizers. Factors such as soil conditions, weather, and plant health can affect the efficiency of nutrient uptake. Unutilized nutrients may contribute to environmental pollution. Fertilizers provide a short-term solution to nutrient deficiencies. While they can boost plant growth in the immediate term, they do not address underlying soil health issues. Sustainable practices, such as incorporating organic matter, are necessary for long-term soil fertility.
Myth 2: All Soils Are the Same
Soils are incredibly diverse, and their variations arise from a combination of factors such as climate, parent material, topography, vegetation, and time. The geological material from which soils develop, known as parent material, greatly influences soil properties. Different types of rocks and minerals contribute distinct minerals to the soil, impacting its texture, nutrient composition, and overall characteristics.
Climate plays a significant role in soil formation. The amount and distribution of rainfall, temperature fluctuations, and freeze-thaw cycles all contribute to the physical and chemical weathering of rocks. These weathering processes shape the texture and composition of soils in a particular region.
The landscape, or topography, influences how water moves across the soil. Sloped areas may experience more erosion, leading to differences in soil depth and composition. Flat or valley regions may accumulate sediments differently, resulting in varied soil profiles.
The types of plants that grow in an area impact soil characteristics. Plants contribute organic matter through leaf litter and root systems, influencing soil structure, nutrient cycling, and microbial activity. Different vegetation types lead to variations in soil organic content. The presence and activity of soil organisms, such as bacteria, fungi, earthworms, and insects, contribute to soil diversity. Biological processes, including decomposition and nutrient cycling, vary across different ecosystems, shaping the unique characteristics of soils.
The acidity or alkalinity of soils, represented by pH levels, can vary widely. Different plants have specific pH preferences, influencing the types of vegetation that thrive in a particular soil and, consequently, the characteristics of that soil. Specific geographical features, such as river valleys, hills, and coastal plains, contribute to variations in soil types. The proximity to water bodies, elevation changes, and drainage patterns all play roles in shaping the unique characteristics of soils in different regions.
Myth 3: Vinegar as weed killer won’t damage soil
The myth that vinegar as a weed killer won't damage soil stems from the belief that because vinegar is a natural substance, it won't have negative impacts on the soil. However, this notion oversimplifies the complexity of soil ecosystems and the potential consequences of using vinegar as a weed killer. Vinegar is acidic, and its acetic acid content is what makes it effective in killing weeds. However, high acidity can have detrimental effects on soil pH. Excessive use of vinegar can lead to soil acidification, negatively impacting nutrient availability and the overall health of the soil. Soil is home to a diverse community of microorganisms crucial for nutrient cycling, decomposition, and overall soil health. The acidity of vinegar can potentially harm beneficial soil microbes, disrupting the balance of the soil ecosystem.
Vinegar-based weed killers are non-selective, meaning they can harm both weeds and desirable plants. Overspray or unintended contact with plants you want to keep can result in damage, affecting the overall plant diversity in the area.
Vinegar is a contact herbicide, meaning it primarily affects the parts of the plant it comes into direct contact with. It may not address the underlying causes of weed growth, such as soil compaction or nutrient imbalances, making it a short-term solution.
There are alternative, more sustainable practices for weed control that don't pose risks to soil health. For example, mulching, hand weeding, and maintaining proper plant spacing are methods that promote weed suppression without negatively impacting the soil.

Myth 4: Tilling is Always Beneficial
Tilling, or the mechanical cultivation of soil, has been a traditional practice in agriculture for centuries. While it can offer benefits in certain situations, there are instances where tilling the soil may not be a good idea due to various drawbacks. Tilling can disrupt the natural structure of the soil. It breaks down soil aggregates and destroys pore spaces, leading to compaction over time. This impairs water infiltration, root penetration, and air circulation, affecting overall soil health. Tilled soil is more susceptible to erosion, especially in areas with sloping terrain. The disruption of the soil surface removes natural protection against water and wind erosion, leading to the loss of valuable topsoil.
Tilling accelerates the decomposition of organic matter in the soil. Organic matter is crucial for soil fertility, structure, and water retention. Excessive tilling can deplete organic matter, leading to nutrient deficiencies and reduced soil quality. Tilling brings buried weed seeds to the surface, exposing them to light and promoting germination. This can lead to increased weed growth, counteracting the initial purpose of tilling.
Tilling disrupts the habitat of soil microorganisms. Beneficial microbes play a key role in nutrient cycling, organic matter decomposition, and disease suppression. Excessive tilling can harm these microbes, impacting soil fertility and ecosystem balance. And while tilling initially loosens the soil, repeated or improper tilling can contribute to long-term soil compaction. The disruption of soil structure and creation of a plow pan can hinder water movement and root development.
Conservation tillage and no-till practices have gained popularity as alternatives to traditional tilling. These methods help maintain soil structure, reduce erosion, and conserve moisture while minimizing the negative impacts associated with frequent and intensive tilling.
WHAT SOIL IS BEST FOR RAISED BEDS?
The best soil for traditional raised beds that sit on the ground is a mix of topsoil, compost, and sand. Topsoil provides nutrients and drainage. Compost improves the soil quality. And sand helps to aerate the soil. You can buy a pre-made mix of soil for raised beds or you can make your own. I always recommend Coast of Maine soil mixes for filling raised beds. Their Castine Blend™ Organic & Natural Raised Bed Mix is the ideal soil for raised bed organic gardening. It is carefully formulated to provide balance between structure, water retention, drainage and aeration for growing strong, vigorous vegetables, herbs and flowers in raised beds, planter boxes or other container gardens. It provides your garden the rich and diverse soil it needs.
Coast of Maine prides themselves on using a high quality enriched blend of fully cured compost, sphagnum peat moss, dehydrated poultry manure, lobster and crab shell meal, greensand, biochar, worm castings and mycorrhizae in their mixes. Close attention to detail with frequent turning, sampling and testing plus a lengthy aging and curing process produces dark, rich compost that builds soil and enhances plant growth.
If you are gardening in elevated raised beds like mine that are on legs, these are technically considered container gardens. It is important to use a lightweight potting mix (which has no actual soil in it) since your container gardens have different drainage and weight requirements.
![How To Grow Pumpkins In The Garden: Everything You Need To Know [Guide]](https://images.squarespace-cdn.com/content/v1/60e85024dc86d643da81c96a/1696955542836-7EJ1RVO7IO74E9EKS16A/image-asset.jpeg)
How To Grow Pumpkins In The Garden: Everything You Need To Know [Guide]
Pumpkins are a versatile and nutritious vegetable that comes in a wide variety of shapes, sizes, and flavors. From the delicate and tender to the rich and sweet, pumpkins, there is a pumpkin variety to suit every palate. Pumpkins are not only delicious but also packed with essential vitamins, minerals, and dietary fiber, making it a healthy addition to any diet. Their vibrant colors and unique textures make it a visually appealing ingredient that can elevate any dish. Whether you're looking to make comforting soups, hearty stews, vibrant salads, or even sweet desserts, pumpkin can be a go-to ingredient.

Pumpkins are a versatile and nutritious vegetable that comes in a wide variety of shapes, sizes, and flavors. From the delicate and tender to the rich and sweet, pumpkins, there is a pumpkin variety to suit every palate. Pumpkins are not only delicious but also packed with essential vitamins, minerals, and dietary fiber, making it a healthy addition to any diet. Their vibrant colors and unique textures make it a visually appealing ingredient that can elevate any dish. Whether you're looking to make comforting soups, hearty stews, vibrant salads, or even sweet desserts, pumpkin can be a go-to ingredient.
Growing pumpkins allows you to explore a wide range of varieties that may not be readily available in stores. You can experiment with heirloom or lesser-known varieties, each offering unique flavors and characteristics. This opens up a world of culinary possibilities, as you can tailor your dishes to your preferences and discover new and exciting flavor profiles.
WHAT KINDS OF PUMPKINS CAN YOU GROW?
The classic Jack-O'-Lantern Pumpkin boasts a large, round shape and a vibrant orange hue, perfect for carving spooky faces during Halloween. On the sweeter side, the Sugar Pie Pumpkin is smaller and squat, ideal for crafting delicious pies and desserts with its deep orange flesh. For a touch of fairy tale charm, the Cinderella Pumpkin features a flat, deeply ribbed profile in a reddish-orange shade, excellent for both roasting and decorative use.
Opting for a unique aesthetic, the White Pumpkin with its creamy or pale white skin can be used interchangeably with traditional pumpkins in various dishes, adding a visual twist. If seeking a classic pie pumpkin with a twist, the Long Island Cheese Pumpkin flaunts a flat, cheese-wheel shape in tan with light ribbing, lending itself well to pies, soups, and baking. For those drawn to a blue-gray appearance, the Jarrahdale Pumpkin serves as a delightful option, suitable for roasting, mashing, and decorative purposes.
Adding a touch of whimsy, the Fairytale Pumpkin features a flattened and deeply lobed structure in a reddish-orange hue, perfect for roasting and purees, while also bringing a charming aesthetic to dishes. The Musquee de Provence Pumpkin, with its ribbed, squat form and greenish streaks, offers an aromatic sweetness suitable for baking, soups, and decorative applications.
For a playful twist, the Pink Banana Pumpkin stands out with its long, slender shape and pinkish-orange hue, bringing a sweet, banana-flavored note to baking, purees, and creative culinary endeavors.
Rounding out the list, the Galeux d'Eysines Pumpkin captivates with its salmon-colored skin adorned with peanut-like warts, delivering a smooth and sweet flavor profile perfect for soups, stews, and as an eye-catching decorative item. Each pumpkin variety is a canvas for culinary creativity, promising a delightful array of flavors and textures for every kitchen experiment.

WHERE SHOULD YOU PLANT PUMPKINS?
Pumpkin plants thrive in full sun, so it is essential to select a growing site that receives at least 6 to 8 hours of direct sunlight daily. Sunlight is crucial for the growth and development of pumpkins plants, as it helps them produce ample foliage and ensures optimal fruiting. Therefore, choose a location in your garden that is not shaded by trees, buildings, or other structures.
In addition to sunlight, pumpkins plants require well-draining soil. They prefer soil that is loose, fertile, and rich in organic matter. Well-draining soil prevents waterlogging, which can lead to root rot and other diseases. To improve drainage, you can amend heavy clay soil with organic matter such as compost or well-rotted manure. This helps create a looser soil structure, allowing water to flow through and preventing excess moisture retention around the plant's roots.
Pumpkin plants can spread and occupy a significant area, so ensure that you have sufficient space for the plants to grow and sprawl without overcrowding other crops or plants. Adequate spacing allows for good air circulation and helps prevent the development of fungal diseases.
STARTING PUMPKINS PLANTS FROM SEED
This method involves directly sowing pumpkins seeds into the soil or starting them indoors and later transplanting the seedlings. Sowing seeds directly in the garden is a simple and cost-effective approach. On the other hand, starting seeds indoors allows for earlier planting and a head start on the growing season.
Pumpkin seeds should be planted when the soil has warmed up and all chances of frost have passed. This is typically in spring when the soil temperature reaches around 60°F (15°C) or higher. Ensure that the soil is well-draining and enriched with organic matter. Remove any weeds or debris and break up clumps of soil. Plant pumpkins seeds about 1 inch (2.5 cm) deep into the soil. Space the seeds 2 to 3 feet (60 to 90 cm) apart in rows, or follow the spacing guidelines specific to the variety you are planting. You may also plant three seeds in a hill formation. After planting the seeds, thoroughly water the area to ensure good seed-to-soil contact and proper moisture for germination. Keep the soil consistently moist but not waterlogged as the seeds germinate and the seedlings emerge. Once the seedlings have emerged and developed their first set of true leaves, thin them out if they are planted too closely together. Thin the seedlings to the desired spacing, typically leaving the healthiest and strongest ones.
Using seedlings from a nursery offers the advantage of a shortened time to harvest, as the plants are already established. It can be particularly beneficial in areas with a shorter growing season or for gardeners who prefer a more convenient option. Seedlings provide a head start in the growing process, allowing you to harvest pumpkins earlier than if you were to start from seeds, but buying seedlings can be more expensive compared to starting from seeds, and seedlings may experience some level of transplant shock when moved from the controlled environment of the nursery to your garden. This shock can temporarily slow down growth and require extra care during the transition.

HOW TO GROW PUMPKINS VERTICALLY
Vining pumpkins tend to spread out and take up a lot of garden space. By providing support or trellises, you can train the vines to grow vertically, saving valuable space in your garden. When vining pumpkins plants are trained upwards, they allow for better airflow around the foliage, reducing the chances of diseases caused by excessive moisture and promoting overall plant health. Growing vining pumpkins vertically makes it easier to locate and harvest the fruits. The pumpkins hang down from the trellis, making them more visible and accessible.
To provide support for vining pumpkins, you can use trellises, stakes, or cages. Install the support structure at the time of planting or when the plants are young to avoid disturbing the roots later. As the vines grow, gently train them to climb the support structure, securing them with garden ties or soft twine if needed. Be sure to choose sturdy supports that can handle the weight of the developing fruits.
WATERING PUMPKIN PLANTS
Pumpkin plants have high water needs, and lack of moisture can lead to stunted growth and poor fruit development. Aim to provide about 1 to 1.5 inches (2.5 to 3.8 cm) of water per week, either through rainfall or irrigation. Fluctuating moisture levels can cause stress to the plants and lead to issues like blossom end rot or fruit cracking. Water the plants deeply, ensuring the moisture reaches the root zone. Mulching around the plants can help retain soil moisture and reduce water evaporation.
MULCHING PUMPKIN PLANTS
A layer of mulch helps retain soil moisture by reducing water evaporation. This is especially important during hot and dry periods when water availability is crucial for healthy plant growth. Mulch acts as a natural weed barrier, preventing weed growth and competition with pumpkins plants for nutrients and water. This reduces the need for frequent weeding, saving time and effort. Mulch helps regulate soil temperature by keeping it cooler in hot summer months and providing insulation during cooler periods. This creates an ideal environment for root development and overall plant growth.
PUMPKIN PESTS AND DISEASES
Squash bugs: These insects feed on the leaves, stems, and fruits of pumpkin plants, causing wilting, yellowing, and decline. They can be identified by their flat, shield-shaped bodies and dark brown or gray color.
Squash vine borers: The larvae of these pests bore into the stems of pumpkin plants, causing wilting, dieback, and eventual plant death. Adult vine borers are clear-winged moths.
Cucumber beetles: These beetles can transmit diseases and damage leaves, flowers, and fruits of pumpkin plants. They are typically yellowish-green with black stripes or spots.
Organic pest control methods can help manage pumpkin pests effectively while minimizing the use of synthetic pesticides. Consider the following approaches:
Row covers: Use lightweight fabric row covers to physically exclude pests from reaching the plants. Cover the plants soon after planting and secure the edges to prevent pests from entering.

Beneficial insects: Encourage the presence of natural predators and beneficial insects in your garden, such as ladybugs, lacewings, and parasitic wasps. These insects prey on pumpkin pests and help control their populations.
Pumpkin plants are susceptible to several diseases that can affect their overall health and productivity. Here are some common diseases that may affect pumpkins:
Powdery mildew: This fungal disease appears as a white, powdery coating on the leaves, stems, and fruits of pumpkin plants. It can cause leaf yellowing, stunting, and reduced fruit production.
Bacterial wilt: This disease is caused by bacteria that clog the water-conducting tissues of pumpkin plants, leading to wilting and eventual death. It is often transmitted by cucumber beetles.
TO PREVENT AND MANAGE PUMPKINS DISEASES, CONSIDER THE FOLLOWING MEASURES:
Crop rotation: Avoid planting pumpkins in the same area of the garden year after year. Rotate your crops to different locations to reduce the buildup of disease-causing pathogens in the soil.
Remove and destroy any infected plant debris to prevent the spread of diseases. This includes removing and disposing of infected plant parts, fallen leaves, and fruits.
Select pumpkin varieties that have resistance or tolerance to common diseases prevalent in your area. This can help reduce the risk of infection and improve plant health.
HOW TO HARVEST PUMPKINS
When it comes to harvesting pumpkins, there are a few signs that indicate the fruits are mature and ready to be picked. Look for pumpkins with firm skin and vibrant color. Depending on the variety, the skin may be tough and resistant to scratching or denting. Additionally, the stem connecting the pumpkins to the vine should be dry and starting to wither.
To harvest pumpkins properly, use a sharp knife or pruning shears to cut the fruit from the vine, leaving a small stem at least one inch long attached. Avoid pulling or twisting the pumpkins, as this can damage the plant and reduce the quality of the fruit. Handle the pumpkins with care to prevent bruising or puncturing.
HOW TO CURE PUMPKINS
Curing is particularly important for pumpkins varieties you want to store long term to last the winter. After harvest, wipe the outside down with soapy water and allow the pumpkins to cure in a warm and well-ventilated area for a period of time, typically about 1 to 2 weeks. This process toughens the skin, enhances flavor, and extends their storage life. During curing, the pumpkins should be kept in a single layer, allowing air circulation around each fruit.
HOW TO STORE PUMPKINS
Storing pumpkins properly is essential to maintain their quality and extend their shelf life. Winter pumpkins can be stored for several months when stored correctly. Keep them in a cool (50-55°F or 10-13°C), dry, and well-ventilated area. Avoid storing winter pumpkins near fruits that produce ethylene gas, such as apples, as this can cause premature ripening and spoilage.
Growing your own pumpkins can be a rewarding experience that provides you with fresh, flavorful, and nutritious produce. By following proper harvesting and storage techniques, you can enjoy your homegrown pumpkins for an extended period, adding versatility and delicious flavors to your meals. Start your own pumpkin garden, explore different varieties, and savor the many culinary possibilities that pumpkins have to offer.