
BACKYARD GARDENING MADE SIMPLE
![Decorate with Flowers Year Round Using These Tips [Tutorial]](https://images.squarespace-cdn.com/content/v1/60e85024dc86d643da81c96a/f8300749-3a98-4317-8965-fde98f8f8f19/November+2022+The+Cottage+Peach-25.jpg)
Decorate with Flowers Year Round Using These Tips [Tutorial]
A plan set in motion last March, when I set seeds into soil blocks underneath the grow light in the cold basement. A plan for eternal, dried flower blooms that would last far longer than the warm summer days in which they would stretch and grow and bloom. This is the story of strawflower and statice, poppies and cornflower, aster and lavender. While their scent may fade, the colors we miss so much in deep winter continue on in a vivid show that defies the passage of time.
The Cottage Peach is reader-supported. When you purchase through links on our site, we may earn an affiliate commission at no additional cost to you. All opinions are our own.
When winter has settled on our doorstep and blinding white snow fills the field outside my bedroom window, it is easy to forget the thrill of a vibrant bouquet of fresh flowers on the kitchen table. The muted tones of the season lend themselves to quiet reflection, but also a deep sense of emptiness that can set in with no notice if we leave it unchecked.
It is the time of year where Jeff and I find ourselves drowsy and full, disoriented by the lack of sunlight in the afternoons and finding the effort to keep awake to be challenging. But this year, I promised myself, would be different. This year, I would have flowers in winter.
A plan set in motion last March, when I set seeds into soil blocks underneath the grow light in the cold basement. A plan for eternal, dried flower blooms that would last far longer than the warm summer days in which they would stretch and grow and bloom. This is the story of strawflower and statice, poppies and cornflower, aster and lavender. While their scent may fade, the colors we miss so much in deep winter continue on in a vivid show that defies the passage of time.
Best flowers for drying
An endless variety of flower seeds will leave you feeling overwhelmed as you begin to flip through the catalogs and plan which flowers you’d like to grow for drying. However, with a few simple tricks you can easily set your sights on the best flowers to dry for eternal blooms. My first piece of advice is to ensure you receive the Fedco seed catalog each year - in fact, this is the best place to begin all your garden planning, not just flowers. The reason I suggest Fedco over others is twofold - firstly, you’ll be shopping high quality, non-gmo seed from a private source that isn’t just another subsidiary for Monsanto. Second, it is really a misnomer to call the Fedco book a catalog since the vast amount of educational information contained within really qualifies it as more of a book or guide. A free one at that! This is because the folks at Fedco have gone out of their way to provide useful charts and more to help guide you in your seed selection process. One chart in particular will be useful to us now, and that is the chart denoting the different forms and functions of all the flower seeds available for purchase. You’ll find this chart at the very beginning of the flower section. And no, this isn’t an advertisement for Fedco - just an honest recommendation from a fellow gardener who has utilized this tool for years.
It’ll make more sense once you have the chart in front of you, but there will be a column ticked off just for those flowers which dry well. This is an excellent place to begin making a list of all the possibilities before you do further research.
Don’t want to wait for the catalog to arrive? Here’s what I grew in 2022 for my dried flower garden:
Lavender

A favorite for many reasons, lavender is one of the few dried flowers which will retain its pleasant fragrance after drying. I have lavender bunches from a year ago that still smell incredible if you give them a quick squeeze to release the essential oils within. Known for its calming effects on the nervous system, lavender is an incredibly therapeutic plant to grow. Being a woody shrub however, it is also one of the more difficult ones to grow from seed on this list. You’ll want to do research on how this Mediterranean plant will fare in your own climate, and learn the best pruning techniques to keep it in tip-top shape. Once dried, the delicate purple flowers will make an excellent addition to any arrangement. I like to keep bunches of lavender on my bedroom windowsill.
Strawflower

This eternal bloom is a must for flower crowns and wreaths of all sizes. Strawflower has a long growing season and produce a huge amount of stems. We were picking strawflower all the way up to our first frost. The trick with cutting strawflower to dry is to cut at just the right stage of blooming - too early and the bud won’t open enough as it dries, too late and the blossom will open so far once it has dried that it will be barely recognizable, almost turning inside-out. To time it right, cut when the stem is no longer very wobbly when shaken and only 2-3 bracts of petals are open. This way, as the bloom dries the petals can expand outwards but still leave the very center intact and slightly closed. Strawflower is fun to tuck within an arrangement, but due to the stems tending to dry with bends and curves it is easier to use shorter pieces within a circular craft.
Statice
The variety of color within the purple family you can achieve with statice is remarkable. From our plot, we harvested rich magenta, pale pink, deep amethyst, bright white and even butter yellow blooms. Somehow all of these shades complimented each other perfectly, and made creating an arrangement simple. The long stems go rigid with drying, standing perfectly upright and straight for a large vase arrangement. The tiny individual blossoms are compact and generous, making for a full bouquet. But the best part of statice is in it’s longevity; I had fellow gardeners tell me they have bouquets of dried statice that were ten years old and still preserved their beautiful coloring.
Poppies

Fresh poppies are notoriously difficult as a cut flower - picked at the wrong moment, they “shatter” in the vase, dropping all their petals dramatically within hours. Truthfully, I was only ever able to get the timing right a couple of times last season - they must be picked in the early morning hours, just after blooming, and immediately placed in water. Their stems also leak an unforgiving bright yellow sap that will permanently stain your favorite gardening clothes without a care (ask me how I know). So I found poppies to be best enjoyed fresh in the garden itself, however, the dried seed pods that begin to pop up as the blooms die off in late summer lend themselves to drying very well. The unique shape and neutral brown coloring of these pods means they will look right at home in most arrangements.
Cornflower
They don’t call it cornflower blue for nothing! These small but delightful blue wildflowers will grow with abandon anywhere you can think to spread them. Like their friend the strawflower, they too require careful timing in cutting to dry in order to preserve their coloring and structure. If you are wondering why your dried cornflower has faded or the petals seem to shed just about everywhere, it’s probably because you picked the bloom too late. Cornflower dries best when it is picked just before the bloom fully opens. These small delicate flowers can be tucked in a crown, a small bud vase or bunched together for a wall sash. They tend to be overpowered in arrangements using multiple other flowers, so let these blooms stand on their own if possible.
New England Aster
The wild child of the group, my tiny pink New England Aster flowers offer an autumn finale in the garden, jumping up out of seemingly nothing and taking over for a few short weeks. Each stem branches out with clusters of inch wide blossoms that dry to a deep magenta pink. Though a bit unruly in a vase, I have a soft spot for their unkempt nature and deep coloring with pinks that last through the whole winter season. Easy to grow and requiring no upkeep, they are certainly a worthwhile addition to any garden for the benefits given to pollinators in search of late season food alone.
Goldenrod

This list wouldn’t be complete without the admirable goldenrod. Often confused for its allergy-causing lookalike, ragweed, goldenrod isn’t the reason for your autumn sniffle session. In fact, goldenrod has many medicinal benefits - but that’s another story for another time. Goldenrod’s showy, small yellow blooms are arranged in rich clusters that droop delightfully.
How to preserve dried flowers
Preserving dried flowers is one of the easiest ways to extend your garden season. The most important step begins with ascertaining the best moment to pick your flower based on the breed. After picking, most flowers (aside from larger blooms like sunflowers and roses) may be dried in a similar fashion - tied with string, hung upside down in a cool dry place. The amount of time needed to dry will vary depending on how hot and dry your climate is in that moment and the amount of water within each stem and bloom - thicker stems such as strawflower taking a few weeks to dry while thinner plants such as cornflower drying in just a few days.
How long do dried flowers last
Dried flowers should last anywhere from 3-6 months, with some varieties such as lavender and statice holding their color for a year or more. It’s important to note too that “last” is relative here - since they are dried, they are unlikely to mold or go “bad”, so if you continue to enjoy the look of your dried flowers past their prime, by all means keep them around!
How to store dried flowers
When not in use, it is best to store dried flowers in brown paper bags or cardboard boxes in a cool, dry place.
What to do with dried flowers
With a little imagination, the options are endless. But here are a few of my favorite ways to use dried flowers:

Door wreaths
Candle wreaths
Crowns
Attached to a barrette
Displayed in a vase, crock, pitcher or other container
Bunches on a windowsill
Bunches hung on a wall
Bunches tied to your shower head
Suspended within a glass bottle sealed with a cork
Flatted between two pieces of glass in a frame
Cooking - check to be sure they are edible
Drawer sachets - best for more fragrant blooms
Potpourri
Blended into hand poured candles
Blended into handmade paper
Blended into teas and herbal steams
Where to buy dried flowers
If you aren’t ready to grow your own flowers for drying, I recommend searching on Etsy for flower growers near you who offer the types of blooms you are looking for.
What varieties will you be growing this year? Comment and let me know!

![7 Tips to Survive a Long Winter[Nature Activities]](https://images.squarespace-cdn.com/content/v1/60e85024dc86d643da81c96a/6de8ff70-4e24-4023-9bc0-ca25cc9357e1/PXL_20211209_122333855.jpg)
7 Tips to Survive a Long Winter[Nature Activities]
Winter is a fleeting season for some, but long here in the Northeast. Long enough to require that we adapt and find space in our routines for signals that pass the time, as well as ways to enjoy it for what it is.
New England winters force us to turn inward, to find ways to slog through the darkest days, to connect with nature when that connection is scarce.
How to Survive a Long Winter
Winter is a fleeting season for some, but long here in the Northeast. Long enough to require that we adapt and find space in our routines for signals that pass the time, as well as ways to enjoy it for what it is.
New England winters force us to turn inward, to find ways to slog through the darkest days, to connect with nature when that connection is scarce.

They feel like crunchy snow underfoot, stinging wind on your cheek, and the numbing cold in your fingertips, and sound like the patter of sleet on the windows, slush under car tires, and crackling fires.
There is a hush in the air with the sound of insects and busy birds gone from the land, for the time being.
I can smell the snow on the air, and see it building in the dense shapes of the clouds above.
Snow clouds always look a little bit different than regular clouds. There's a slight glow within the deep gray of them that promises nights when snow muffles the sounds outside, ice coats the roof and we say "winter is here" tucked in and insulated from the chill, mugs full of hot chocolate.
Living in a place where winter is the longest season of our year when I don’t particularly love winter has come with its challenges.
My arthritis always is worse during the winter months, leaving me struggling more often with pain and fatigue that limits my ability to enjoy many activities.
I’ve had to find new ways to pass the time - simple, small things that make the winter more enjoyable without pushing myself. But in a way winter has taught me an important lesson; it really is the little things which matter most, which bring us the most light and joy on our darkest days.
We forget this easily, living in a fast paced and unforgiving world that is constantly telling us we need more more more to be happy. Winter does not play this game. Winter knows that pausing and stepping back forces us to focus on the things that really matter in our lives.
We truly begin to absorb the lessons of slow living when winter arrives to wrap us in her embrace.
With winter being so long, finding ways to pass the time and survive this cold and grey season is essential. Here are my top tips for small ways to survive the long winter this year:
#1 Let’s Get Cozy: Snuggle Up
There are a few non-negotiables required to make a home cozy. The first, of course, is blankets. Lots and lots of blankets! I have a bit of a blanket obsession, to tell the truth. I want heavy blankets, wool blankets, knit blankets, and quilts. Having the choice of a few well made, well chosen and well loved blankets is one way I give myself a little gift, an opportunity to feel cared for.
I love to collect blankets from antique stores, thrift stores, and occasionally even friends’ houses, if they are feeling generous! And, of course, there’s not much nicer than knitting a blanket myself on long winter nights.
We drape blankets over every available surface, just in case a sudden chill takes hold. Every chair arm and couch back, plus the ends of our beds, is covered in blankets in the winter. A blanket ladder, cabinet, trunk or chest are some other great ways you can store or display your blanket collection.
Of course, if you find yourself with an overabundance of blankets, there are many people in need who would benefit from your donation, and animal shelters that need a cozy spot for their four legged friends to find a reassuring moment of peace. Although it may be hard to believe from what I’ve written thus far, I do think there is such a thing as too many blankets. The same goes for coats - don’t forget to dig through your coat closet each year and donate any well-loved pieces that you no longer need. No one should go cold in the winter and this is an easy way you can help.
#2 Add warmth with fire
A flame of some sort will instantly bring peace and warmth to your day. Any sort of flame will do. The flickering of a hand poured soy candle on your kitchen counter, a crackling fireplace filled with wood logs, a pellet stove with a glass front or simply some beeswax candles are all good places to start.
When the sun sets as early as three or four o’clock in the afternoon, the warmth of the light, the dancing shadows, and the opportunity to roast marshmallows are all absolutely necessary to a cozy winter. The ambiance of a flame cannot be matched - just be sure to follow all necessary safety precautions with any open flame in your home.
#3: Drink Your Tea
If you’re anything like me, you have an extensive collection of mugs waiting for you to use them in your cabinet. Embrace these colder months by making a habit of enjoying a cup of tea with your breakfast each morning, or before bed. Experiment with different flavors and types of tea, and even different sweeteners and milks. While I lean heavily on green tea with honey and lemon in the summer, in the winter months I prefer chai and rooibos and rich black teas with raw sugar and oat milk.
#4: Read a Book
What could be more reassuring than a stack of books? I set myself a reading challenge this year, but you don’t need to be so structured about it. If you’re having trouble finding time in your day to read, try to find even five or ten minutes at first - there’s nothing wrong with starting small.
Here are some of my favorite book recommendations from what I read this year to add to your own stack:
Wintering: the Power of Rest and Retreat in Difficult Times by Katherine May: I felt this one in my soul. If you are struggling, read this.
The Hidden Life of Trees by Peter Wohlleben: Read this book and you’ll never look at trees the same way again!
With the Fire On High by Elizabeth Acevedo: I bawled my eyes out reading this book. It isn’t even particularly sad, it’s just that she has a way of making you care about the characters.
Braiding Sweetgrass by Robin Wall Kimmerer: If you love nature, the outdoors, gardening, etc., this is a must read. On second thought, everyone should read this.
Anxious People by Fredrik Backman: This book has a fun twist at the end, and is written by one of my favorite authors. Check out his other books as well!
#5: Use your hands
In the summer it is my feet that guide my activity, padding through the garden barefoot feeling the earth, but in the winter, I lean heavily on my hands.
In winter I am drawn to different sensory experiences, which primarily revolve around fiber + cooking, to keep busy.
I work with my hands to keep my head busy and my heart full. I know this season too will pass, and my thoughts will turn from knit stitches to seedlings and a growing of a different kind. I don’t want to hold my breath until that happens, but rather, enjoy the now.
These pursuits make time stand still even as it seems to whirl past me faster and faster every season.
#6: Get Outside
There is lots to do outside in the winter but so often we forget that there’s no such thing as bad weather – just bad outfits. Gear up to go outside with some wool or fleece-lined leggings, a baklava, alpaca gloves and your favorite wool hat.
Dust of your sled from childhood and find a new hill to careen down, visit a new ice skating rink, take a walk in the woods with your field guide and hunt for animal tracks, put some birdseed on your deck and see what visitors you attract, hike a snow capped mountain or enjoy a quiet night beside a bonfire, wrapped up in one of those blankets you collected earlier and roasting marshmallows.
#7: Experiment in the kitchen
Nothing is more synonymous with winter cooking than baking. As our bodies crave richer foods to keep us warm through the winter season, I try to make a point to experiment in the kitchen with new recipes as well as old favorites. If you’re interested in a baking project, you could try making a spiced gingerbread with whipped cream, pumpkin cookies or sourdough bread. Make soup with whatever you have on hand and freeze some for those nights where you just can’t wait to eat another minute. Use seasonal ingredients such as potatoes, squash, apples, beets, brussel sprouts and carrots. Not every meal needs to be a fancy or extravagant preparation, but cooking from scratch allows you to work with your hands and maybe even learn something new.
Comment below and let me know what your winter essentials are!


![The Power of Nature: How To Make Infused Oregano Oil for Your Health and Wellness [Recipe]](https://images.squarespace-cdn.com/content/v1/60e85024dc86d643da81c96a/1682625337753-AFI1M6MRRMDQ5CBNY2TX/unsplash-image-Fl2Ki3_GZIU.jpg)


Caring For Cast Iron Cookware
Cooking on cast iron is a traditional method that has stood the test of time. Some of the best dishes I’ve ever made have involved cast iron cookware. The timelessness of cast iron pans is outshone only by their innate quality. You would be hard pressed to break a cast iron pan. Consider this your ultimate guide to choosing, maintaining and cooking with cast iron.

The Cottage Peach is reader-supported. When you purchase through links on our site, we may earn an affiliate commission at no additional cost to you. All opinions are our own.
Cooking on cast iron is a traditional method that has stood the test of time. Some of the best dishes I’ve ever made have involved cast iron cookware. The timelessness of cast iron pans is outshone only by their innate quality. You would be hard pressed to break a cast iron pan. Consider this your ultimate guide to choosing, maintaining and cooking with cast iron.
What is Cast Iron?
There are two ways we make things from iron. One is to heat it and work it with tools, the product of which we call wrought iron. The other is to cast it. In casting, melted iron is poured into molds to form a solid piece, such as a frying pan.
Why Cook on Cast Iron?
There are five reasons just about everyone should have a cast iron pan if they are able:
Cast iron pans will outlive you.
Cast iron pans are virtually indestructible. There’s a reason you can easily find them at antique stores and garage sales. Even a rusty old cast iron pan can be revitalized with a bit of work. When handled properly, a cast iron pan can be handed down to generation after generation.
Cast iron handles heat.
A cast iron pan can go from the stovetop to the oven to the table. Cast iron pans can handle heat up to 600 degrees, so have no trouble in a kitchen oven.
Cast iron maintains heat.
Once a cast iron pan is hot, it stays hot. This makes it ideal for searing food, keeping dinner warm, and making pizza.
Seasoned cast iron is non-stick.
With proper care, you can build up layers which will develop into a slick, hard, non-stick surface. Seasoning a pan is not hard. I’ll explain how below.
How to Choose a Cast Iron Pan
The first decision to make is whether you want to buy an older, used pan or a brand-new one.
There are benefits and downsides to either choice.
Benefits of old cast iron pans:
Ecologically, an older pan is the obvious choice.

In the 1940s and earlier, cast iron pans were poured into sand-based molds. They were then polished to smooth their pebbly surface. Because of this, an older pan can be slighter more non-stick than a newer one. People will hunt hard to collect these ‘original’ pans.
A vintage pan may already be beautifully seasoned. It takes time to develop a cast iron pan’s non-stick surface. An old pan that’s been cared for properly is a real find.
Downsides of old cat iron pans:
A vintage cast iron pan will need work if it has been allowed to rust. This can be time-consuming.
An old pan may hair hairline cracks or be warped, so needs to be examined closely before purchasing.
Vintage cast iron, particularly Griswold pans, can be more expensive than buying new. (Griswold pans are thinner, which means they are lighter and take less time to heat up.)
Benefits of new cast iron pans:
A new cast iron pan may be more readily available.
There are very inexpensive options available for new cast iron pans, and there are new pans available that are lightweight and relatively well-seasoned. Field pans are some of the best lightweight cast iron pans you can buy.
Downsides to new cast iron pans:
In the 1950s, a much higher volume of pans was produced than had been in the past. In order to streamline the process, the final step of polishing the pans was dropped. This results in cast iron pans that have more of a pebbly surface. These newer pans can be seasoned to a really nice non-stick surface, but they will never be quite as non-stick as an older pan.
While new pans may be marketed as pre-seasoned, for the most part there will only be a couple of thin layers of seasoning.
Inexpensive new cast iron pans are much thicker, and therefore much heavier. They are also rougher and take longer to season.
A lighter, well-seasoned cast iron pan, like those from Field, come with a higher cost but many benefits to go along with it.
How to Cook in Cast Iron

When you first start using a cast iron pan, even a pre-seasoned one, you may find your food sticks to it. To avoid this, it’s best not to cook with high heat until your seasoning develops.
The more often you cook with oil or butter, the faster you’ll have a well-seasoned pan.
The handle of a cast iron pan can get as hot as the pan itself, so use quality potholders. Silicone sleeves to cover the handles are also available.
It is ok to use metal utensils on seasoned cast iron if that’s what you’ve got. Seasoning is not just a coating on the surface of the cast iron. It is chemically bonded to it. You may not want to scrape hard at your cast iron pan with a metal spatula, but using it in the normal course of cooking is fine.
Acidic foods like tomatoes and vinegar can break down your pan’s seasoning. Once your pan has developed a non-stick seasoning, you can use small amounts of these ingredients, but it’s best not to use large quantities or to simmer acidic dishes for long periods of time in cast iron.
How to Clean a Cast Iron Skillet
Cast iron pans have a bad reputation as being finicky and difficult to clean. You’ll hear that you should never use soap, for example.
It’s true that cast iron should not go in the dishwasher. But there is no harm in using a small amount of soap with a pot scraper or sponge to hand-wash your pan. The advice to not use any soap is from back when soap was a lot harsher.
If you’d rather not use soap, though, you can use coarse salt and warm water to scrub your pan clean.
It’s easiest to clean a cast iron pan while it is still warm from cooking. This is true of just about every kind of pan I’ve ever used.
There are two big no-no’s when cleaning cast iron pans. The first is soaking. Soaking a cast iron pan can cause it to rust. It’s possible to repair a rusted cast iron pan, but it is not a quick process.
The second is that you should never put a cast iron pan away wet. Any moisture can be a problem.
There is one (quick) extra step when cleaning a cast iron pan as opposed to other pans. Cast iron pans should be seasoned after each use.
How to Season Cast Iron
Seasoning cast iron is a process which bonds hot fat molecules to the iron to build up a smooth, non-stick surface. Seasoning also protects the iron from rust and corrosion.

Cast iron is porous and when heated, those pores expand, which makes it possible for the fats to incorporate themselves within the iron.
Cooking with oil plays a part in seasoning the pan, but for best results, you should season your pan after each use.
How to season cast iron after use:
After washing it, put your cast iron pan on a burner over high heat until any water has evaporated.
Once it is dry, spread a small amount of olive, vegetable, sunflower, or grapeseed oil in a very thin layer over the pan with a paper towel or rag. Keep in on the heat for a minute, but remove it before the oil on the pan begins to smoke. Let it cool, and it’s ready to be put away.
How to do a deep seasoning of cast iron pans:
When you first get a cast iron pan, and then 2 or 3 times a year thereafter, you should do a deeper seasoning of your pan. It’s a similar process to regular seasoning, but in this case, we bake the pan in the oven rather than heating it on the stovetop.
What you’ll need:
An oven
¼ teaspoon + ¼ teaspoon oil, divided
Paper towel or rag
Instructions:
Preheat your oven to 200 degrees.
Clean your pan as you would after use, as described above, and dry it by heating it on the stove.
Put your dry pan in the oven at 200 degrees for 10 minutes. This will ensure it is completely dry and also open the iron’s pores.
After 10 minutes, remove it from the oven and increase the oven’s heat to 300 degrees.
Use a clean rag or paper towel to rub ¼ teaspoon of oil onto the pan, using a circular motion.
Using a different, clean rag or paper towel, rub off the excess oil. When you’ve removed the excess, your pan will look dry and dull. It will look as though you have removed all the oil, but a very thin layer will remain, which is just what you want.
Repeat this oiling process on the handle and underside of the pan with the second ¼ teaspoon of oil.
Put the pan, upside-down, on the middle rack of your oven at 300 degrees.
Leave it for 10 minutes, then remove the pan from the oven and increase the heat to 400.
Once your oven is at 400 degrees, return your pan to the middle rack, and let it bake for 1 hour.
At the end of the hour, turn off the oven, but keep the pan in there for an additional hour.
It’s important the heat be consistent, so do not open the oven door during the final two hours of the process.
Cooking Pizza on Cast Iron

As someone who likes each tool to do more than one job, I’m not a huge fan of pizza stones. Luckily for me, cast iron is equally useful for cooking pizza as it is for cooking eggs.
Cast iron is incredibly strong and can withstand very high temperatures. A baking stone is more fragile, and is more apt to experience thermal shock than a cast iron pan.
Pizza develops a crispy, chewy, puffed up crust when cooked on an already heated surface. Because cast iron holds heat extremely well, it is perfectly suited to the job. Pizza can be cooked either in the cast iron skillet or on the bottom of it.
Recipe: Pizza Cooked on Cast Iron
What you need:
Pizza dough
Sauce
Cheese
Toppings
Oil
10-12” cast iron skillet
Instructions: Pizza Cooked on Cast Iron
Put your skillet, empty, into the oven.
Set the oven to 500 degrees.
After 10 minutes, the pan should be hot. Remove it from the oven.
Sprinkle the surface of the pan with cornmeal or flour, and then arrange your dough, being careful not to burn your fingers.
Brush the dough with olive oil and put it back in the oven until the dough bubbles. (You can skip this step and move straight to toppings if you want. It just improves the texture of the dough.)
Add your sauce, cheese, and toppings and cook until golden brown, about 15 minutes.


Recipe: Easy Vegetable soup
We all know soup is good for you, and a great source of comfort. But have you considered that soup may be the best thing you can make for yourself when you are in the midst of a chronic illness flare, when you have no energy? Here is why soup is the best food to make for people with limited energy:

The Cottage Peach is reader-supported. When you purchase through links on our site, we may earn an affiliate commission at no additional cost to you. All opinions are our own.
“To feel safe and warm on a cold wet night, all you really need is soup.” — Laurie Colwin
We all know soup is good for you, and a great source of comfort. But have you considered that soup may be the best thing you can make for yourself when you are in the midst of a chronic illness flare, when you have no energy? Here is why soup is the best food to make for people with limited energy:
It’s easy to make soup, you can just throw your ingredients into the pot, set the heat and sit down while it cooks. You only need to get up every so often to stir the pot. You can easily modify it to substitute ingredients and save yourself a trip to the store, and using frozen vegetables (which contrary to popular belief often have a very similar level of nutrition as fresh produce) will save you the trouble of chopping everything yourself.
There’s only one pan to clean. Less dishes filling up your sink means less precious energy expended. And who really enjoys doing dishes anyway?
You can make a big batch of soup all at once and freeze most of it for later in individual servings to save you time on days when you really don’t have the ability to cook anything at all. This is also an excellent time saver if you’re planning for dinner guests - save your energy for conversation by thawing out your soup the day of and have dinner ready to go with the turn of a dial.
Soup is easy on your stomach. Because everything is cooked low and slow for an extended period of time, your gut won’t have to work as hard to digest it. The nutrients within the soup are also more bioavailable, meaning your body can absorb more of the benefits more easily.
A scent that brings us home
The way the smells of soup fill a house easily brings us back to our childhood, and the comforting knowledge that our bowls will be filled by our loved ones without fail. I almost exclusively make soup in the fall and winter, as I find the aromas to be the perfect way to bring warmth to your kitchen and home in the cold and gray months. Plus, a bowl of soup functions as an excellent hand warmer!
Why should you saute soup ingredients first?
Many soup recipes begin with instructions to saute the vegetables and aromatic herbs first. It can be easy to dismiss this step thinking that these ingredients will cook through just fine since the soup will cook a long time once the liquids are added.
Here’s what Serious Eats has to say about sauteing vegetables: “Vegetables contain many different aromatic molecules trapped inside their cells. But the aromas you get from raw vegetables are quite different from those you get from cooked vegetables. In fact, the aromas you get from whole vegetables is even different from those that you get from vegetables that have been finely chopped, grated, or have otherwise had their cells ruptured. This is all due to reactions that take place between chemical precursors inside the vegetables cells. When those cells are ruptured, these precursors come into contact with each other and recombine into new compounds. Heat and time can increase the rate of these reactions, and indeed cause brand new ones to occur.”
Can you freeze vegetable soup?
Yes, soup generally freezes very well. I prefer to ladle my leftover soup into mason jars for long term storage in the deep freezer. Make sure to leave at least an inch of headspace at the top of your jars since the liquid will expand as it freezes. You can store soup in the freezer for two to three months. Soups with dairy don’t always freeze as well or as long - about one month. To thaw, just move your mason jar to the refrigerator the night before you want to eat. Then you can pour your thawed soup into a sauce pan to reheat on the stove top.
How long will vegetable soup last in the fridge?
Soup can be stored in the fridge for five to seven days. I still prefer mason jars for storing soup in the fridge, since it’s easy to pour from. We have a large metal canning funnel that makes ladling the soup into the jars very simple. Be sure to label it too so you don’t lose track of it in the back of the fridge!
Can you make vegetable soup in advance?

Vegetable soup is great to have on hand for busy nights. You can meal prep your soup up to five days in advance and store it in the fridge for another time.
What kind of pot should you make soup in?
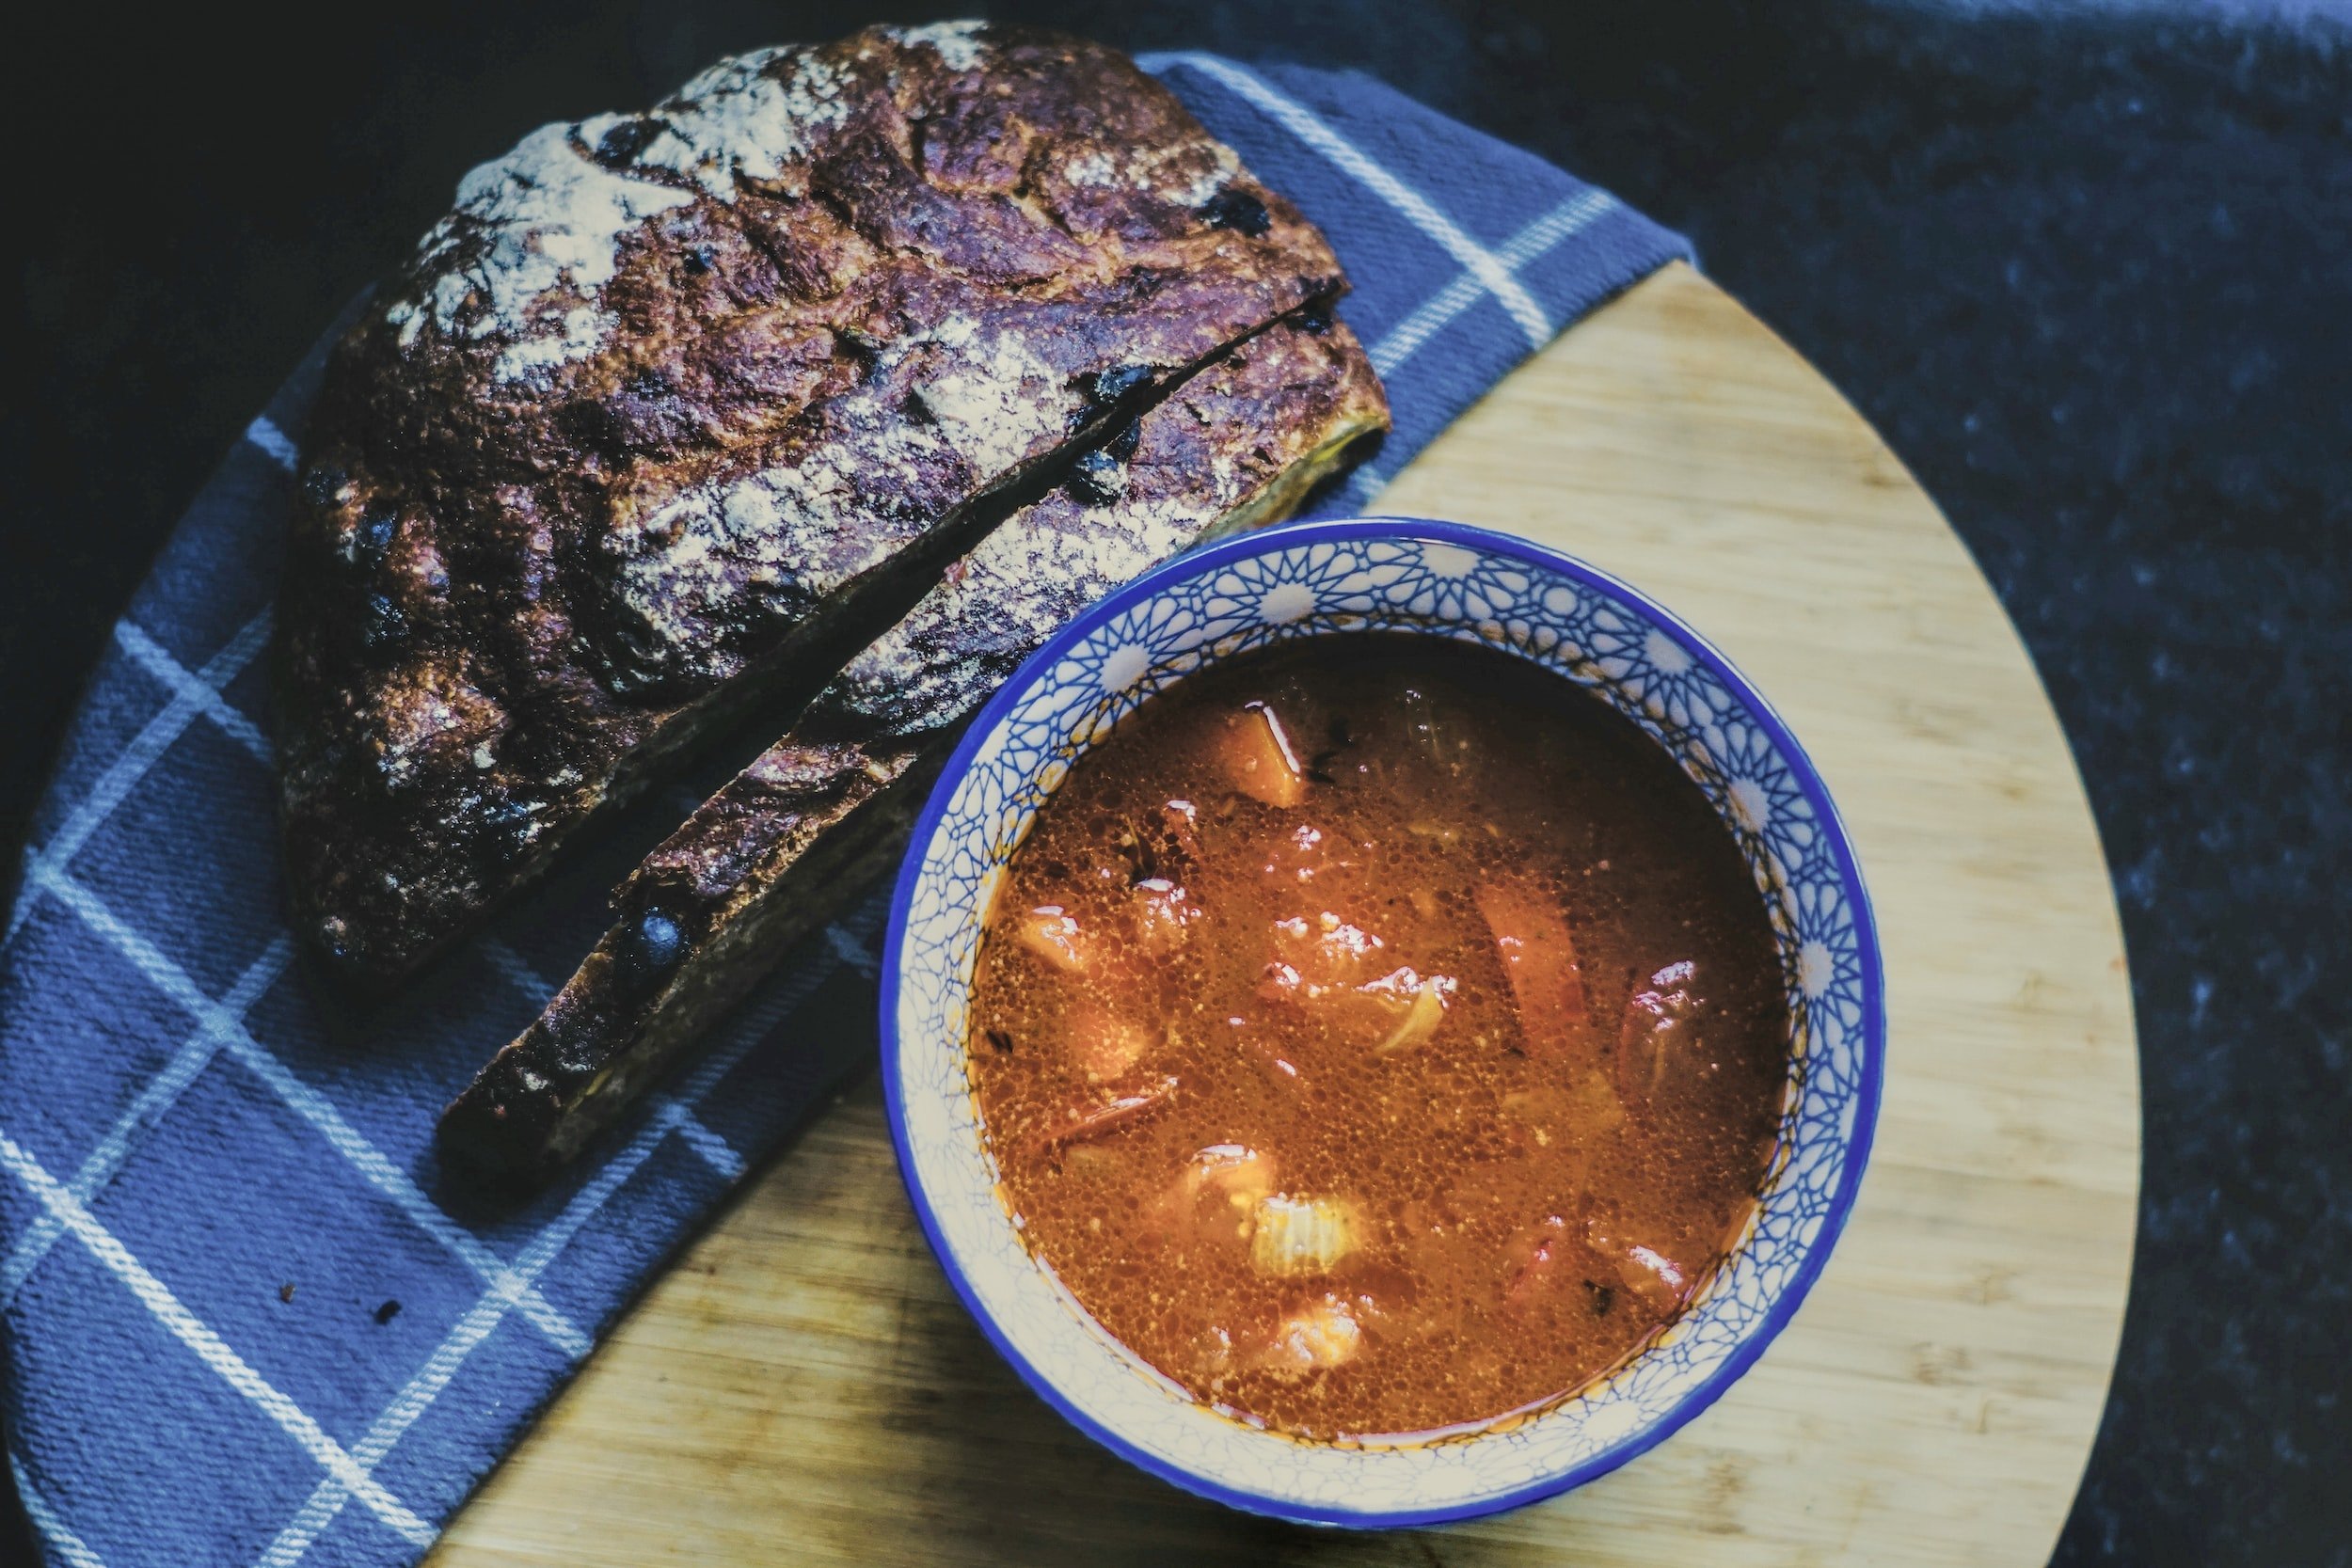
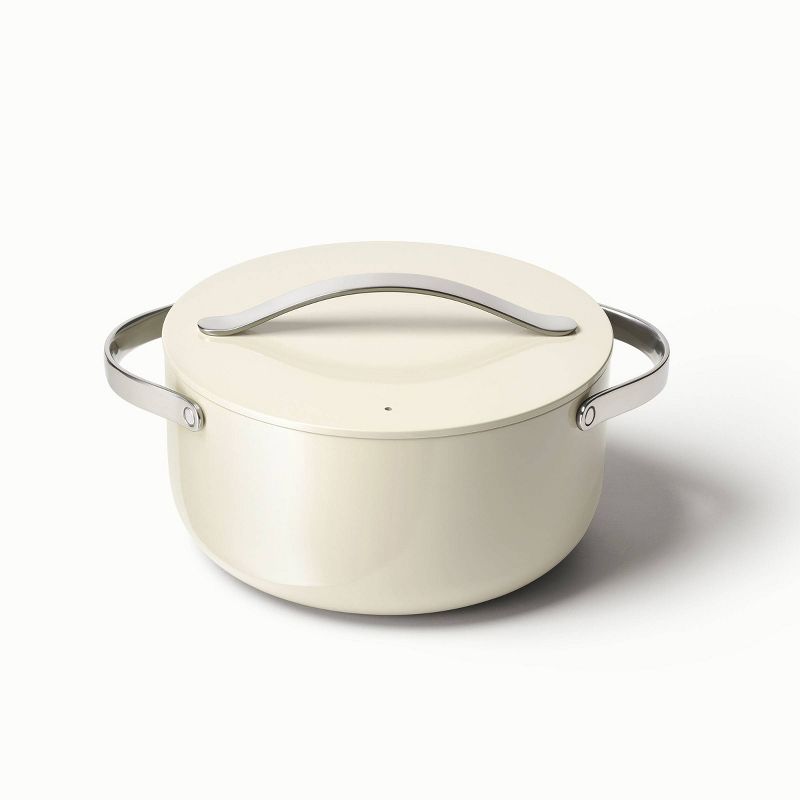
Soup is one of the larger batch meals we cook in our kitchen, and so I find myself reaching for our Caraway Home non-toxic 6.5 quart Dutch oven. It never fails to surprise me how quickly such a large pot can be filled once all your soup ingredients are added. Soup really is the best way to stretch your ingredients the farthest.
Is vegetable soup healthy?
There are many healthy soup recipes and vegetable soup in general is very healthy and a great vehicle for serving vegetables to picky eaters in particular. One thing that can make soup less healthy is when there is excessive sodium in the soup, which usually comes from the broth that has been used. Most processed vegetable broth as well as powders and cubes have extremely high levels of sodium to make up for the lack of other flavoring. You can make your own dry vegetable broth mix pretty easily by combining nutritional yeast, and powdered onion, garlic, tomato, carrot, salt and pepper and herbs. We personally use the Frontier Co-op Low Sodium Vegetable Broth Powder in all our soups including my vegetarian vegetable soup recipe and love it, but it is definitely more cost effective to make it from scratch yourself.
So what is the best way to make an easy soup recipe? The basics of soup making are the same, no matter what soup recipe you start from. You will heat your fat (I usually use olive oil) and add your toughest vegetables like carrots and potatoes first. Then your softer vegetables like onion and broccoli, peas and corn. Lastly, you’ll sautee your aromatics like herbs, spices and garlic for the shortest amount of time.
Once your vegetables are all softened you can go ahead and add any liquids - tomato paste, crushed tomatoes, broth. All this needs to simmer to allow the flavors to blend for thirty to sixty minutes depending on the specific soup recipe.
Really, once you understand the basic elements of soup making it is the best sort of recipe to begin experimenting with in the kitchen. Start with small modifications to a recipe you know and love, and move on to more complex changes. Once you’re comfortable with substitutions, you’ll probably have a good idea of what flavors go nicely with each other and can start developing recipes from scratch on your own. Soup is a fantastic first foray into recipe development for this reason.
My favorite easy soup recipe is my grandmother’s vegetable soup. Aside from the obvious nostalgia that comes with every spoonful, it makes a fantastic base from which you can modify and make the vegetable soup recipe your own. This is a tomato based soup, with grains for fiber and protein and a mix of vegetables that everyone will enjoy including onion, peas, carrots and corn. You can easily swap out the farro for a different grain of your choice, and add or subtract whatever vegetables you and your family enjoy. Plus, this is the perfect soup recipe when you are putting off making another grocery run because you can just throw whatever frozen veggie mix you have in the freezer in and call it a day!
My grandma always serves this soup with a big loaf of fresh challah bread, golden brown on the top and slightly sweet. Toasted with butter, I can’t imagine a meal that feels more like home to me. I can remember many cozy evenings as a child enjoying this soup with my family, and now that my grandma has moved to another country, I make this soup any time I miss her to bring her comforting and sometimes wild presence to our kitchen once again.
Since I’m always looking for easy vegetarian soup recipes and ideas, I wanted to share mine with you and encourage you to use it as a starting point to develop your own favorite vegetable soup! This is a modified version of my grandma’s recipe, made based on what we usually have on hand in our pantry on any given day. I hope you make this recipe your own, and share a bowl with the people you love this winter.
Grandma’s Easy Vegetarian Vegetable Soup Recipe
Easy Vegetable Soup
Ingredients
- 2 Carrots
- 1 Yellow onion
- ½ cup Peas
- ½ cup Corn
- 28oz Diced tomatoes
- 8oz Tomato sauce
- ½ cup Farro
- 4 cups vegetable broth
- Salt and pepper to taste
Instructions
- Saute the onion and carrot on medium heat until softened.
- Add all remaining ingredients and bring to a boil.
- Lower heat and simmer 40 minutes, partially covered.


Nutrition Facts
Calories
102.86Fat
0.67Sat. Fat
0.12Carbs
22.64Fiber
4.97Net carbs
17.68Sugar
6.97Protein
3.56Sodium
646.31Cholesterol
0


Equilibria CBD Review + My Routine
My introduction to CBD came at the lowest point in my life. I was exhausted and struggling with my arthritis, and every day by three o’clock my stress level had compounded to the point where the tension in my body would not go away.
I have always appreciated a balance between incorporating natural remedies and modern medicine to manage my stress and discomfort, but I felt like I had hit a wall and nothing was going to help. Plus, there are so many fake “natural remedies” out there that are just preying on vulnerable people desperate for a cure. I didn’t want to fall into that trap (this is also why my CBD partnership with Equilibria is the only wellness-based company I will partner with, so hopefully that tells you something about how reputable they are)

The Cottage Peach is reader-supported. When you purchase through links on our site, we may earn an affiliate commission at no additional cost to you. All opinions are our own. Products in this post were gifted.
My introduction to CBD came at the lowest point in my life. I was exhausted and struggling with my arthritis, and every day by three o’clock my stress level had compounded to the point where the tension in my body would not go away. I have always appreciated a balance between incorporating natural remedies and modern medicine to manage my stress and discomfort, but I felt like I had hit a wall and nothing was going to help. Plus, there are so many fake “natural remedies” out there that are just preying on vulnerable people desperate for a cure. I didn’t want to fall into that trap (this is also why my CBD partnership with Equilibria is the only wellness-based company I will partner with, so hopefully that tells you something about how reputable they are)
I had tried CBD before, but it never seemed to work for me. But it took me watching another Instagram creator talking about CBD to decide to give it another try. She talked about how you need to use CBD consistently for at least 30 consecutive days in order to see an effect. In the past, I had tried to use CBD to solve in-the-moment stress and found it lacking.
It is so important when trying something new to educate yourself before making a decision, and one of the main reasons that I gravitated towards the brand this creator was advertising was that they really emphasized the importance of education and provided tons of easy to understand resources about how CBD works in your body to mirror compounds we produce naturally, retraining your nervous system to take better care of itself.
Another thing that was holding me back from really putting my trust in CBD was it seemed too easy - it didn’t make sense to me that we could all just take the same dose no matter our issues or body size and have great results. Part of what Equilibria is doing differently is that they fully support you throughout your CBD discovery journey with their free dosage consultations with experts who custom tailor your routine to fit your life and needs. They taught me that CBD is flexible, and what you need may change from season to season. For example, when I have a flare up of my arthritis symptoms or a stressful time at work filled with deadlines, I know I need to lean on my CBD routine more and increase my dosage. But I can accomplish this in so many different ways, because depending on the form of CBD that I use it may be more fast-acting or long-lasting.
So, let’s start with the basics.
What is CBD?

CBD is a phytocannabinoid found in the hemp plant. But what does this actually mean? Our body produces compounds like CBD naturally in our endocannabinoid system or ECS. The ECS comprises a vast network of chemical signals and cellular receptors that are densely packed throughout our brains and bodies. The ECS affects our immune system, nervous system and organs.
Here’s what Equilibria has to say about the ECS:
“The primary function of the Endocannabinoid System is to maintain balance throughout your body. Endocannabinoids (neurotransmitters) and cannabinoid receptors are the two essential players in this system.
Stress can contribute to a decline in ECS function, and one approach that may support the healing of this system is to introduce phytocannabinoids like CBD.
CBD is not used to treat underlying medical conditions; instead, it plays a role in supporting the ECS to address imbalances by amplifying your body’s natural balancing and healing properties.
Since the discovery of the ECS in the early nineties, researchers have identified ECS receptors in nearly every area of the body. “
Is CBD legal? Is CBD psychoactive?
CBD is not psychoactive, meaning it does not cause a “high”. That feeling comes primarily from THC which is only found in extremely low quantities in the hemp plant - in fact, the amount of THC is so low that hemp is totally legal in all 50 states. Think of it like a non-alcoholic beer - there may still be a tiny amount of alcohol present, but not enough to intoxicate or require legal regulation.
CBD for discomfort and soreness
One of the worst parts about having arthritis is managing the discomfort that comes with joint inflammation. I have really bad knees, so any kind of bending or kneeling (which we have to do a lot of in the garden!) is difficult for me and causes my joints to start to stiffen. I also get tension and soreness in my neck that can make turning my head difficult.
Now, before you click away because this sounds too good to be true I’ll say this is just my own experience, and it doesn’t always help especially when my discomfort is at a ten, but the first time I used the Relief Balm for my neck soreness, I was shocked. I literally went from not being able to turn my head to the side at all to almost a full range of motion in minutes.

CBD effects
So what does CBD feel like? Honestly, it’s subtle. Within a couple weeks of starting my CBD routine with Equilibria, I was in the middle of an extremely stressful day when I realized something; I could breathe. If you’ve ever experienced stress, you probably know what I mean - but with CBD, it wasn’t that it turned me into a groggy zombie, I just suddenly had the choice to decide what was worth being stressed about instead of having that stress own me. This in itself was life changing.
Difference between full spectrum and broad spectrum CBD
I’ve alluded to the fact that not all CBD is created equal. This is a huge, unregulated industry, and I’d encourage you to be very wary of brands who make bold claims with no data to back them up. This means looking for third party testing data available publicly on their website, and also choosing a full spectrum versus broad spectrum product. Full spectrum CBD includes more than just CBD - it utilizes the entire spectrum of cannabinoids available within the hemp plant to activate something we like to call the “entourage effect”. Other minor cannabinoids work in unison with CBD to help it work more effectively to reach its goal.
From the Equilibria website: “The Entourage Effect put simply, is like having team members. The more hands-on-deck we have to work toward a common goal, the better! When CBD has the other components of the hemp plant there to help it out, its job as team leader becomes a lot more productive.
While Broad Spectrum products do include some of CBD’s teammates, they are missing one key component. And that component is THC. Full Spectrum products, on the other hand, keep THC in the formula. Albeit in teeny tiny amounts (each of our products contains <<0.3% THC, which means it won’t get you high and it’s federally legal).”
My daily CBD routine
My routine is literally the only thing that keeps me going most days. If you live with chronic illness too, you probably know what I mean! If I don't start my day with stretching, journaling and CBD my mind and my body just won't cooperate.
AM:
Meditate 10-15 minutes - I use the Insight app for this.
Move my body 15-20 minutes - I usually just pick a YouTube video focused on upper body, lower body or yoga or go for a walk.
Shower

Breakfast - I try to always incorporate healthy fats into my breakfast because that helps the CBD bind better and work most effectively. Avocado, cheese, dark chocolate, eggs, nuts and chia seeds are all great sources of healthy fat. At the end of my meal I take 1 Extra Strength Soft Gel. This has a slower release than a CBD oil you take sublingually (under the tongue) and lasts longer to get me through the day.
Throughout the day, I’ll use a topical CBD to spot treat sore areas (usually my neck) with Relief Balm (best long term relief) or the Recovery Roll On (best for fast acting relief). If it’s a particularly rough day I may take a Daily Gummy in the afternoon if I start to feel my morning dose wearing off.
PM: If it’s been a stressful day, I like to unwind with CBD Drink Drops. These are an excellent non-alcoholic alternative to a glass of wine and come in a three pack with different flavors. At night before bed I take either 2 CBD Sleep Gummies (these are long lasting if you have trouble staying asleep) or 1 Sleep Melt (Best for helping you to fall asleep)
It’s important to note that I have pretty severe psoriatic arthritis and anxiety. If you’re taking CBD just for stress relief, your needs may be different. That’s why it’s so important to meet with one of Equilibria’s dosage specialists to build a routine specific to your needs.
For best results with CBD, it’s essential to make this a consistent part of your routine and allow at least 30 days to see any changes. So where should you begin?
CBD for beginners
If you’re new to CBD, I’d recommend starting with a monthly subscription to the Relief+ bundle.
This bundle includes the topical relief balm, regular strength daily drops and regular strength daily soft gels. Everything you need to really get a sense of whether or not CBD will work for you. Buying as a bundle unlocks a 25% discount which you can stack with my 15% off code “thecottagepeach”
Pro tip: The only negative I can find with Equilibria is the cost. It can be prohibitively expensive if you don’t take advantage of their promotions, although I do believe it is worth every penny for the mental health benefits alone. Thankfully, just by signing up for their monthly subscription you can save even more, and they make canceling really easy if you decide CBD is not for you. No sketchy recurring fees here!
Adding CBD to my daily routine keeps my stress from overwhelming me, and my discomfort at a minimum. I can’t imagine going without it.
Click here to shop Equilibria CBD and use code “THECOTTAGEPEACH” for 15% off your first order.
![Make This Easy + Natural Botanical Hand Salve [Recipe]](https://images.squarespace-cdn.com/content/v1/60e85024dc86d643da81c96a/b57698b0-de70-4101-afaf-7af57788237d/Herbal+Face+Steam+Recipe+by+The+Cottage+Peach-1.jpg)

Recipe: Homemade Hot Chocolate
There is nothing quite so nostalgic and comforting as curling up for a cozy night by the fire in your wool socks to watch a holiday movie while clutching a mug of warm homemade hot chocolate. With the sun leaving us for the day earlier and earlier each day, finding ways to keep ourselves occupied in the evening hours can be challenging, and so we tend to fall back on the traditions of childhood to keep us awake until bedtime. But this is not a post about my bedtime routine, as much as I would like to lull us all to sleep with that tale! This is a post about the unimpeachable winter drink to top all winter drinks (eggnog lovers cover your ears!) hot chocolate

The Cottage Peach is reader-supported. When you purchase through links on our site, we may earn an affiliate commission at no additional cost to you. All opinions are our own.
There is nothing quite so nostalgic and comforting as curling up for a cozy night by the fire in your wool socks to watch a holiday movie while clutching a mug of warm homemade hot chocolate. With the sun leaving us for the day earlier and earlier each day, finding ways to keep ourselves occupied in the evening hours can be challenging, and so we tend to fall back on the traditions of childhood to keep us awake until bedtime. But this is not a post about my bedtime routine, as much as I would like to lull us all to sleep with that tale! This is a post about the unimpeachable winter drink to top all winter drinks (eggnog lovers cover your ears!) hot chocolate
Now, to be clear I’m not knocking a mug of nutmeg and nog - far from it. But hot chocolate is just on another level. The rich, creamy thick and warm liquid can have as much or as little depth of flavor as you like, depending on the chocolate used. My personal favorite is Mexican hot chocolate. We have a local chocolate company here in Massachusetts called Taza Chocolate that makes a perfectly portioned disk of chocolate with which to make yourself a mug full. At first, the experience is full of uncertainty - are you really supposed to put THIS much chocolate in one serving? But then as the chocolate melts and blends with your chosen milk and alchemy conspires to create the most spectacularly rich and thick molten treat you can imagine. This is not for the faint of heart, so you better love chocolate if you’re going to make your own. A drink this rich coats your mouth with the flavors of fermenting cacao bean, the acidity reminiscent of coffee, and the subtle sweetness of dark chocolate.
If this sounds like an experience you need to try, you can find Taza Chocolate in many health food stores or purchase online, this is not an affiliate link just love supporting local!
Hot chocolate also offers an endless array of options for flavoring and add-ins that are simple but can have a huge impact on the end result.
Add peppermint to lighten the overall flavor and add a festive touch
Add cinnamon and salt to bring out the different flavors in the cacao beans
Add caramel for the comforting sweetness of browned butter and sugar
Toppings are add-ins that compliment your hot chocolate drink, creating a full dessert experience in your mug.
I’m personally partial to the dandies vegan marshmallows for my hot chocolate garnish, but any marshmallow will do - I think hot chocolate is the only place those hard dried mini marshmallows have a chance to really shine.
Bump up the sweetness factor with a chocolate covered spoon or caramel dipped rim coated in sea salt.
Hook a candy cane over the side to keep your mug company and your breath minty.
Can you make hot chocolate with non-dairy milk?
Yes, and I do this myself as I can’t drink cow’s milk. After nearly a decade of trial and error, I can say with certainty that the best non-dairy milk to use when making homemade hot chocolate is without a doubt oat milk, since oat milk is usually richer and mimics whole milk best.
There’s no reason that vegan hot chocolate can’t be just as rich and delicious as hot chocolate made with cow’s milk. Try coconut milk, soy milk and almond milk too and see which one is your favorite.

Sourcing ethical cacao
Whether you decide to make peppermint hot chocolate, dark hot chocolate, caramel hot chocolate or plain I would urge you to consider the origins of your chocolate.
Cocoa and chocolate come from the cacao tree, which thrives in the rainforest.
According to Source Trace, on average cacao farmers earn less than $2 per day, an income much below the poverty line.
As per the latest report on cacao farming, close to two million children in the Ivory Coast and Ghana are engaged in child labor in hazardous conditions.
Also, cacao production is rising at an alarming rate – it has risen by 62% over the last two decades. This is a serious threat to Africa’s forest cover as farmers are choosing to expand their growing operations into rainforests and other patches of land. 40% of the cacao coming from the Ivory Coast can be traced back to being grown in protected lands.
The best way to tell if your cacao is ethically sourced is to buy from companies who share the origin of their cacao and practice fair or direct trade, utilizing third party verification to certify their claims. You should also look for transparency reports available on their website.
What is direct trade?
Currently, there is no industry standard for direct trade in the cacao industry. As one example, Taza created their own direct trade program which they are held accountable for by a third party company. Their program focuses on real relationships (they meet with the farmers whose cacao they are purchasing) quality (they only purchase USDA certified organic cacao) and fair wages.
The main way that direct trade is different from fair trade is that direct trade purchasers typically pay their farmers more than fair trade companies. Direct trade companies may pay a 15%-20% premium to their cacao farmers compared to similar fair trade companies. In exchange for this higher rate, these farmers are expected to produce a high quality, organic product and use production methods that lower the environmental impact of growing cacao trees.
So why should you make your homemade hot chocolate on the stovetop rather than the slow cooker? While I encourage you to utilize whatever cooking methods you need to in order to support your own body’s limitations, I consider the stovetop version to be an easy way to practice some mindfulness in my day. Warming your hot chocolate beverage on the stovetop forces you to pause and be present. Sometimes, coming off of autopilot is the best way to fully appreciate the beauty of winter in all its glory. So, pull up a chair if you need to and truly allow yourself to savor the experience - from the comforting scent of the chocolate to the invigorating scent of mint.
Of course, when you’re finished making my best hot chocolate recipe, the mug you choose to enjoy it in can be equally as important in determining how cozy of an experience you create. I like to put out an enticing array of handmade ceramic mugs for my guests to choose from, alongside a tray with add-ins like marshmallows and candy canes they can add as a garnish to their drink. Make this hot chocolate as the perfect refreshment for your cozy movie night with friends!

What’s the difference between hot chocolate and hot cocoa?
Hot chocolate refers to a decadent dessert drink made with real melted chocolate blended into a liquid, usually milk. Hot cocoa uses cocoa powder dissolved in milk or water and is generally lighter and thinner. While both can be delicious, today I’ll be sharing with you a recipe for homemade Mexican hot chocolate.
What is Mexican chocolate?
According to The Spruce Eats, “The craft of chocolate making can be traced back to 1900 BCE in Mesoamerica and in fact, it appears the way the Aztecs prepared it is similar to how Mexicans do today. The cacao beans are typically fermented, roasted, peeled, and then ground into a paste using either a metate, which is a traditional tool for hand-grinding materials or with a molino, a mill. Sugar is then mixed in and from here, cinnamon is traditionally added…Finally, the chocolate is worked into its final shape, which is most often a disc or log. This rustic presentation works perfectly since Mexican chocolate is still made by hand in many regions.”
How to make homemade chocolate recipe:
This hot chocolate recipe is so easy, and only requires a handful of ingredients. As with most simple recipes, the best way to dress it up is in the quality of the ingredients you choose. While we can all appreciate the nostalgia of the instant hot chocolate packets you can get at any supermarket, this Mexican hot chocolate recipe is a much richer, more decadent treat to warm you all the way through. You’ll just need a saucepan, your milk of choice, and a high quality chocolate like these disks from Taza to get started. From there it’s choose-your-own-adventure to add additional flavors and garnishes.
Mexican Hot Chocolate Recipe (modified from recipe by Taza Chocolate)
Mexican Hot Chocolate
Ingredients
- 2.7oz dark chocolate bar (The Taza chocolate disks are the perfect size)
- 2 cups milk, non-dairy or cow
- ¼ tsp vanilla extract
- 2 tbsp maple syrup
- Pinch of salt
Instructions
- Roughly chop or grate the chocolate and set aside.
- Heat two cups of milk in a small saucepan over medium heat to just below a simmer.
- Remove the milk from heat and add a pinch of salt.
- Slowly mix in the chocolate, stirring frequently until dissolved.
- When the chocolate is dissolved, return the mixture to the stove and re-warm over low heat.
- While the chocolate is warming, use a whisk or molinillo to froth the chocolate.
- When the chocolate is hot and frothy, remove from heat and serve.
Nutrition Facts
Calories
430.78Fat
24.13Sat. Fat
13.91Carbs
42.51Fiber
4.17Net carbs
38.34Sugar
32.97Protein
10.99Sodium
121.6Cholesterol
30.43