
BACKYARD GARDENING
WITHOUT THE BACKACHE
![Winter Sowing in Milk Jugs - How to Winter Sow Seeds [Tutorial]](https://images.squarespace-cdn.com/content/v1/60e85024dc86d643da81c96a/ce1bff67-74ef-407a-acac-a45d4d9572f3/E9D5DEFD-A4BA-446D-A0E5-83B1594BB789.JPG)
Winter Sowing in Milk Jugs - How to Winter Sow Seeds [Tutorial]
You don't need an expensive grow light setup to start seeds for your garden. In fact, all you need is a humble milk jug, some soil, and seeds to kickstart your gardening journey. This simple and cost-effective method, known as winter sowing, allows you to harness the power of nature to germinate seeds and get a head start on your garden. In this blog post, we'll explore the step-by-step process of winter sowing in milk jugs, making it accessible to even the most novice gardeners.
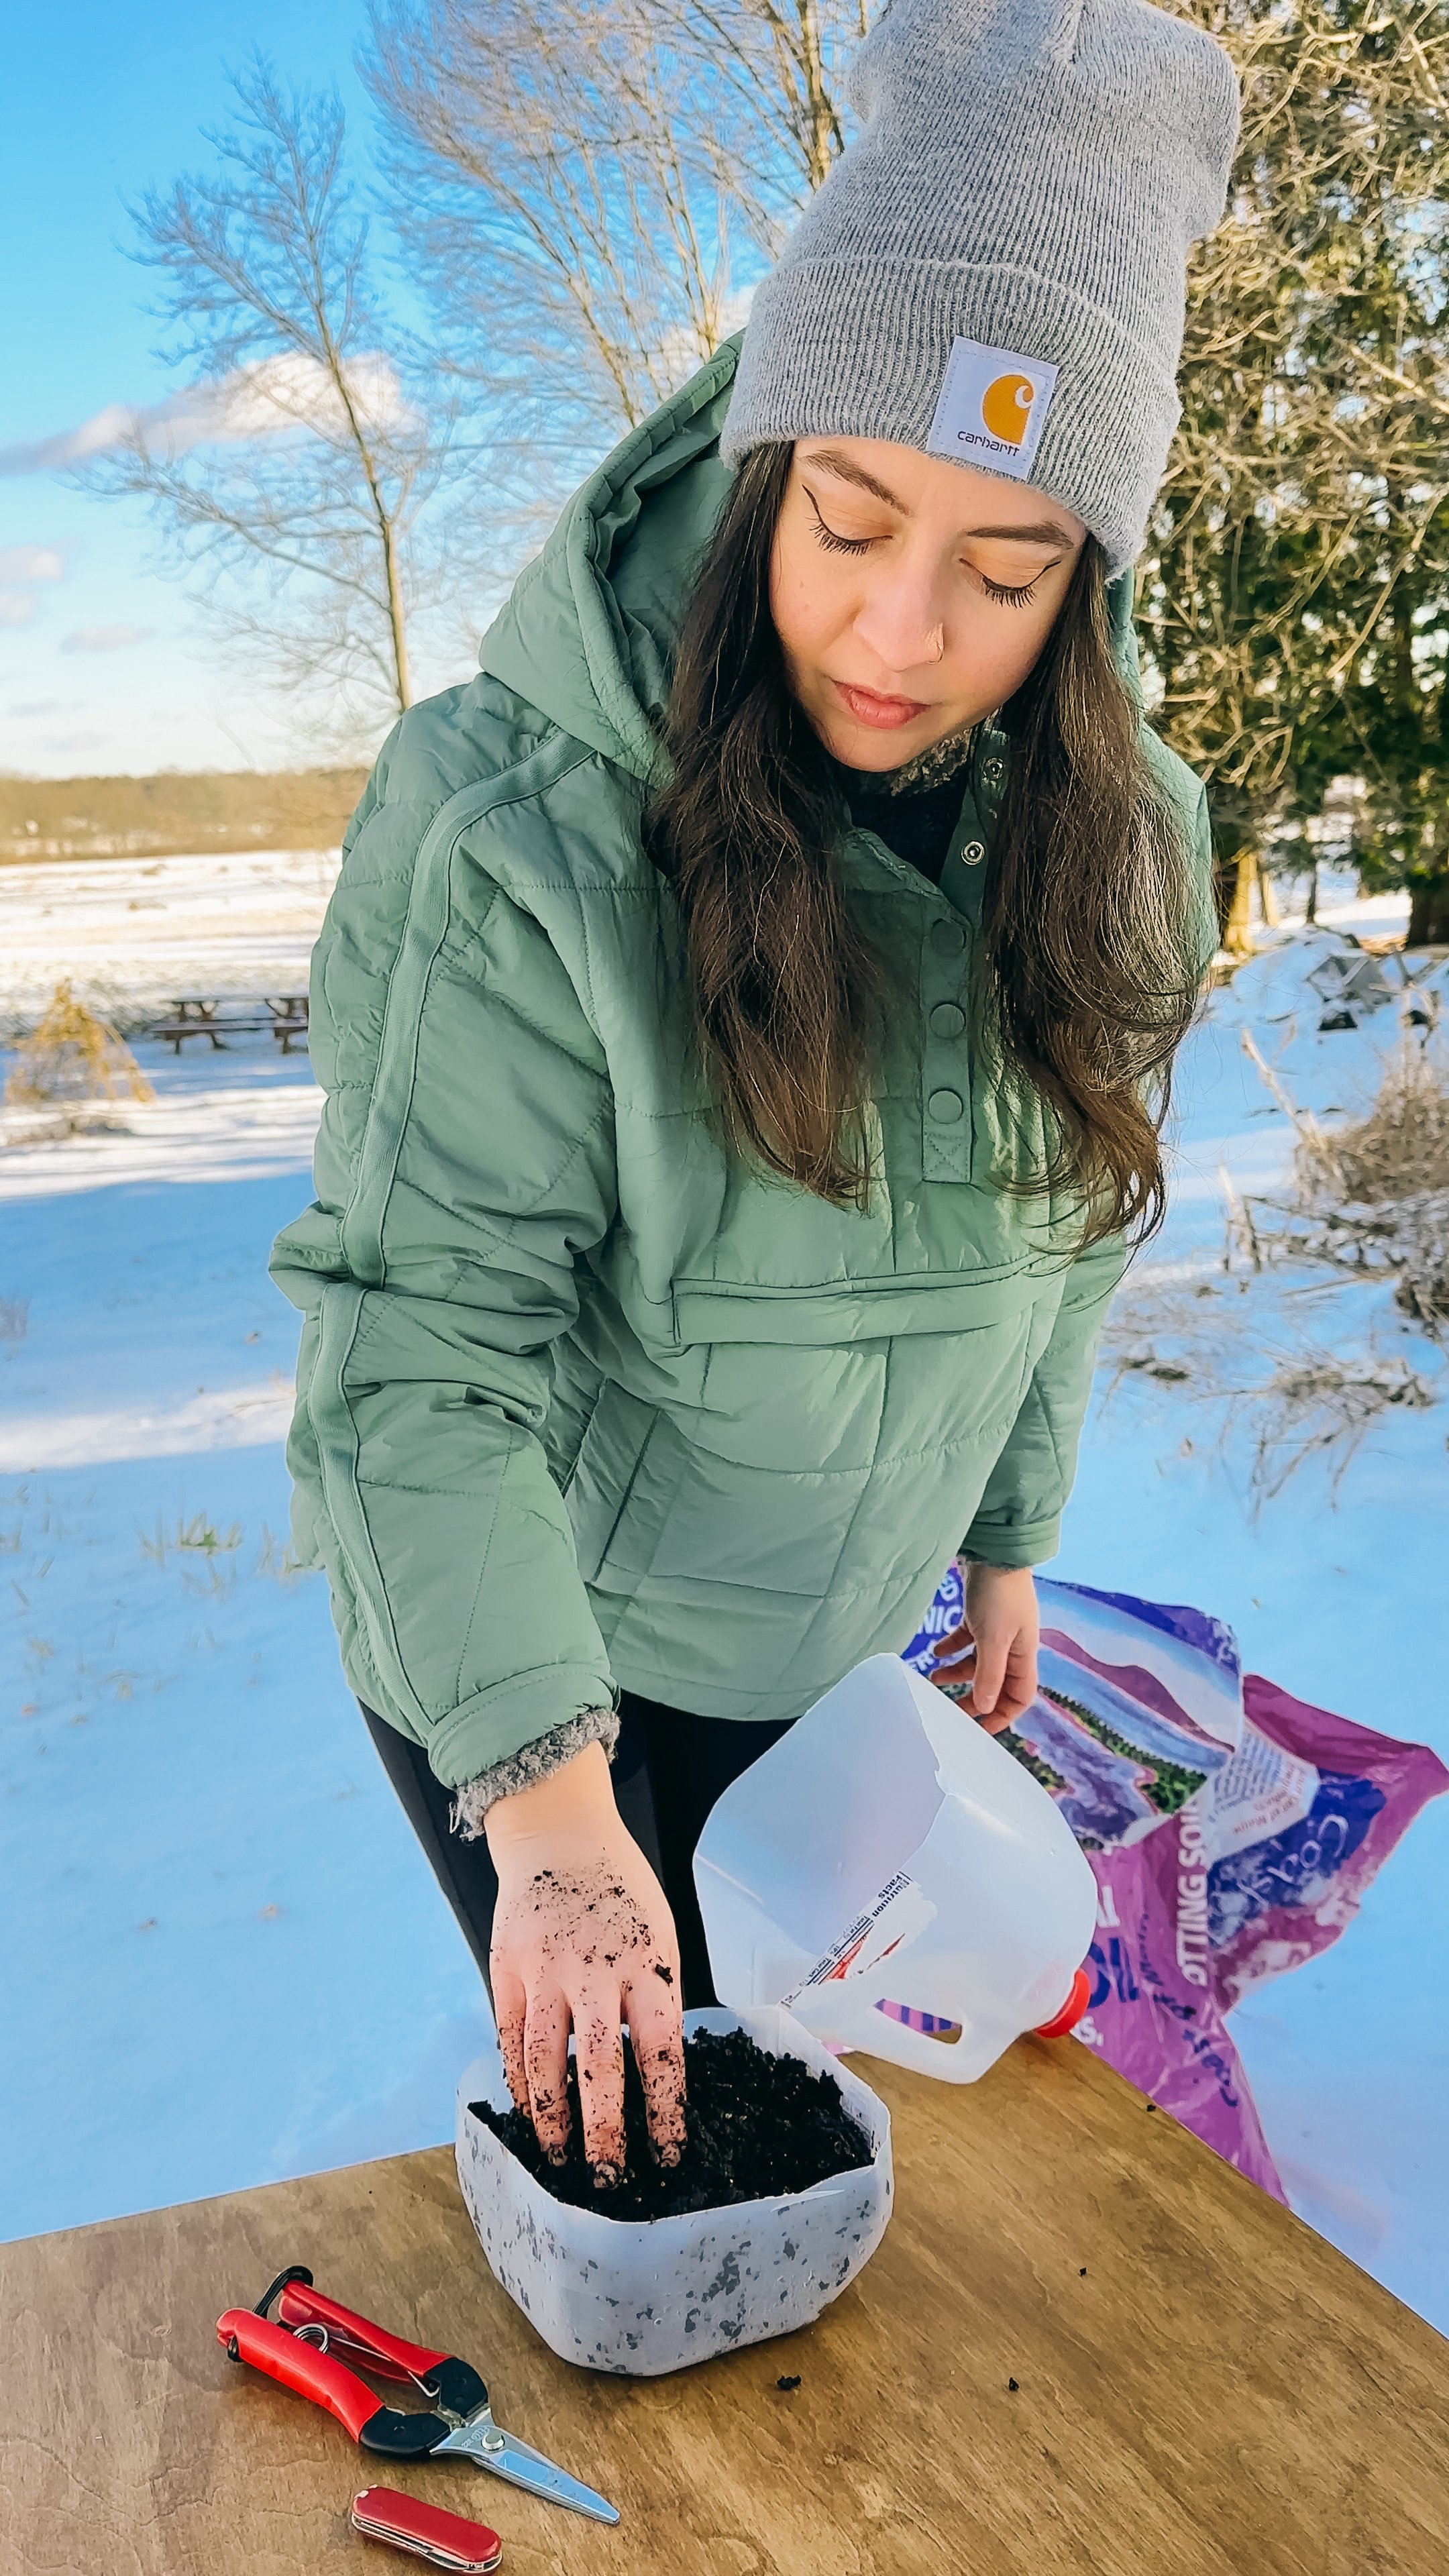
You don't need an expensive grow light setup to start seeds for your garden. In fact, all you need is a humble milk jug, some soil, and seeds to kickstart your gardening journey. This simple and cost-effective method, known as winter sowing, allows you to harness the power of nature to germinate seeds and get a head start on your garden. In this blog post, we'll explore the step-by-step process of winter sowing using milk jugs, making it accessible to even the most novice gardeners.
Watch me do it
Winter Sowing in Milk Jugs | How to Winter Sow Seeds For The Garden · Subscribe on YouTube
Benefits of Winter Sowing
Wondering what is winter sowing? Winter sowing eliminates the need for expensive grow light setups, making it an incredibly budget-friendly option for seed starting. By using the power of natural sunlight and outdoor conditions, winter sowing mimics the seeds' natural environment, promoting healthier and more robust seedlings. This method allows you to get a head start on your cold-hardy spring crops, giving them a longer growing season and increased chances of success. With just a few basic supplies, you can embark on your gardening journey without the need for complex equipment.
How to winter sow seeds
Materials Needed
Milk jug (or any similar plastic container)
Soil
Seeds
Scissors or utility knife
Duct tape
Popsicle stick or other plant marker you can write on
Permanent marker
Step 1: Prepare Your Milk Jug
Start by collecting empty milk jugs or similar plastic containers. Ensure that they are clean and free of any residue. Milk jugs or water jugs are ideal for this method due to their translucent nature, allowing sunlight to penetrate while providing a protective environment for your seeds.
Poke drainage holes in the base of the jug to prevent waterlogging. Adequate drainage is crucial for seedlings' health, preventing root rot and mold formation.
Step 2: Cut and Create a Hinge
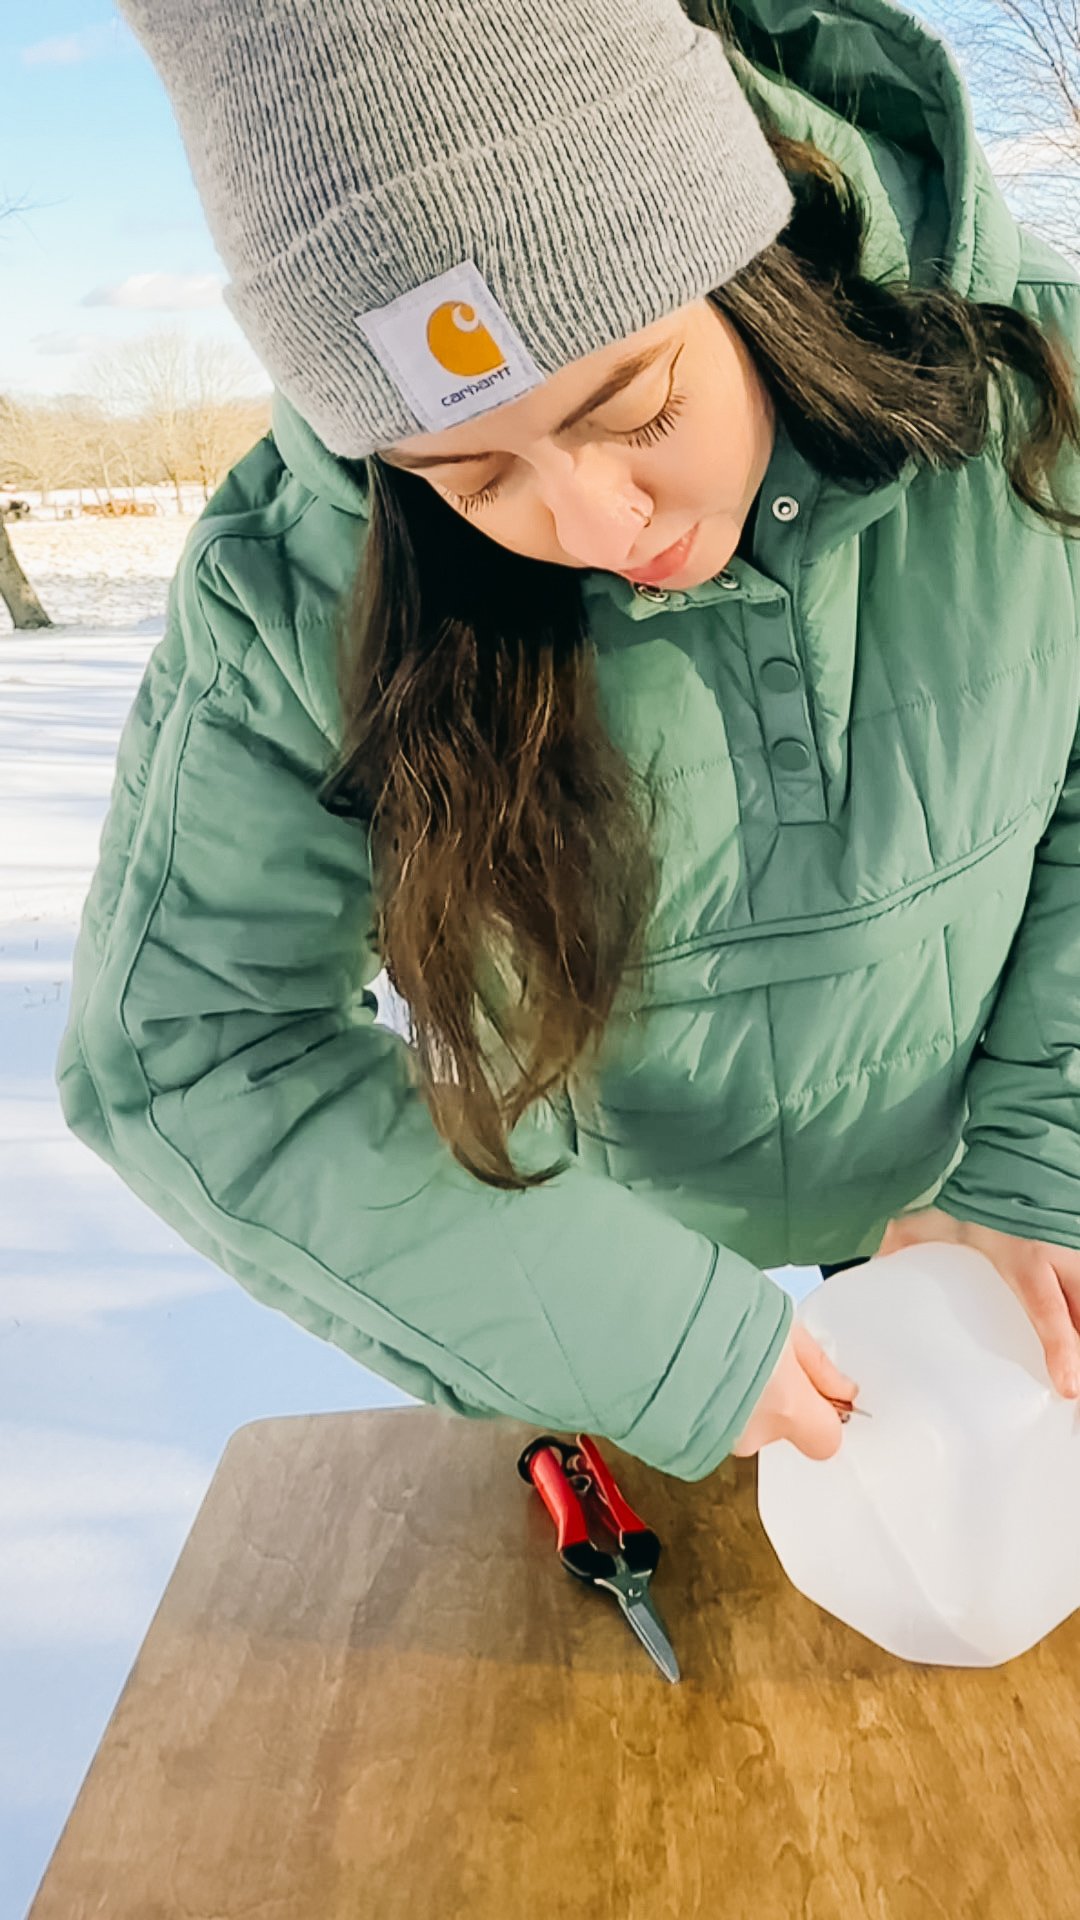
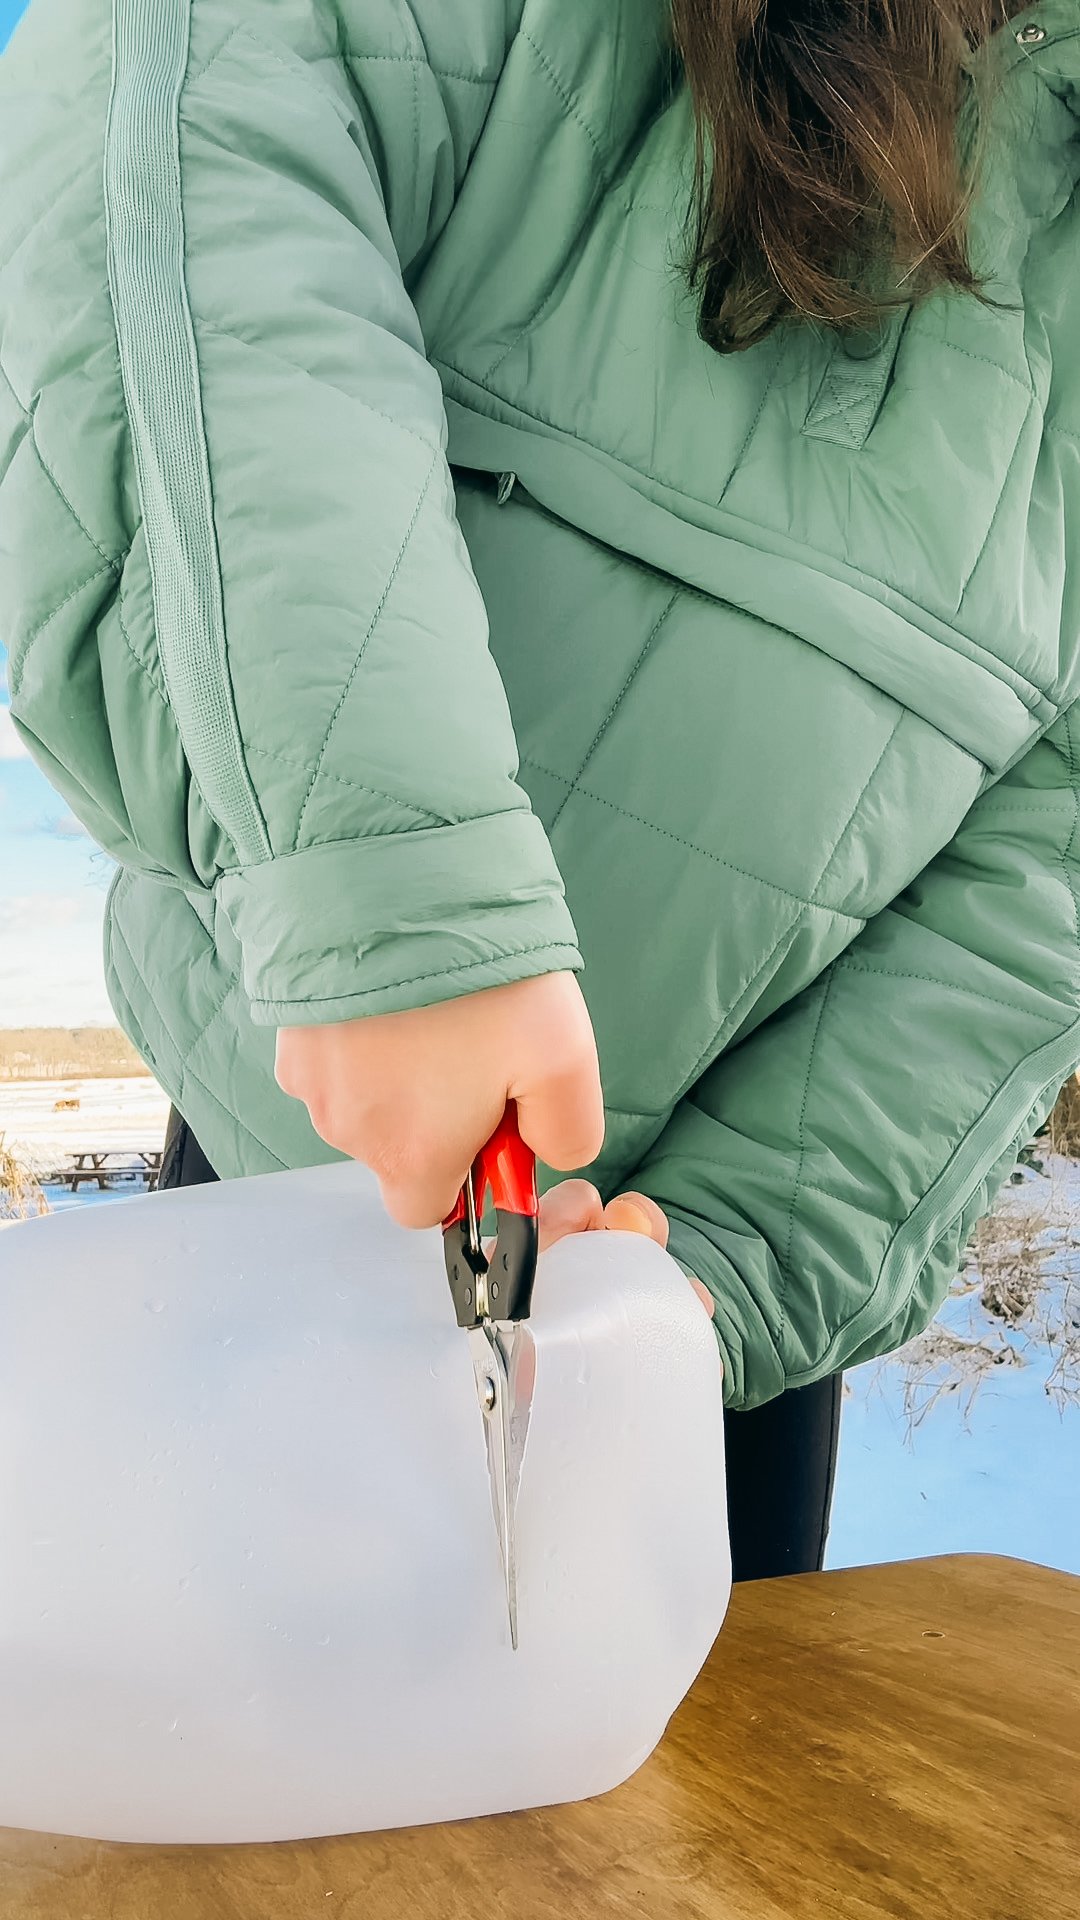
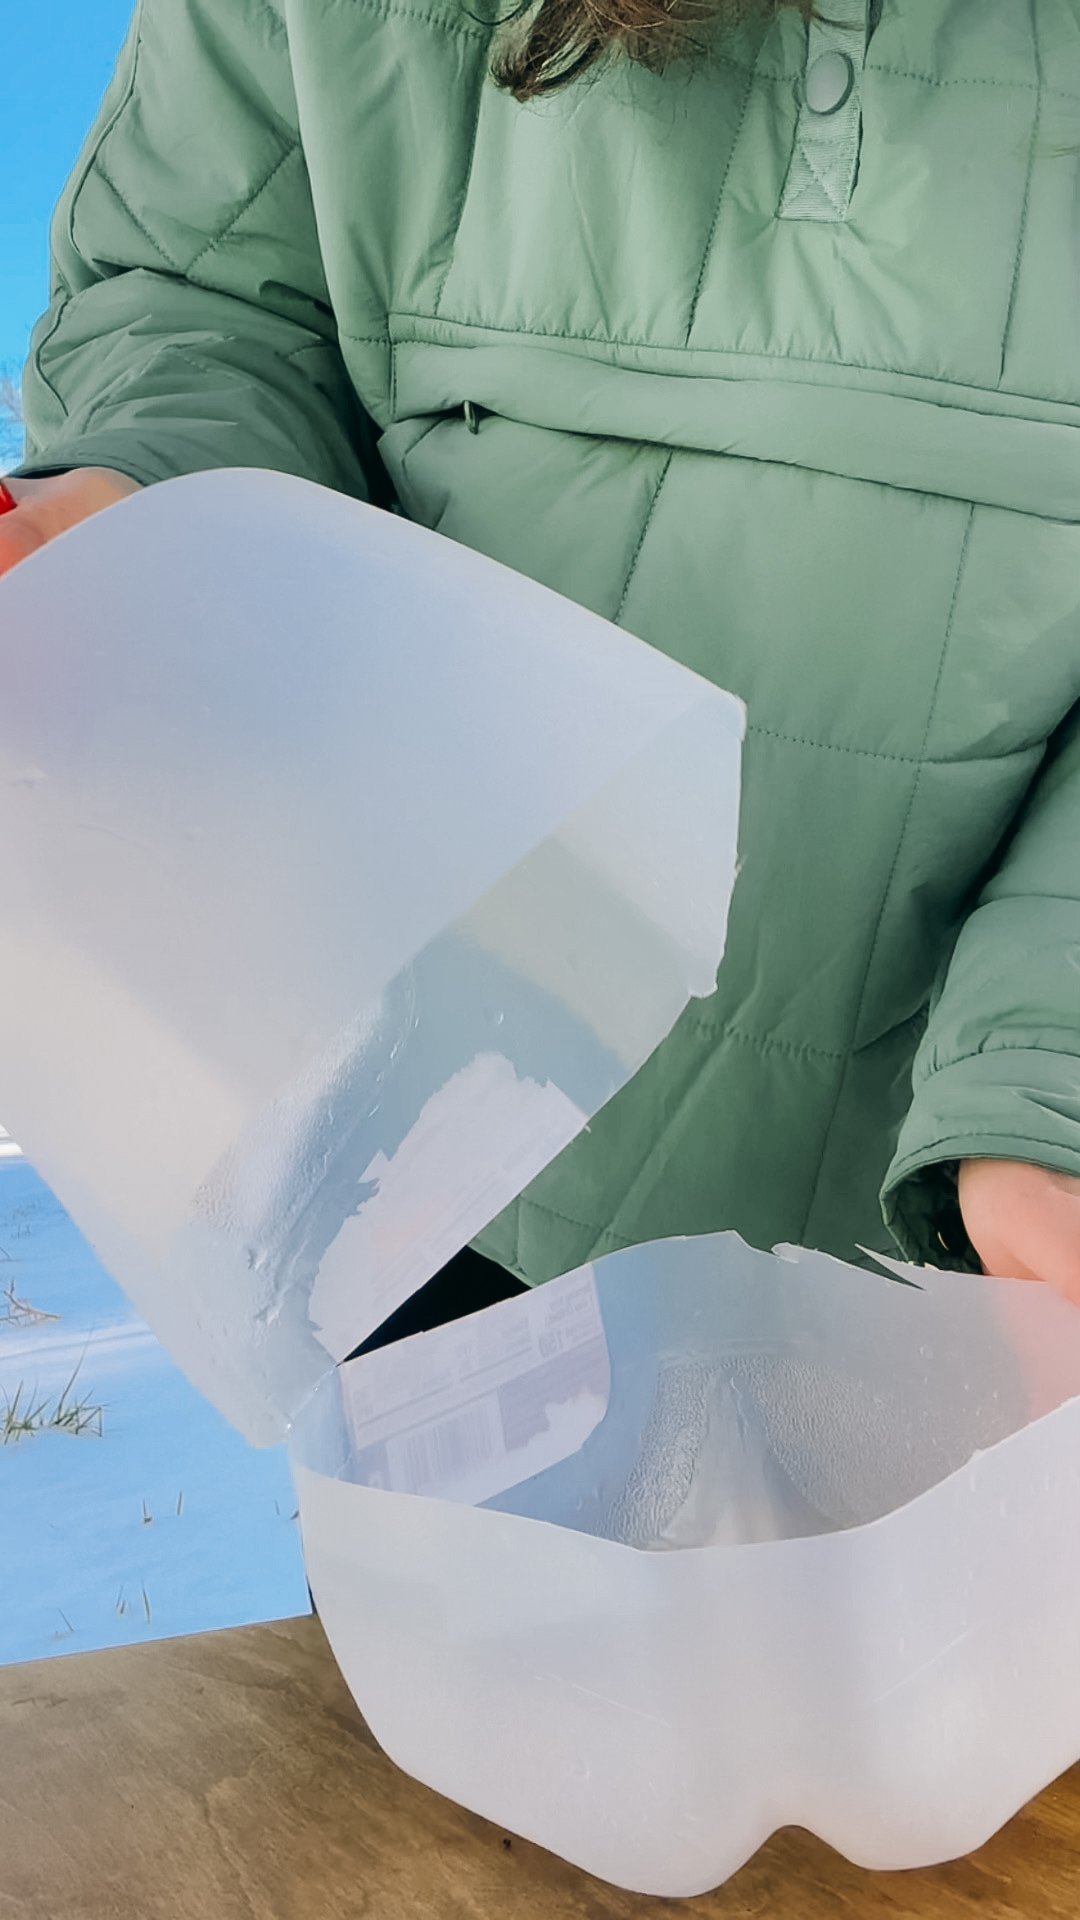
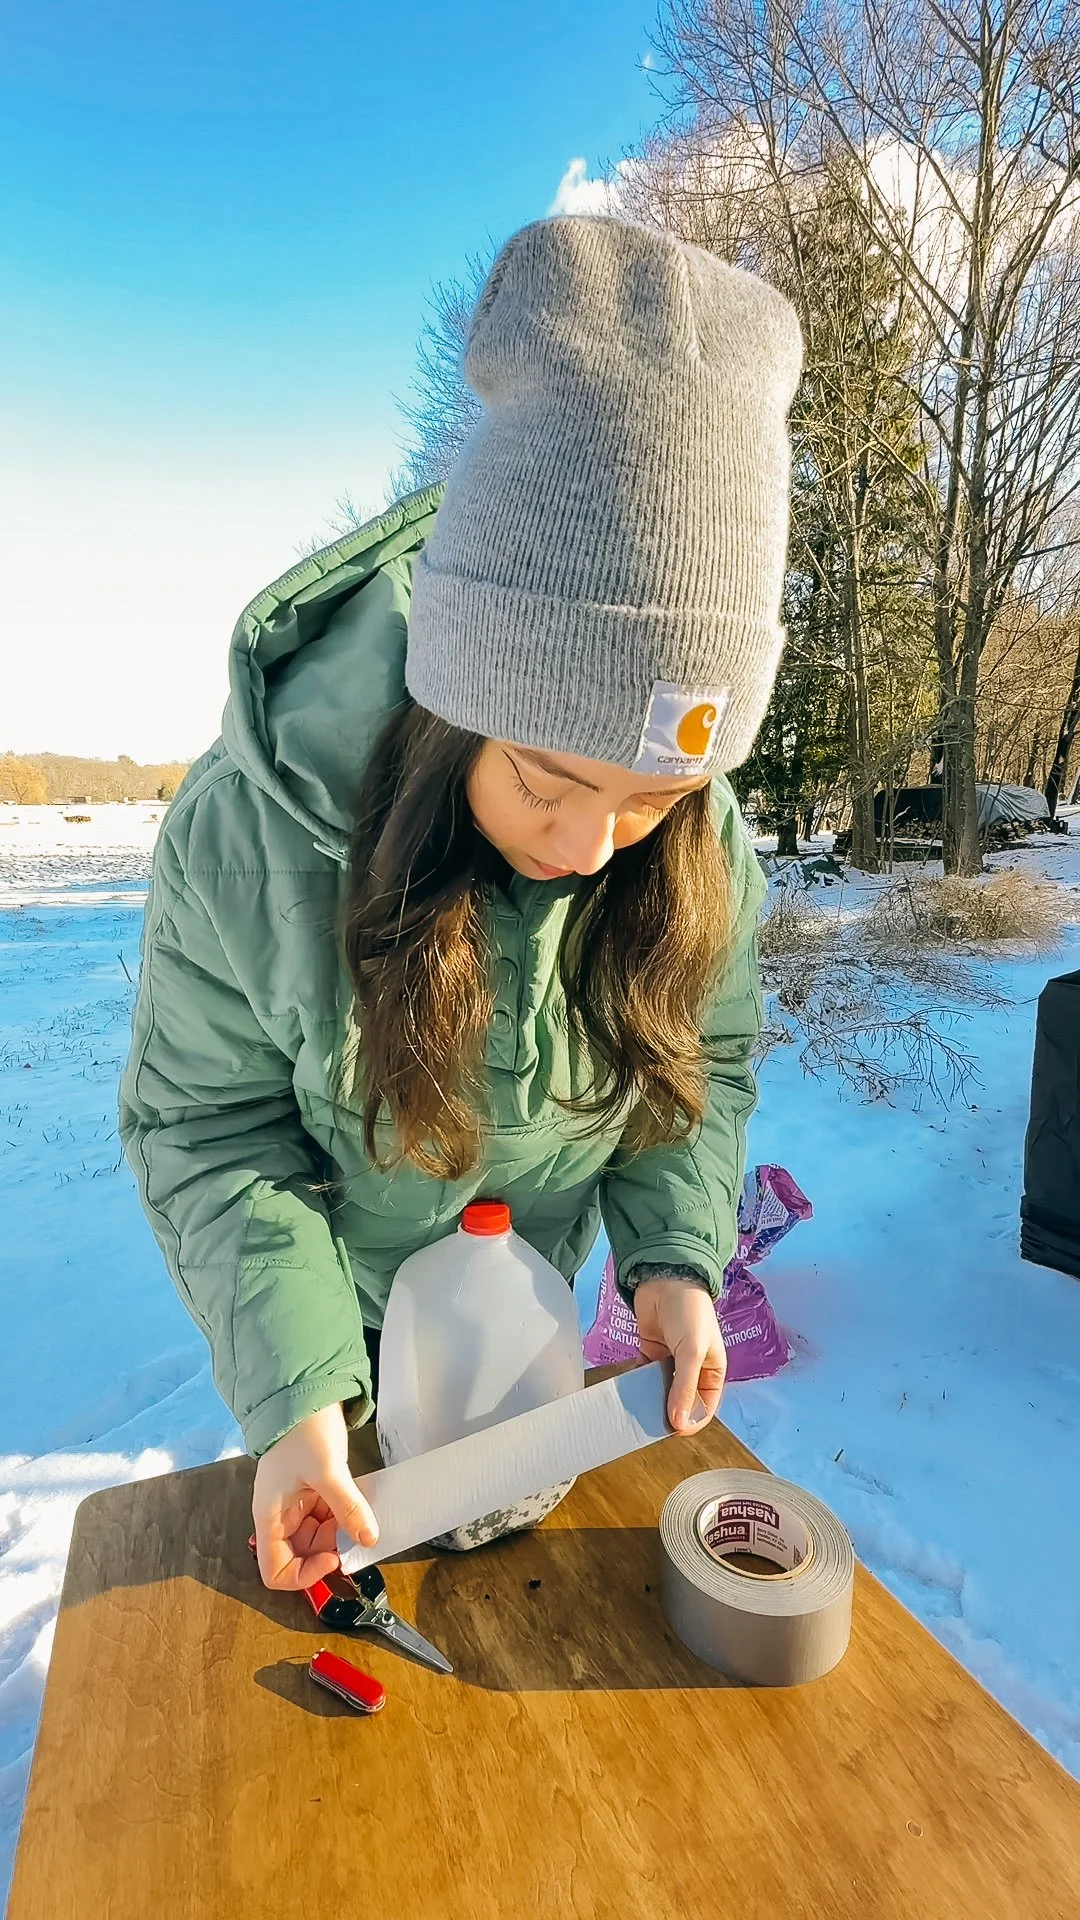
Using scissors or a utility knife, carefully cut the milk jug in half, leaving a hinge along the side where the handle is located. This hinge will act as a connection point, allowing you to open and close the jug easily.
The hinged design serves a dual purpose – it provides easy access for planting and labeling while maintaining a protective cover for your seeds.
Step 3: Add Soil and Plant Seeds
Fill the bottom half of the milk jug with high-quality potting soil. Ensure that the soil is moist but not waterlogged. Plant your seeds according to the recommended depth and spacing for each type. This is also the perfect time to label your seeds inside the jug, preventing any labels from washing away during watering.
Choosing the right seeds is crucial for successful winter sowing. Opt for seeds that can withstand cold temperatures, such as self-seeding annuals and perennial plants suitable for your zone. This method is particularly effective for cold-hardy spring crops.
Step 4: Seal and Protect
After planting your seeds and labeling the jug, close the top half of the milk jug and tape it shut. This creates a mini greenhouse effect, trapping warmth and moisture inside. The tape also ensures that the jug remains securely closed, protecting your seeds from potential disturbances.
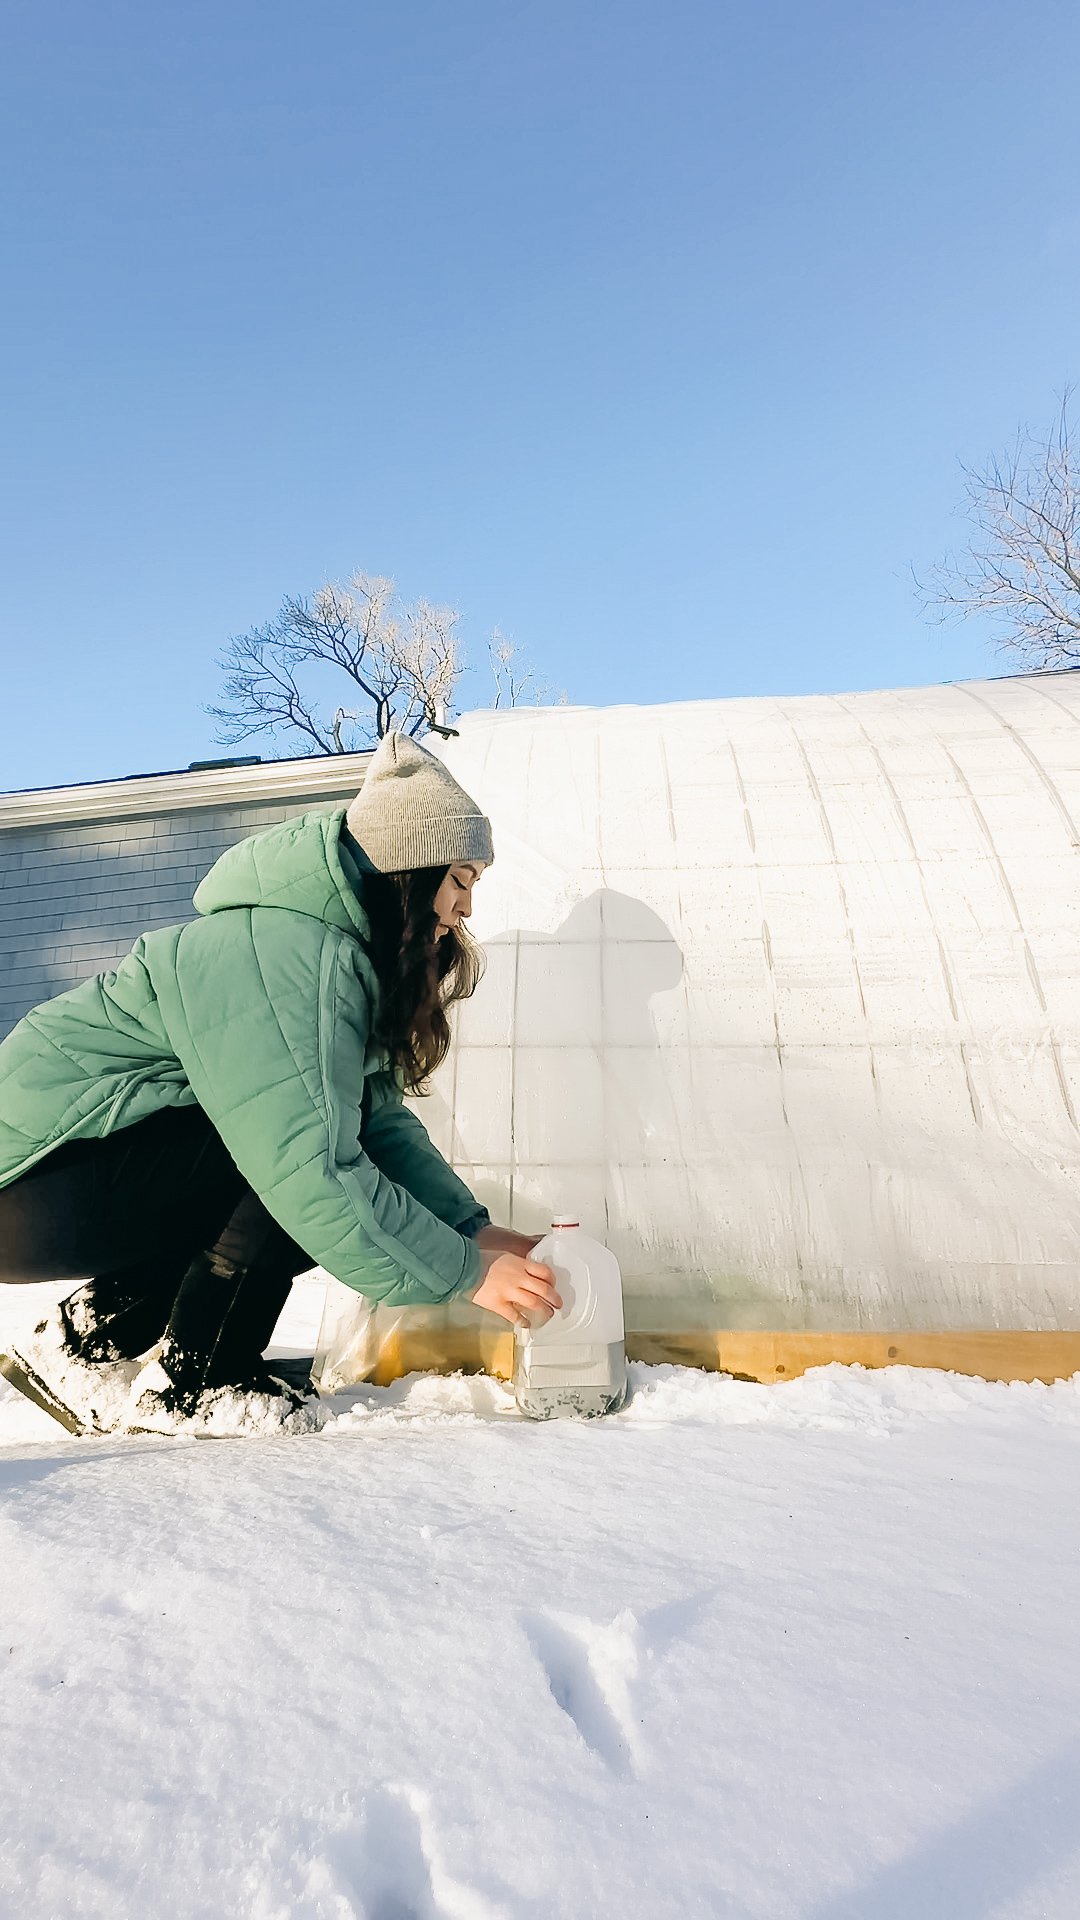
Remove the lid from the jug so it can vent properly and rain and snow can enter through the opening to keep the soil damp and place the milk jug in a sunny spot, ideally where it is sheltered from strong winds. This provides the optimal conditions for germination while protecting the seeds from harsh weather elements.
Can I use any type of plastic container for winter sowing, or is a milk jug essential?
While milk jugs are commonly used due to their translucent nature, you can experiment with similar plastic containers. Just ensure they are clean, have drainage holes, and provide some transparency for sunlight to reach the seeds.
How many drainage holes should I add to the base of the milk jug?
Adding 3-4 small drainage holes should be sufficient to prevent waterlogging. This ensures proper drainage while maintaining the necessary moisture for seed germination.
What soil should I use for winter sowing?
Using high-quality potting soil is recommended for optimal seed germination. Choose a mix that provides good aeration and drainage to support healthy root development.
Can I winter sow seeds that require warmer temperatures to germinate?
Winter sowing is best suited for seeds that tolerate cold temperatures. It's ideal for self-seeding annuals and plants that are naturally perennial in your zone. If you have warm-weather crops like tomatoes or peppers, consider other seed-starting methods indoors.
How often should I water the seeds inside the milk jug?
Since the jug is sealed, it retains moisture well, but it's essential to prevent the soil from drying out completely. You shouldn’t need to water your milk jugs unless there’s an unusually dry and warm period. Be cautious not to overwater, as drainage holes help avoid waterlogged conditions.
Can you winter sow tomatoes?
Winter sowing is most effective for cold-hardy plants and early spring crops. While it may work for tomatoes, it's best suited for those that can withstand colder temperatures and benefit from a longer growing season.
Where to place winter sowing containers
Choose a sheltered spot for placing the milk jug, such as near a building or behind a windbreak. If necessary, you can also place heavier objects around the jug to provide additional protection from strong winds.
Can I start winter sowing in any climate zone?
Winter sowing is adaptable to various climate zones. However, its effectiveness may vary depending on your specific climate. Adjust the timing and seed selection based on your local frost dates and weather conditions.
What should I do if mold develops inside the milk jug?
If mold appears, open the jug to increase ventilation, and reduce watering frequency. Ensure the soil surface is dry between waterings, and consider applying a dilute hydrogen peroxide solution to the affected areas to combat mold.
Can I reuse the milk jugs for multiple seasons of winter sowing?
While milk jugs are durable, they may degrade over time due to exposure to sunlight and the elements. It's advisable to inspect them before each season and replace any that show signs of damage or wear. Reusing jugs can be cost-effective, but ensure they are in good condition for successful winter sowing.
When to start winter sowing
You can begin winter sowing any time after the winter solstice (December 21st) because that is when daylight hours begin increasing again.
When should I transplant my winter sown seedlings into the ground?
Transplant your winter sown seedlings after your last frost date. Winter sown seedlings are generally much more cold hardy since they are already adapted and require no hardening off.
Best seeds for winter sowing
Winter Sowing Herbs:
Lavender (Lavandula): Lavender is a hardy herb that thrives in cooler temperatures, making it an excellent candidate for winter sowing. It appreciates well-drained soil and full sunlight.
Chives (Allium schoenoprasum): Chives are cold-tolerant and can be easily grown from seeds in milk jugs. They add a mild onion flavor to dishes and are a great addition to any herb garden.
Parsley (Petroselinum crispum): Parsley is a biennial herb that can withstand cold temperatures. Winter sowing provides an early start for this versatile herb, commonly used in culinary applications.
Winter Sowing Flowers:
Calendula (Calendula officinalis): Calendula, or pot marigold, is a self-seeding annual flower that thrives in cooler weather. Its vibrant orange and yellow blooms add beauty to gardens and can be winter-sown for early spring blossoms.
Sweet Alyssum (Lobularia maritima): Sweet Alyssum is a low-growing flower with a sweet fragrance. It's perfect for borders and containers and can be started in milk jugs for a head start on spring blooms.
Bachelor's Button (Centaurea cyanus): Bachelor's Button, or cornflower, is a cold-tolerant annual with striking blue flowers. Winter sowing allows you to enjoy its blooms earlier in the season.
Winter Sowing Vegetables:
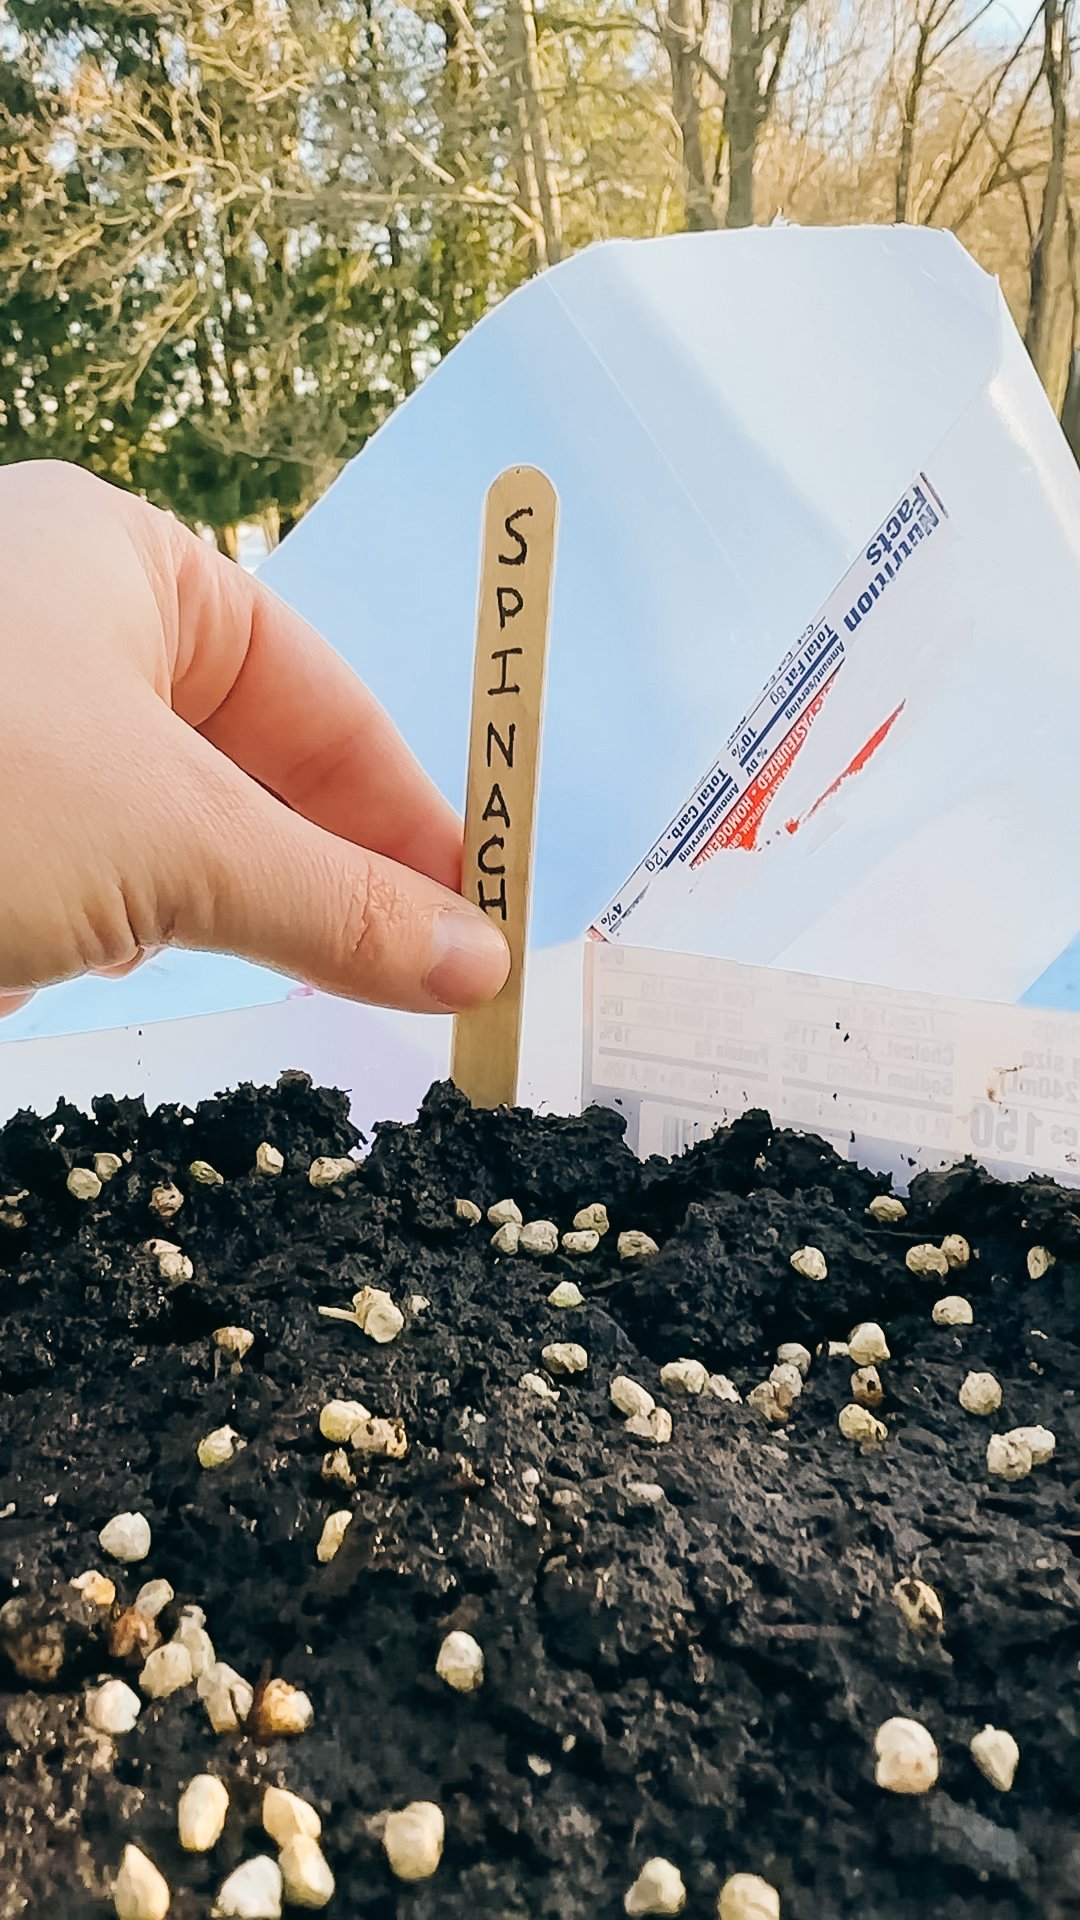
Spinach (Spinacia oleracea): Spinach is a cold-hardy leafy green that does well with winter sowing. You can start spinach seeds in milk jugs to get an early harvest of fresh greens.
Radishes (Raphanus sativus): Radishes are quick-growing vegetables that tolerate cooler temperatures. Winter sowing radish seeds allows you to enjoy their crisp and peppery roots in early spring.
Kale (Brassica oleracea acephala): Kale is a cold-resistant leafy green that benefits from winter sowing. It's rich in nutrients and can be harvested early for delicious and nutritious greens.
Arugula (Eruca sativa): Arugula, with its peppery flavor, is an ideal candidate for winter sowing. This quick-growing green thrives in cooler temperatures, making it a perfect addition to your winter-sown vegetable garden. The young leaves are tender and can be harvested for salads or added to sandwiches, providing a burst of freshness.
Bok Choy (Brassica rapa subsp. chinensis): Bok Choy, a type of Chinese cabbage, is well-suited for winter sowing. Its crisp and mild-flavored stalks and dark green leaves are delicious in stir-fries and salads. Starting Bok Choy seeds in milk jugs allows for an early harvest and a continuous supply throughout the growing season.
Broccoli (Brassica oleracea var. italica): Broccoli, a cold-tolerant vegetable, can be successfully grown from seeds in milk jugs. This nutritious and versatile vegetable benefits from an early start, providing you with homegrown broccoli for soups, salads, and side dishes.
Cabbage (Brassica oleracea var. capitata): Cabbage is a hardy and cold-resistant vegetable that can be started in milk jugs for an early crop. Whether you prefer green or red cabbage, winter sowing allows you to enjoy homegrown cabbage in various culinary creations.
Cauliflower (Brassica oleracea var. botrytis): Cauliflower, with its distinctive white head, is a cool-season crop that responds well to winter sowing. This method gives you a jumpstart on the growing season, ensuring a bountiful harvest of this versatile vegetable.
Endive (Cichorium endivia): Endive, known for its slightly bitter flavor, is an excellent choice for winter sowing. Growing endive from seeds in milk jugs provides you with a crisp and flavorful addition to salads and other dishes.
Leek (Allium ampeloprasum): Leeks, with their mild onion flavor, are cold-resistant and suitable for winter sowing. Starting leek seeds in milk jugs allows for an early harvest of these versatile vegetables, perfect for soups, stews, and as a flavorful addition to many recipes.
Lettuce (Lactuca sativa): Lettuce, a staple in salads, benefits from winter sowing. This method provides an early start for various lettuce varieties, ensuring a continuous harvest of fresh and crispy leaves for your salads and sandwiches.
Swiss Chard (Beta vulgaris subsp. cicla): Swiss Chard, with its colorful stems and nutritious leaves, is well-suited for winter sowing. This versatile green can be started in milk jugs, offering an early supply of homegrown Swiss Chard for cooking and salads.
Remember to check the specific requirements of each seed variety, as some may have preferences for soil conditions, sunlight, and watering. Additionally, consider your local climate and adjust the timing of winter sowing based on frost dates in your area.
Winter sowing in milk jugs is a simple yet effective method for starting seeds, even for those with limited gardening experience or resources. By harnessing the power of nature and utilizing everyday items, you can kickstart your garden without breaking the bank. Give winter sowing in milk jugs a try and watch as your seeds sprout into healthy seedlings, ready to be transplanted into your garden come spring. Happy gardening!

Extend Your Garden Season With These Techniques
With your garden prepped for winter, you may be ready to turn in and take a break from growing for a few months. But if you’re like me and the idea of the garden totally ending breaks your heart, there’s a few different ways we can extend our growing season and keep harvesting fresh food from the garden all year round. I’ll be using all of these methods in my own garden to grow cold loving crops while the snow falls.
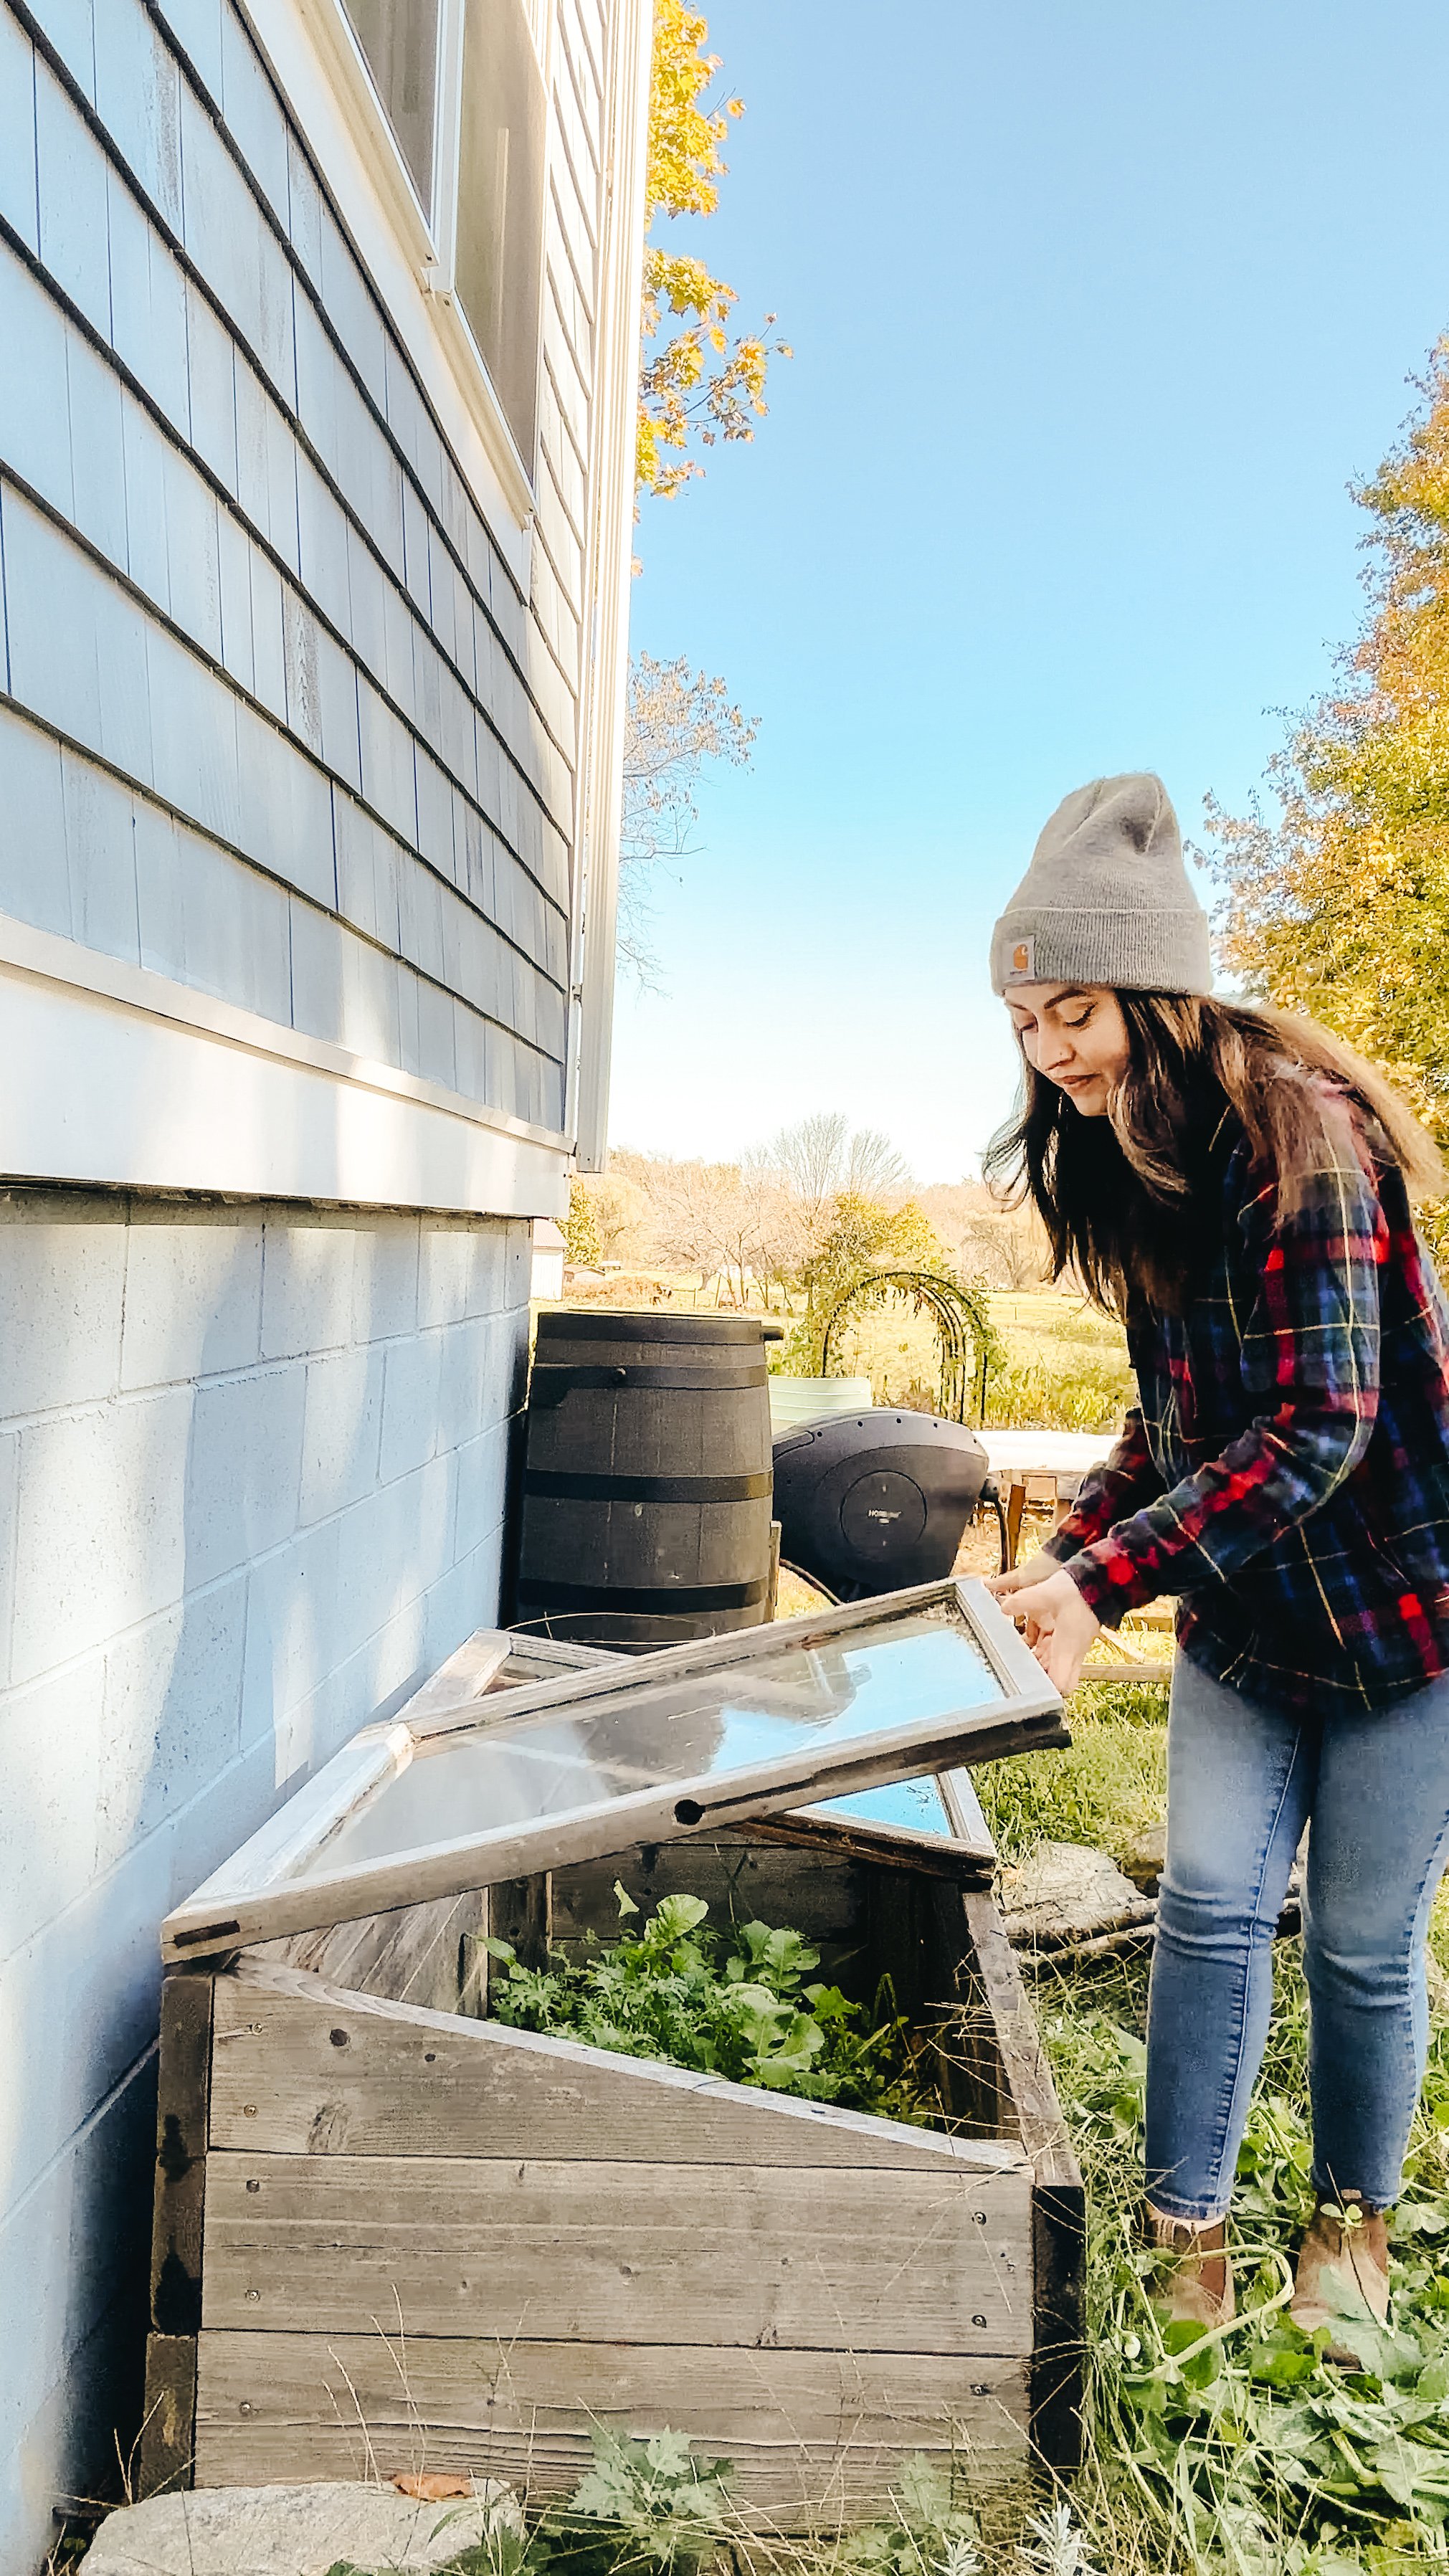
With your garden prepped for winter, you may be ready to turn in and take a break from growing for a few months. But if you’re like me and the idea of the garden totally ending breaks your heart, there’s a few different ways we can extend our growing season and keep harvesting fresh food from the garden all year round. I’ll be using all of these methods in my own garden to grow cold loving crops while the snow falls.
How To Use Row Cover
There’s a good chance you have some plants already in the ground that can withstand cooler temperatures and give you harvests well into winter with a little planning. Plants in the brassica family for example have the ability to produce a type of natural anti-freeze that converts into sugars and makes the plants taste even better after a frost. But you can extend their life even further by utilizing frost covers which act as a cozy winter blanket and keep out the wind chill and moisture that causes the most damage to these cold hardy plants. These covers act as a shield against harsh frost, preserving the warmth around the plants and preventing frost damage. It's a simple yet effective measure to safeguard your garden and extend your harvest.
Benefits of Mulch
We aren’t the only ones who benefit from an extra blanket or two in the winter months. A layer of mulch such as wood chips, pine needles or straw around perennial plants acts as insulation, protecting their roots from extreme temperatures. It also helps retain moisture and suppresses weeds, contributing to the overall well-being of your garden beds during the winter months. A good rule of thumb is to use four to six inches of mulch around the plants - just don’t press the mulch up against the plant itself. We are insulating the roots, not the aboveground parts.
Using cold frames/cloches
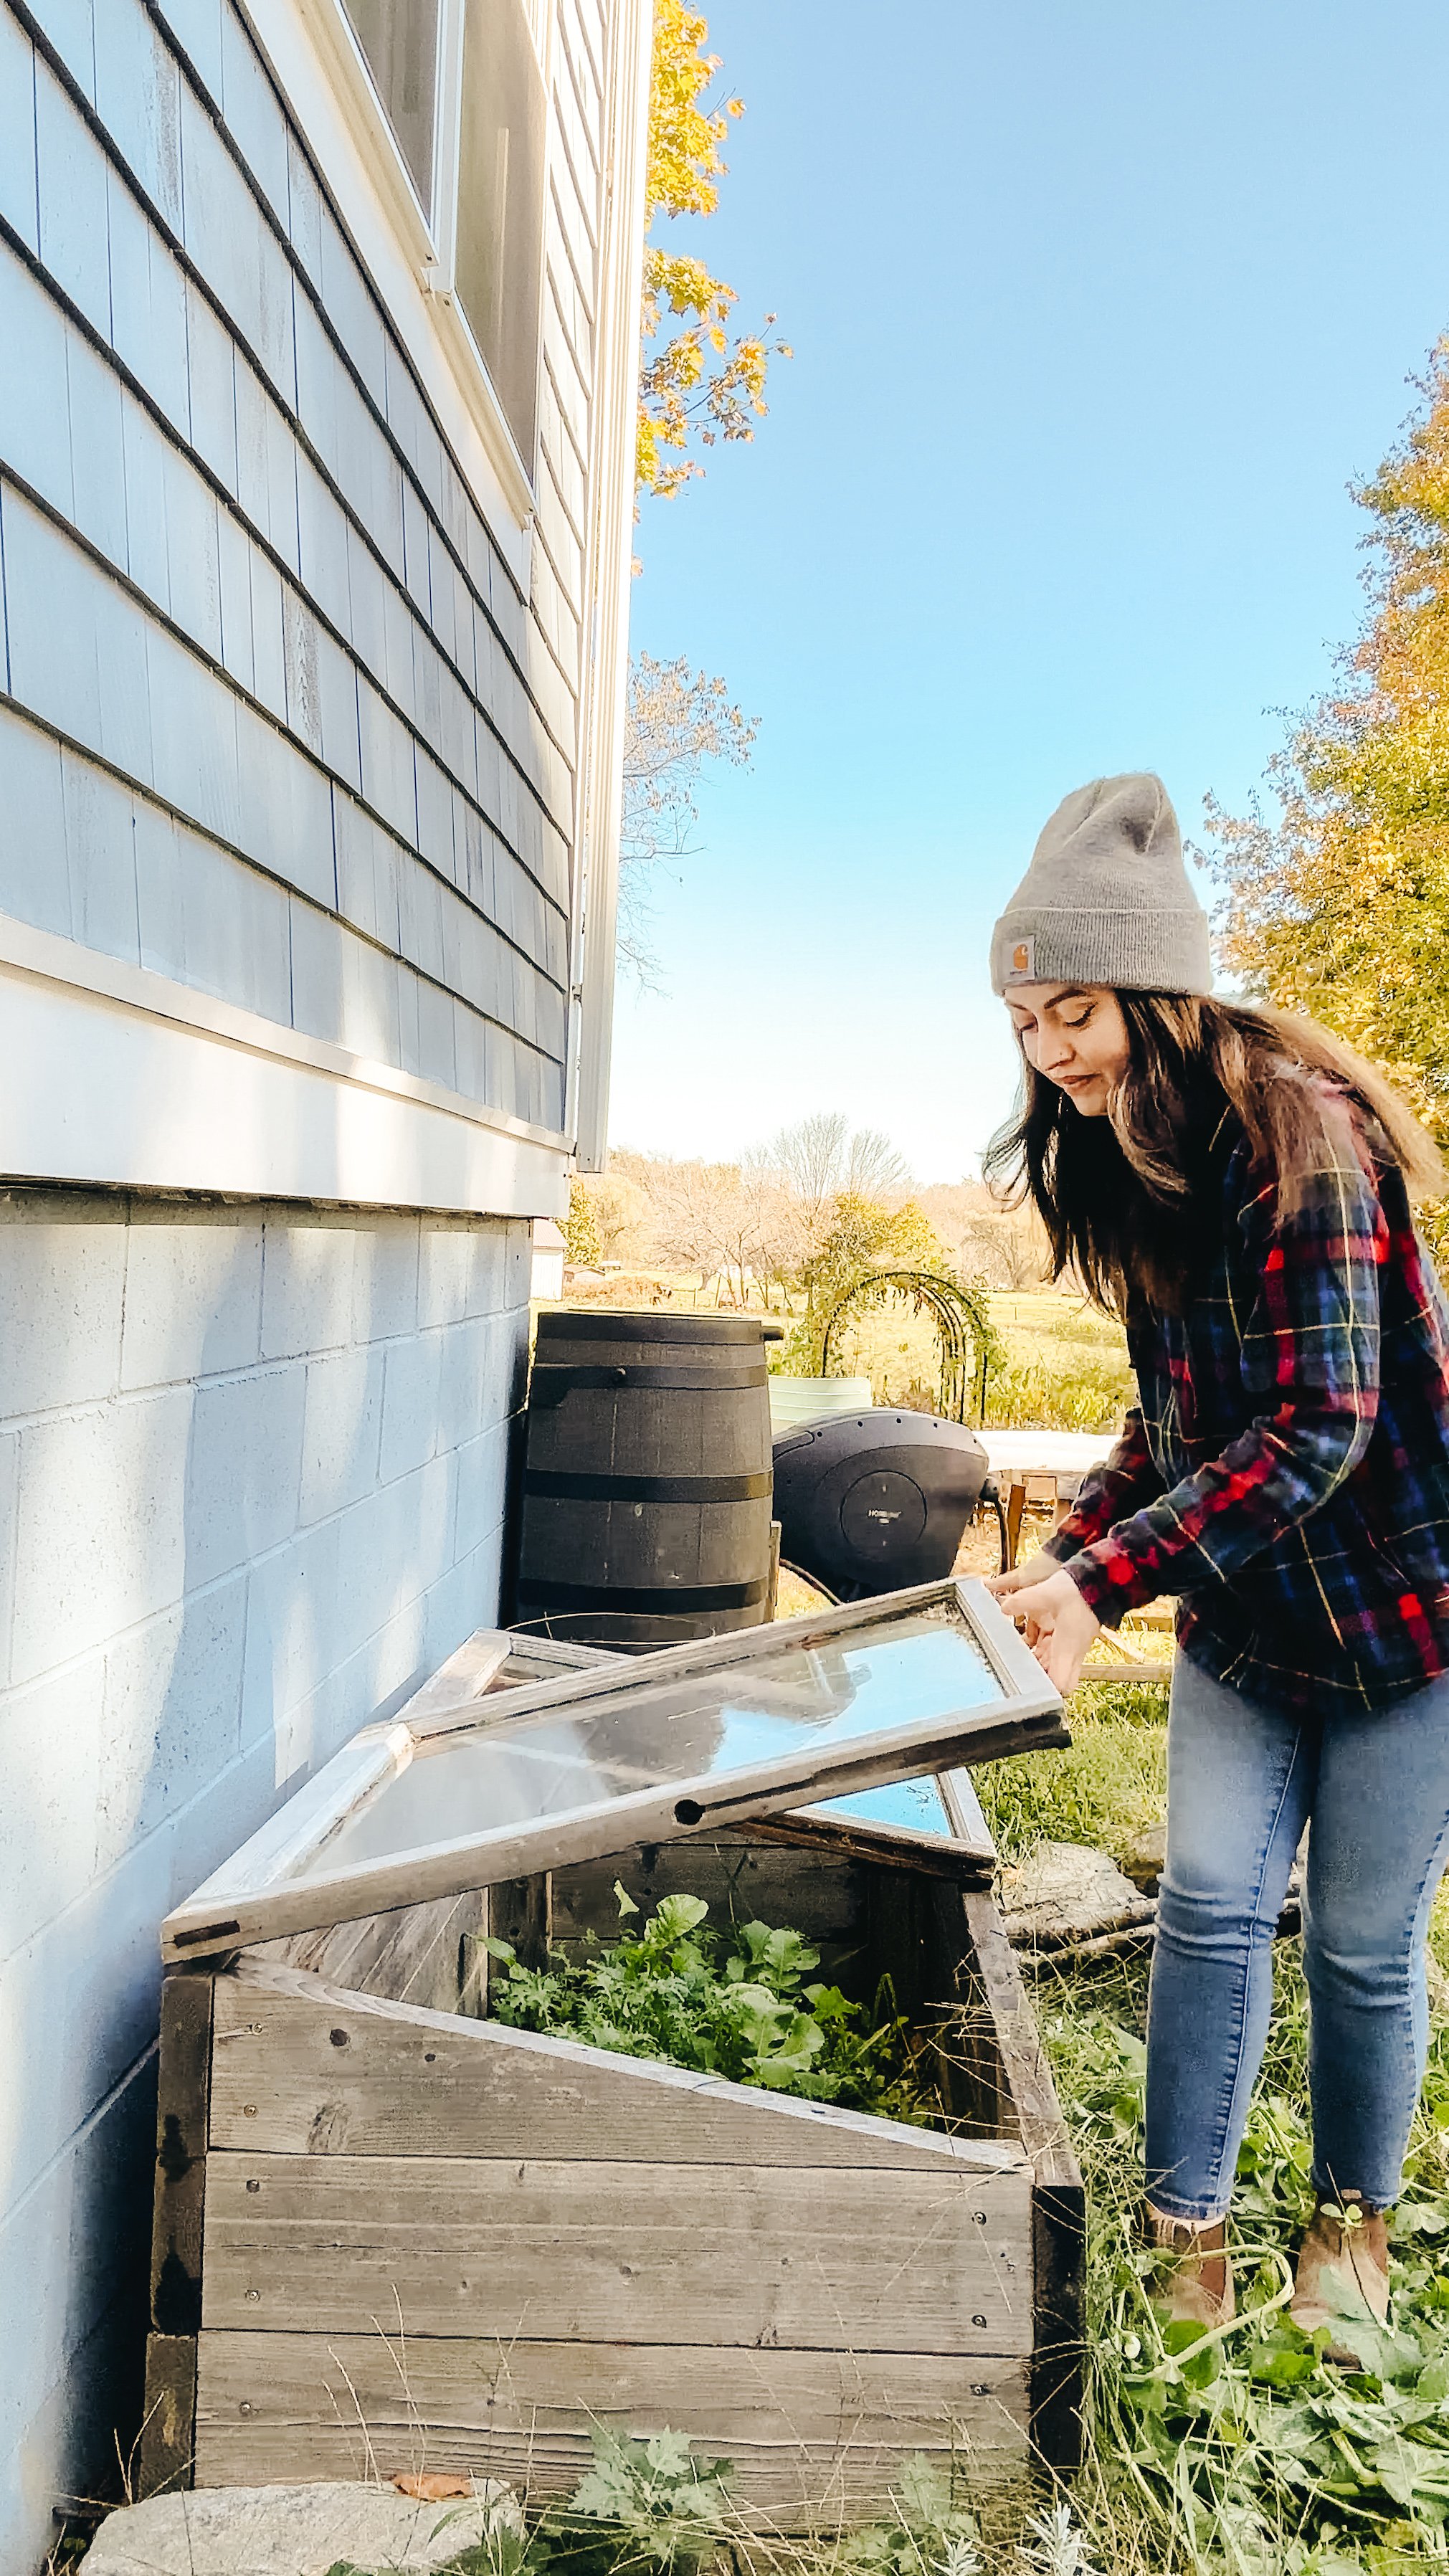
A cold frame works by creating something like a mini-greenhouse, trapping warm air through solarization inside of the box and insulating the plants within from the worst that winter has to offer. We control the temperature inside of the cold frame with a simple vent - the hinged lid can be propped open with different sized sticks to allow excess heat to escape on warmer days, but for the most part in our deep New England winters the lid stays firmly shut until we trudge through the knee deep snow to harvest.
If you have the time and physical ability, building a cold frame yourself is absolutely the most economical solution. Purchasing one ready-made can cost you anywhere from $60-$500 and quality issues on the low end of that budget will prevent you from getting many years of use out of it. Meanwhile, if you build one yourself it can be done for far less than the low end of that range, and produce an end result that will be sturdy enough to continue providing shelter to your winter crop for years to come. While old windows can be fragile and prone to breaking, when they can be found for free I still find it a better option than a new piece of corrugated plexiglass.
DIY CATTLE PANEL Hoop House
Hoop houses are used by growers in all types of climates for many different reasons - but the main goal is climate control, whether that is to make the growing area colder using the artificial shade created or warmer by taking advantage of the insulating properties of the covered area to effectively move your grow zone south.
If you’ve never seen a hoop house before, you probably have and just didn’t realize it! The basic idea is that you form some sort of rounded roof structure using metal rods, cattle panel or pvc that bends down and is anchored to the ground and cover that with heavy duty greenhouse plastic that lets light in but keeps wind out and provides some insulation.
You can build your own greenhouse easily in an afternoon with just the help of one other person, and you don’t need any special skills or carpentry experience either. The hardest part is honestly just getting the cattle panel - they are huge, so unless you have a truck you’ll probably need to rent something or have them delivered. Click here for my full guide to build your own DIY cattle panel hoop house.

Cold Tolerant Plants
Of course, with any of these methods you still won’t create tropical conditions for your plants if you live in a colder climate. So it’s important to stick with plants that are known to tolerate temperatures down to about thirty degrees fahrenheit. Here’s a list of everything I’ll be growing this winter:
Gai Choy Mustard
This mustard matures in 40-60 days and grows anywhere from six to ten inches wide and ten to twelve inches tall. This is a head forming traditional Chinese mustard with a mild flavor when it’s young.
Bloomsdale Spinach
This is a dependable, open pollinated variety that matures in 28-45 days and grows about six to eight inches tall with dark green, thick and curly leaves. It’s a prolific grower with tender leaves and rich flavor.
Common Sorrel
This green has been popular in France and England for centuries but for some reason it isn’t as popular in the states. It matures in 60 days with bright green crinkled leaves that have a lemony spinach flavor.
Easter Egg Radish
This blend has red, white, pink purple and bi colored radishes that mature in just 30 days. Easter egg is a mild and crisp radish that forms small one inch globe shaped roots, so if you don’t like the spiciness of other radishes you may want to try this one.
French breakfast radish
These radishes are super mild - almost sweet and mature in 28 days. The root is scarlet with a white tip about 1 inch around and 2 or 3 inches long.
Spanish black radish
This is an extra large medium spicy radish that matures in 60-70 days with a black exterior and white interior. The globes are about 3-4 inches in diameter when mature. Since this is a winter radish it needs shortening day length and cool temps to mature, so this one gets planted later than the other radish varieties I’m growing.

Bok Choy Choko
I can’t live without this for my stir fries and this variety is so good and tender when harvested when it’s only about four inches tall. It matures in around 50 days and has smooth, leafy blades in a cluster with crisp, pale green stems. Choko was bred to be small and heat tolerant.
Big Seeded Mache
Mache can survive temperatures down to ten degrees fahrenheit and matures in 60 days. It’ll grow to be about six inches tall and eight inches in diameter with dark green, spoon shaped soft leaves in a loose rosette.
Tokyo Long White Bunching Scallion
These Japanese scallions are long, slender, mild and mature in 65 days. They are sweet enough to use in pretty much anything from salads, soups, and stir-fry dishes and grow about 16-18 inches tall.
Olesh Tres Fine Endive
This is a mildly bitter flavored green with a really interesting frilly texture that matures in 42-70 days. It grows about six inches wide and tall in rosettes with broad crinkled green leaves.
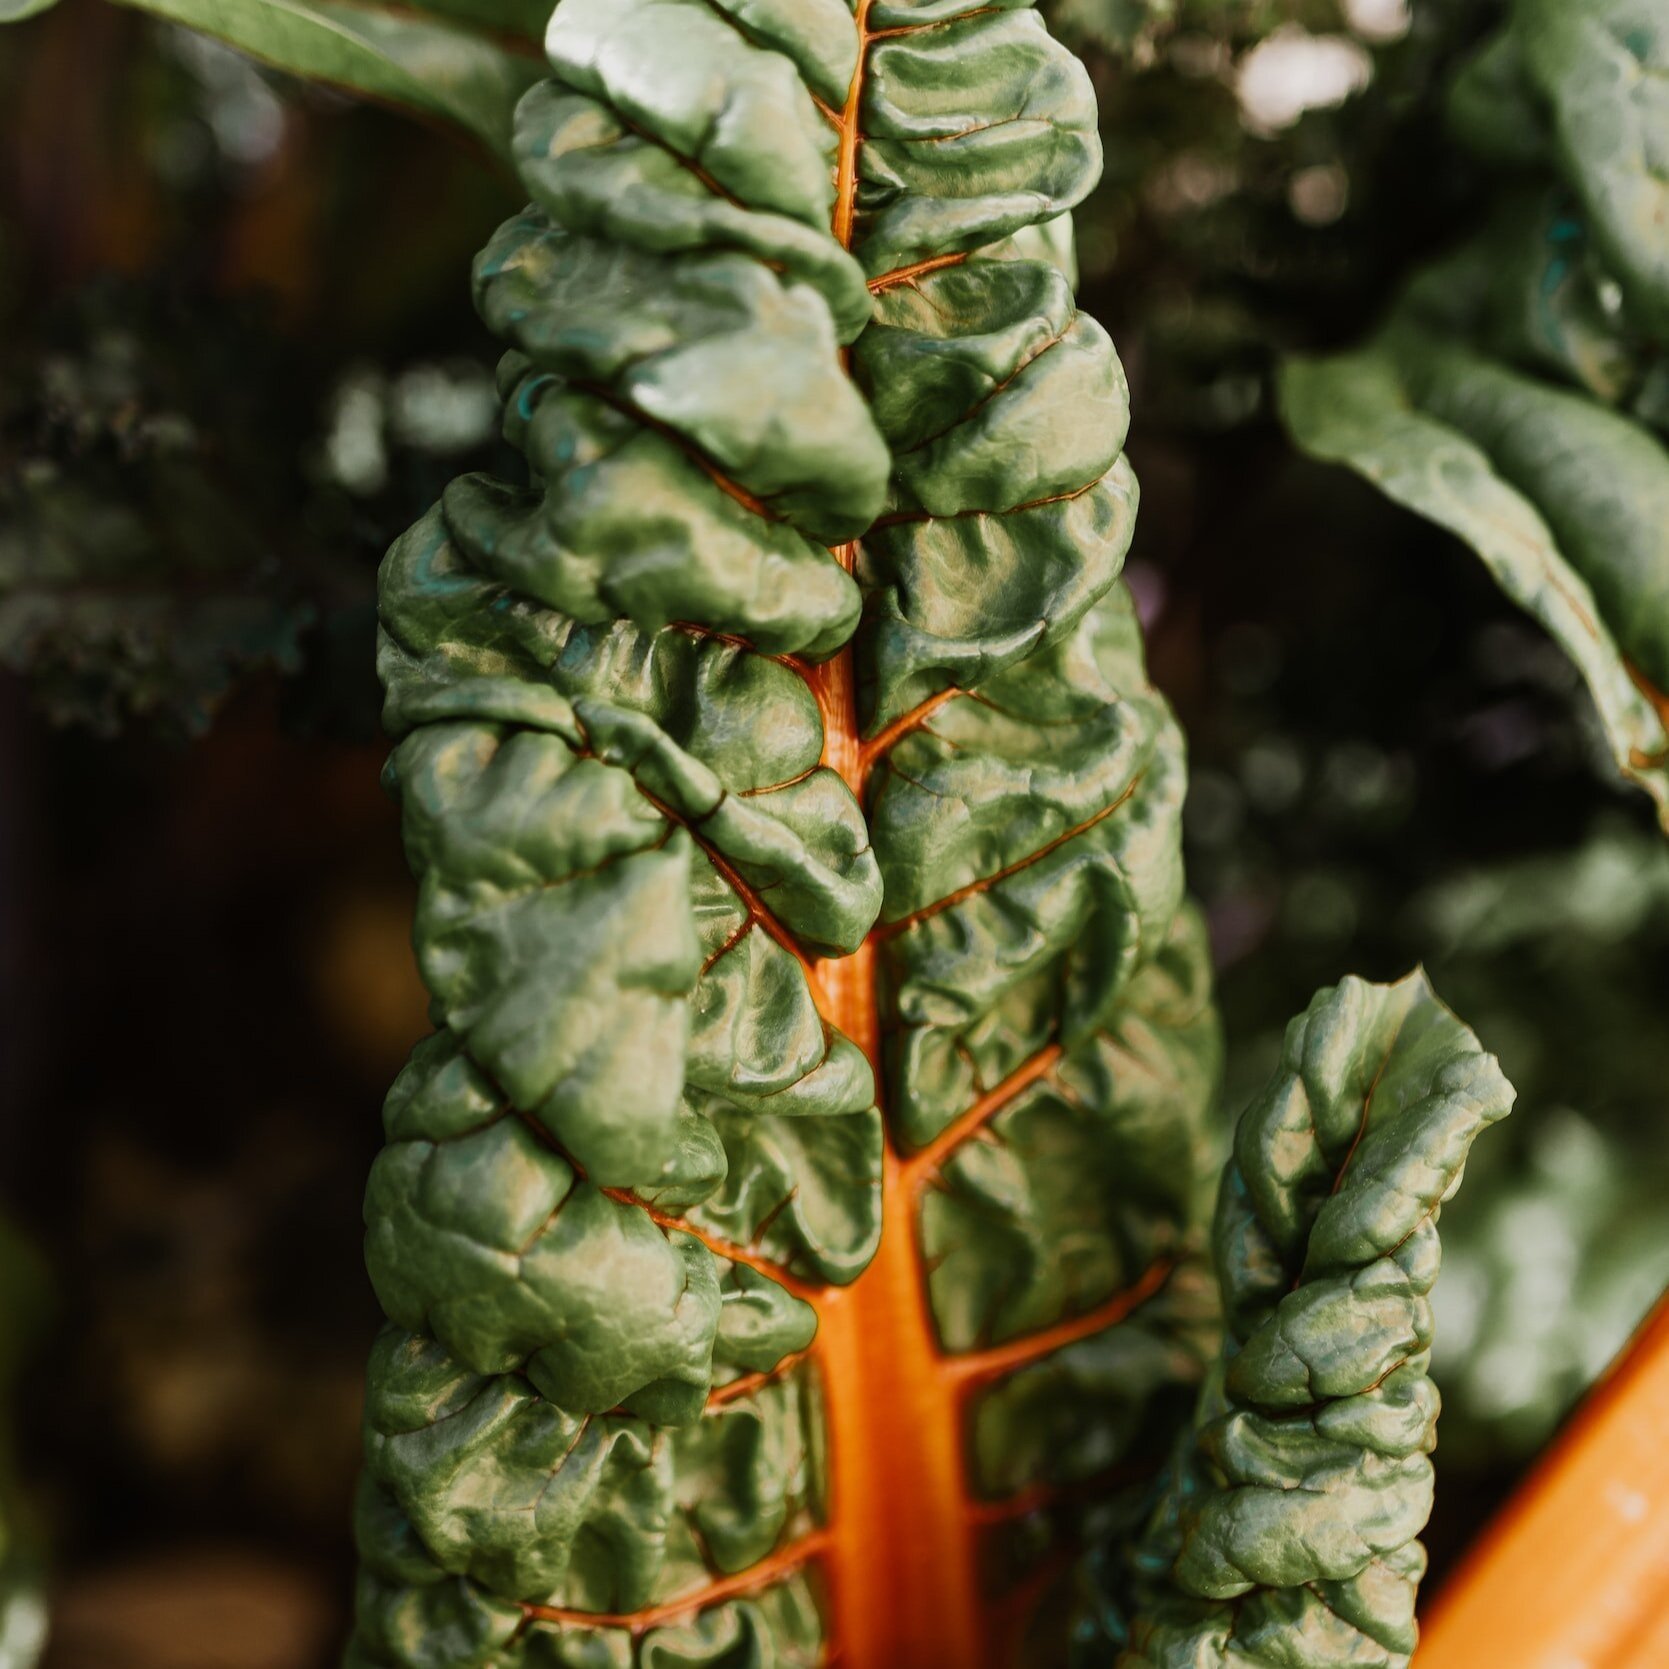
Ruby Red Swiss Chard
Chard can withstand moderate freezes and matures in 50-60 days, growing about 24 inches tall and eighteen inches wide with dark green crinkled leaves, red veins and stalks. I use this the same way I use spinach
Danvers Carrot
This variety was actually created an hour from where I live way back in the day when growers were looking for a carrot with improved yield, color and uniformity. It matures in about 65 days. It’s a sweet classic carrot that’s resistant to cracks and splits and roots grow about six inches long/
Astro Arugula
I said I would never grow this, but there’s very few foods I actively dislike and I have a personal rule that I re-try foods I hate about once a year in different forms or varieties and since arugula is so cold hardy, I had to bite the bullet with this and try a new type to see if I can learn to love it. Astro matures in 32-55 days and supposedly has more of a mild flavor than other varieties when the plants are young so I’m hopeful.
Mizuna Mustard
This tender Japanese mustard is milder than other varieties and ready to harvest in 30-50 days. It can grow up to a foot tall and wide but it’s usually harvested when it’s smaller.
Rosette Tatsoi
This beautiful leafy green is more flavorful than traditional bok choy and matures in 45 days. It is super cold tolerant down to 15 degrees fahrenheit and can be harvested even in the snow. It grows pretty low and wide with spoon shaped dark green thick leaves in a rosette.
Tendergreen Mustard
This is also called mustard spinach, but it’s not actually mustard OR spinach. It’s super easy to grow, hardy and productive and matures fast in 30 days to be about two feet tall and up to two feet wide with smooth dark green glossy leaves.
Are you team take a break for the winter, or keep growing?

Preparing Your Garden For Winter
There’s always more that can be done to prepare the garden for winter, and some tips will be more specific to your garden setup. But with all this checked off my list, I’m looking forward to a slower season of rest and planning, organizing my seed collection (and let’s be real, buying a lot more) as well as drawing up new garden bed layouts for the spring. What are you doing to prep your garden for the winter months now?

By late October, the summer garden is hanging on by a thread, tattered and browning at the edges. Every day, I step outside and ask myself if this is the day to put it to rest. Admittedly, I probably wait longer than I should because I’m in denial about what’s coming. While some gardeners may be grateful for the period of rest winter offers, I’m just looking for more ways to keep growing even in the cold. I like living somewhere that experiences all four seasons, I just wish winter was just a little bit shorter! But eventually reality catches up with me, and I have to accept that it is time to take the necessary steps to prepare the garden for the winter months.
In my zone, 6b, we experience a long cold winter. We have a good four to five months of temperatures between zero and twenty degrees Fahrenheit. The ground freezes solid, everything dies back, winds pick up from the field and if I don’t take steps to protect it, the elements can do a number on the structures and systems I have in place for my summer garden. But there’s more to winter garden prep than just protecting what is there so it can lie in wait until next season. Now is also the best time to start preparing for any new additions you want to add to your garden for next year. So let’s dive into exactly what I’m doing to prepare my garden for winter.
Clear and compost dead plants
The very first thing I do to prepare the garden for winter is to try and give myself a clean slate. This not only tidies up the space but also helps prevent diseases from overwintering in dead plant material. For plants that remain disease free all season, you can use the “chop and drop” method to compost in place. Simply cut the plant down at the base, breaking apart any larger branches or sections so they can decompose easily, and lay them on the soil in your garden bed. These plants will break down over the winter months, returning nutrients to the soil. However, if you notice any signs of disease on your plants or just aren’t sure, it’s best to pull the entire plant up by the root. For things like powdery mildew, I’m generally not too worried about putting them into my regular compost. But if your tomatoes had blight, you may want to burn the foliage to try and stop it from spreading.
Add frost covers
There’s a good chance you have some plants that can withstand cooler temperatures and give you harvests well into December with a little planning. Plants in the brassica family for example have the ability to produce a type of natural anti-freeze that converts into sugars and makes the plants taste even better after a frost. But you can extend their life even further by utilizing frost covers which act as a cozy winter blanket and keep out the wind chill and moisture that causes the most damage to these cold hardy plants. These covers act as a shield against harsh frost, preserving the warmth around the plants and preventing frost damage. It's a simple yet effective measure to safeguard your garden and extend your harvest.
Look for abandoned tools
In the chaos of summer gardening, I know I’m not the only one who has lost track of a tool or two. It’s too easy to get swept up in the task at hand, exhaust yourself and then say you’ll “clean up later” but every gardener knows that later never comes. Take a quick inventory of your garden tools and do a walkaround for any abandoned tools that may have been left to rust so your valuable equipment doesn't deteriorate in the cold, wet weather. And then maybe make a plan for next year so you have an easily accessible drop point in your garden where you can keep tools without having to remember to walk them back to the shed.
Oil and clean tools
Now that you’ve recovered your neglected tools, it’s a great time to give them some TLC. Clean off any dirt with a dry brush, sharpen the blades and apply a protective coat of oil to prevent rusting and keep your tools in top-notch condition. For your more precious tools (like my Felcos) it’s worth taking the time to learn how to disassemble and oil any interior components. I know it seems like a lot of tiny pieces, but if you spend a bit of time watching how-tos on YouTube, anyone can do it with an hour or two to spare. This small effort pays off when spring arrives, and you can dive straight into gardening without dealing with rusty, malfunctioning tools.
Disconnect hoses

Frozen hoses can lead to burst pipes and costly repairs. To avoid this, disconnect and drain hoses before temperatures plummet. In most modern homes, each exterior spigot should have its own shut off point. Storing them in a shed or garage ensures they stay in good shape, ready for use when the growing season returns.
Make leaf mold
The more leaves you can “leaf” in place, the happier your lawn and neighborhood wildlife will be. But if you must rake up your leaves, you should definitely turn them into leaf mold. Creating a dedicated spot in your yard for leaves to break down will result in a rich, crumbly material that acts as a fantastic soil conditioner, improving the structure and fertility of your garden soil. It's a sustainable way to recycle nature's abundance and enhance your garden's health.
Wrap trees
Especially in very cold climates like mine, young trees or those susceptible to winter damage benefit from being wrapped with burlap or tree wrap. This protective layer shields the bark from harsh winter conditions, preventing sunscald and frost cracks. It's a simple yet effective measure for the long-term health of your trees.
Mulch perennials
We aren’t the only ones who benefit from an extra blanket or two in the winter months. A layer of mulch such as wood chips, pine needles or straw around perennial plants acts as insulation, protecting their roots from extreme temperatures. It also helps retain moisture and suppresses weeds, contributing to the overall well-being of your garden beds during the winter months. A good rule of thumb is to use four to six inches of mulch around the plants - just don’t press the mulch up against the plant itself. We are insulating the roots, not the aboveground parts.
Empty outdoor planters so they don’t crack
Freezing and thawing cycles can cause soil in containers to expand and contract, which can cause your clay or ceramic pots to crack. To avoid this, empty out some or all of the soil from your breakable containers or, if space allows, move them to a sheltered area. This simple step ensures your pots remain intact and ready for planting in the spring.
Prep new garden bed areas with cardboard and compost
If you're planning new garden beds for the next growing season, winter is an excellent time to start preparing the ground using the lasagna method. Lay down untreated cardboard to smother weeds and grass, and top it with compost, leaves or straw. This not only enriches the soil but also creates a weed-free foundation for your future garden.
Cover crops
Sowing cover crops, such as winter rye or clover, during the fall is a smart way to protect and improve your garden soil. These crops prevent soil erosion, suppress weeds, and add organic matter as they decompose. Come spring, you can easily incorporate them into the soil, providing a nutrient boost for your plants.
Cover raised beds
This one is more specific to my raised beds because they are off of the ground. While they are weather resistant on their own being made of cedar, in order to make them last as long as possible I grabbed firewood rack covers that are the exact size of my raised beds. These waterproof covers will protect my beds from the elements - but be aware that they can cause soil to turn hydrophobic if they totally dry out over the winter and aren’t typically necessary with standard raised beds. Because my raised beds also have wicking trays built into them, I’ve disconnected the tubes underneath so water won’t sit stagnant in the beds all winter. The arch trellises are powder coated, so they’ll be just fine out in the elements over the winter.
Watch me prep my own garden over on YouTube!
There’s always more that can be done to prepare the garden for winter, and some tips will be more specific to your garden setup. But with all this checked off my list, I’m looking forward to a slower season of rest and planning, organizing my seed collection (and let’s be real, buying a lot more) as well as drawing up new garden bed layouts for the spring. What are you doing to prep your garden for the winter months now?

Fall Gardening 101: How to Plant a Thriving Vegetable Garden for the Cooler Months
Fall gardening is more limited, since not as many plants thrive in the colder weather of September, October or November. But the plants that are resilient enough to survive these colder temps are that much more gratifying to harvest. In this blog post, you’ll learn everything you need to know to plant a fall garden and keep your garden going as long as possible.

No one in a state that experiences all four seasons wants to think about fall and winter in the summer, but sometimes it pays to look ahead. If you’re wondering if it’s too late in the year to start a garden, or you’re noticing some gaps starting to form as your spring plantings reach the end of their harvestable life span, fall gardening is the answer. Gardening in zone 6, we don’t get to grow all year long unless we have cold frames, a green house or a hoop house - our season for a productive garden is from about May to October, and even within that limited season we have to contend with variable temperatures at the beginning and end of that time period. A fall garden is our final push to maximize the yield we can get in this limited time frame, as well as a second chance for beginner gardeners new to gardening to join in and get planting their first garden with easy to grow crops to start saving money and eating healthier.
Fall gardening is more limited, since not as many plants thrive in the colder weather of September, October or November. But the plants that are resilient enough to survive these colder temps are that much more gratifying to harvest. In this blog post, you’ll learn everything you need to know to plant a fall garden and keep your garden going as long as possible.
Watch me do it
Planting a Fall Garden The Lazy Gardening Way · Subscribe on YouTube
Types of vegetables that can be grown in the fall
Certain groups of vegetables thrive in the cooler temperatures of fall, and many even require that cooler weather in order to germinate properly. Some can survive temps as low as 20F degrees. Coincidentally, many of these are great options for beginners to grow if you’re just starting out. Fall vegetables are fast growing, since they need to reach maturity in a short amount of time before the cold of winter sets in fully, so you’ll be reaping the rewards of your garden quickly. They are usually pretty low maintenance too, so if you’re a beginner fall is the perfect time to start gardening.
Where to buy vegetable seeds
Botanical Interests is the only place I order vegetable seeds online. The quality is unmatched, they offer a wide variety of seeds and their customer service is excellent. I did about fifty percent transplants from the nursery in the garden this year and fifty percent direct sowed to avoid dealing with a seed starting setup this spring, and everything that I direct sowed in my garden this year came from Botanical Interests, and I had zero issues with germination. It doesn’t hurt that the seed packet illustrations are pretty enough to frame either. Of course, you can also get all the flowers and summer crops you’ll want for your garden too.
Here’s my top recommendations for planting your fall vegetable garden with picks and descriptions from Botanical Interests
Leafy greens
Many leafy greens germinate best in cooler temperatures. Wait to plant these until the heat of summer has fully passed for a quick harvest and you’ll be enjoying salads well into October (or add a DIY cold frame to your garden for fresh greens all winter long)
LETTUCE
From the Botanical Interests website:
Butterhead, also called Boston or Bibb, has soft, smooth leaves perfect for carb-free wraps.
Crisphead is your familiar iceberg, which perfectly complements a BLT sandwich.
Mesclun, literally means mixture, creating a diversity of texture and color. Mesclun is harvested when young, and perfect for a multitude of culinary dishes.
Leaf lettuce is soft, with a crisp rib and can be not only green, but red or red-tipped.
Romaine lettuce is upright with broad, stiff ribs—the classic ingredient in a crisp Caesar salad.
Summer Crisp, also called Batavia, forms a loose head with green or red leaves that are sweet and crisp.
SPINACH
'Bloomsdale' is an early 1800's, dependable, open-pollinated variety. For growing tender, baby greens in as little as 28 days, you can sow seeds just 1" apart. Very nutritious—lots of vitamins A and C and iron. Grows great in a container too!
SWISS CHARD
'Celebration' is a multi-colored chard that produces uniform plants with dark green, glossy leaves. Vibrant multi-colored petioles (stems) are various shades of pink, yellow, white, and orange.

Root vegetables
Root vegetables are sweetest and juiciest when harvested in cool weather. They usually prefer warmer temperatures to germinate, so you’ll want to get your seeds planted in August for a fall harvest. They tend to store for a long time in cold storage too, and certain crops like carrots can even be left in the frozen ground over the winter and harvested in the following year in early spring - the freeze makes them even sweeter!
CARROTS
Grown and eaten in Asia and Europe 1,000 years ago, these colorful carrots are available once again. Just like the popular orange carrots, red, purple, white, and yellow carrots contain plenty of vitamin A and other healthful nutrients. Carnival Blend carrots can also be harvested when only 3"-4" long for gourmet baby carrots.
RADISHES
'Round Black Spanish', also known as 'Noir Gros Rond d'Hiver', grown in the U.S. since the 1800s, is an extra large, winter radish that adds spiciness to raw or cooked dishes; spiciness declines when cooked. Winter radishes require a shortening day length and cool temperatures to mature the edible root; sow after mid-summer and into early fall. They can be stored for long periods.
'French Breakfast' has endured in gardens for over 100 years because of its wonderful, delicate flavor. This spring radish grows best during the cool periods of spring and fall but will also withstand some summer heat!
TURNIPS
Pure white and mild, 'Market Express' is a great baby turnip in salads, crudité trays, and pickling, as well as traditional cooked turnip dishes. The roots have a smooth texture and slightly sweet, fruity flavor that upgrades homegrown meals, and the greens are also delicious. Fast growing, enjoy 2" baby-sized turnips in only 30 days, or grow them to full size (4"–5") in just 40 days.
The globe-shaped roots of ‘Purple Top White Globe Turnips’ have purple shoulders above ground and are creamy-white below the soil level.
BEETS
Aside from the health benefits, which include significant amounts of fiber, potassium, folic acid, and vitamin C, beets come in many colors. 'Gourmet Blend' includes 'Detroit Dark Red' with deep red roots and delicious dark green tops, 'Chioggia' with interior rings of bright pink and white, and 'Golden' with bright yellow flesh.
Brassicas
Plants in the brassica family produce a form of antifreeze when exposed to cold temperatures that actually causes the plants to taste sweeter. I enjoy winter kale far more than summer kale - not to mention, there’s no cabbage moth pests in the winter chewing through every leaf before I have a chance to harvest it.
KALE:
'Red Russian', brought to North America in 1885, is sweet and tender all the time, making it excellent for mesclun, garnishes, and sautéing. The red veins, wavy margins, and foliage that resembles oak leaves make 'Red Russian' as attractive as it is delicious. Harvest baby greens in just 21 days.
BRUSSELS SPROUTS
‘Long Island Improved’ produce 1"–1½", blue-green orbs that look like tiny cabbage heads, and grow tightly and densely against the main trunk of the plant. The cluster of leaves at the top of the plant give it a palm-tree-like look. Long Island Improved was developed in the 1890s, quickly becoming the garden standard, and continues to be a dependable heirloom for home gardeners.
CAULIFLOWER
‘Snowball Y’ provides flavorful, 6" snow-white heads in just 70 to 80 days. The leaves naturally curl nicely around the heads providing self-blanching and protection from sun scald. Mature heads hold well in the garden, so they don't all have to be picked at once.
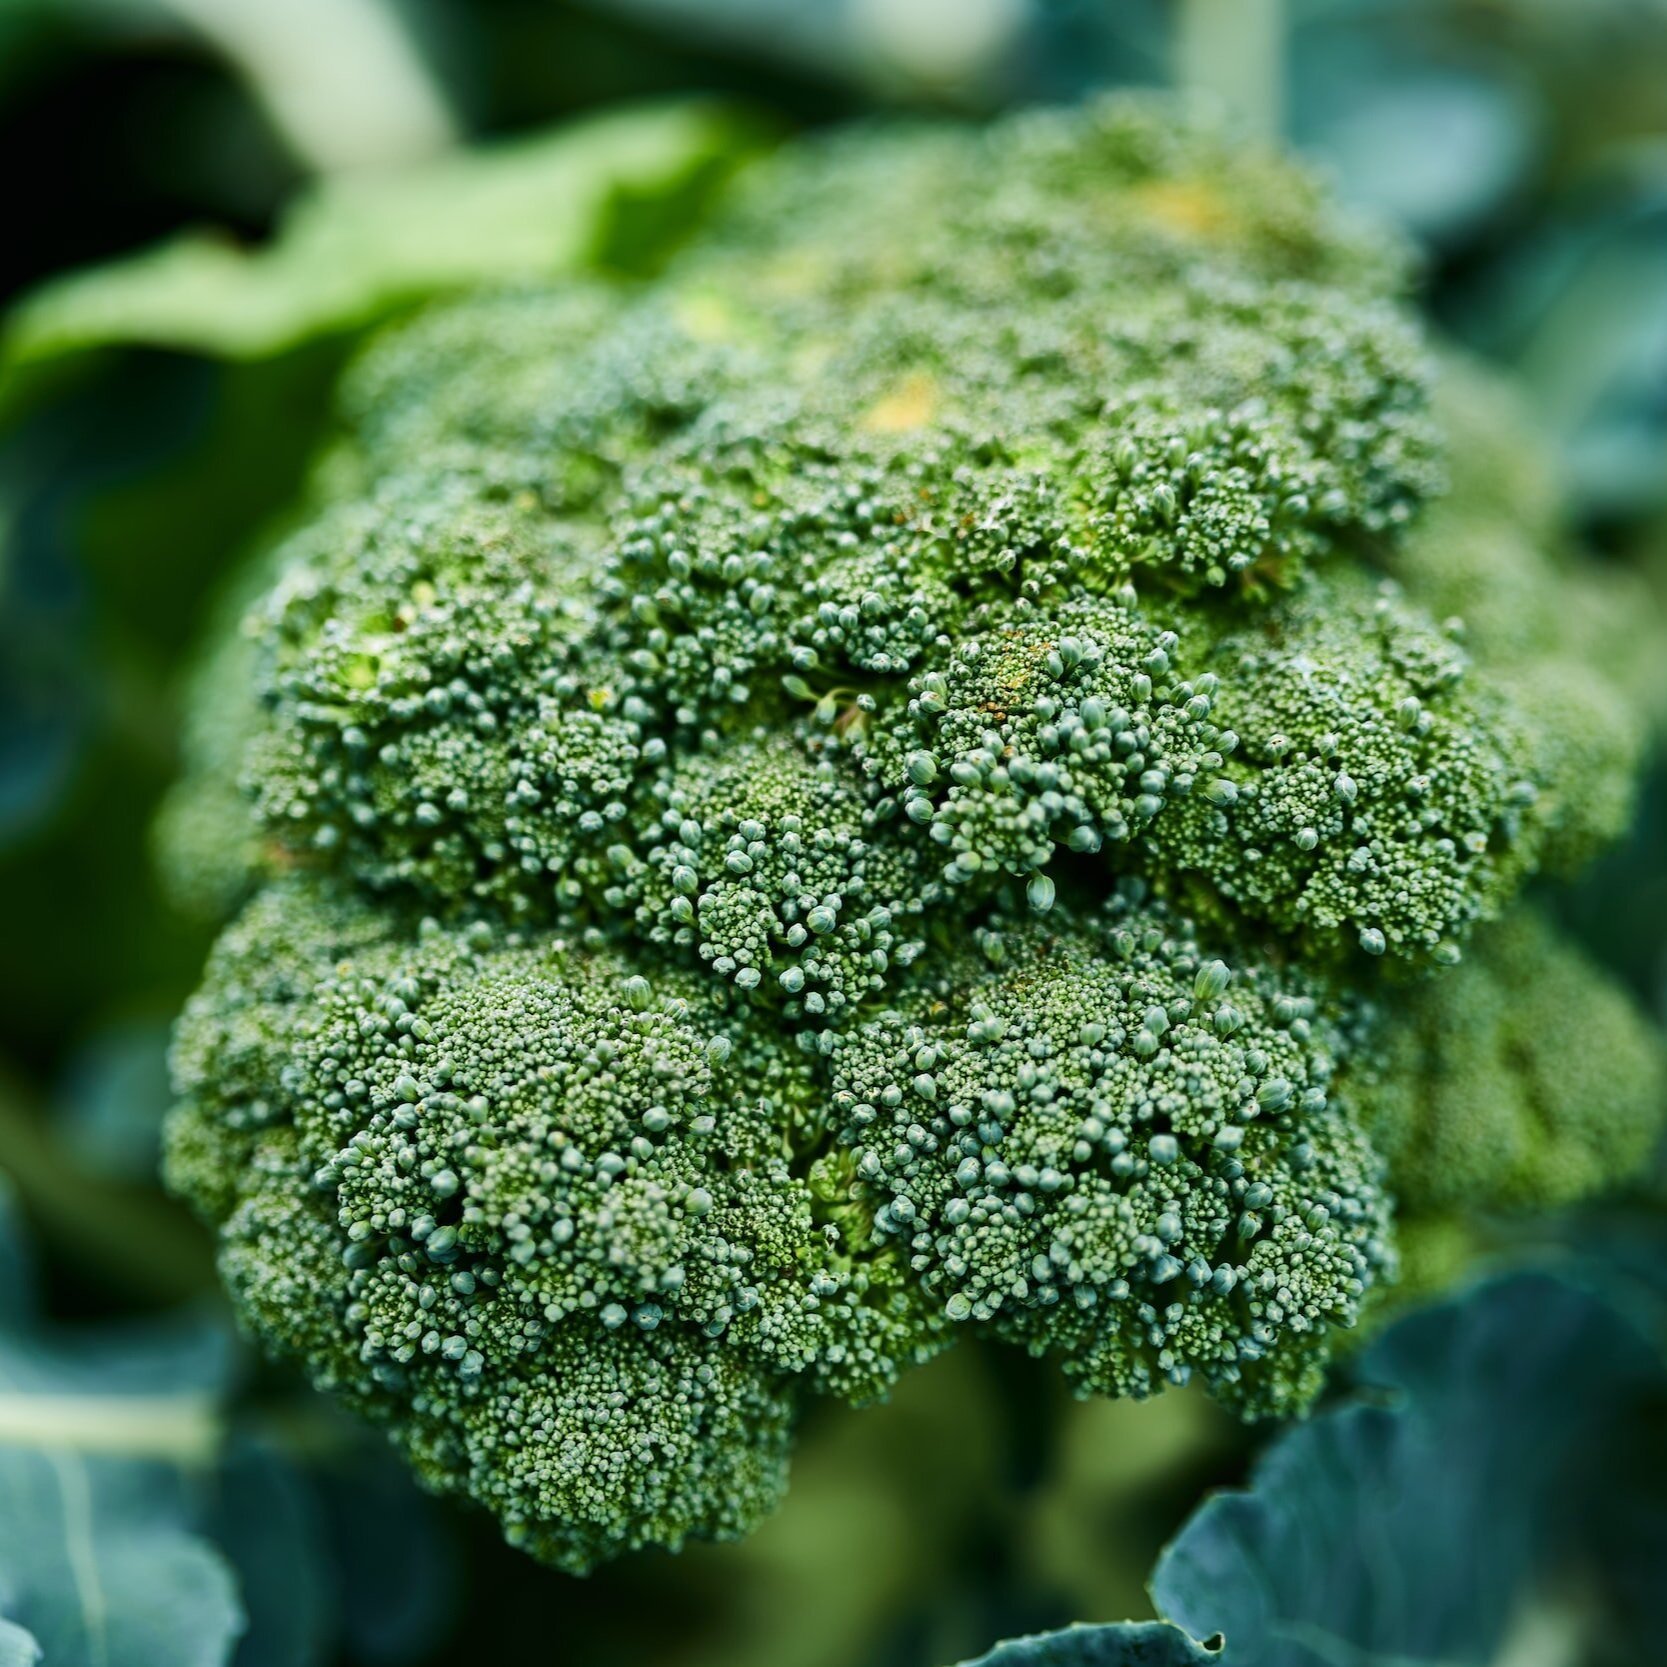
BROCCOLI
'Waltham 29' grows prolific side shoots and is specially adapted for cold tolerance. Freezes well. The 4"-6", blue-green heads are delicious raw or cooked.
Sprouting broccolis, like 'Burgundy', create one moderate to small main head, but the real show starts as it begins to produce generous side shoots. Purple broccolis are known for being quite tender, flavorful, and full of antioxidants, but in most cases also a bit fickle, needing cool temperatures–not 'Burgundy'; it's tolerant of a wider range of temperatures, which means a longer harvest period. Some gardeners pinch the first main floret off as soon as it is visible to encourage more abundant side shoots.
Garden Tip
Make sure to prepare your soil by top dressing your beds with fertilizer before you add new plants to your garden, as the soil is likely depleted from all the growth of the past few months. Pest pressure should be a lot lighter in your fall garden, and you won’t need to water as often since there won’t be as much heat drying out the soil. Fall gardening is an easy and fun way to extend your growing season, I hope you’ll give it a try!

Spring Gardening: 7 Cold Hardy Plants to Grow in March
The ground is attempting to thaw, which means mud season has officially arrived and with it my itch to garden and grow has returned in earnest. I’ve just gotten my new elevated garden beds from Gardener’s Supply Co built over the old garden bed and spread a thick layer of clover seed beneath with dreams of a carpet of clover to rest on come warmer days and now I can’t think how I could wait another two months for our last frost to start planting them. So we’re going to plant out a small cold hardy garden in the first two beds here just to tide us over until we can start planting the majority of our crops in May.

The Cottage Peach is reader-supported. When you purchase through links on our site, we may earn an affiliate commission at no additional cost to you. All opinions are our own.
Are you wondering if March is too early to start a garden? This post explains what plants can survive in the cold, what is a winter hardy plant, what are the easiest plants to grow in winter and more.
The ground is attempting to thaw, which means mud season has officially arrived and with it my itch to garden and grow has returned in earnest. I’ve just gotten my new elevated garden beds from Gardener’s Supply Co built over the old garden bed and spread a thick layer of clover seed beneath with dreams of a carpet of clover to rest on come warmer days and now I can’t think how I could wait another two months for our last frost to start planting them. So we’re going to plant out a small cold hardy garden in the first two beds here just to tide us over until we can start planting the majority of our crops in May.
This will be the smallest planting we do all year, and so I committed to really savoring the sensory experience of it and slowing down to enjoy the process. All I need to bring with me are my seeds, my favorite trowel and gloves. And I’ll be bundling up because while these plants I’m growing may be cold hardy, I most certainly am not! So sweaters and hats and layers galore. I love the lack of urgency and the sense of hope I get from planting the first cold hardy garden of the season. Soon green things will push up out of the earth and remind us that we are all connected to the life that grows beneath our feet.
We have a short growing season here in New England, but that won’t stop me from planting cold hardy vegetables that can thrive in these colder temperatures. My garden is just a few short steps from the back door, overlooking 70+ acres of my neighbors fields and surrounded by the buzz of life beginning to stir - a blue heron in the distance, a mouse skittering through the undergrowth.
Out back the trees are still in their deep sleep and the sun is trying its hardest to break through the seemingly endless layer of gray clouds that has graced the sky for the past four months now. I can still see my breath as I exhale, and this too is a reminder to be mindful. I breathe the same air as these trees that rest around me, and thank them for how clean and fresh it feels within my lungs. This grounds me in my purpose to bring myself and my body closer to the living things that are all around us.
What is a winter garden?
A winter garden is just a garden that you grow using only plants that can thrive in winter! There are many fun varieties of cold hardy vegetables and perennial plants that have unique characteristics that help them to survive in colder climates. For instance, kale, brussels sprouts and other brassica plants produce a form of antifreeze when exposed to cold temperatures that actually causes the plants to taste sweeter. I enjoy winter kale far more than summer kale - not to mention, there’s no cabbage moth pests in the winter chewing through every leaf before I have a chance to harvest it.
What plants can survive in the cold?
Now I’ll preface this by saying that what can grow in my garden in March may not be the same as what can grow in your garden. If you are in California for example I’m afraid this post won’t be much help to you as you do not suffer from the same deep cold winters we have here in the northeast. But in grow zone 6B many plants can survive the chill of late winter - as a matter of fact, some plants like lettuce and spinach require a colder temperature in order to germinate. This is why you’ll begin to see signs of life in the form of things like wild onion grass even this early in the season when the trees are still sleeping. And since we’re all about low-energy gardening tips and tricks here, I’ll also only focus on what is the easiest plants to grow in winter. No seed starting, forcing rhubarb or chilling your garlic seed in the freezer to trick it into sprouting earlier here. I want to focus just on plants that can go straight into the ground in March.
Winter plants for the garden:
Watch me do it
Greenhouse Gardening in Cold Climates | Day In The Life · Subscribe on YouTube
Here is everything I will be planting in my cold hardy garden using my elevated beds from Gardener’s.
Snap peas (germination temp 40+ F)
Pansies (germination temp 45+F but we are planting these from established plants from the nursery not seeds)
Lettuce (germination temp 35+F)
Radish (germination temp 50+F)
Spinach (germination temp 40+F)
Chives (transplanting this from another spot, these grow well at temps above 40F)
Calendula (this one is more of an experiment as while it is cold-hardy once established, it probably won’t germinate until soil temps reach 60 degrees fahrenheit)
What is a winter hardy plant?
A winter hardy plant means any plant that can survive average winter temperatures, including cold hardy vegetables and cold hardy perennials. Most winter hardy plants do not produce much throughout the winter due to the lack of sunlight but by surviving these cold conditions they are able to establish themselves faster in the spring which means they will be the first to yield a harvest since they will mature before anything else in your garden.
What can I plant in pots for winter?
Some plants that won’t survive the winter outdoors can be transplanted into pots for the winter and brought indoors. You can do this successfully with most herbs including rosemary and sage. You can also overwinter pepper plants (which are perennial in warmer climates) by cutting off all of the foliage except for the main Y shaped stem, moving into pots and storing in your basement. They will go dormant and then can be transplanted back into your garden beds after your last frost date.
When I was deciding what to plant in early spring, I was happy that everything I wanted to grow would thrive in my elevated garden beds - which meant I didn’t have to worry about hurting my back while gardening. With my arthritis, it’s important that the way I garden is accessible and gentle on my body while still providing me with opportunities to stretch and strengthen my joints. I found prepping the elevated raised beds to be the easiest it has ever been, since I didn’t even need to weed the planting area prior to starting. It feels like a true luxury to stand over my raised beds in the garden and I was able to save more of my limited energy for actually enjoying being in the garden instead of just trying to finish as quickly as possible before my energy ran out. The beds are quite deep and so they can support the largest root structures of some of the plants I’ll be growing with no problem.
I had honestly begun to dread spring garden prep last year. I found myself crying in frustration more than once trying to wrangle the wildness of my in-ground beds into shape for planting. It is really shocking how much harder it is to work the earth when your back is in pain and your energy reserves are lower. While I do greatly appreciate the physical benefits of working out via the garden, and weeding has always been the best way to let out any pent up aggression, my body has been telling me for a couple of years now that this isn’t the right way to go about it for me anymore. I feel lighter knowing that I won’t have these dark moments in the garden where I really have to push myself beyond my limits anymore and can just be present and enjoy the process of gardening again. A part of me felt worried I wouldn’t be taken seriously as a gardener if the majority of my plants were grown in what is effectively a giant container garden. Especially with our full acre to work with, I knew I wanted to take a hybrid approach. So we have perennials like asparagus and rhubarb in-ground since those don’t require much maintenance year-to-year and then larger crops like garlic in ground as well. And of course borders of wildflowers fill up a lot of space too. Eventually it is my dream to add a greenhouse to carry us through the endless winters. But these elevated beds have taken such a weight off my shoulders (and my back!) and gave me back my peace in the garden, and I would not trade that feeling for anything.
If you’re looking for winter garden ideas, I hope that you’ve found this post helpful. Don’t forget to check out this post on cold frame gardening to extend your growing season even further + Let me know in the comments what you are planting in your winter garden this year.

Grow Food Outdoors All Year Long With Cold Frame Gardening
Living with arthritis as a gardener, I have formed a close bond with the land in order to better support my body. My immune system requires careful tending, and I find myself craving dark leafy greens, hearty soups and protein rich comfort foods as the weather turns cold. But in a cruel twist of fate, when my body craves these deeply nutritious foods most, the bitter cold of our New England winters do not accommodate a growing season which would allow me to cultivate all of the produce I wish to grow deep in December.
So how do we ask the land to sustain us through its deep hibernation? The answer may be found in the form of a simple wooden box called a cold frame.
As cold and snowy weather descends upon us here in the Northeast, I find my achy joints actively calling out for more attention. Living with arthritis as a gardener, I have formed a close bond with the land in order to better support my body. My immune system requires careful tending, and I find myself craving dark leafy greens, hearty soups and protein rich comfort foods as the weather turns cold. But in a cruel twist of fate, when my body craves these deeply nutritious foods most, the bitter cold of our New England winters do not accommodate a growing season which would allow me to cultivate all of the produce I wish to grow deep in December.
So how do we ask the land to sustain us through its deep hibernation? The answer may be found in the form of a simple wooden box called a cold frame.
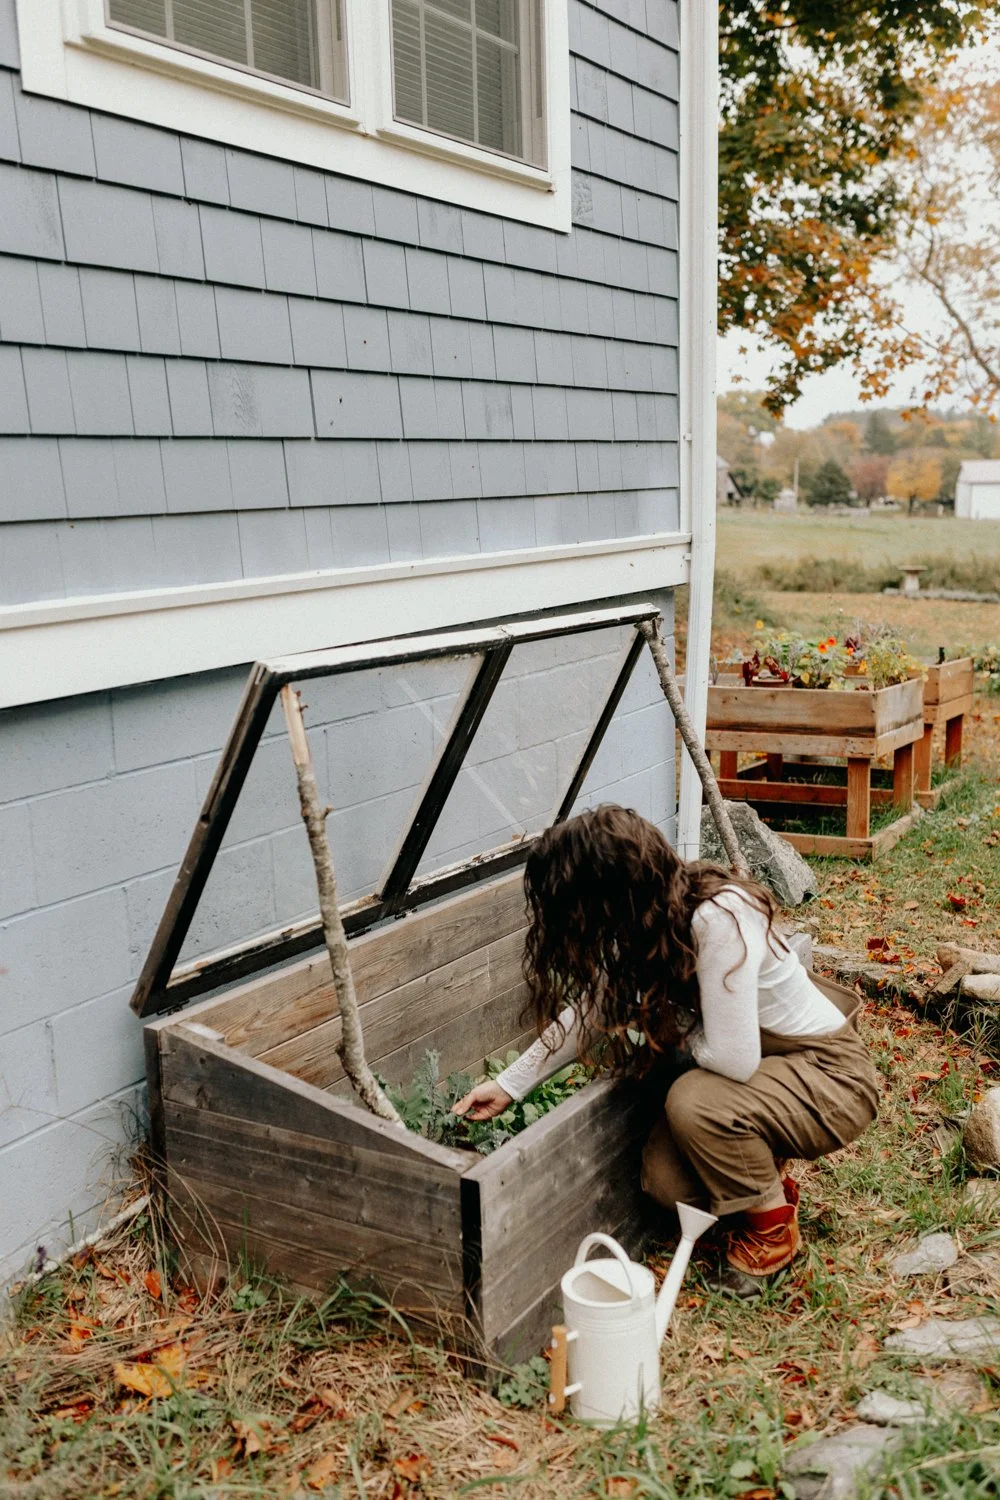
This rustic frame set into the earth, snuggled up against the sunny south wall of our home provides us ample opportunities to tend, grow and gather even in the darkest days of winter. It can feel like pure magic to enjoy a diverse variety of produce even as we are cozy in our blankets beside the fire.
How does a cold frame work?
A cold frame works by creating something like a mini-greenhouse, trapping warm air through solarization inside of the box and insulating the plants within from the worst that winter has to offer. We control the temperature inside of the cold frame with a simple vent - the hinged lid can be propped open with different sized sticks to allow excess heat to escape on warmer days, but for the most part in our deep New England winters the lid stays firmly shut until we trudge through the knee deep snow to harvest.
Like many things in life, we cannot expect to circumvent nature entirely for our own benefit. Nothing in nature blooms all year. Try to plant delicate heat loving peppers, for example, and you will be met with disappointment. Similarly, the plants enjoy a slower season in winter, much the way we humans do. If you’re not convinced, I’d ask you to consider this: if the trees can take a break, so can you.
A cold frame is a lesson in slowing down and radically accepting things as they are. Your kale, radishes and lettuce will grow and thrive at a slower pace than you can expect in warmer seasons. The harvests are fewer, but more rewarding for the mere fact that they exist at all. And while a cold frame requires a certain amount of upkeep and planning in the beginning, this slowed down nature means that watering and weeding becomes virtually unnecessary in the coldest months.
Now, if you live in a climate that does not experience a cold winter season you may think a cold frame is unnecessary. Although, they continue to be useful even into the spring season here in New England since they make the perfect protected nursery in which to harden off your summer seedlings each spring. And if you can easily build one for cheap or free using reclaimed materials, why not give it a try?
Watch me do it
Get 3 Extra Months of Garden Harvests (Season Extenders) · Subscribe on YouTube
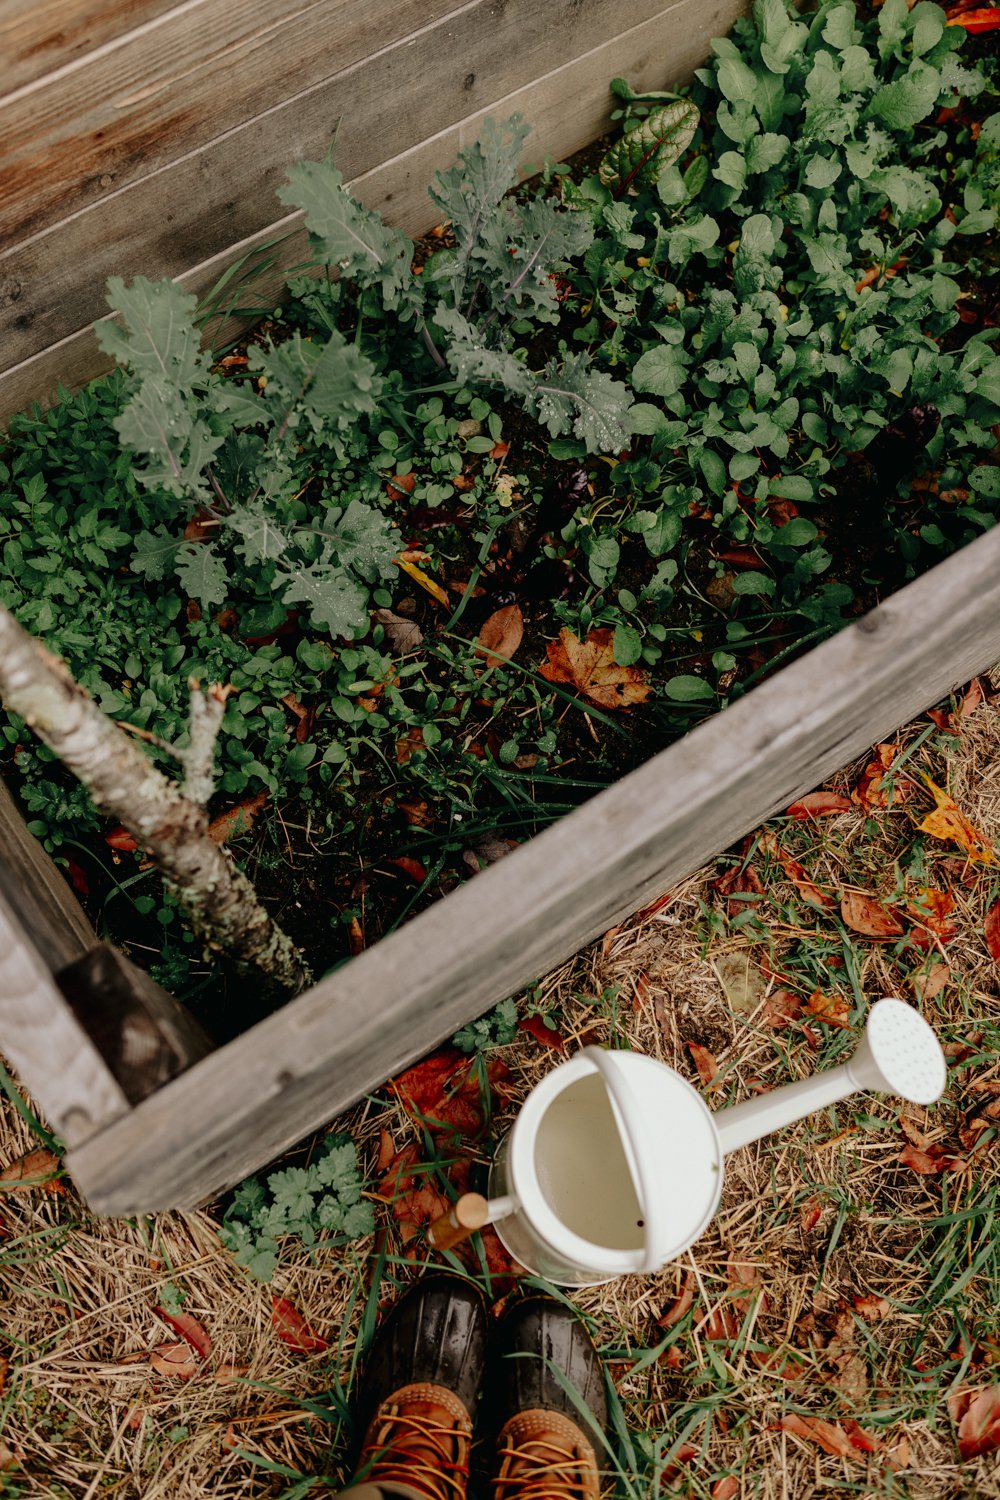
Where should you put a cold frame?
You’ll want to choose a location for your cold frame that is protected from north winds and generally sunny. This means the best spot for your cold frame will have no shade from any trees, and preferably be placed with the back wall of the cold frame up against the south side of your house, shed or barn. If you don’t have a spot like this available, then anywhere without shade will do. You’ll just need to spend some extra effort properly insulating your box from the winds.
Speaking of howling winds, so long as it is protected from those north winds we discussed you shouldn’t worry yourself too much about creating something airtight. Your cold frame is not a greenhouse, and so we don’t expect it to function quite the same. Build your frame to be thick and sturdy, but don’t worry about every little seam and crack.
How to build a cold frame
If you have the time and physical ability, building a cold frame yourself is absolutely the most economical solution. Purchasing one ready-made can cost you anywhere from $60-$500 and quality issues on the low end of that budget will prevent you from getting many years of use out of it. Meanwhile, if you build one yourself it can be done for far less than the low end of that range and produce an end result that will be sturdy enough to continue providing shelter to your winter crop for years to come. While old windows can be fragile and prone to breaking, when they can be found for free I still find it a better option than a new piece of corrugated plexiglass.
We built our cold frame just as the first leaves began dusting the earth, making their final descent from the branches above. Pulling out the old wooden windows and reclaimed lumber from our basement, I didn’t really have a plan. This is the nature of projects on our little homestead - in order to put to rest my fears and limiting beliefs, I have a tendency to turn a blind eye to the specifics and figure things out as I go. “I’m just going to build a big rectangle, the size of the two windows combined, and stick the windows on top” I confidently told myself. It’s safe to say I don’t have a ton of confidence when it comes to building things, but I was betting that between the two of us, we could figure it out. A chill wind traveled across the field. I adjusted my hat over my cold ears and set to work.
This method of trial and error has generally served me quite well on this journey, and I’ve found it to be essential to growing plants in particular. A fussy Nasturtium in Georgia, for example, is going to have very different needs that one planted in Vermont. So why overwhelm ourselves with tips and tricks from every gardener in the land when we could simply plant, observe, expect failure and experiment until things go right?
You can use many different materials to build a cold frame - but the very best materials are the ones you already have. Our little pile of scrap lumber provided nearly everything we needed to create a sloped box on which to mount our hinges and old wooden windows.
The result was…lopsided. For some reason, the box wasn’t sitting level on the earth, the wood having twisted under tension at some point, unnoticed by our novice eyes. The old windows we used for a lid were chipping questionably safe paint flakes every time we opened and closed the hinges. But it was finished, and it was free, and so - in the ground it went. I packed straw around the exterior to fill in the gaps where the frame didn’t meet the soil and added extra in the space between the wall and the cold frame, set my plants in the earth and held my breath that I would discover an abundance of fresh food beneath the glass in a couple of months.
I suppose I shouldn’t have led with such an obvious spoiler, but the cold frame did work, and an abundance we did have, regardless of our lack of building skills. And so as its lessons compounded the cold frame became something more than a simple box to grow in. The weathered wood shines like a beacon, a reminder to ourselves that we can accomplish more than we think, and done is better than perfect.
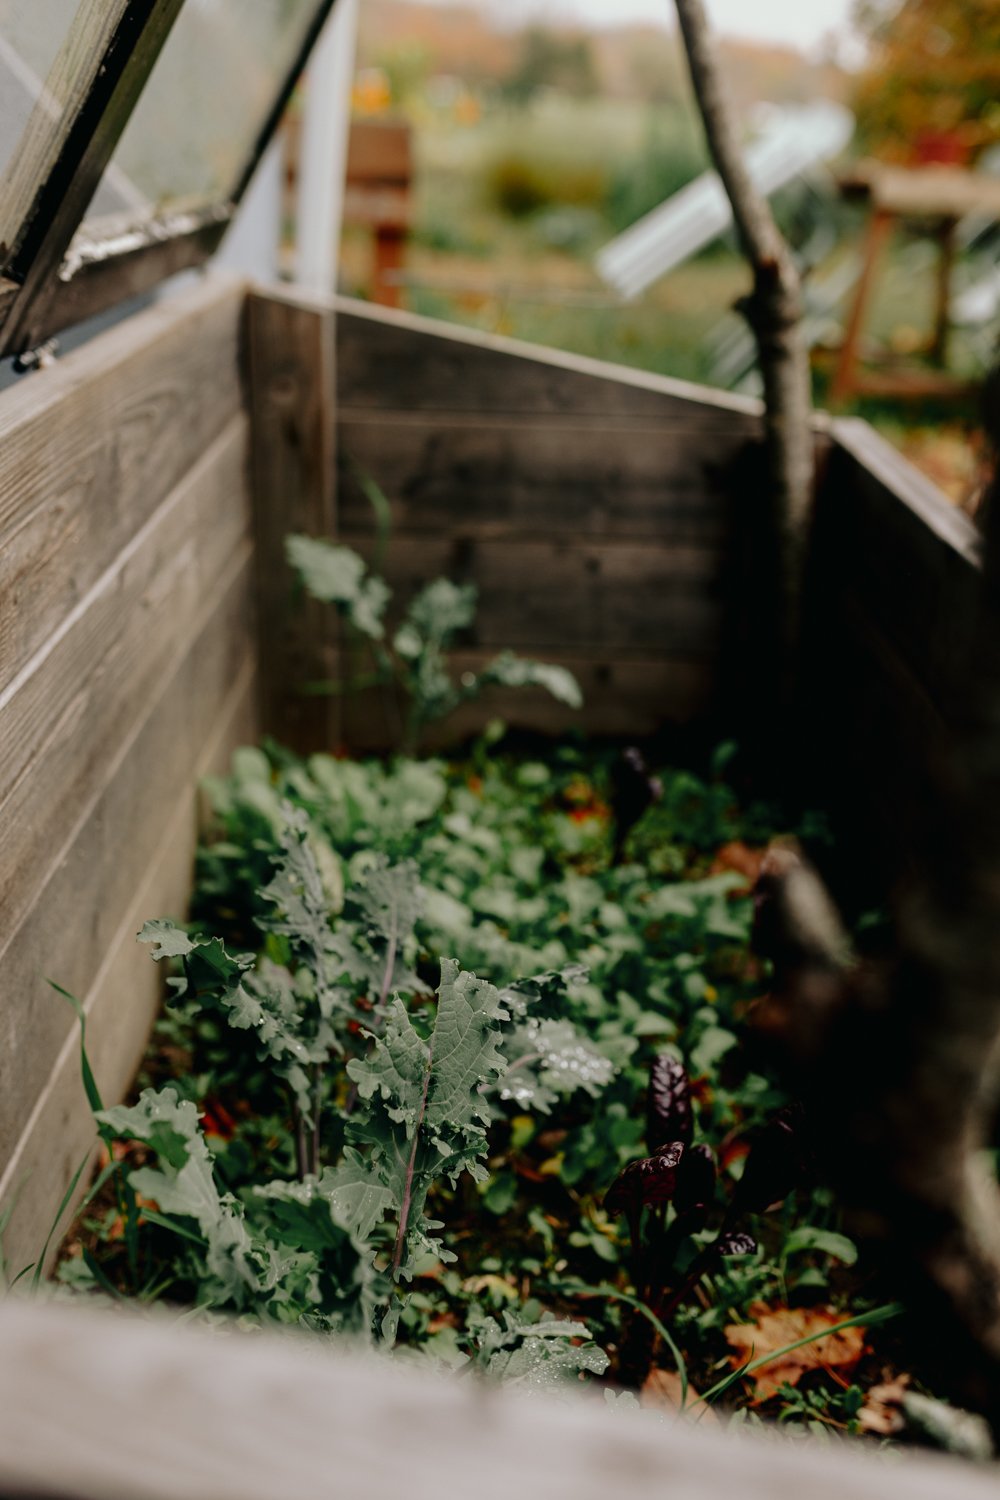
What Can you grow in a cold frame?
Kale
Swiss Chard
Spinach
Radishes
Lettuce
Beets
Carrots
Arugula
Kohlrabi
Scallions
Parsley
Mustard
Best cold frames to buy
Don’t want to build your own cold frame? There are many pre-made options available that are built to last. I suggest looking for a cold frame that has a rot-resistant cedar base and shatterproof polycarbonate lid. If you already have raised beds, then a plant protection tent may be the best option for you as you can simply convert your raised beds into a cold frame for the winter months and then remove the tent structure in the summer heat. Here’s my recommendations for the best pre-made cold frames and tent frames you can buy:
The 3-Season Garden Protection Tent from Gardener’s Supply makes it easy to access plants within your raised bed and includes two covers and durable powder-coated steel frame. This tent provides 70% light transmission, 40" of head room at the peak, and has roll-up end windows for ventilation. A second cover protects against ravenous summer bugs and scorching sun. Three zippered doors on each cover provide easy access for tending and harvesting. Tie-downs secure the covers to the steel frame. Click to Shop
The Cedar Cold Frame from Gardener’s Supply is an attractive cold frame with a narrow footprint. The base is made from rot-resistant lumber with aluminum corners. The top is made with polycarbonate panels that diffuse light so plants don't "cook," and there are adjustable braces to hold panels at various intervals for ventilation. Click to Shop