
BACKYARD GARDENING MADE SIMPLE
![Step-By-Step Tips For Growing, Harvesting, Storing, and Using Broccoli [Guide]](https://images.squarespace-cdn.com/content/v1/60e85024dc86d643da81c96a/1687360510758-7YZ9DFRDUQ3QT9VH62VH/image-asset.jpeg)
Step-By-Step Tips For Growing, Harvesting, Storing, and Using Broccoli [Guide]
Growing broccoli in your own garden brings a host of advantages. One of the most significant benefits is having access to fresh and pesticide-free produce. When you grow broccoli at home, you have complete control over the cultivation process, ensuring that no harmful chemicals are used on your plants. This allows you to enjoy the peace of mind that comes with knowing exactly what you're consuming. Additionally, harvesting your own vegetables can be an immensely rewarding experience. There's a sense of pride and satisfaction in tending to your plants and watching them flourish. Plus, the taste of freshly harvested broccoli is unparalleled, as it retains its crispness and flavors that can be lost during transportation. By growing broccoli in your garden, you can indulge in the delights of homegrown goodness and elevate your culinary creations to new heights.

Broccoli is not just a delicious vegetable; it's also a nutritional powerhouse. Packed with essential vitamins, minerals, and antioxidants, broccoli offers numerous health benefits. It is rich in vitamin C, vitamin K, fiber, and folate, making it a valuable addition to a healthy diet. Furthermore, broccoli contains compounds like glucosinolates, which have been linked to reducing the risk of certain cancers. Introducing broccoli into your meals can be a great way to boost your overall well-being.
Growing broccoli in your own garden brings a host of advantages. One of the most significant benefits is having access to fresh and pesticide-free produce. When you grow broccoli at home, you have complete control over the cultivation process, ensuring that no harmful chemicals are used on your plants. This allows you to enjoy the peace of mind that comes with knowing exactly what you're consuming. Additionally, harvesting your own vegetables can be an immensely rewarding experience. There's a sense of pride and satisfaction in tending to your plants and watching them flourish. Plus, the taste of freshly harvested broccoli is unparalleled, as it retains its crispness and flavors that can be lost during transportation. By growing broccoli in your garden, you can indulge in the delights of homegrown goodness and elevate your culinary creations to new heights.
What Type Of Broccoli to Grow In Your Garden
When it comes to choosing broccoli varieties for your garden, there are several popular options to consider. Green Magic, known for its compact size, is an excellent choice for smaller gardens or container gardening. It produces medium-sized heads with tight, deep green florets. Belstar, another popular variety, is prized for its excellent flavor and large, dome-shaped heads. It has a slightly longer maturity time, but the wait is well worth it. Calabrese is a traditional Italian variety and one of the most widely grown types of broccoli. It produces large heads with blue-green florets and has a relatively shorter maturity period compared to other varieties.
Each broccoli variety possesses unique characteristics that may influence your choice. Green Magic typically produces heads that are around 6-8 inches in diameter, making them suitable for individual or small-sized households. Belstar, on the other hand, can yield larger heads, reaching up to 10 inches in diameter, making it ideal for families or those who enjoy preserving or freezing their harvest. Calabrese tends to have medium to large-sized heads, averaging around 7-9 inches in diameter.
When selecting broccoli varieties, it's important to consider their suitability for different climates and growing seasons. Green Magic and Belstar are known for their versatility and adaptability to a wide range of climates. They can be grown in both cool and warm seasons, making them suitable for areas with varying temperature fluctuations. Calabrese, being a traditional variety, thrives in cooler climates and is best grown as a fall or early spring crop in regions with mild winters. Understanding the specific growing requirements of each variety will help you select the best broccoli types that align with your local climate and growing season.
Where to Grow Broccoli
Broccoli thrives in full sun, so it is crucial to choose a growing site that receives at least 6 to 8 hours of direct sunlight daily. Sunlight is essential for the development of healthy and robust broccoli plants and ensures optimal head formation. Select a location in your garden that is not shaded by trees or buildings to maximize sun exposure.
When choosing the right location for planting broccoli, consider several factors. First, ensure that you have adequate space for the plants to grow and spread. Broccoli plants typically require about 18 to 24 inches of space between each plant, so plan accordingly. The chosen site should also receive ample sunlight throughout the day to promote healthy growth and head development. Avoid planting broccoli in areas shaded by buildings, tall plants, or trees that may obstruct sunlight. Additionally, consider the protection of your broccoli plants from strong winds. Broccoli plants have shallow root systems and can be easily toppled by strong gusts, so selecting a location shielded by structures, fences, or windbreaks can help protect them from wind damage.
Starting Broccoli Plants From Seed
To start broccoli from seeds, begin by filling seedling trays or small pots with a seed-starting mix. Sow the seeds about ¼ to ½ inch deep, spacing them around 2 inches apart. Gently cover the seeds with soil and lightly tamp it down. Water the seeds thoroughly but avoid overwatering, as broccoli seeds can rot in excessively wet conditions. Place the trays or pots in a warm location with temperatures around 70 to 80°F (21 to 27°C) for optimal germination. Keep the soil consistently moist and provide adequate airflow to prevent damping off disease. Once the seedlings have developed two to four true leaves, they are ready to be transplanted into the garden.
Using Transplants for Broccoli
Using transplants for broccoli offers several advantages. Firstly, it reduces the time it takes for the plants to mature and produce heads, allowing you to enjoy your homegrown broccoli sooner. Transplants also provide a level of convenience, as they can be purchased from nurseries or started indoors and then moved outside when the weather and soil conditions are favorable. However, there are considerations to keep in mind. Transplants may experience transplant shock when moved to a new location, especially if not properly hardened off. Harden off transplants by gradually exposing them to outdoor conditions over the course of a week before transplanting. Additionally, transplants may have limited root development compared to direct-sown seeds, so take care not to disturb the roots during transplanting to ensure successful establishment.

How to Plant Broccoli
Before planting broccoli, it is important to prepare the soil properly. Start by clearing the area of weeds or any other vegetation that may compete with the broccoli for nutrients and space. Incorporating compost or well-rotted organic matter into the soil can improve its fertility and drainage. This will provide the broccoli plants with the necessary nutrients for healthy growth.
When it comes to planting broccoli, spacing is crucial. Each broccoli plant should be given enough space to allow for proper air circulation and growth. Allow for a twelve inch squash area for each broccoli plant. Dig a hole slightly larger than the root ball of the transplant or seedling. Place the plant in the hole, making sure the crown of the plant is level with the soil surface. Gently firm the soil around the plant, ensuring it is well-supported but not compacted.
Providing adequate spacing between broccoli plants is essential for their overall health and development. Sufficient spacing allows for proper air circulation, which helps prevent the buildup of moisture and reduces the risk of fungal diseases such as powdery mildew. It also gives the plants room to spread out and develop robust foliage and heads. If the plants are crowded together, they may compete for sunlight and nutrients, resulting in stunted growth and smaller heads. By allowing for ample spacing, you can ensure that each broccoli plant has enough room to thrive and reach its full potential.
Caring for Broccoli Plants
Regular watering is crucial for the proper growth and development of broccoli plants. Broccoli requires consistent moisture, especially during dry periods, to prevent stress and promote healthy foliage and head formation. Water deeply, providing enough moisture to reach the root zone of the plants. It is important to avoid overwatering, as excessive moisture can lead to root rot and other diseases. Aim to keep the soil consistently moist but not waterlogged. Mulching around the plants can help retain moisture and reduce water evaporation from the soil surface.
Weed control is essential for the well-being of broccoli plants. Weeds compete with broccoli for nutrients, water, and sunlight, which can hinder their growth and development. Regularly remove weeds from the vicinity of broccoli plants, either by hand-pulling or using appropriate gardening tools. Mulching with organic materials like straw or wood chips can also help suppress weed growth around the plants. By minimizing weed competition, you can ensure that your broccoli plants receive the necessary resources to thrive.
Fertilizing broccoli plants is important for providing them with the nutrients they need for optimal growth and production. Before planting, incorporate well-rotted compost or organic matter into the soil to improve its fertility. Broccoli benefits from balanced organic fertilizers with an NPK (nitrogen, phosphorus, potassium) ratio of approximately 10-10-10 or similar. Apply the fertilizer according to the package instructions, typically at planting time and again during the growing season. Additionally, foliar feeding can be beneficial by spraying a diluted organic liquid fertilizer directly onto the foliage, providing a quick nutrient boost.
Mulching is a beneficial practice for broccoli plants. Applying a layer of organic mulch, such as straw, wood chips, or compost, around the base of the plants offers several advantages. Firstly, mulch helps conserve soil moisture by reducing evaporation, thus reducing the frequency of watering. Secondly, it acts as a barrier against weed growth, minimizing weed competition and the need for manual weeding. Finally, mulch helps regulate soil temperature by insulating the soil, keeping it cooler during hot weather and warmer during cool periods. Apply mulch around the base of the plants, taking care to keep it away from direct contact with the stems to prevent potential rot or disease issues.
Broccoli Pests and Diseases
Broccoli plants can be susceptible to various pests that can hinder their growth and damage the foliage and heads. Common pests that may affect broccoli include cabbage worms, aphids, slugs, and caterpillars. Cabbage worms are green caterpillars that can feed on the leaves, causing significant damage. Aphids are small insects that suck sap from the plant, leading to stunted growth and distorted leaves. Slugs are nocturnal pests that feed on the leaves and can leave behind slime trails. Monitoring your broccoli plants regularly and being able to identify these pests will help you take timely action to prevent severe infestations.
When it comes to pest control in broccoli, organic methods are often preferred to minimize the use of synthetic chemicals. One effective method is to use floating row covers, which are lightweight, permeable fabrics that create a physical barrier around the plants. Row covers prevent pests from reaching the plants and laying eggs. Beneficial insects, such as ladybugs and lacewings, can also be introduced into the garden to prey on pests like aphids.
Harvesting and Storing Broccoli
Harvesting broccoli at the right time is crucial to ensure the best flavor and quality. Signs of broccoli maturity include compact heads with tightly closed buds. The heads should be firm and dense, without any yellowing or flowering. Avoid waiting too long to harvest, as over-mature broccoli can become tough and develop a bitter taste. It's better to harvest a bit early than to let the heads become too mature.

When harvesting broccoli, it's important to use a sharp knife or garden shears to cut the main head at a slant, about 5 to 8 inches below the head. Make the cut clean and avoid damaging nearby developing side shoots. Cutting the main head encourages the growth of smaller side shoots, which can be harvested later for a continuous supply of broccoli. Harvest the side shoots when they reach a suitable size, typically 2 to 4 inches in diameter.
Harvesting broccoli at the right time is crucial for optimal flavor. If left on the plant for too long, broccoli heads can become over-mature, with open buds and a stronger, less desirable taste.
After harvesting, there are different methods for storing broccoli. For short-term storage, you can place the unwashed heads in the refrigerator. To maintain freshness, it's best to store broccoli in a perforated plastic bag or wrap it in a damp paper towel. This will help retain moisture without causing excessive condensation. For long-term storage, blanch the broccoli by briefly immersing it in boiling water, then cool it rapidly in ice water before draining and packaging it in airtight containers or freezer bags. Properly blanched and frozen broccoli can be stored for several months.
Growing broccoli in your own garden offers numerous benefits, from its high nutritional value to its culinary versatility. Broccoli is packed with essential vitamins, minerals, and antioxidants, making it a valuable addition to a healthy diet. By following the steps outlined in this blog post, you can successfully grow your own broccoli and enjoy the satisfaction of harvesting fresh, flavorful heads. From choosing the right variety to providing optimal growing conditions, each stage of the process contributes to a successful broccoli harvest.
Remember, broccoli is not only nutritious but also a versatile ingredient that can be used in stir-fries, salads, soups, and more. So, get started on your broccoli garden and relish the goodness and flavor it brings to your meals. Happy gardening!

![Step-By-Step Tips For Growing, Harvesting, Storing, and Using Carrots [Guide]](https://images.squarespace-cdn.com/content/v1/60e85024dc86d643da81c96a/1687360054871-DXM328Q1FRSVCOGQVJC4/image-asset.jpeg)
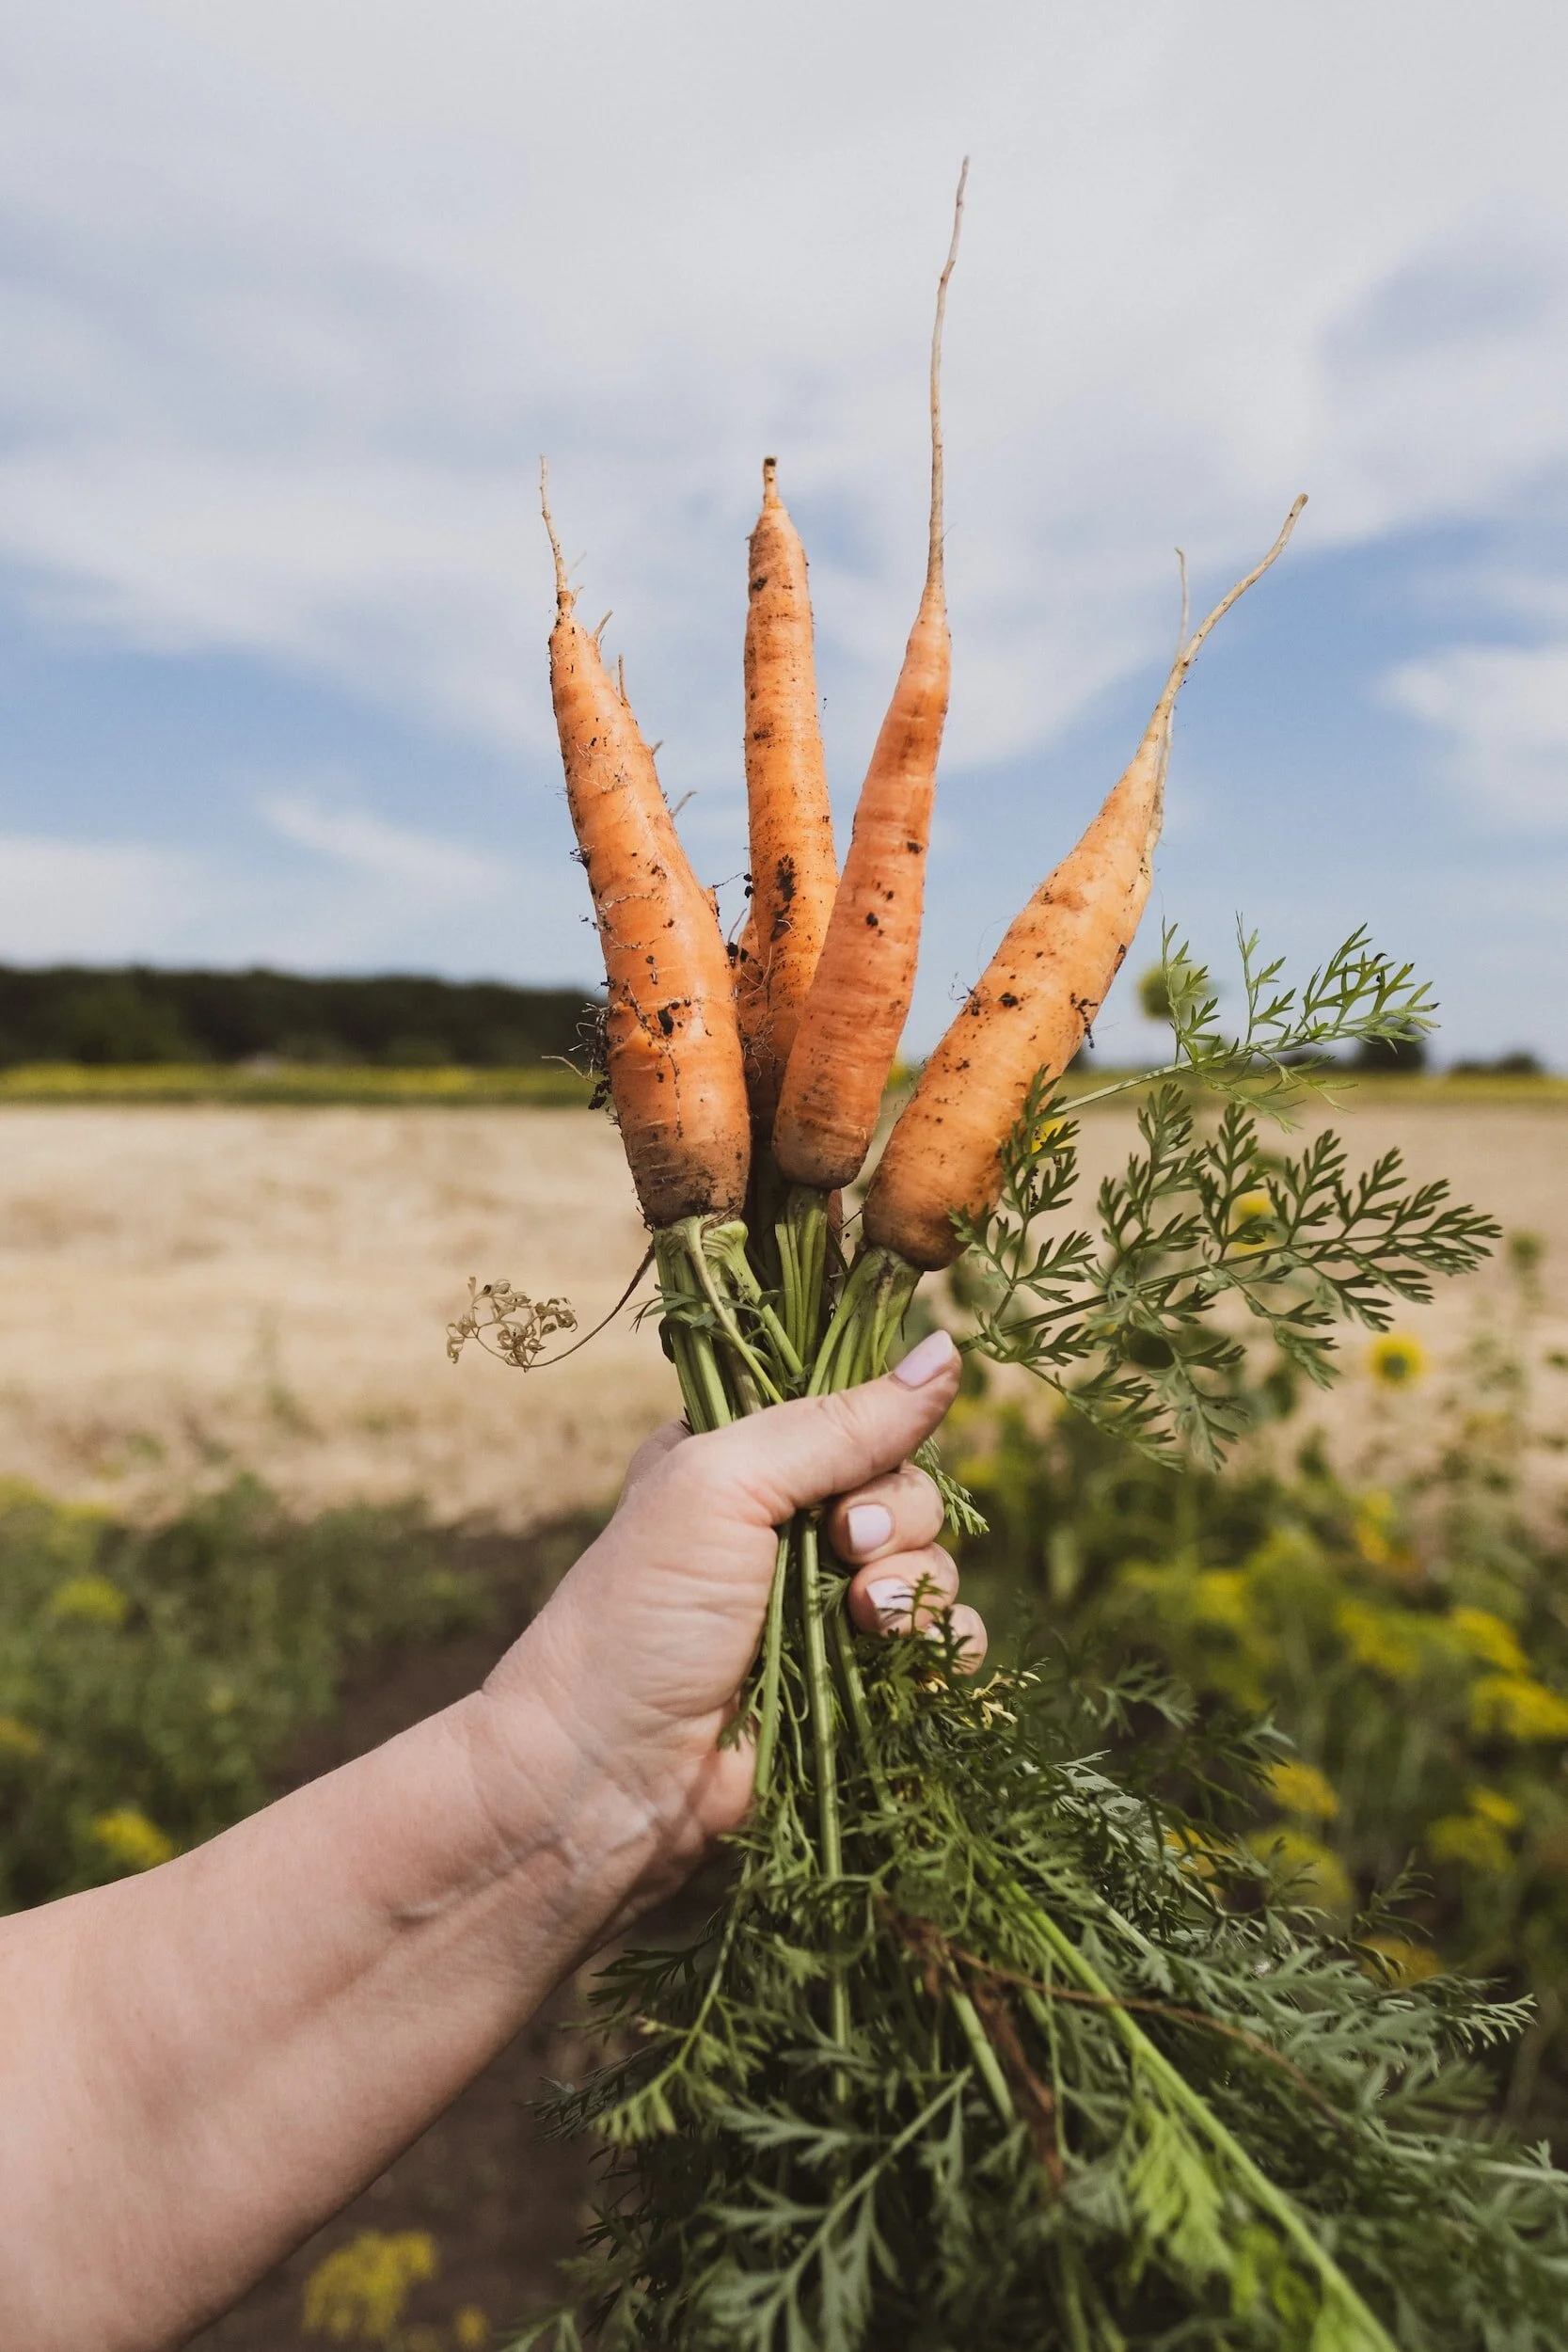
Step-By-Step Tips For Growing, Harvesting, Storing, and Using Carrots [Guide]
The joy of growing your own vegetables is unparalleled, and carrots are no exception. Their vibrant colors, sweet flavor, and versatility make them a staple in many gardens. In this comprehensive guide, we'll explore everything you need to know about growing carrots successfully. From selecting the right carrot varieties to caring for your plants and harvesting those crunchy roots, let's get growing!
The joy of growing your own vegetables is unparalleled, and carrots are no exception. Their vibrant colors, sweet flavor, and versatility make them a staple in many gardens. In this comprehensive guide, we'll explore everything you need to know about growing carrots successfully. From selecting the right carrot varieties to caring for your plants and harvesting those crunchy roots, let's get growing!
Choosing Carrot Varieties
Carrots come in a wide range of varieties, each with its unique characteristics. Here are three popular carrot varieties to consider:
Nantes: Nantes carrots are known for their sweet, crisp, and tender roots. They have a cylindrical shape, a bright orange color, and typically grow to around 6-8 inches in length. This variety is a favorite for fresh eating, juicing, and cooking.
Danvers: Danvers carrots are known for their excellent flavor and versatility. They have a conical shape with a blunt tip and a deep orange color. Danvers carrots are medium-sized, typically reaching 6-7 inches in length. They are great for juicing, roasting, and adding to soups and stews.
Imperator: Imperator carrots are known for their long and slender shape, reaching lengths of up to 10 inches. They have a deep orange color and a sweet, crisp texture. Imperator carrots are perfect for fresh eating, slicing into salads, and stir-frying.
Planting Carrots In The Garden
Choose a sunny location in your garden with well-drained soil. Remove any weeds and rocks from the planting area. Incorporate organic matter, such as compost or well-rotted manure, to improve soil fertility and structure. Test the soil pH and aim for a slightly acidic to neutral range between 6.0 and 7.0.
Carrots are typically grown from seeds, and direct sowing is the most common method as the roots are extremely delicate and transplanting can lead to twisted and undersized carrots. Wait until the soil temperature reaches around 50°F (10°C) for optimal germination. Press carrot seeds into the surface of the soil, do not cover. Carrot seeds must remain consistently damp until they have germinated, which can take one to three weeks, so cover the seeds with cheesecloth or burlap and water gently to ensure the soil is evenly moist.
Once the seedlings have emerged, water deeply but infrequently to encourage the roots to grow deep. You can remove the cheesecloth or burlap covering when your plants reach about one inch tall. Avoid overwatering, as it can lead to root rot and poor carrot development. Mulch the soil around the carrot plants to retain moisture and regulate soil temperature.
Thinning Carrots
Since the root of the carrot plant is what we will be harvesting, thinning is crucial to provide enough space for each carrot plant to grow. Once the seedlings have grown to about 2 inches tall, thin them to a spacing of about 2-3 inches between plants. Gently remove the excess seedlings, being careful not to disturb the roots of the remaining plants.
Carrot Care and Maintenance
To ensure healthy growth and robust carrot plants it’s important to weed regularly to reduce competition for nutrients and moisture, monitor soil moisture levels and water when the top inch of soil feels dry. Avoid excessive nitrogen fertilizers, as they can cause foliage growth at the expense of root development and use organic mulches like straw or woodchips to suppress weeds and maintain soil moisture.
Carrot plants, like many other vegetables, can be vulnerable to pests and diseases that can hinder their growth and overall health. Implementing preventive measures is key to ensuring a successful carrot harvest.

Carrot rust flies are a common pest that lays eggs near the base of the carrot plant. The larvae then tunnel into the roots, causing significant damage. To prevent infestation, cover your young seedlings with floating row covers. These covers create a physical barrier, preventing the flies from reaching the plants and laying eggs. Be sure to secure the edges of the covers to prevent any gaps where the flies can enter.
Carrots are susceptible to various soil-borne diseases, including carrot leaf blight and powdery mildew. To minimize the risk of these diseases, practice crop rotation. Avoid planting carrots in the same location year after year. Rotate them with other vegetable families to disrupt the disease cycle and prevent the buildup of pathogens in the soil. Ideally, wait three to four years before planting carrots in the same area again.
Regular monitoring of your carrot plants is essential for early detection of diseases. Carrot leaf blight appears as dark, water-soaked spots on the foliage, which can eventually cause the leaves to yellow and die. Powdery mildew, on the other hand, presents as a white, powdery growth on the leaves, stems, and fruits. If you notice any signs of disease, promptly remove affected plants or leaves to prevent the spread. Consider using organic fungicides if necessary, following the instructions carefully.
Consider using organic pest control methods, such as companion planting and introducing beneficial insects: Companion planting involves growing certain plants alongside carrots that can repel or deter pests. For example, planting onions, garlic, or chives near carrots can help repel carrot flies. Additionally, attracting beneficial insects, such as ladybugs and lacewings, can help control aphids and other pests that may attack your carrot plants. Consider planting flowers like marigolds and alyssum, which attract beneficial insects, in close proximity to your carrot bed.
Growing Carrots with Tomatoes
Carrots and tomatoes are considered highly compatible companion plants in the garden. There are a few reasons why they tend to grow well together. Carrots and tomatoes have different root structures and nutrient needs, which allows them to thrive in the same soil. Carrots have fine, delicate roots that grow deep, while tomato roots are more fibrous and spread horizontally. This means they don't compete heavily for the same nutrients and can coexist without negatively impacting each other's growth.
The strong scent of tomatoes is believed to help deter pests that commonly affect carrots. For example, tomatoes emit a natural chemical called solanine, which acts as a natural repellent against certain carrot pests, including carrot flies. By planting tomatoes near carrots, you can help minimize pest infestations and protect your carrot crop.
As tomato plants grow taller, they can provide some shade for carrot plants, which prefer cooler soil temperatures. The shade helps prevent the soil from drying out too quickly and provides a more favorable growing environment for carrots. Additionally, tomato plants can act as a natural support structure for vining carrot varieties, allowing the carrots to grow vertically and utilize space more efficiently.
Mixing different plant species in the garden promotes biodiversity and can help reduce the risk of plant-specific diseases or pests. By growing carrots and tomatoes together, you create a more diverse and balanced ecosystem, making it less likely for pests or diseases to spread rapidly.
How to Harvest Carrots

Carrots are typically ready for harvest between 60-80 days after sowing, depending on the variety. Gently pull a carrot from the soil and assess its size and color. Most varieties will reach their mature size but can be harvested earlier for smaller "baby" carrots. Harvest carrots by gently loosening the soil around the roots, rocking the carrot back and forth while holding at the base and pulling them up. Avoid yanking or twisting, as it can damage the roots.
Storing Carrots
To extend the shelf life and enjoy your carrots for longer, remove the tops or greens from the carrots, as they can cause the roots to wilt faster. Store unwashed carrots in a perforated plastic bag or container in the refrigerator's crisper drawer. Properly stored carrots can last for several weeks.
Enjoying Your Homegrown Carrots
The beauty of growing your own carrots is the pleasure of enjoying them fresh and incorporating them into various dishes. Here are some ideas:
Add fresh carrots to salads, stir-fries, or roasted vegetable medleys.
Create delicious carrot-based recipes, such as carrot soup, carrot cake, or carrot muffins.
Juice carrots for a nutritious and refreshing drink.
Share your homegrown carrots with friends and family.
Growing carrots is a rewarding experience that allows you to savor the crispness and sweetness of homegrown roots. By following the tips and techniques outlined in this comprehensive guide, you'll be on your way to cultivating a successful carrot crop. Happy gardening and enjoy the harvest of your homegrown carrots!
![Step-By-Step Tips For Growing, Harvesting, Storing, and Using Cauliflower [Guide]](https://images.squarespace-cdn.com/content/v1/60e85024dc86d643da81c96a/1687359215561-P6ZRQJ3EK8GMPLGTETAX/image-asset.jpeg)
Step-By-Step Tips For Growing, Harvesting, Storing, and Using Cauliflower [Guide]
Growing cauliflower at home comes with a host of benefits that go beyond the kitchen. Firstly, cultivating your own cauliflower allows you to enjoy fresh and pesticide-free produce right from your garden. You have control over the cultivation process, ensuring that your cauliflower is grown using organic methods and free from harmful chemicals. This makes it not only healthier for you and your family but also better for the environment.

Cauliflower is a versatile and nutritious vegetable that belongs to the cruciferous family, which includes other popular vegetables like broccoli, cabbage, and kale. It is known for its unique texture and delicate flavor, making it a favorite among both home cooks and professional chefs. With its beautiful white or vibrant colored heads, cauliflower adds visual appeal to any dish.
Growing cauliflower at home comes with a host of benefits that go beyond the kitchen. Firstly, cultivating your own cauliflower allows you to enjoy fresh and pesticide-free produce right from your garden. You have control over the cultivation process, ensuring that your cauliflower is grown using organic methods and free from harmful chemicals. This makes it not only healthier for you and your family but also better for the environment.
Additionally, there is immense satisfaction in harvesting your own vegetables, and cauliflower is no exception. Witnessing the growth and development of cauliflower from a small seedling to a mature head is a rewarding experience that connects you to nature and the food you consume. The joy of harvesting and serving a homegrown cauliflower dish to your loved ones is unmatched.
Moreover, growing cauliflower at home allows you to experiment with different varieties and flavors that may not be readily available in grocery stores. You can explore unique heirloom varieties or try your hand at growing colored cauliflowers, such as purple, green, or orange varieties, adding a vibrant twist to your meals. This culinary adventure adds excitement to your gardening journey and expands your gastronomic horizons.
Popular Cauliflower Varieties
When it comes to cauliflower, there are several popular varieties to choose from, each with its own unique characteristics and flavor profiles. Here are some of the well-known cauliflower varieties that you can consider for your garden:
Snowball: Snowball cauliflower is a classic and widely cultivated variety. It is known for its large, pure white heads that have a smooth texture. Snowball cauliflower is a reliable choice for beginners as it is relatively easy to grow and matures in about 60-80 days. Its mild and delicate flavor makes it a versatile option for various culinary uses.
Cheddar: Cheddar cauliflower stands out with its vibrant orange-colored heads. This variety is rich in beta-carotene, giving it a nutritional boost. Cheddar cauliflower has a slightly nutty and sweet flavor, making it a favorite for roasting and adding a pop of color to dishes. It typically takes around 70-85 days to mature.
Graffiti: Graffiti cauliflower is known for its striking deep purple heads. This variety adds a visually appealing touch to any dish. It has a slightly milder flavor compared to traditional white cauliflower and retains its vibrant color even after cooking. Graffiti cauliflower matures in approximately 70-85 days.
Romanesco: Romanesco cauliflower is a captivating variety with a distinct appearance. It features intricate, spiraling, lime-green heads that resemble fractals. Romanesco cauliflower has a unique and slightly nutty flavor that sets it apart from other varieties. It takes longer to mature, usually around 75-100 days, but its stunning appearance and delicious taste make it worth the wait.
Some varieties are more tolerant of heat, while others are better suited for cooler temperatures. Here are some general guidelines:
Snowball: Snowball cauliflower is a versatile variety that can be grown in both cool and moderate climates. It is known for its adaptability and can tolerate a wide range of temperatures.
Cheddar: Cheddar cauliflower is more heat-tolerant compared to other varieties, making it a good choice for regions with warmer climates. However, it still thrives in cooler conditions as well.
Graffiti: Graffiti cauliflower performs well in moderate climates and is more tolerant of heat compared to traditional white cauliflower. It can be grown in both spring and fall seasons.
Romanesco: Romanesco cauliflower prefers cooler climates and performs best in mild temperatures. It is well-suited for fall or early spring plantings.
How to Grow Cauliflower
Cauliflower thrives in specific growing conditions that provide it with the best chance for healthy growth and development. Cauliflower requires at least 6 hours of direct sunlight per day. Choose a location in your garden that receives ample sunlight throughout the day to promote optimal growth and head formation. Cauliflower prefers well-drained soil that is rich in organic matter. Avoid heavy clay soils that retain excessive moisture, as this can lead to root rot and other diseases. Good drainage is crucial to prevent waterlogged soil, which can stunt the growth of cauliflower plants.
Where to plant cauliflower
Choose a spot in your garden that receives full sun exposure. Adequate sunlight ensures proper growth and development of cauliflower plants and promotes the formation of dense, compact heads. Cauliflower plants need sufficient space to spread out and grow. Provide enough room between plants to allow for proper air circulation, which helps prevent the onset of diseases. Space plants about 12-18 inches apart. Cauliflower prefers cool temperatures and can be sensitive to extreme heat or frost or drastic temperature changes in general.. Consider planting cauliflower in an area that is sheltered from intense heat or cold, such as near a fence, wall, or other tall plants that can provide some shade or insulation.

Starting Cauliflower: Seeds or Transplants
There are two main methods of starting cauliflower: from seeds or using transplants. Each method has its advantages and considerations, allowing you to choose the approach that suits your gardening preferences and timeline.
Starting from Seeds: Starting cauliflower from seeds allows you to have control over the entire growth process, starting from germination. Begin by filling seedling trays or containers with a quality seed starting mix. Ensure that the mix is well-drained and loose to promote healthy root development. Sow the cauliflower seeds at a depth of about ¼ to ½ inch into the seedling trays. Lightly cover the seeds with the seed starting mix and gently press it down. Place the seedling trays in a warm and well-lit area, such as near a south-facing window or under grow lights. Maintain a consistent temperature of around 70-75°F (21-24°C) to promote successful germination. Keep the soil moist but not waterlogged. Once the seedlings develop their first true leaves and reach a height of 2-3 inches, thin them out by removing weaker seedlings, leaving the strongest ones. Transplant the seedlings into individual pots or into the garden when they are about 4-6 weeks old and have grown a few more leaves.
Using transplants is an alternative method that can save time and ensure a more predictable outcome. You can purchase cauliflower transplants from a local nursery or garden center. Alternatively, you can grow your own transplants from seeds and then transplant them once they have reached the appropriate size. Using transplants can shorten the time to harvest since the plants have already started growing. This can be beneficial if you have a shorter growing season or want to enjoy cauliflower earlier. When transplanting cauliflower, there is a risk of transplant shock, which occurs when the plants experience stress from the transplanting process. To minimize shock, handle the plants gently, transplant on a cloudy day or in the evening, and provide adequate water and care after transplanting.
Planting Cauliflower
To plant your cauliflower, start by clearing the planting area of any weeds or grass. Weeds can compete with cauliflower plants for nutrients and hinder their growth. Cauliflower thrives in fertile soil. Incorporate organic matter, such as compost or well-rotted manure, into the soil. This improves its structure, drainage, and nutrient content. Spread a layer of compost or organic fertilizer over the planting area and work it into the top few inches of soil. Dig holes that are slightly larger than the root ball of the transplant or seedling. The depth should be such that the crown of the plant sits level with the soil surface. Gently place the transplant or seedling into the hole and backfill with soil, firming it gently around the base of the plant.
Caring for Cauliflower Plants
Cauliflower plants require consistent moisture to grow properly and form healthy heads. Cauliflower plants need about 1-1.5 inches of water per week. During dry periods, it may be necessary to provide supplemental irrigation to ensure the soil remains consistently moist. Monitor the moisture levels in the soil and water deeply and evenly, avoiding shallow, frequent watering. It's best to water cauliflower plants at the base, directing the water towards the root zone. This helps prevent foliage diseases and encourages deep root growth. Avoid overhead watering, as wet leaves can promote fungal diseases.
Common Pests Affecting Cauliflower
Cabbage Worms: Cabbage worms are the larvae of white butterflies. They feed on the leaves of cauliflower plants, creating holes and damaging the foliage.
Aphids: Aphids are small, sap-sucking insects that can multiply rapidly and cause curling or distortion of leaves. They can also transmit viral diseases to cauliflower plants.
Flea Beetles: Flea beetles are tiny, jumping insects that feed on cauliflower leaves, resulting in small holes or pits. Heavy infestations can weaken the plant and affect its overall growth.
To manage pests in a natural and environmentally friendly way, use lightweight, permeable fabric covers known as floating row covers to physically protect the cauliflower plants from pests like cabbage worms and flea beetles. Secure the covers tightly to prevent insects from entering. Encourage the presence of beneficial insects, such as ladybugs and lacewings, which feed on aphids and other pests. You can attract these insects by planting companion plants like dill, cilantro, and yarrow, which provide nectar and shelter.
Common Diseases Affecting Cauliflower
Clubroot: Clubroot is a soil-borne disease caused by a fungus that affects the roots of cauliflower plants, causing them to become swollen and deformed. Infected plants may exhibit stunted growth and yellowing leaves.
Downy Mildew: Downy mildew is a fungal disease that appears as yellowish patches on the upper surface of cauliflower leaves. It can cause leaf wilting, reduced growth, and overall plant decline.
Preventive Measures for Diseases
Crop Rotation: Practice crop rotation by avoiding planting cauliflower or other Brassica family crops in the same location for at least three years. This helps prevent the buildup of disease-causing pathogens in the soil.
Proper Sanitation: Remove and destroy any infected plant debris to prevent the spread of diseases. Clean gardening tools, pots, and containers to minimize the transfer of pathogens.
Harvesting and Storing Cauliflower

Knowing when to harvest cauliflower is essential to ensure optimal flavor and texture. The cauliflower head should be firm, dense, and tightly packed. Avoid harvesting cauliflower with loose or separated florets, as this indicates immaturity. The head should have a consistent color throughout, depending on the variety. For white cauliflower, the head should be creamy white. Other varieties may have colors like orange, purple, or green, and the heads should display a vibrant and even hue.
Harvest cauliflower when the head reaches its full size and maturity. This is typically when it is around 6-8 inches in diameter, depending on the variety. Use a sharp knife and make a clean cut through the stem, about an inch below the head. Leave a few outer leaves attached to protect the curds (the tight clusters of immature flowers) during transportation and storage.
Harvesting cauliflower at the right time is crucial for optimal taste and quality. If left in the garden for too long, the heads can become over-mature, resulting in a grainy texture and a bitter or strong flavor. Harvesting at the peak of maturity ensures a tender and sweet cauliflower experience.
Place harvested cauliflower heads in a plastic bag or airtight container and store them in the refrigerator's crisper drawer. Cauliflower can stay fresh for up to a week when refrigerated. If you have a surplus of cauliflower, blanching and freezing is an excellent option for long-term storage. Blanch the cauliflower florets in boiling water for a few minutes, then cool them quickly in ice water. Drain and pack them into freezer-safe containers or bags. Frozen cauliflower can retain its quality for up to 12 months.
Growing cauliflower in your own garden allows you to experience the nutritional value and culinary versatility of this remarkable vegetable. From its distinct texture and flavor to its vibrant colors and numerous varieties, cauliflower offers a range of possibilities in the kitchen. By following the steps outlined in this blog post, including choosing the right variety, providing optimal growing conditions, and caring for the plants, you can cultivate a successful cauliflower harvest. Remember to harvest at the right time, ensuring tight heads with uniform color, and store them appropriately to maintain their freshness. Embark on your cauliflower-growing journey, enjoy the delicious harvest, and discover the many delightful ways to incorporate this nutritious vegetable into your meals.
![Step-By-Step Tips For Growing, Harvesting, Storing, and Using Chives [Guide]](https://images.squarespace-cdn.com/content/v1/60e85024dc86d643da81c96a/1687358411165-UIZIDYMJSQZNNSLXLHNW/image-asset.jpeg)
Step-By-Step Tips For Growing, Harvesting, Storing, and Using Chives [Guide]
Chives (Allium schoenoprasum) are perennial herbs that belong to the onion family. They feature slender, hollow leaves with a mild onion-like flavor. Chives are commonly used as a culinary herb, lending their fresh and delicate onion flavor to dishes like soups, salads, dips, and more.
Whether you're a seasoned gardener or a beginner, growing chives in your own garden is rewarding and easy. In this guide, we'll explore everything you need to know about growing chives, from planting to harvest.

Whether you're a seasoned gardener or a beginner, growing chives in your own garden is rewarding and easy. In this guide, we'll explore everything you need to know about growing chives, from planting to harvest.
Chives (Allium schoenoprasum) are perennial herbs that belong to the onion family. They feature slender, hollow leaves with a mild onion-like flavor. Chives are commonly used as a culinary herb, lending their fresh and delicate onion flavor to dishes like soups, salads, dips, and more.
There are different varieties of chives that you can choose from to suit your preferences and gardening needs. While the most common variety is the standard chive, there are a few notable variations worth exploring:
Garlic Chives (Allium tuberosum): Also known as Chinese chives, garlic chives have flat, strap-like leaves and a milder garlic flavor compared to standard chives. They produce lovely white flowers that can be used as an edible garnish.
Siberian Chives (Allium nutans): Siberian chives feature slender, blue-green leaves and delicate lavender-pink flowers. They have a mild onion flavor and are particularly attractive in ornamental garden settings.
Curly Chives (Allium schoenoprasum 'Curly'): This unique variety of chives has curly or wavy leaves, adding a decorative element to your garden. They offer the same onion-like flavor as standard chives and are great for garnishing.
Giant Siberian Chives (Allium ledebourianum): As the name suggests, this variety of chives produces larger and taller plants. It features broad, blue-green leaves and lovely pink flowers. The flavor is similar to standard chives but with a slightly stronger taste.
Planting Chives
To ensure successful growth, chives require well-draining soil that is rich in organic matter. Aim for a slightly acidic to neutral pH range of 6.0 to 7.0. Chives can be started from seeds or transplanted as seedlings, but it is easiest to start from a transplant as they are easily divided to produce multiple plants.
It is a myth that chives will spread in your garden like mint and take over - while they are prolific growers, it is easy to simply remove any overgrowth once a year to keep the plant the size you want.
Caring for Chive Plants
Chives thrive in full sun but can tolerate partial shade. Regular watering is essential, especially during dry spells. Applying a balanced organic fertilizer can provide the necessary nutrients for healthy growth. Chives benefit from occasional division to rejuvenate the plants and promote better growth.
Harvesting Chives
Knowing the right time to harvest chives is crucial for optimal flavor. Harvesting can begin when the leaves reach eight to ten inches tall. Chive plants benefit from being cut back about two or three inches above the soil every three or four weeks. Chive blossoms are also edible or can be left for pollinators to enjoy.
Storing and preserving chives can be done by various methods, including storing fresh chives, drying chives for later use, and freezing chives to enjoy their flavor year-round.
Common Chive Pests and Diseases
Chive plants may encounter pests such as aphids, thrips, and onion flies. Identifying these pests and implementing organic pest control measures is crucial. Strategies like handpicking, using insecticidal soap, and companion planting can help manage chive pests effectively. Additionally, practicing good garden sanitation, proper spacing, and watering practices can help prevent diseases like leaf spot and powdery mildew.
Pests
Aphids: These tiny, soft-bodied insects can cluster on the tender new growth of chive plants, sucking sap and causing distortion and stunted growth. To control aphids, start by spraying a strong stream of water on the affected plants to dislodge them. Alternatively, you can use insecticidal soap or make a homemade solution using mild dish soap and water to spray on the plants.

Thrips: Thrips are tiny, slender insects that can cause damage by piercing plant tissues and feeding on the sap. They can leave silver streaks or black dots on the leaves. One way to control thrips on chive plants is by introducing beneficial insects like ladybugs or lacewings that prey on thrips. Sticky traps can also be used to catch and monitor thrips activity.
Onion flies: These pests lay eggs near the base of the chive plants, and the larvae burrow into the stems, causing damage and rot. To protect chives from onion flies, cover the plants with floating row covers to prevent the adult flies from laying eggs. Make sure the covers are securely sealed around the plants to prevent any gaps.
Diseases
Leaf spot: Leaf spot diseases can cause dark spots or lesions on the leaves of chive plants. To prevent leaf spot, avoid overhead watering and ensure good air circulation around the plants. If leaf spot is observed, remove and destroy the infected leaves to prevent further spread.
Powdery mildew: Powdery mildew is a fungal disease that appears as a white powdery coating on the leaves of chive plants. To minimize the risk of powdery mildew, avoid overhead watering and provide adequate spacing between plants to promote air circulation. If powdery mildew develops, you can try spraying a solution of one part milk to nine parts water on the affected leaves, as the milk's natural enzymes can help suppress the fungus.
Downy mildew: Downy mildew is another fungal disease that can affect chive plants, causing yellowing of leaves and a fuzzy growth on the undersides. To prevent downy mildew, avoid overhead watering and provide proper spacing between plants. If downy mildew is present, remove and destroy the affected leaves to prevent further spread.
Can Chives Help Repel Pests?
Chives have been known to possess certain pest-repellent properties, which can be attributed to their distinctive odor and the compounds they contain. Chives produce a strong fragrance that some insects find unpleasant. The sulfur compounds found in chives, such as allicin, are believed to be responsible for this odor. The pungent scent of chives may help deter pests like aphids, carrot flies, and Japanese beetles from infesting nearby plants. Planting chives alongside other susceptible crops can act as a natural deterrent to pests. For instance, interplanting chives with roses may help repel aphids that are commonly attracted to roses. Similarly, planting chives near carrots can help deter carrot flies. Chives have been suggested as a potential deterrent for soil-borne pests like nematodes. The roots of chive plants release compounds into the soil that may help suppress nematode populations, reducing their damage to nearby crops.
Chive Health Benefits
Chives offer several health benefits due to their nutritional profile and potential medicinal properties. Chives are packed with essential nutrients, including vitamins A, C, and K, as well as minerals like calcium, potassium, and iron. Chives contain antioxidants, such as flavonoids and sulfur compounds, which help combat oxidative stress and protect cells from damage caused by free radicals. Chives contain organosulfur compounds that have anti-inflammatory properties. These compounds may help reduce inflammation in the body, potentially benefiting conditions like arthritis and other inflammatory disorders.
Chive blossoms

Chive blossoms are the beautiful flowering part of the chive plant. They emerge from the chive plant in late spring or early summer, showcasing delicate and colorful clusters of small flowers atop tall, slender stems. Each flower is typically star-shaped and has six petals. The flowers can vary in color, ranging from pale pink to lavender-purple. The flowers are edible and possess a milder version of the chive plant's distinct onion-like flavor, albeit with a slightly sweeter and more delicate taste. They offer a subtle onion or garlic flavor, making them a versatile ingredient in various dishes. They make an excellent garnish, adding a pop of color and mild onion flavor to salads, soups, and other savory dishes. The blossoms can be used as a finishing touch, sprinkled over omelets, baked potatoes, or creamy spreads like hummus and cream cheese. They can also be used to infuse oils or vinegar for a hint of chive flavor.
To harvest chive blossoms, simply snip the entire flower stalk from the plant, taking care not to damage the surrounding foliage. It's best to harvest the blossoms when they are fully open but before they start to wither or lose their vibrant color.
Apart from their culinary applications, chive blossoms can be used as an attractive addition to floral arrangements or as an edible garnish for serving platters and cheese boards. They can bring a touch of elegance and a pop of color to various presentations.
Chive blossoms are highly attractive to bees, butterflies, and other pollinators. The clusters of tiny flowers provide a source of nectar and pollen, making chive plants beneficial for supporting pollinator populations in your garden.
Growing chives in your garden offers a fresh and aromatic herb that elevates the flavor of many dishes. By following the guidelines outlined in this comprehensive guide, you'll be equipped with the knowledge and techniques to successfully grow chives from seed to harvest. Enjoy the satisfaction of harvesting your own chives and savoring their delightful taste in your culinary creations. Happy chive gardening!
![Step-By-Step Tips For Growing, Harvesting, Storing, and Using Lettuce [Guide]](https://images.squarespace-cdn.com/content/v1/60e85024dc86d643da81c96a/1687357653543-2B95WS2HEDE1WD23PTR4/image-asset.jpeg)
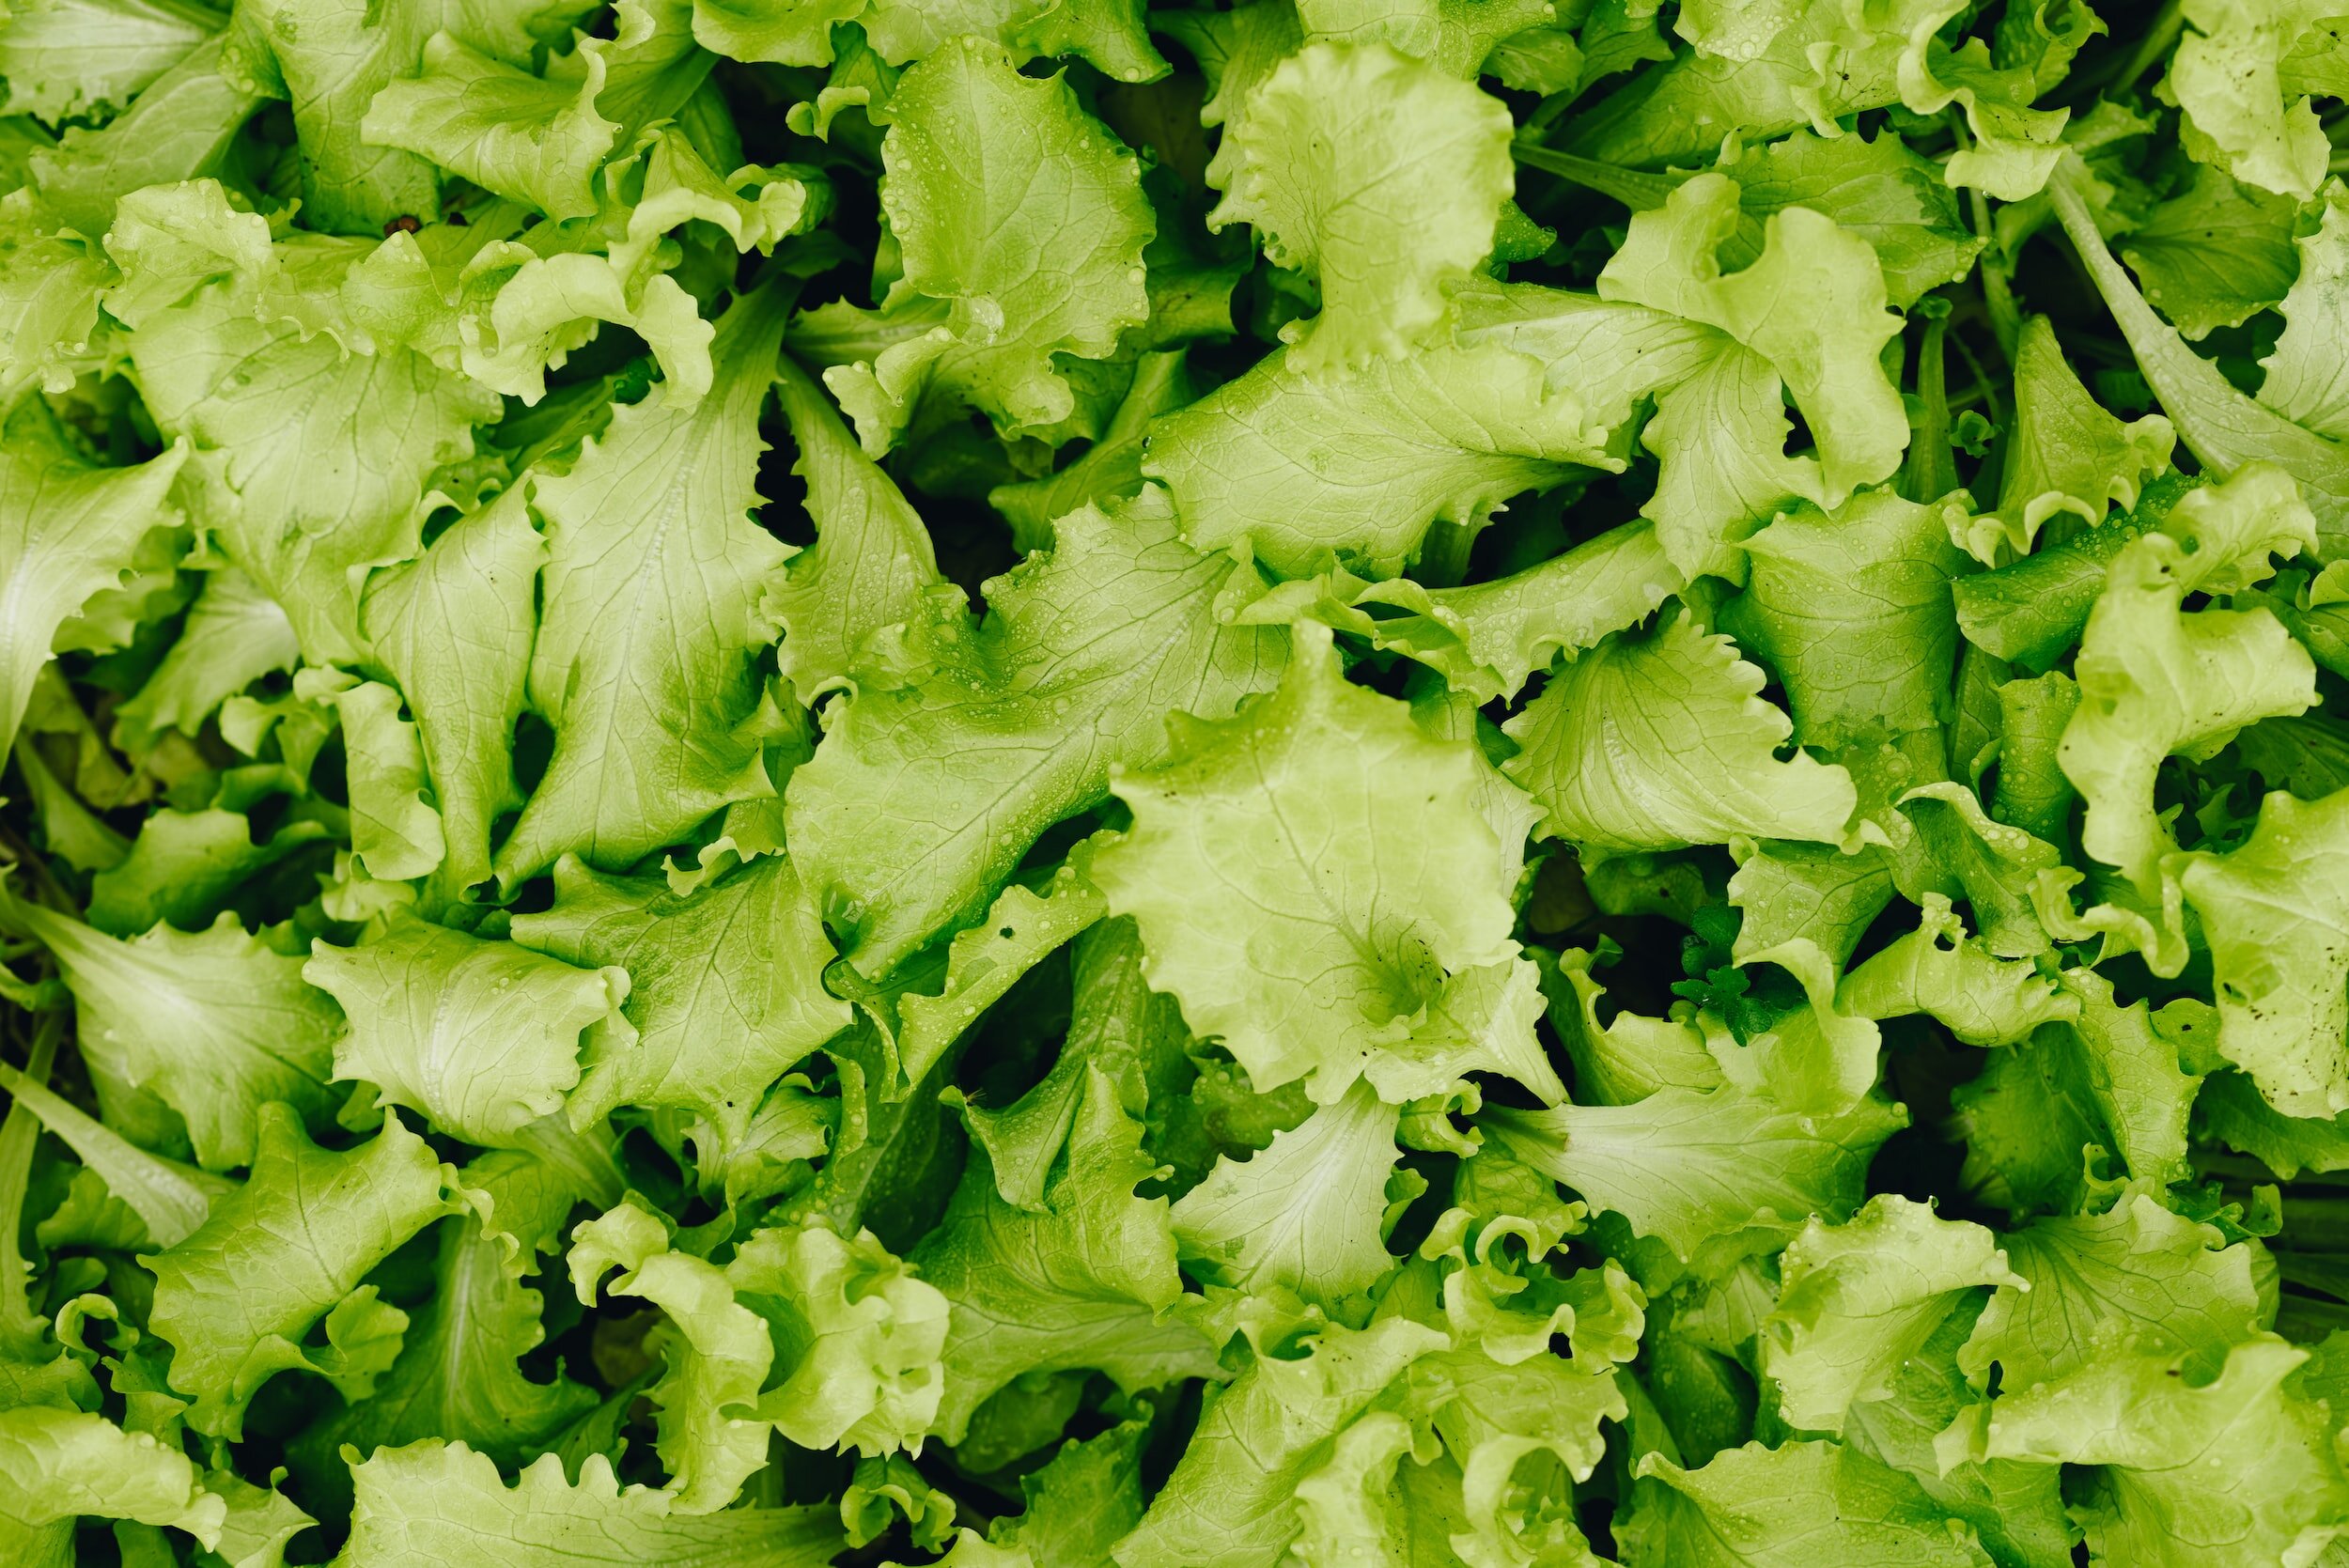
Step-By-Step Tips For Growing, Harvesting, Storing, and Using Lettuce [Guide]
Lettuce is a popular and versatile leafy green that can be easily grown at home, even for beginners. With a huge variety of types and flavors available, lettuce is a fantastic addition to any garden or container. In this comprehensive guide, we will explore the different lettuce varieties, their nutritional benefits, how to get started with lettuce, lettuce plant care and maintenance tips, and proper harvesting and storage techniques.
Lettuce is a popular and versatile leafy green that can be easily grown at home, even for beginners. With a huge variety of types and flavors available, lettuce is a fantastic addition to any garden or container. In this comprehensive guide, we will explore the different lettuce varieties, their nutritional benefits, how to get started with lettuce, lettuce plant care and maintenance tips, and proper harvesting and storage techniques.
Lettuce Varieties
Lettuce comes in various forms, each with unique characteristics and flavors. Leaf lettuce showcases loose leafy growth, vibrant colors, and a tender texture. Romaine lettuce boasts elongated leaves, crispness, and a slightly bitter taste. Butterhead lettuce offers soft and buttery leaves, perfect for salads and sandwiches. Crisphead (Iceberg) lettuce presents tightly packed, crunchy leaves, making it a classic choice.
Butterhead Lettuce
Flavor: This variety has a mild and slightly sweet flavor with a buttery texture.
Size and Appearance: The heads are medium-sized, loose, and have tender leaves that form a compact rosette shape. The outer leaves are green, while the inner ones have a pale yellow hue.
Unique Characteristics: Butterhead lettuce is known for its soft, delicate leaves and is a popular choice for salads and sandwiches.
Romaine Lettuce
Flavor: Romaine lettuce offers a crisp and slightly bitter taste, making it a refreshing choice for salads.
Size and Appearance: This variety grows in long, upright heads with elongated leaves. The outer leaves are dark green, while the inner ones are pale green or yellow.
Unique Characteristics: Romaine lettuce is excellent for wraps and adds a satisfying crunch to various dishes. It is also known for its sturdy texture and ability to hold dressings well.
Leaf Lettuce
Flavor: Leaf lettuce offers a mild and slightly sweet flavor with a delicate crunch.
Size and Appearance: This variety comes in various colors, including green, red, and bronze. The leaves are loose, ruffled, and grow in a rosette shape. They can be harvested individually or as a whole head.
Unique Characteristics: Leaf lettuce is versatile and can be harvested at any stage of growth. Its colorful leaves make for an attractive addition to salads and garnishes.
Crisphead (Iceberg) Lettuce
Flavor: Crisphead lettuce has a mild and refreshing taste.
Size and Appearance: This variety forms dense, tightly packed heads with crisp, pale green leaves. The leaves have a crunchy texture and a slightly sweet flavor.
Unique Characteristics: Crisphead lettuce is popular for its ability to retain its crunchiness even when dressed. It's commonly used in salads, sandwiches, and as a lettuce cup for fillings.
Batavia Lettuce
Flavor: Batavia lettuce offers a balanced flavor with a slightly sweet and mild bitterness.
Size and Appearance: This variety features loose heads with broad, curly leaves that have a crinkled texture. The outer leaves are green, while the inner ones have a pale yellow or creamy color.
Unique Characteristics: Batavia lettuce is prized for its tolerance to heat and resistance to bolting. It's a great choice for warm climates and adds texture to salads and sandwiches.

Oakleaf Lettuce
Flavor: Oakleaf lettuce provides a mild, nutty flavor with a slight hint of bitterness.
Size and Appearance: The leaves of this variety resemble the shape of oak tree leaves, hence the name. They are lobed, delicate, and grow in loose clusters. Oakleaf lettuce comes in various colors, including green and red.
Unique Characteristics: Oakleaf lettuce has tender leaves and is quick to mature. It's a versatile variety that works well in salads, sandwiches, and as a bed for other ingredients.
Summer Crisp (Batavian) Lettuce
Flavor: Summer Crisp lettuce offers a refreshing, sweet flavor with a slight hint of nuttiness.
Size and Appearance: This variety forms medium to large heads with thick, crisp leaves. The leaves have a slightly ruffled texture and come in green and red varieties.
Unique Characteristics: Summer Crisp lettuce is known for its heat tolerance and ability to hold its crispness in warm weather. It's a great choice for summer salads and complements a wide range of dressings and toppings.
Nutritional Benefits of Lettuce
Lettuce is not only delicious but also highly nutritious. Packed with vitamins A, C, and K, as well as fiber and antioxidants, lettuce provides an array of health benefits. Furthermore, lettuce is low in calories, making it an excellent choice for those aiming for a healthier lifestyle.
Getting Started with Growing Lettuce
When growing lettuce, it's essential to select the right variety based on your climate, taste preference, and intended use. Consider factors such as heat tolerance, cold-hardiness, and the ability to resist bolting.
Starting Lettuce from Seeds
To begin your lettuce journey, you can start from seeds. Ensure successful germination by providing optimal conditions such as proper soil temperature and moisture levels. You can start lettuce seeds indoors using seed trays, potting mix, and adequate lighting. Alternatively, you can directly sow the seeds into your garden or containers.I like to sprinkle a cluster of seeds in empty patches of my garden, lightly cover with soil and then separate them once they are about two inches tall so they have room to grow.
Lettuce Plant Care and Maintenance
Consistent moisture is crucial for lettuce growth. Water your lettuce plants regularly, ensuring the soil remains evenly moist. Avoid overwatering or allowing the soil to dry out, as these conditions can negatively impact the quality and growth of your lettuce.
Lettuce thrives in cool temperatures and appreciates partial shade in warmer climates. Provide your lettuce plants with adequate sunlight for healthy growth. If exposed to extreme heat or cold, use shading techniques or row covers to protect them.
Prepare the soil by incorporating organic matter and balanced fertilizers before planting. Well-draining and fertile soil is essential for optimal lettuce growth. Regularly monitor soil conditions and adjust fertilization as needed.
Weeds can compete with lettuce for nutrients and water. Implement effective weed control measures such as regular weeding and the application of organic mulch. Mulching helps suppress weed growth, retain moisture, and regulate soil temperature.
How to stop lettuce from bolting
Lettuce bolting, or going to seed prematurely, can be a common concern for gardeners. However, there are several measures you can take to prevent or minimize bolting in your lettuce crop. Some lettuce varieties are more prone to bolting than others. Opt for heat-tolerant varieties or those specifically bred for bolt resistance. Look for terms like "slow to bolt" or "heat-resistant" when selecting lettuce seeds or seedlings. Plant lettuce early in the spring or late in the summer to avoid the hottest periods of the year. Lettuce prefers cooler temperatures and is more likely to bolt when exposed to extended periods of high heat. Shield your lettuce plants from direct sunlight during the hottest parts of the day by providing shade. Use shade cloth or plant taller crops nearby to create natural shade. This helps keep the soil and surrounding environment cooler, reducing the risk of bolting. Ensure your lettuce plants receive consistent moisture, as dry soil can trigger bolting. Water deeply and regularly, keeping the soil evenly moist. Mulching around the plants can help retain moisture and regulate soil temperature.

Crowded lettuce plants can stress each other and promote bolting. Adequate spacing allows for good air circulation and reduces competition for resources. Follow the recommended spacing guidelines for the specific lettuce variety you're growing. Harvest lettuce heads or leaves promptly when they reach the desired size. Delayed harvesting can signal to the plant that it has completed its lifecycle, triggering bolting. Regularly harvest outer leaves to encourage continuous growth and delay bolting. Instead of planting all your lettuce at once, stagger your plantings by a few weeks. This practice, known as succession planting, ensures a continuous supply of fresh lettuce throughout the growing season. By planting in intervals, you can avoid having all your lettuce plants reach maturity simultaneously and reduce the risk of bolting. Stay aware of weather patterns and temperature changes. If an unexpected heatwave is forecasted, take preventive measures such as shading the plants or providing additional moisture to help prevent bolting.
Harvesting and Storing Lettuce
Determine the readiness of lettuce for harvest based on the variety and desired stage. Harvest baby greens by cutting leaves individually or allow heads to mature fully before harvesting. Use clean, sharp tools to avoid damaging the plant. If you cut the lettuce about 2 inches from the soil, it will typically regrow 1-2 times before bolting, so don’t pull it just yet!
Properly store harvested lettuce to maintain its freshness and crispness. Wash lettuce leaves thoroughly, dry them well, and store in sealed containers or bags in the refrigerator. A lettuce spinner can be helpful for removing excess moisture before storage.
Growing lettuce is a rewarding experience that allows you to enjoy fresh and nutritious greens right from your garden or container. By understanding the different lettuce varieties, providing proper care and maintenance, and following the right harvesting and storage techniques, you can have a bountiful supply of lettuce for your salads, sandwiches, and other culinary creations. Start your lettuce-growing journey today and savor the satisfaction of homegrown goodness on your plate.
![Step-By-Step Tips For Growing, Harvesting, Storing, and Using Melons [Guide]](https://images.squarespace-cdn.com/content/v1/60e85024dc86d643da81c96a/1687356926945-WPNBTT5GUKMWVHHCJKOY/image-asset.jpeg)
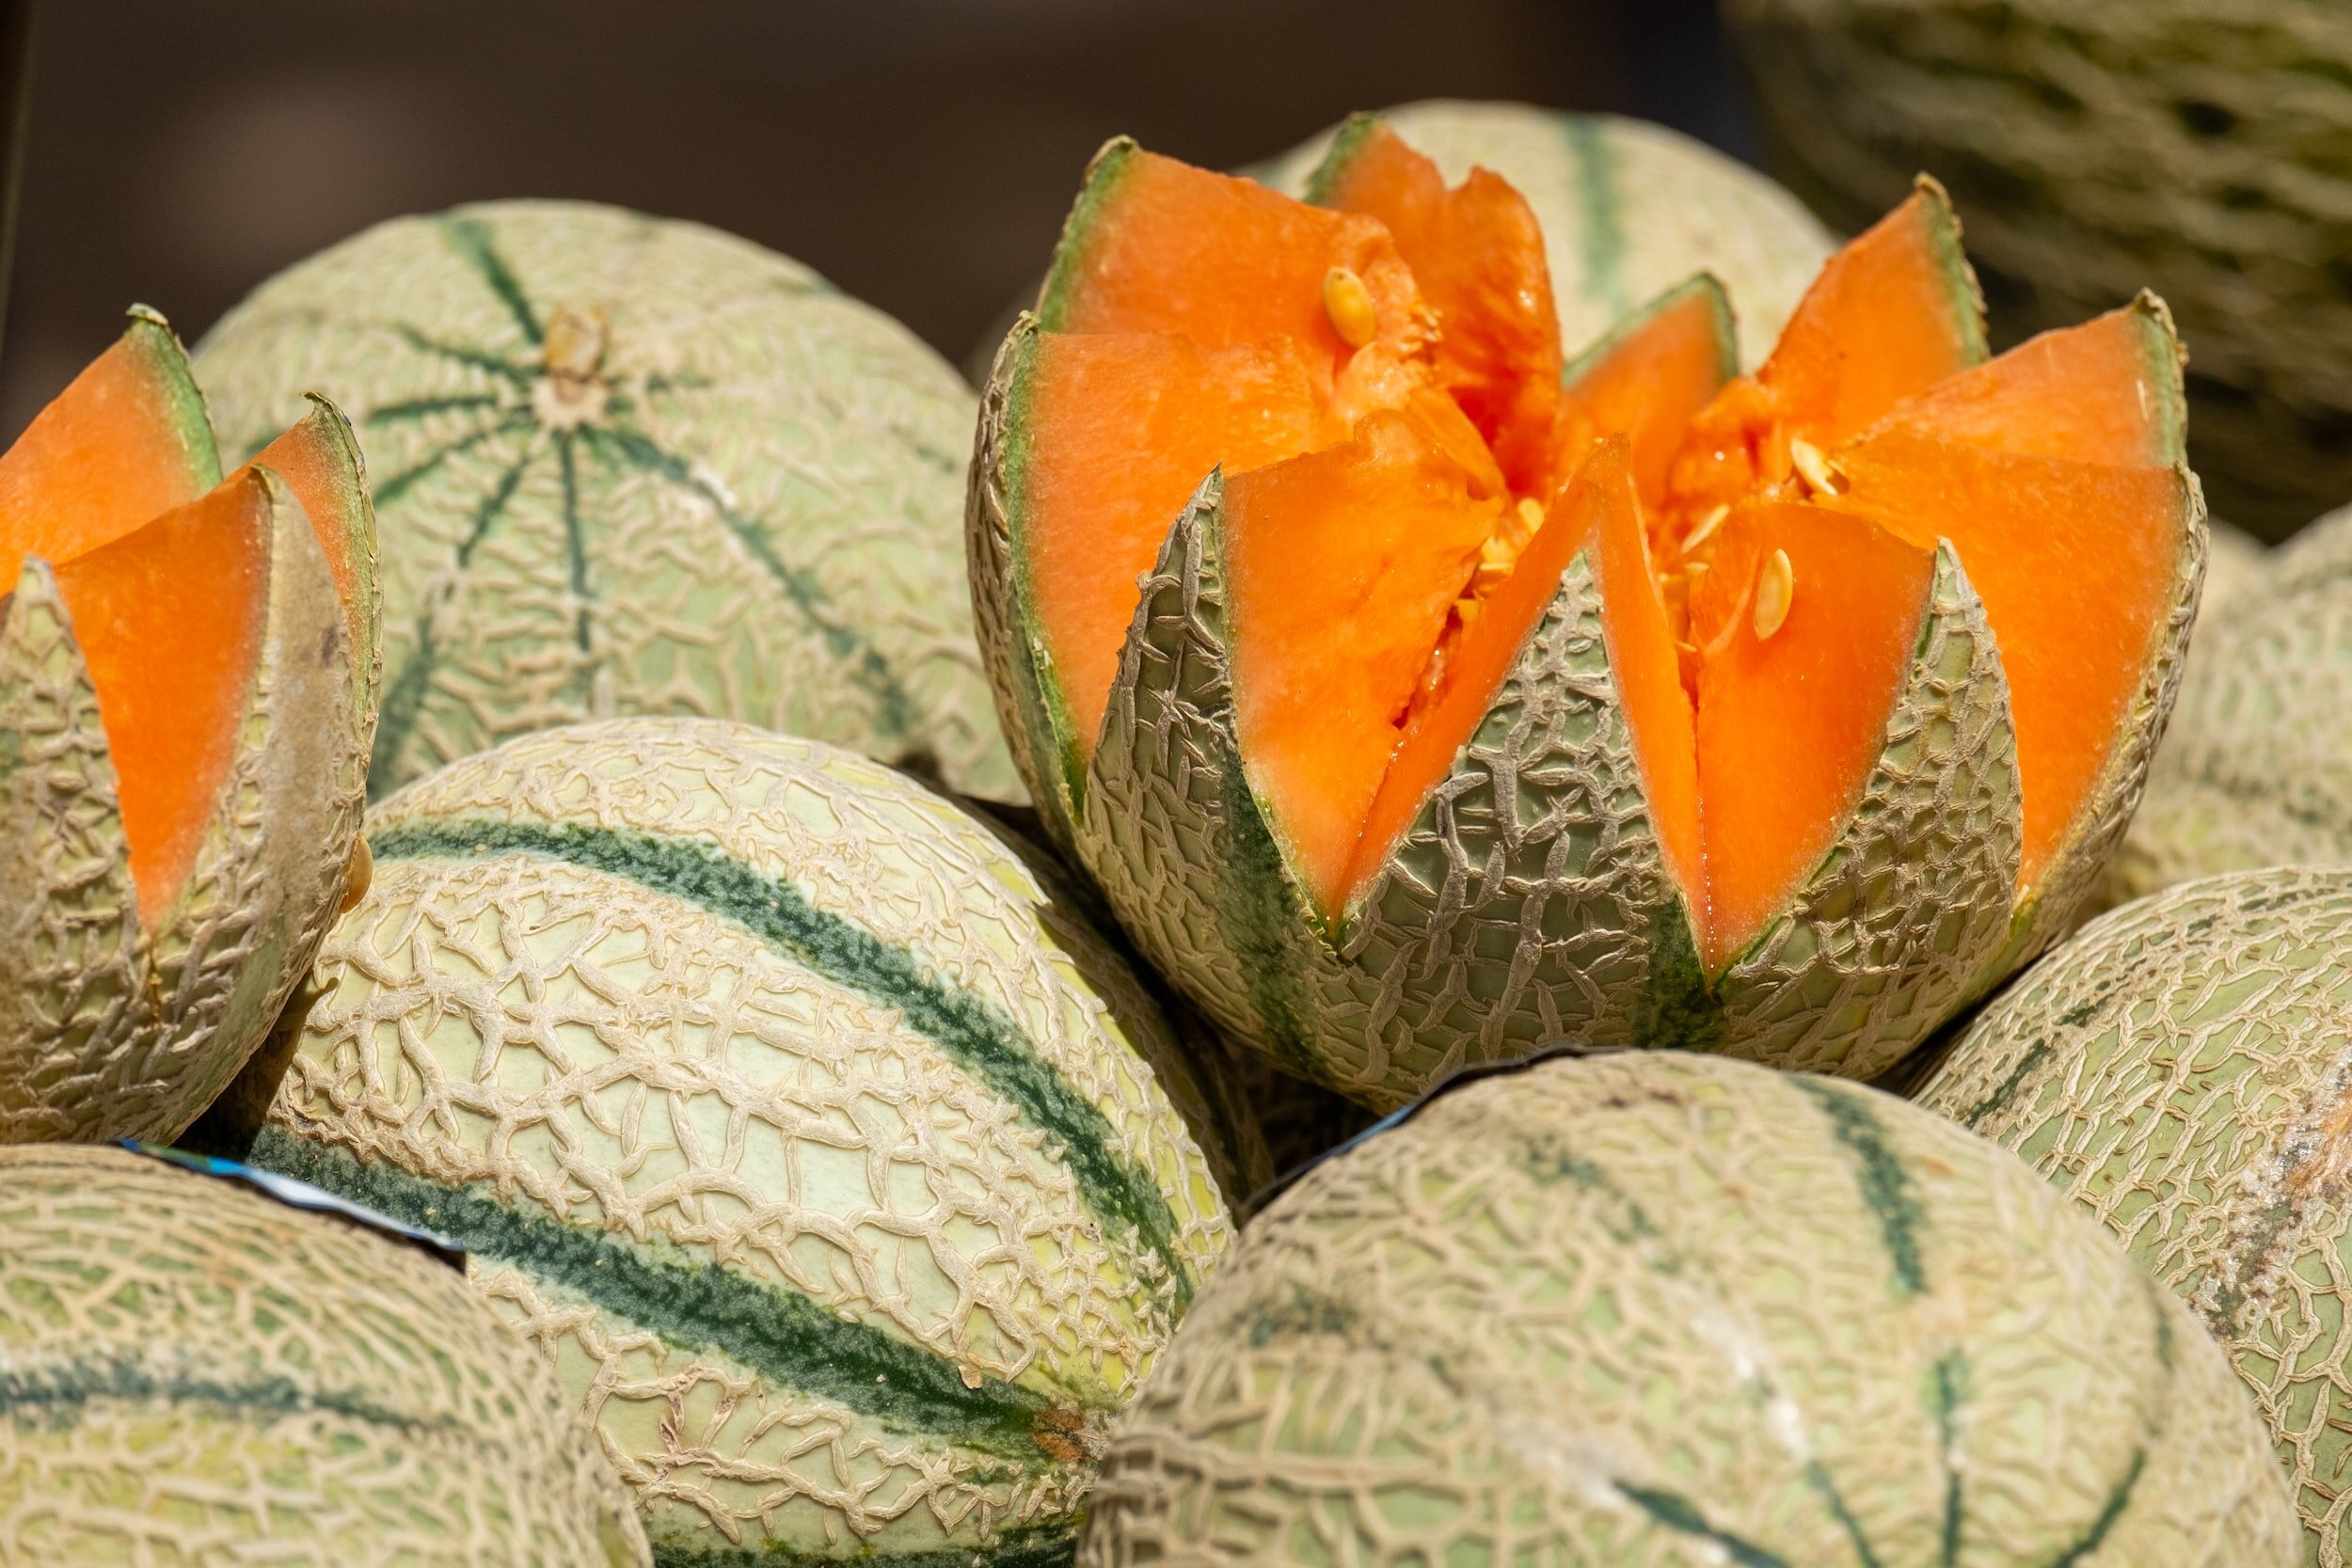
Step-By-Step Tips For Growing, Harvesting, Storing, and Using Melons [Guide]
Growing melons in your own garden offers a multitude of benefits beyond the delectable fruits they provide. One of the greatest pleasures of cultivating melons is the anticipation and satisfaction of harvesting your own perfectly ripened fruits. Witnessing the transformation from tiny seeds to thriving plants and finally being able to pluck a melon at the peak of its flavor is an immensely rewarding experience.

Melons are a popular and refreshing summer fruit; from the vibrant red flesh of watermelons to the aromatic sweetness of cantaloupes, melons have a unique ability to quench our thirst and satisfy our taste buds on hot summer days. Their juicy and succulent texture, combined with their natural sweetness, makes them a favorite among fruit lovers worldwide. Whether enjoyed fresh, in salads, or as part of smoothies and desserts, melons are a versatile and irresistible treat.
Growing melons in your own garden offers a multitude of benefits beyond the delectable fruits they provide. One of the greatest pleasures of cultivating melons is the anticipation and satisfaction of harvesting your own perfectly ripened fruits. Witnessing the transformation from tiny seeds to thriving plants and finally being able to pluck a melon at the peak of its flavor is an immensely rewarding experience.
So, if you are a fan of melons and eager to embark on a fruitful gardening adventure, growing melons at home is an excellent choice. Prepare yourself for a season of mouthwatering fruits, the joy of harvest, and the satisfaction of indulging in the freshest, most flavorful melons you've ever tasted.
What Kinds of Melons Can You Grow?
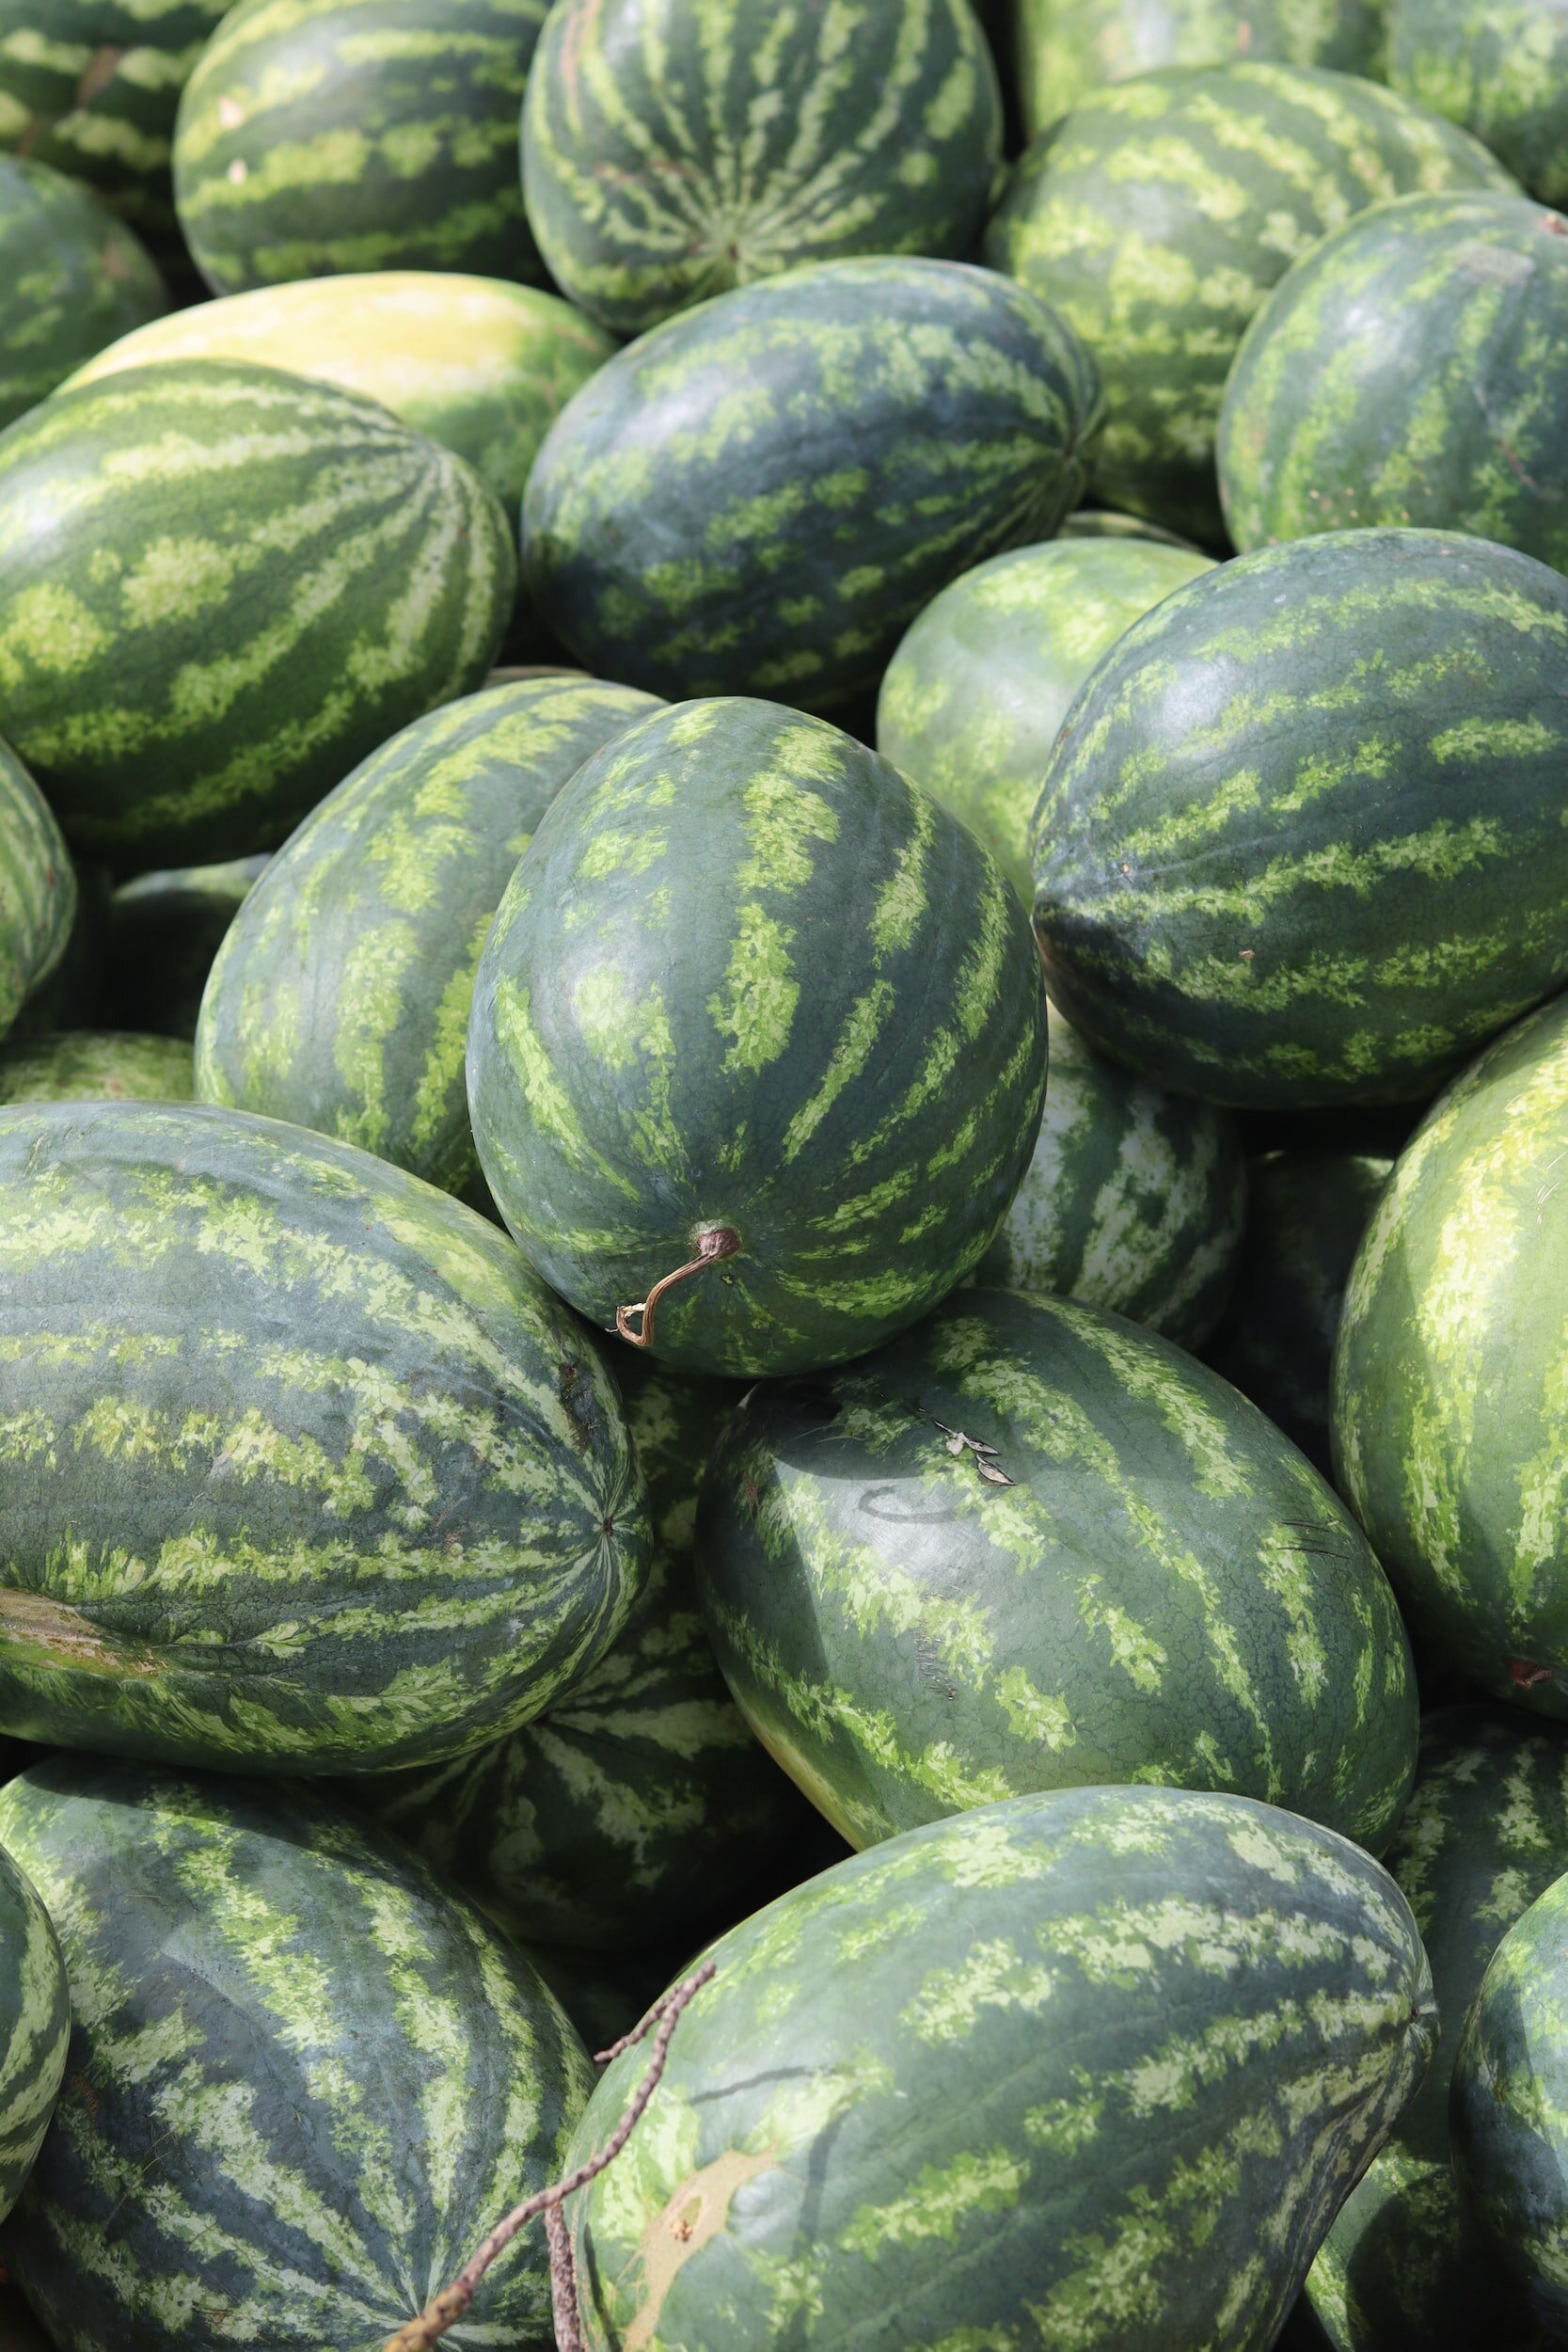
Watermelon: Watermelons are synonymous with summertime refreshment. They are known for their large size, typically ranging from a few pounds to over 50 pounds. Watermelons have a thick green rind and juicy, sweet flesh that can be red, pink, yellow, or even white. Popular watermelon varieties include Crimson Sweet, Sugar Baby, and Jubilee.
Cantaloupe: Cantaloupes are recognized for their netted rind and sweet, orange flesh. They are typically smaller in size compared to watermelons, making them more manageable for home gardens. Cantaloupes have a distinctive musky aroma and a rich, sweet flavor. Popular cantaloupe varieties include Hale's Best, Ambrosia, and Athena.
Honeydew: Honeydew melons have a smooth, pale green or yellowish rind and sweet, succulent flesh. They are known for their refreshing and slightly floral flavor. Honeydews are typically round or oval-shaped and can vary in size. Popular honeydew varieties include Green Flesh, Golden Dew, and Honey Yellow.
Muskmelon: Muskmelons, also known as European cantaloupes, have a smooth, ribbed rind and fragrant, sweet, and juicy flesh. They are slightly smaller than traditional cantaloupes but offer a similar flavor experience. Muskmelons come in various shapes and sizes, with popular varieties including Charentais, Ambrosia, and Ogen.
Different melon varieties have varying preferences for growing conditions and climate zones. Understanding the suitability of each variety for your specific region is crucial for successful cultivation. Here are some general guidelines:
Watermelon: Watermelons thrive in warm climates with a long growing season. They require full sun exposure and well-draining soil. Certain varieties, such as smaller icebox watermelons, may be suitable for cooler regions with shorter summers.
Cantaloupe: Cantaloupes are adaptable and can be grown in a wide range of climates. They prefer warm temperatures and full sun. However, certain varieties are more tolerant of cooler climates and can be successfully grown in regions with shorter summers.
Honeydew: Honeydews prefer warm and sunny climates with a longer growing season. They require similar growing conditions as cantaloupes, including well-draining soil and full sun exposure.
Muskmelon: Muskmelons have similar growing requirements to cantaloupes. They prefer warm temperatures and full sun exposure. Some varieties are more suitable for regions with shorter summers or cooler climates.
Where to plant melons
Melons thrive in warm and sunny conditions, requiring at least 6-8 hours of direct sunlight each day. They are heat-loving plants and need temperatures consistently above 60°F (15°C) for optimal growth. It is important to select a site that offers ample sunlight throughout the day to promote vigorous growth and fruit development. Melons also require well-draining soil to prevent waterlogged conditions that can lead to root rot and other diseases.
Melon vines can spread extensively, so ensure you have enough space to accommodate their growth. Vine-type melons, such as watermelons and some varieties of muskmelons, require more space than bush-type melons like cantaloupes. Plan for adequate spacing between plants to allow for proper airflow and to prevent overcrowding. Good air circulation is crucial for reducing the risk of diseases. Choose a site with sufficient airflow to prevent the buildup of humidity, which can contribute to fungal diseases. Avoid planting melons in low-lying areas or spots surrounded by tall structures that may obstruct air movement.
Melons are heavy feeders and benefit from nutrient-rich soil. Select a location with fertile soil or amend the soil with organic matter and balanced fertilizers to ensure the plants have access to essential nutrients throughout the growing season.
Melon plants can be vulnerable to strong winds, which may damage their delicate vines and fruits. Consider planting melons in a location shielded from strong winds or use protective barriers like trellises or windbreaks to safeguard the plants.
Growing Melons From Seed
Melons do well direct sown in the garden after your last frost date. If you want to start seeds indoors, fill seed trays or containers with a well-draining seed starting mix. You can also make your own mix by combining equal parts of sterile potting soil, vermiculite, and perlite. Plant the melon seeds according to the recommended planting depth, which is typically around 1 inch deep. Space the seeds 2-3 inches apart within the tray or container. Place the seed trays or containers in a warm location with temperatures between 70-85°F (21-29°C). You can use a heating mat to maintain consistent warmth. Ensure the seeds receive sufficient moisture by misting the soil or using a gentle watering technique. Keep the soil consistently moist but not waterlogged. Once the seedlings emerge, provide them with ample light by placing them under grow lights or in a sunny location. As the seedlings grow, thin them out if they are overcrowded, leaving only the strongest ones.
How to Harden Off Melon Seedlings
Before transplanting the seedlings outdoors, gradually expose them to outdoor conditions over a week or two. Start by placing them outside for a few hours in a sheltered area and gradually increase their exposure to direct sunlight and outdoor temperatures.
Growing Melon From Transplants
Transplants give you a head start by providing mature seedlings that are ready to be planted outdoors. This can shorten the time from planting to harvest. However, there are some considerations when using transplants: Transplanting seedlings can cause some stress to the plants, known as transplant shock. It is essential to handle the seedlings carefully and minimize root disturbance during the transplanting process.
Planting Melons
Melon plants need adequate space for their vines to spread and produce fruit. Leave a spacing of about 3-5 feet between each melon plant. If you're planting in rows, space the rows about 6-8 feet apart to allow room for vine growth. For vining melon varieties, consider creating planting hills or mounds. Mound the soil into a circular hill about 12-18 inches in diameter and 4-6 inches high. Plant 2-3 seedlings or transplants on top of each hill, spacing them evenly.
Growing Melons Vertically
By training vining melons to grow vertically, you can save space in your garden. This is particularly useful if you have limited growing space or want to maximize your garden's productivity. Training melon vines on trellises or cages helps improve airflow around the plants, reducing the risk of diseases like powdery mildew. Good air circulation also promotes better pollination and fruit development. When melons are grown vertically, they are easier to spot and harvest. Additionally, supporting the fruits off the ground can help prevent rotting or damage caused by pests, rodents, or wet soil.
To provide support for vining melon varieties, you can use trellises, fences, or sturdy cages. Install the support structure before planting the melons, ensuring it is secure and can handle the weight of the growing vines and fruits. As the melon vines grow, gently train them to climb the support structure, using soft ties or twine if necessary.
Melon Pests and Diseases
Melon plants are susceptible to various pests that can damage the foliage, flowers, and fruits. Here are some common pests that may affect melons:
Aphids: These small, soft-bodied insects feed on the sap of melon plants, causing stunted growth, yellowing leaves, and distorted shoots. They can also transmit viral diseases.
Cucumber beetles: These striped or spotted beetles are a major pest of melons. They feed on the leaves, stems, and fruits, causing damage and spreading bacterial wilt.
Squash bugs: Although they primarily target squash plants, squash bugs can also affect melons. They feed on the leaves, causing wilting, and may transmit bacterial diseases.
When it comes to managing pests on melon plants, organic methods are often preferred to minimize chemical exposure and maintain the integrity of the fruits. Consider the following organic pest control methods:
Row covers: Use lightweight fabric row covers to physically exclude pests like aphids and cucumber beetles. Install the covers over the plants early in the season, making sure they are securely anchored to prevent pests from accessing the plants.
Beneficial insects: Encourage natural predators and parasitic insects that feed on pests. Ladybugs, lacewings, and predatory wasps can help control aphids, while soldier beetles and parasitic nematodes can target cucumber beetles and squash bugs. Planting flowers that attract beneficial insects, such as marigolds or daisies, can also help.
Melon plants are susceptible to several diseases that can impact their growth and yield. Here are a couple of common diseases and preventive measures:
Powdery mildew: This fungal disease appears as a white powdery coating on the leaves, eventually causing them to yellow and wither. To prevent powdery mildew, provide adequate spacing between plants to improve airflow, avoid overhead watering, and apply fungicidal sprays containing sulfur or potassium bicarbonate if necessary.
Bacterial wilt: Bacterial wilt is transmitted by cucumber beetles and causes wilting and death of melon plants. To reduce the risk of bacterial wilt, employ crop rotation practices, avoiding planting melons in the same area for consecutive years. Promptly remove and destroy any infected plants to prevent the spread of the disease.
Additionally, practicing good sanitation in the garden is essential. Remove plant debris, fallen fruits, and weeds regularly, as they can harbor pests and diseases. This reduces the likelihood of recurring problems in subsequent growing seasons.
How to Harvest Melons
The skin of ripe melons often changes color. Watermelons may develop a dull or matte appearance, while cantaloupes and honeydews exhibit a change in skin color from green to yellow or beige. Ripe melons emit a sweet, fragrant aroma from the stem end. The scent becomes more pronounced as the fruit ripens. Give it a gentle sniff to detect a pleasant, fruity fragrance. Gently tap the melon with your knuckles. A ripe melon produces a dull thud or deep sound rather than a high-pitched or hollow sound, indicating a good level of ripeness.
Use a clean, sharp knife or pruning shears to cut the melon from the vine. Dull tools can damage the fruit or leave jagged cuts that may invite disease. Leave a short stem attached to the melon to help prolong its shelf life. This stem can act as a natural barrier against pathogens and minimize moisture loss.
For the best flavor and sweetness, it's crucial to allow melons to ripen fully on the vine. While some fruits can ripen after being picked, melons do not continue to ripen once harvested. Harvesting them prematurely may result in a lack of sweetness and flavor. Therefore, it's essential to be patient and wait until the melons exhibit the signs of maturity mentioned earlier.
How to Store Melons
Melons can be stored at room temperature for a few days if they are fully ripe. However, keep in mind that warmer temperatures can cause them to deteriorate more quickly. For longer storage, place ripe melons in the refrigerator. Store them in the crisper drawer or a well-ventilated area to maintain their freshness. It's best to wrap them in a plastic bag or cover them with plastic wrap to retain moisture.
Note: Watermelons can be kept at room temperature for a few days before refrigeration, while other melon varieties are generally refrigerated soon after harvesting for optimal freshness.
With the right growing conditions, care, and patience, you can savor the incredible taste and freshness of melons straight from your garden throughout the summer season.