
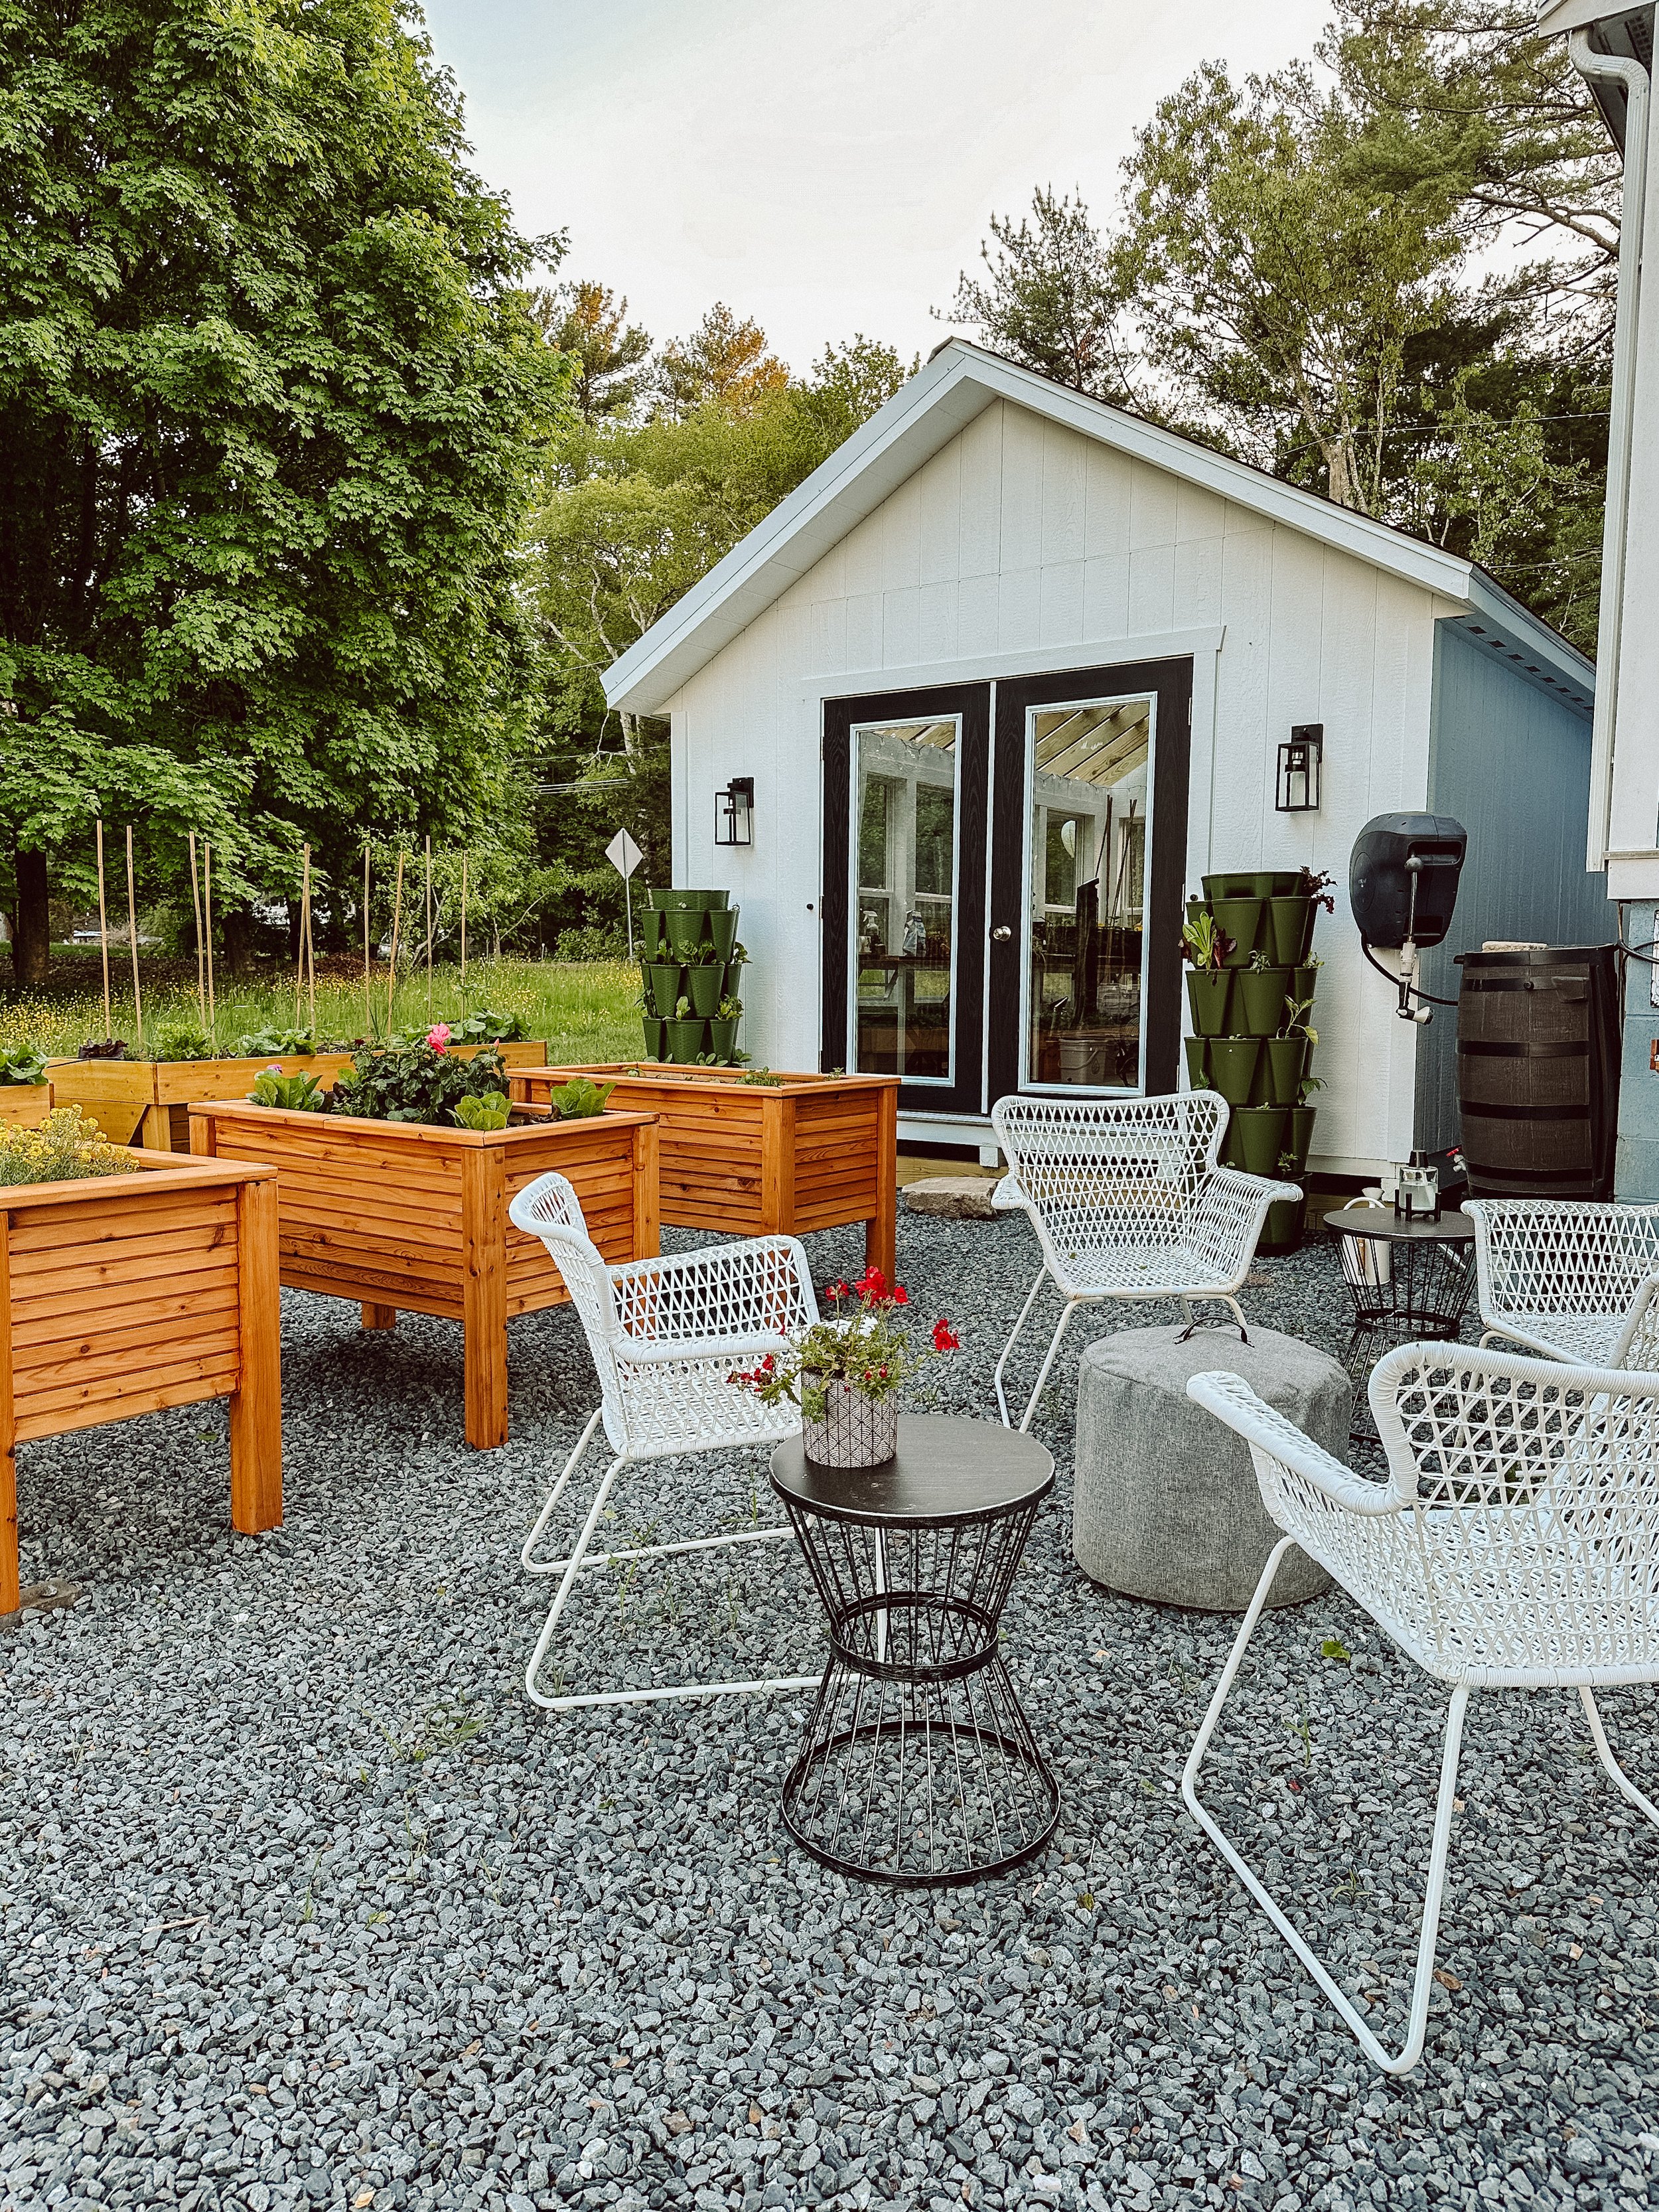
BACKYARD GARDENING MADE SIMPLE
![Starting Seeds in a Greenhouse [Hometown Structures]](https://images.squarespace-cdn.com/content/v1/60e85024dc86d643da81c96a/52183bea-a751-44f0-a3fb-886eae74b696/IMG_9419.JPG)
Starting Seeds in a Greenhouse [Hometown Structures]
One of the things I was most excited about doing in my Hometown Structures Greenhouse is seed starting. With summer upon us, you might be thinking “seed starting is over for the year!” But if you’re trying to grow year round like I am, July and August are actually when we need to start planning our seed starting for our fall and winter gardens. So the cycle is beginning again and while a greenhouse makes seed starting easier in so many ways - with it comes some challenges that are unique to starting seeds in a greenhouse that we’re going to dive into today.

One of the things I was most excited about doing in my Hometown Structures Greenhouse is seed starting. With summer upon us, you might be thinking “seed starting is over for the year!” But if you’re trying to grow year round like I am, July and August are actually when we need to start planning our seed starting for our fall and winter gardens. So the cycle is beginning again and while a greenhouse makes seed starting easier in so many ways - with it comes some challenges that are unique to starting seeds in a greenhouse that we’re going to dive into today.
What’s the benefit of starting seeds in a greenhouse?
A greenhouse like mine from Hometown Structures allows you to control the temperature and environment, which means you can start seeds earlier in the spring than you would be able to outdoors. This gives your plants a head start on the growing season and can lead to a longer harvest.Greenhouses provide a more stable environment for seedlings to grow in, with consistent temperatures, humidity, and light. This can help to prevent them from becoming leggy or stressed, and can lead to stronger, healthier plants overall. You're also less limited to planting seeds that thrive in your local climate. A greenhouse allows you to grow plants that wouldn't normally survive outdoors in your area. Seedlings are vulnerable to pests, diseases, and harsh weather conditions. A greenhouse can help to protect them from these threats. And with a greenhouse, you have complete control over the environment your seeds are germinating in. This allows you to fine-tune the conditions to match the specific needs of each plant variety.
What are the key steps and considerations for successful seed germination?
Before Planting:
Choose high-quality seeds from a reputable source. Consider factors like your climate, desired harvest time, and gardening experience when selecting seeds. Different plants have different germination requirements. Research the specific needs of your chosen seeds, including ideal planting time, depth, light requirements, and any pre-treatment needs (like scarification or soaking). Seed packets often have this information. Use a well-draining, sterile seed starting mix. Avoid using garden soil directly, as it can be too dense and harbor pathogens.
Planting:
Plant seeds at the correct depth according to their size. A general rule is to plant seeds 2-3 times their diameter deep. Water the growing medium thoroughly before planting. After planting, keep the soil consistently moist but not soggy. A mister can be helpful for maintaining even moisture.Maintain the optimal temperature range for your seeds. Use a heat mat if necessary to provide warmth for seeds that prefer germination in warmer soil, and keep in mind that some seeds need light to germinate, while others prefer darkness. Follow the instructions for your specific seeds. You may need to cover the planting tray with plastic wrap or a humidity dome to retain moisture and create darkness if needed.
After Planting:
Once seedlings emerge, provide them with adequate light for strong growth. You may need to use grow lights if natural light is insufficient. Maintain consistent moisture levels. As seedlings grow, they will require more water. If you sowed multiple seeds per pot, thin them once seedlings have established true leaves to prevent overcrowding. Once seedlings have a few sets of true leaves, you can begin fertilizing them with a weak solution of liquid fertilizer.
Setting Up Your Greenhouse for Seed Starting
A clean environment is crucial for successful seed starting in your greenhouse. Seedlings are particularly vulnerable to fungal diseases and pests in their early stages. Fungus spores and bacteria that cause damping-off (a disease that attacks seedlings) can thrive in dirty environments. Sterilization helps eliminate these pathogens before they can harm your seedlings. Insects and other pests can also be attracted to leftover debris and organic matter. A clean environment reduces their harborage points. Cleanliness promotes healthy root development and prevents competition from unwanted microorganisms for nutrients and water.
Disinfecting Tools, Containers, and Surfaces:
Start by removing any leftover soil, plant material, or debris from your greenhouse, tools, and containers. A shop vac can be helpful for floors. Wash all surfaces, tools (pots, trays, trowels, etc.), and containers with warm, soapy water. This removes dirt, grime, and organic material that harbors pathogens.
There are a few options for disinfecting your greenhouse and equipment:
Bleach: Mix one part household bleach (5.25% sodium hypochlorite) to nine parts water. Soak containers and tools for 30 minutes. Rinse thoroughly afterwards. Caution: Bleach is corrosive and can damage some materials. Wear gloves and work in a well-ventilated area. Never mix bleach with other cleaning products.
Hydrogen Peroxide (3%): This is a gentler alternative to bleach. Apply directly to clean surfaces and tools with a spray bottle. Let it sit for at least 20 minutes, then wipe clean with a damp cloth. Hydrogen peroxide is safe for most materials.
Alcohol (70%): Similar to hydrogen peroxide, apply directly to clean surfaces and tools. Let it sit for a few minutes, then wipe clean. Alcohol evaporates quickly, making it a convenient option.
While new containers are generally sterile, it's still wise to wash them with soapy water before use. Allow everything to dry completely before using them for seed starting. Moisture can encourage fungal growth. Wash down greenhouse walls, floors, and benches with your chosen disinfectant solution. It's a good practice to clean and disinfect your greenhouse and equipment between each planting season.
Now that your tools are clean and sterilized, you can set your greenhouse up for success by organizing everything before you get started to optimize seed germination and seedling growth. Dedicate a well-lit, easily accessible area for seed starting. Shelving or a designated seed starting table is ideal. This area should be close to a water source for easy watering. Once seedlings emerge, they'll need space for continued growth. Staggered shelves or benches will maximize space utilization. Consider using a mobile bench for flexibility. Allocate space for storing seeds, pots, trays, tools, and other supplies. Hanging shelves, cabinets, or a designated storage area will keep things organized and within reach.
Optimizing Seed starting Conditions
Group plants together based on their light requirements. Seedlings needing high light should be placed closest to the light source (windows or grow lights). Shade-loving plants can be placed on lower shelves. Arrange plants according to their temperature needs. Heat mats can be used on lower shelves for warmth-loving seeds. A thermometer can help you monitor temperature variations within the greenhouse. Ensure proper air circulation to prevent fungal diseases. Avoid overcrowding plants and position them to allow for airflow between them. You may need to use small fans to create gentle air movement.
Utilize vertical space with shelves or hanging racks to maximize your limited footprint, and clearly label each pot or tray with the plant variety, planting date, and any special instructions. This will help you stay organized and track progress. Arrange everything to allow for easy access for watering, monitoring, and transplanting seedlings. Avoid placing heavy objects on high shelves. Use trays with wheels or place them on rolling benches for easy movement and rearranging. Use drip trays under pots to catch excess water and prevent moisture build-up on lower shelves.
Seed starting containers
Seedling trays
Trays come with multiple cells and are ideal for starting small seeds or seeds that don't require deep planting. Standard propagation tray have shallow cells (1-2 inches deep) and are perfect for starting most flower and vegetable seeds. Deep cell trays have a depth of 3-4 inches and are suitable for seeds with longer taproots. Choose a tray size that fits your workspace and the number of seeds you plan to start.
Pots
Individual pots are ideal for larger seeds or plants that need more root space early on. 3-4 inch pots are perfect for transplanting seedlings from trays or for starting larger seeds like tomatoes or peppers.
Small seeds don't need deep pots. Shallow trays or pots with minimal depth (1-2 inches) are sufficient. Larger seeds benefit from deeper pots (3-4 inches) to accommodate developing roots. Plastic is the most affordable and durable option. Biodegradable pots are eco-friendly but may dry out faster and are not reusable. Ensure your pots or trays have drainage holes to prevent waterlogging, which can rot seeds and seedlings.
Ideal Soil Mix for Seed Starting
Seedlings need a well-draining, sterile, and lightweight potting mix to germinate and grow successfully. Look for a mix that contains peat moss, perlite, and vermiculite. These ingredients provide good drainage, aeration, and moisture retention. Many seed starting mixes are available commercially and are formulated specifically for seedlings. These are a convenient option. Avoid using garden soil directly for seed starting. It can be too dense, harbor pathogens, and contain weed seeds.
Selecting Seeds and Planning Timing for Greenhouse Seed Starting
Choose seeds suited to your local climate. Consider factors like your growing season length and average temperatures. Pay attention to "days to maturity" listed on seed packets. This helps you plan your planting schedule to ensure your harvest falls within the frost-free window. Purchase seeds from reputable sources to ensure good quality and germination rates.
The key to successful seed starting is timing your plantings to coincide with the last frost date in your area. This is the average date of the last light frost in spring. You can find this information through websites like the Old Farmer's Almanac (https://www.almanac.com/gardening/frostdates) which allow you to search by zip code. Once you know your last frost date, you can create a seed-starting calendar. Look for the "days to maturity" listed on each seed packet. Count back the number of "days to maturity" from your last frost date. This will give you the recommended date to sow your seeds indoors. Add some buffer days to account for seed germination time (usually 5-10 days). This will give you your ideal seed starting date. Tender plants like tomatoes, peppers, and eggplants benefit the most from starting indoors for an earlier harvest. Consider staggering your plantings throughout the season to extend your harvest window. For some fast-growing vegetables like lettuce or spinach, you can practice succession planting. Sow seeds every few weeks directly outdoors after the last frost date for a continuous harvest.
Selecting suitable varieties for seed starting is crucial and requires considering your climate, growing season, available space, and seed quality. Choose varieties suited to your average temperatures. Consider both warm and cool season crops. Some plants won't tolerate frost, while others may even benefit from a light frost. Seed packets will typically indicate temperature preferences. Pay attention to a plant's light requirements (full sun, part shade, etc.). Not all plants will thrive in the amount of sunlight your greenhouse receives. Select varieties with maturity dates that fall within your frost-free window. Short season varieties are ideal for areas with shorter growing seasons. Consider how long each variety takes to mature from seed to harvest. Stagger plantings throughout the season for a continuous harvest.
Choose varieties that will fit comfortably within your greenhouse space when fully grown. Consider dwarf or compact varieties for limited space. Tomatoes, for example, come in bush and vining varieties, with bush tomatoes requiring less vertical space. Some plants sprawl outwards, while others grow vertically. Factor in the mature size and growth habit when choosing varieties to optimize space usage.
High-quality seeds from reputable sources will have better germination rates, meaning more seeds will sprout successfully. This saves you time and resources. Consider varieties with resistance to common diseases in your area. This can help reduce problems and improve your harvest. Heirloom varieties may have lower yields but produce seeds you can save for future plantings. Hybrids are often bred for high yields and disease resistance but don't produce true seeds. Choose vegetables, herbs, or flowers you and your family love to eat or use and once you have the basics down, try new and interesting varieties to expand your gardening experience.
Optimizing seed germination in your greenhouse
As mentioned before, using fresh, high-quality seeds from reputable sources increases your chances of successful germination. Some seeds require specific treatments like scarification (nicking the seed coat) or stratification (exposure to cold temperatures) to break dormancy and encourage germination. Research the needs of your specific seeds. Follow the recommended planting depth on seed packets. Planting too deep can hinder germination. Keep the growing medium evenly moist but not soggy. A mister can be helpful for maintaining consistent moisture levels. For seeds that prefer warm soil temperatures for germination, use a heat mat placed under your seed trays. Some seeds need light to germinate, while others prefer darkness. Follow the instructions on the seed packet. You may need to cover trays with plastic wrap or a humidity dome to retain moisture and create darkness if needed. Maintain some air circulation to prevent fungal diseases. Avoid overcrowding seedlings or creating stagnant air pockets. And clearly label each pot or tray with the plant variety, planting date, and any special instructions. This will help you track progress and avoid confusion.
Optimal Temperature and Humidity for Seed Germination
Different plant varieties have specific temperature ranges for optimal germination. Seed packets typically indicate the ideal temperature range. A general guideline is that Warm Season Crops (like tomatoes, peppers, eggplants) prefer temps between 70-80°F (21-27°C) and Cool Season Crops (like lettuce, spinach, kale prefer temps between 60-70°F (16-21°C)
Most seeds benefit from high humidity during germination. You can achieve this by covering seed trays with a clear plastic dome that helps trap moisture around the seeds and lightly misting the surface of the growing medium with a spray bottle to keep it moist. Use a thermometer and hygrometer to monitor temperature and humidity levels in your greenhouse. Make adjustments as needed to maintain optimal conditions for your seeds.
Seed germination is highly sensitive to temperature fluctuations. Maintaining a consistent temperature within the optimal range for your specific seeds is crucial for successful seed starting in your greenhouse. Enzymes play a vital role in seed germination. Consistent temperatures ensure optimal enzyme activity, which is essential for seed development and sprouting.Consistent temperatures promote even and synchronized germination across all your seeds within a tray. Fluctuations can lead to some seeds germinating earlier or slower than others, creating uneven growth. Seeds germinating in stable temperatures develop stronger root systems and shoots, leading to healthier and more vigorous seedlings overall.
Maintaining Consistent Temperature in a Greenhouse
Need to warm things up? Heat mats provide gentle bottom heat to the growing medium, raising the soil temperature to the desired level for germination. This is particularly beneficial for seeds that prefer warm soil temperatures. Place seed trays directly on top of a heat mat set to the recommended temperature for your seeds.
While maintaining warmth is important, proper ventilation is equally crucial. Ventilation helps prevent excessive heat build-up and removes excess moisture, which can lead to fungal diseases. Open vents or use fans strategically in your greenhouse to promote air circulation. However, avoid creating drafts that can chill seedlings. Use a thermometer to monitor the temperature in your greenhouse at different locations and times of the day. This will help you identify any hot or cold spots and adjust positioning or ventilation accordingly.
Do I need to use lights in my greenhouse?
Whether you need artificial lights for seed starting in your greenhouse depends on several factors. The primary factor is the amount of natural light your greenhouse receives. South-facing greenhouses with ample sunlight may not require artificial lights for all seeds. Different plants have varying light requirements. Some seeds germinate in darkness, while seedlings need sufficient light for healthy growth after germination. Research the specific needs of your chosen seeds. The length of daylight hours during your planting season also plays a role. Seedlings started in the shorter days of winter or early spring may benefit from supplemental lighting.
Greenhouses with limited natural light due to north-facing orientation, shading from trees, or insufficient window space will benefit from artificial lights. Seeds that require long periods of bright light for healthy growth, like tomatoes, peppers, and eggplants, may need supplemental lighting even in a well-lit greenhouse, especially during the shorter daylight hours. And if you're starting seeds very early in the season before daylight hours are long enough, or if you want to extend your growing season into fall, artificial lights will be necessary to provide sufficient light for seedlings. LED Grow Lights are the most popular and energy-efficient option for seed starting. They come in various sizes and spectrums suitable for seedling growth.
Watering and Humidity Management in a Greenhouse

Watering seeds in a greenhouse requires a delicate balance to avoid soil compaction, surface disturbance, and maintain optimal humidity for germination. Bottom watering is an excellent method for seed trays. Place the trays in a shallow dish filled with water. The water will wick up into the growing medium evenly, moistening the soil from below without disturbing the seeds or compacting the surface. You can also use a fine spray mister to gently apply water directly to the soil surface. Avoid using a forceful stream that can dislodge seeds or splash potting mix.
Controlling Humidity
Humidity Domes trap moisture around the seeds, creating a mini greenhouse environment with high humidity. They are particularly helpful during the germination stage for most seeds. While domes maintain humidity, it's crucial to provide some ventilation to prevent fungal diseases. Lift the domes slightly or create small ventilation holes to allow for some air circulation. Reduce reliance on domes as seedlings emerge. Group trays with similar moisture needs together. This allows you to target specific areas for humidity control. Instead of soaking the soil completely, alternate between light watering and misting the surface to maintain consistent moisture without oversaturation.
Use your finger to check the moisture level of the soil. The top inch should feel moist but not soggy. As seedlings mature, their watering needs will change. You may need to transition from misting to watering the soil directly as root systems develop. Once seedlings emerge, you may need to thin them to prevent overcrowding. This will improve air circulation and reduce competition for moisture and light.
Transplanting greenhouse Seedlings
Recognizing when your seedlings are ready for transplanting in your greenhouse is crucial for their successful establishment and growth. Most seedlings are ready for transplanting once they have developed several sets of true leaves (usually 2-4 sets) beyond the initial cotyledons (seed leaves). The stem should be thick and sturdy enough to support the seedling when transplanted. Avoid transplanting seedlings with thin, weak stems.The seedling should have reached a height appropriate for the variety. Refer to seed packet information or plant labels for specific guidelines.
Check the roots of the seedlings in their pots. If they appear root-bound, with roots circling the bottom or sides of the pot, it's definitely time to transplant. Look for healthy, white roots that are well-developed and branching out. Avoid transplanting seedlings with stunted or discolored roots. Seedlings should appear healthy and vigorous, with good color and no signs of disease or pests. When the second set of true leaves start touching their neighbors in the pot, it can also indicate they're ready for more space.
Fungus Gnats While Seed Starting in a Greenhouse
Adult fungus gnats are weak fliers and dislike moving air. Using small fans to create gentle air circulation can disrupt their breeding activity and make your greenhouse less hospitable to them. Fungus gnats thrive in moist environments. Bottom watering helps target moisture delivery to the root zone, minimizing excess moisture on the soil surface where fungus gnats lay their eggs.
Bacillus Thuringiensis Israelensis (BTI) is a biological larvicide that specifically targets fungus gnat larvae in the soil. It's a safe and effective option for organic gardening. Follow the product instructions for mixing and application rates. BTI is typically available as a powder or liquid concentrate that you can mix with water and drench the potting mix or use when bottom watering. Repeat applications every 2-3 weeks, especially during periods of high humidity or warm temperatures when fungus gnat populations tend to be higher.
Sticky traps won't eliminate fungus gnats entirely, but they can help monitor adult populations and track the effectiveness of your control methods. Place them near fungus gnat breeding areas, like around potted plants.
The key to controlling fungus gnats is using an integrated approach that combines these methods. By creating a less favorable environment for fungus gnats to breed (air circulation, bottom watering) and eliminating existing larvae (BTI), you can significantly reduce their population. Sticky traps will help you monitor their activity and adjust your control methods as needed. Remember, consistency is key! By implementing these practices regularly, you can effectively prevent fungus gnats from becoming a nuisance in your greenhouse and ensure a healthy environment for your plants.
Looking for a high quality pre-made greenhouse in Massachusetts? Hometown Structures offers the finest craftsmanship with custom designs in a wide variety of sizes perfect for the home gardener to give your plants the perfect climate to thrive in a protected environment, keep pests away from your plants, grow plants and food that don’t otherwise exist in your area/climate and extend your season with options including 8mm twin wall polycarbonate for optimal insulation, venting and windows. Every custom shed greenhouse comes with 50-Year LP Siding and 30-Year Collapse From Snow Warranty.
Tap here to visit their website to learn more and book a design consultation today.


Garden Planning Part 3: How To Start Seeds Indoors
Wondering how to start seeds for your garden indoors? Here’s exactly what you need and how to do it - from grow lights to seed cells.
The Cottage Peach is reader-supported. When you purchase through links on our site, we may earn an affiliate commission at no additional cost to you. All opinions are our own.
This is part three of my garden planning guide. For part one all about deciding what to plant, click here. For part two, all about planning your garden layout, click here. For part four, how to companion plant, click here.
Today we’ll cover when to start seeds indoors, how to germinate seeds, my favorite seed starting supplies and more.
I love growing my vegetable garden from seeds. What could be more gratifying than watching your plants grow from one tiny seed into a full grown plant ready to harvest? It is so fulfilling to nurture and care for these tiny bits of life and bring them to maturity.
I also love to feel the tie back to my ancestors through this process of growing. I know that not too many generations ago, my relatives would have tended their own little garden to support their family and put food on the table. I have combed through old family photos endlessly searching for evidence of this connection, but so much was lost through time. Considering industrial agriculture is a fairly modern concept though, it’s safe to say that the vast majority of our relatives have grown food at some point in their past. I feel this connection and find my way back to these ancestral roots through the soil.
How to start seeds Indoors
Let’s start with the basics: For many plants, you don’t need even technically need grow lights to start seeds for your garden. You can use winter sowing in milk jugs outdoors, or try starting seeds in egg cartons and even toilet paper rolls. I’ve tried all of these with mixed results. My method of choice used to be soil blocking. Soil blocking is just compressing soil into cubes using a mold and planting directly into that cube without any additional containers. Then you can bottom water those seedlings and build nice strong root structures with zero waste. This method words great for producing strong plants, but it comes with a learning curve that can make it frustrating as you need exactly the right type of soil, and I find it really hurts my hands and is too strenuous.
I’ve been starting seeds using seed cells and trays, but often these are not built to last, and in order to keep plastic out of our landfills and reduce the frustration that comes with cracking cells and flimsy trays, I’ve upgraded my seed starting setup with these extra durable seed starting trays.
Each individual cell in these trays features an air pruning side slot on all four corners to discourage root circling and encourage better root growth. The bottoms of each cell are also open providing air pruning at the lower end of each cell. Large, convenient finger holes in the bottom of each cell make it easy to remove seedlings when you're ready to transplant.
Tap Here To Shop Epic Gardening - Use Code TheCottagePeach5
If you’re growing heat loving crops like peppers and eggplant, you should also grab a heat mat for each tray.
So now that you have your tools, how do you know when to start planting seeds? Start too early, and your plants will outgrow their indoor containers before it is warm enough to move them outdoors. Start your seeds too late, and your plants won’t be mature by your last frost date. That last frost date is exactly where we will start our seed starting journey. This one is easy, I promise; you already know your grow zone from our previous post, so just Google “Last frost date + (your grow zone)” to find out when it’s safe to plant outdoors in your area, since this is the last date when all danger of a freeze has passed.
Next, go back to your list of everything you will be growing and open up Google. Search for each plant name + “when to plant”. For direct sown plants (that means we just put the seed directly into the soil outdoors) this will most often just be “after last frost” (unless it’s a cold hardy plant like spinach or kale which can usually be started a lot earlier) but for plants that need to be started indoors in order to mature before that last frost date, it will say something like “start indoors 8 weeks before last frost” Next to each line write down the planting timing.
The benefit of using a spreadsheet when you are learning how to start seeds is that you can then sort the data in your list by the planting date instead of whatever order you had originally written them down in. This creates a planting schedule for starting plants from seed with just a click of a button. Otherwise you’re going to have to manually organize your list by planting date so you know what dates to do which tasks.
Should you use potting soil or seed starting soil?
Potting soil and seed starting soil are both designed to provide a suitable growing medium for plants, but they have some key differences based on the needs of plants at different stages of growth. Potting soil is a general-purpose mix that is formulated to support the growth of established plants, both indoors and outdoors. It often contains a blend of ingredients such as peat moss, perlite, vermiculite, pine bark, and sometimes added fertilizers. Potting soil may have added nutrients to support the nutritional needs of mature plants. Some formulations include slow-release fertilizers that provide nutrients over an extended period. Potting soil tends to have a coarser texture compared to seed starting soil. This coarser texture helps with drainage, aeration, and provides stability for larger plants.
Seed starting soil is specifically designed for germinating seeds. It typically consists of a lightweight and fine-textured blend, often containing ingredients like peat moss, vermiculite, and perlite. Seed starting soil is often sterile, which helps prevent damping off and other soil-borne diseases that can affect germinating seeds and young seedlings. Seed starting soil is formulated to retain moisture well, providing the consistent moisture levels necessary for seed germination. This helps seeds absorb water and initiate the germination process. Seed starting soil usually has minimal nutrients because seeds initially rely on the nutrients stored within them. As the seedlings grow and develop true leaves, additional nutrients may need to be provided through fertilization. Seed starting soil has a finer texture compared to potting soil. This fine texture allows seeds to make good contact with the soil, facilitating germination.
Use seed starting soil when germinating seeds in trays or small containers. The fine texture and sterile nature help create an ideal environment for germination. Once seedlings have developed a few sets of true leaves, you can transplant them into larger containers with potting soil, which provides the nutrients and structure needed for more mature plants.
What grow light should you use for starting seeds?
Don’t overcomplicate this. Grab some LED strip grow lights like these, and a couple of timers to turn them on automatically. Unless you are going to grow your plants indoors for their entire lifecycle and need them to flower/fruit without sunlight, you do not need to worry about the specific spectrum of light you’re using nearly as much.
How many hours of light do seedlings need?
You should set your grow light timer to give your seedlings 12-18 hours of light per day. I usually set mine for 16 hours.
What is germination?
Germination the development of a plant from a seed or spore after a period of dormancy. Most of the time, your seeds will germinate (or sprout) themselves simply by being activated through the process of hydration. So, you’ll put your seed into the soil at the recommended depth, cover with soil and keep damp, and this increase in the moisture content will trigger the germination of the seed. However, it’s important to check the germination requirements for any seed you haven’t grown before. Some, such as peppers, require a higher temperature in order to germinate successfully. Others like spinach and lettuce prefer a cooler temperature to germinate. Some seeds will just be duds and never germinate - that’s why you’ll often plant multiple seeds in one cell and thin them later, to hedge your bets. You can improve the rate of germination of certain plants like peas, beans, pumpkins and other winter squash by soaking them prior to planting. But, to be honest, since I have fatigue from my arthritis I don’t usually do this step and it’s usually just fine as long as you have quality seeds.
How do you prevent damping off?
Damping off is a common problem when starting seeds, and it is caused by various types of fungi that attack young seedlings, causing them to rot at the soil line. To prevent damping off, you can take several precautions. Start with a high-quality, sterile seed starting mix. Sterilized soil helps eliminate the presence of damping off-causing fungi. Ensure that the containers or seed trays you use are clean and have been properly washed or sterilized before planting. This reduces the chances of introducing harmful fungi. Overwatering can create a favorable environment for damping off fungi. Water the seedlings from the bottom to keep the surface of the soil dry. Use a tray underneath the pots and allow the soil to wick up water as needed. Adequate air circulation helps prevent the buildup of humidity around the seedlings. Use a fan on low speed or open windows to provide ventilation, especially if you are growing seedlings indoors. You should also aim to maintain a moderate humidity level. High humidity can contribute to the growth of damping off fungi. Proper ventilation and spacing between seedlings can help manage humidity levels.
By implementing these practices, you can reduce the risk of damping off and give your seedlings a healthy start. If you notice any signs of damping off, remove affected seedlings immediately to prevent the spread of the fungus.
Thinning seedlings
Thinning seedlings is an important step in the early stages of plant growth to ensure that the remaining seedlings have enough space, nutrients, and sunlight to develop into strong, healthy plants. Allow the seedlings to grow to a height where they have at least two sets of “true leaves”. True leaves are the leaves that follow the initial seed leaves (cotyledons) and have the characteristics of the plant species. Identify the strongest and healthiest seedlings. Look for seedlings with vigorous growth, a good color, and well-developed leaves. This does not necessarily mean the tallest - a short, stocky seedling is a better choice than a thin, leggy one. Instead of pulling out the excess seedlings, which can disturb the roots of neighboring plants, use clean scissors or small pruners to cut the unwanted seedlings at soil level. This ensures minimal disruption to the roots of the remaining seedlings. If you are thinning edible plants like lettuce or carrots, you can eat the thinned seedlings. Thinning can be a way to enjoy some early greens from your garden. Otherwise, just toss them in your compost.
Starting a GArden Checklist
Pick and order your seeds (don’t forget to check out this blog post if you get stuck)
Plan your garden layout (see this post for my tips)
Write down the planting dates for every plant on your list - both the seed starting date and the date to transplant
Gather your supplies; soil, seeds, cell containers to grow in or a soil blocker and trays, a trowel, a tarp to keep your work area clean, and your light source
Work down your list of seeds from the first planting date to the last
Presoak any seeds that require it for germination
Plant your seeds at the recommended depth
Keep the soil moist at all times - you can cover with any clear material to keep the environment damp until the seeds sprout
Build strength in your seedlings stems by gently running your hands across the surface of your plants daily, and keep a fan on to prevent damping off/mold
Harden off your seedlings by bringing them outdoors to a protected spot out of direct sunlight and wind (up against your house will do). Start with one hour for the first few days, then increase it by an hour every day until they are able to stay outdoors for all daylight hours
Transplant your mature seedlings into the garden when it is safe to do so, usually after your average last frost date
What else do you want to know about starting seeds indoors?
![Winter Sowing in Milk Jugs - How to Winter Sow Seeds [Tutorial]](https://images.squarespace-cdn.com/content/v1/60e85024dc86d643da81c96a/ce1bff67-74ef-407a-acac-a45d4d9572f3/E9D5DEFD-A4BA-446D-A0E5-83B1594BB789.JPG)
Winter Sowing in Milk Jugs - How to Winter Sow Seeds [Tutorial]
You don't need an expensive grow light setup to start seeds for your garden. In fact, all you need is a humble milk jug, some soil, and seeds to kickstart your gardening journey. This simple and cost-effective method, known as winter sowing, allows you to harness the power of nature to germinate seeds and get a head start on your garden. In this blog post, we'll explore the step-by-step process of winter sowing in milk jugs, making it accessible to even the most novice gardeners.
You don't need an expensive grow light setup to start seeds for your garden. In fact, all you need is a humble milk jug, some soil, and seeds to kickstart your gardening journey. This simple and cost-effective method, known as winter sowing, allows you to harness the power of nature to germinate seeds and get a head start on your garden. In this blog post, we'll explore the step-by-step process of winter sowing using milk jugs, making it accessible to even the most novice gardeners.
Benefits of Winter Sowing
Wondering what is winter sowing? Winter sowing eliminates the need for expensive grow light setups, making it an incredibly budget-friendly option for seed starting. By using the power of natural sunlight and outdoor conditions, winter sowing mimics the seeds' natural environment, promoting healthier and more robust seedlings. This method allows you to get a head start on your cold-hardy spring crops, giving them a longer growing season and increased chances of success. With just a few basic supplies, you can embark on your gardening journey without the need for complex equipment.
How to winter sow seeds
Materials Needed
Milk jug (or any similar plastic container)
Soil
Seeds
Scissors or utility knife
Duct tape
Popsicle stick or other plant marker you can write on
Permanent marker
Step 1: Prepare Your Milk Jug
Start by collecting empty milk jugs or similar plastic containers. Ensure that they are clean and free of any residue. Milk jugs or water jugs are ideal for this method due to their translucent nature, allowing sunlight to penetrate while providing a protective environment for your seeds.
Poke drainage holes in the base of the jug to prevent waterlogging. Adequate drainage is crucial for seedlings' health, preventing root rot and mold formation.
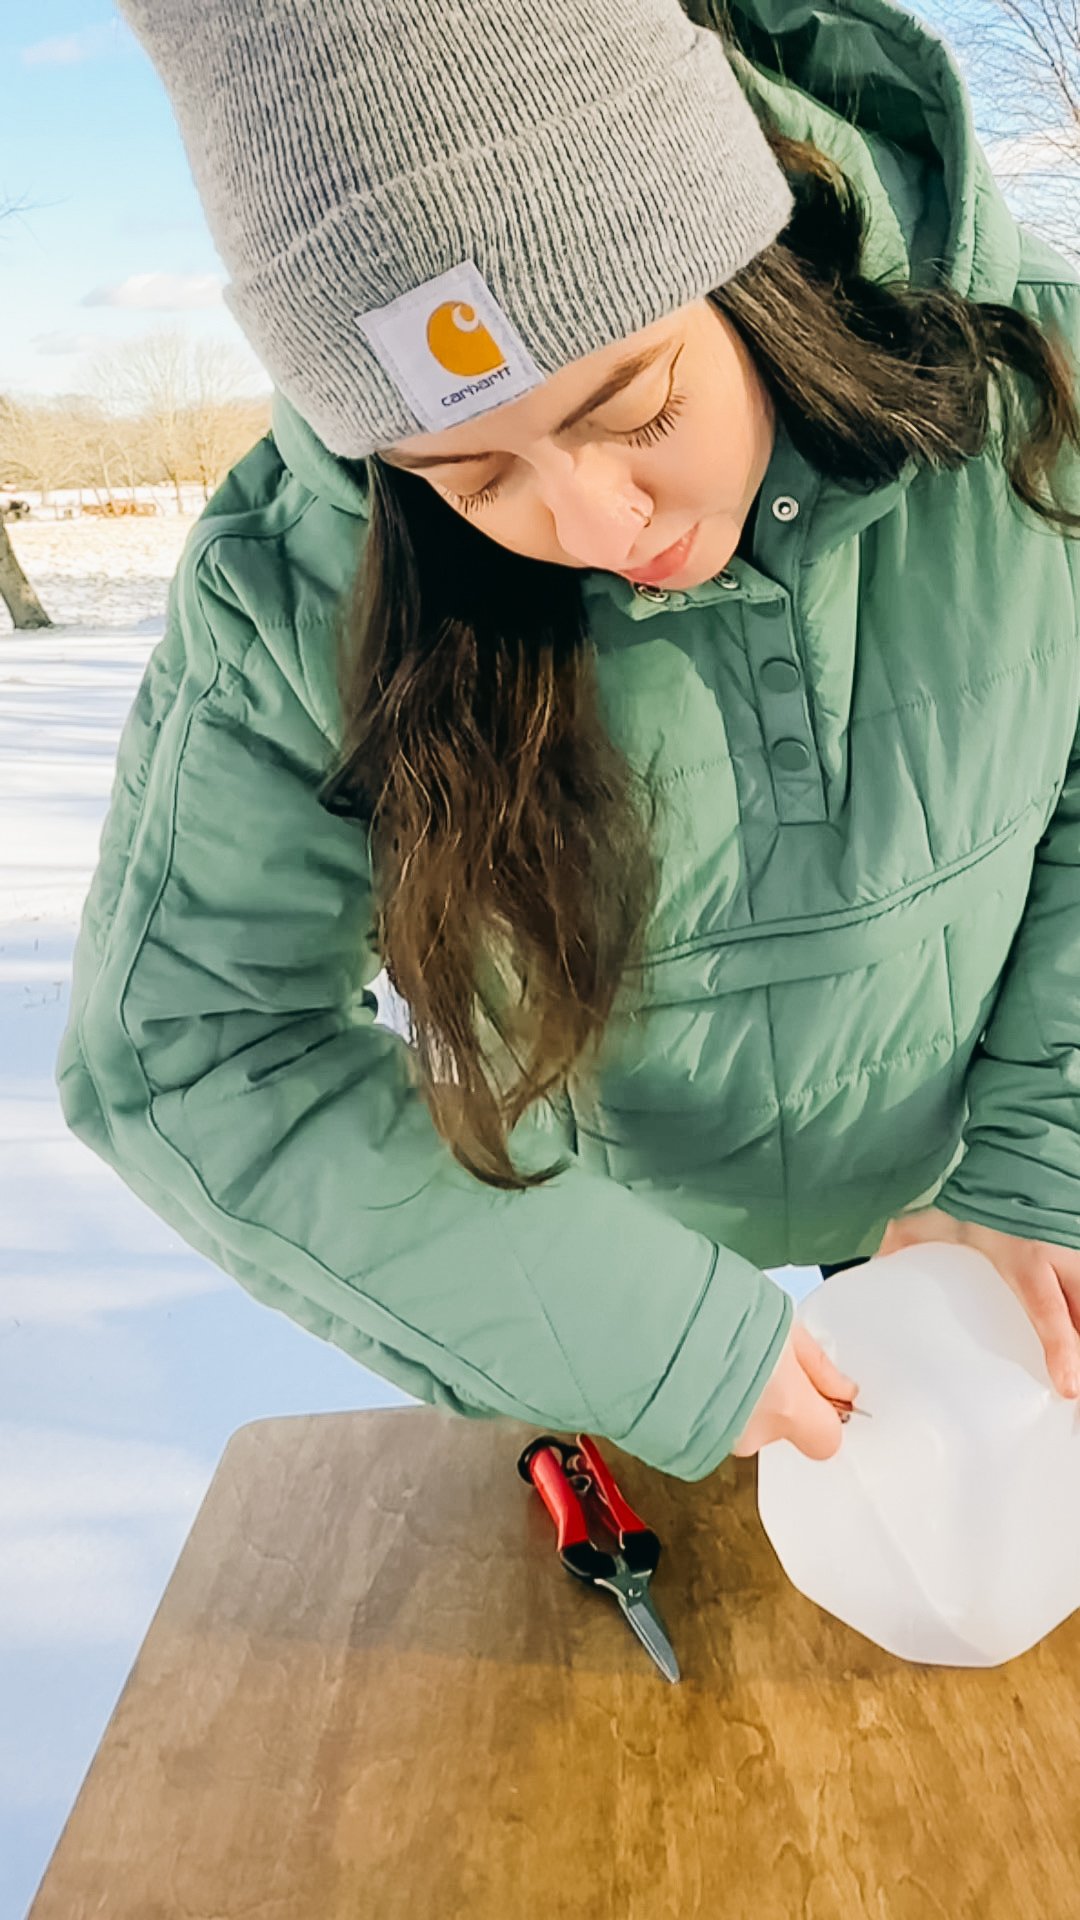
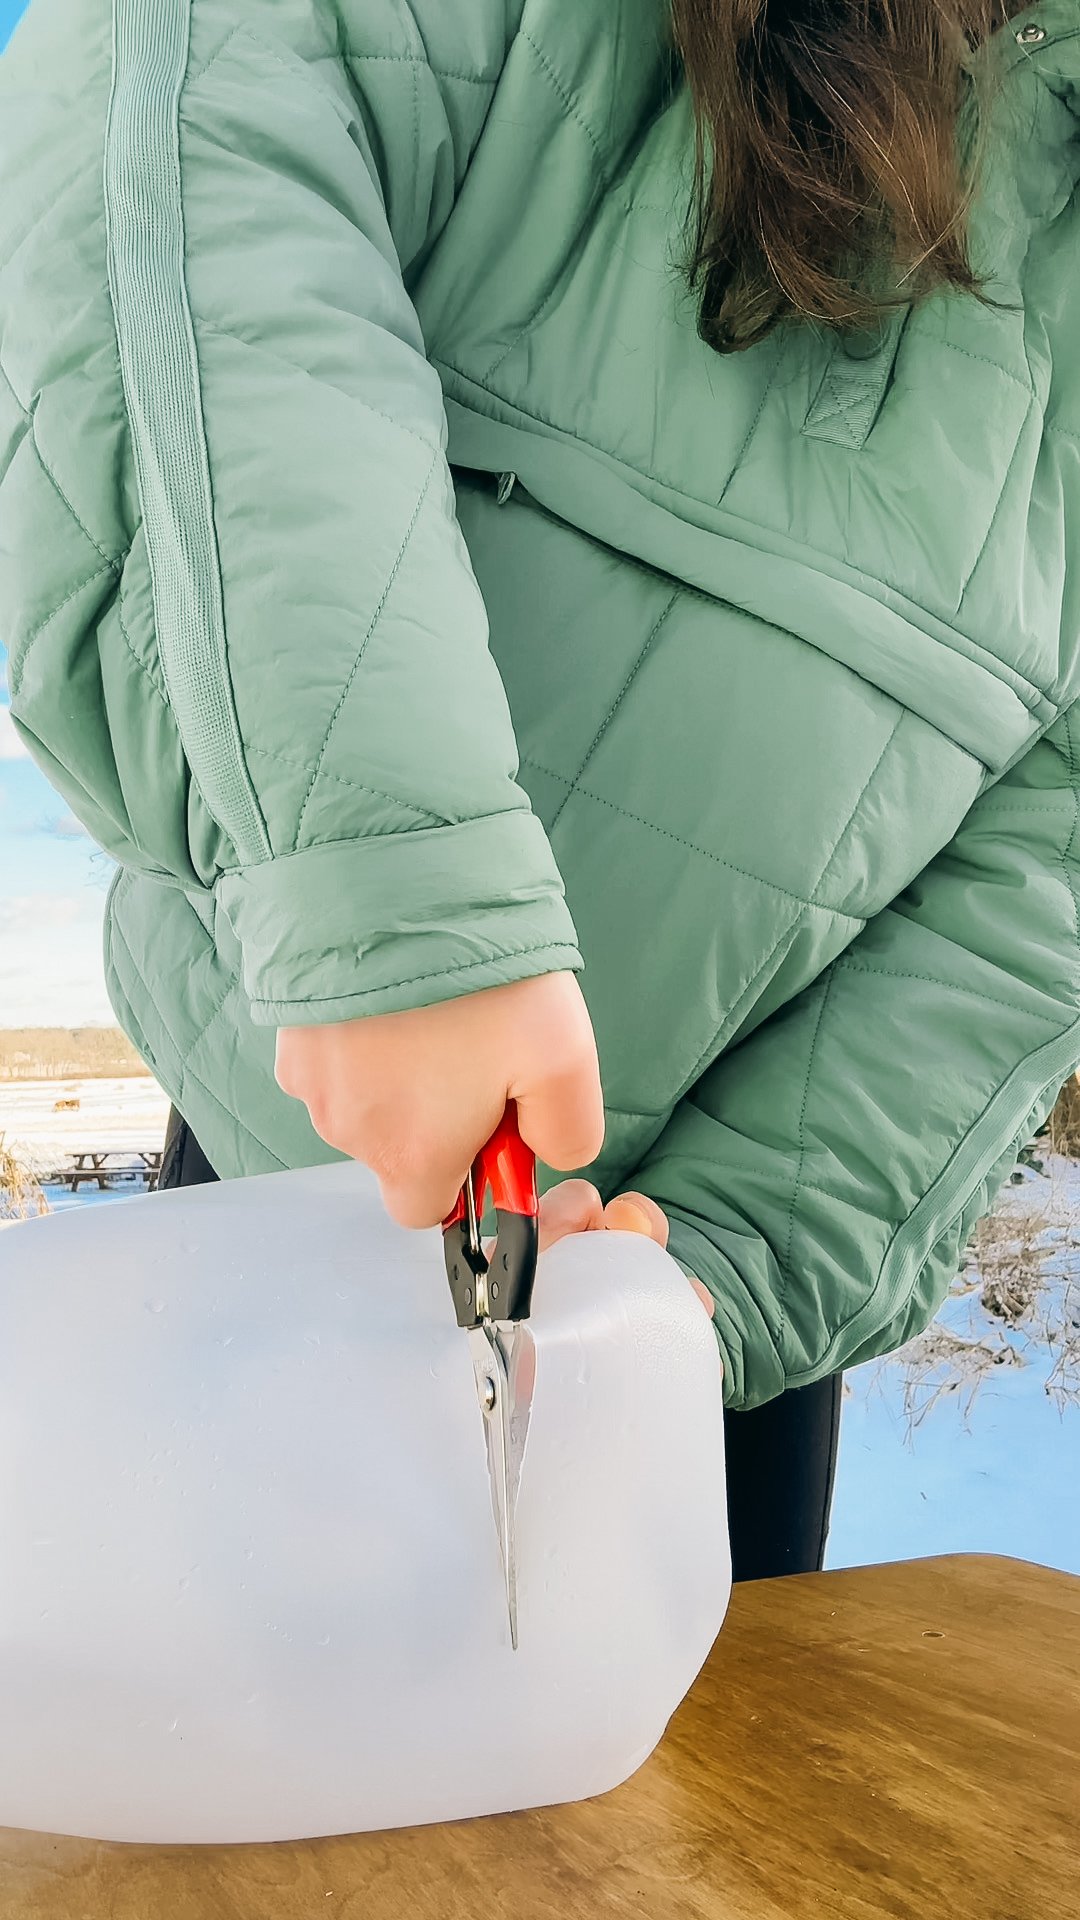
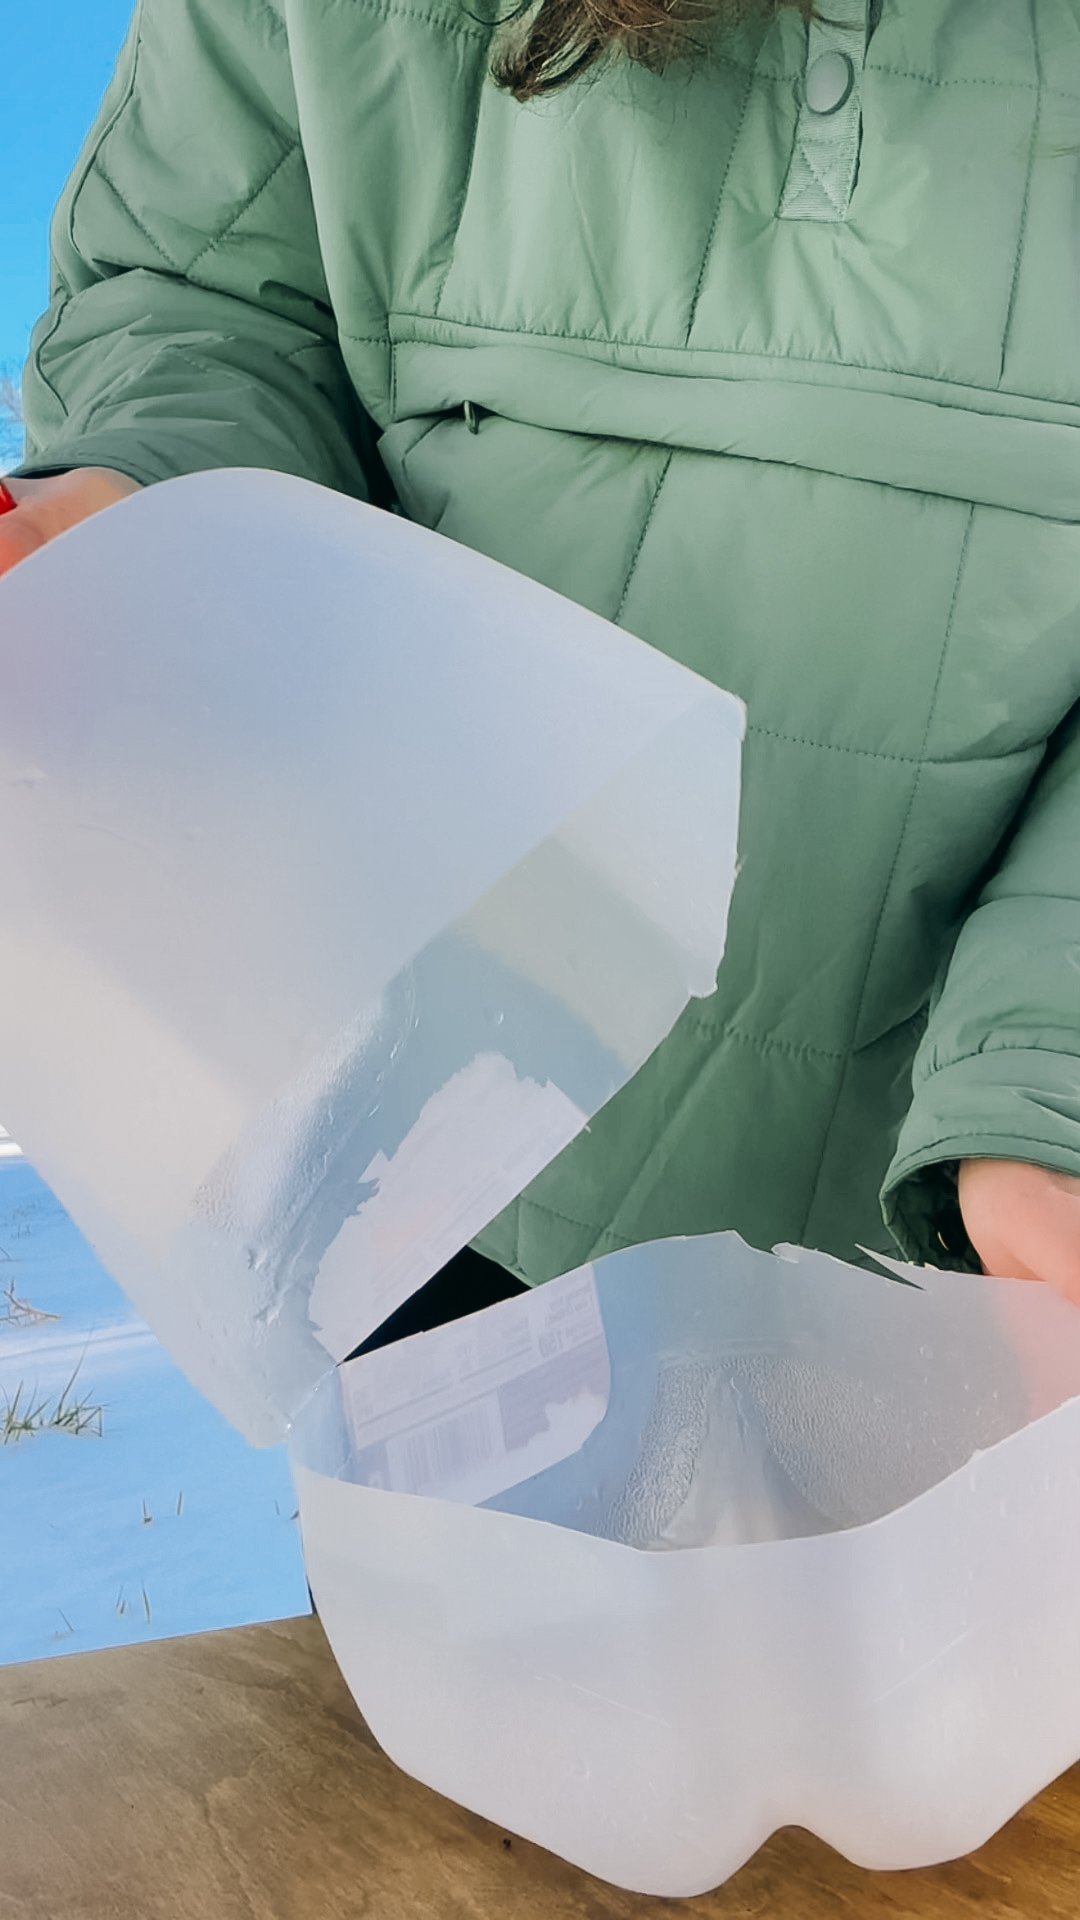
Step 2: Cut and Create a Hinge
Using scissors or a utility knife, carefully cut the milk jug in half, leaving a hinge along the side where the handle is located. This hinge will act as a connection point, allowing you to open and close the jug easily.
The hinged design serves a dual purpose – it provides easy access for planting and labeling while maintaining a protective cover for your seeds.
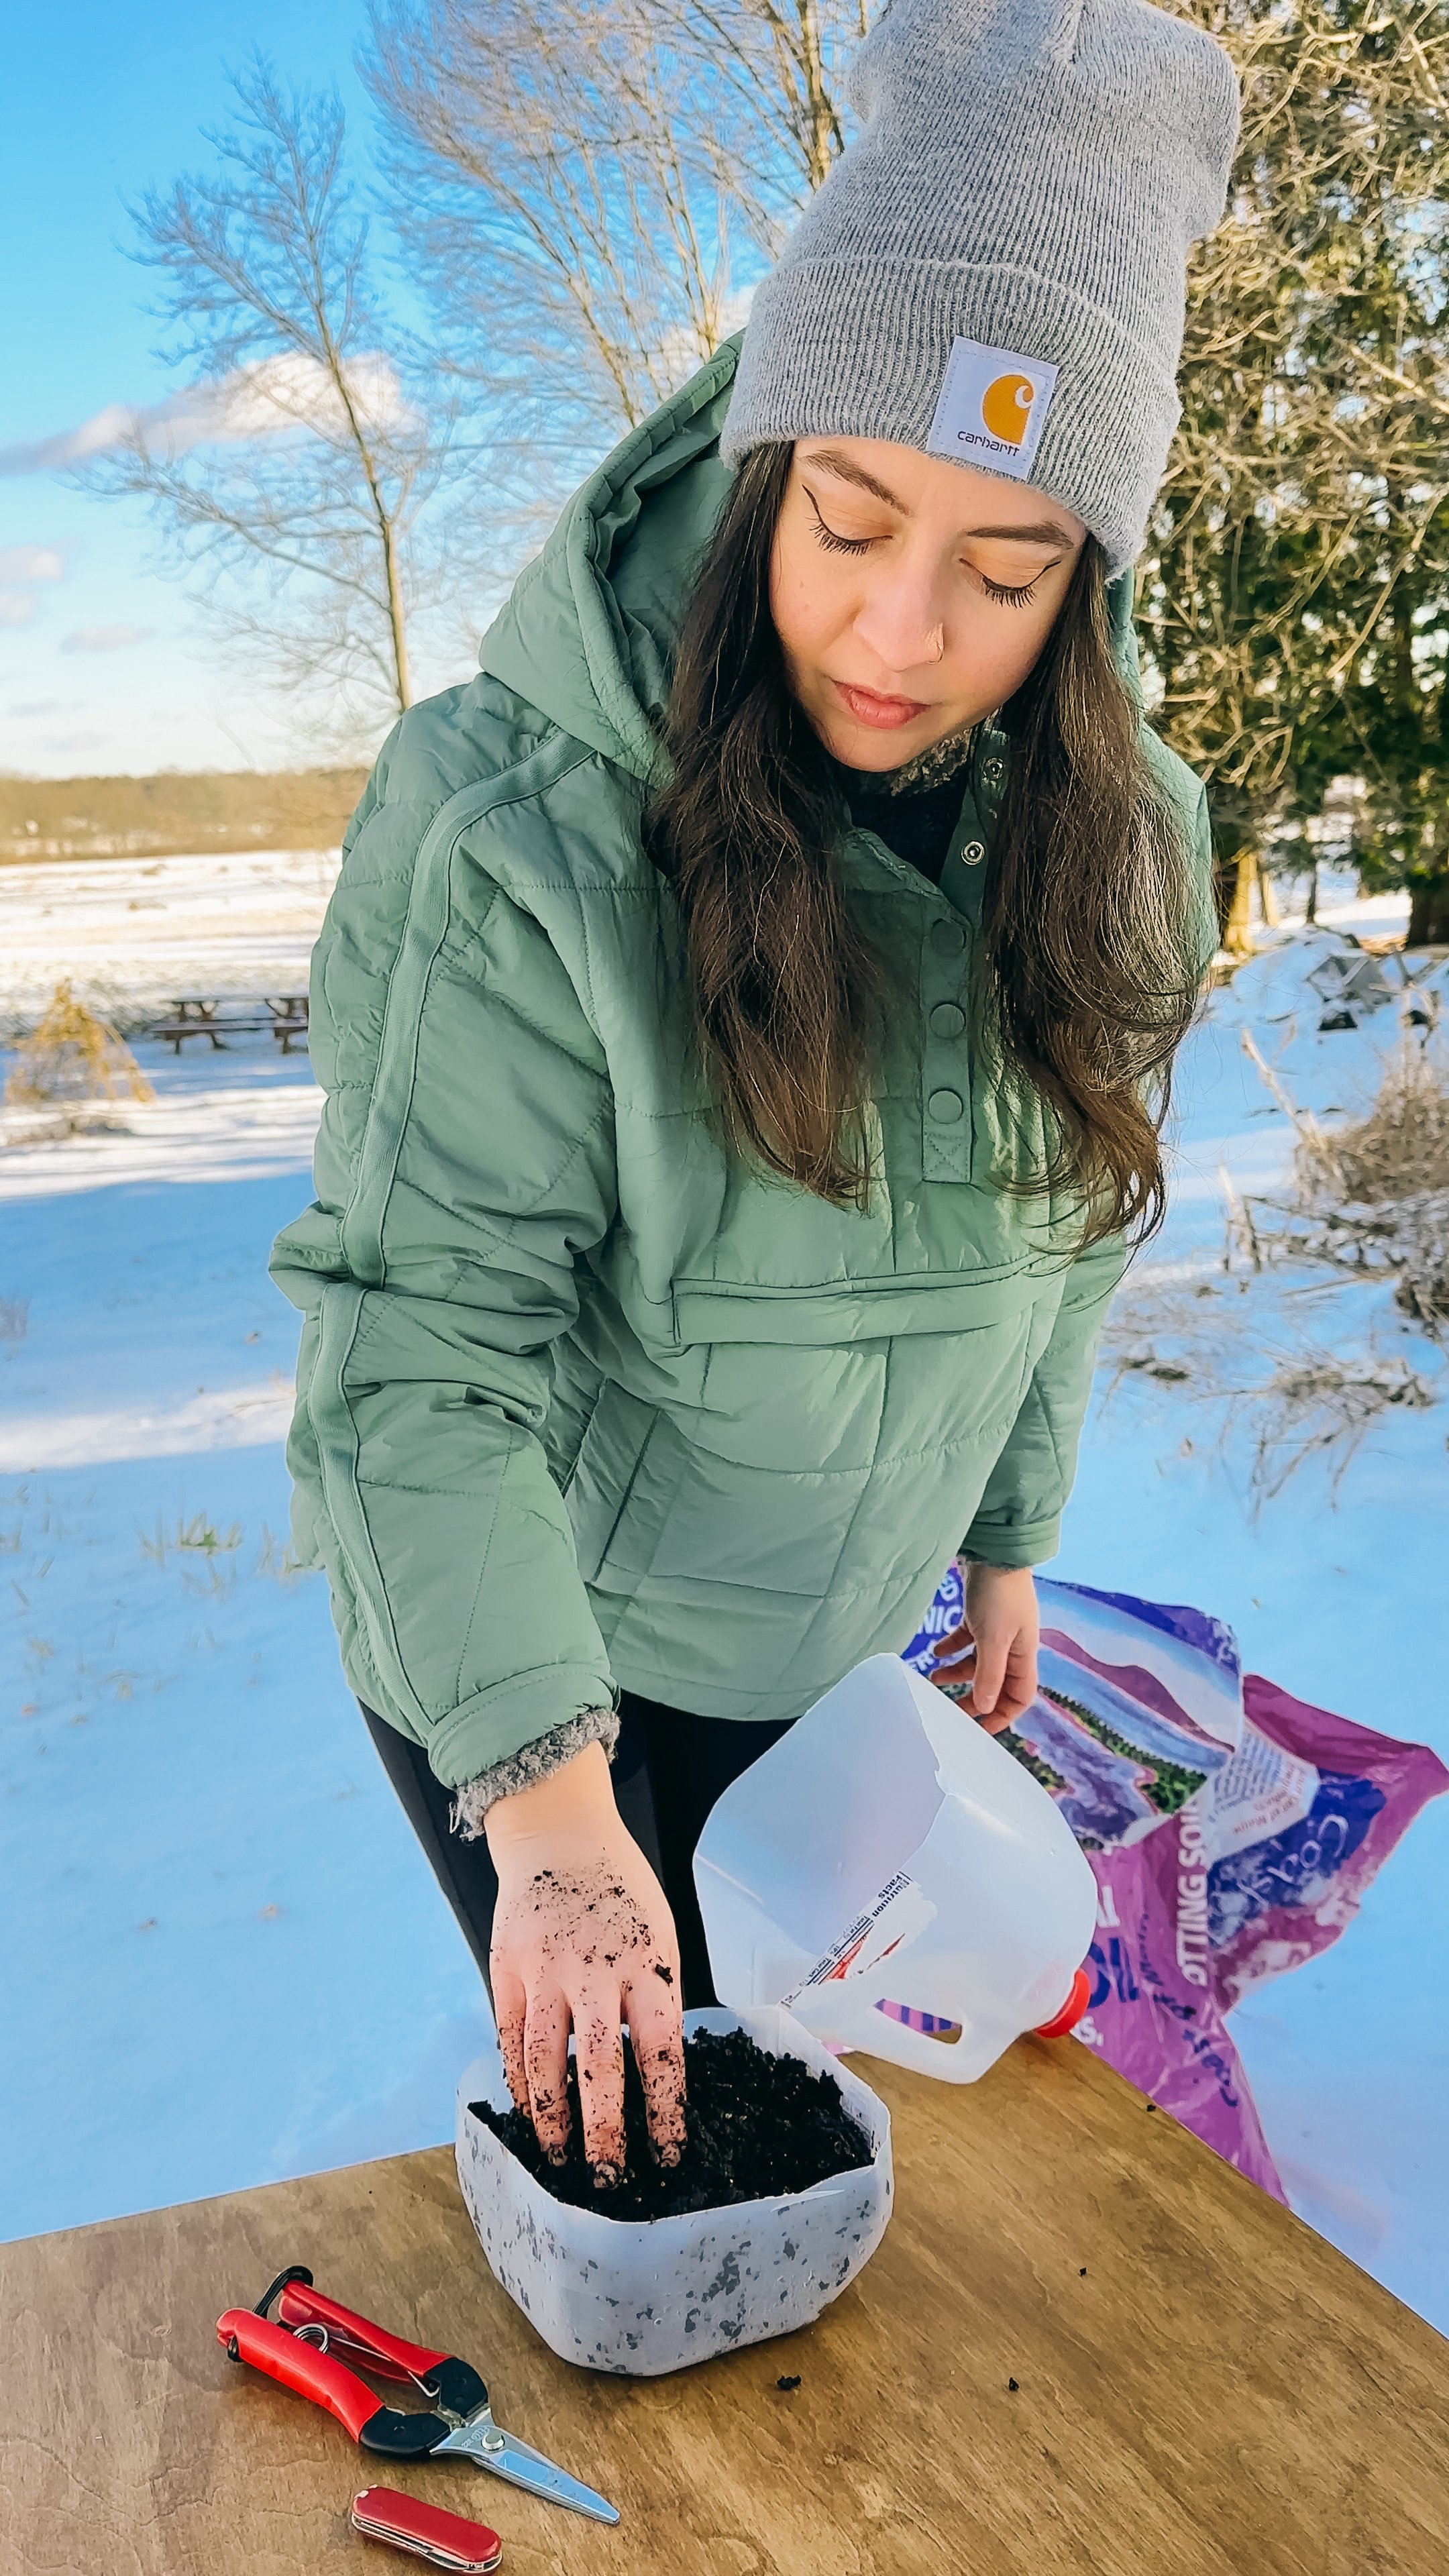
Step 3: Add Soil and Plant Seeds
Fill the bottom half of the milk jug with high-quality potting soil. Ensure that the soil is moist but not waterlogged. Plant your seeds according to the recommended depth and spacing for each type. This is also the perfect time to label your seeds inside the jug, preventing any labels from washing away during watering.
Choosing the right seeds is crucial for successful winter sowing. Opt for seeds that can withstand cold temperatures, such as self-seeding annuals and perennial plants suitable for your zone. This method is particularly effective for cold-hardy spring crops.
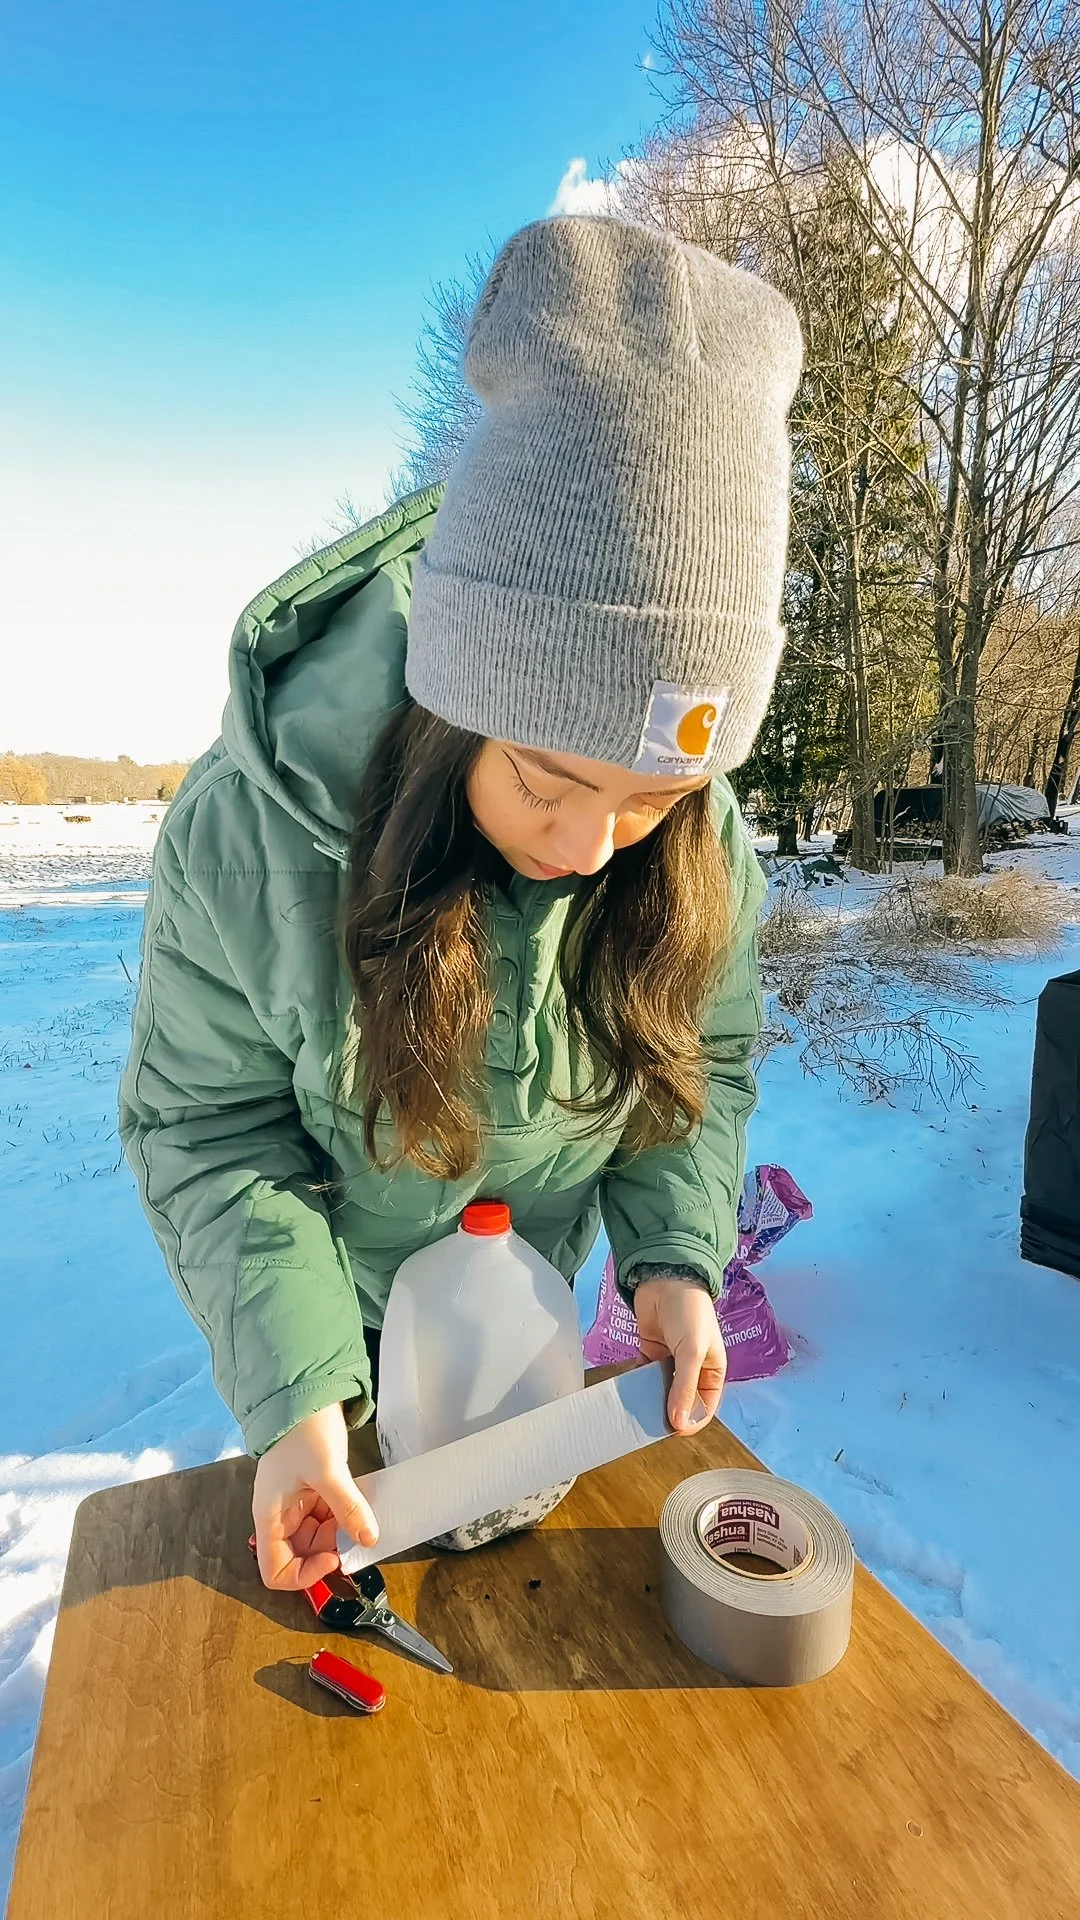
Step 4: Seal and Protect
After planting your seeds and labeling the jug, close the top half of the milk jug and tape it shut. This creates a mini greenhouse effect, trapping warmth and moisture inside. The tape also ensures that the jug remains securely closed, protecting your seeds from potential disturbances.
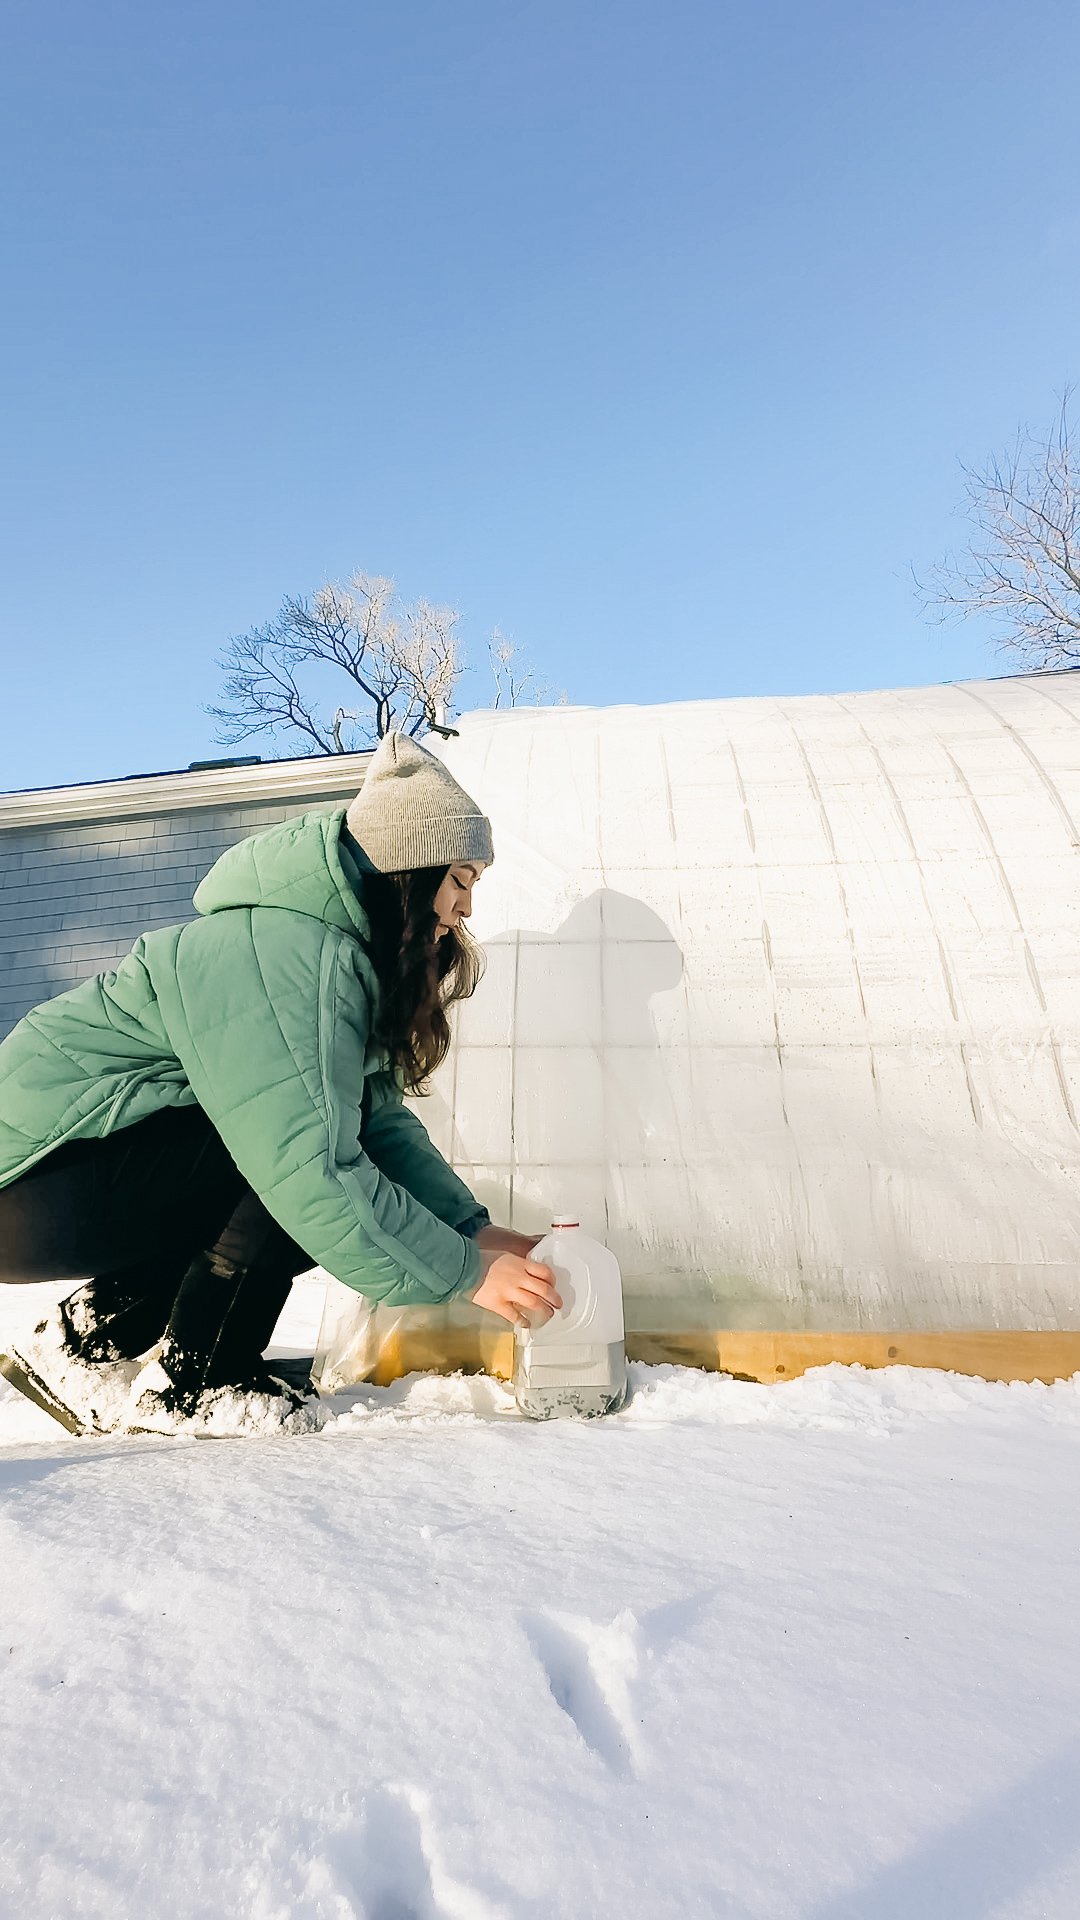
Remove the lid from the jug so it can vent properly and rain and snow can enter through the opening to keep the soil damp and place the milk jug in a sunny spot, ideally where it is sheltered from strong winds. This provides the optimal conditions for germination while protecting the seeds from harsh weather elements.
Can I use any type of plastic container for winter sowing, or is a milk jug essential?

While milk jugs are commonly used due to their translucent nature, you can experiment with similar plastic containers. Just ensure they are clean, have drainage holes, and provide some transparency for sunlight to reach the seeds.
How many drainage holes should I add to the base of the milk jug?
Adding 3-4 small drainage holes should be sufficient to prevent waterlogging. This ensures proper drainage while maintaining the necessary moisture for seed germination.
What soil should I use for winter sowing?
Using high-quality potting soil is recommended for optimal seed germination. Choose a mix that provides good aeration and drainage to support healthy root development.
Can I winter sow seeds that require warmer temperatures to germinate?
Winter sowing is best suited for seeds that tolerate cold temperatures. It's ideal for self-seeding annuals and plants that are naturally perennial in your zone. If you have warm-weather crops like tomatoes or peppers, consider other seed-starting methods indoors.
How often should I water the seeds inside the milk jug?
Since the jug is sealed, it retains moisture well, but it's essential to prevent the soil from drying out completely. You shouldn’t need to water your milk jugs unless there’s an unusually dry and warm period. Be cautious not to overwater, as drainage holes help avoid waterlogged conditions.
Can you winter sow tomatoes?
Winter sowing is most effective for cold-hardy plants and early spring crops. While it may work for tomatoes, it's best suited for those that can withstand colder temperatures and benefit from a longer growing season.
Where to place winter sowing containers
Choose a sheltered spot for placing the milk jug, such as near a building or behind a windbreak. If necessary, you can also place heavier objects around the jug to provide additional protection from strong winds.
Can I start winter sowing in any climate zone?
Winter sowing is adaptable to various climate zones. However, its effectiveness may vary depending on your specific climate. Adjust the timing and seed selection based on your local frost dates and weather conditions.
What should I do if mold develops inside the milk jug?
If mold appears, open the jug to increase ventilation, and reduce watering frequency. Ensure the soil surface is dry between waterings, and consider applying a dilute hydrogen peroxide solution to the affected areas to combat mold.
Can I reuse the milk jugs for multiple seasons of winter sowing?
While milk jugs are durable, they may degrade over time due to exposure to sunlight and the elements. It's advisable to inspect them before each season and replace any that show signs of damage or wear. Reusing jugs can be cost-effective, but ensure they are in good condition for successful winter sowing.
When to start winter sowing
You can begin winter sowing any time after the winter solstice (December 21st) because that is when daylight hours begin increasing again.
When should I transplant my winter sown seedlings into the ground?
Transplant your winter sown seedlings after your last frost date. Winter sown seedlings are generally much more cold hardy since they are already adapted and require no hardening off.
Best seeds for winter sowing
Winter Sowing Herbs:
Lavender (Lavandula): Lavender is a hardy herb that thrives in cooler temperatures, making it an excellent candidate for winter sowing. It appreciates well-drained soil and full sunlight.
Chives (Allium schoenoprasum): Chives are cold-tolerant and can be easily grown from seeds in milk jugs. They add a mild onion flavor to dishes and are a great addition to any herb garden.
Parsley (Petroselinum crispum): Parsley is a biennial herb that can withstand cold temperatures. Winter sowing provides an early start for this versatile herb, commonly used in culinary applications.
Winter Sowing Flowers:
Calendula (Calendula officinalis): Calendula, or pot marigold, is a self-seeding annual flower that thrives in cooler weather. Its vibrant orange and yellow blooms add beauty to gardens and can be winter-sown for early spring blossoms.
Sweet Alyssum (Lobularia maritima): Sweet Alyssum is a low-growing flower with a sweet fragrance. It's perfect for borders and containers and can be started in milk jugs for a head start on spring blooms.
Bachelor's Button (Centaurea cyanus): Bachelor's Button, or cornflower, is a cold-tolerant annual with striking blue flowers. Winter sowing allows you to enjoy its blooms earlier in the season.
Winter Sowing Vegetables:
Spinach (Spinacia oleracea): Spinach is a cold-hardy leafy green that does well with winter sowing. You can start spinach seeds in milk jugs to get an early harvest of fresh greens.
Radishes (Raphanus sativus): Radishes are quick-growing vegetables that tolerate cooler temperatures. Winter sowing radish seeds allows you to enjoy their crisp and peppery roots in early spring.
Kale (Brassica oleracea acephala): Kale is a cold-resistant leafy green that benefits from winter sowing. It's rich in nutrients and can be harvested early for delicious and nutritious greens.
Arugula (Eruca sativa): Arugula, with its peppery flavor, is an ideal candidate for winter sowing. This quick-growing green thrives in cooler temperatures, making it a perfect addition to your winter-sown vegetable garden. The young leaves are tender and can be harvested for salads or added to sandwiches, providing a burst of freshness.
Bok Choy (Brassica rapa subsp. chinensis): Bok Choy, a type of Chinese cabbage, is well-suited for winter sowing. Its crisp and mild-flavored stalks and dark green leaves are delicious in stir-fries and salads. Starting Bok Choy seeds in milk jugs allows for an early harvest and a continuous supply throughout the growing season.
Broccoli (Brassica oleracea var. italica): Broccoli, a cold-tolerant vegetable, can be successfully grown from seeds in milk jugs. This nutritious and versatile vegetable benefits from an early start, providing you with homegrown broccoli for soups, salads, and side dishes.
Cabbage (Brassica oleracea var. capitata): Cabbage is a hardy and cold-resistant vegetable that can be started in milk jugs for an early crop. Whether you prefer green or red cabbage, winter sowing allows you to enjoy homegrown cabbage in various culinary creations.
Cauliflower (Brassica oleracea var. botrytis): Cauliflower, with its distinctive white head, is a cool-season crop that responds well to winter sowing. This method gives you a jumpstart on the growing season, ensuring a bountiful harvest of this versatile vegetable.
Endive (Cichorium endivia): Endive, known for its slightly bitter flavor, is an excellent choice for winter sowing. Growing endive from seeds in milk jugs provides you with a crisp and flavorful addition to salads and other dishes.
Leek (Allium ampeloprasum): Leeks, with their mild onion flavor, are cold-resistant and suitable for winter sowing. Starting leek seeds in milk jugs allows for an early harvest of these versatile vegetables, perfect for soups, stews, and as a flavorful addition to many recipes.
Lettuce (Lactuca sativa): Lettuce, a staple in salads, benefits from winter sowing. This method provides an early start for various lettuce varieties, ensuring a continuous harvest of fresh and crispy leaves for your salads and sandwiches.
Swiss Chard (Beta vulgaris subsp. cicla): Swiss Chard, with its colorful stems and nutritious leaves, is well-suited for winter sowing. This versatile green can be started in milk jugs, offering an early supply of homegrown Swiss Chard for cooking and salads.
Remember to check the specific requirements of each seed variety, as some may have preferences for soil conditions, sunlight, and watering. Additionally, consider your local climate and adjust the timing of winter sowing based on frost dates in your area.
Winter sowing in milk jugs is a simple yet effective method for starting seeds, even for those with limited gardening experience or resources. By harnessing the power of nature and utilizing everyday items, you can kickstart your garden without breaking the bank. Give winter sowing in milk jugs a try and watch as your seeds sprout into healthy seedlings, ready to be transplanted into your garden come spring. Happy gardening!