
BACKYARD GARDENING MADE SIMPLE

Extend Your Garden Season With These Techniques
With your garden prepped for winter, you may be ready to turn in and take a break from growing for a few months. But if you’re like me and the idea of the garden totally ending breaks your heart, there’s a few different ways we can extend our growing season and keep harvesting fresh food from the garden all year round. I’ll be using all of these methods in my own garden to grow cold loving crops while the snow falls.
With your garden prepped for winter, you may be ready to turn in and take a break from growing for a few months. But if you’re like me and the idea of the garden totally ending breaks your heart, there’s a few different ways we can extend our growing season and keep harvesting fresh food from the garden all year round. I’ll be using all of these methods in my own garden to grow cold loving crops while the snow falls.
How To Use Row Cover
There’s a good chance you have some plants already in the ground that can withstand cooler temperatures and give you harvests well into winter with a little planning. Plants in the brassica family for example have the ability to produce a type of natural anti-freeze that converts into sugars and makes the plants taste even better after a frost. But you can extend their life even further by utilizing frost covers which act as a cozy winter blanket and keep out the wind chill and moisture that causes the most damage to these cold hardy plants. These covers act as a shield against harsh frost, preserving the warmth around the plants and preventing frost damage. It's a simple yet effective measure to safeguard your garden and extend your harvest.
Benefits of Mulch
We aren’t the only ones who benefit from an extra blanket or two in the winter months. A layer of mulch such as wood chips, pine needles or straw around perennial plants acts as insulation, protecting their roots from extreme temperatures. It also helps retain moisture and suppresses weeds, contributing to the overall well-being of your garden beds during the winter months. A good rule of thumb is to use four to six inches of mulch around the plants - just don’t press the mulch up against the plant itself. We are insulating the roots, not the aboveground parts.
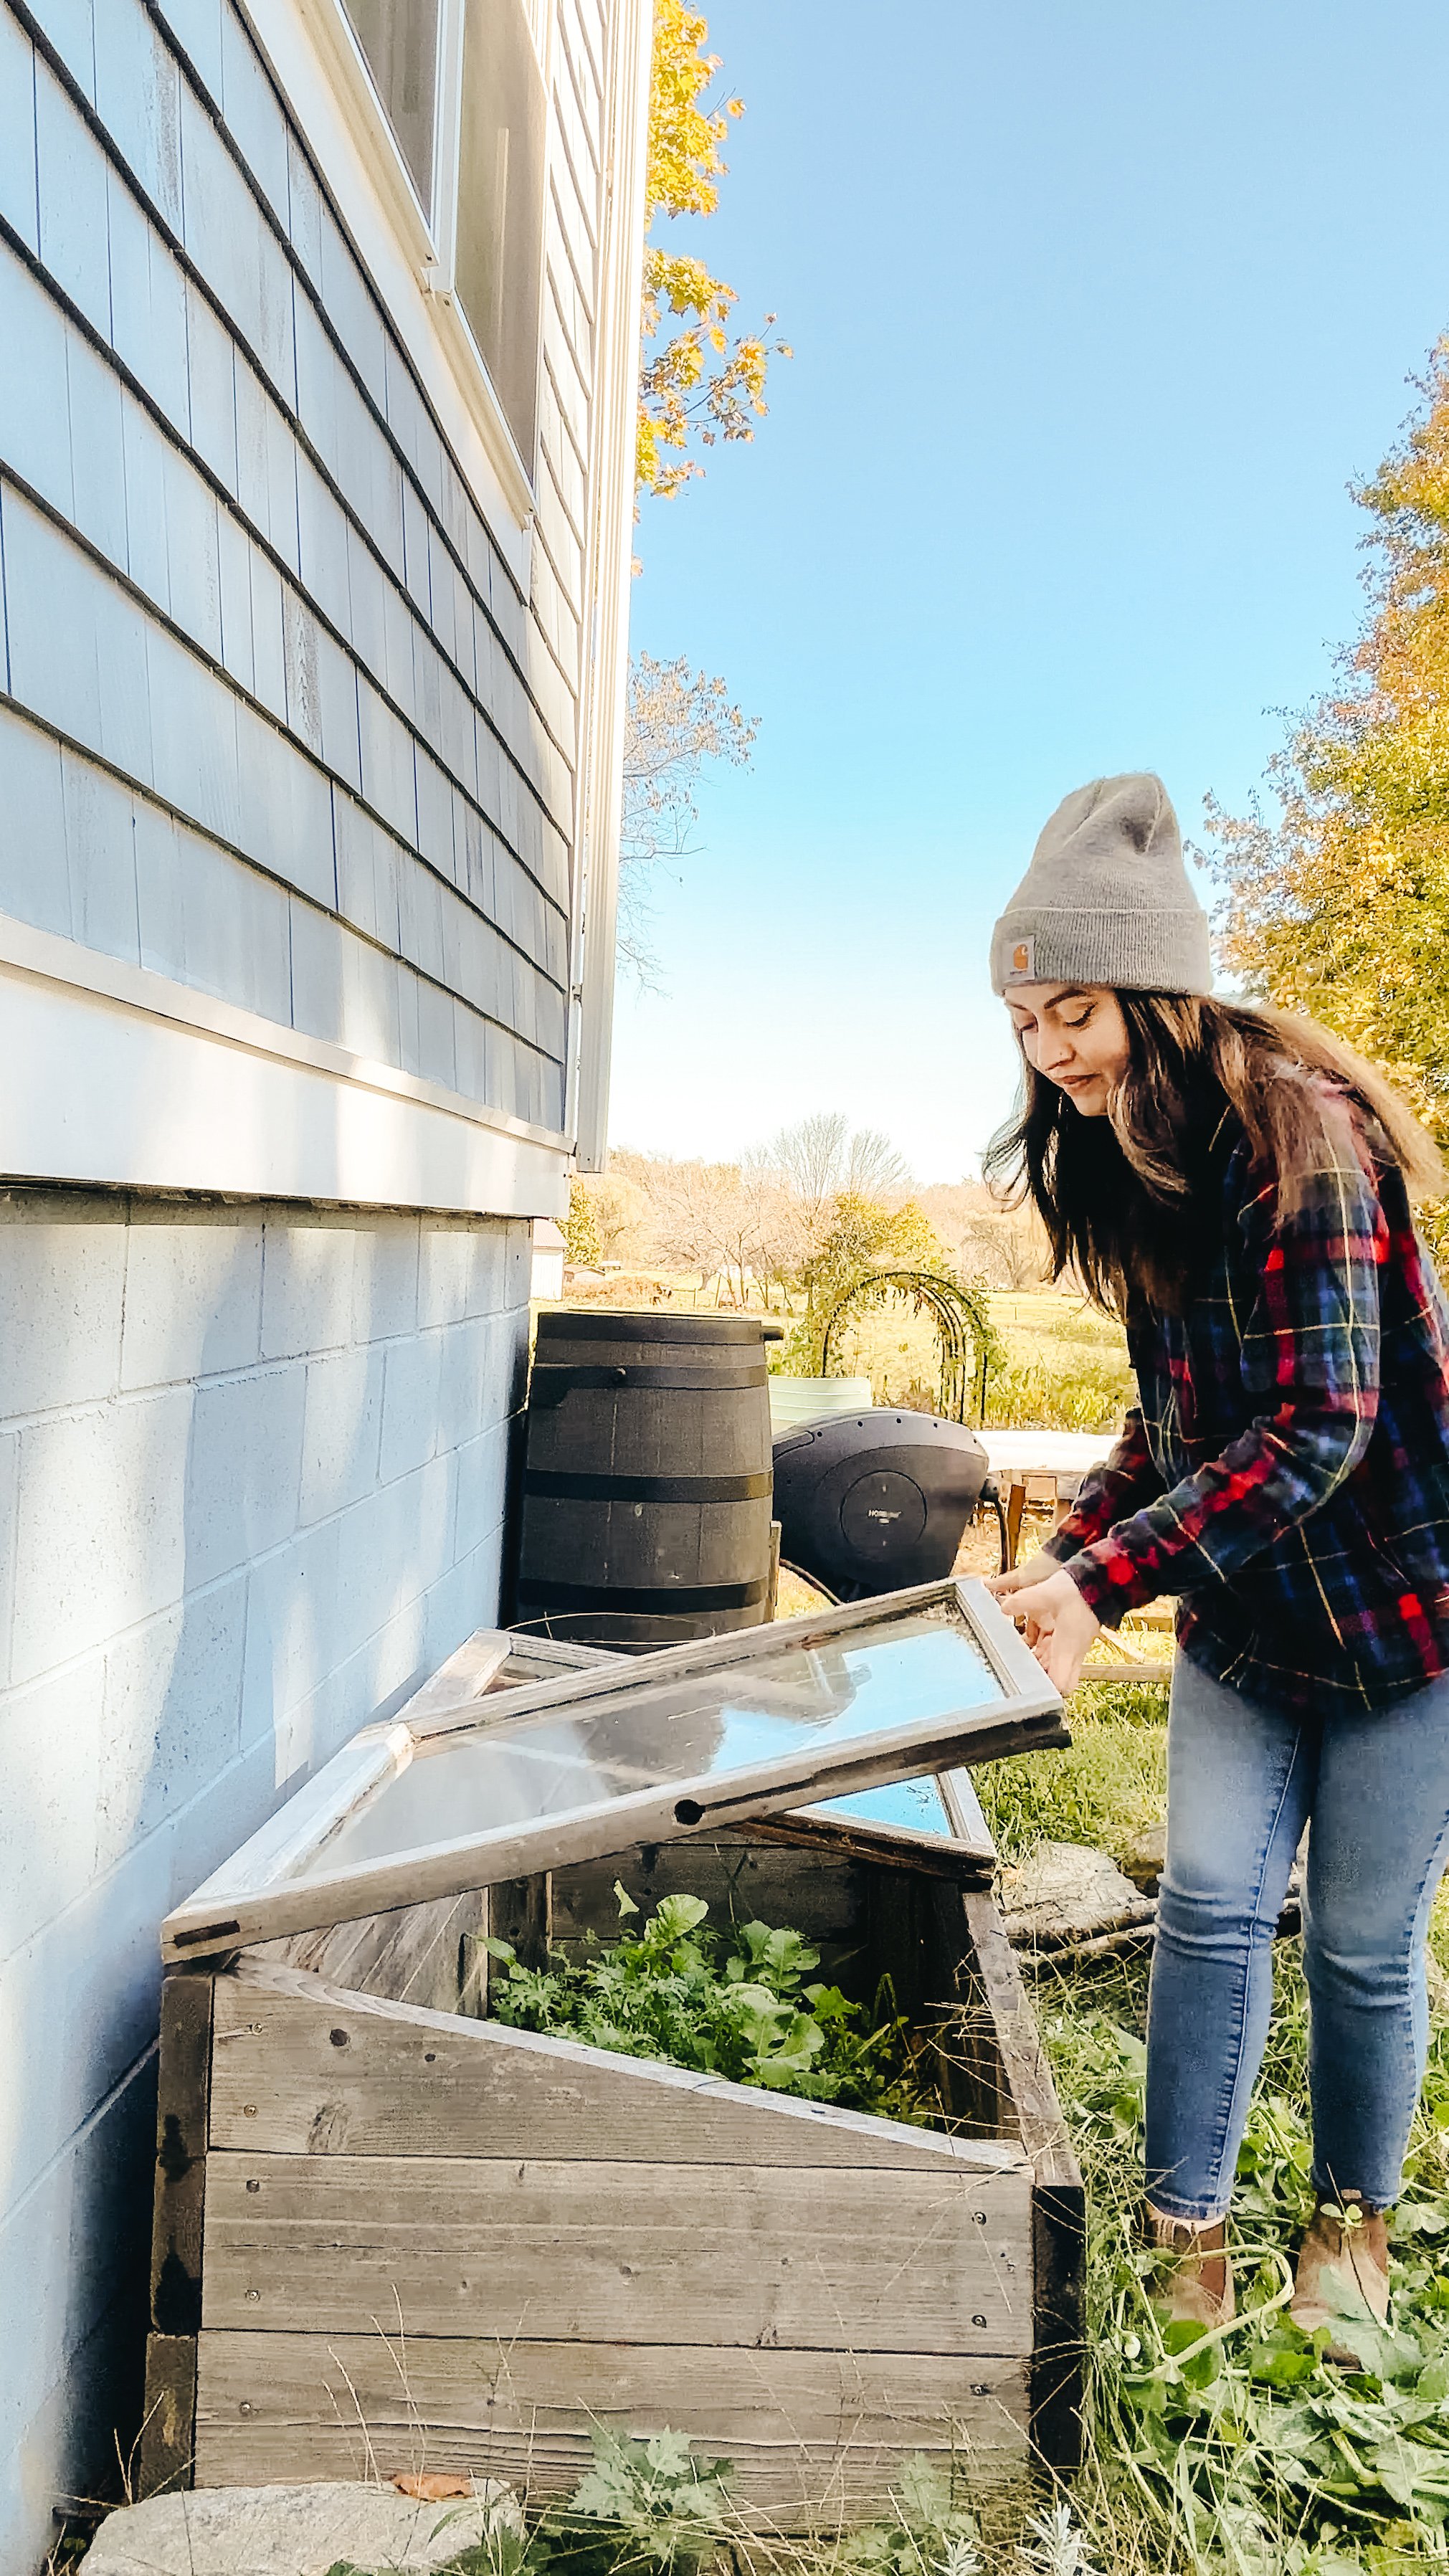
Using cold frames/cloches
A cold frame works by creating something like a mini-greenhouse, trapping warm air through solarization inside of the box and insulating the plants within from the worst that winter has to offer. We control the temperature inside of the cold frame with a simple vent - the hinged lid can be propped open with different sized sticks to allow excess heat to escape on warmer days, but for the most part in our deep New England winters the lid stays firmly shut until we trudge through the knee deep snow to harvest.
If you have the time and physical ability, building a cold frame yourself is absolutely the most economical solution. Purchasing one ready-made can cost you anywhere from $60-$500 and quality issues on the low end of that budget will prevent you from getting many years of use out of it. Meanwhile, if you build one yourself it can be done for far less than the low end of that range, and produce an end result that will be sturdy enough to continue providing shelter to your winter crop for years to come. While old windows can be fragile and prone to breaking, when they can be found for free I still find it a better option than a new piece of corrugated plexiglass.
DIY CATTLE PANEL Hoop House
Hoop houses are used by growers in all types of climates for many different reasons - but the main goal is climate control, whether that is to make the growing area colder using the artificial shade created or warmer by taking advantage of the insulating properties of the covered area to effectively move your grow zone south.
If you’ve never seen a hoop house before, you probably have and just didn’t realize it! The basic idea is that you form some sort of rounded roof structure using metal rods, cattle panel or pvc that bends down and is anchored to the ground and cover that with heavy duty greenhouse plastic that lets light in but keeps wind out and provides some insulation.
You can build your own greenhouse easily in an afternoon with just the help of one other person, and you don’t need any special skills or carpentry experience either. The hardest part is honestly just getting the cattle panel - they are huge, so unless you have a truck you’ll probably need to rent something or have them delivered. Click here for my full guide to build your own DIY cattle panel hoop house.

Cold Tolerant Plants
Of course, with any of these methods you still won’t create tropical conditions for your plants if you live in a colder climate. So it’s important to stick with plants that are known to tolerate temperatures down to about thirty degrees fahrenheit. Here’s a list of everything I’ll be growing this winter:
Gai Choy Mustard
This mustard matures in 40-60 days and grows anywhere from six to ten inches wide and ten to twelve inches tall. This is a head forming traditional Chinese mustard with a mild flavor when it’s young.
Bloomsdale Spinach
This is a dependable, open pollinated variety that matures in 28-45 days and grows about six to eight inches tall with dark green, thick and curly leaves. It’s a prolific grower with tender leaves and rich flavor.
Common Sorrel
This green has been popular in France and England for centuries but for some reason it isn’t as popular in the states. It matures in 60 days with bright green crinkled leaves that have a lemony spinach flavor.
Easter Egg Radish
This blend has red, white, pink purple and bi colored radishes that mature in just 30 days. Easter egg is a mild and crisp radish that forms small one inch globe shaped roots, so if you don’t like the spiciness of other radishes you may want to try this one.
French breakfast radish
These radishes are super mild - almost sweet and mature in 28 days. The root is scarlet with a white tip about 1 inch around and 2 or 3 inches long.
Spanish black radish
This is an extra large medium spicy radish that matures in 60-70 days with a black exterior and white interior. The globes are about 3-4 inches in diameter when mature. Since this is a winter radish it needs shortening day length and cool temps to mature, so this one gets planted later than the other radish varieties I’m growing.

Bok Choy Choko
I can’t live without this for my stir fries and this variety is so good and tender when harvested when it’s only about four inches tall. It matures in around 50 days and has smooth, leafy blades in a cluster with crisp, pale green stems. Choko was bred to be small and heat tolerant.
Big Seeded Mache
Mache can survive temperatures down to ten degrees fahrenheit and matures in 60 days. It’ll grow to be about six inches tall and eight inches in diameter with dark green, spoon shaped soft leaves in a loose rosette.
Tokyo Long White Bunching Scallion
These Japanese scallions are long, slender, mild and mature in 65 days. They are sweet enough to use in pretty much anything from salads, soups, and stir-fry dishes and grow about 16-18 inches tall.
Olesh Tres Fine Endive
This is a mildly bitter flavored green with a really interesting frilly texture that matures in 42-70 days. It grows about six inches wide and tall in rosettes with broad crinkled green leaves.
Ruby Red Swiss Chard
Chard can withstand moderate freezes and matures in 50-60 days, growing about 24 inches tall and eighteen inches wide with dark green crinkled leaves, red veins and stalks. I use this the same way I use spinach
Danvers Carrot
This variety was actually created an hour from where I live way back in the day when growers were looking for a carrot with improved yield, color and uniformity. It matures in about 65 days. It’s a sweet classic carrot that’s resistant to cracks and splits and roots grow about six inches long/
Astro Arugula
I said I would never grow this, but there’s very few foods I actively dislike and I have a personal rule that I re-try foods I hate about once a year in different forms or varieties and since arugula is so cold hardy, I had to bite the bullet with this and try a new type to see if I can learn to love it. Astro matures in 32-55 days and supposedly has more of a mild flavor than other varieties when the plants are young so I’m hopeful.
Mizuna Mustard
This tender Japanese mustard is milder than other varieties and ready to harvest in 30-50 days. It can grow up to a foot tall and wide but it’s usually harvested when it’s smaller.
Rosette Tatsoi
This beautiful leafy green is more flavorful than traditional bok choy and matures in 45 days. It is super cold tolerant down to 15 degrees fahrenheit and can be harvested even in the snow. It grows pretty low and wide with spoon shaped dark green thick leaves in a rosette.
Tendergreen Mustard
This is also called mustard spinach, but it’s not actually mustard OR spinach. It’s super easy to grow, hardy and productive and matures fast in 30 days to be about two feet tall and up to two feet wide with smooth dark green glossy leaves.
Are you team take a break for the winter, or keep growing?


Preparing Your Garden For Winter
There’s always more that can be done to prepare the garden for winter, and some tips will be more specific to your garden setup. But with all this checked off my list, I’m looking forward to a slower season of rest and planning, organizing my seed collection (and let’s be real, buying a lot more) as well as drawing up new garden bed layouts for the spring. What are you doing to prep your garden for the winter months now?

By late October, the summer garden is hanging on by a thread, tattered and browning at the edges. Every day, I step outside and ask myself if this is the day to put it to rest. Admittedly, I probably wait longer than I should because I’m in denial about what’s coming. While some gardeners may be grateful for the period of rest winter offers, I’m just looking for more ways to keep growing even in the cold. I like living somewhere that experiences all four seasons, I just wish winter was just a little bit shorter! But eventually reality catches up with me, and I have to accept that it is time to take the necessary steps to prepare the garden for the winter months.
In my zone, 6b, we experience a long cold winter. We have a good four to five months of temperatures between zero and twenty degrees Fahrenheit. The ground freezes solid, everything dies back, winds pick up from the field and if I don’t take steps to protect it, the elements can do a number on the structures and systems I have in place for my summer garden. But there’s more to winter garden prep than just protecting what is there so it can lie in wait until next season. Now is also the best time to start preparing for any new additions you want to add to your garden for next year. So let’s dive into exactly what I’m doing to prepare my garden for winter.
Clear and compost dead plants
The very first thing I do to prepare the garden for winter is to try and give myself a clean slate. This not only tidies up the space but also helps prevent diseases from overwintering in dead plant material. For plants that remain disease free all season, you can use the “chop and drop” method to compost in place. Simply cut the plant down at the base, breaking apart any larger branches or sections so they can decompose easily, and lay them on the soil in your garden bed. These plants will break down over the winter months, returning nutrients to the soil. However, if you notice any signs of disease on your plants or just aren’t sure, it’s best to pull the entire plant up by the root. For things like powdery mildew, I’m generally not too worried about putting them into my regular compost. But if your tomatoes had blight, you may want to burn the foliage to try and stop it from spreading.
Add frost covers
There’s a good chance you have some plants that can withstand cooler temperatures and give you harvests well into December with a little planning. Plants in the brassica family for example have the ability to produce a type of natural anti-freeze that converts into sugars and makes the plants taste even better after a frost. But you can extend their life even further by utilizing frost covers which act as a cozy winter blanket and keep out the wind chill and moisture that causes the most damage to these cold hardy plants. These covers act as a shield against harsh frost, preserving the warmth around the plants and preventing frost damage. It's a simple yet effective measure to safeguard your garden and extend your harvest.
Look for abandoned tools
In the chaos of summer gardening, I know I’m not the only one who has lost track of a tool or two. It’s too easy to get swept up in the task at hand, exhaust yourself and then say you’ll “clean up later” but every gardener knows that later never comes. Take a quick inventory of your garden tools and do a walkaround for any abandoned tools that may have been left to rust so your valuable equipment doesn't deteriorate in the cold, wet weather. And then maybe make a plan for next year so you have an easily accessible drop point in your garden where you can keep tools without having to remember to walk them back to the shed.
Oil and clean tools
Now that you’ve recovered your neglected tools, it’s a great time to give them some TLC. Clean off any dirt with a dry brush, sharpen the blades and apply a protective coat of oil to prevent rusting and keep your tools in top-notch condition. For your more precious tools (like my Felcos) it’s worth taking the time to learn how to disassemble and oil any interior components. I know it seems like a lot of tiny pieces, but if you spend a bit of time watching how-tos on YouTube, anyone can do it with an hour or two to spare. This small effort pays off when spring arrives, and you can dive straight into gardening without dealing with rusty, malfunctioning tools.
Disconnect hoses

Frozen hoses can lead to burst pipes and costly repairs. To avoid this, disconnect and drain hoses before temperatures plummet. In most modern homes, each exterior spigot should have its own shut off point. Storing them in a shed or garage ensures they stay in good shape, ready for use when the growing season returns.
Make leaf mold
The more leaves you can “leaf” in place, the happier your lawn and neighborhood wildlife will be. But if you must rake up your leaves, you should definitely turn them into leaf mold. Creating a dedicated spot in your yard for leaves to break down will result in a rich, crumbly material that acts as a fantastic soil conditioner, improving the structure and fertility of your garden soil. It's a sustainable way to recycle nature's abundance and enhance your garden's health.
Wrap trees
Especially in very cold climates like mine, young trees or those susceptible to winter damage benefit from being wrapped with burlap or tree wrap. This protective layer shields the bark from harsh winter conditions, preventing sunscald and frost cracks. It's a simple yet effective measure for the long-term health of your trees.
Mulch perennials
We aren’t the only ones who benefit from an extra blanket or two in the winter months. A layer of mulch such as wood chips, pine needles or straw around perennial plants acts as insulation, protecting their roots from extreme temperatures. It also helps retain moisture and suppresses weeds, contributing to the overall well-being of your garden beds during the winter months. A good rule of thumb is to use four to six inches of mulch around the plants - just don’t press the mulch up against the plant itself. We are insulating the roots, not the aboveground parts.
Empty outdoor planters so they don’t crack
Freezing and thawing cycles can cause soil in containers to expand and contract, which can cause your clay or ceramic pots to crack. To avoid this, empty out some or all of the soil from your breakable containers or, if space allows, move them to a sheltered area. This simple step ensures your pots remain intact and ready for planting in the spring.
Prep new garden bed areas with cardboard and compost
If you're planning new garden beds for the next growing season, winter is an excellent time to start preparing the ground using the lasagna method. Lay down untreated cardboard to smother weeds and grass, and top it with compost, leaves or straw. This not only enriches the soil but also creates a weed-free foundation for your future garden.
Cover crops
Sowing cover crops, such as winter rye or clover, during the fall is a smart way to protect and improve your garden soil. These crops prevent soil erosion, suppress weeds, and add organic matter as they decompose. Come spring, you can easily incorporate them into the soil, providing a nutrient boost for your plants.
Cover raised beds
This one is more specific to my raised beds because they are off of the ground. While they are weather resistant on their own being made of cedar, in order to make them last as long as possible I grabbed firewood rack covers that are the exact size of my raised beds. These waterproof covers will protect my beds from the elements - but be aware that they can cause soil to turn hydrophobic if they totally dry out over the winter and aren’t typically necessary with standard raised beds. Because my raised beds also have wicking trays built into them, I’ve disconnected the tubes underneath so water won’t sit stagnant in the beds all winter. The arch trellises are powder coated, so they’ll be just fine out in the elements over the winter.
Watch me prep my own garden over on YouTube!
There’s always more that can be done to prepare the garden for winter, and some tips will be more specific to your garden setup. But with all this checked off my list, I’m looking forward to a slower season of rest and planning, organizing my seed collection (and let’s be real, buying a lot more) as well as drawing up new garden bed layouts for the spring. What are you doing to prep your garden for the winter months now?
Debunking Soil Myths: Solving The Mysteries Behind Good Soil Health
Knowledge of soil conditions allows gardeners to tailor their gardening practices to the specific needs of their plants. This includes choosing appropriate planting times, selecting suitable varieties, and implementing effective weed control strategies.
What’s so important about garden soil anyway?
Soil provides the foundation for plant growth. Different plants have specific soil requirements in terms of texture, composition, and pH levels. Understanding the soil allows gardeners to choose plants that are well-suited to the conditions, promoting healthier and more robust growth.
Soil serves as a reservoir for essential nutrients that plants need for their growth and development. By understanding soil composition, gardeners can identify nutrient deficiencies or excesses and adjust fertilizer applications accordingly. This ensures that plants receive the right balance of nutrients for optimal health.
Soil influences water retention and drainage. Some soils retain water well, while others drain quickly. Understanding soil characteristics helps gardeners implement appropriate watering practices. Overwatering or underwatering can lead to problems like root rot or dehydration, so a balanced approach is essential.
Knowledge of soil types and structures enables gardeners to implement erosion control measures. Certain plants and groundcovers can help prevent soil erosion, ensuring that valuable topsoil is retained and not washed away during heavy rainfall.
Soil structure, influenced by its texture and organic matter content, plays a role in aeration and root penetration. Gardeners can take steps to improve soil structure, such as adding organic amendments, which enhances the overall health of the soil and facilitates better plant growth.
Knowledge of soil conditions allows gardeners to tailor their gardening practices to the specific needs of their plants. This includes choosing appropriate planting times, selecting suitable varieties, and implementing effective weed control strategies.
What are the Key Factors Impacting Soil Health?
Several key factors influence soil health. The relative proportions of sand, silt, and clay in the soil determine its texture. Different textures impact water retention, drainage, and nutrient availability. The amount of organic material in the soil affects its fertility, structure, and water-holding capacity. Organic matter improves soil structure and provides essential nutrients for plant growth.
The pH level of the soil indicates its acidity or alkalinity. Different plants have specific pH preferences. Soil pH influences nutrient availability, microbial activity, and overall plant health. Essential nutrients, such as nitrogen, phosphorus, potassium, and micronutrients, are crucial for plant growth. Soil testing helps determine nutrient levels, allowing gardeners to adjust fertilizer applications based on plant needs.
Healthy soil is teeming with microorganisms like bacteria, fungi, and protozoa. These microbes play a vital role in nutrient cycling, organic matter decomposition, and disease suppression. A diverse and active microbial community contributes to soil fertility.
Soil structure influences water retention and drainage. Sandy soils drain quickly but may not retain enough water, while clayey soils can retain water but may drain poorly. Ideal soil structure balances water retention and drainage.
Adequate aeration is crucial for root health and microbial activity. Compacted soil restricts air movement, leading to poor aeration. Practices such as tilling and adding organic matter can improve soil aeration. Soil erosion can degrade soil health by removing the topsoil layer. Factors like slope, rainfall, and vegetation cover influence erosion rates. Implementing erosion control measures, such as cover cropping and mulching, helps protect soil.

Biodiversity in the soil includes a variety of plants, microbes, and other organisms. Diverse ecosystems contribute to soil health by enhancing nutrient cycling, pest control, and overall ecosystem resilience.
Exploration of Soil Texture (Sand, Silt, Clay)
Soil is composed of mineral particles, organic matter, water, and air. The relative proportions of three main mineral particles—sand, silt, and clay—determine the soil's texture. Each type of soil particle has distinct characteristics, influencing the soil's properties and its suitability for different plants.
Sand particles are the largest among the three soil types, with diameters ranging from 0.05 to 2.0 millimeters. Sandy soil feels gritty and coarse to the touch. Sand has excellent drainage due to large particles, but water retention is low. It has good aeration, as sand allows air to move freely through the soil, but low fertility, as sand doesn't retain nutrients well. It is suitable for plants that prefer well-draining soil, such as cacti and succulents.
Silt particles are smaller than sand but larger than clay, with diameters ranging from 0.002 to 0.05 millimeters. Silty soil feels smooth and flour-like when dry and slippery when wet. Silt has oderate drainage and retains water better than sand. It compacts more easily than sand and is better at retaining nutrients than sand but not as well as clay. It is suitable for a wide range of plants, but benefits from organic matter to improve fertility and structure.
Clay particles are the smallest among the three, with diameters less than 0.002 millimeters. Clay soil feels smooth and sticky when wet and hard and clumpy when dry. Clay has poor drainage but retains water very well. It easily becomes compacted, but has high fertility. Clay soil is suitable for plants that tolerate or benefit from moisture retention, such as certain vegetables and water-loving plants.
Understanding the soil texture in a particular area helps gardeners make informed decisions about plant selection, watering practices, and soil amendments. Loam is a balanced soil type that contains a mixture of sand, silt, and clay, offering good drainage, aeration, and fertility. Gardeners often aim to improve soil structure by adding organic matter, which benefits all soil types by enhancing water retention, nutrient availability, and overall soil health.
Why You Should Add Organic Matter to Soil
Organic matter is a cornerstone of soil health, influencing nutrient availability, soil structure, water retention, and overall ecosystem dynamics. Organic matter acts as a reservoir for essential nutrients such as nitrogen, phosphorus, and potassium. It has the ability to retain and slowly release these nutrients to plant roots, ensuring a steady supply for optimal growth.
Organic matter improves soil structure by promoting the formation of aggregates. This enhances soil porosity, allowing for better water infiltration and root penetration. Well-structured soil facilitates root development and provides aeration. It also increases the soil's water-holding capacity. It can absorb and retain water, making it available to plants during dry periods. This is especially beneficial in sandy soils with poor water retention.
Organic matter serves as a food source for soil microbes. Microorganisms, including bacteria and fungi, break down organic matter into simpler compounds, releasing nutrients in a form that plants can absorb. This microbial activity contributes to overall soil fertility. It has a buffering effect on soil pH. It helps stabilize soil pH levels, preventing rapid fluctuations. This is important because many plant nutrients are most available within specific pH ranges.
Some components of organic matter, like certain compounds produced during decomposition, can have suppressive effects on soil-borne diseases. This contributes to the overall health of plants in the soil. And the improvement of soil structure through organic matter helps prevent soil erosion. Stable soil structure reduces the risk of topsoil being washed away during heavy rainfall.
Common Myths About Soil
Myth 1: Fertilizer Can Fix Any Soil Issue
While fertilizers are valuable tools for enhancing soil fertility and promoting plant growth, they come with certain limitations that need to be considered. Fertilizers typically provide specific nutrients such as nitrogen, phosphorus, and potassium. However, they may not contain the full spectrum of micronutrients and trace elements that plants need for optimal growth. Over-reliance on specific fertilizers may lead to nutrient imbalances.
Excessive use of fertilizers can lead to overapplication of nutrients. This not only wastes resources but can also have detrimental effects on the environment. Nutrient runoff from fields into water bodies can contribute to water pollution and ecological imbalances. The production, transportation, and application of synthetic fertilizers have environmental implications. The manufacturing process often involves energy-intensive procedures, and the runoff of excess nutrients can contribute to issues like algal blooms and waterway pollution. Continuous reliance on fertilizers without considering soil health and organic matter can create a dependency on external inputs. This may lead to a decline in natural soil fertility and long-term sustainability issues.
Certain fertilizers can influence soil pH. For example, nitrogen-based fertilizers can contribute to soil acidification over time. This can impact nutrient availability and the overall health of the soil. Some fertilizers, especially those containing high concentrations of salts, can lead to salt accumulation in the soil. This can be harmful to plant roots, affecting their ability to take up water and nutrients.
Plants may not utilize all the nutrients provided by fertilizers. Factors such as soil conditions, weather, and plant health can affect the efficiency of nutrient uptake. Unutilized nutrients may contribute to environmental pollution. Fertilizers provide a short-term solution to nutrient deficiencies. While they can boost plant growth in the immediate term, they do not address underlying soil health issues. Sustainable practices, such as incorporating organic matter, are necessary for long-term soil fertility.
Myth 2: All Soils Are the Same
Soils are incredibly diverse, and their variations arise from a combination of factors such as climate, parent material, topography, vegetation, and time. The geological material from which soils develop, known as parent material, greatly influences soil properties. Different types of rocks and minerals contribute distinct minerals to the soil, impacting its texture, nutrient composition, and overall characteristics.
Climate plays a significant role in soil formation. The amount and distribution of rainfall, temperature fluctuations, and freeze-thaw cycles all contribute to the physical and chemical weathering of rocks. These weathering processes shape the texture and composition of soils in a particular region.
The landscape, or topography, influences how water moves across the soil. Sloped areas may experience more erosion, leading to differences in soil depth and composition. Flat or valley regions may accumulate sediments differently, resulting in varied soil profiles.
The types of plants that grow in an area impact soil characteristics. Plants contribute organic matter through leaf litter and root systems, influencing soil structure, nutrient cycling, and microbial activity. Different vegetation types lead to variations in soil organic content. The presence and activity of soil organisms, such as bacteria, fungi, earthworms, and insects, contribute to soil diversity. Biological processes, including decomposition and nutrient cycling, vary across different ecosystems, shaping the unique characteristics of soils.
The acidity or alkalinity of soils, represented by pH levels, can vary widely. Different plants have specific pH preferences, influencing the types of vegetation that thrive in a particular soil and, consequently, the characteristics of that soil. Specific geographical features, such as river valleys, hills, and coastal plains, contribute to variations in soil types. The proximity to water bodies, elevation changes, and drainage patterns all play roles in shaping the unique characteristics of soils in different regions.
Myth 3: Vinegar as weed killer won’t damage soil
The myth that vinegar as a weed killer won't damage soil stems from the belief that because vinegar is a natural substance, it won't have negative impacts on the soil. However, this notion oversimplifies the complexity of soil ecosystems and the potential consequences of using vinegar as a weed killer. Vinegar is acidic, and its acetic acid content is what makes it effective in killing weeds. However, high acidity can have detrimental effects on soil pH. Excessive use of vinegar can lead to soil acidification, negatively impacting nutrient availability and the overall health of the soil. Soil is home to a diverse community of microorganisms crucial for nutrient cycling, decomposition, and overall soil health. The acidity of vinegar can potentially harm beneficial soil microbes, disrupting the balance of the soil ecosystem.
Vinegar-based weed killers are non-selective, meaning they can harm both weeds and desirable plants. Overspray or unintended contact with plants you want to keep can result in damage, affecting the overall plant diversity in the area.
Vinegar is a contact herbicide, meaning it primarily affects the parts of the plant it comes into direct contact with. It may not address the underlying causes of weed growth, such as soil compaction or nutrient imbalances, making it a short-term solution.
There are alternative, more sustainable practices for weed control that don't pose risks to soil health. For example, mulching, hand weeding, and maintaining proper plant spacing are methods that promote weed suppression without negatively impacting the soil.

Myth 4: Tilling is Always Beneficial
Tilling, or the mechanical cultivation of soil, has been a traditional practice in agriculture for centuries. While it can offer benefits in certain situations, there are instances where tilling the soil may not be a good idea due to various drawbacks. Tilling can disrupt the natural structure of the soil. It breaks down soil aggregates and destroys pore spaces, leading to compaction over time. This impairs water infiltration, root penetration, and air circulation, affecting overall soil health. Tilled soil is more susceptible to erosion, especially in areas with sloping terrain. The disruption of the soil surface removes natural protection against water and wind erosion, leading to the loss of valuable topsoil.
Tilling accelerates the decomposition of organic matter in the soil. Organic matter is crucial for soil fertility, structure, and water retention. Excessive tilling can deplete organic matter, leading to nutrient deficiencies and reduced soil quality. Tilling brings buried weed seeds to the surface, exposing them to light and promoting germination. This can lead to increased weed growth, counteracting the initial purpose of tilling.
Tilling disrupts the habitat of soil microorganisms. Beneficial microbes play a key role in nutrient cycling, organic matter decomposition, and disease suppression. Excessive tilling can harm these microbes, impacting soil fertility and ecosystem balance. And while tilling initially loosens the soil, repeated or improper tilling can contribute to long-term soil compaction. The disruption of soil structure and creation of a plow pan can hinder water movement and root development.
Conservation tillage and no-till practices have gained popularity as alternatives to traditional tilling. These methods help maintain soil structure, reduce erosion, and conserve moisture while minimizing the negative impacts associated with frequent and intensive tilling.
WHAT SOIL IS BEST FOR RAISED BEDS?
The best soil for traditional raised beds that sit on the ground is a mix of topsoil, compost, and sand. Topsoil provides nutrients and drainage. Compost improves the soil quality. And sand helps to aerate the soil. You can buy a pre-made mix of soil for raised beds or you can make your own. I always recommend Coast of Maine soil mixes for filling raised beds. Their Castine Blend™ Organic & Natural Raised Bed Mix is the ideal soil for raised bed organic gardening. It is carefully formulated to provide balance between structure, water retention, drainage and aeration for growing strong, vigorous vegetables, herbs and flowers in raised beds, planter boxes or other container gardens. It provides your garden the rich and diverse soil it needs.
Coast of Maine prides themselves on using a high quality enriched blend of fully cured compost, sphagnum peat moss, dehydrated poultry manure, lobster and crab shell meal, greensand, biochar, worm castings and mycorrhizae in their mixes. Close attention to detail with frequent turning, sampling and testing plus a lengthy aging and curing process produces dark, rich compost that builds soil and enhances plant growth.
If you are gardening in elevated raised beds like mine that are on legs, these are technically considered container gardens. It is important to use a lightweight potting mix (which has no actual soil in it) since your container gardens have different drainage and weight requirements.
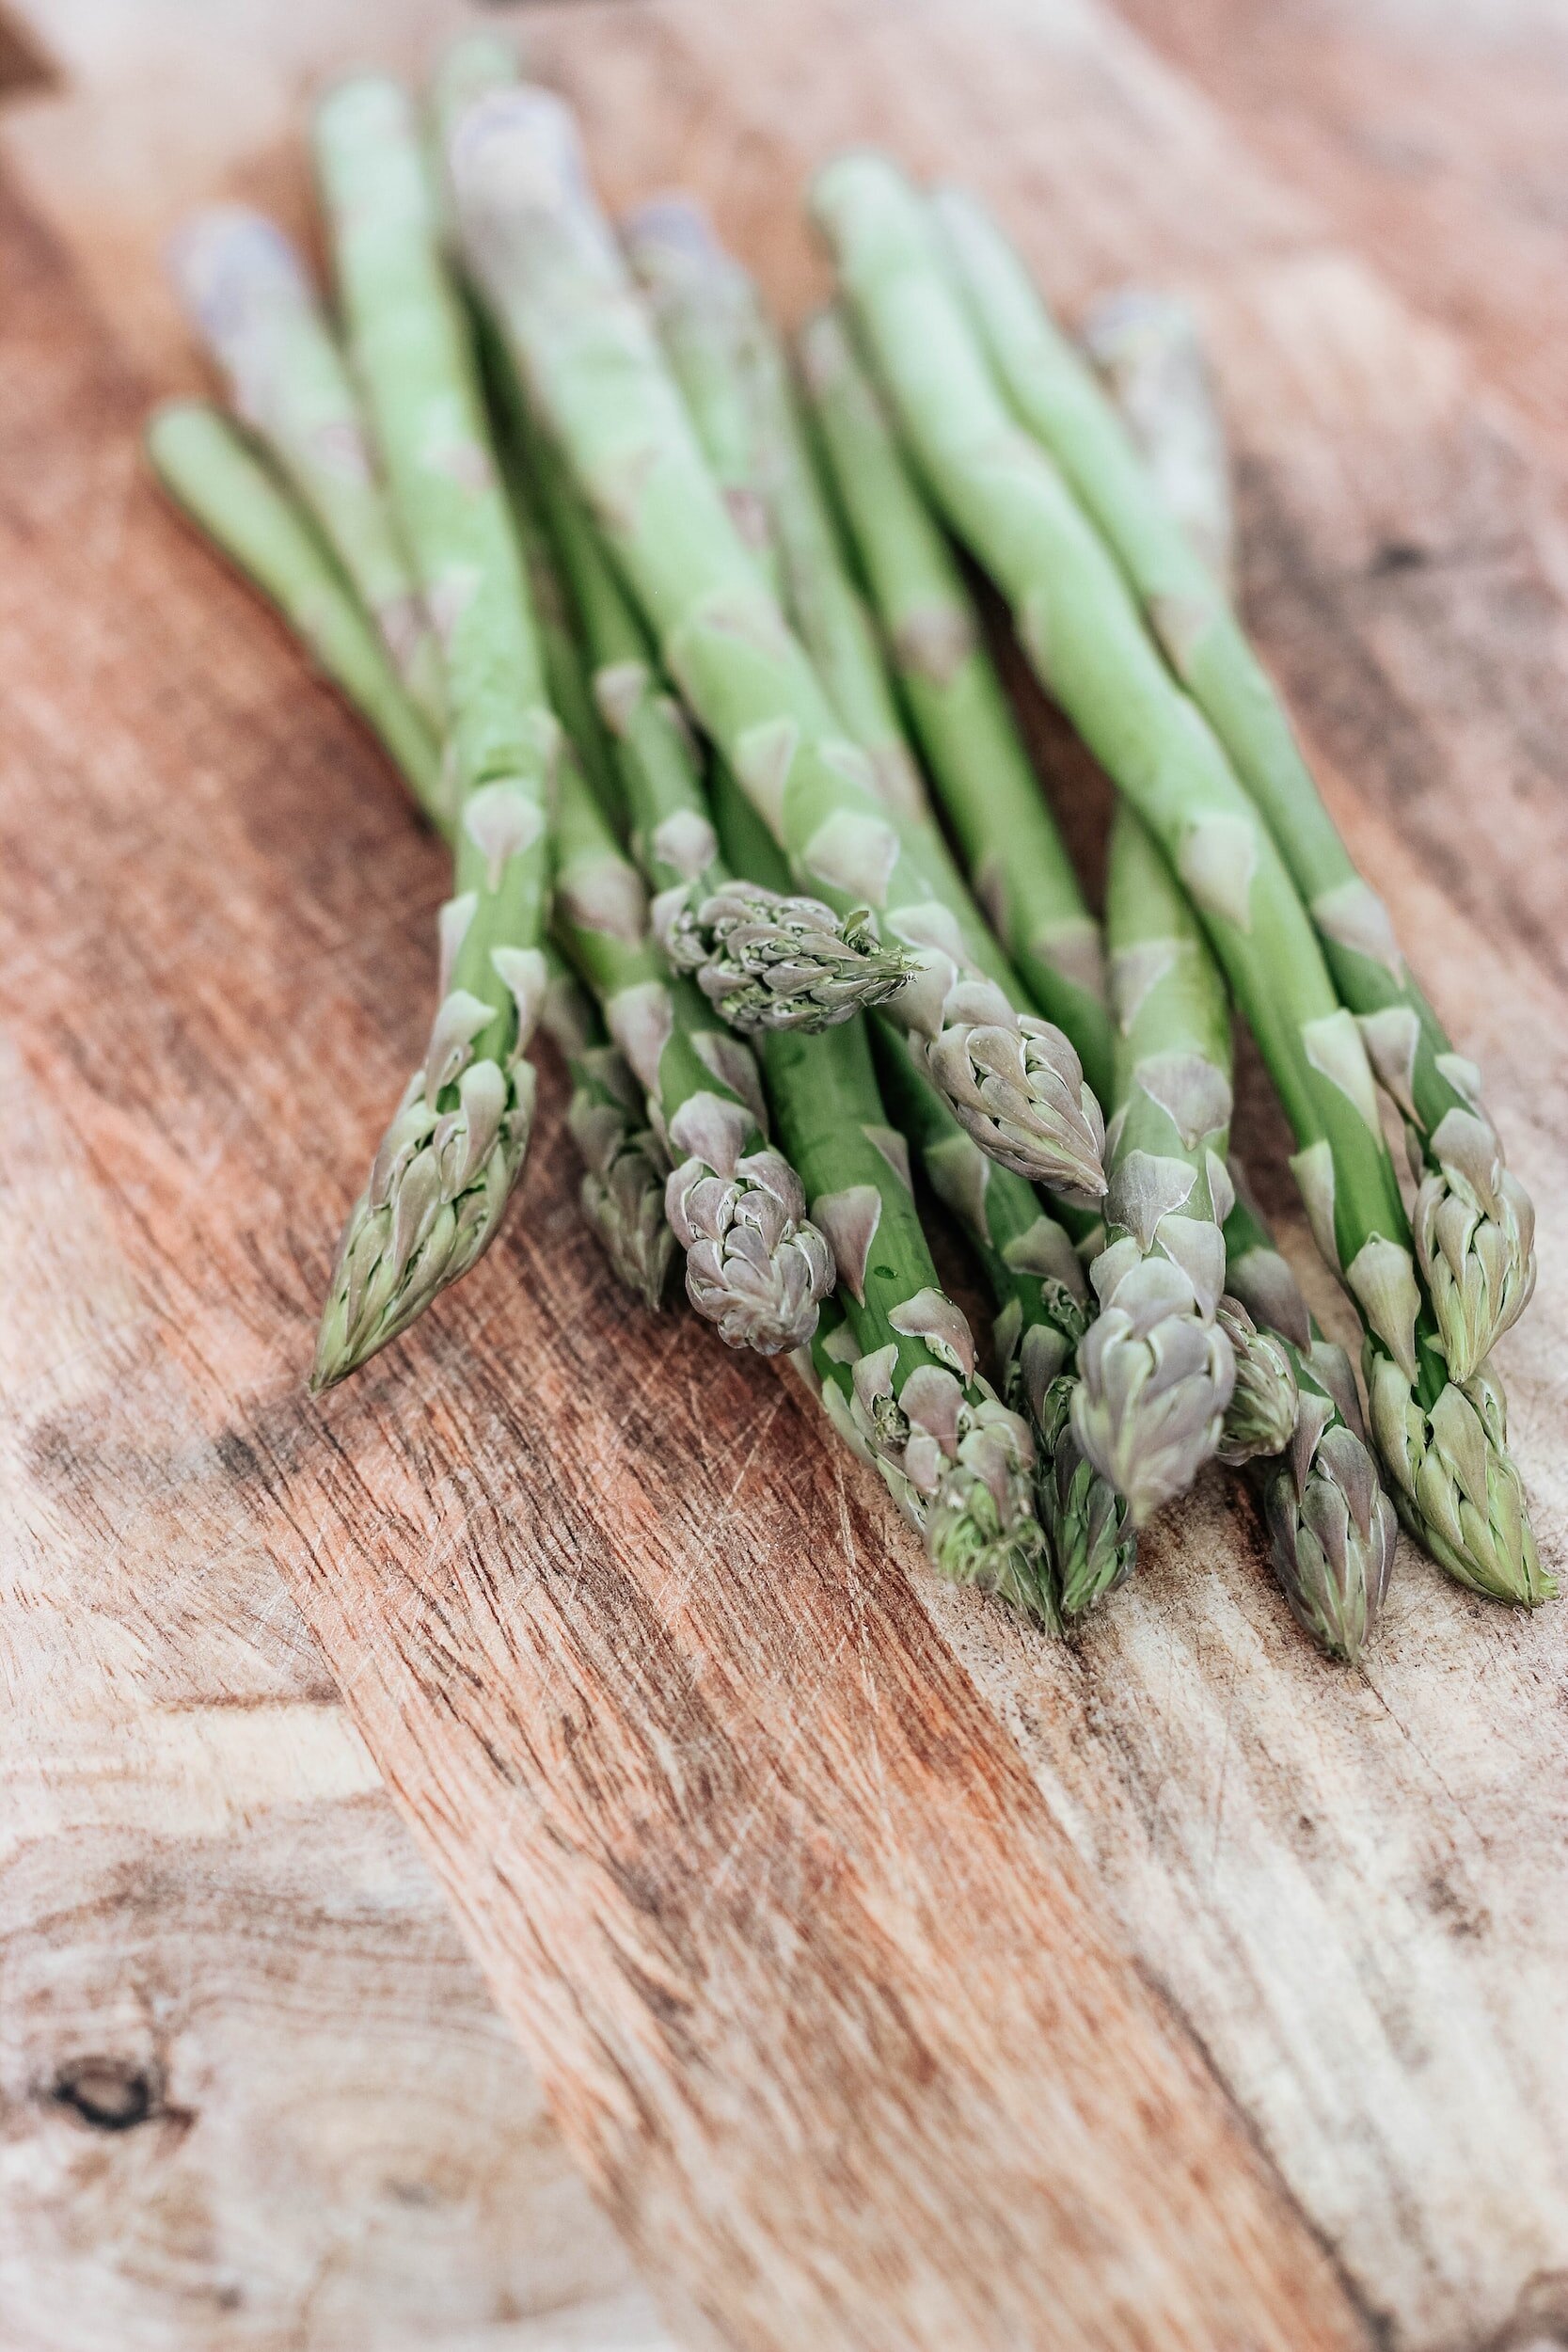
![Step-By-Step Tips For Growing, Harvesting, Storing, and Using Asparagus [Guide]](https://images.squarespace-cdn.com/content/v1/60e85024dc86d643da81c96a/1687364468764-ABN29K3UWFK6D0UQS9RR/image-asset.jpeg)
Step-By-Step Tips For Growing, Harvesting, Storing, and Using Asparagus [Guide]
The advantages of growing asparagus extend beyond its exquisite flavor. One of the most appealing aspects of cultivating asparagus is its long lifespan. Unlike annual vegetables that require replanting every year, asparagus plants can thrive for up to 20 years or more with proper care. This longevity translates to an abundant supply of fresh asparagus spears, providing you with a steady harvest for many seasons to come.

Renowned for its tender spears, asparagus brings a unique taste to dishes and adds a touch of elegance to any meal. Its mild yet distinctive flavor pairs well with a variety of ingredients, making it a favorite among chefs and home cooks. Whether sautéed, grilled, roasted, or used in creamy soups and savory tarts, asparagus always delivers a delightful culinary experience.
But the advantages of growing asparagus extend beyond its exquisite flavor. One of the most appealing aspects of cultivating asparagus is its long lifespan. Unlike annual vegetables that require replanting every year, asparagus plants can thrive for up to 20 years or more with proper care. This longevity translates to an abundant supply of fresh asparagus spears, providing you with a steady harvest for many seasons to come.
Furthermore, asparagus boasts a high yield potential, making it a rewarding crop to grow at home. Once established, a well-maintained asparagus bed can produce a generous harvest year after year. With patience and dedication, you can enjoy an ample supply of succulent spears, giving you the freedom to indulge in your favorite asparagus-based recipes throughout the growing season.
Additionally, asparagus is a nutritious addition to your diet. Packed with vitamins A, C, and K, as well as folate and dietary fiber, it offers a range of health benefits. Asparagus is also low in calories and sodium.
What asparagus variety should you grow?
When it comes to choosing asparagus varieties for your garden, you have several options to consider. Each variety has its own unique characteristics, including spear color, thickness, and flavor profile.
'Mary Washington': This is one of the most popular asparagus varieties among home gardeners. It produces medium to large-sized green spears with a traditional asparagus flavor. 'Mary Washington' is known for its vigorous growth and high yield potential. It is well-adapted to various climates and is moderately resistant to diseases, making it a reliable choice for many gardeners.
'Jersey Giant': If you're looking for thick, tender spears, 'Jersey Giant' is an excellent option. This variety is known for its robust growth and the ability to produce large-sized, green spears with a slightly sweeter flavor compared to other varieties. 'Jersey Giant' performs well in a wide range of climates and exhibits good disease resistance, making it a popular choice for both home gardeners and commercial growers.
'Purple Passion': For those seeking a unique twist to their asparagus harvest, 'Purple Passion' is a standout variety. This striking cultivar produces vibrant purple spears that turn green when cooked. Not only does it add visual interest to your garden and plate, but it also offers a slightly sweeter and more delicate flavor compared to traditional green asparagus varieties. 'Purple Passion' thrives in both cool and warm climates and demonstrates good disease resistance.
Choosing Where to Grow Asparagus
Asparagus plants require full sun to thrive and produce a bountiful harvest. Choose a site that receives at least 6 to 8 hours of direct sunlight each day. Avoid areas with excessive shade from trees, buildings, or other structures that may block sunlight and hinder the plant's growth.
Asparagus prefers well-draining soil to prevent waterlogging and root rot. It is crucial to select a location with soil that drains well, as waterlogged soil can lead to the decline of asparagus plants. Avoid low-lying areas or places prone to water accumulation. If you have heavy clay soil, consider amending it with organic matter, such as compost or well-rotted manure, to improve drainage.
Asparagus is a long-lived perennial plant that can remain productive for 15 to 20 years or even longer. Therefore, it's important to choose a permanent location for your asparagus bed. Asparagus plants develop deep and extensive root systems, so it's best to avoid transplanting them once they are established. Plan ahead and choose a spot where your asparagus bed can remain undisturbed for many years.
To prepare the soil, start by removing any weeds or grass from the area. Dig the soil to a depth of about 12 to 18 inches and remove rocks, roots, and debris. Incorporate organic matter, such as compost or well-rotted manure, into the soil to improve its fertility, drainage, and water-holding capacity. This will provide a nutrient-rich environment for your asparagus plants to thrive.
Additionally, consider adding a balanced organic fertilizer to provide essential nutrients for the asparagus plants. Follow the recommended application rates based on the product instructions and the results of a soil test, if available.
How to Plant Asparagus
When it comes to planting asparagus, there are two main methods you can choose from: planting from crowns or growing from seeds. Each method has its own advantages and considerations.
Planting from Crowns
Planting asparagus crowns is the most common and recommended method, as it allows you to establish your asparagus bed more quickly and ensures a higher success rate.
Selecting Crowns: Purchase high-quality asparagus crowns from a reputable nursery or garden center. Look for healthy, firm crowns with intact roots. It's best to choose varieties that are known to perform well in your region.
To plant asparagus crowns, dig trenches or furrows in the prepared bed, with a depth of about 6 to 8 inches. Space the trenches about 3 feet apart to allow enough room for the asparagus plants to spread and grow. Place the asparagus crowns at the bottom of the trenches, spacing them about 12 to 18 inches apart.
Gently spread the roots of each crown in the trench and cover them with 2 to 3 inches of soil. Gradually fill in the trenches as the asparagus plants grow, ensuring that the crowns are fully covered with soil by the end of the planting process.
After planting, water the asparagus bed thoroughly to help settle the soil and promote root establishment. Apply a layer of organic mulch, such as straw or shredded leaves, around the plants to suppress weeds, retain moisture, and maintain a more consistent soil temperature.
Growing Asparagus from Seed
Growing asparagus from seeds requires more patience and time, as it takes longer for the plants to establish and reach maturity. However, it can be a cost-effective method, especially if you have access to asparagus seeds or want to experiment with different varieties.
Start asparagus seeds indoors about 10 to 12 weeks before the last frost date in your area. Plant the seeds in seed trays or pots filled with seed starting mix, sowing them at a depth of about ¼ inch. Keep the soil consistently moist and provide warmth and adequate light for germination.
Once the seedlings have developed several sets of true leaves and the danger of frost has passed, they can be transplanted into the garden bed. Space the seedlings about 12 to 18 inches apart in rows or in a designated asparagus bed.
Remember that growing asparagus from seeds requires more time and patience compared to planting crowns. However, it can be a rewarding and cost-effective option if you are willing to wait for the plants to mature.
Caring for Asparagus Plants
Regular watering is essential for asparagus plants, especially during dry spells or periods of prolonged heat. Asparagus requires consistent moisture to thrive.
Mulching is beneficial for asparagus beds as it helps retain soil moisture, regulate soil temperature, and suppress weed growth. Apply a layer of organic mulch, such as straw, wood chips, or shredded leaves, around the base of the asparagus plants. This will help conserve moisture in the soil, reduce the need for frequent watering, and provide insulation during extreme weather conditions.
Weed control is essential for asparagus plants, as weeds compete with the asparagus for nutrients, water, and sunlight. Regular weeding is necessary to prevent weed growth and keep the asparagus bed free from competition. Remove weeds by hand or use a hoe or cultivator to gently loosen the soil and uproot any unwanted vegetation. Be careful not to disturb the shallow roots of the asparagus plants while weeding.
What are Asparagus Ferns?
Asparagus ferns are the leafy, feathery growth that emerges from mature asparagus plants. These ferns play a crucial role in the health and vitality of the asparagus plant. They collect sunlight and convert it into energy through photosynthesis, which is then transported to the plant's roots to nourish them. This energy helps the roots develop and store nutrients for the next growing season.
Cutting back asparagus ferns at the appropriate time is essential for maintaining the health and productivity of the asparagus plant. After the ferns have turned yellow or brown in the fall, you can prune them back to the ground. This pruning helps prevent the ferns from self-seeding and conserves energy for the roots. By cutting back the foliage, the plant can redirect its resources towards root development and nutrient storage during the dormant period.
Using sharp pruning shears or scissors, carefully remove the ferns at ground level. Be sure to dispose of the cut foliage to prevent any potential diseases or pests from spreading.
Common Asparagus Pests
Asparagus plants may encounter pests that can affect their growth and productivity. Two common pests that target asparagus plants are asparagus beetles and aphids.
Asparagus beetles are small, elongated insects that feed on asparagus foliage and lay eggs on the plants. Both the adult beetles and their larvae can cause damage to the foliage, leading to reduced plant vigor and yield.
Aphids are tiny, soft-bodied insects that can cluster on the undersides of asparagus leaves and feed on their sap. Their feeding can cause stunted growth, yellowing of leaves, and distorted foliage.
Harvesting and Storing Asparagus
Asparagus spears should be harvested when they reach a height of 6 to 8 inches. This usually occurs in the second or third year after planting, once the plants have become established. Harvesting too early may result in thin, weak spears, while waiting too long may lead to tough and woody stalks.
To harvest asparagus you don’t need any tools. Just hold the spear near the base of the plant and bend to the side until the spear snaps off at its natural breaking point. Harvesting spears regularly promotes the development of new spears and encourages continued growth throughout the season.
Storing Asparagus
Asparagus is best stored in the refrigerator to maintain its freshness. To do this, wrap the spears in a damp paper towel or place them in a glass of water. Store them in the vegetable crisper section of your refrigerator, where they can stay fresh for up to one week.
Caring for Asparagus Over the Winter
Asparagus plants require proper care during the winter months to ensure their survival and maintain their health for the following growing season. One essential task is cutting back the ferns. In late fall or early winter, after the foliage has turned yellow or brown, use pruners or shears to cut the ferns down to ground level. Removing the dead foliage prevents disease and pests from overwintering in the plant debris.
Adding organic mulch around asparagus beds offers several benefits during the winter season. A layer of mulch helps insulate the soil and regulate temperature fluctuations, protecting the asparagus crowns and roots from extreme cold. Organic mulch, such as straw, hay, or compost, also helps retain moisture and suppress weed growth. Apply a thick layer of mulch, about 2 to 3 inches deep, around the base of the asparagus plants, taking care not to bury the crowns.
Growing asparagus in your own garden can be a rewarding and satisfying experience. From selecting the right varieties to planting, caring, and harvesting, the process allows you to enjoy the delectable flavor of fresh asparagus while reaping the numerous health benefits it provides. Start your own asparagus garden, savor the taste of homegrown goodness, and experience the satisfaction of harvesting your own spears.
![Step-By-Step Tips For Growing, Harvesting, Storing, and Using Blackberries [Guide]](https://images.squarespace-cdn.com/content/v1/60e85024dc86d643da81c96a/1687363841431-GM8UBNSCD0T0QG8EO2F1/image-asset.jpeg)
Step-By-Step Tips For Growing, Harvesting, Storing, and Using Blackberries [Guide]
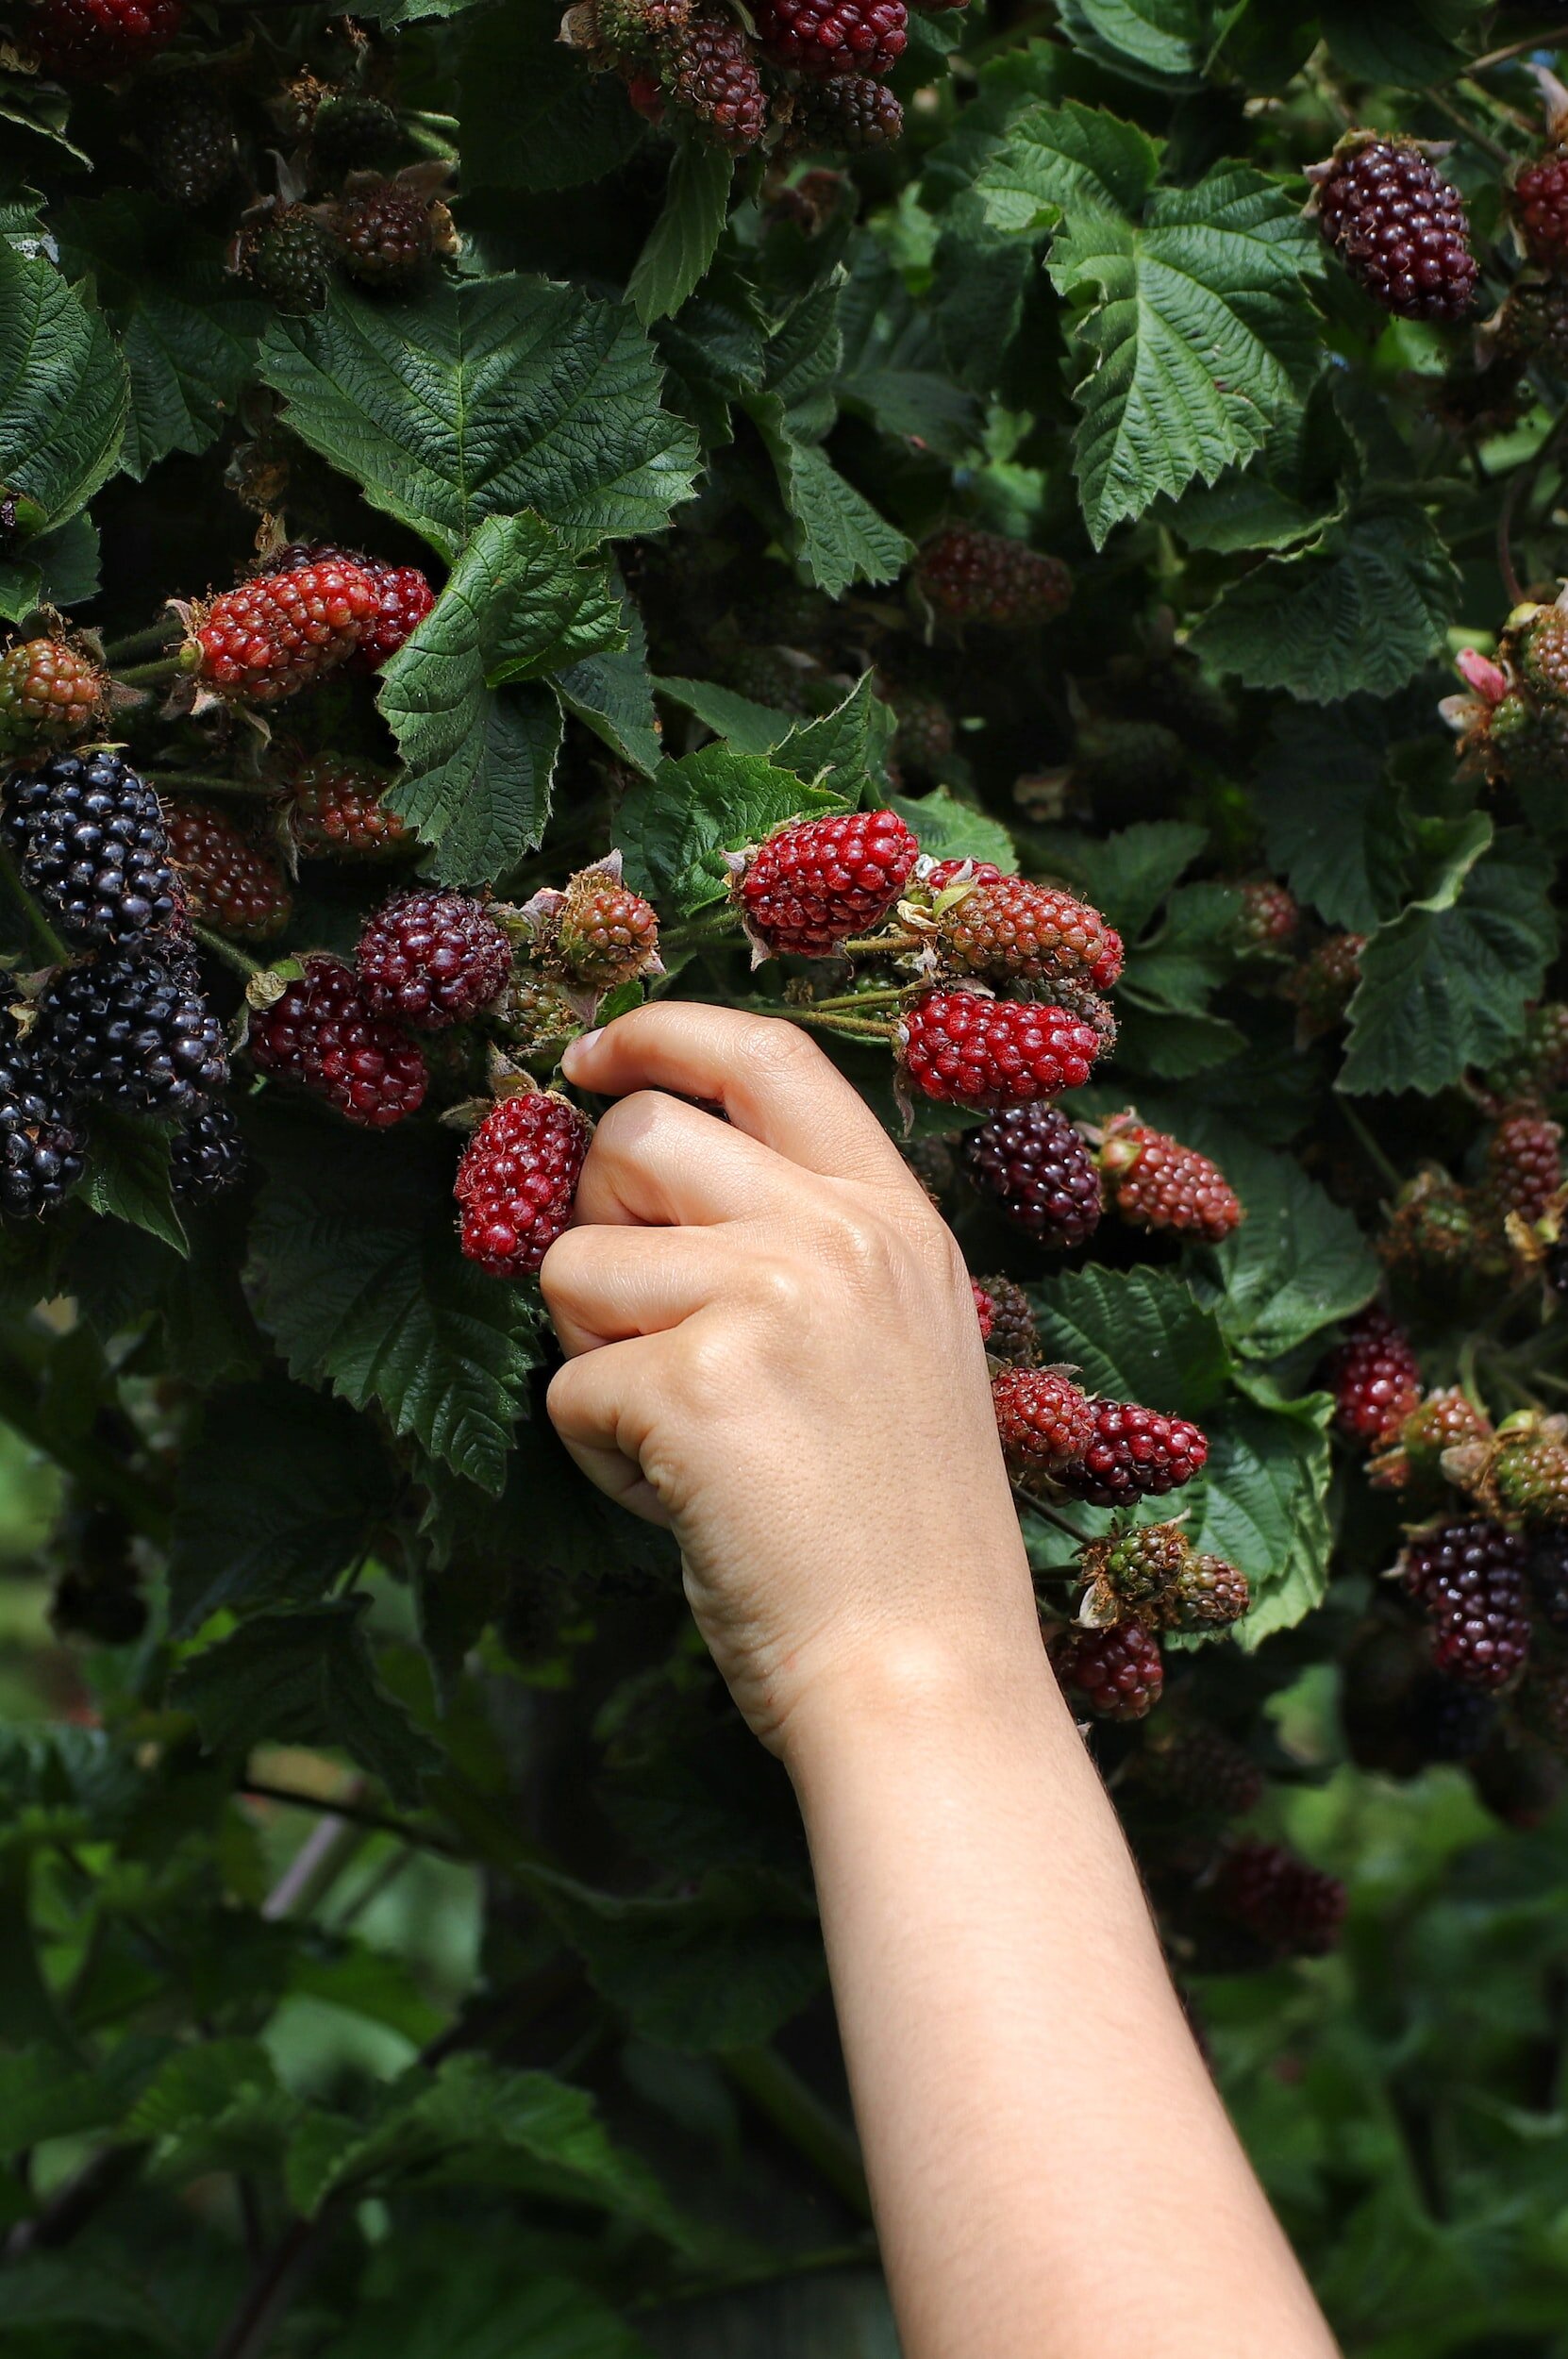
Blackberries, known for their sweet and tangy flavor, are a popular choice for gardeners looking to cultivate their own fresh and juicy berries. These delectable fruits belong to the Rubus genus and are closely related to raspberries. With their dark purple to black color and unique texture, blackberries are not only a delight to the taste buds but also a visually appealing addition to any garden.
Blackberries, known for their sweet and tangy flavor, are a popular choice for gardeners looking to cultivate their own fresh and juicy berries. These delectable fruits belong to the Rubus genus and are closely related to raspberries. With their dark purple to black color and unique texture, blackberries are not only a delight to the taste buds but also a visually appealing addition to any garden.
Blackberries are not just a delicious treat but also a nutrient powerhouse. They are rich in vitamins C and K, fiber, and antioxidants, making them a healthy addition to your diet. Growing blackberries in your own garden allows you to enjoy these nutritional benefits without worrying about harmful pesticides or chemicals commonly found in store-bought produce.
Choosing Blackberry Varieties
Blackberries come in various cultivars, each with its own unique characteristics and qualities. Some popular blackberry varieties include Thornless Evergreen, Apache, and Triple Crown. These varieties are well-regarded among home gardeners for their exceptional fruit quality and growth habits.
Thornless Evergreen is a popular variety known for its thornless canes, making it easier to handle during harvesting and maintenance. It produces medium-sized berries with a pleasant balance of sweetness and tartness. Thornless Evergreen is known to be cold-hardy and performs well in various climates, making it a versatile choice for many regions.
Apache, on the other hand, is prized for its large and firm berries with a rich, sweet flavor. This variety is also known for its vigorous growth habit and excellent disease resistance, making it a reliable choice for many gardeners. Apache is known for its adaptability to different climates, including both colder and warmer regions. It can tolerate heat and humidity, making it suitable for areas with hot summers.
Triple Crown is renowned for its exceptionally large, sweet berries that are perfect for fresh consumption or adding to desserts. It features a semi-erect growth habit, making it easier to manage and harvest. Triple Crown is known for its ability to thrive in warmer climates, although it can also be grown in colder regions with proper care and protection.
Where to Plant Blackberries
Blackberries thrive in full sun, which is typically defined as at least six to eight hours of direct sunlight per day. This ensures optimal growth and fruit production. Additionally, well-drained soil is crucial for blackberries as they are susceptible to root rot and other diseases in overly wet or waterlogged conditions. Adequate drainage promotes healthy root development and reduces the risk of water-related issues.
First and foremost, ensure the location receives full sun exposure for the majority of the day to promote optimal growth and fruiting. Blackberries also require well-drained soil to prevent waterlogged conditions and root diseases. Avoid areas prone to flooding or with heavy clay soils that retain water. Furthermore, consider the protection from strong winds, as excessive wind can damage the canes and hinder fruit production. If possible, select a location with natural windbreaks, such as fences or nearby structures, or consider planting windbreak plants. Additionally, take into account the proximity to other plants or structures that may shade the blackberry bushes, as this can reduce sunlight exposure and impact their growth and fruiting potential.
Planting Blackberries
Blackberries are best planted during their dormant season when they are not actively growing. Late fall or early spring is generally the optimal time for planting. Planting during these seasons allows the roots to establish before the growing season begins. In cooler regions, fall planting is preferred to give the plants a head start in the following spring. However, in areas with harsh winters, it's best to wait until the danger of frost has passed in early spring.
Start by preparing the planting area by removing any weeds or grass and loosening the soil. Add compost or organic matter to improve soil fertility and drainage. Next, determine the appropriate spacing between blackberry plants. This can vary depending on the variety and the growth habit. Typically, allow for 3 to 4 feet between plants within a row and space rows about 6 to 8 feet apart. This provides ample room for the plants to spread and ensures good air circulation.
When it comes to planting depth, it is important to handle the roots properly. For bare-root blackberry plants, soak the roots in water for about an hour before planting to rehydrate them. Dig a hole wide and deep enough to accommodate the roots without bending or crowding them. Spread the roots out in the hole and backfill with soil, gently firming it around the roots. Ensure that the soil level is at the same depth as it was in the nursery or container.
For container-grown blackberry plants, gently remove the plant from the container and loosen any circling roots. Place the plant in the hole at the same depth it was growing in the container. Backfill the hole with soil, ensuring that the plant is upright and the soil is firmly packed around the roots. Water the newly planted blackberries thoroughly to settle the soil and eliminate any air pockets.
When handling the roots of bare-root blackberry plants, it is essential to be gentle to avoid damaging the delicate root system. Avoid bending or breaking the roots as this can affect the plant's ability to establish and grow. Handle the plants carefully, holding them by the crown or the roots themselves, rather than by the canes.
For container-grown blackberry plants, check the root system for any circling or tangled roots. Gently tease them apart or make small cuts to encourage the roots to grow outward. This helps prevent root girdling and encourages better nutrient uptake and overall plant health.
Ensuring proper planting depth is crucial for the success of blackberry plants. Planting too shallow or too deep can have negative consequences. The crown, where the canes emerge from the roots, should be level with or slightly above the soil surface. Planting too deep can lead to rotting of the crown, while planting too shallow can expose the roots to drying out and potential damage. Carefully gauge the depth during planting to ensure the crown is positioned correctly and the roots are adequately covered with soil.
Caring for Blackberry Plants
Adequate watering is crucial for the health and productivity of blackberry plants, particularly during periods of drought and fruit development. Blackberries have shallow root systems, so they are sensitive to moisture fluctuations. Water consistently to maintain soil moisture levels, especially during dry spells. Provide deep watering rather than frequent shallow watering to encourage the roots to grow deeper into the soil. Aim to provide about 1 to 1.5 inches of water per week, either through rainfall or irrigation, ensuring that the soil is evenly moist but not waterlogged.
Weeds can compete with blackberry plants for essential nutrients, water, and sunlight. To maintain the health and vigor of your blackberry plants, it's important to control weeds effectively. Regularly inspect the area around the plants and remove any weeds that emerge. Use mulch or organic weed barriers to suppress weed growth and prevent their establishment. Take care not to disturb the shallow roots of the blackberry plants while weeding.
Blackberry plants benefit from regular fertilization to promote healthy growth and fruit production. Before planting, incorporate organic matter such as compost or well-rotted manure into the soil. This improves soil fertility and structure. During the growing season, apply balanced organic fertilizers that provide a mix of nitrogen, phosphorus, and potassium. Choose fertilizers specifically formulated for berry plants or use a general-purpose fertilizer with a balanced NPK ratio. Follow the manufacturer's instructions for application rates and timing.
In terms of timing, it's generally recommended to apply fertilizers in early spring before new growth begins. You can also make additional applications in early summer after fruiting to support the development of new canes and flower buds for the following year. Avoid excessive fertilizer application, as it can lead to excessive vegetative growth at the expense of fruit production.
Mulching is highly beneficial for blackberry plants. A layer of organic mulch around the plants provides numerous advantages. It helps conserve soil moisture by reducing evaporation, thus reducing the need for frequent watering. Mulch also acts as a barrier, suppressing weed growth and preventing competition for resources. It helps maintain a more stable soil temperature, protecting the shallow roots from extreme heat or cold.

Apply a layer of organic mulch, such as wood chips, straw, or compost, around the base of the blackberry plants. Ensure that the mulch layer is around 2 to 4 inches thick but avoid piling it directly against the canes to prevent moisture buildup and potential rot. Replenish the mulch as needed to maintain its thickness and effectiveness throughout the growing season.
Mulching also contributes to the overall health of the soil by improving its structure, promoting microbial activity, and gradually enriching it as the organic mulch breaks down over time.
Pruning Blackberry Plants
Pruning is an essential practice for blackberry plants as it helps maintain plant health, encourages new growth, improves airflow, and maximizes fruit production. By removing old and unproductive canes, you stimulate the growth of new canes that will bear fruit in the following season. Pruning also helps maintain a more open and organized plant structure, allowing better penetration of sunlight and airflow, which reduces the risk of disease and promotes even ripening of the berries.
Regular pruning also prevents overcrowding, which can lead to reduced fruit size and increased susceptibility to pests and diseases. It allows you to remove damaged or diseased canes, increasing the overall vigor of the plant. Pruning blackberry plants is typically done during the dormant season in late winter or early spring when the plants are not actively growing.
Blackberries are categorized into three main types based on their growth habit: erect, semi-erect, and trailing. Each type has slightly different pruning requirements:
Pruning Erect Blackberries
Erect blackberries have a more upright growth habit and typically require minimal pruning. In late winter or early spring, remove any dead or damaged canes, as well as weak or diseased canes. Leave the healthy, productive canes intact, as they will bear fruit in the coming season. It's also a good idea to remove any suckers that emerge outside the desired planting area to prevent overcrowding.
Pruning Semi-Erect Blackberries
Semi-erect blackberries have a combination of upright and trailing canes. They require moderate pruning to maintain an organized plant structure and encourage fruiting. In late winter or early spring, remove any dead, damaged, or weak canes. Prune the lateral branches of the remaining canes to a length of about 12 to 18 inches, cutting just above a healthy bud. This stimulates the growth of new fruiting laterals. As with erect blackberries, remove any unwanted suckers.
Pruning Trailing Blackberries
Trailing blackberries have a more sprawling growth habit and require more extensive pruning to manage their long canes. In late winter or early spring, remove any dead, damaged, or weak canes. Select and retain the strongest canes, usually about 4 to 6 per plant, and trim them back to a manageable length of about 4 to 5 feet. Secure the canes to a trellis or support system to keep them upright and prevent them from touching the ground. Prune the lateral branches of the canes to encourage fruit production.
Training blackberry plants
Trellis System: Install a trellis system before planting your blackberries. A trellis provides support for the canes and allows for better airflow and sunlight penetration. The trellis should be sturdy and about 4 to 6 feet high, with horizontal wires spaced about 18 inches apart. As the canes grow, tie them loosely to the trellis wires using soft ties or twine. Ensure the canes are spread out and not touching each other, allowing for good air circulation and minimizing the risk of disease.
Support System: If you have trailing blackberries, a support system is essential to keep the canes upright and off the ground. Create a support system by placing posts at either end of the row and running a wire or string between them. As the canes grow, gently weave them through the wire or string, ensuring they are supported and not trailing on the ground. Secure the canes with soft ties or twine if needed.
Managing Blackberry Pests and Diseases
Blackberries are susceptible to various pests that can damage the leaves, fruit, and overall health of the plants. Here are some common pests that you may encounter when growing blackberries:
Japanese Beetles: These metallic green beetles feed on the foliage of blackberry plants, causing skeletonized leaves. They can be controlled by handpicking or using traps. Insecticidal sprays approved for use on blackberries can also be applied.
Spider Mites: These tiny pests suck the sap from blackberry leaves, causing yellowing, stippling, and webbing. Regularly inspect the underside of leaves for signs of infestation. Spraying the plants with a strong jet of water can help dislodge mites. Introducing predatory mites or using insecticidal soap can also provide effective control.
Raspberry Fruitworms: These larvae feed on the developing fruit, causing damage and reducing yields. Inspect the berries regularly, and remove any infested ones. Applying organic insecticides labeled for fruitworm control can help prevent infestations.
When it comes to managing pests in your blackberry plants, organic methods can be effective and environmentally friendly. Here are some organic pest control methods you can use:
Beneficial Insects: Encourage the presence of beneficial insects, such as ladybugs, lacewings, and predatory mites, which feed on pests like aphids and spider mites. Planting flowers that attract beneficial insects, such as marigolds or alyssum, can help attract them to your garden.
Physical Barriers: Protect your blackberry plants from pests by using physical barriers. Covering the plants with lightweight floating row covers can prevent insects from reaching the foliage and fruit. Netting can be used to protect the berries from birds.
Blackberries can be susceptible to various diseases that can affect their overall health and fruit production. Here are some common diseases that may impact blackberries:
Cane Blight: Cane blight is a fungal disease that causes wilting, dark lesions, and dieback of blackberry canes. Prune and remove infected canes promptly. Proper sanitation practices, such as cleaning pruning tools between cuts, can help prevent the spread of the disease.
Anthracnose: Anthracnose is a fungal disease that causes dark, sunken lesions on berries, stems, and leaves. Remove and destroy infected plant material. Provide good air circulation and avoid overhead watering to reduce humidity levels. Fungicidal sprays labeled for blackberries can be applied preventively.
To prevent diseases in your blackberry plants, plant disease-resistant varieties whenever possible. These varieties are bred to have increased resistance to specific diseases. Practice good garden hygiene by removing and destroying any infected plant material promptly. Avoid overhead watering, as it can create conditions favorable for disease development. Instead, water at the base of the plants. Provide adequate spacing between plants to promote airflow and reduce humidity levels. Mulch around the base of the plants to prevent soil splashing onto the foliage and spreading diseases.
Harvesting and Using Blackberries
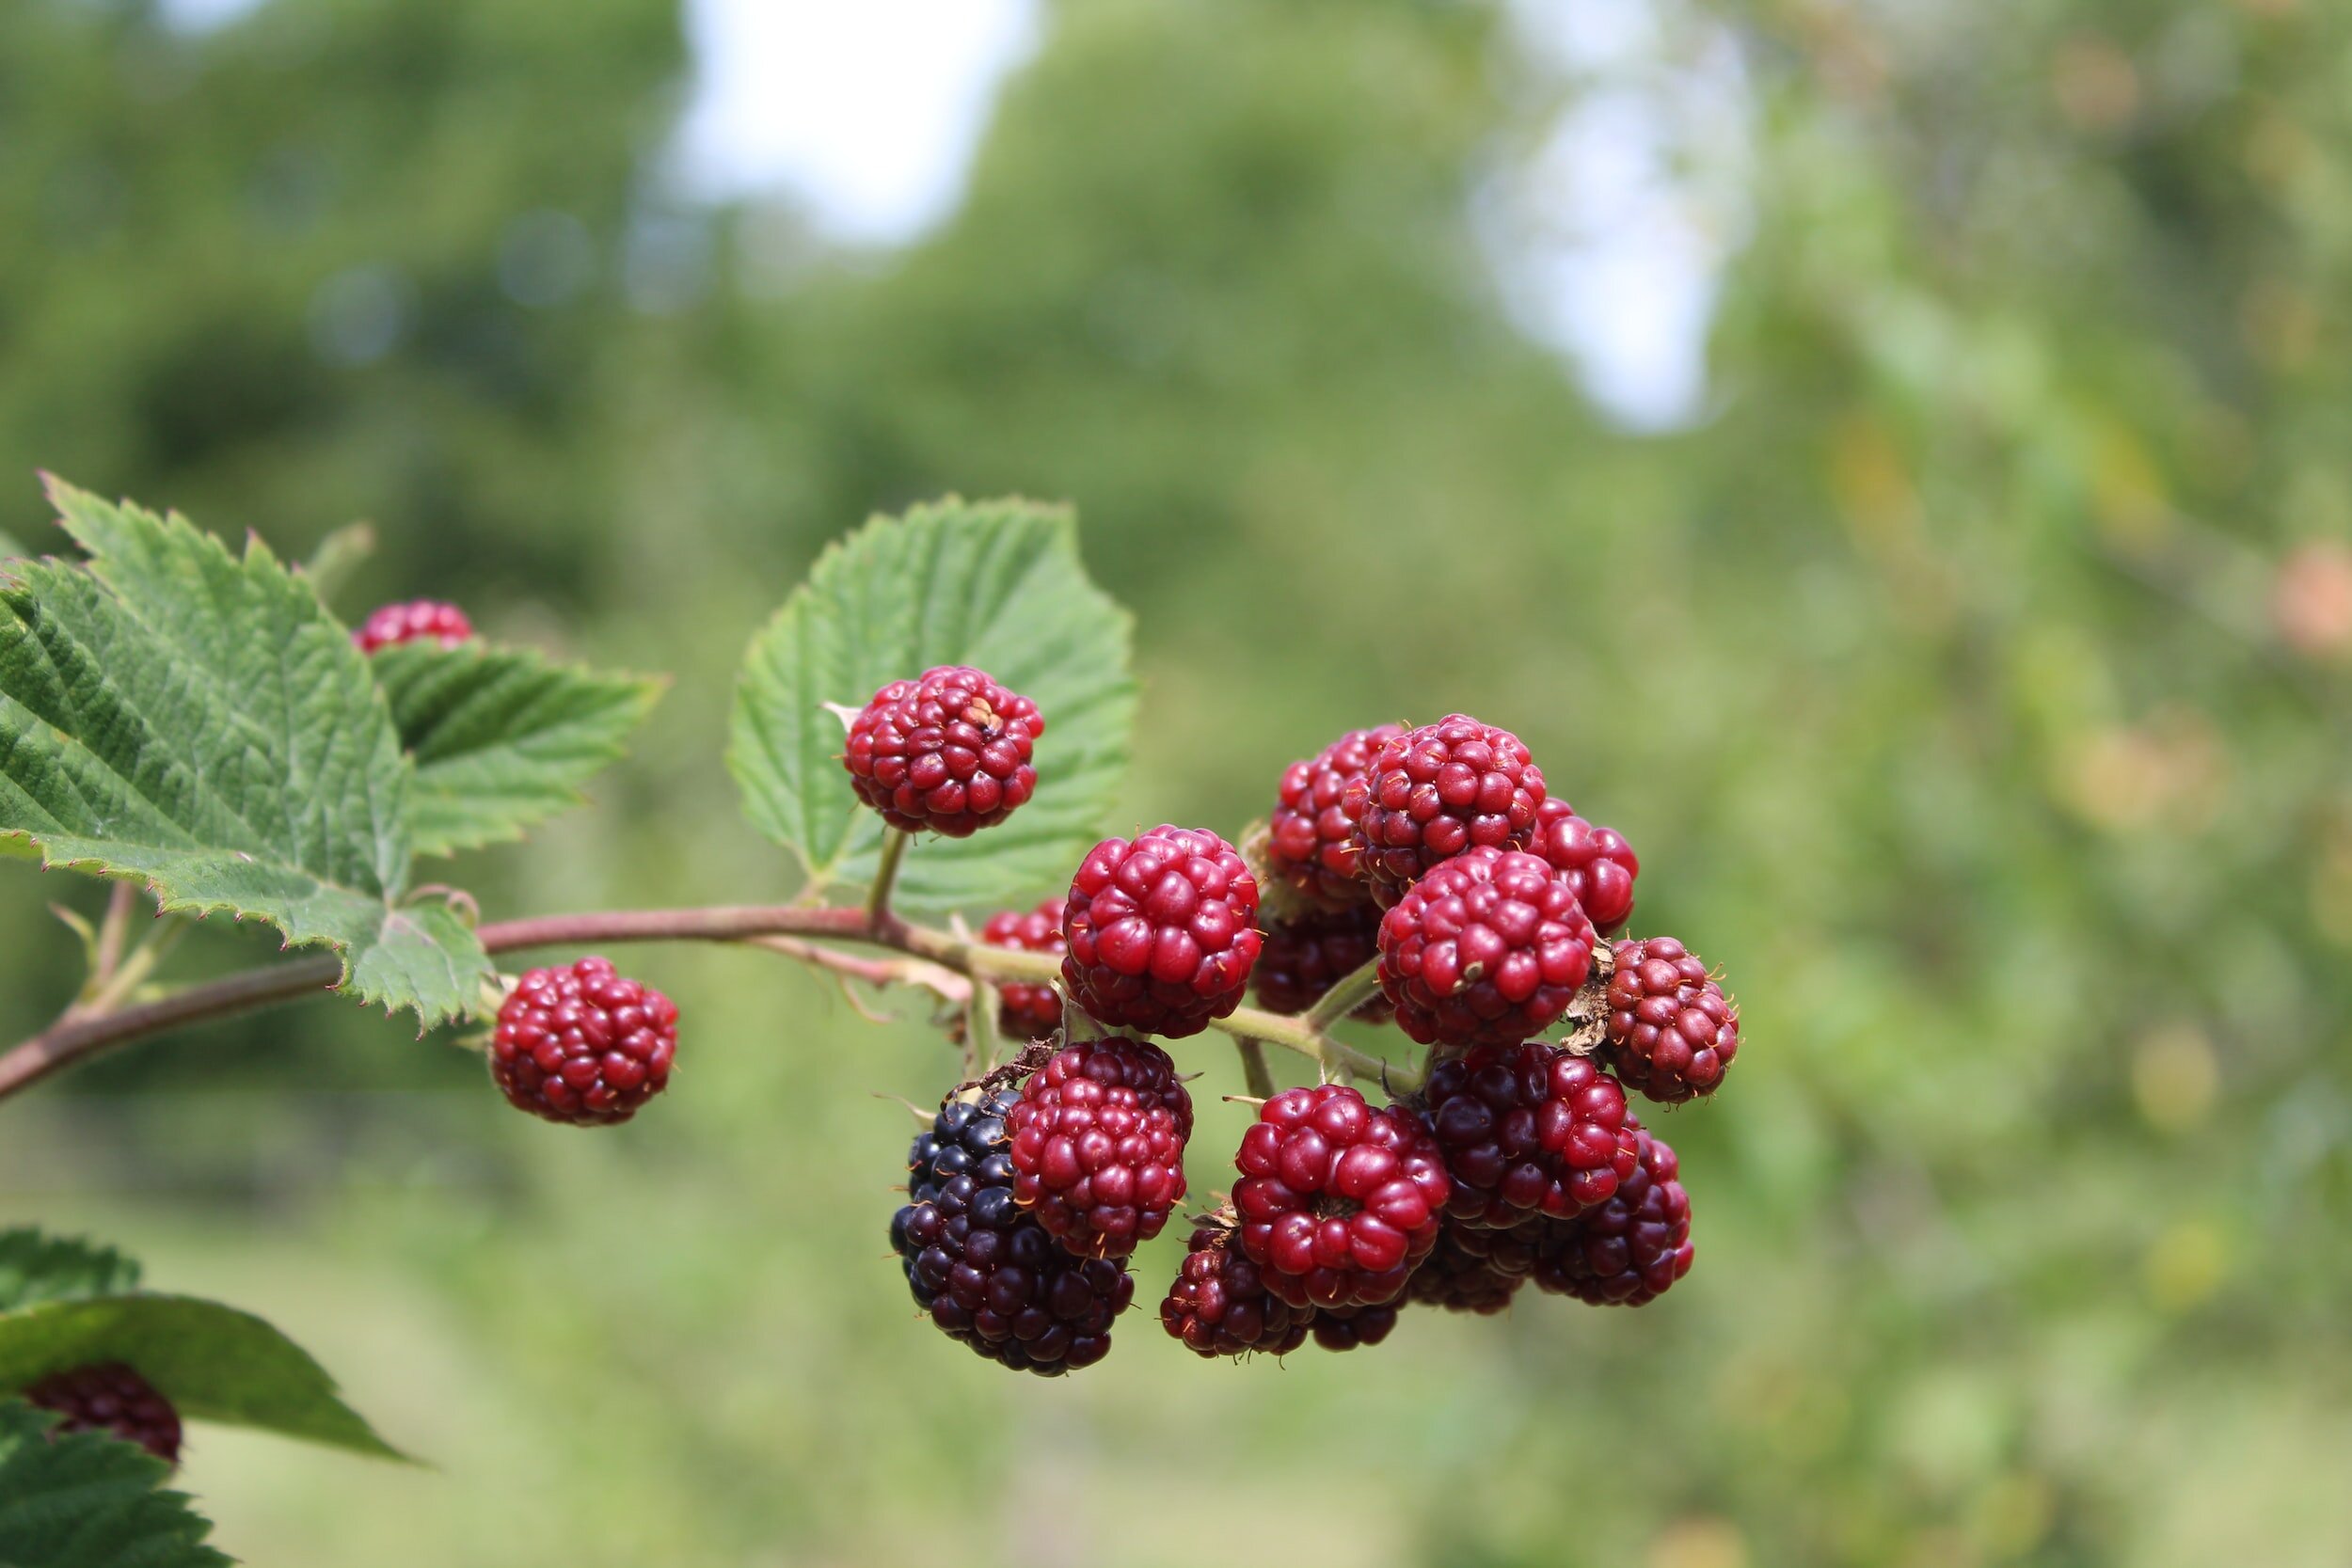
When it comes to harvesting blackberries, it's important to pick them at the peak of ripeness to enjoy their full flavor and sweetness. The berries should have a deep, rich color that is characteristic of the variety you are growing. For most blackberry varieties, this is a dark purplish-black hue. Avoid picking berries that are still green or red. Ripe blackberries will be plump and firm to the touch. Gently squeeze the berries to assess their firmness. Avoid picking berries that are overly soft or mushy. Ripe blackberries will easily detach from the plant when lightly touched or gently pulled. If the berries require excessive force to detach, they may not be fully ripe.
Blackberries are delicate and can bruise easily. Hold the berry gently between your thumb and fingertips, being careful not to squeeze or crush them. Only pick berries that are fully ripe and ready for consumption. This ensures the best flavor and sweetness. It's best to harvest blackberries in small batches rather than picking large quantities all at once. This allows you to handle the berries carefully and prevent any unnecessary damage.
How To Eat Blackberries
Fresh Consumption: Enjoy the sweet and tangy flavor of fresh blackberries on their own as a healthy snack or add them to fruit salads for an extra burst of flavor.
Baking: Blackberries can be used in various baked goods, such as pies, tarts, cobblers, and muffins. They add a delicious sweetness and vibrant color to your favorite recipes.
Jams and Preserves: Make homemade blackberry jam or preserves to enjoy the flavors of summer all year round. Spread it on toast, use it as a topping for pancakes or waffles, or incorporate it into your favorite desserts.
Smoothies and Drinks: Blend blackberries into smoothies for a nutritious and refreshing treat. You can also use them to flavor homemade lemonades, iced teas, or cocktails.
Growing blackberries can be a rewarding and enjoyable experience, whether you have a large garden or a small balcony. By following the tips and techniques shared in this blog post, you can embark on your own blackberry-growing adventure and savor the taste of homegrown blackberries throughout the season.
![Step-By-Step Tips For Growing, Harvesting, Storing, and Using Broccoli [Guide]](https://images.squarespace-cdn.com/content/v1/60e85024dc86d643da81c96a/1687360510758-7YZ9DFRDUQ3QT9VH62VH/image-asset.jpeg)
Step-By-Step Tips For Growing, Harvesting, Storing, and Using Broccoli [Guide]
Growing broccoli in your own garden brings a host of advantages. One of the most significant benefits is having access to fresh and pesticide-free produce. When you grow broccoli at home, you have complete control over the cultivation process, ensuring that no harmful chemicals are used on your plants. This allows you to enjoy the peace of mind that comes with knowing exactly what you're consuming. Additionally, harvesting your own vegetables can be an immensely rewarding experience. There's a sense of pride and satisfaction in tending to your plants and watching them flourish. Plus, the taste of freshly harvested broccoli is unparalleled, as it retains its crispness and flavors that can be lost during transportation. By growing broccoli in your garden, you can indulge in the delights of homegrown goodness and elevate your culinary creations to new heights.

Broccoli is not just a delicious vegetable; it's also a nutritional powerhouse. Packed with essential vitamins, minerals, and antioxidants, broccoli offers numerous health benefits. It is rich in vitamin C, vitamin K, fiber, and folate, making it a valuable addition to a healthy diet. Furthermore, broccoli contains compounds like glucosinolates, which have been linked to reducing the risk of certain cancers. Introducing broccoli into your meals can be a great way to boost your overall well-being.
Growing broccoli in your own garden brings a host of advantages. One of the most significant benefits is having access to fresh and pesticide-free produce. When you grow broccoli at home, you have complete control over the cultivation process, ensuring that no harmful chemicals are used on your plants. This allows you to enjoy the peace of mind that comes with knowing exactly what you're consuming. Additionally, harvesting your own vegetables can be an immensely rewarding experience. There's a sense of pride and satisfaction in tending to your plants and watching them flourish. Plus, the taste of freshly harvested broccoli is unparalleled, as it retains its crispness and flavors that can be lost during transportation. By growing broccoli in your garden, you can indulge in the delights of homegrown goodness and elevate your culinary creations to new heights.
What Type Of Broccoli to Grow In Your Garden
When it comes to choosing broccoli varieties for your garden, there are several popular options to consider. Green Magic, known for its compact size, is an excellent choice for smaller gardens or container gardening. It produces medium-sized heads with tight, deep green florets. Belstar, another popular variety, is prized for its excellent flavor and large, dome-shaped heads. It has a slightly longer maturity time, but the wait is well worth it. Calabrese is a traditional Italian variety and one of the most widely grown types of broccoli. It produces large heads with blue-green florets and has a relatively shorter maturity period compared to other varieties.
Each broccoli variety possesses unique characteristics that may influence your choice. Green Magic typically produces heads that are around 6-8 inches in diameter, making them suitable for individual or small-sized households. Belstar, on the other hand, can yield larger heads, reaching up to 10 inches in diameter, making it ideal for families or those who enjoy preserving or freezing their harvest. Calabrese tends to have medium to large-sized heads, averaging around 7-9 inches in diameter.
When selecting broccoli varieties, it's important to consider their suitability for different climates and growing seasons. Green Magic and Belstar are known for their versatility and adaptability to a wide range of climates. They can be grown in both cool and warm seasons, making them suitable for areas with varying temperature fluctuations. Calabrese, being a traditional variety, thrives in cooler climates and is best grown as a fall or early spring crop in regions with mild winters. Understanding the specific growing requirements of each variety will help you select the best broccoli types that align with your local climate and growing season.
Where to Grow Broccoli
Broccoli thrives in full sun, so it is crucial to choose a growing site that receives at least 6 to 8 hours of direct sunlight daily. Sunlight is essential for the development of healthy and robust broccoli plants and ensures optimal head formation. Select a location in your garden that is not shaded by trees or buildings to maximize sun exposure.
When choosing the right location for planting broccoli, consider several factors. First, ensure that you have adequate space for the plants to grow and spread. Broccoli plants typically require about 18 to 24 inches of space between each plant, so plan accordingly. The chosen site should also receive ample sunlight throughout the day to promote healthy growth and head development. Avoid planting broccoli in areas shaded by buildings, tall plants, or trees that may obstruct sunlight. Additionally, consider the protection of your broccoli plants from strong winds. Broccoli plants have shallow root systems and can be easily toppled by strong gusts, so selecting a location shielded by structures, fences, or windbreaks can help protect them from wind damage.
Starting Broccoli Plants From Seed
To start broccoli from seeds, begin by filling seedling trays or small pots with a seed-starting mix. Sow the seeds about ¼ to ½ inch deep, spacing them around 2 inches apart. Gently cover the seeds with soil and lightly tamp it down. Water the seeds thoroughly but avoid overwatering, as broccoli seeds can rot in excessively wet conditions. Place the trays or pots in a warm location with temperatures around 70 to 80°F (21 to 27°C) for optimal germination. Keep the soil consistently moist and provide adequate airflow to prevent damping off disease. Once the seedlings have developed two to four true leaves, they are ready to be transplanted into the garden.
Using Transplants for Broccoli
Using transplants for broccoli offers several advantages. Firstly, it reduces the time it takes for the plants to mature and produce heads, allowing you to enjoy your homegrown broccoli sooner. Transplants also provide a level of convenience, as they can be purchased from nurseries or started indoors and then moved outside when the weather and soil conditions are favorable. However, there are considerations to keep in mind. Transplants may experience transplant shock when moved to a new location, especially if not properly hardened off. Harden off transplants by gradually exposing them to outdoor conditions over the course of a week before transplanting. Additionally, transplants may have limited root development compared to direct-sown seeds, so take care not to disturb the roots during transplanting to ensure successful establishment.

How to Plant Broccoli
Before planting broccoli, it is important to prepare the soil properly. Start by clearing the area of weeds or any other vegetation that may compete with the broccoli for nutrients and space. Incorporating compost or well-rotted organic matter into the soil can improve its fertility and drainage. This will provide the broccoli plants with the necessary nutrients for healthy growth.
When it comes to planting broccoli, spacing is crucial. Each broccoli plant should be given enough space to allow for proper air circulation and growth. Allow for a twelve inch squash area for each broccoli plant. Dig a hole slightly larger than the root ball of the transplant or seedling. Place the plant in the hole, making sure the crown of the plant is level with the soil surface. Gently firm the soil around the plant, ensuring it is well-supported but not compacted.
Providing adequate spacing between broccoli plants is essential for their overall health and development. Sufficient spacing allows for proper air circulation, which helps prevent the buildup of moisture and reduces the risk of fungal diseases such as powdery mildew. It also gives the plants room to spread out and develop robust foliage and heads. If the plants are crowded together, they may compete for sunlight and nutrients, resulting in stunted growth and smaller heads. By allowing for ample spacing, you can ensure that each broccoli plant has enough room to thrive and reach its full potential.
Caring for Broccoli Plants
Regular watering is crucial for the proper growth and development of broccoli plants. Broccoli requires consistent moisture, especially during dry periods, to prevent stress and promote healthy foliage and head formation. Water deeply, providing enough moisture to reach the root zone of the plants. It is important to avoid overwatering, as excessive moisture can lead to root rot and other diseases. Aim to keep the soil consistently moist but not waterlogged. Mulching around the plants can help retain moisture and reduce water evaporation from the soil surface.
Weed control is essential for the well-being of broccoli plants. Weeds compete with broccoli for nutrients, water, and sunlight, which can hinder their growth and development. Regularly remove weeds from the vicinity of broccoli plants, either by hand-pulling or using appropriate gardening tools. Mulching with organic materials like straw or wood chips can also help suppress weed growth around the plants. By minimizing weed competition, you can ensure that your broccoli plants receive the necessary resources to thrive.
Fertilizing broccoli plants is important for providing them with the nutrients they need for optimal growth and production. Before planting, incorporate well-rotted compost or organic matter into the soil to improve its fertility. Broccoli benefits from balanced organic fertilizers with an NPK (nitrogen, phosphorus, potassium) ratio of approximately 10-10-10 or similar. Apply the fertilizer according to the package instructions, typically at planting time and again during the growing season. Additionally, foliar feeding can be beneficial by spraying a diluted organic liquid fertilizer directly onto the foliage, providing a quick nutrient boost.
Mulching is a beneficial practice for broccoli plants. Applying a layer of organic mulch, such as straw, wood chips, or compost, around the base of the plants offers several advantages. Firstly, mulch helps conserve soil moisture by reducing evaporation, thus reducing the frequency of watering. Secondly, it acts as a barrier against weed growth, minimizing weed competition and the need for manual weeding. Finally, mulch helps regulate soil temperature by insulating the soil, keeping it cooler during hot weather and warmer during cool periods. Apply mulch around the base of the plants, taking care to keep it away from direct contact with the stems to prevent potential rot or disease issues.
Broccoli Pests and Diseases
Broccoli plants can be susceptible to various pests that can hinder their growth and damage the foliage and heads. Common pests that may affect broccoli include cabbage worms, aphids, slugs, and caterpillars. Cabbage worms are green caterpillars that can feed on the leaves, causing significant damage. Aphids are small insects that suck sap from the plant, leading to stunted growth and distorted leaves. Slugs are nocturnal pests that feed on the leaves and can leave behind slime trails. Monitoring your broccoli plants regularly and being able to identify these pests will help you take timely action to prevent severe infestations.
When it comes to pest control in broccoli, organic methods are often preferred to minimize the use of synthetic chemicals. One effective method is to use floating row covers, which are lightweight, permeable fabrics that create a physical barrier around the plants. Row covers prevent pests from reaching the plants and laying eggs. Beneficial insects, such as ladybugs and lacewings, can also be introduced into the garden to prey on pests like aphids.
Harvesting and Storing Broccoli
Harvesting broccoli at the right time is crucial to ensure the best flavor and quality. Signs of broccoli maturity include compact heads with tightly closed buds. The heads should be firm and dense, without any yellowing or flowering. Avoid waiting too long to harvest, as over-mature broccoli can become tough and develop a bitter taste. It's better to harvest a bit early than to let the heads become too mature.

When harvesting broccoli, it's important to use a sharp knife or garden shears to cut the main head at a slant, about 5 to 8 inches below the head. Make the cut clean and avoid damaging nearby developing side shoots. Cutting the main head encourages the growth of smaller side shoots, which can be harvested later for a continuous supply of broccoli. Harvest the side shoots when they reach a suitable size, typically 2 to 4 inches in diameter.
Harvesting broccoli at the right time is crucial for optimal flavor. If left on the plant for too long, broccoli heads can become over-mature, with open buds and a stronger, less desirable taste.
After harvesting, there are different methods for storing broccoli. For short-term storage, you can place the unwashed heads in the refrigerator. To maintain freshness, it's best to store broccoli in a perforated plastic bag or wrap it in a damp paper towel. This will help retain moisture without causing excessive condensation. For long-term storage, blanch the broccoli by briefly immersing it in boiling water, then cool it rapidly in ice water before draining and packaging it in airtight containers or freezer bags. Properly blanched and frozen broccoli can be stored for several months.
Growing broccoli in your own garden offers numerous benefits, from its high nutritional value to its culinary versatility. Broccoli is packed with essential vitamins, minerals, and antioxidants, making it a valuable addition to a healthy diet. By following the steps outlined in this blog post, you can successfully grow your own broccoli and enjoy the satisfaction of harvesting fresh, flavorful heads. From choosing the right variety to providing optimal growing conditions, each stage of the process contributes to a successful broccoli harvest.
Remember, broccoli is not only nutritious but also a versatile ingredient that can be used in stir-fries, salads, soups, and more. So, get started on your broccoli garden and relish the goodness and flavor it brings to your meals. Happy gardening!