
BACKYARD GARDENING MADE SIMPLE
Garden Tool Maintenance | The Best Garden Tools For Chronic Pain
I know we're all anxious to get into garden planning, but there's one thing that's just as important to having a successful garden this year as a good plan; the tools that you're going to use to garden. I don’t use many different kinds of garden tools since I like to keep things simple, but the garden tools that I use have to withstand a lot of use, as well as be comfortable enough to use for extended periods of time. I prefer to buy things once, and I’d rather invest a little more in a tool that I will have for a lifetime than continually replace and send old ones to the landfill.

I know we're all anxious to get into garden planning, but there's one thing that's just as important to having a successful garden this year as a good plan; the tools that you're going to use to garden. I don’t use many different kinds of garden tools since I like to keep things simple, but the garden tools that I use have to withstand a lot of use, as well as be comfortable enough to use for extended periods of time. I prefer to buy things once, and I’d rather invest a little more in a tool that I will have for a lifetime than continually replace and send old ones to the landfill.
The reason comfortable garden tools are especially important for me is that I have chronic pain. About ten years ago I was diagnosed with arthritis, and this affects me not just in terms of pain but in terms of weakness that makes gripping things difficult - so having garden tools that are comfortable and easy to grip is essential for me, and I’ve found through a lot of trial and error which ones work best and which ones just make things worse.
But I’ve also realized it’s less about having what you’d think of as a comfortable handle and more about having a garden tool that works so well, it reduces the amount of time you have spend using it - because the reality is that no matter how comfortable a garden tool is, when you have chronic pain you’re going to hit a time limit (or number of available spoons) faster than someone who doesn’t, no matter how “comfortable” that garden tool may be.
Effective garden tools are sharp and sturdy, don’t wobble, and have features that make the task itself easier and faster. They are typically built to last using classic construction methods that withstand the test of time. The only downside is that they usually cost a bit more upfront. I wish I had a workaround for this, but for me personally it is worth the investment in order to be able to continue participating in hobbies that feel essential to my identity like gardening, regardless of my physical limitations.
I'm going to walk you through all the garden tools that I use and I'm also going to tell you my strategy for daily maintenance versus seasonal maintenance, so let's get started!
The Best Garden Trowel
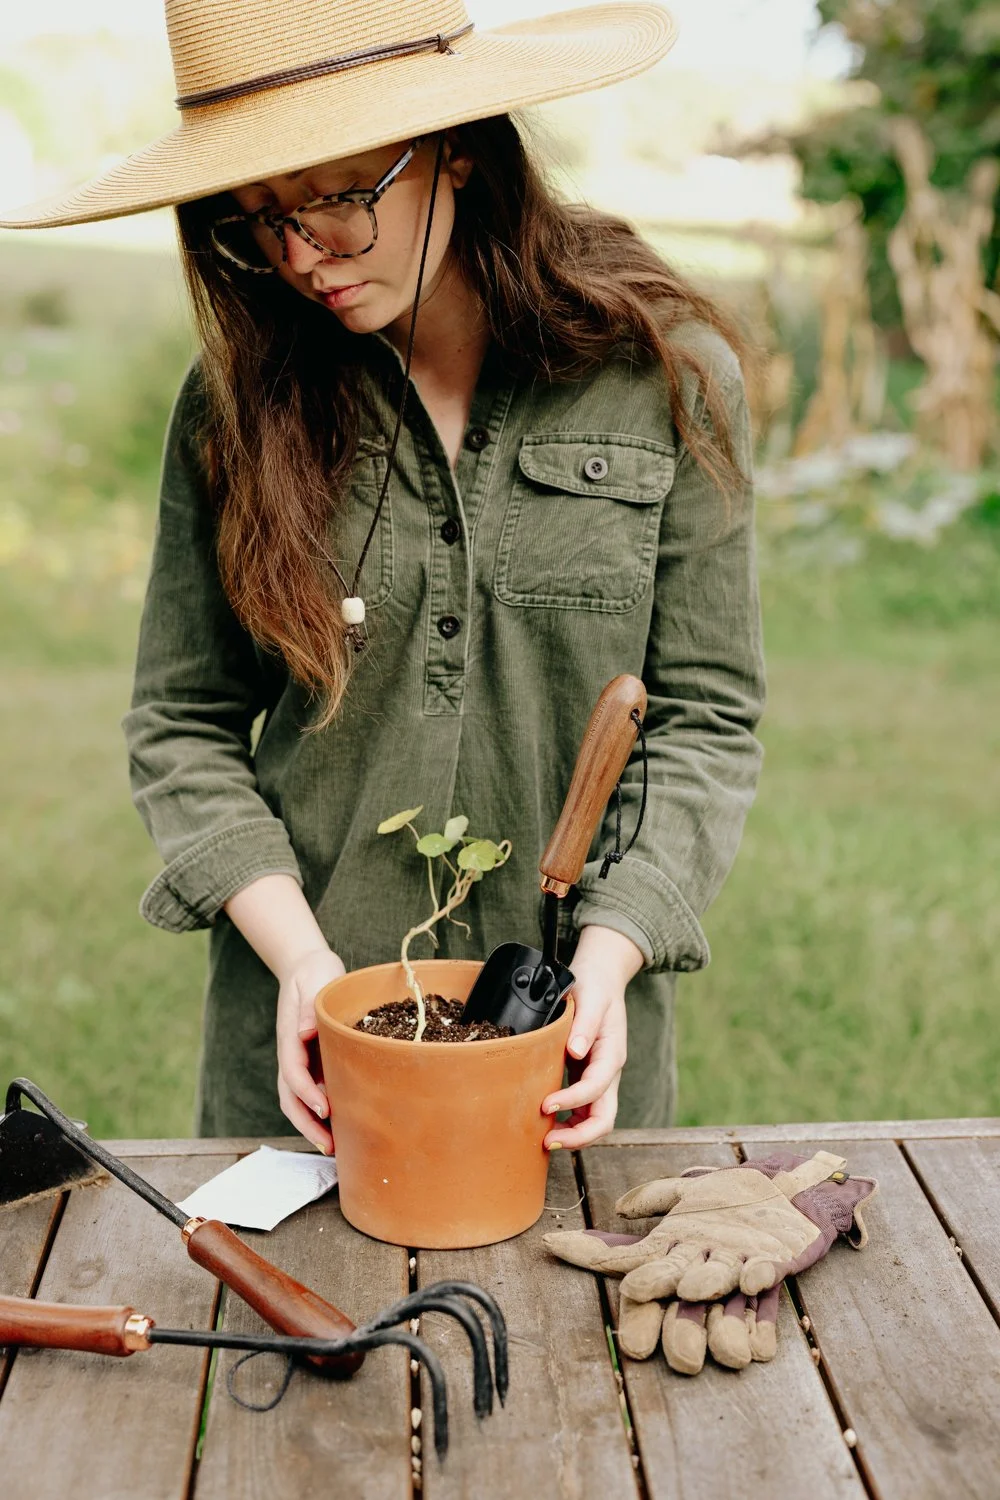
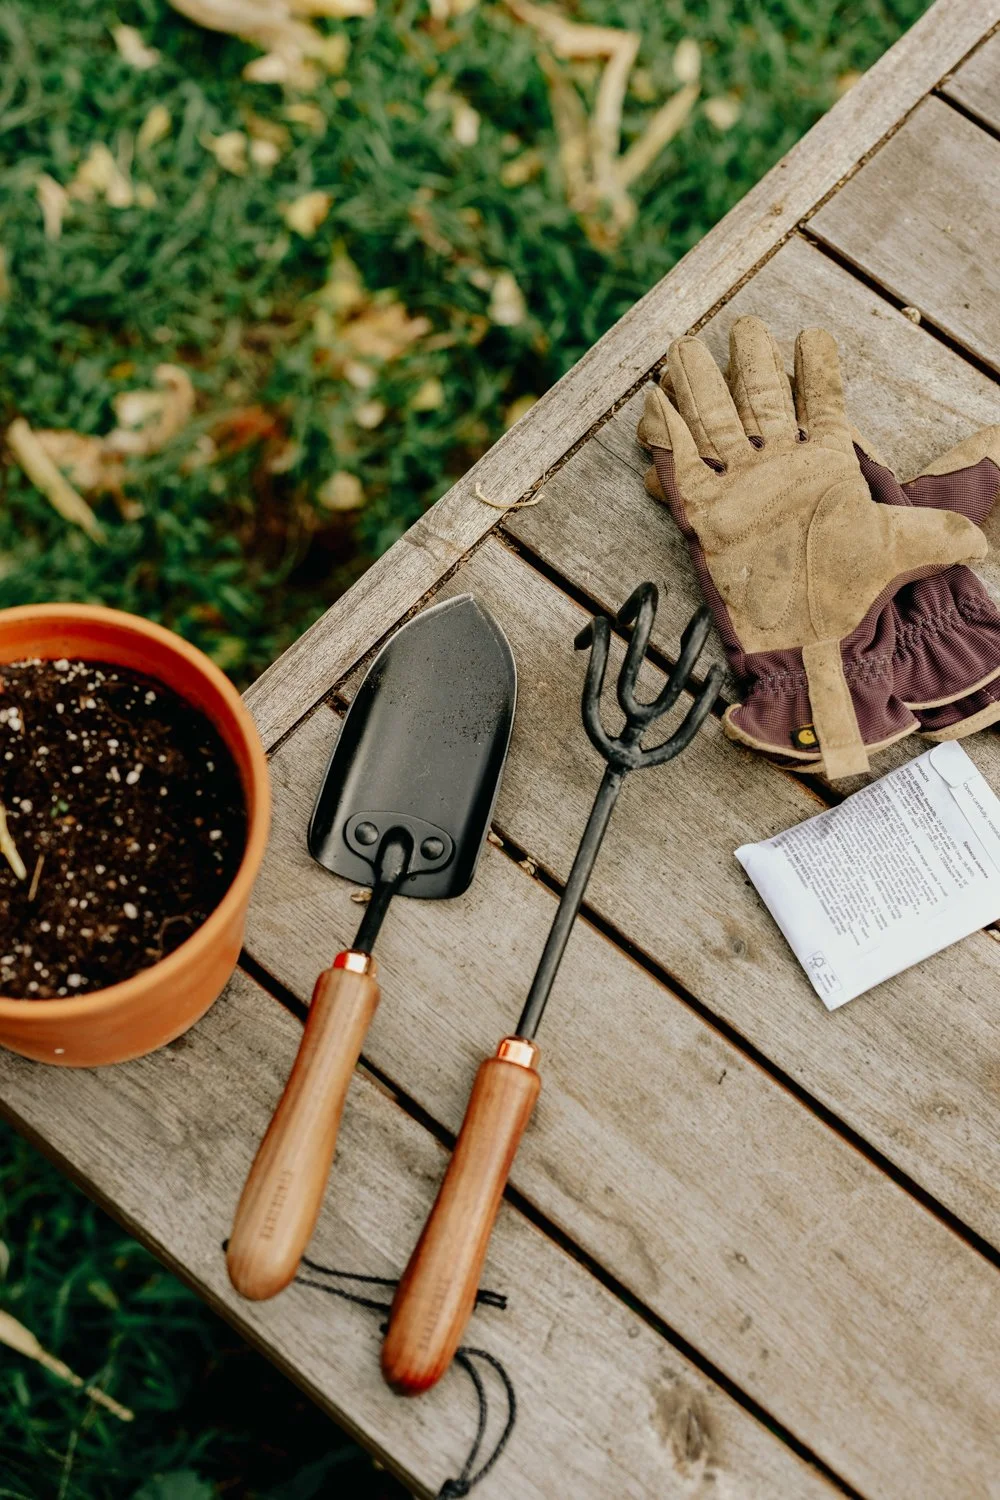
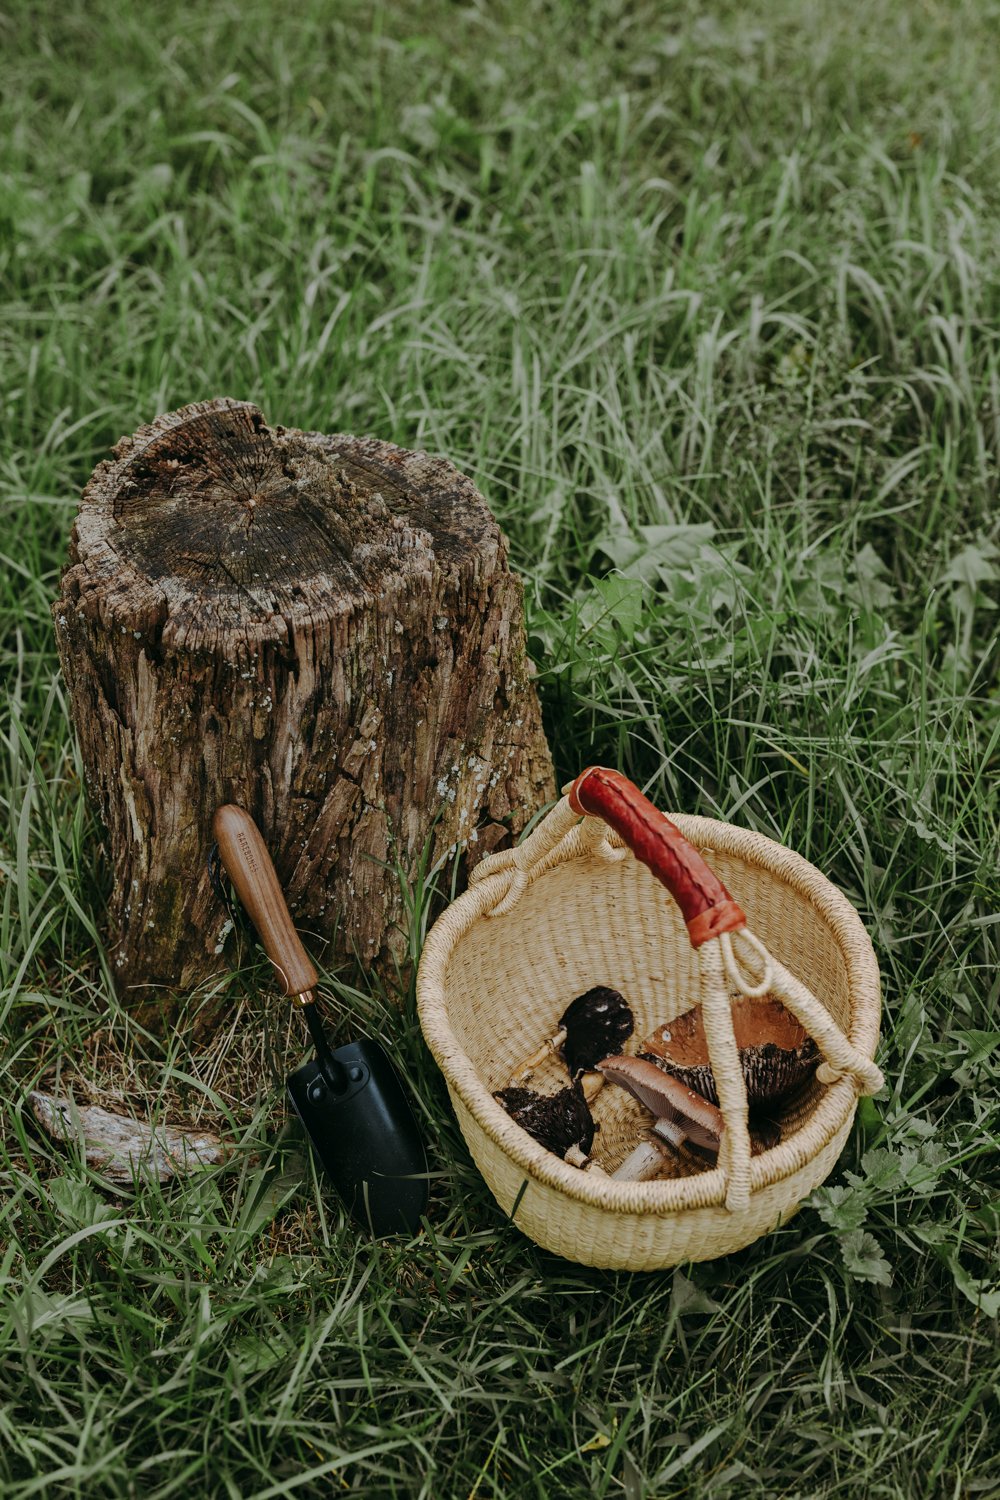
I don't think I have to tell you why a trowel is important, but I will tell you to get one that has a beveled edge almost like a blade to make cutting through soil easier. I like my trowel to have a bit of weight behind it with a solid metal blade and wood handle. This metal and wood trowel is B-Corp certified, sustainably produced and built to last.
The Best Garden Weeder
A Japanese sickle is extremely sharp which makes breaking up weeds by cutting through the roots themselves extremely easy. With my chronic pain and fatigue, weeding is one of the more strenuous garden tasks I have to do, and this greatly eases a lot of the strain I experience. I don't really do any tilling, but this is also great if you do need to kind of loosen up the dirt in some spots. This Japanese sickle has served me well for many years now and the blade is still as sharp as the day I got it.
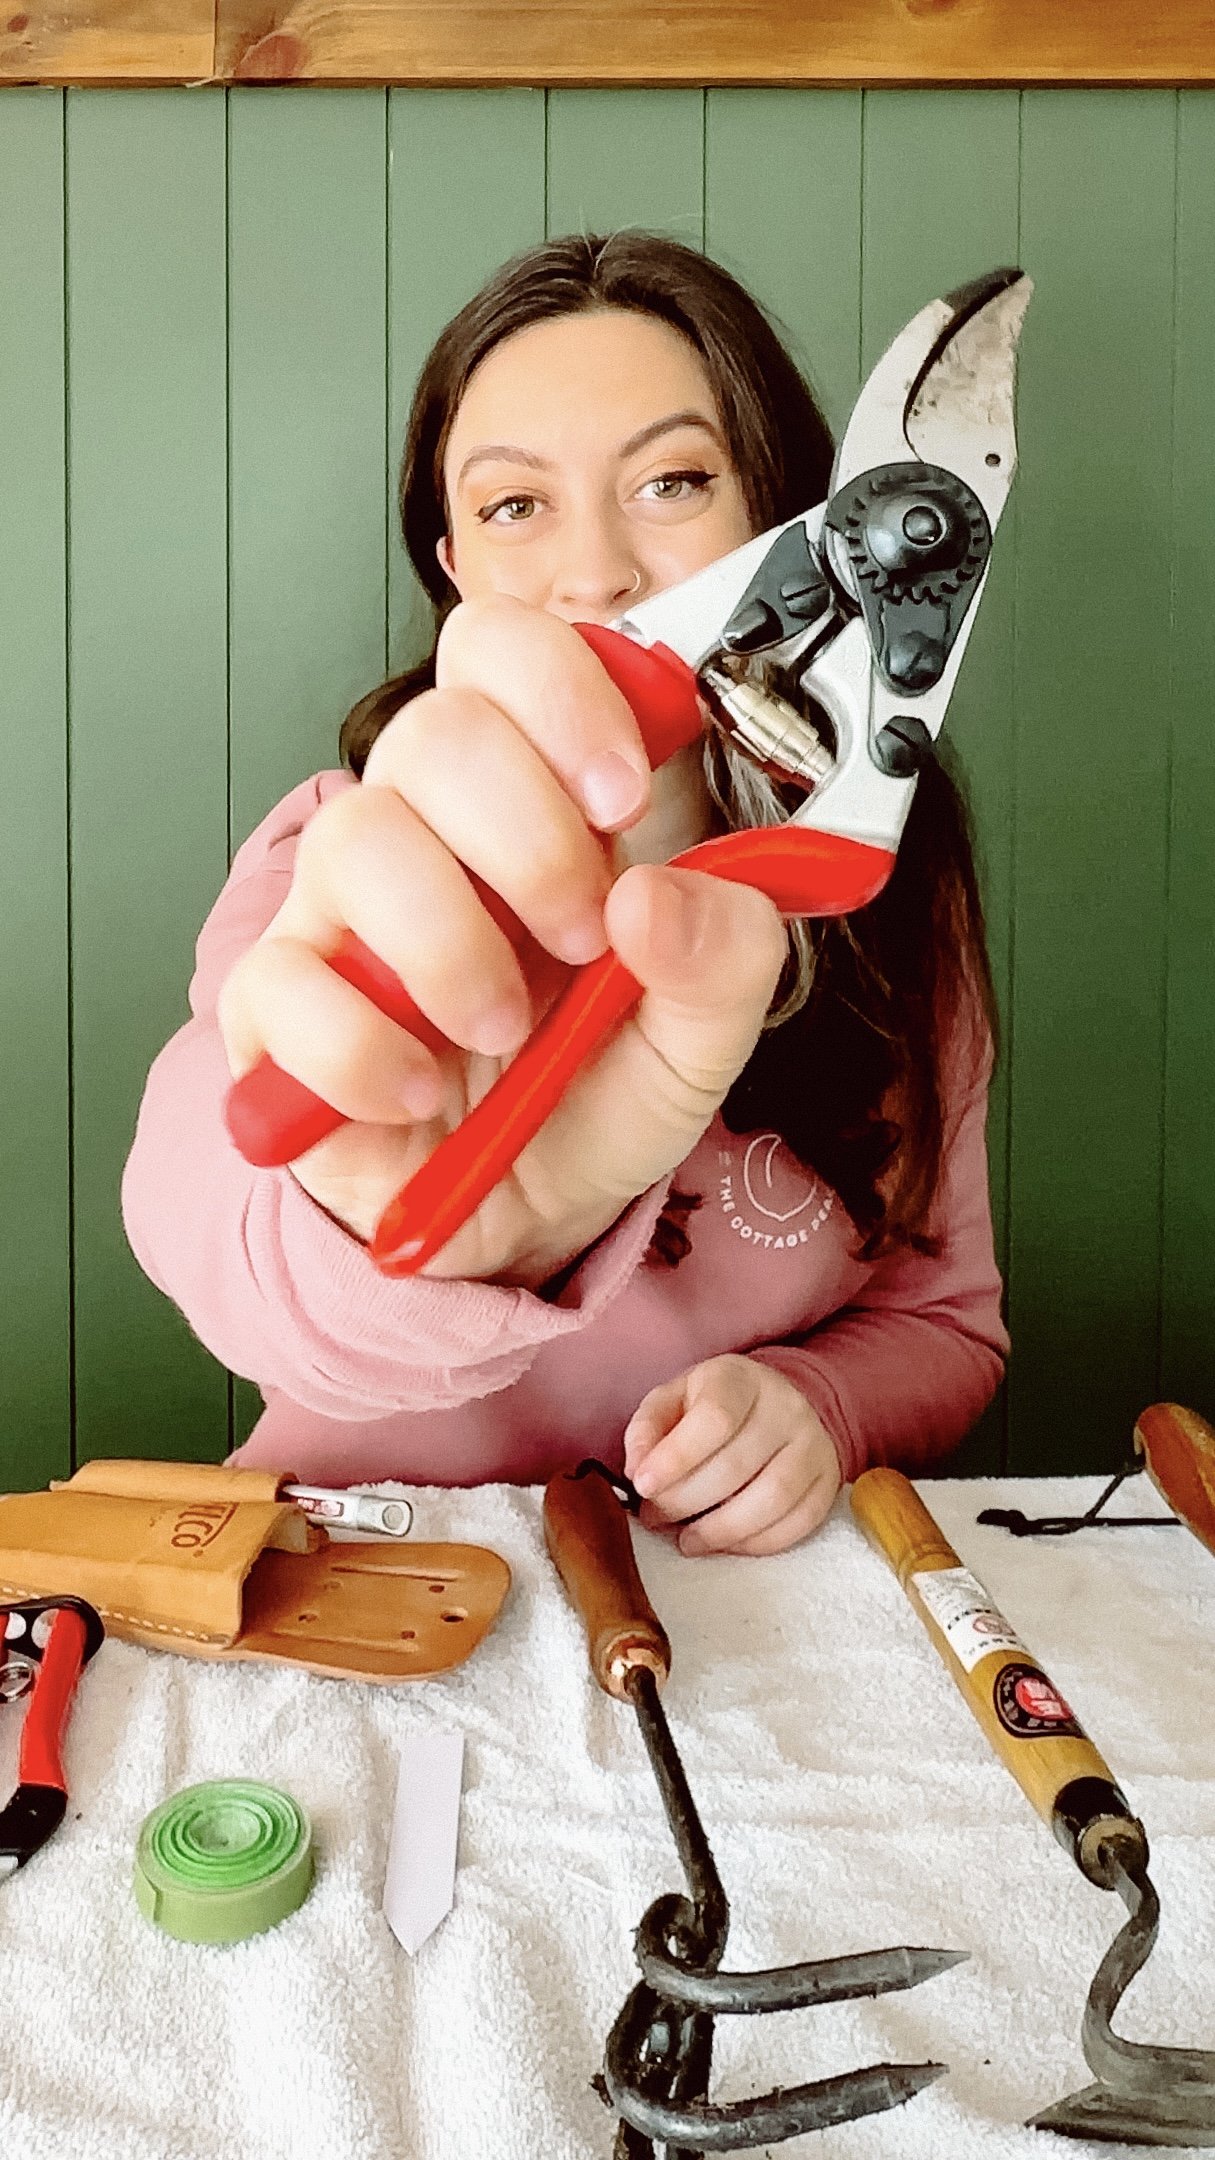
The Best Garden Pruners
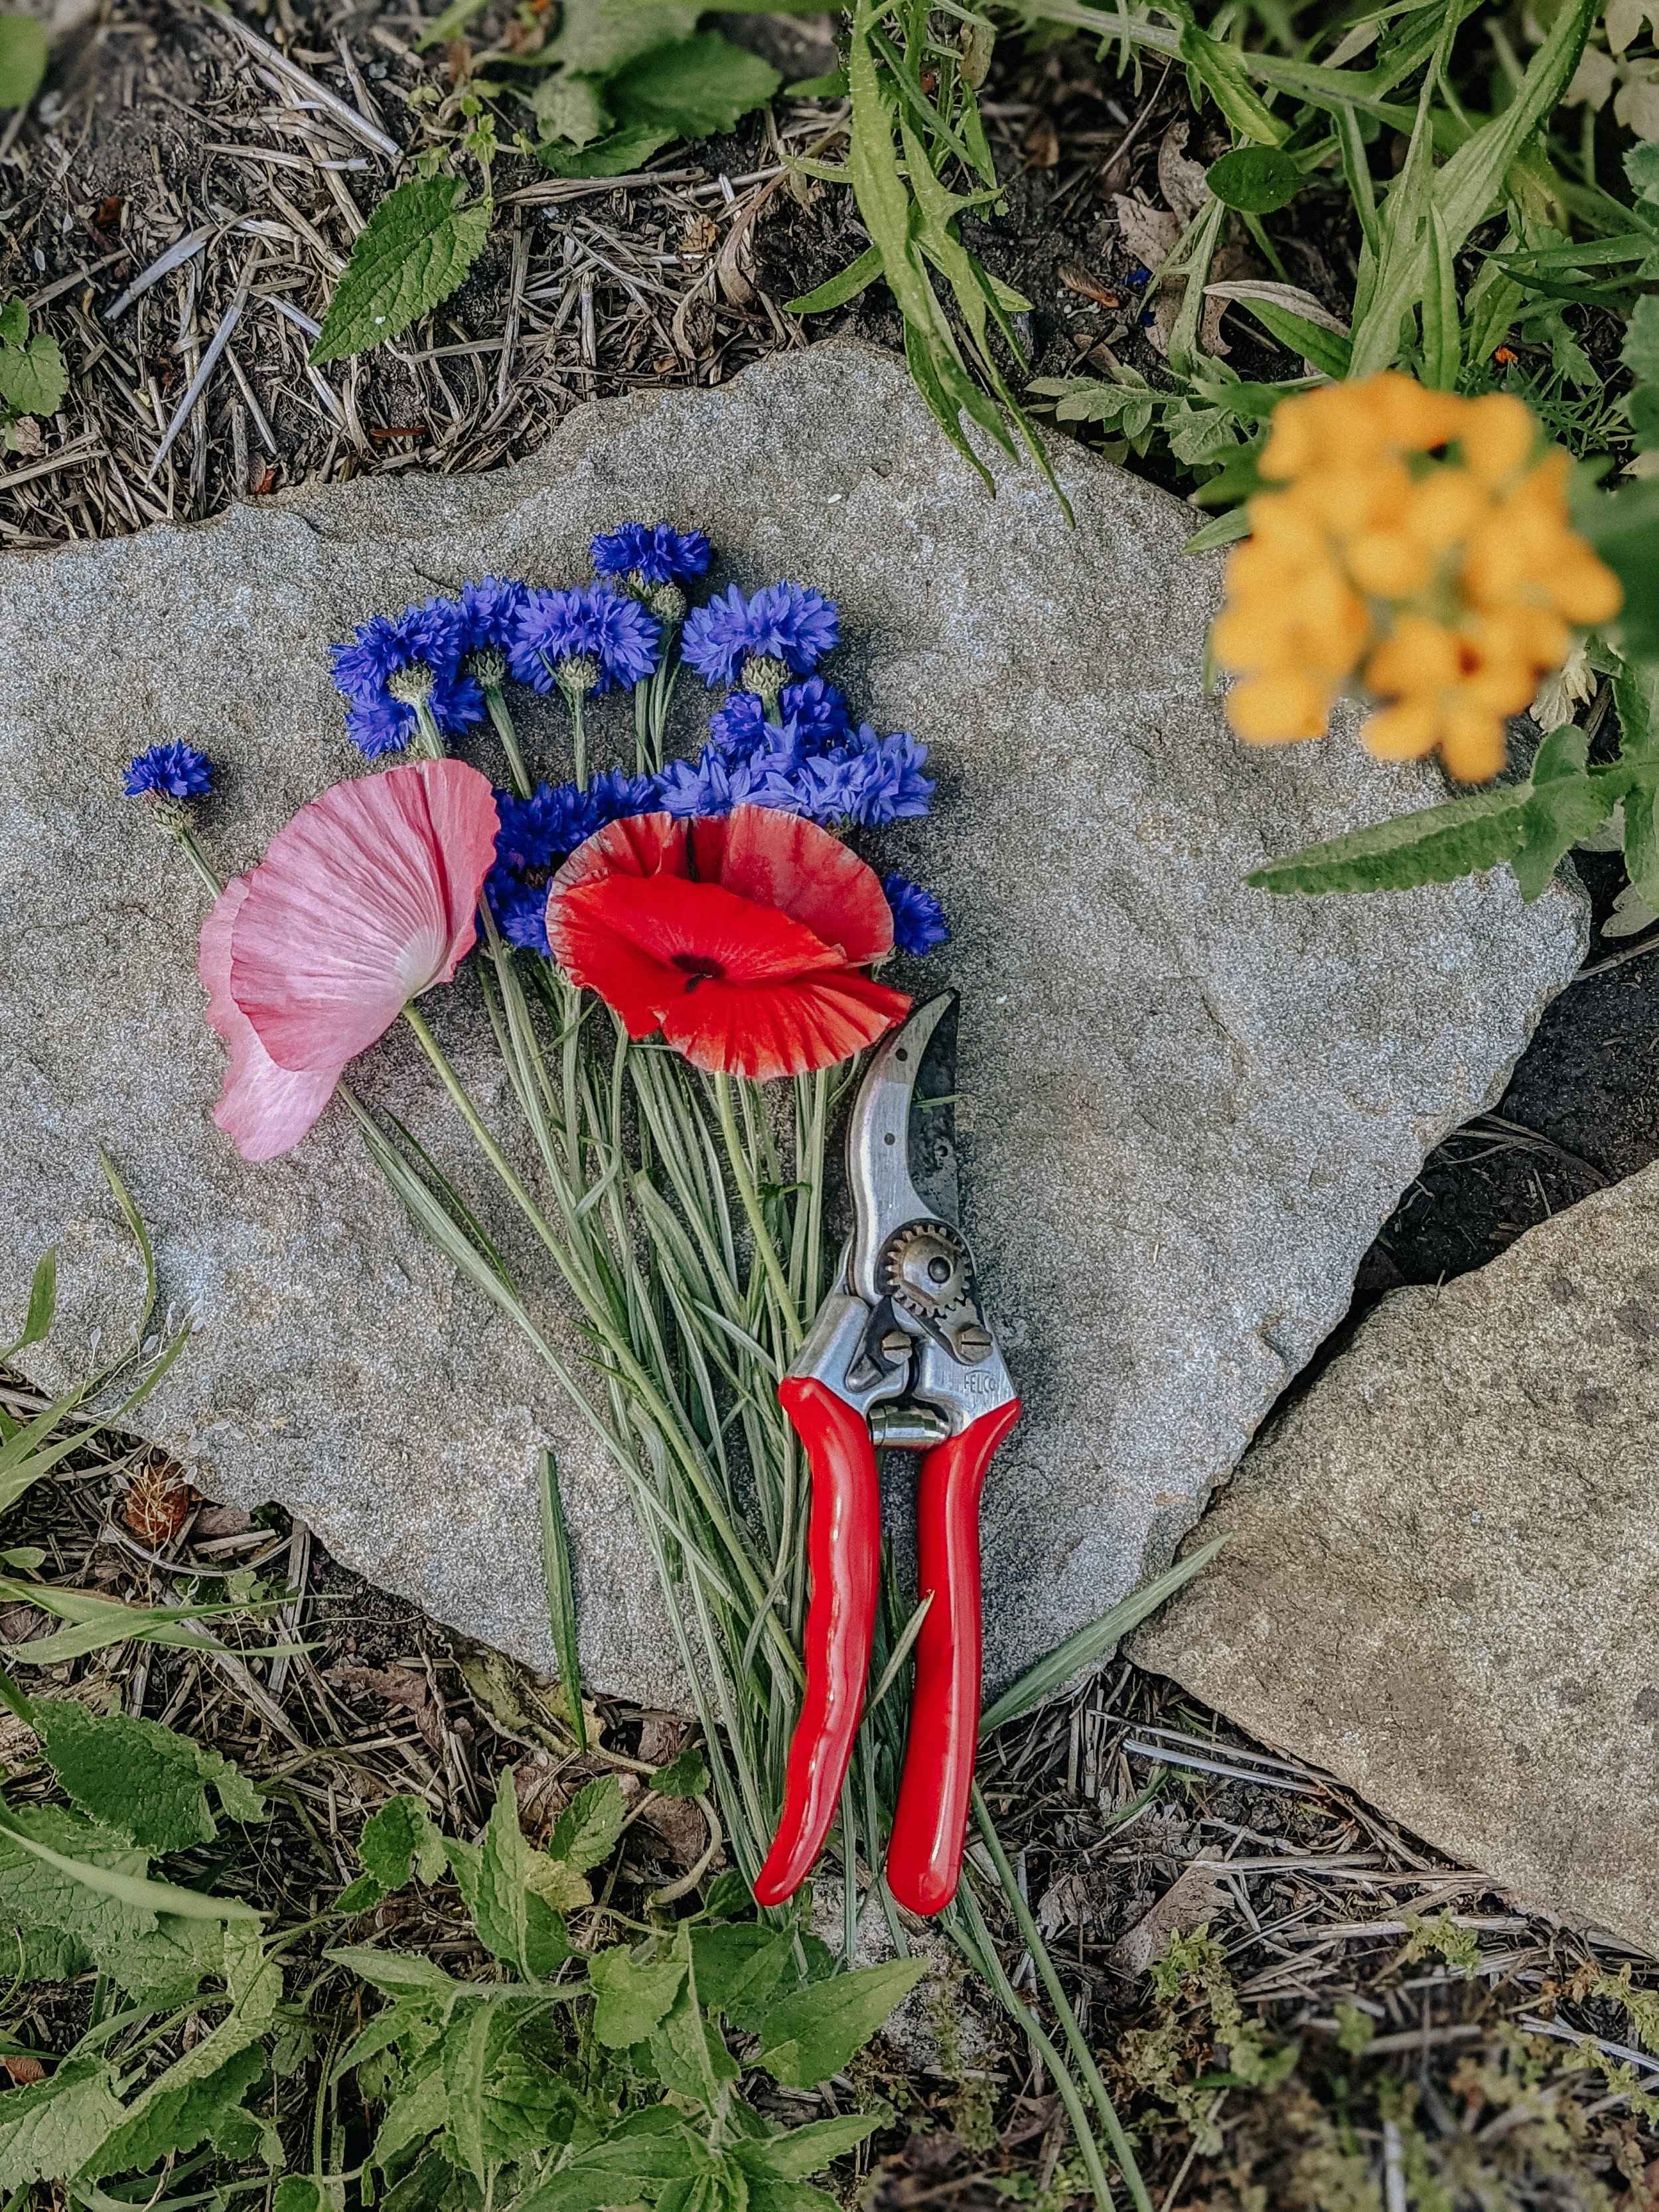
Up until recently the Felco 2s were my number one pick for pruning and clipping anything larger, and while I still love them last year Felco reached out to me and offered to send me their Felco 15s. What's really amazing about these pruners is the handle rotates when you squeeze it close, which takes so much of the pressure off of your hand, you would not believe it. The first time I tried them I practically cried because it made such a huge difference in how comfortable the grip was. The ONLY downside is the Felco 15s have a slightly smaller blade than the Felco 2s, so I still keep the Felco 2s around since they're great for larger projects.
The Best Garden Snips
Garden snips get the absolute most use in my garden, since they’re compact and lightweight they are perfect for harvesting and removing dead leaves from vegetable plants, as well as pruning suckers from tomatoes and deadheading flower plants. Many people I know, myself included, swear by these Felco 322 snips for just this purpose.
A couple small things that I consider garden tools you may consider garden accessories:
Plant labels
You don't need to get fancy with these. These thin white plastic ones can be reused again and again with a paint marker and are durable and easy to read from a distance.
Velcro plant tape
If tying tons of knots for trellises is uncomfortable for you like it is for me or just generally time consuming, this velcro plant tape will make all the difference. I love this stuff - you can custom fit it to any size that you need and you can reuse it over and over again.
How to Find Comfortable Garden Tools
When you're looking for a handle that's going to be ergonomic, it’s easy to jump straight for the options with a cushioned handle, but I’m going to caution you against this. Unfortunately in a lot of cases those foam cushions aren't very long lasting and they tend to deteriorate in sunlight. You will have a lot more luck finding comfortable tools if you are able to invest in quality tools built with a specific purpose in mind. But generally speaking, I often find wooden handles to be most comfortable. They just feel slightly “softer” than a metal based handle, and they hold up really well. Most also have a bit of a curve to them so they almost have that hand carved feel.
Daily Garden Tool Maintenance
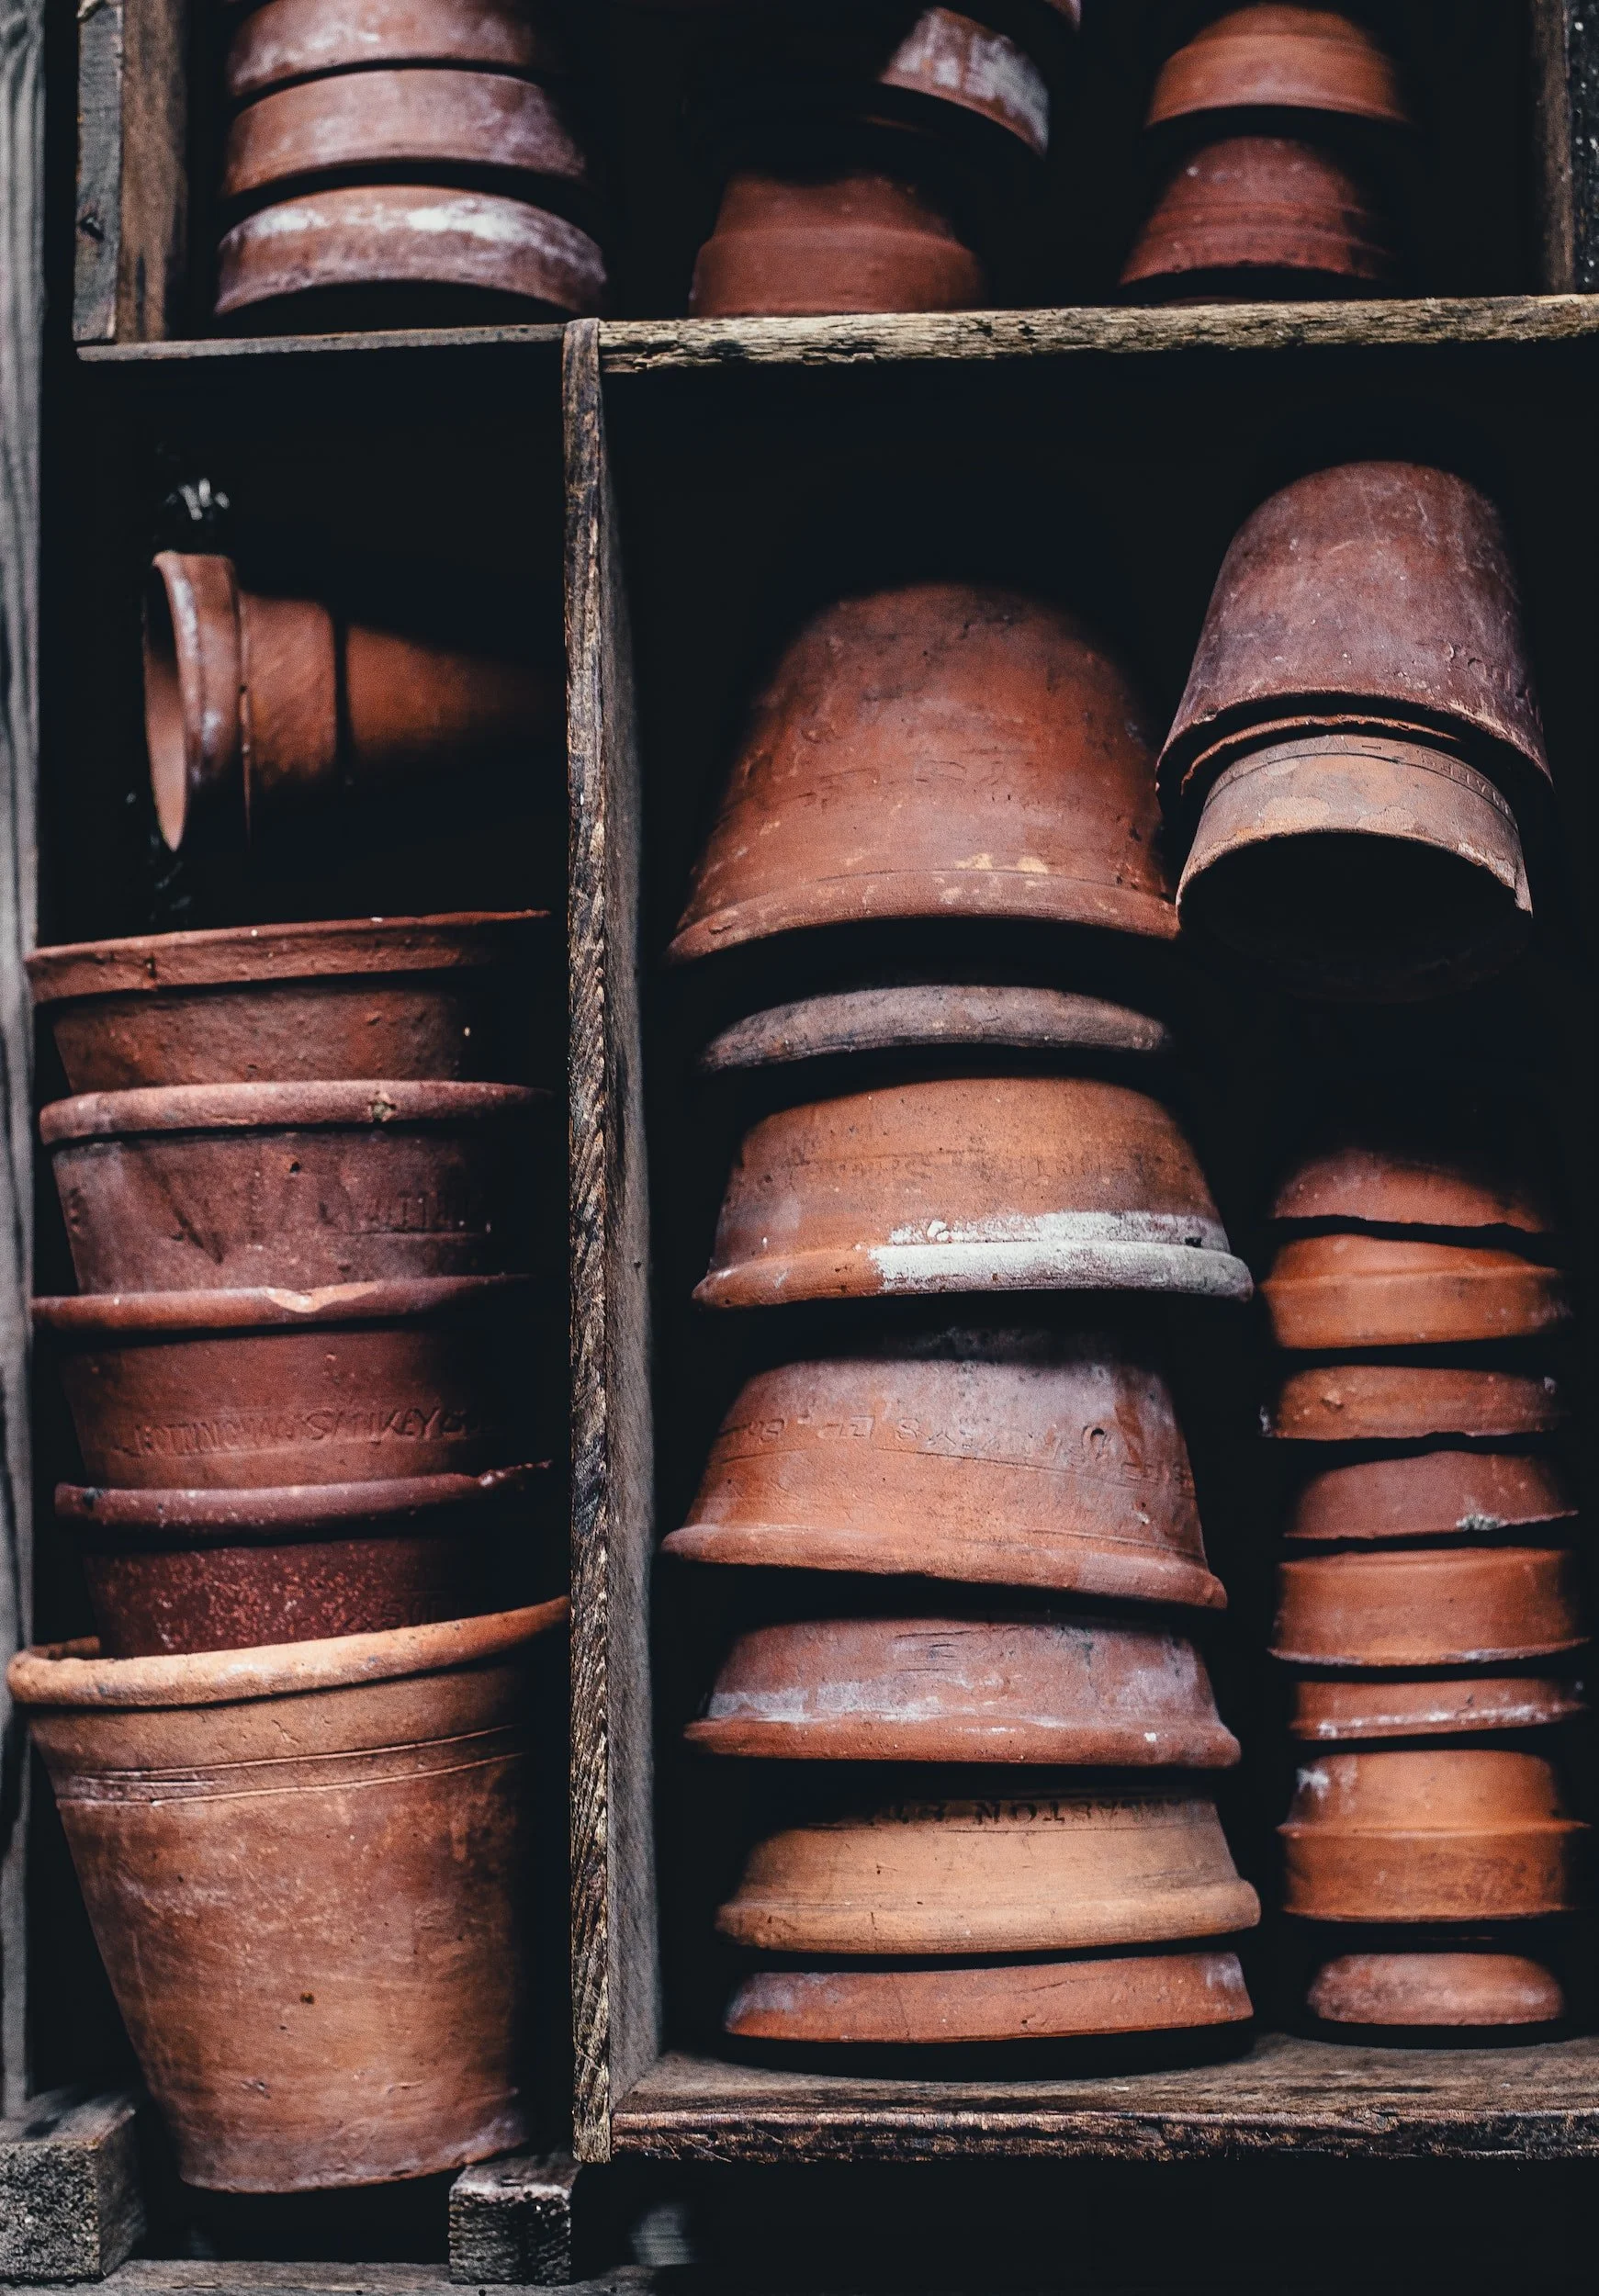
My general rule of thumb is I'm trying to keep my tools as clean as possible throughout my daily tasks so that I don't really get to this point where they're super dirty. I'm sure most gardeners have also had the humbling moment where you realize that you left a tool outside in the rain, only to find it weeks later impossibly rust. Last year I came up with the solution; I have a container outside that I can keep them in that’s actually connected to my raised beds so I can just drop them and go. I think the most important thing here is reducing that friction and making it super accessible and easy. Something like a mailbox mounted somewhere can be a really great affordable solution for storing your garden tools.
Seasonal Garden Tool Maintenance
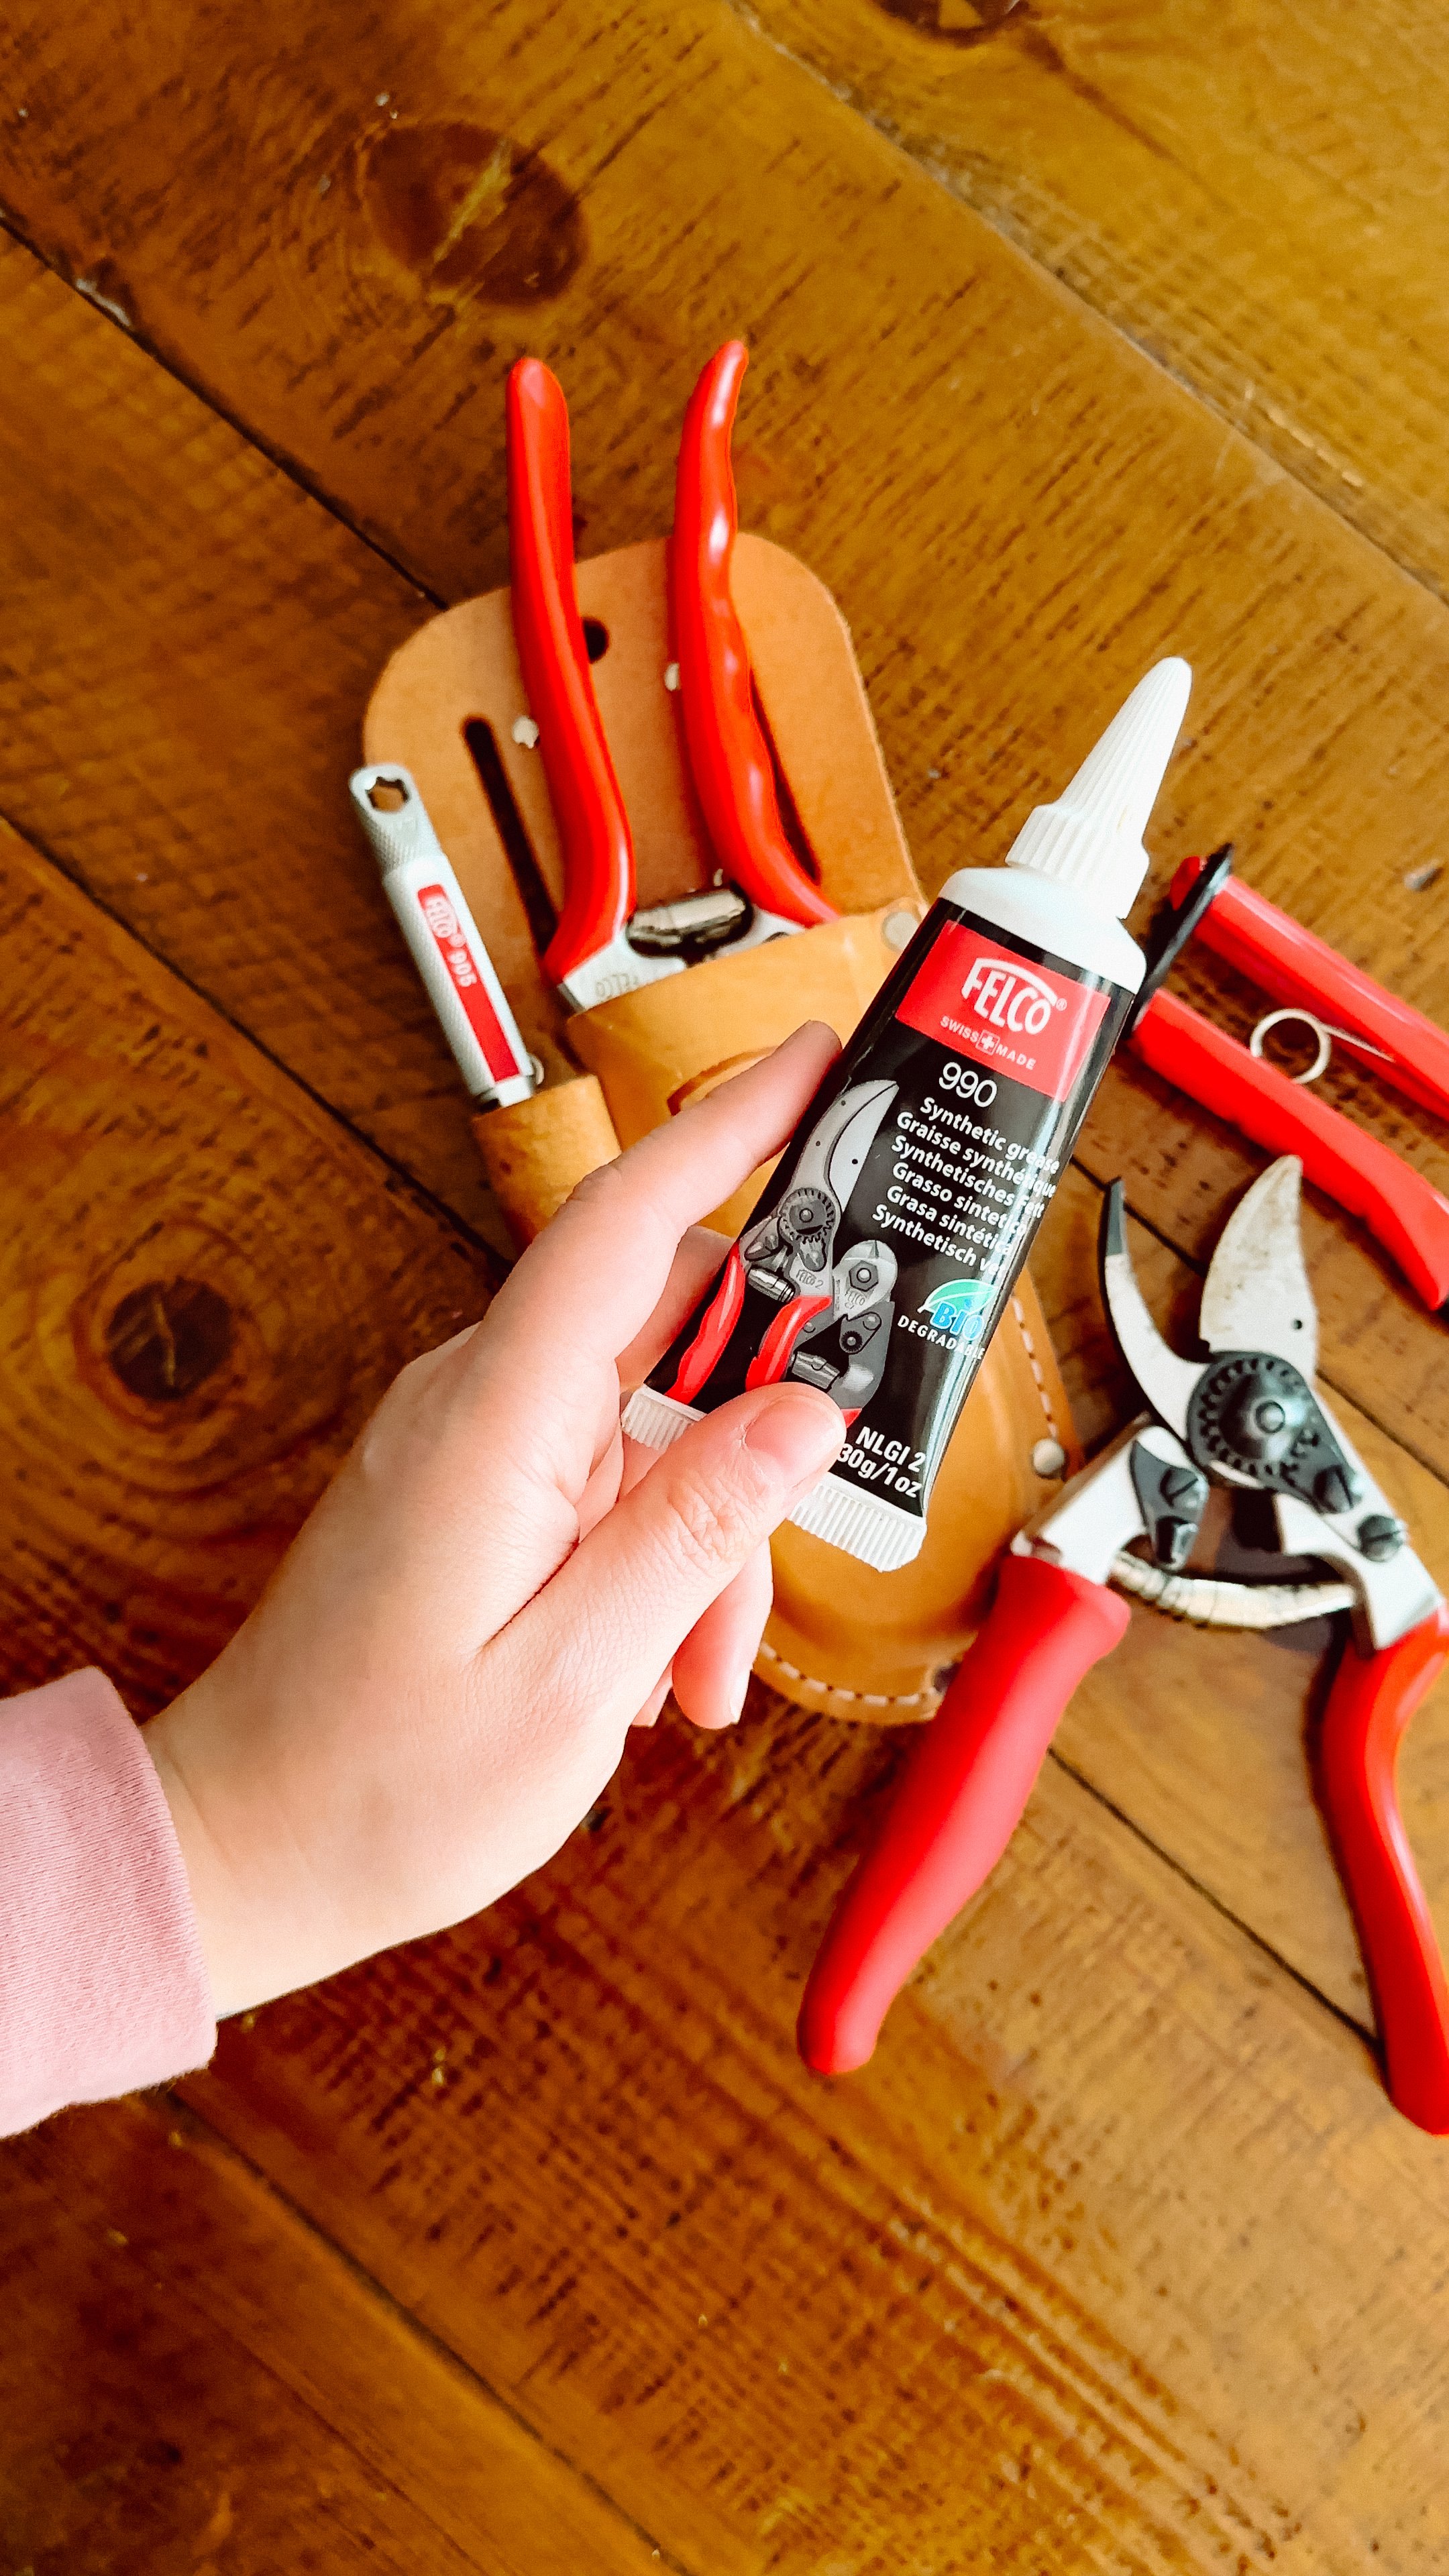
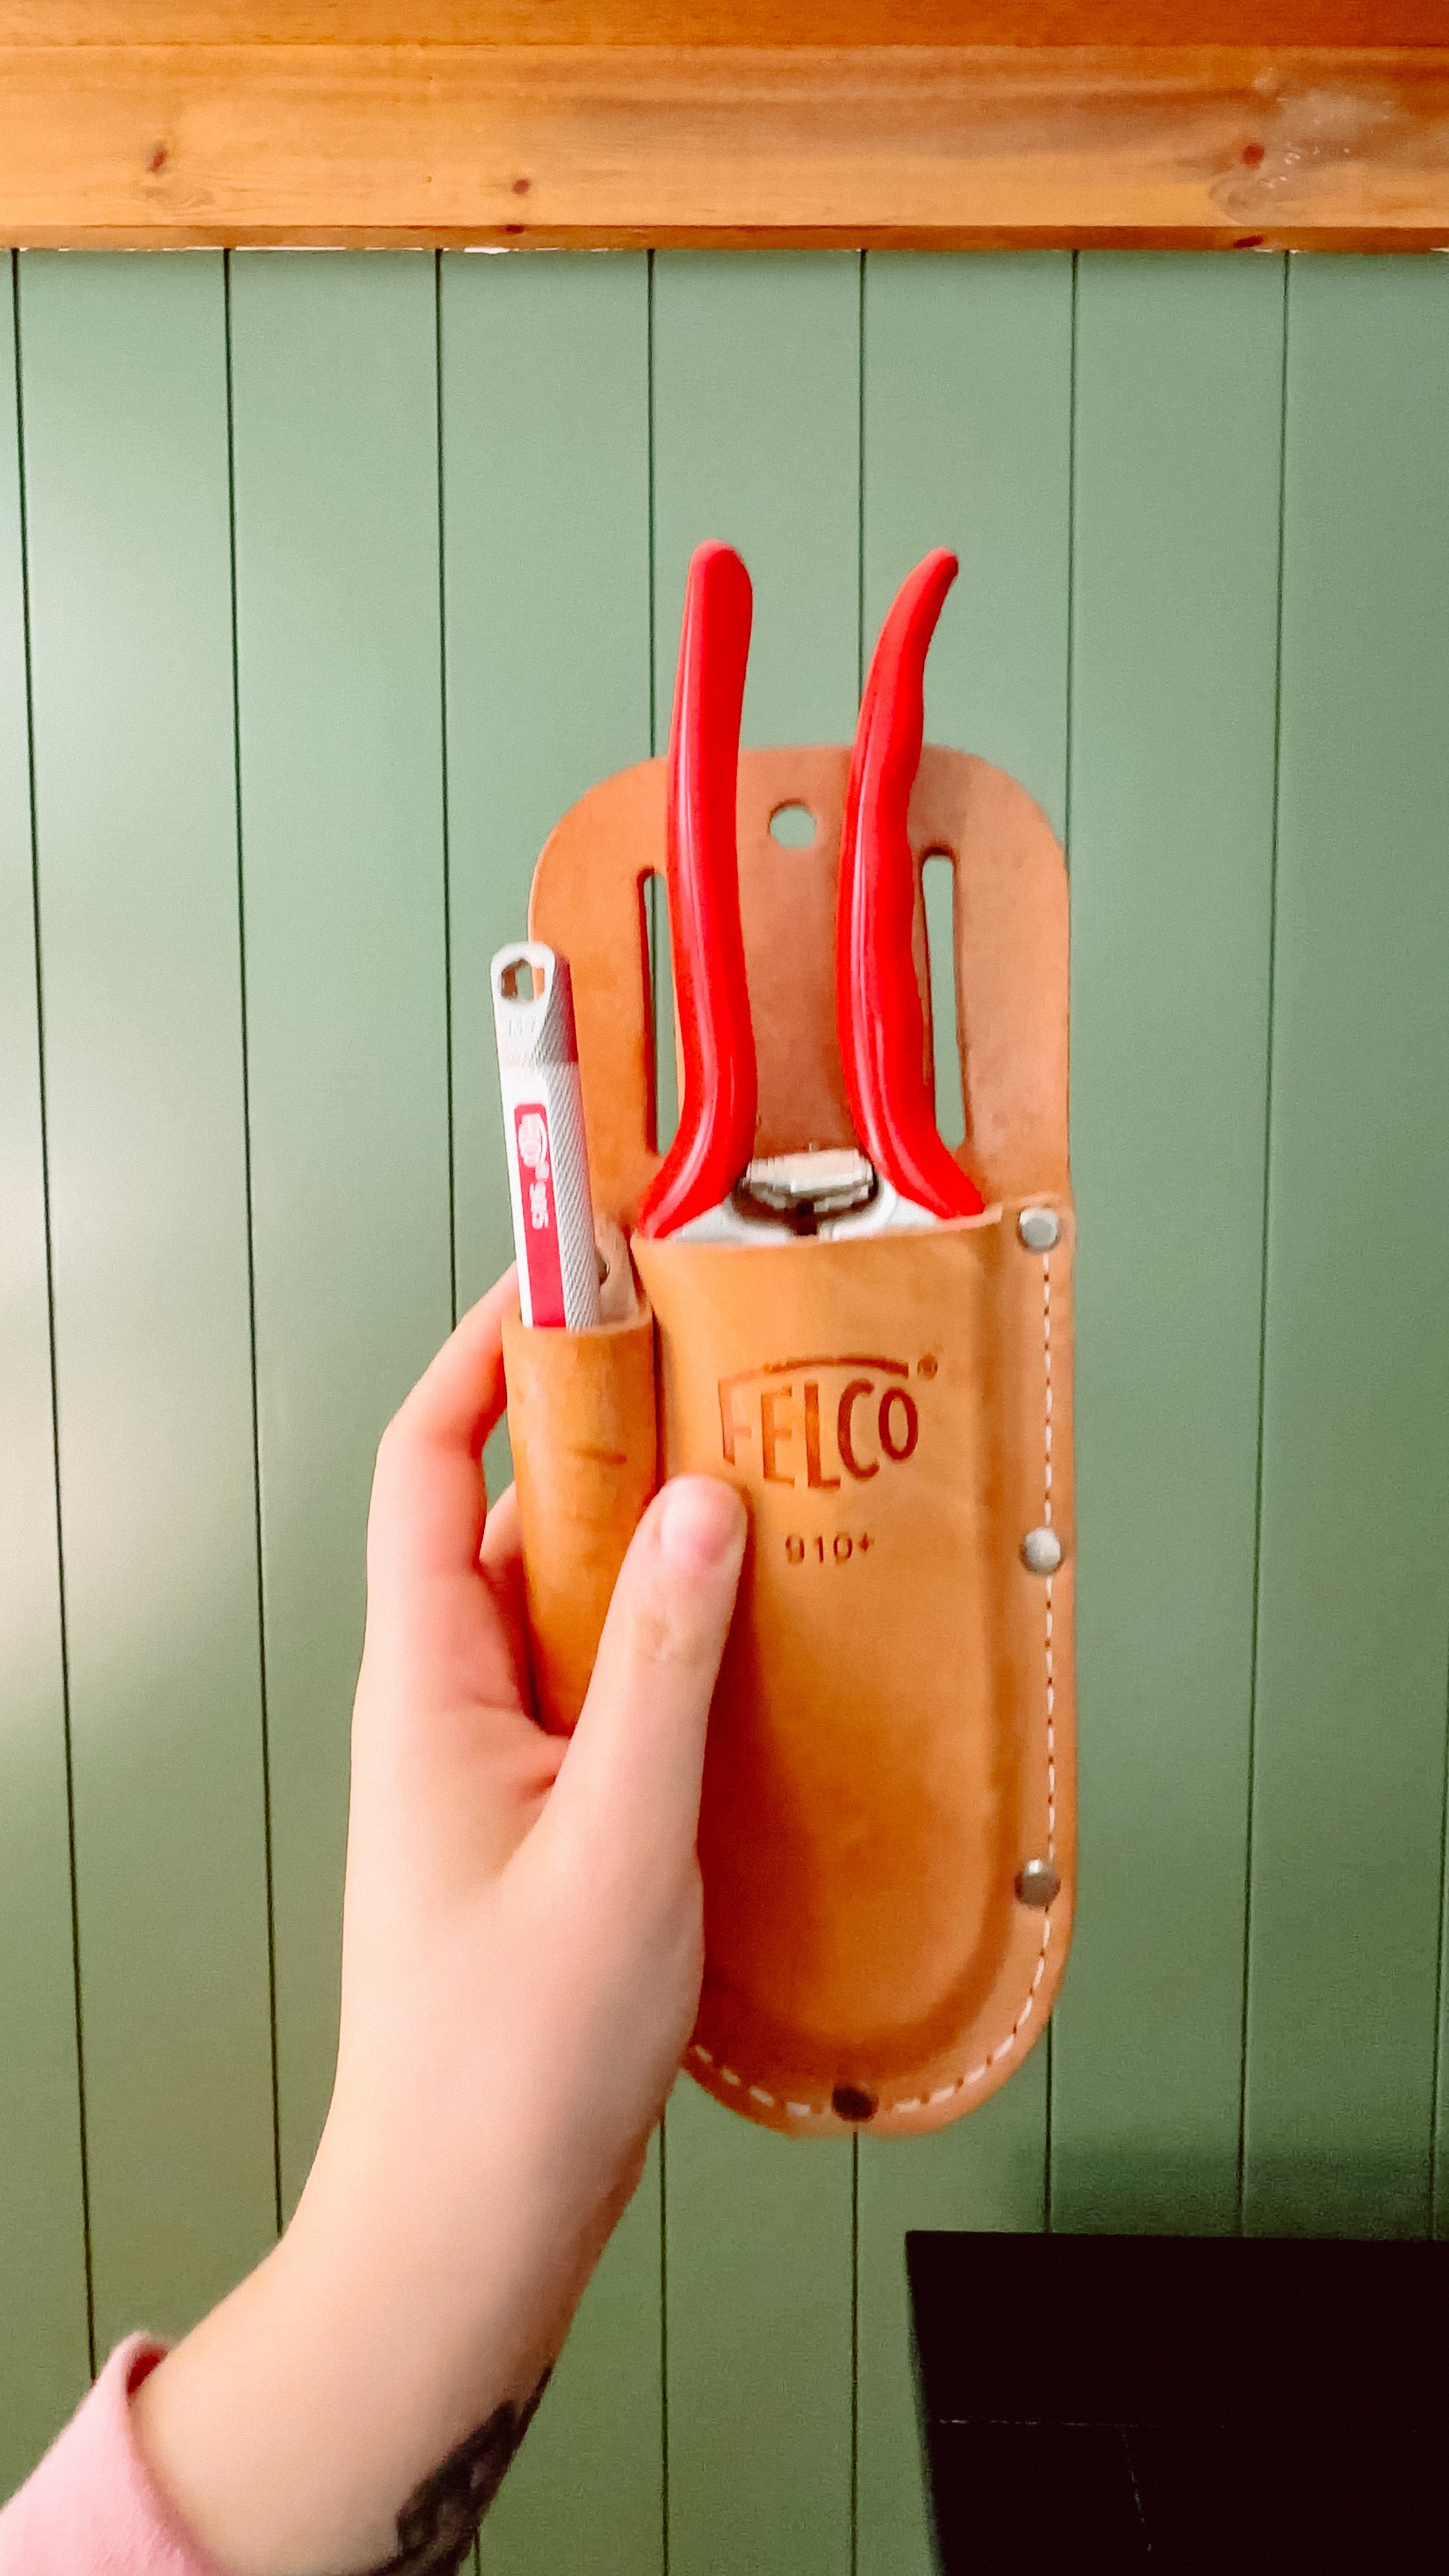
In the winter when things are slow is the perfect time to give all your garden tools a once over and some deep cleaning/TLC. Trowels, hand rakes and hoes generally just get brushed off with a dry rag and any wooden handles oiled with linseed oil. Blades are a little bit trickier and require some additional attention. I always keep a Felco 905 sharpener around for this task, it is a really great all purpose sharpener when you've got tools with blades that you need to maintain. But really a bit of Felco 990 grease, a sharpener and some clean rags are all you’ll need to get started!
Cleaning snips
My harvest snips always have some plant residue buildup on the blades themselves that I want to clean off. In terms of daily maintenance with these, I sanitize the blades with an alcohol wipe pretty much every time that I use them because we don't want to be transferring any diseases from one plant to another. For example last year I had an experience with black rot on my grapes which can transfer to other plants and thankfully when I discovered this I didn't have to panic because I knew I had taken care of sanitizing those blades before using them on any other plants.
For something like these snips where they are really only cutting through really lightweight plant material you're not going to notice a lot of burrs on the blades themselves most of the time, but you can always do a quick sharpen just to give them a fresh edge.
Sharpening and cleaning Felco F2s
If your Felcos aren’t looking super rusty or having trouble opening and closing smoothly, you can usually get away with just a light sharpening. In general, it’s a good idea to take them apart once a year to regrease the internal mechanisms. If you do need to take these apart, never use water, always use some kind of oil based lubricant cleaner. Take a photo before you take them apart so that you know how it goes back together. And of course, we're dealing with a very sharp blade here so make sure that you’re holding with a secure grip and cleaning/sharpening away from your body.
Keeping your garden tools in good shape doesn’t have to be difficult, but it is important to prioritize finding time each winter to keep them working like new. What other garden tools would you like me to cover next?

Make Gardening Manageable with These Must-Have Tools for Low Energy Gardeners
April brings with it the arrival of the height of gardening preparations, and the demand it takes on our bodies as we assemble new gardens, pull lawn furniture from storage and shovel mulch means that I am ending my days sore and tired. I’ve been gardening for most of my life in one form or another, but ten years ago I was diagnosed with psoriatic arthritis, and since then I’ve had a whole decade to come up with the best gardening hacks to and gardening tools for gardening with chronic pain and low energy.
The Cottage Peach is reader-supported. When you purchase through links on our site, we may earn an affiliate commission at no additional cost to you. All opinions are our own.
April brings with it the arrival of the height of gardening preparations, and the demand it takes on our bodies as we assemble new gardens, pull lawn furniture from storage and shovel mulch means that I am ending my days sore and tired. I’ve been gardening for most of my life in one form or another, but ten years ago I was diagnosed with psoriatic arthritis, and since then I’ve had a whole decade to come up with the best gardening hacks to and gardening tools for gardening with chronic pain and low energy.
Psoriatic arthritis often confuses people who don’t have it - its cousins rheumatoid and osteoarthritis are far more common, so there’s a misconception that psoriatic arthritis isn’t as serious or doesn’t have as much of an impact on quality of life as these more well known forms of arthritis. The fact is that psoriatic arthritis is more than a skin condition. I experience severe joint pain and fatigue, just like someone with rheumatoid arthritis or osteoarthritis. I just get the added “bonus” of sensitive dry skin too. While exercise can help with my symptoms, it can also make them worse if I push myself too hard. I’ve had to learn my physical limitations by testing them, and those limits are a lot lower than someone living without an autoimmune disease. The idea that arthritis is an “old person's” condition is so pervasive that people often think it can’t really be that bad, especially since I am young and don’t look sick. But invisible illnesses like arthritis and other autoimmune conditions can dramatically change your life, no matter how old you are.
I’ve hit breaking points with my arthritis while gardening many times. I have sat, covered in dirt and crying because I couldn’t bend over or kneel to clear weeds from an in-ground garden bed. I thought the solution was to just scoot along on my butt, but quickly discovered that even though this was easier on my joints it was still physically exhausting and left me too fatigued to finish. I have lost the hand strength to grip a shovel or rake on more than one occasion. I have felt scared that someday even the little things I do could be beyond my ability if I’m not careful. Gardening is rooted in my soul, a part of my identity, and I don’t know what I’d do without it at this point. Gardening and nature in general have brought me out of the darkest moments in my life. Tending to plants gives me purpose and fulfills my need to nurture.
This is my why. The reason I sit here day after day and type these words to you: I grew from these challenges, and I want to show you how you can too. Now these hard times that I faced are just more proof that I know I can trust myself to stand up for my needs and prioritize them. They solidified my identity and brought me closer to knowing myself. Most of this came from mindset (we are hard-wired to see the negative first, but that can be overcome) but after that mindset shift, in order to make real concrete change I invested in a few gardening tools that would make it possible for me to continue doing what I love.
The key to low energy gardening:
These tools won’t give you superpowers. I could give you all my best vegetable gardening tips and tricks but you’ll still find the key to low energy gardening is planning and pacing yourself. This means working in short blocks of time, around the times of day when you know you have the most energy (mornings are hardest for me) and being strategic about resting when needed by encouraging rest through your outdoor garden seating arrangements. They also may not fully address all of the limiting factors you may experience. I hope however that they can serve as a jumping off point from which you will feel inspired to find what feels good for you. I have chosen these tools either because they are specifically comfortable to handle with chronic pain, or they speed up whatever task they are designed to be used for.
Tools used for gardening

Weeding tools
Gardener's Lifetime Taproot Weed Extractor
Remove stubborn taproots and other deep-rooted weeds with less effort! Insert the prongs of this weed extractor vertically, right at the root, until the tubular section rests on the ground. Then, pull the handle towards you, and the weed will pop right out.
Gardener's Lifetime Half-Moon Hoe
Also called a swan-neck hoe, this popular tool cuts weeds just below the soil surface. The ergonomic design lets you stand up straight while working, minimizing back strain, and the curved blade lets you work in tight spaces between plants and rows. To give it extra strength and durability, the wooden handle is bolted into the deep socket
Gardener's Lifetime Cape Cod Weeder
Used by generations of New England gardeners, Cape Cod Weeders slice weeds just below the soil line and are great for working in tight spaces This Lifetime Cape Cod Weeder is hand-forged from the finest high-carbon Swedish boron steel with a pointed, self-sharpening tip. Unlike flimsy tools that are stamped from thin stainless steel, this weeder is ready for a lifetime of use by serious gardeners. To give it extra strength and durability, a 4" metal tang extends into the handle, which is securely fastened with a welded socket.
Best raised garden beds
Self-Watering Elevated Planter Box, 2' x 8'
These no-bend garden boxes keep plants hydrated via a series of innovative, connected reservoirs that deliver water to roots on demand. Four generous 5-gallon reservoirs extend the time between waterings and create more even moisture throughout the bed. And, since water is drawn primarily from the bottom instead of applied from the top, less water is lost to evaporation too! 10" planting depth accommodates a variety of crops, from tomatoes to root-crops like carrots.
The height of the planter box has other advantages too: fewer weeds, reduced maintenance, and fewer critters nibbling at your prize plants. The sturdy aluminum legs won't buckle or sag, and the wood is naturally rot-resistant and safe for your organic crops.
Garden seating ideas
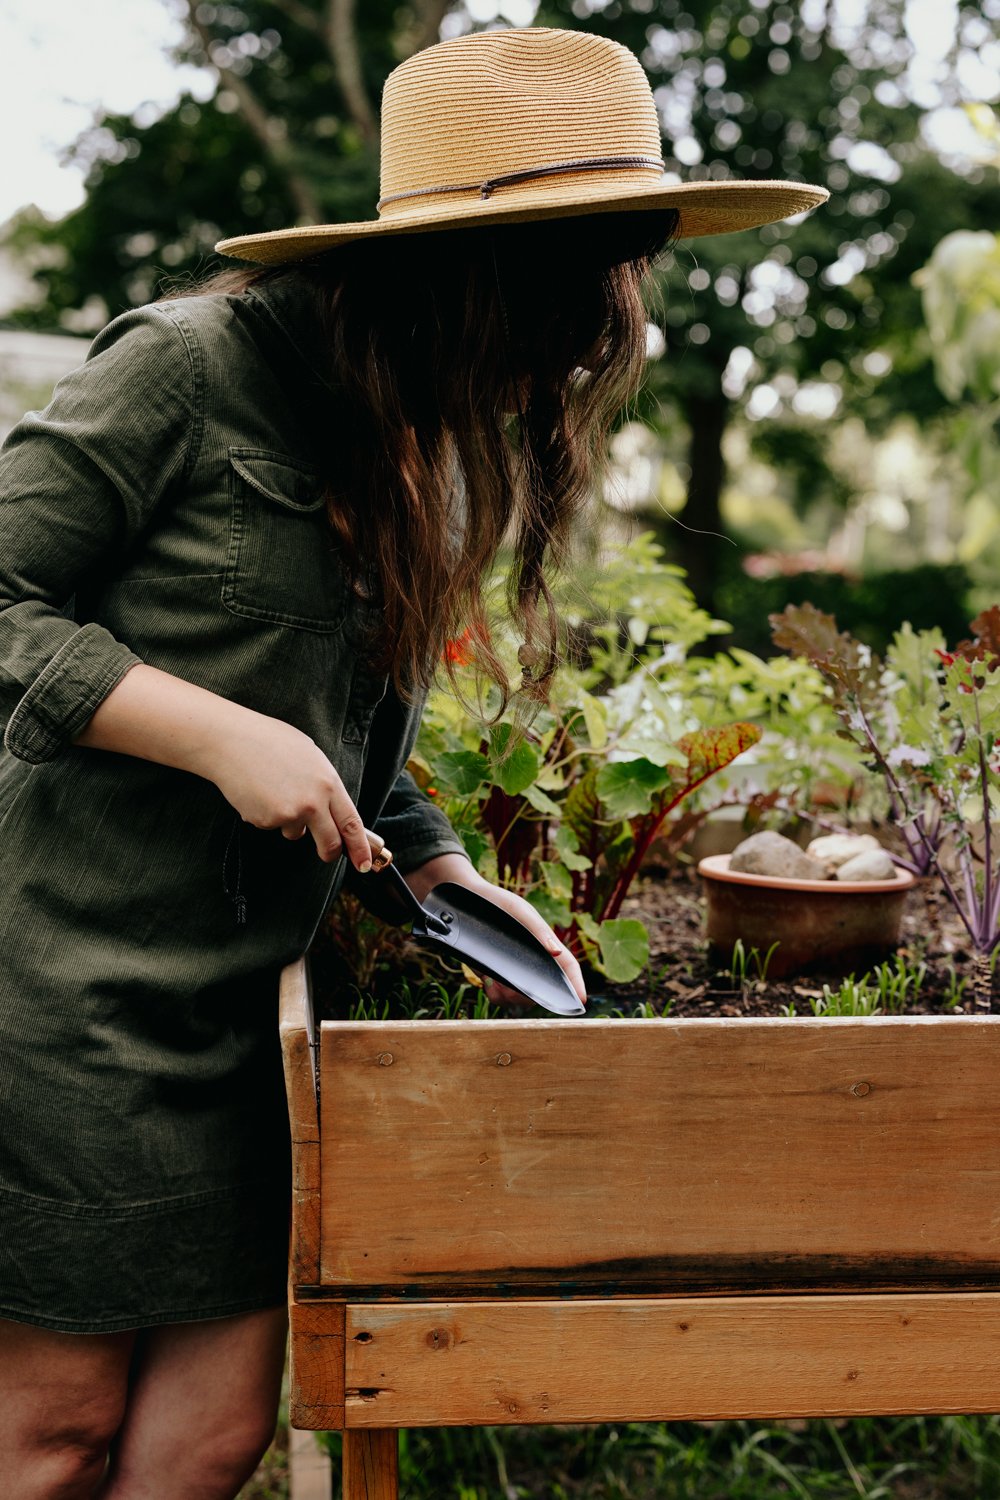
Garden seating is going to be so important if you have low energy or chronic pain. I like to have one main large work table outside that I can sit at for tasks I know will take longer like transplanting seedlings or just organizing a harvest. This is an inviting spot where I can rest while still feeling productive. It’s also a good idea to scatter around various benches and chairs throughout your garden space or at least keep a folding camp chair handy that you can collapse onto periodically in between weeding, watering and harvesting. Always keep water and sunscreen handy - I like to keep my harvest basket stocked with these essentials plus my clippers too, so I’m not walking back and forth just gathering everything. This way you don’t have to go inside every time you need a break, wasting more energy with the walk to and from the house as well as interrupting the flow state of gardening that gives us the most mental clarity.

Deep Seat Garden Kneeler
The extra-wide base makes it much more stable than narrower models, with sturdy sides that lock in place so you can raise and lower yourself with confidence. Easily flips from kneeler to padded bench. Sides fold in for compact storage. Holds up to 250 lbs. Weighs just 9 pounds, so it’s easy to carry.
Bamboo Garden Stool and Basket Combo
Versatile, heirloom-quality, all-in-one basket, stool, and seat. Carry tools and plant starts out to your garden, harvest veggies to bring inside, sit on it to weed and tend or keep potatoes and onions (or bath items, dog toys, and more!) neatly corralled.
Beautifully made from bamboo, a strong and highly renewable resource, it can support up to 250 lbs. as a seat. Quality joinery gives you the confidence to step up or sit down and go about your work. Flipped over, it feels solid in your hands plus the handles are wide and smooth — making it ultra comfortable to carry.
Deluxe tractor scoot with bucket basket
This go-anywhere, do-anything, super-stable rolling scoot lets you work from a comfortable seated position and is perfect for gardening, washing tires, painting baseboards and more. Super-sturdy; holds up to 400 lbs. Bucket Basket holds a 3-1/2 gal. Tubtrug or 5-gal. pail and carries up to 40 lbs.; perfect for tossing weeds or gathering the harvest. Handle extends for pulling, retracts & locks for support. Storage tray holds hand tools and supplies.
Best garden hose
Low energy garden irrigation is going to have to be a whole post in itself, because there are as many ways to water a garden as there are gardeners in the world. I will say that watering has turned out to be one of the biggest physical challenges to gardening for me. Since it often needs to be done daily, and cannot be timed around when I’m feeling best in the week, and winding/unwinding hoses is a special kind of torture to those of us with limited energy. Hoses are a low energy gardener’s number one enemy. I have two solutions to suggest:
Hoselink Retractable Garden Hose
The Retractable Garden Hose Reel is a wall-mounted unit featuring a high-quality spring-loaded hose that automatically rewinds on command. Its specially designed ‘stop-anywhere’ locking mechanism secures the hose at any length, eliminating excess hose to prevent kinks and tangles. To lengthen, simply walk the hose out further and stop wherever you want.
Olla Watering System
You can use ollas like these and never have to water your garden the hard way again, while reducing wasted water lost to evaporation by 60-70%.
Indoor gardening hacks
If starting a full outdoor garden is too much for you I have one last gardening tip to share: consider indoor gardening. There are so many options available now that will actually allow you to grow your own fruits and vegetables inside of your house. My favorite is the Smart Garden from Click&Grow - both stylish and functional tower garden options that bring nature to you. You can read more about my thoughts on the Click&Grow here!


Grow Food Outdoors All Year Long With Cold Frame Gardening
Living with arthritis as a gardener, I have formed a close bond with the land in order to better support my body. My immune system requires careful tending, and I find myself craving dark leafy greens, hearty soups and protein rich comfort foods as the weather turns cold. But in a cruel twist of fate, when my body craves these deeply nutritious foods most, the bitter cold of our New England winters do not accommodate a growing season which would allow me to cultivate all of the produce I wish to grow deep in December.
So how do we ask the land to sustain us through its deep hibernation? The answer may be found in the form of a simple wooden box called a cold frame.
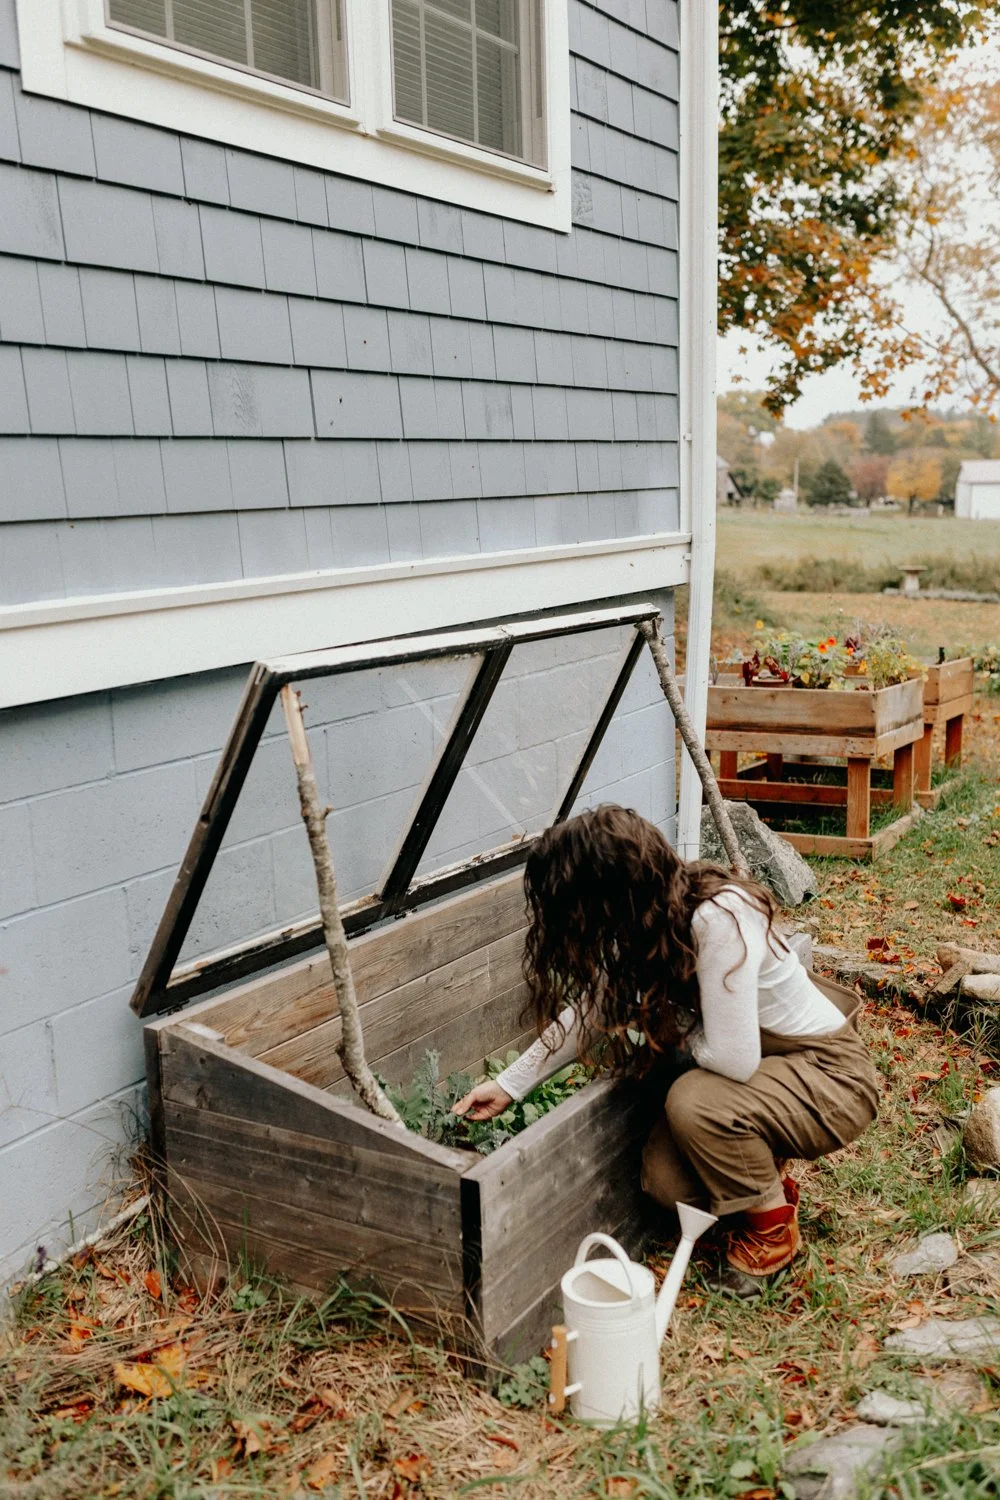
As cold and snowy weather descends upon us here in the Northeast, I find my achy joints actively calling out for more attention. Living with arthritis as a gardener, I have formed a close bond with the land in order to better support my body. My immune system requires careful tending, and I find myself craving dark leafy greens, hearty soups and protein rich comfort foods as the weather turns cold. But in a cruel twist of fate, when my body craves these deeply nutritious foods most, the bitter cold of our New England winters do not accommodate a growing season which would allow me to cultivate all of the produce I wish to grow deep in December.
So how do we ask the land to sustain us through its deep hibernation? The answer may be found in the form of a simple wooden box called a cold frame.
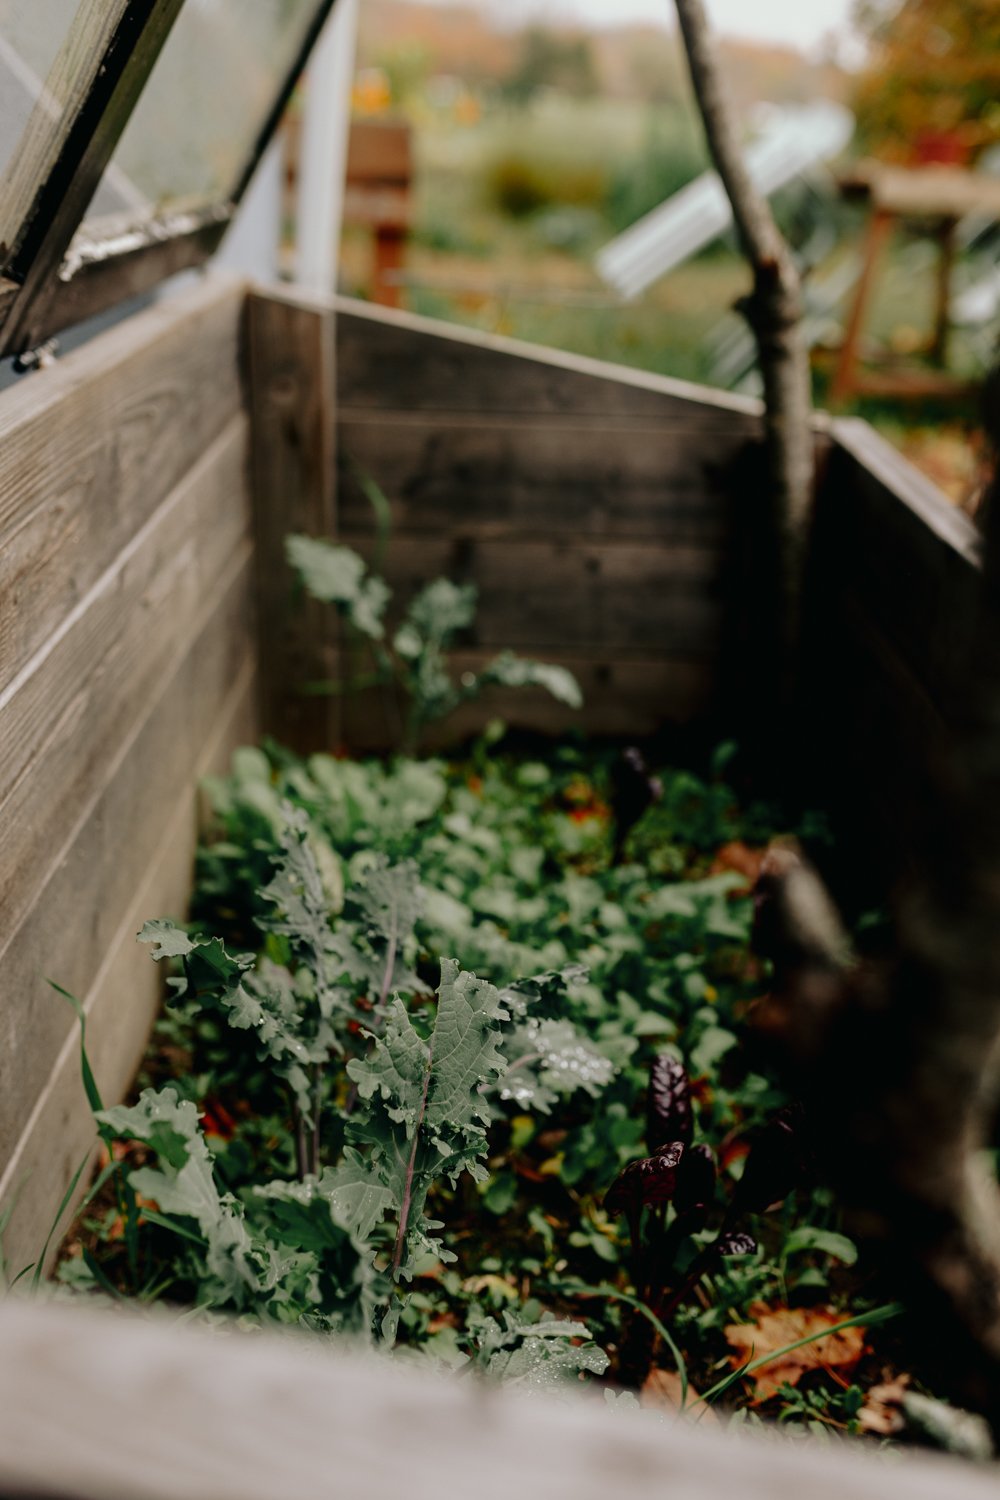
This rustic frame set into the earth, snuggled up against the sunny south wall of our home provides us ample opportunities to tend, grow and gather even in the darkest days of winter. It can feel like pure magic to enjoy a diverse variety of produce even as we are cozy in our blankets beside the fire.
How does a cold frame work?
A cold frame works by creating something like a mini-greenhouse, trapping warm air through solarization inside of the box and insulating the plants within from the worst that winter has to offer. We control the temperature inside of the cold frame with a simple vent - the hinged lid can be propped open with different sized sticks to allow excess heat to escape on warmer days, but for the most part in our deep New England winters the lid stays firmly shut until we trudge through the knee deep snow to harvest.
Like many things in life, we cannot expect to circumvent nature entirely for our own benefit. Nothing in nature blooms all year. Try to plant delicate heat loving peppers, for example, and you will be met with disappointment. Similarly, the plants enjoy a slower season in winter, much the way we humans do. If you’re not convinced, I’d ask you to consider this: if the trees can take a break, so can you.
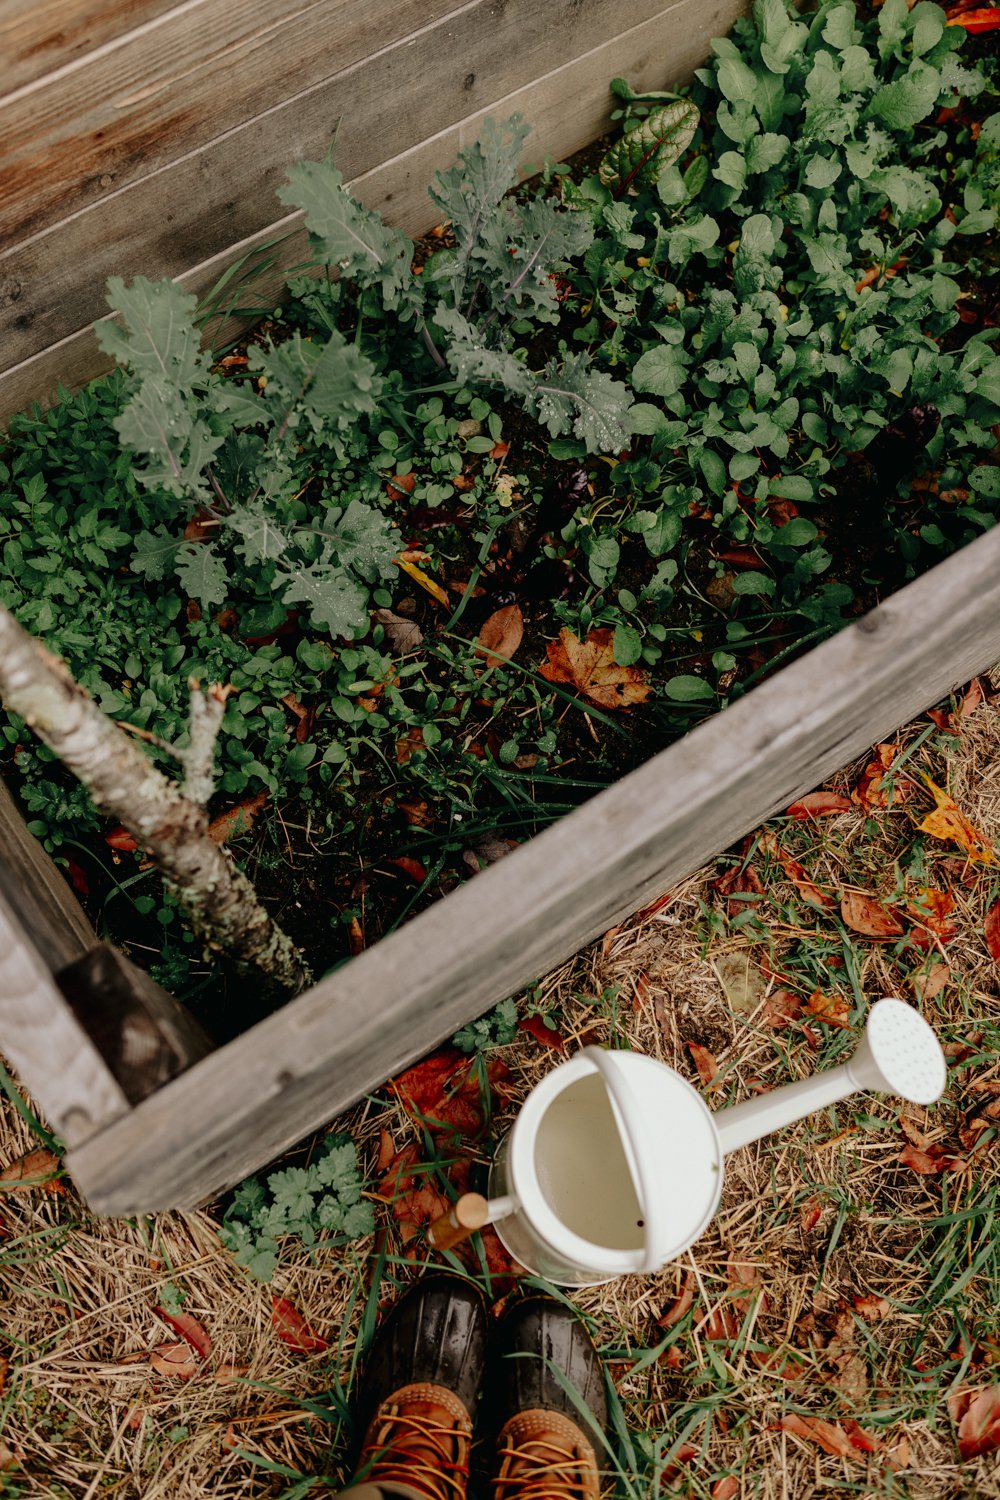
A cold frame is a lesson in slowing down and radically accepting things as they are. Your kale, radishes and lettuce will grow and thrive at a slower pace than you can expect in warmer seasons. The harvests are fewer, but more rewarding for the mere fact that they exist at all. And while a cold frame requires a certain amount of upkeep and planning in the beginning, this slowed down nature means that watering and weeding becomes virtually unnecessary in the coldest months.
Now, if you live in a climate that does not experience a cold winter season you may think a cold frame is unnecessary. Although, they continue to be useful even into the spring season here in New England since they make the perfect protected nursery in which to harden off your summer seedlings each spring. And if you can easily build one for cheap or free using reclaimed materials, why not give it a try?
Where should you put a cold frame?
You’ll want to choose a location for your cold frame that is protected from north winds and generally sunny. This means the best spot for your cold frame will have no shade from any trees, and preferably be placed with the back wall of the cold frame up against the south side of your house, shed or barn. If you don’t have a spot like this available, then anywhere without shade will do. You’ll just need to spend some extra effort properly insulating your box from the winds.
Speaking of howling winds, so long as it is protected from those north winds we discussed you shouldn’t worry yourself too much about creating something airtight. Your cold frame is not a greenhouse, and so we don’t expect it to function quite the same. Build your frame to be thick and sturdy, but don’t worry about every little seam and crack.
How to build a cold frame
If you have the time and physical ability, building a cold frame yourself is absolutely the most economical solution. Purchasing one ready-made can cost you anywhere from $60-$500 and quality issues on the low end of that budget will prevent you from getting many years of use out of it. Meanwhile, if you build one yourself it can be done for far less than the low end of that range and produce an end result that will be sturdy enough to continue providing shelter to your winter crop for years to come. While old windows can be fragile and prone to breaking, when they can be found for free I still find it a better option than a new piece of corrugated plexiglass.
We built our cold frame just as the first leaves began dusting the earth, making their final descent from the branches above. Pulling out the old wooden windows and reclaimed lumber from our basement, I didn’t really have a plan. This is the nature of projects on our little homestead - in order to put to rest my fears and limiting beliefs, I have a tendency to turn a blind eye to the specifics and figure things out as I go. “I’m just going to build a big rectangle, the size of the two windows combined, and stick the windows on top” I confidently told myself. It’s safe to say I don’t have a ton of confidence when it comes to building things, but I was betting that between the two of us, we could figure it out. A chill wind traveled across the field. I adjusted my hat over my cold ears and set to work.
This method of trial and error has generally served me quite well on this journey, and I’ve found it to be essential to growing plants in particular. A fussy Nasturtium in Georgia, for example, is going to have very different needs that one planted in Vermont. So why overwhelm ourselves with tips and tricks from every gardener in the land when we could simply plant, observe, expect failure and experiment until things go right?
You can use many different materials to build a cold frame - but the very best materials are the ones you already have. Our little pile of scrap lumber provided nearly everything we needed to create a sloped box on which to mount our hinges and old wooden windows.
The result was…lopsided. For some reason, the box wasn’t sitting level on the earth, the wood having twisted under tension at some point, unnoticed by our novice eyes. The old windows we used for a lid were chipping questionably safe paint flakes every time we opened and closed the hinges. But it was finished, and it was free, and so - in the ground it went. I packed straw around the exterior to fill in the gaps where the frame didn’t meet the soil and added extra in the space between the wall and the cold frame, set my plants in the earth and held my breath that I would discover an abundance of fresh food beneath the glass in a couple of months.
I suppose I shouldn’t have led with such an obvious spoiler, but the cold frame did work, and an abundance we did have, regardless of our lack of building skills. And so as its lessons compounded the cold frame became something more than a simple box to grow in. The weathered wood shines like a beacon, a reminder to ourselves that we can accomplish more than we think, and done is better than perfect.
What Can you grow in a cold frame?
Kale
Swiss Chard
Spinach
Radishes
Lettuce
Beets
Carrots
Arugula
Kohlrabi
Scallions
Parsley
Mustard
Best cold frames to buy
Don’t want to build your own cold frame? There are many pre-made options available that are built to last. I suggest looking for a cold frame that has a rot-resistant cedar base and shatterproof polycarbonate lid. If you already have raised beds, then a plant protection tent may be the best option for you as you can simply convert your raised beds into a cold frame for the winter months and then remove the tent structure in the summer heat. Here’s my recommendations for the best pre-made cold frames and tent frames you can buy:
The 3-Season Garden Protection Tent from Gardener’s Supply makes it easy to access plants within your raised bed and includes two covers and durable powder-coated steel frame. This tent provides 70% light transmission, 40" of head room at the peak, and has roll-up end windows for ventilation. A second cover protects against ravenous summer bugs and scorching sun. Three zippered doors on each cover provide easy access for tending and harvesting. Tie-downs secure the covers to the steel frame. Click to Shop
The Cedar Cold Frame from Gardener’s Supply is an attractive cold frame with a narrow footprint. The base is made from rot-resistant lumber with aluminum corners. The top is made with polycarbonate panels that diffuse light so plants don't "cook," and there are adjustable braces to hold panels at various intervals for ventilation. Click to Shop
Will you try cold frame gardening this year? Have you used a cold frame already? Comment and let me know!

10 Zero Waste Gardening Tools and Ideas
In all areas of our lives, from our hobbies to our habits, we have opportunities to either increase or reduce our impact on the environment and the effects of climate change. While the burden of fixing our climate crisis should not fall on the individual but the corporations that are responsible for the vast majority of damage done, every little bit you are able to do can help. The best part is, most of the ways we can reduce or eliminate our waste in gardening come at no additional effort or cost - it simply comes down to intentionally deciding on the plastic free or secondhand option instead (which is often cheaper anyway)

The Cottage Peach is reader-supported. When you purchase through links on our site, we may earn an affiliate commission at no additional cost to you. All opinions are our own.
In all areas of our lives, from our hobbies to our habits, we have opportunities to create or reduce our impact on the environment and the effects of climate change. While the burden of fixing our climate crisis should not fall on the individual but the corporations that are responsible for the vast majority of damage done, every little bit you are able to do can help. The best part is, most of the ways we can reduce or eliminate our waste in gardening come at no additional effort or cost - it simply comes down to intentionally deciding on the plastic free or secondhand option instead (which is often cheaper anyway)
What does zero waste mean? What is zero waste?
Zero waste is the principle or practice of sustainable living in which the participant commits to reducing or eliminating streams of waste in various aspects of their lives. This can include reducing water consumption, shopping the bulk food bins or repurposing household items at the end of their “useful” life, to name a few.
The concept of zero waste living can sound intimidating or difficult, but more often than not it is nothing more than a simple shift in your awareness and intention. It also does not mean you must completely eliminate all sources of waste in your life - despite the word “zero”, it is not an all or nothing game.
What kinds of waste are there?
Waste comes in all forms, in all areas of our lives. While the majority of waste filling landfills is produced by industrial operations, domestically, we waste food, water, energy, paper, packaging, furniture, clothes, computers, tires, appliances and more in unimaginable amounts. Americans send nearly 150 million tons of trash to landfills each year instead of recycling it, and we’re running out of space.
Where does waste go?
Waste goes into landfills, which typically cause the destruction of natural wildlife habitats in their construction. They are often lined in plastic. The average landfill size is 600 acres. With over 3,000 active landfills in the United States, as much as 1,800,000 acres of habitat have been lost. When waste breaks down in a landfill, methane gas is released. Methane is 84 times more effective at absorbing the sun’s heat than carbon dioxide, making it one of the most potent greenhouse gases and a huge contributor to climate change.
Food can’t break down in a landfill
Food waste needs oxygen in order to break down properly. Due to the fact that landfills are so tightly packed with waste of all kinds, food waste is often suffocated to the point where it cannot break down into the individual nutrients it is composed of and be reabsorbed into the earth, regenerating the soil. What happens if food doesn’t break down? It rots. When food rots in a landfill, it produces huge amounts of methane — a greenhouse gas at least 28 times as potent as carbon dioxide.
Here’s what the FDA has to say about the impacts of food waste:
“Food loss and waste is estimated to be roughly one third of the food intended for human consumption in the United States. When food is discarded, all inputs used in producing, processing, transporting, preparing, and storing discarded food are also wasted. Food loss and waste also exacerbates the climate change crisis with its significant greenhouse gas (GHG) footprint. Production, transportation, and handling of food generate significant Carbon Dioxide (CO2) emissions and when food ends up in landfills, it generates methane, an even more potent greenhouse gas.”
This is why zero waste food is so important, and we can do this easily with composting! (More information on that below)
Ways to incorporate zero waste principles into your garden
We live in an era that romanticizes convenience in all forms. Of course it’s easy to see where these ideas might apply to a zero waste home, but this also extends to our hobbies, including gardening. You can’t visit the local garden center without being bombarded with gadgets and tools promising to make garden tasks easier, faster or better. But the fact is that humans have been gardening successfully for hundreds of years, without many of these interventions. Certainly there are tools that make gardening more accessible for those of us with chronic illness or pain that find it challenging, but here I’m primarily referring to situations where there is a perfectly good alternative with less packaging, that is made without plastic which can never break down once it reaches the end of its useful life.
I’m sure you’ve heard this before, but the key concepts behind achieving a zero waste lifestyle are to reduce, recycle and repurpose. But how do you apply these concepts in the garden?
I recommend intentionally shifting your mindset.
When something breaks and needs to be replaced in the garden, first ask yourself “Can this be repaired?” if not, ask “can it be repurposed?” and if you still cannot find a use for the broken item, ask “can it be recycled?”
With these three simple questions, you’ll be well on your way to intentionally incorporating zero waste practices into your garden routine. But here’s a few ideas for zero waste gardening to get you started:
Reuse food containers for produce storage
Pop your zucchini in an old bread bag, pureed pumpkin in salsa jars and fresh picked berries in plastic yogurt tubs - all of which make excellent replacements for disposable freezer bags or plastic wrap. You’re keeping those items out of the waste stream AND preventing the addition of another piece of waste from the disposable products you skip using.
Wrap produce in damp cloths
Not only are you avoiding the use of disposable cling wrap, you’ll extend the life of your vegetables and avoid having to send them to the compost all together. In fact, learning the best storage methods for every fruit or vegetable that you grow is the best way to reduce food waste.
Save shower water for plants
Before you close this page in disgust, I’m not saying you have to save your DIRTY shower water. But how long are you running that shower before you even get in? Simply place an empty 5 gallon bucket under the faucet until you’re ready to get in, then pour that excess water on your garden beds when you go out to water.
Make vegetable stock
By being proactive and saving any cut offs from your carrot and onion ends, as well as any whole vegetables you won’t be able to use before they go bad and freezing until you have a full gallon bag to work with you can make simple and nutritious vegetable stock - just add your collected scraps to a pot of boiling water and simmer covered for 1-4 hours.
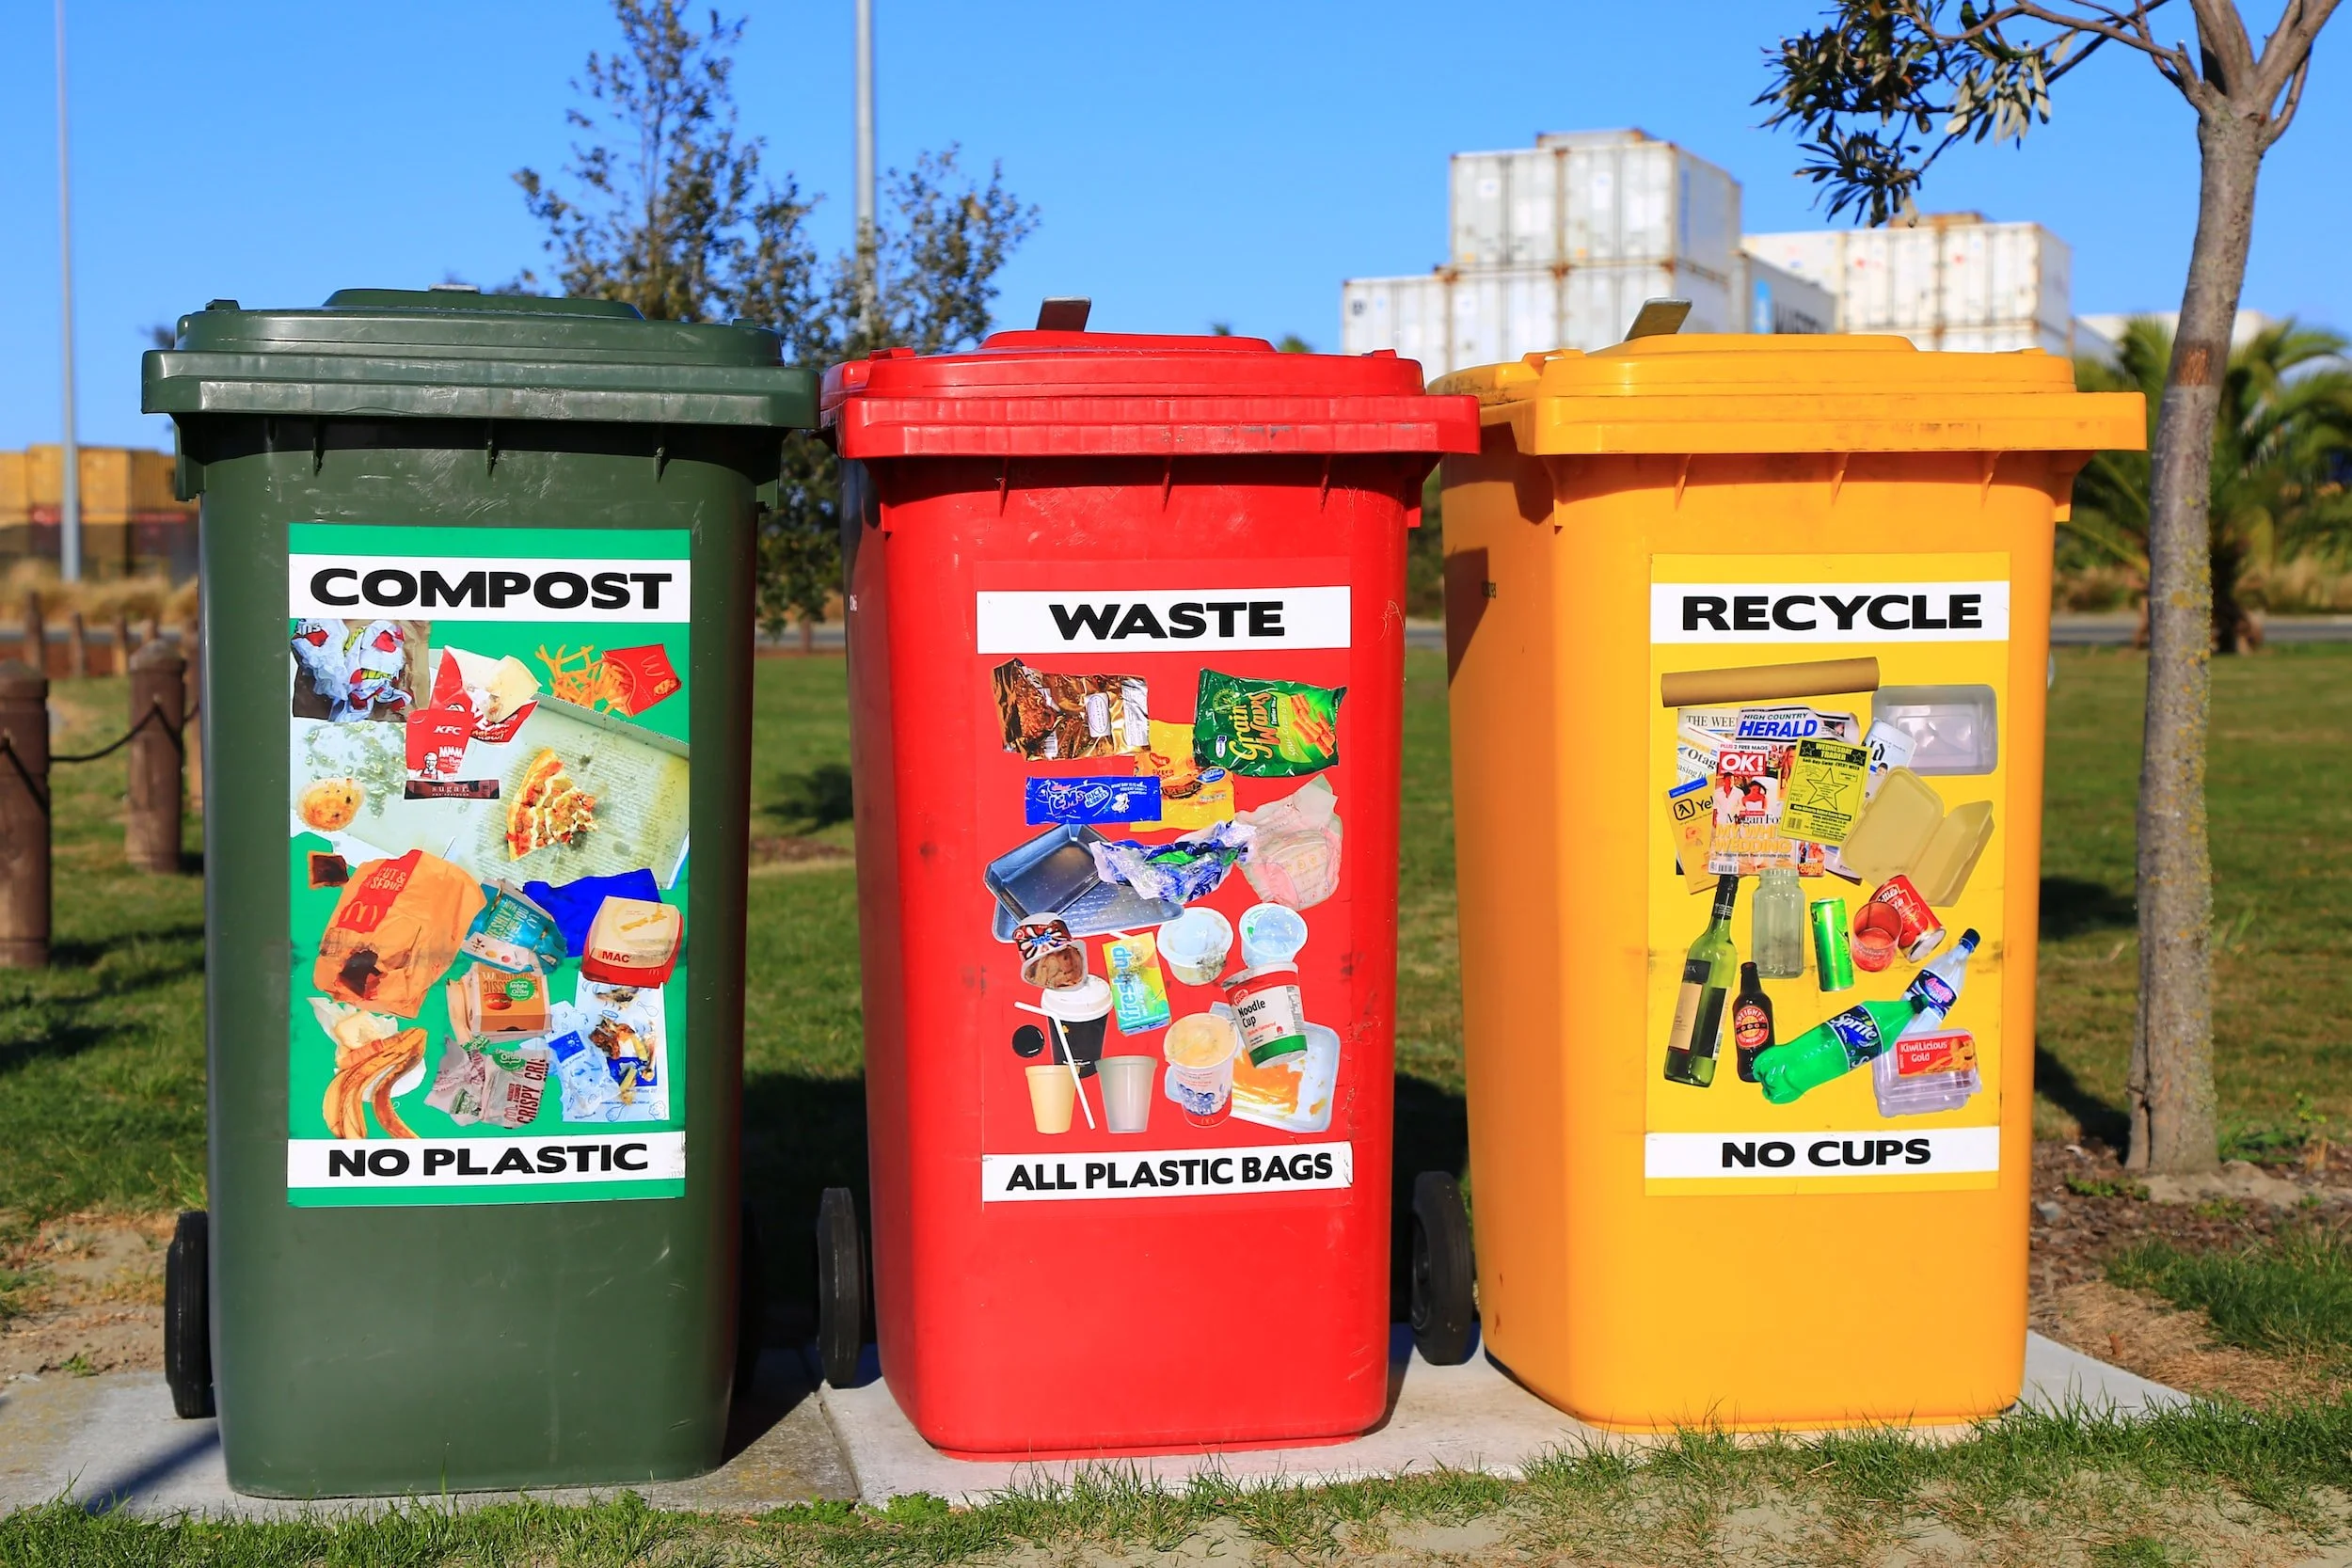
Compost
Landfills lack the oxygen that compostable items need to fully decompose. By putting biodegradable items into the compost instead of the trash, you can save huge amounts of waste from the landfill. We have an outdoor compost pile as well as Lomi - an indoor countertop composter that allows us to compost all sorts of things we couldn’t put in a regular compost pile including meat, dairy and bioplastic packaging which would take years to fully decompose in a traditional compost pile.
Save cardboard for kindling/weed barrier
Any child who has ever built a fort out of a box will tell you that cardboard has infinite uses, and the garden is no exception.
Buy second hand garden clothing/tools
When you choose second hand gardening tools, hats and aprons you’re keeping precious items from the landfill, giving them a new life and best of all these items have generally already withstood the test of time, so you can count on them to last.
Take care of what you have to make tools last
Once you have those second hand tools, make sure and do your research on the best way to maintain them. Click here for my post all about the best ways to maintain your gardening tools.
Repurpose branches for stakes/trellis
Nobody likes a plastic trellis, and even the pretty wooden ones available at garden centers hardly last me one season. Building a natural trellis using sticks and branches is simple and rewarding, and fits in well with the natural landscape you’re working in. Plus, at the end of the year you can just chuck them back in the woods if they’re broken or place aside to reuse again.
Use jute twine instead of nylon
According to GoodOnYou, producing nylon creates nitrous oxide, a greenhouse gas that is 300 times more potent than carbon dioxide…Manufacturing nylon is a very thirsty process; large amounts of water are used for cooling the fibers, which can be a source of environmental contamination and pollution. Treehugger says that nylon production is associated with the same negative environmental impacts as fossil fuels, including exacerbating the climate crisis. It’s safe to say that nylon is definitely not biodegradable, unlike its natural cousin jute twine. Because jute is compostable and biodegradable and requires fewer resources to grow and produce, it is considered a future-proof sustainable fiber.
I hope this post all about zero waste gardening ideas was helpful! what tricks do you use in the garden to reduce, reuse and repurpose? Comment below and let me know!

The garden tools I need to have in my shed
The planting of seeds by humans is believed to date back tens of thousands of years. Even before that, people cultivated food forests by protecting useful plants and eliminating those which provided them with no benefits.
In ancient times, a hole might be dug with a stone or stick, and water carried from a river in an animal bladder.
All that to say, it’s not the tools that make the garden. In the past, I have gardened quite happily with one shovel and a hand cultivator/hoe, but there’s no denying that having the right tool for the job makes the work of gardening easier and more enjoyable.
The Cottage Peach is reader-supported. When you purchase through links on our site, we may earn an affiliate commission at no additional cost to you. All opinions are our own.
What Tools Do You Need to Garden?
The planting of seeds by humans is believed to date back tens of thousands of years. Even before that, people cultivated food forests by protecting useful plants and eliminating those which provided them with no benefits.
In ancient times, a hole might be dug with a stone or stick, and water carried from a river in an animal bladder.
All that to say, it’s not the tools that make the garden. In the past, I have gardened quite happily with one shovel and a hand cultivator/hoe, but there’s no denying that having the right tool for the job makes the work of gardening easier and more enjoyable.
Are Garden Tools Expensive?
Garden tools are available at all price points. There will always be an endless chorus of marketers telling you this tool or that is better than the other, but remember you’re digging soil and planting seeds - not building a spaceship. You want something durable, but not necessarily fancy.
In some cases there is a real difference in quality between the cheaper and more expensive options. If you have a bit of money to spend on tools, the choice becomes, in which cases is an investment in a pricier tool a good financial decision?
But no matter what your budget is, there are sources other than the hardware store or internet from which to acquire tools. Just about every garage or estate sale has some which, while not brand new, have stood the test of time and have years of life still in them. Better yet, many older relatives have amassed a collection over the years and would be happy to pass them on to someone a bit more spry. Often these older tools are better made than what you’d find today. If they’re in rough shape, it’s easy enough to sharpen a hoe or replace a shovel handle.
These options not only save money, they mean less is produced and less ends up in a landfill.
My Favorite Gardening Tools
As I said, in the past I have gardened with two simple tools. But at this point, our gardening has expanded enormously, and we’re lucky enough to be able to carefully spend on tools which make our work easier and are durable enough to last a lifetime. Barebones Living is a favorite among gardeners because they check all these boxes - plus, they are a certified B Corp dedicated to protecting the environment. You can find my favorite selections from Barebones below:
Seed Starting Tools
One of the foundations of economizing in our gardening is seed starting. It saves so much money as compared to buying plants!
There are many cheap and accessible ways to start seeds. Egg cartons, newspaper, or even toilet paper rolls can be used to hold your soil.
How to Make Seed Pots From Toilet Paper Rolls
Step one is to rummage through your recycling for TP rolls. Better yet, skip the recycling bin and save them up throughout the year for use in the spring.
Once you have your empty rolls, just cut four 1 1/2” slits in one end of the tube and fold them over themselves to create a bottom. Fill with soil and your seeds and get growing!
Using a Soil Blocker to Start Seeds
These days, we use a soil blocker when starting seeds. It’s a simple tool that allows me to work a bit more quickly, which is helpful for those times when I’m not feeling well enough for a longer project.
Blocks are also great for the plants themselves. Because each block is planted directly into the garden, the roots are not damaged and the plants aren’t likely to experience any transplant shock, giving them a stronger start on life.
One potential drawback of this tool is that it might be difficult for someone with arthritis or other pain in their hands to squeeze the handle that releases the blocks from the mold, so that’s something to keep in mind.
How to Use a Soil Blocker
Soil blocking is really easy once you get the hang of it. You might read in a catalog or hear from another gardener that you need a fancy soil blend designed for soil blocking, and I’m sure it would be nice to have, but I’ll take the giant $15 bag of soil from Lowes please and thank you. I’m not about to ship $50 worth of soil to my house - call me lazy, or a bad gardener, but I never have and everything grows just fine.
Just take your soil, mix water in until it’s just a little drier than mud and get pressing. The trick is to really firmly compact the soil into the mold with your hand as hard as you can. The blocker will form a small divot on top into which you can plop your seed. Cover with a bit of loose soil, and that’s all there is to it!
Tools for Planting
There are endless options for digging a hole, and I’m sure you’re familiar with most of them. A shovel or spade is best for larger holes, but one tool I particularly like for planting seeds and seedlings is the Japanese Hori Hori knife.
Like any knife, it’s best to find one which has a full, or integrated, tang, which will make it much more durable. With a full tang, the metal extends the whole length and width of the handle.
Why Use a Hori Hori Knife for Planting?
A Hori Hori has multiple uses, including weeding and cutting roots and small branches, but in the case of planting, there are two things that make it the right tool for the job.
One is that the point is sharp, but wide enough that, with a twist of the wrist, you can cut a hole rather than just a slash in the soil. The second is that most Hori Hori knives are marked to show you the depth of your hole, which is really helpful when planting seeds.
Tools for Weeding
I’ve used hand cultivators and spades, Hori Hori knives, standing hoes, and shovels to weed over the years. I still prefer a shovel for very large weeds, but the tool I use most often to weed is this Japanese Weeding Hoe.
This hoe is very sharp. I use it to loosen the soil under and around the weed so I can easily pull it up and not lose any roots. The blade is also narrow enough to use around things I have planted without fear of damaging them.
Tools for Watering Plants
Not rocket science here, any container or hose will do, but I do have my favorites. I have some difficulties with most hoses, which basically come down to the fact that I have a chronic illness. Most hoses are quite heavy and tend to kink. So aside from it being difficult for me to pull them out or coil them back up because of the weight, I have to walk back and forth any number of times to straighten up the hose so the water can flow through it, which quickly exhausts me.
I’ve found two hoses that solve these problems for me.
Hoses That Make Gardening More Accessible
The Flexi Hose is a lightweight, expandable hose which does not kink. It’s available in lengths up to 150 feet and has solid brass connectors. We’ve had ours for three or four years now, and are very happy with it.
A more serious option if you’re looking to invest in a dedicated system is a Hoselink retractable hose reel. For me, this hose was worth every penny. Even with a lighter hose like the Flexi Hose, it can be difficult for me to pull the hose where I need it and then get it coiled back up. The Hoselink solves that problem by automatically retracting the hose when I give it a small tug. It still takes a bit of effort for me to pull it out to its full length, but it does not leave me fatigued the way other hoses do.
It comes with a wall bracket, and can be mounted on a pole or the side of your house. The longest length available for the Hoselink is 82 feet. I’d love a longer one, but it is definitely the hose to choose if you have a larger budget.
Pruning Tools
Like a lot of gardeners, I am fiercely loyal to my favorite pruners – the Felco F2 Classic hand pruners.
Aside from being able to cut through fairly large branches, they are comfortable to use, have a thumb mechanism for one-handed opening and closing, and are easy to sharpen. On top of that, each of the pruner’s components is replaceable, meaning one pair, with some care, can last a lifetime.
How to Care for Garden Tools
It’s no use spending money on tools only to let their condition deteriorate over the years. Caring for your tools will make them last longer and be more pleasant to use.
Clean Your Tools
Give your tools a quick scrub or hose-down after using them. Be sure they are dry before putting them away.
In the case of pruners, it’s important to wipe them down with rubbing alcohol after each use. If you are pruning more than one tree, wipe them after you finish with each one, to avoid potentially spreading disease from one tree to the next.
Store Your Tools
It can be a pain to schlep everything back in when you’re tired out from gardening, but leaving tools outside is a recipe for disaster. Store them in a dry place, and hang longer tools so as not to dull their blades.
Sharpen Your Tools
Some tools come with their own sharpeners, but for those that don’t there are a wide variety available. Keeping your tools sharp will cut down on frustrations from them not working as well as they should when you need them.
Oil Your Tools
It’s a good idea to apply a lubricating oil to wooden handles and metal blades. This doesn’t need to be done every time you use a tool, but it’s great to do in the spring and fall. It will keep metal from rusting and wood from splitting.