
BACKYARD GARDENING MADE SIMPLE

Garden Planning Part 3: How To Start Seeds Indoors
Wondering how to start seeds for your garden indoors? Here’s exactly what you need and how to do it - from grow lights to seed cells.
The Cottage Peach is reader-supported. When you purchase through links on our site, we may earn an affiliate commission at no additional cost to you. All opinions are our own.
This is part three of my garden planning guide. For part one all about deciding what to plant, click here. For part two, all about planning your garden layout, click here. For part four, how to companion plant, click here.
Today we’ll cover when to start seeds indoors, how to germinate seeds, my favorite seed starting supplies and more.
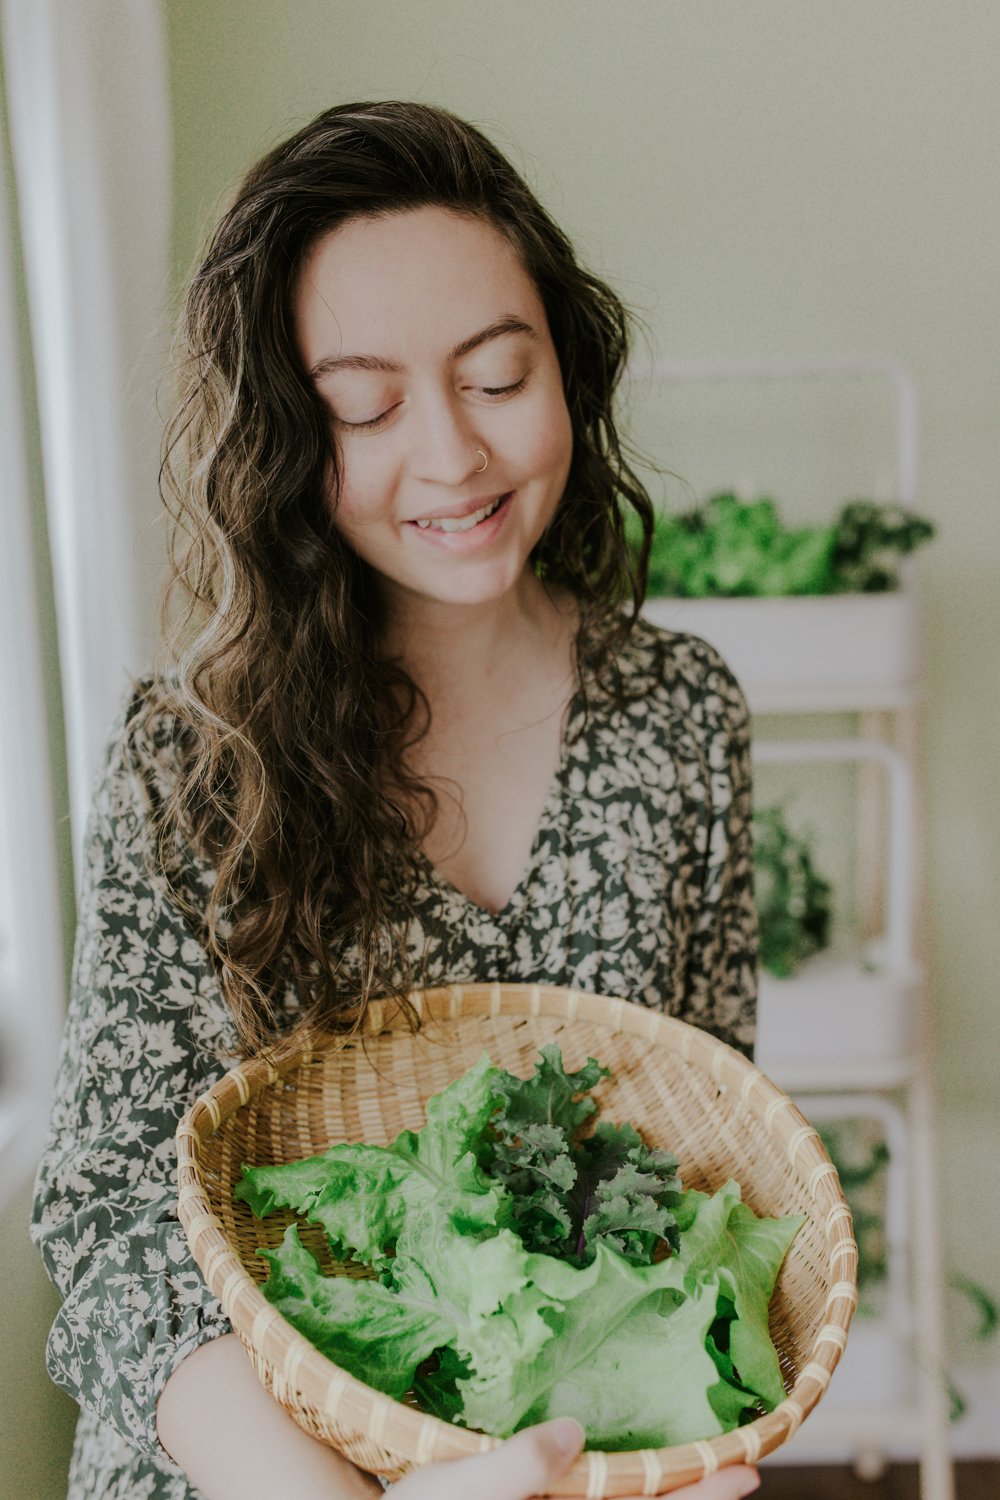
I love growing my vegetable garden from seeds. What could be more gratifying than watching your plants grow from one tiny seed into a full grown plant ready to harvest? It is so fulfilling to nurture and care for these tiny bits of life and bring them to maturity.
I also love to feel the tie back to my ancestors through this process of growing. I know that not too many generations ago, my relatives would have tended their own little garden to support their family and put food on the table. I have combed through old family photos endlessly searching for evidence of this connection, but so much was lost through time. Considering industrial agriculture is a fairly modern concept though, it’s safe to say that the vast majority of our relatives have grown food at some point in their past. I feel this connection and find my way back to these ancestral roots through the soil.
How to start seeds Indoors
Let’s start with the basics: For many plants, you don’t need even technically need grow lights to start seeds for your garden. You can use winter sowing in milk jugs outdoors, or try starting seeds in egg cartons and even toilet paper rolls. I’ve tried all of these with mixed results. My method of choice used to be soil blocking. Soil blocking is just compressing soil into cubes using a mold and planting directly into that cube without any additional containers. Then you can bottom water those seedlings and build nice strong root structures with zero waste. This method words great for producing strong plants, but it comes with a learning curve that can make it frustrating as you need exactly the right type of soil, and I find it really hurts my hands and is too strenuous.
I’ve been starting seeds using seed cells and trays, but often these are not built to last, and in order to keep plastic out of our landfills and reduce the frustration that comes with cracking cells and flimsy trays, I’ve upgraded my seed starting setup with these extra durable seed starting trays.
Each individual cell in these trays features an air pruning side slot on all four corners to discourage root circling and encourage better root growth. The bottoms of each cell are also open providing air pruning at the lower end of each cell. Large, convenient finger holes in the bottom of each cell make it easy to remove seedlings when you're ready to transplant.
Tap Here To Shop Epic Gardening - Use Code TheCottagePeach5
If you’re growing heat loving crops like peppers and eggplant, you should also grab a heat mat for each tray.
So now that you have your tools, how do you know when to start planting seeds? Start too early, and your plants will outgrow their indoor containers before it is warm enough to move them outdoors. Start your seeds too late, and your plants won’t be mature by your last frost date. That last frost date is exactly where we will start our seed starting journey. This one is easy, I promise; you already know your grow zone from our previous post, so just Google “Last frost date + (your grow zone)” to find out when it’s safe to plant outdoors in your area, since this is the last date when all danger of a freeze has passed.
Next, go back to your list of everything you will be growing and open up Google. Search for each plant name + “when to plant”. For direct sown plants (that means we just put the seed directly into the soil outdoors) this will most often just be “after last frost” (unless it’s a cold hardy plant like spinach or kale which can usually be started a lot earlier) but for plants that need to be started indoors in order to mature before that last frost date, it will say something like “start indoors 8 weeks before last frost” Next to each line write down the planting timing.
The benefit of using a spreadsheet when you are learning how to start seeds is that you can then sort the data in your list by the planting date instead of whatever order you had originally written them down in. This creates a planting schedule for starting plants from seed with just a click of a button. Otherwise you’re going to have to manually organize your list by planting date so you know what dates to do which tasks.
Should you use potting soil or seed starting soil?
Potting soil and seed starting soil are both designed to provide a suitable growing medium for plants, but they have some key differences based on the needs of plants at different stages of growth. Potting soil is a general-purpose mix that is formulated to support the growth of established plants, both indoors and outdoors. It often contains a blend of ingredients such as peat moss, perlite, vermiculite, pine bark, and sometimes added fertilizers. Potting soil may have added nutrients to support the nutritional needs of mature plants. Some formulations include slow-release fertilizers that provide nutrients over an extended period. Potting soil tends to have a coarser texture compared to seed starting soil. This coarser texture helps with drainage, aeration, and provides stability for larger plants.
Seed starting soil is specifically designed for germinating seeds. It typically consists of a lightweight and fine-textured blend, often containing ingredients like peat moss, vermiculite, and perlite. Seed starting soil is often sterile, which helps prevent damping off and other soil-borne diseases that can affect germinating seeds and young seedlings. Seed starting soil is formulated to retain moisture well, providing the consistent moisture levels necessary for seed germination. This helps seeds absorb water and initiate the germination process. Seed starting soil usually has minimal nutrients because seeds initially rely on the nutrients stored within them. As the seedlings grow and develop true leaves, additional nutrients may need to be provided through fertilization. Seed starting soil has a finer texture compared to potting soil. This fine texture allows seeds to make good contact with the soil, facilitating germination.
Use seed starting soil when germinating seeds in trays or small containers. The fine texture and sterile nature help create an ideal environment for germination. Once seedlings have developed a few sets of true leaves, you can transplant them into larger containers with potting soil, which provides the nutrients and structure needed for more mature plants.
What grow light should you use for starting seeds?
Don’t overcomplicate this. Grab some LED strip grow lights like these, and a couple of timers to turn them on automatically. Unless you are going to grow your plants indoors for their entire lifecycle and need them to flower/fruit without sunlight, you do not need to worry about the specific spectrum of light you’re using nearly as much.
How many hours of light do seedlings need?
You should set your grow light timer to give your seedlings 12-18 hours of light per day. I usually set mine for 16 hours.
What is germination?
Germination the development of a plant from a seed or spore after a period of dormancy. Most of the time, your seeds will germinate (or sprout) themselves simply by being activated through the process of hydration. So, you’ll put your seed into the soil at the recommended depth, cover with soil and keep damp, and this increase in the moisture content will trigger the germination of the seed. However, it’s important to check the germination requirements for any seed you haven’t grown before. Some, such as peppers, require a higher temperature in order to germinate successfully. Others like spinach and lettuce prefer a cooler temperature to germinate. Some seeds will just be duds and never germinate - that’s why you’ll often plant multiple seeds in one cell and thin them later, to hedge your bets. You can improve the rate of germination of certain plants like peas, beans, pumpkins and other winter squash by soaking them prior to planting. But, to be honest, since I have fatigue from my arthritis I don’t usually do this step and it’s usually just fine as long as you have quality seeds.
How do you prevent damping off?
Damping off is a common problem when starting seeds, and it is caused by various types of fungi that attack young seedlings, causing them to rot at the soil line. To prevent damping off, you can take several precautions. Start with a high-quality, sterile seed starting mix. Sterilized soil helps eliminate the presence of damping off-causing fungi. Ensure that the containers or seed trays you use are clean and have been properly washed or sterilized before planting. This reduces the chances of introducing harmful fungi. Overwatering can create a favorable environment for damping off fungi. Water the seedlings from the bottom to keep the surface of the soil dry. Use a tray underneath the pots and allow the soil to wick up water as needed. Adequate air circulation helps prevent the buildup of humidity around the seedlings. Use a fan on low speed or open windows to provide ventilation, especially if you are growing seedlings indoors. You should also aim to maintain a moderate humidity level. High humidity can contribute to the growth of damping off fungi. Proper ventilation and spacing between seedlings can help manage humidity levels.
By implementing these practices, you can reduce the risk of damping off and give your seedlings a healthy start. If you notice any signs of damping off, remove affected seedlings immediately to prevent the spread of the fungus.
Thinning seedlings
Thinning seedlings is an important step in the early stages of plant growth to ensure that the remaining seedlings have enough space, nutrients, and sunlight to develop into strong, healthy plants. Allow the seedlings to grow to a height where they have at least two sets of “true leaves”. True leaves are the leaves that follow the initial seed leaves (cotyledons) and have the characteristics of the plant species. Identify the strongest and healthiest seedlings. Look for seedlings with vigorous growth, a good color, and well-developed leaves. This does not necessarily mean the tallest - a short, stocky seedling is a better choice than a thin, leggy one. Instead of pulling out the excess seedlings, which can disturb the roots of neighboring plants, use clean scissors or small pruners to cut the unwanted seedlings at soil level. This ensures minimal disruption to the roots of the remaining seedlings. If you are thinning edible plants like lettuce or carrots, you can eat the thinned seedlings. Thinning can be a way to enjoy some early greens from your garden. Otherwise, just toss them in your compost.
Starting a GArden Checklist
Pick and order your seeds (don’t forget to check out this blog post if you get stuck)
Plan your garden layout (see this post for my tips)
Write down the planting dates for every plant on your list - both the seed starting date and the date to transplant
Gather your supplies; soil, seeds, cell containers to grow in or a soil blocker and trays, a trowel, a tarp to keep your work area clean, and your light source
Work down your list of seeds from the first planting date to the last
Presoak any seeds that require it for germination
Plant your seeds at the recommended depth
Keep the soil moist at all times - you can cover with any clear material to keep the environment damp until the seeds sprout
Build strength in your seedlings stems by gently running your hands across the surface of your plants daily, and keep a fan on to prevent damping off/mold
Harden off your seedlings by bringing them outdoors to a protected spot out of direct sunlight and wind (up against your house will do). Start with one hour for the first few days, then increase it by an hour every day until they are able to stay outdoors for all daylight hours
Transplant your mature seedlings into the garden when it is safe to do so, usually after your average last frost date
What else do you want to know about starting seeds indoors?


Click and Grow Smart Garden 27 Review: Does it work?
Here in New England, the majority of the year it is too cold to grow most vegetables and fruits outdoors. We have a very short growing season and limited amount of time to harvest everything we need to put away for winter. I knew that if I could find a way to combine an accessible raised gardening system with indoor grow lights, we could continue growing food in the colder months and reduce our grocery bill at a time when produce prices continue to skyrocket. My love of vertical gardening continued to grow.
The Cottage Peach is reader-supported. When you purchase through links on our site, we may earn an affiliate commission at no additional cost to you. All opinions are our own.
My gardening journey with chronic illness
When I was 20, I was diagnosed with Psoriatic Arthritis, an autoimmune disease that affects my joints, and causes major fatigue and chronic pain. The nature of autoimmune conditions is that they come and go, and over the winter I found myself experiencing the worst flare up of my symptoms I’d ever had.

Suddenly, my homesteading journey had hit a snag - bending, kneeling, and lifting (all essential tasks on a homestead) were difficult. I wasn’t sure what gardening was going to look like for me in the spring, if I could garden at all.
It’s easy to feel like you’ve lost a part of yourself when your body doesn’t allow you to do the activities that mean the most to you. For myself, these were dark days until I found enough energy to make a plan. I knew I was going to need to modify my normal gardening routine in order to continue growing our own food, so we added raised beds. Suddenly the benefits of vertical gardening were crystal clear to me. So much of what makes gardening so difficult is the crouching required to plant, weed and harvest. With the garden raised to a more natural standing height, I felt way less limited in what I could accomplish and grow. I started to wonder - with our long winter months, were there options that could extend our growing season AND provide a more accessible indoor gardening system that wouldn’t hurt my back?
Here in New England, the majority of the year it is too cold to grow most vegetables and fruits outdoors. We have a very short growing season and limited amount of time to harvest everything we need to put away for winter. I knew that if I could find a way to combine an accessible raised gardening system with indoor grow lights, we could continue growing food in the colder months and reduce our grocery bill at a time when produce prices continue to skyrocket. My love of vertical gardening continued to grow.
Vertical gardening systems
Vertical gardening is for everyone. Whether you’re interested in designing a vertical garden of your own due to physical limitations, space constraints, or you just enjoy experimenting with different gardening techniques, vertical gardening is an easy way to add a unique and functional element to your gardens and grow food more efficiently.
If bending, kneeling or lifting is something that is hard for you to do, vertical gardening allows you to reduce the amount of physical effort involved in your everyday garden tasks. There is usually little to no weeding involved, and watering systems can be set up to automatically keep your plants hydrated. Harvesting is a breeze because you won’t be digging through a tangle of branches or vines looking for produce - everything will be highly visible.
If you have little space to grow your own food or no yard at all - indoor gardening kits can help you bring fresh produce to your kitchen easily.
Why does it matter if your produce is fresh anyway?
When you buy and consume fresh grown fruits and vegetables, you are less likely to be ingesting harmful preservatives, chemicals, or dyes that have been added to your food to make them look more appealing. Produce actually loses its nutritional value over time, so the quicker it's eaten, the more nutrients that can be gained from it. Unfortunately even something like lettuce may be up to two weeks old by the time it reaches your local grocery store - and on average, our produce travels fifteen THOUSAND miles to reach us. That’s a lot of opportunity for lost nutrients.
Indoor Gardening Kit
There are lots of indoor gardening kits you can buy, but I decided to try the Click & Grow Smart Garden 27 vertical gardening system for a few reasons. This setup comes with three Smart Garden 9s (the 9 means each unit can grow 9 plants, so 27 in total) as well as a vertical plant stand in a modern white and wood finish. I really liked that the plant stand would fit into my existing home style, and allow me to stack the gardens so they would take up less space and be easy to access as needed. I also liked that the lights are included, and on an automatic timer so I wouldn’t have to fuss with anything or remember to turn it off and on every night.
The Smart Garden 27 isn’t a hydroponic garden - it uses a water reservoir that only needs to be filled about once a month, and Smart Soil blocks with nutrients and seeds already inside. The seeds and soil blocks are completely non-GMO and pesticide free, and use a patented nano-material that automatically releases nutrients, oxygen and water your plants need to thrive.
I also really liked the variety of plants offered by Click & Grow - they have over 75 different plants to choose from right now, including a seemingly endless array of swiss chard, arugula, sorrel, cress, mibuna, pak choi, and multiple varieties of kale and lettuce, bell peppers, strawberries, tomatoes, hot peppers and peas. Or you can start an indoor herb garden with rosemary, celery, mint, dill, parsley, lavender and many different kinds of basil. There’s flower seeds if you want to add some beauty and color. They also have seedless pods available so you can try your hand at growing anything you want.
How to Set Up the Vertical Vegetable Garden
The Click & Grow vertical vegetable garden is going to make winter gardening indoors so simple. Set up was easy - the included plant shelf comes together in less than fifteen minutes and has easy to follow instructions with no tools required. Next you just click together the light bar that attaches to the top of the unit with a few simple snaps and you’re ready to grow.
To plant the vertical garden planters, all I had to do was place each Smart Soil block into the pods that nest within the water tank. You cover each pod with a clear dome that is provided to create a moist environment that is then removed once your seed has germinated. I filled the water reservoir and plugged it in. That’s really it! I was kind of shocked by how simple it actually was. The water reservoir has a float on the back corner that will sink to let you know when it’s time to add more water. There’s even an app where you can track the progress of your gardens.
For my first planting, I’m growing lettuce, tomatoes, basil and dwarf peas as well as the Fruit & Veggie mix pack with strawberries, chili peppers and yellow tomatoes and the Asian Cuisine Mix with pak choi, red kale and mibuna. This will supply us with a continuous stream of fresh fruits and vegetables that are normally out of season during the winter months, allowing us to fuel up on fresh nutrient dense produce grown in our own home.
It takes about 3-4 weeks for your plants to reach maturity, depending on what you’ve planted. Then you can start harvesting continuously - each plant pod will live for about 3-4 months, again depending on the variety that you grow.
Now, if you’re thinking this is way too much vertical vegetable garden to fit in your own home stay with me because while I’ve gone all out here with the Smart Garden 27, there’s multiple ways you can configure this system to work for your space. First off, the Smart Garden 9 which is used on this plant shelf is available individually - so you can grab just one garden and pop it on your counter or table. If that’s still too large Click & Grow also has a Smart Garden 6 which is just a smaller version with only 6 plant pods. You could grab a couple Smart Garden 9’s and just sprinkle them throughout your house! Personally I love the shelf system because it means less bending and kneeling for me and it takes up less space in our kitchen. In terms of deciding where to place your indoor garden, the grow lights can be fairly bright so if that’s something you are sensitive to I’d recommend just choosing a location in your home that is a little out of the way.
Indoor gardening tips
So what tips should you know before starting your indoor gardening journey? Honestly, it’s so much easier than gardening outdoors in a lot of ways. With this system, it’s a good idea to periodically clean out the water tank before you plant a new round of seeds to prevent any mold from developing. Keep in mind that you’ll want a spot that you don’t mind having basically a bright lamp glowing on for 16 hours a day - those grow lights are for real! You shouldn’t have any problems with pests since you’re inside, and you won’t need to fertilize since the Smart Soil pods have everything your plants need to thrive. There’s no weeding to do and watering is only done about once a month. So long as you are mindful not to cut your plants back too hard when you harvest, you should enjoy a nice big continuous harvest from your indoor garden!