
BACKYARD GARDENING
WITHOUT THE BACKACHE

Olla Pots for Container Gardening: A Guide for Balcony and Patio Gardeners
If you're wondering if you can use ollas in a container garden, the answer is yes! Container gardening is perfect for those with limited space, but it comes with it's own unique set of challenges (including watering) that an olla watering system can help with. I love container gardening from an accessibility standpoint, because it makes it possible for a lot more people to grow their own food. But, container gardens dry out much faster than in ground garden beds since they can heat up faster and have less volume to hold excess water in reserve. Which means if you're not careful, all it takes is one hot day or a weekend away to damage your plants. That's pretty unforgiving! Having backup systems in place not only reduces plant stress but also reduces wasted water lost to surface evaporation, a huge problem for container gardens in general that warm up so fast. But how do you know you're choosing the right sized olla watering system for your container garden?
The Cottage Peach is reader-supported. When you purchase through links on our site, we may earn an affiliate commission at no additional cost to you. All opinions are our own.
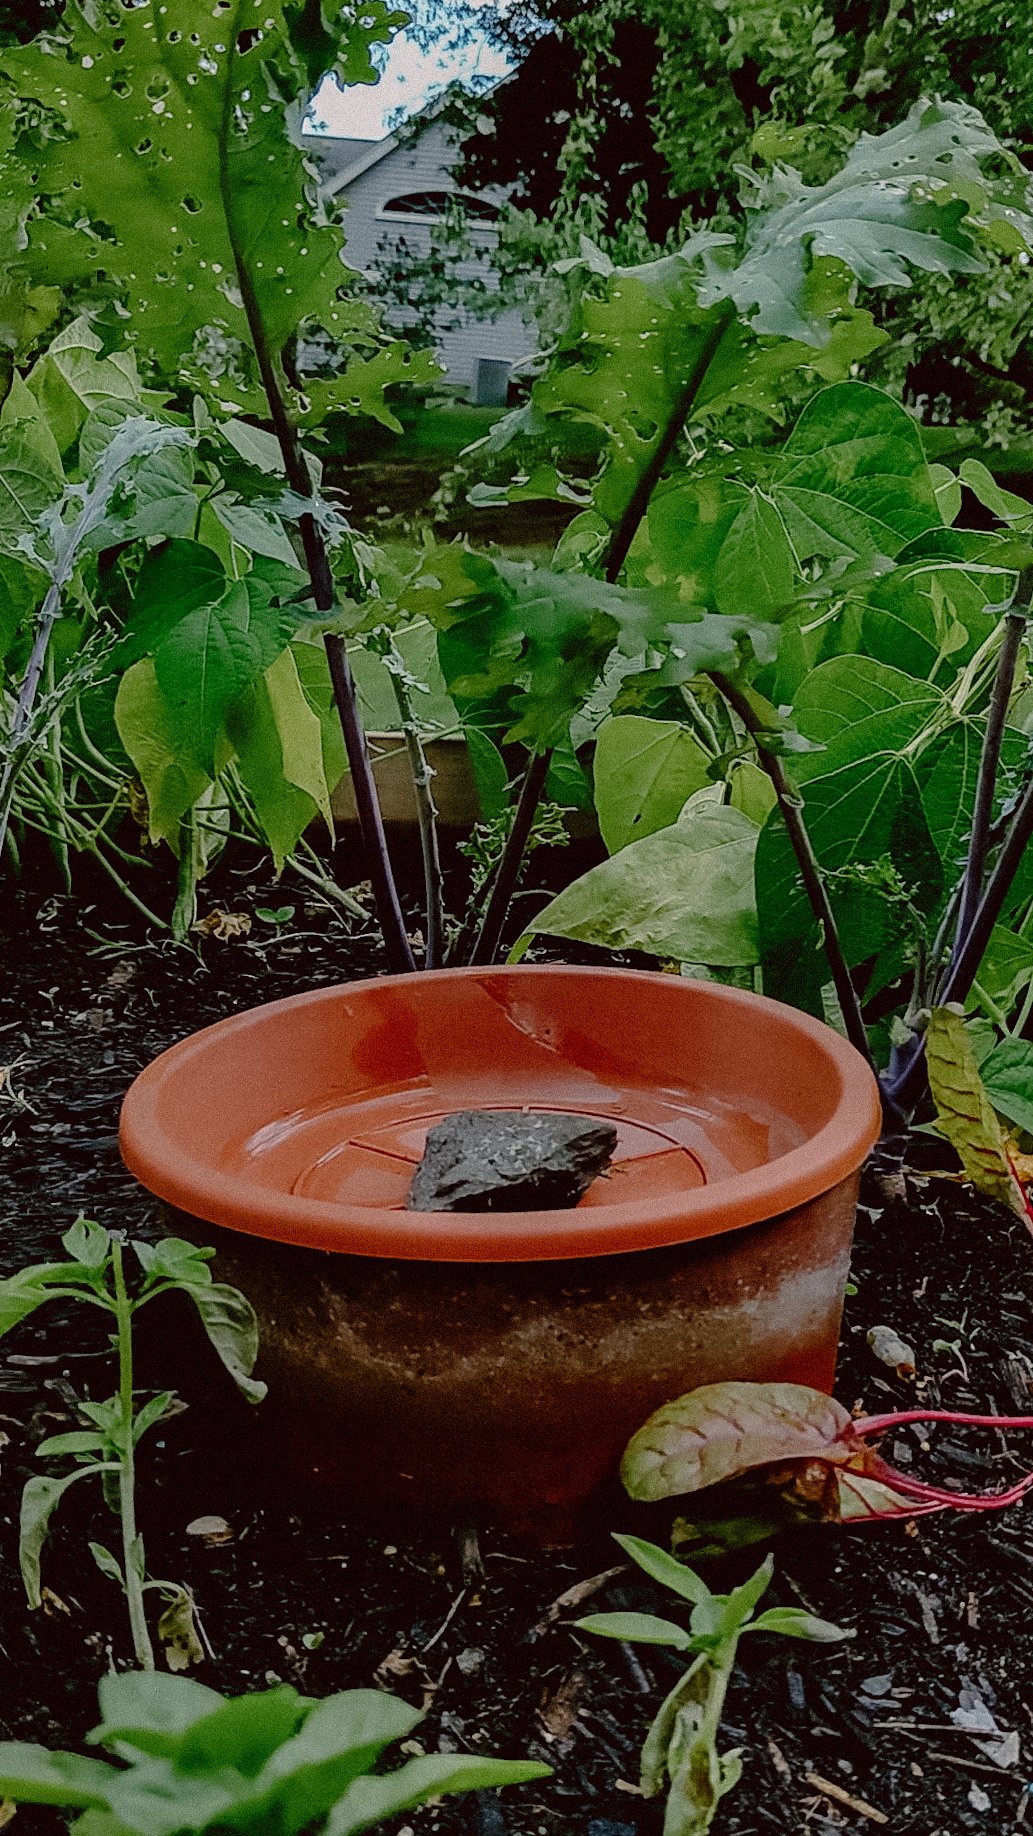
If you're wondering if you can use ollas in a container garden, the answer is yes! Container gardening is perfect for those with limited space, but it comes with it's own unique set of challenges (including watering) that an olla watering system can help with. I love container gardening from an accessibility standpoint, because it makes it possible for a lot more people to grow their own food. But, container gardens dry out much faster than in ground garden beds since they can heat up faster and have less volume to hold excess water in reserve. Which means if you're not careful, all it takes is one hot day or a weekend away to damage your plants. That's pretty unforgiving! Having backup systems in place not only reduces plant stress but also reduces wasted water lost to surface evaporation, a huge problem for container gardens in general that warm up so fast. But how do you know you're choosing the right sized olla watering system for your container garden?
Watch me do it
Self Watering Pots | Olla Garden Watering System + ThirstyEarth Review · Subscribe on YouTube
Choosing the Right Olla Pot for Your Container Gardens
Upside down wine bottles and terracotta spikes aren't going to cut it. These fun gardening hacks may seem like the easy way out, but it comes at a cost. The upside down bottles don't regulate the flow of water based on the actual moisture content below the soil surface, which means it's easy to over water your plants. And terracotta spikes (while one step better than an upside down bottle) don't do the work ensuring optimal moisture distribution and root development since they are so small. My favorite olla watering system to use in container gardens is about the size of a water bottle, so it maximizes surface area while leaving the most amount of room for your plants around it - super important to consider in the limited space of a container garden.
Soil Selection for Olla Watering System Container Gardens
While olla watering systems are effective in any type of soil, in a container garden you can give your plants a leg up by choosing the right kind of soil since drainage is so much more important in a container garden to prevent water logging and promote healthy plant growth. Choose a high quality potting mix with as much organic matter as possible and a slow release fertilizer - container gardens require a lot more added nutrients to survive since they are cut off from the natural microbiome of in ground soil, but we want something light and fluffy that allows for good drainage if there's a heavy rain storm that still holds moisture well in dry seasons, so make sure it has a good amount of coco coir too (or peat moss, but that's less sustainable).
The Best Plants for Olla Pot Container Gardens
The good news is, even plants that normally don't thrive in container gardens will often perform better with the addition of an olla, as it eliminates a lot of the stress plants face when grown in containers. Experiment and see what works for you!
Guide to Planting with Olla Pots in Containers
Using an olla watering system in a container garden is pretty straightforward, but I do recommend starting with your soil and olla before adding plants. For any container under twenty four inches, you'll only need a single olla to keep the entire container well watered. But it should be placed directly in the center of the container to provide the most even amount of moisture throughout the whole pot. Once your container is full of soil, simply dig out a hole in the center so that your olla can rest flush with the surface of the soil - we want the olla to be almost completely buried so it's making the most contact with the soil possible and doesn't dry out. Then, add your plants around the olla, keeping the thirstiest plants like cucumbers or tomatoes closest to the olla.
Maintenance and Troubleshooting for Olla Pot Container Gardens
One of the most common concerns with olla water systems is preventing algae growth. But since ollas are made of terracotta, they keep the environment inside of the olla dark and cool - which algae doesn't like. So it typically isn't an issue. You may notice harmless moss, mildew or fungus growing on the outside of your olla as it ages. This should not affect the olla's performance, but you can scrub it off periodically with a diluted vinegar mixture.
Another concern is whether ollas are a breeding ground for mosquitoes. All the ollas I use in my garden have closed lids, so mosquitoes cannot access the water inside to lay their eggs. If your olla watering system is open for some reason, you can add mosquito dunks to the water to terminate the eggs and keep them from hatching. Mosquito dunks are made from BTI and totally safe to use in garden beds where you are growing food.
If you normally introduce fertilizer to your garden through your hose system, the good news is you can simplify that process using ollas as well by adding the liquid fertilizer directly into the olla itself.
WHAT IS AN OLLA WATERING SYSTEM?
Olla (pronounced oya) means “pot” in Spanish, but the concept of using ollas as an irrigation system goes back thousands of years and has been used in countless cultures around the world. An olla watering system is basically an unglazed eight to ten inch terracotta pot that is buried beneath the soil with only a small amount sticking up above the surface and filled with water. The water then leeches out of tiny holes or “pores” in the unglazed clay and is pulled through the soil to the roots of your thirsty plants using a process called soil moisture tension. This functions much the same way as osmosis, in that the water is trying to equalize to a certain level of moisture within the soil. This means your soil will never become overwatered either - if the soil is moist, the water stays in the pot until it is needed. The downsides of DIYing a system like this are that it can be hard to identify true terracotta - and other types of clays have different properties that make them not as well suited for this job. Plus, you have to fill each one manually every 2-5 days depending on how hot it is and most importantly they take up a lot of room in the garden beds. But thankfully, with the Thirsty Earth system all of those cons are eliminated.
WHY SHOULD YOU USE A Thirsty Earth OLLA WATERING System?
Hauling around a watering can and standing with a hose for 45 minutes isn't exactly a walk in the park for everyone, especially folks like me with arthritis. This past spring, I was right in the middle of a flare-up when I planted my garden. I knew I needed a way to water my plants without turning myself into a pretzel!
Imagine this: you water your plants, but most of the water just sits on top and bakes away in the sun. olla watering systems stop that waste! The water seeps out of the pot slowly, right where your plants need it most - at their roots. This fancy trick can slash your water use by up to 61%. Less water wasted means a lighter water bill and a happier planet.
Olla watering systems aren't just about saving water, they're also all about growing healthy plants! Since the water seeps out underground, plant roots stretch out searching for that moisture. This makes them stronger and helps your plants stand tall. Olla watering systems also keep the leaves of your plants dry, making it harder for fungus and disease to spread. And the slow release of water means your plants get the perfect amount to drink, never too much.
Basically, olla watering systems create happy, healthy plants that can take on anything. But, each olla can only cover an area of about 2 feet all around it (depending on the system you use, but this is true for the ThirstyEarth ollas). So depending on the size and shape of your garden, you'll need to keep this in mind when choosing your olla placement.
Thirsty Earth Olla Watering System Review

Since it can be hard to find genuine terracotta pots affordably in your area, and they take up a lot of space in the garden, the Thirsty Earth olla watering system can be a good compromise that allows you to actually hook up your ollas to an automatic rainwater harvesting system that will continuously refill your ollas for you on it’s own from free rainwater collected from your roof. Plus they are about the size of a water bottle, so they don’t waste precious planting space. I added the Thirsty Earth system to two of my raised beds, and since the system is super easy to customize to whatever garden bed configuration you have, you don’t have to worry about not having the right parts or enough pieces to get it done. The website does a great job of showing you exactly how to lay out the cotta cups and it’s made an already pretty hands-off system completely self-sustaining; water is collected from my roof into a 50 gallon barrel, flows automatically into reservoirs and down the irrigation tube into individual terracotta cups. Setup is easy thanks to the push to connect fittings that come with every kit. You just lay out your cups, cut the included tubing to size and connect everything with the fittings. No need to understand plumbing or any special building skills and you won't need any special tools either. Once everything is set up, you can leave it all summer and the reservoir will refill automatically from your rain barrel or you can manually refill it about once a week. I know it sounds too good to be true, but it really is that easy.
Other posts in this olla watering system series:
DIY OLLA WATERING SYSTEM INSTRUCTIONS
OLLA POTS FOR CONTAINER GARDENING
TROUBLESHOOTING OLLA POT PROBLEMS
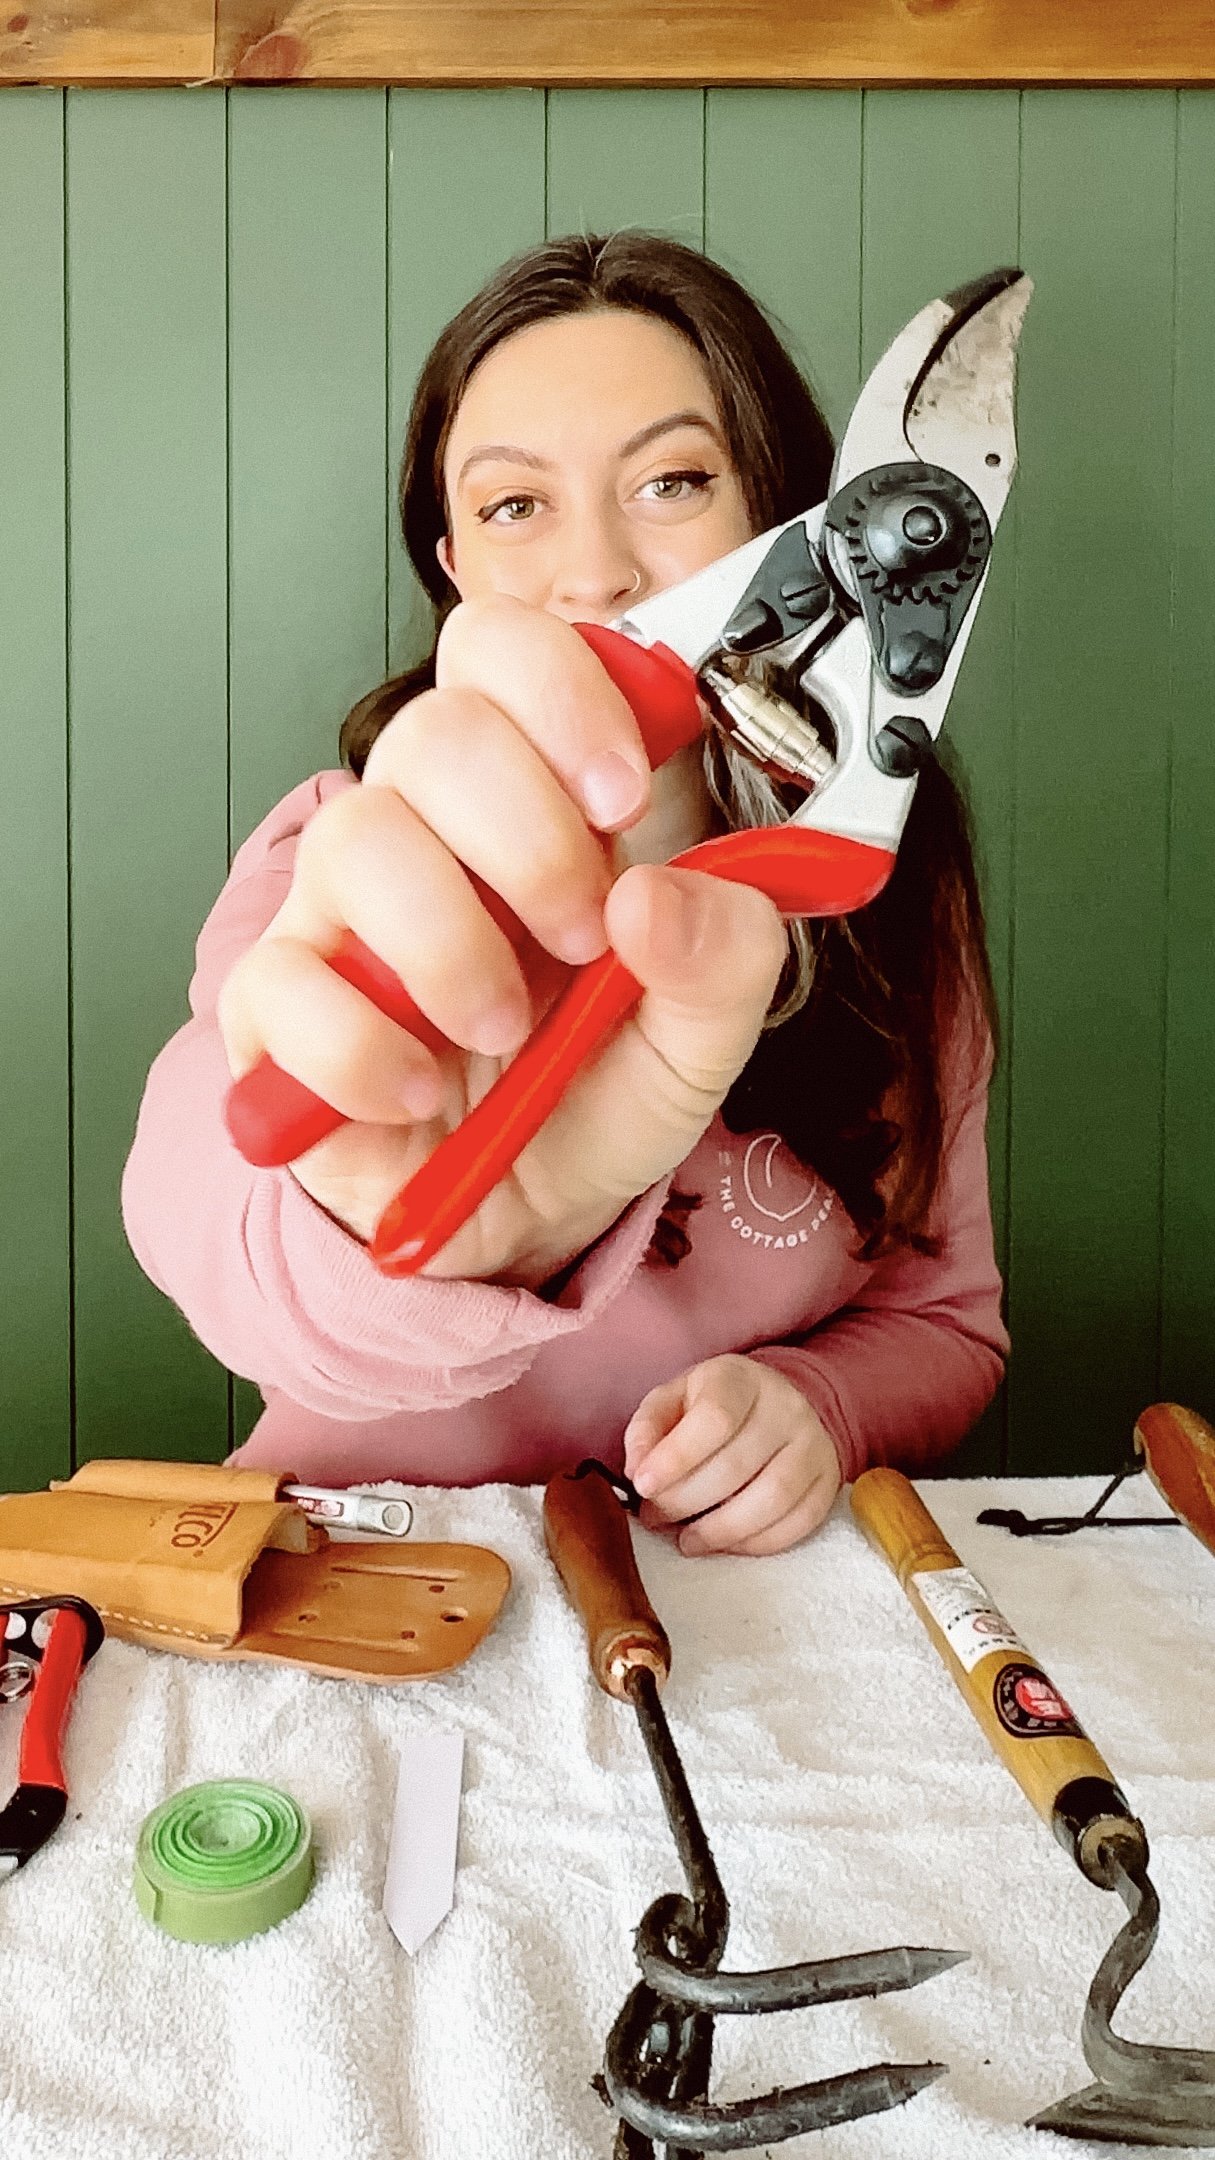
Garden Tool Maintenance | The Best Garden Tools For Chronic Pain
I know we're all anxious to get into garden planning, but there's one thing that's just as important to having a successful garden this year as a good plan; the tools that you're going to use to garden. I don’t use many different kinds of garden tools since I like to keep things simple, but the garden tools that I use have to withstand a lot of use, as well as be comfortable enough to use for extended periods of time. I prefer to buy things once, and I’d rather invest a little more in a tool that I will have for a lifetime than continually replace and send old ones to the landfill.

I know we're all anxious to get into garden planning, but there's one thing that's just as important to having a successful garden this year as a good plan; the tools that you're going to use to garden. I don’t use many different kinds of garden tools since I like to keep things simple, but the garden tools that I use have to withstand a lot of use, as well as be comfortable enough to use for extended periods of time. I prefer to buy things once, and I’d rather invest a little more in a tool that I will have for a lifetime than continually replace and send old ones to the landfill.
The reason comfortable garden tools are especially important for me is that I have chronic pain. About ten years ago I was diagnosed with arthritis, and this affects me not just in terms of pain but in terms of weakness that makes gripping things difficult - so having garden tools that are comfortable and easy to grip is essential for me, and I’ve found through a lot of trial and error which ones work best and which ones just make things worse.
But I’ve also realized it’s less about having what you’d think of as a comfortable handle and more about having a garden tool that works so well, it reduces the amount of time you have spend using it - because the reality is that no matter how comfortable a garden tool is, when you have chronic pain you’re going to hit a time limit (or number of available spoons) faster than someone who doesn’t, no matter how “comfortable” that garden tool may be.
Effective garden tools are sharp and sturdy, don’t wobble, and have features that make the task itself easier and faster. They are typically built to last using classic construction methods that withstand the test of time. The only downside is that they usually cost a bit more upfront. I wish I had a workaround for this, but for me personally it is worth the investment in order to be able to continue participating in hobbies that feel essential to my identity like gardening, regardless of my physical limitations.
I'm going to walk you through all the garden tools that I use and I'm also going to tell you my strategy for daily maintenance versus seasonal maintenance, so let's get started!
Watch me do it
Getting My Tools Ready For Spring Gardening | Garden Tool Maintenance Tips · Subscribe on YouTube
The Best Garden Trowel
I don't think I have to tell you why a trowel is important, but I will tell you to get one that has a beveled edge almost like a blade to make cutting through soil easier. I like my trowel to have a bit of weight behind it with a solid metal blade and wood handle. This metal and wood trowel is B-Corp certified, sustainably produced and built to last.
The Best Garden Weeder
A Japanese sickle is extremely sharp which makes breaking up weeds by cutting through the roots themselves extremely easy. With my chronic pain and fatigue, weeding is one of the more strenuous garden tasks I have to do, and this greatly eases a lot of the strain I experience. I don't really do any tilling, but this is also great if you do need to kind of loosen up the dirt in some spots. This Japanese sickle has served me well for many years now and the blade is still as sharp as the day I got it.
The Best Garden Pruners
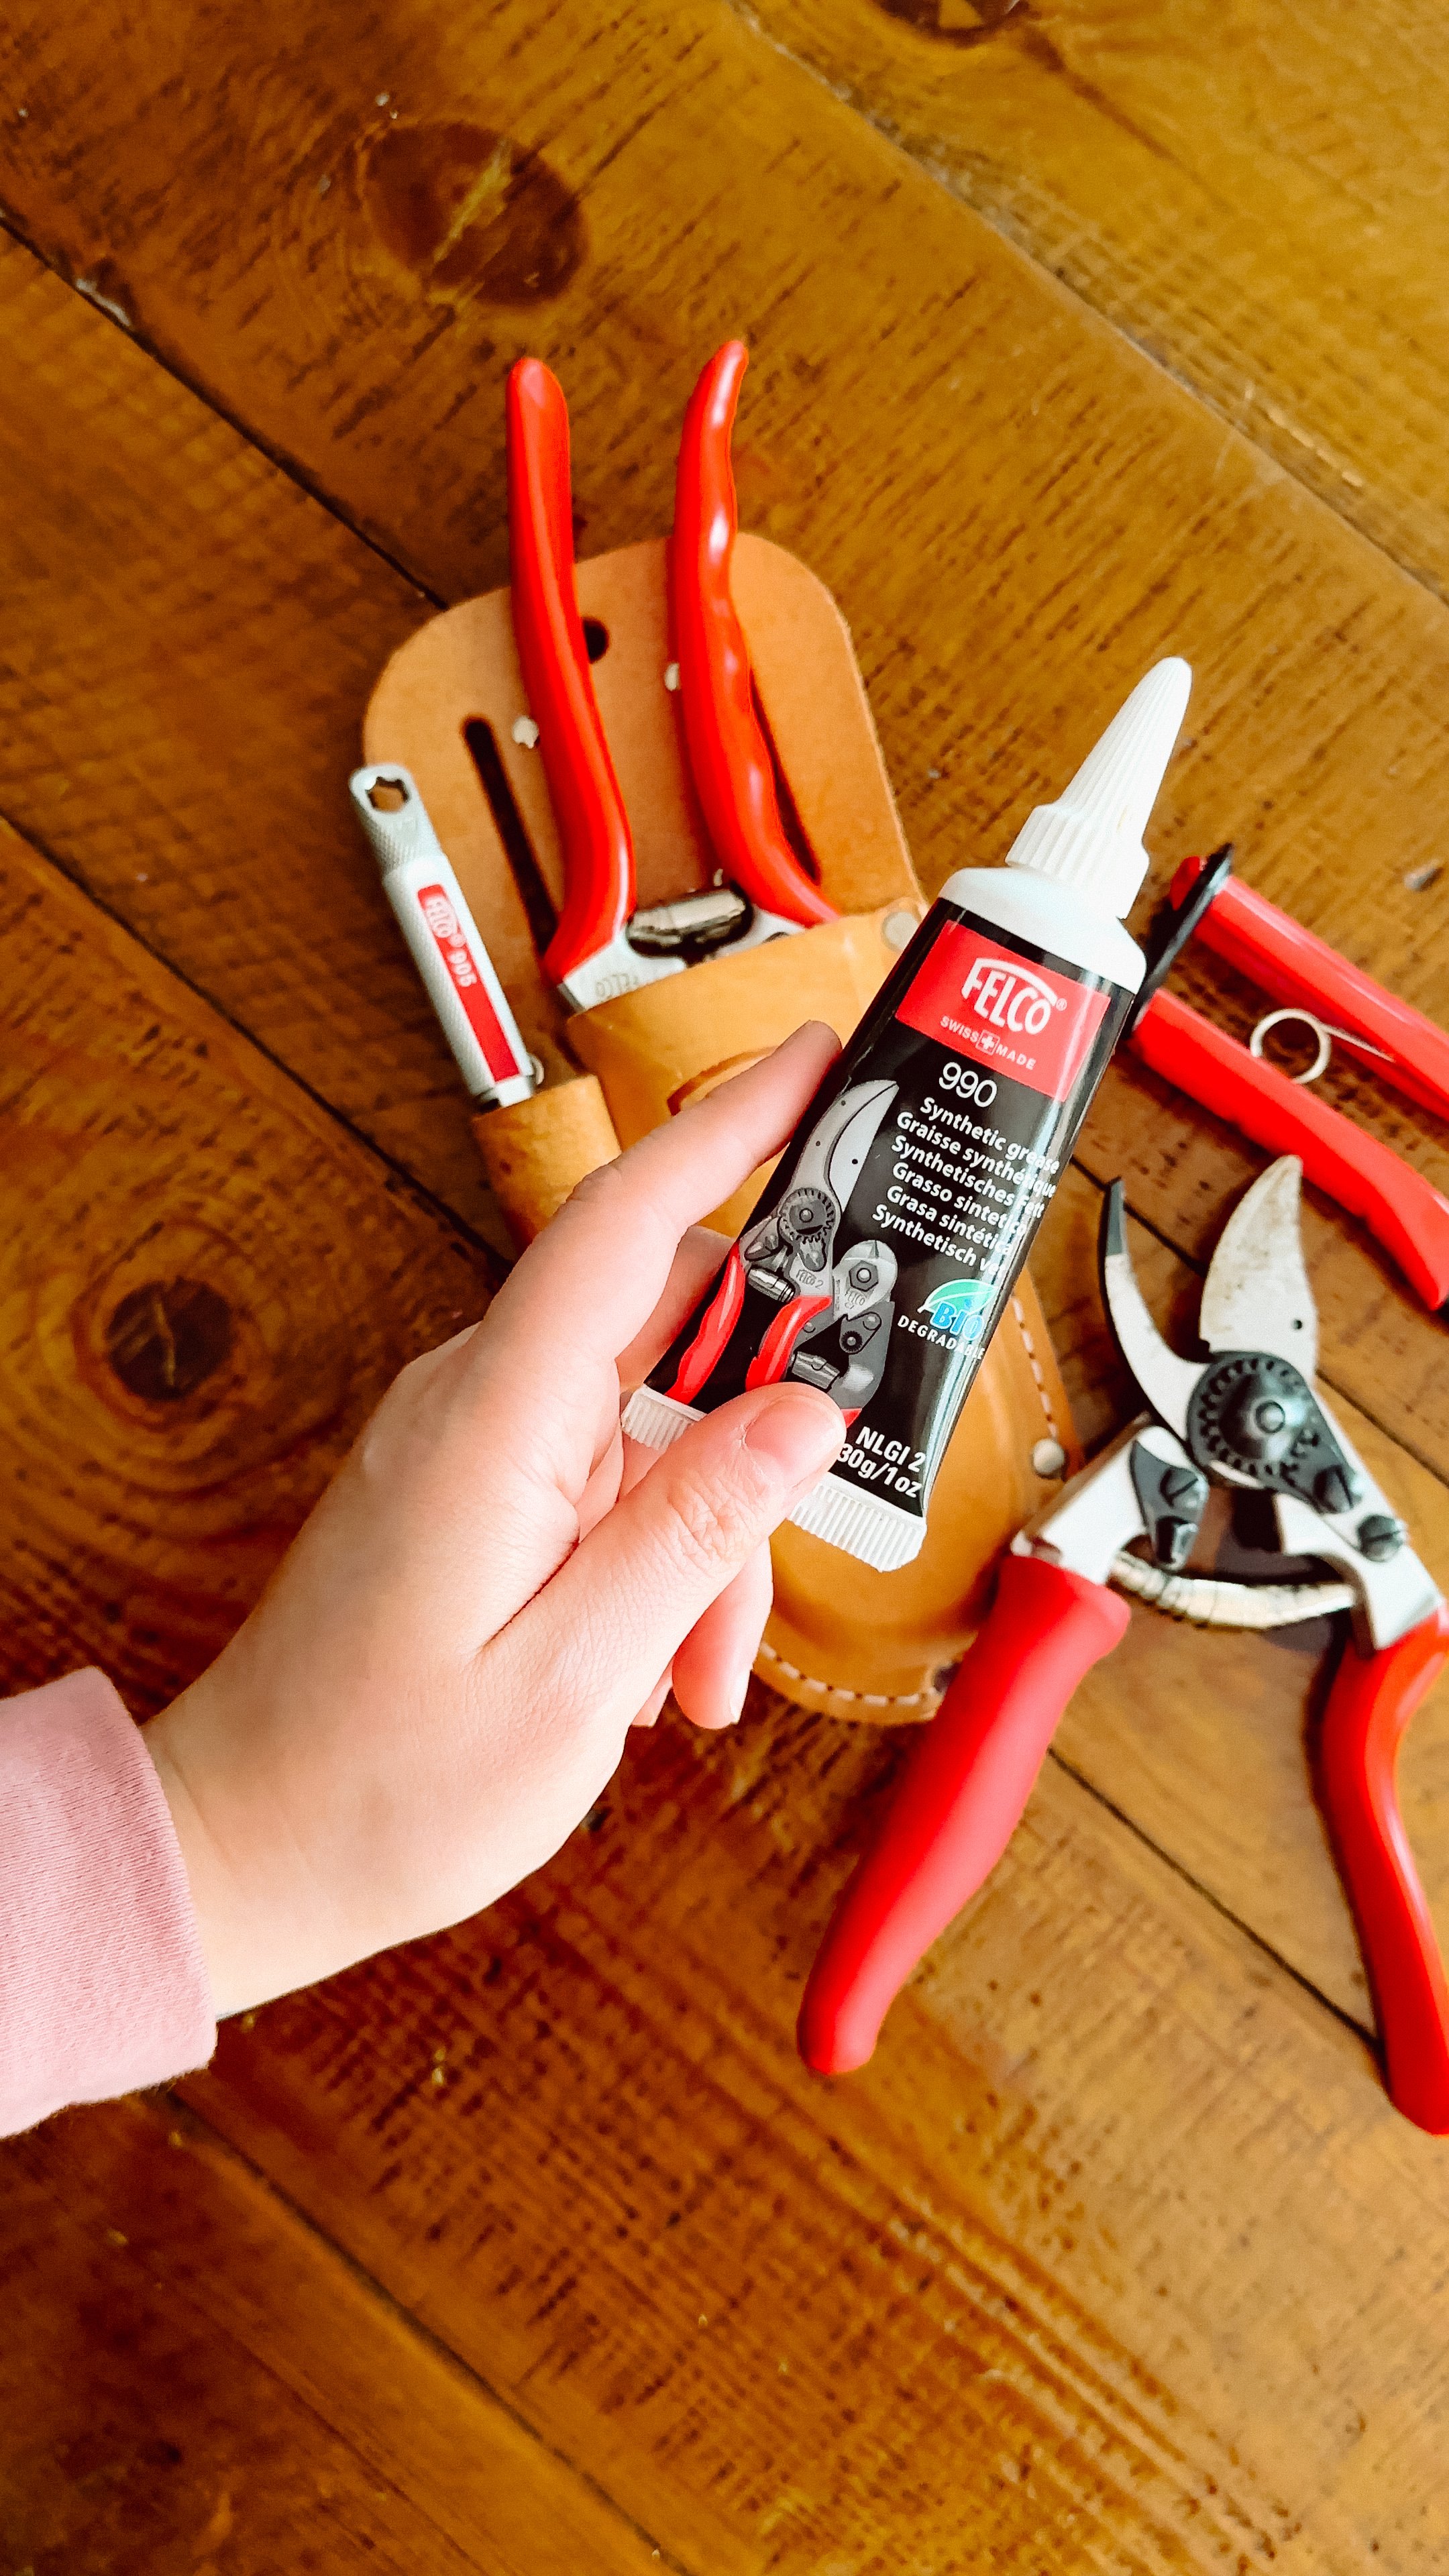
Up until recently the Felco 2s were my number one pick for pruning and clipping anything larger, and while I still love them last year Felco reached out to me and offered to send me their Felco 15s. What's really amazing about these pruners is the handle rotates when you squeeze it close, which takes so much of the pressure off of your hand, you would not believe it. The first time I tried them I practically cried because it made such a huge difference in how comfortable the grip was. The ONLY downside is the Felco 15s have a slightly smaller blade than the Felco 2s, so I still keep the Felco 2s around since they're great for larger projects.
The Best Garden Snips
Garden snips get the absolute most use in my garden, since they’re compact and lightweight they are perfect for harvesting and removing dead leaves from vegetable plants, as well as pruning suckers from tomatoes and deadheading flower plants. Many people I know, myself included, swear by these Felco 322 snips for just this purpose.
A couple small things that I consider garden tools you may consider garden accessories:
Plant labels
You don't need to get fancy with these. These thin white plastic ones can be reused again and again with a paint marker and are durable and easy to read from a distance.
Velcro plant tape
If tying tons of knots for trellises is uncomfortable for you like it is for me or just generally time consuming, this velcro plant tape will make all the difference. I love this stuff - you can custom fit it to any size that you need and you can reuse it over and over again.
How to Find Comfortable Garden Tools
When you're looking for a handle that's going to be ergonomic, it’s easy to jump straight for the options with a cushioned handle, but I’m going to caution you against this. Unfortunately in a lot of cases those foam cushions aren't very long lasting and they tend to deteriorate in sunlight. You will have a lot more luck finding comfortable tools if you are able to invest in quality tools built with a specific purpose in mind. But generally speaking, I often find wooden handles to be most comfortable. They just feel slightly “softer” than a metal based handle, and they hold up really well. Most also have a bit of a curve to them so they almost have that hand carved feel.
Daily Garden Tool Maintenance
My general rule of thumb is I'm trying to keep my tools as clean as possible throughout my daily tasks so that I don't really get to this point where they're super dirty. I'm sure most gardeners have also had the humbling moment where you realize that you left a tool outside in the rain, only to find it weeks later impossibly rust. Last year I came up with the solution; I have a container outside that I can keep them in that’s actually connected to my raised beds so I can just drop them and go. I think the most important thing here is reducing that friction and making it super accessible and easy. Something like a mailbox mounted somewhere can be a really great affordable solution for storing your garden tools.
Seasonal Garden Tool Maintenance
In the winter when things are slow is the perfect time to give all your garden tools a once over and some deep cleaning/TLC. Trowels, hand rakes and hoes generally just get brushed off with a dry rag and any wooden handles oiled with linseed oil. Blades are a little bit trickier and require some additional attention. I always keep a Felco 905 sharpener around for this task, it is a really great all purpose sharpener when you've got tools with blades that you need to maintain. But really a bit of Felco 990 grease, a sharpener and some clean rags are all you’ll need to get started!
Cleaning snips
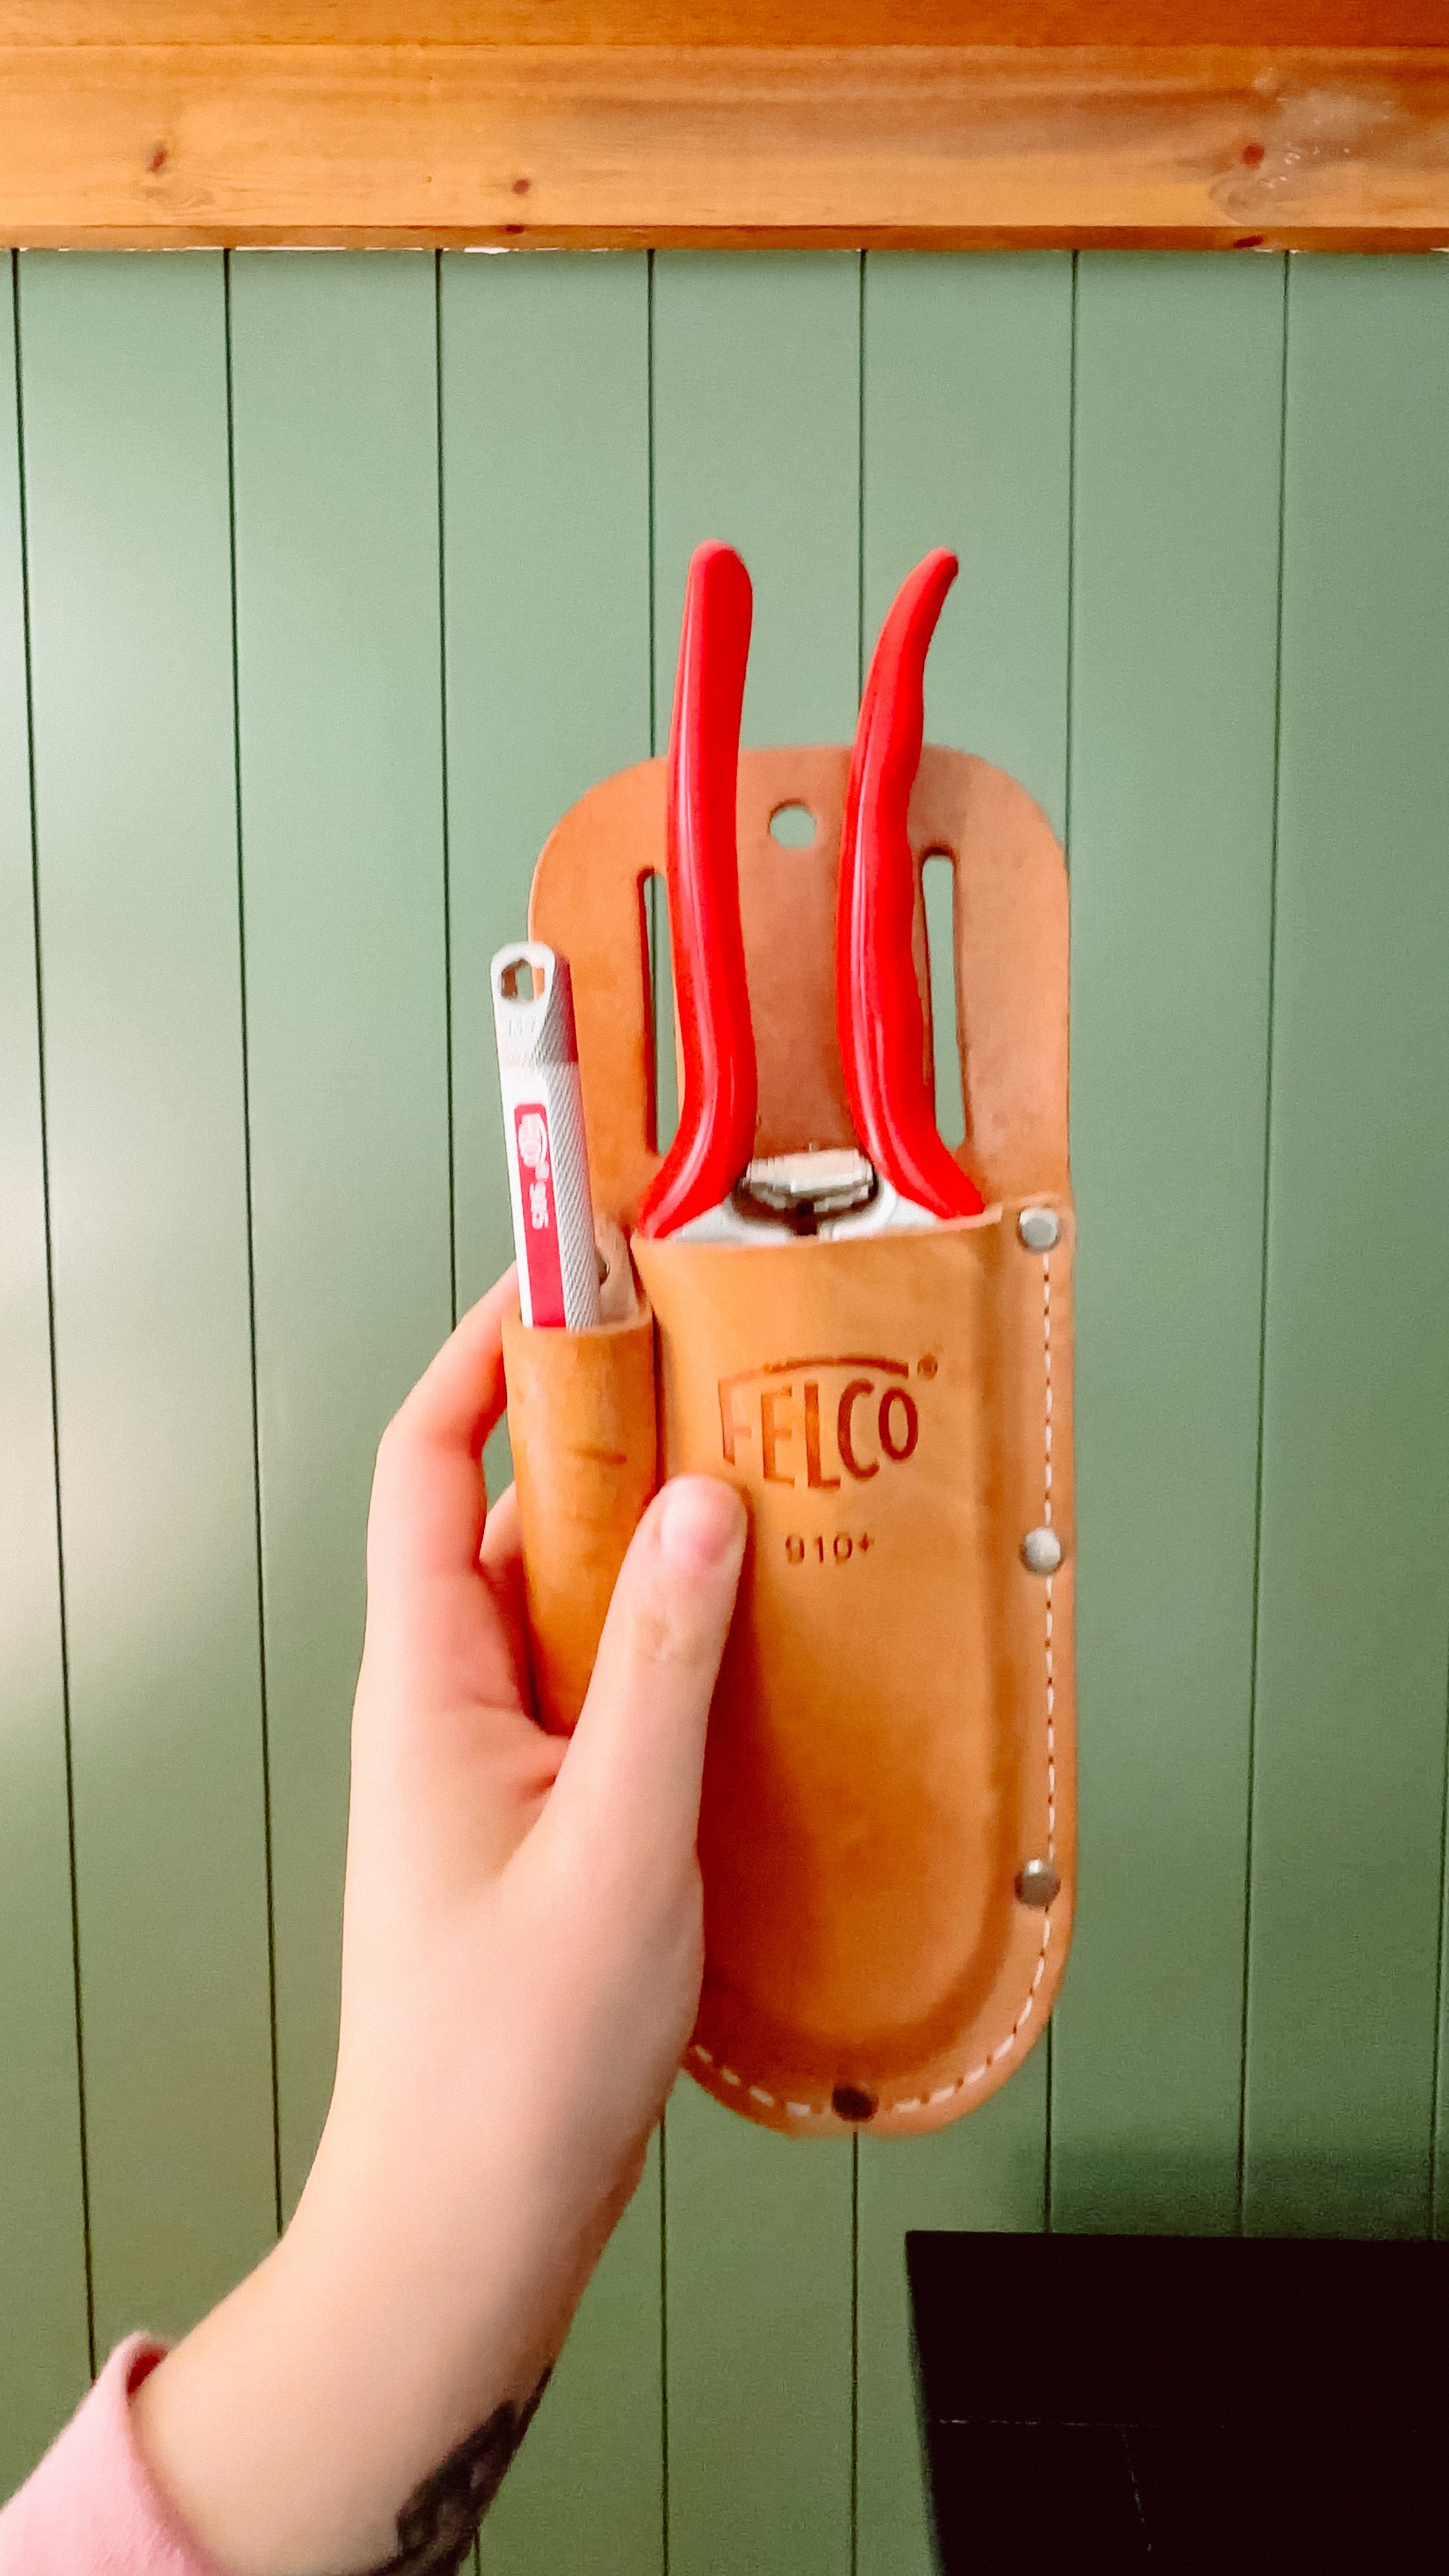
My harvest snips always have some plant residue buildup on the blades themselves that I want to clean off. In terms of daily maintenance with these, I sanitize the blades with an alcohol wipe pretty much every time that I use them because we don't want to be transferring any diseases from one plant to another. For example last year I had an experience with black rot on my grapes which can transfer to other plants and thankfully when I discovered this I didn't have to panic because I knew I had taken care of sanitizing those blades before using them on any other plants.
For something like these snips where they are really only cutting through really lightweight plant material you're not going to notice a lot of burrs on the blades themselves most of the time, but you can always do a quick sharpen just to give them a fresh edge.
Sharpening and cleaning Felco F2s
If your Felcos aren’t looking super rusty or having trouble opening and closing smoothly, you can usually get away with just a light sharpening. In general, it’s a good idea to take them apart once a year to regrease the internal mechanisms. If you do need to take these apart, never use water, always use some kind of oil based lubricant cleaner. Take a photo before you take them apart so that you know how it goes back together. And of course, we're dealing with a very sharp blade here so make sure that you’re holding with a secure grip and cleaning/sharpening away from your body.
Keeping your garden tools in good shape doesn’t have to be difficult, but it is important to prioritize finding time each winter to keep them working like new. What other garden tools would you like me to cover next?
![Greenstalk Planter Review [Vertical Garden Planter]](https://images.squarespace-cdn.com/content/v1/60e85024dc86d643da81c96a/de0ebf9c-0d8e-4a6b-ba17-06d21ec07075/IMG_2728.JPG)
Greenstalk Planter Review [Vertical Garden Planter]
This honest review of the Greenstalk Planter vertical garden tower has everything you need to know about Greenstalk gardens!

The Cottage Peach is reader-supported. When you purchase through links on our site, we may earn an affiliate commission at no additional cost to you. All opinions are our own.
Vertical gardening is quickly becoming one of my favorite gardening hacks to not only grow more plants in small spaces, but also make gardening more accessible if you have chronic pain. Having grown in a Greenstalk vertical planter for 3+ years now, I can safely say it’s my favorite way to garden - and that these planters are built to last. After multiple seasons left out in the cold northern elements, my vertical planter looks as good as the day I assembled it.
Watch me do it
GreenStalk Planter | Vertical Garden Planter Review · Subscribe on YouTube
What is vertical gardening?
Vertical gardening is a way to grow plants in a vertical space, such as on a wall or fence. It can be used to grow a variety of plants, including vegetables, herbs, flowers, and even trees. Vertical gardens are a great way to save space, add beauty to your home, and grow your own food.
What are the benefits of vertical gardening?
Increased yield: Vertical gardens can produce more fruits, vegetables, and herbs in a smaller footprint.
Improved plant health: Vertical gardens can reduce the risk of pests and diseases by providing better airflow and drainage. They also minimize or eliminate weeding.
Reduced water usage: Vertical gardens can use up to 90% less water than traditional gardens.
Increased accessibility: Vertical gardens can be used by people with limited mobility or chronic pain.
Improved air quality: Vertical gardens can help to improve air quality by absorbing carbon dioxide and releasing oxygen.

Are vertical gardens high maintenance?
No, most vertical gardens like the planter I use are very low maintenance. With the addition of automated timers for your grow lights and self watering trays you’ll really only have to maintain your garden once or twice a week.
How long do vertical gardens last?
My Greenstalk Planter is super durable - I’ve even heard stories of people having them fall off their decks and they were totally fine! My Greenstalk planter should last for many years, especially if they are properly cared for. You’ll be continually refreshing the plants in your garden as they reach the end of their lifecycle, which can be anywhere from a month for lettuce to six months for larger plants like squash.
How do you start a vertical garden?
To start a vertical garden, you will need to choose a location and purchase the necessary supplies. You can then choose the plants you want to grow and plant them in your vertical garden. The entire process is much faster than planting a traditional garden in the ground. I recommend choosing a spot that is easily accessible from your kitchen, so you can easily grab what you need before you start cooking dinner and have the freshest harvest possible. You’ll also want a spot in full sun if you’re using your vertical garden outdoors. I have this vertical garden outside on my deck to increase my available growing space and yield.
Greenstalk Planter Review
If you had told me I could grow 30 veggie plants, flowers and herbs in 2 square feet of space, I would have thought you were crazy. But the Greenstalk has grow pockets that are a full ten inches deep so my plants can grow as big as they want (and I can grow everything from carrots to peppers, tomatoes, herbs and squash!). It's by far the best way to maximize your garden space and make gardening more accessible if you have chronic pain like me.
The Greenstalk was a breeze to set up. I just filled each individual tier with soil and then my plant starts/seeds. The high-quality, food-grade, UV-resistant, BPA, BPS & PVC-free plastic tiers snap together with built in clips so there's no fiddling with tools or tiny parts trying to line everything up. I also got the spinner base with wheels which allows me to rotate the planter to get the most sun during the day and roll it around if it's ever in my way. Next I attached the self watering kit which is basically a long custom tube that clips to the side of the planter and connects directly to your hose to fill the top reservoir automatically.
I’ve grown with my Greenstalk for 3+ years now, and in that time the only issue I’ve encountered was soil related - NOT planter related. These vertical planters are container gardens, which means it’s extra important to only use potting mix since it is designed to balance drainage and water retention. Raised bed soil or topsoil will be too heavy and dense, and your plants may not thrive. As long as you use standard potting mix and fertilize regularly, you will have a thriving garden in your Greenstalk.
The planters are made from high quality, thick materials that do not wear down when exposed to the elements. Unlike my wood beds, which need to be covered and resealed yearly to protect them from my harsh northern winters, my Greenstalks require no maintence or protection from the elements. And they come in so many gorgeous colors, it’s hard not to want to collect them all.
How does the Greenstalk planter work?
What makes this outdoor vertical garden unique is the patented top water reservoir for easier watering with 4 watering disks to easily distribute water. GreenStalk’s patented watering system delivers fresh water to every tier at the same time so you don’t have to water each pocket by hand. All you do is add water to the top tray up to the fill line and the Greenstalk does the rest utilizing a gravity-fed system to slowly and evenly drip irrigate your planter, which means no need to worry about thirsty plants OR root rot!
After using my Greenstalk all summer, fall AND winter with the optional frost cover, I can't imagine my garden without it. In fact, I'm trying to resist buying a bunch more! If I had a choice, all my garden beds would be at least three feet off the ground, but this setup combined with the self watering bluetooth timer in summer is a GAME CHANGER. Talk about hands off (and weed-free) gardening.
Does Greenstalk have a warranty?
Yes, they include a 5-year warranty on color and functionality of the planter.
What can I grow in the GreenStalk Planter?
There are many different plants that can be grown in the Greenstalk planter, thanks to the super deep 10' pockets. I can grow peppers, tomatoes, cucumbers, squash, lettuce and other greens, herbs and even root crops like potatoes and carrots. strawberries are a really popular choice to grow in a Greenstalk planter as well. And of course I had to add some flowers like petunias, marigolds, and pansies. But these are just some of the many plants you can grow in your Greenstalk! Greenstalk recommends growing larger plants in the GreenStalk Original and smaller plants in the GreenStalk Leaf.
Can I use the GreenStalk Planter indoors?
These Greenstalk planters are basically all-weather outdoor champs. Some folks get creative and bring them indoors, tweaking the lighting and drainage. But with the addition of a frost cover and some careful planning to grow cold loving crops you can continue the outdoor harvesting well into the winter months.
How to store a GreenStalk Planter during the winter months?
Greenstalk planters are made for all climates. They can stay outdoors all year long (yes, really!) or they can be cleaned, stacked, and stored away.
How much does each tier weigh?
One Original Greenstalk with all its green glory and watering action hits the scale at around 30 lbs. If you're eyeing the Leaf Greenstalk, each tier throws down a weight of about 23 lbs.
How much soil do I need for the Greenstalk?
Each Original Tier holds 1 cubic foot of potting mix (about 8 gallons). Each Leaf Tier holds 0.75 cubic feet of potting mix (about 6 gallons).
Do I need special soil to use a GreenStalk?
Any high-quality, lightweight potting mix would work well. Avoid using topsoil, raised bed soil, or garden soil.
How often should I water my Greenstalk?
Watering is all about the season, weather, and the plants you've got growing. When you kick off the planter setup, my tip is to drench the soil using the water reservoir and each little pocket. If you're starting from seeds, give 'em a gentle mist until the plants are holding their own, so you don't go tossing those seeds around. And don't forget to sneak a peek and make sure the soil is staying moist below the top layer.
How long does the water sit in the reservoir?
GreenStalk's patented slow drip watering system allows water to drain through the system within approximately 5 minutes. If used correctly, there will be no sitting water anywhere in the system. The bottom of the GreenStalk includes little “feet” that allow water to drain out and away from the planter.
How do I fertilize my GreenStalk Garden?
You can add granular fertilizers, compost or worm castings when filling the tiers with soil, but the best hack is to add water soluble fertilizer as needed through the GreenStalk’s internal watering system when filling the top water reservoir.
Want more vertical gardening ideas?
I love vertical gardening so much, I literally wrote a book on it. This ebook has everything you need to know to get started with indoor gardening, including DIY vertical gardens you can make, to-do lists so you don’t miss a thing and more. Just click here to grab your copy.
![How To Grow Pumpkins In The Garden: Everything You Need To Know [Guide]](https://images.squarespace-cdn.com/content/v1/60e85024dc86d643da81c96a/1696955542836-7EJ1RVO7IO74E9EKS16A/image-asset.jpeg)
How To Grow Pumpkins In The Garden: Everything You Need To Know [Guide]
Pumpkins are a versatile and nutritious vegetable that comes in a wide variety of shapes, sizes, and flavors. From the delicate and tender to the rich and sweet, pumpkins, there is a pumpkin variety to suit every palate. Pumpkins are not only delicious but also packed with essential vitamins, minerals, and dietary fiber, making it a healthy addition to any diet. Their vibrant colors and unique textures make it a visually appealing ingredient that can elevate any dish. Whether you're looking to make comforting soups, hearty stews, vibrant salads, or even sweet desserts, pumpkin can be a go-to ingredient.

Pumpkins are a versatile and nutritious vegetable that comes in a wide variety of shapes, sizes, and flavors. From the delicate and tender to the rich and sweet, pumpkins, there is a pumpkin variety to suit every palate. Pumpkins are not only delicious but also packed with essential vitamins, minerals, and dietary fiber, making it a healthy addition to any diet. Their vibrant colors and unique textures make it a visually appealing ingredient that can elevate any dish. Whether you're looking to make comforting soups, hearty stews, vibrant salads, or even sweet desserts, pumpkin can be a go-to ingredient.
Growing pumpkins allows you to explore a wide range of varieties that may not be readily available in stores. You can experiment with heirloom or lesser-known varieties, each offering unique flavors and characteristics. This opens up a world of culinary possibilities, as you can tailor your dishes to your preferences and discover new and exciting flavor profiles.
Watch me do it
Harvesting Pumpkins Before It's Too Late · Subscribe on YouTube
WHAT KINDS OF PUMPKINS CAN YOU GROW?
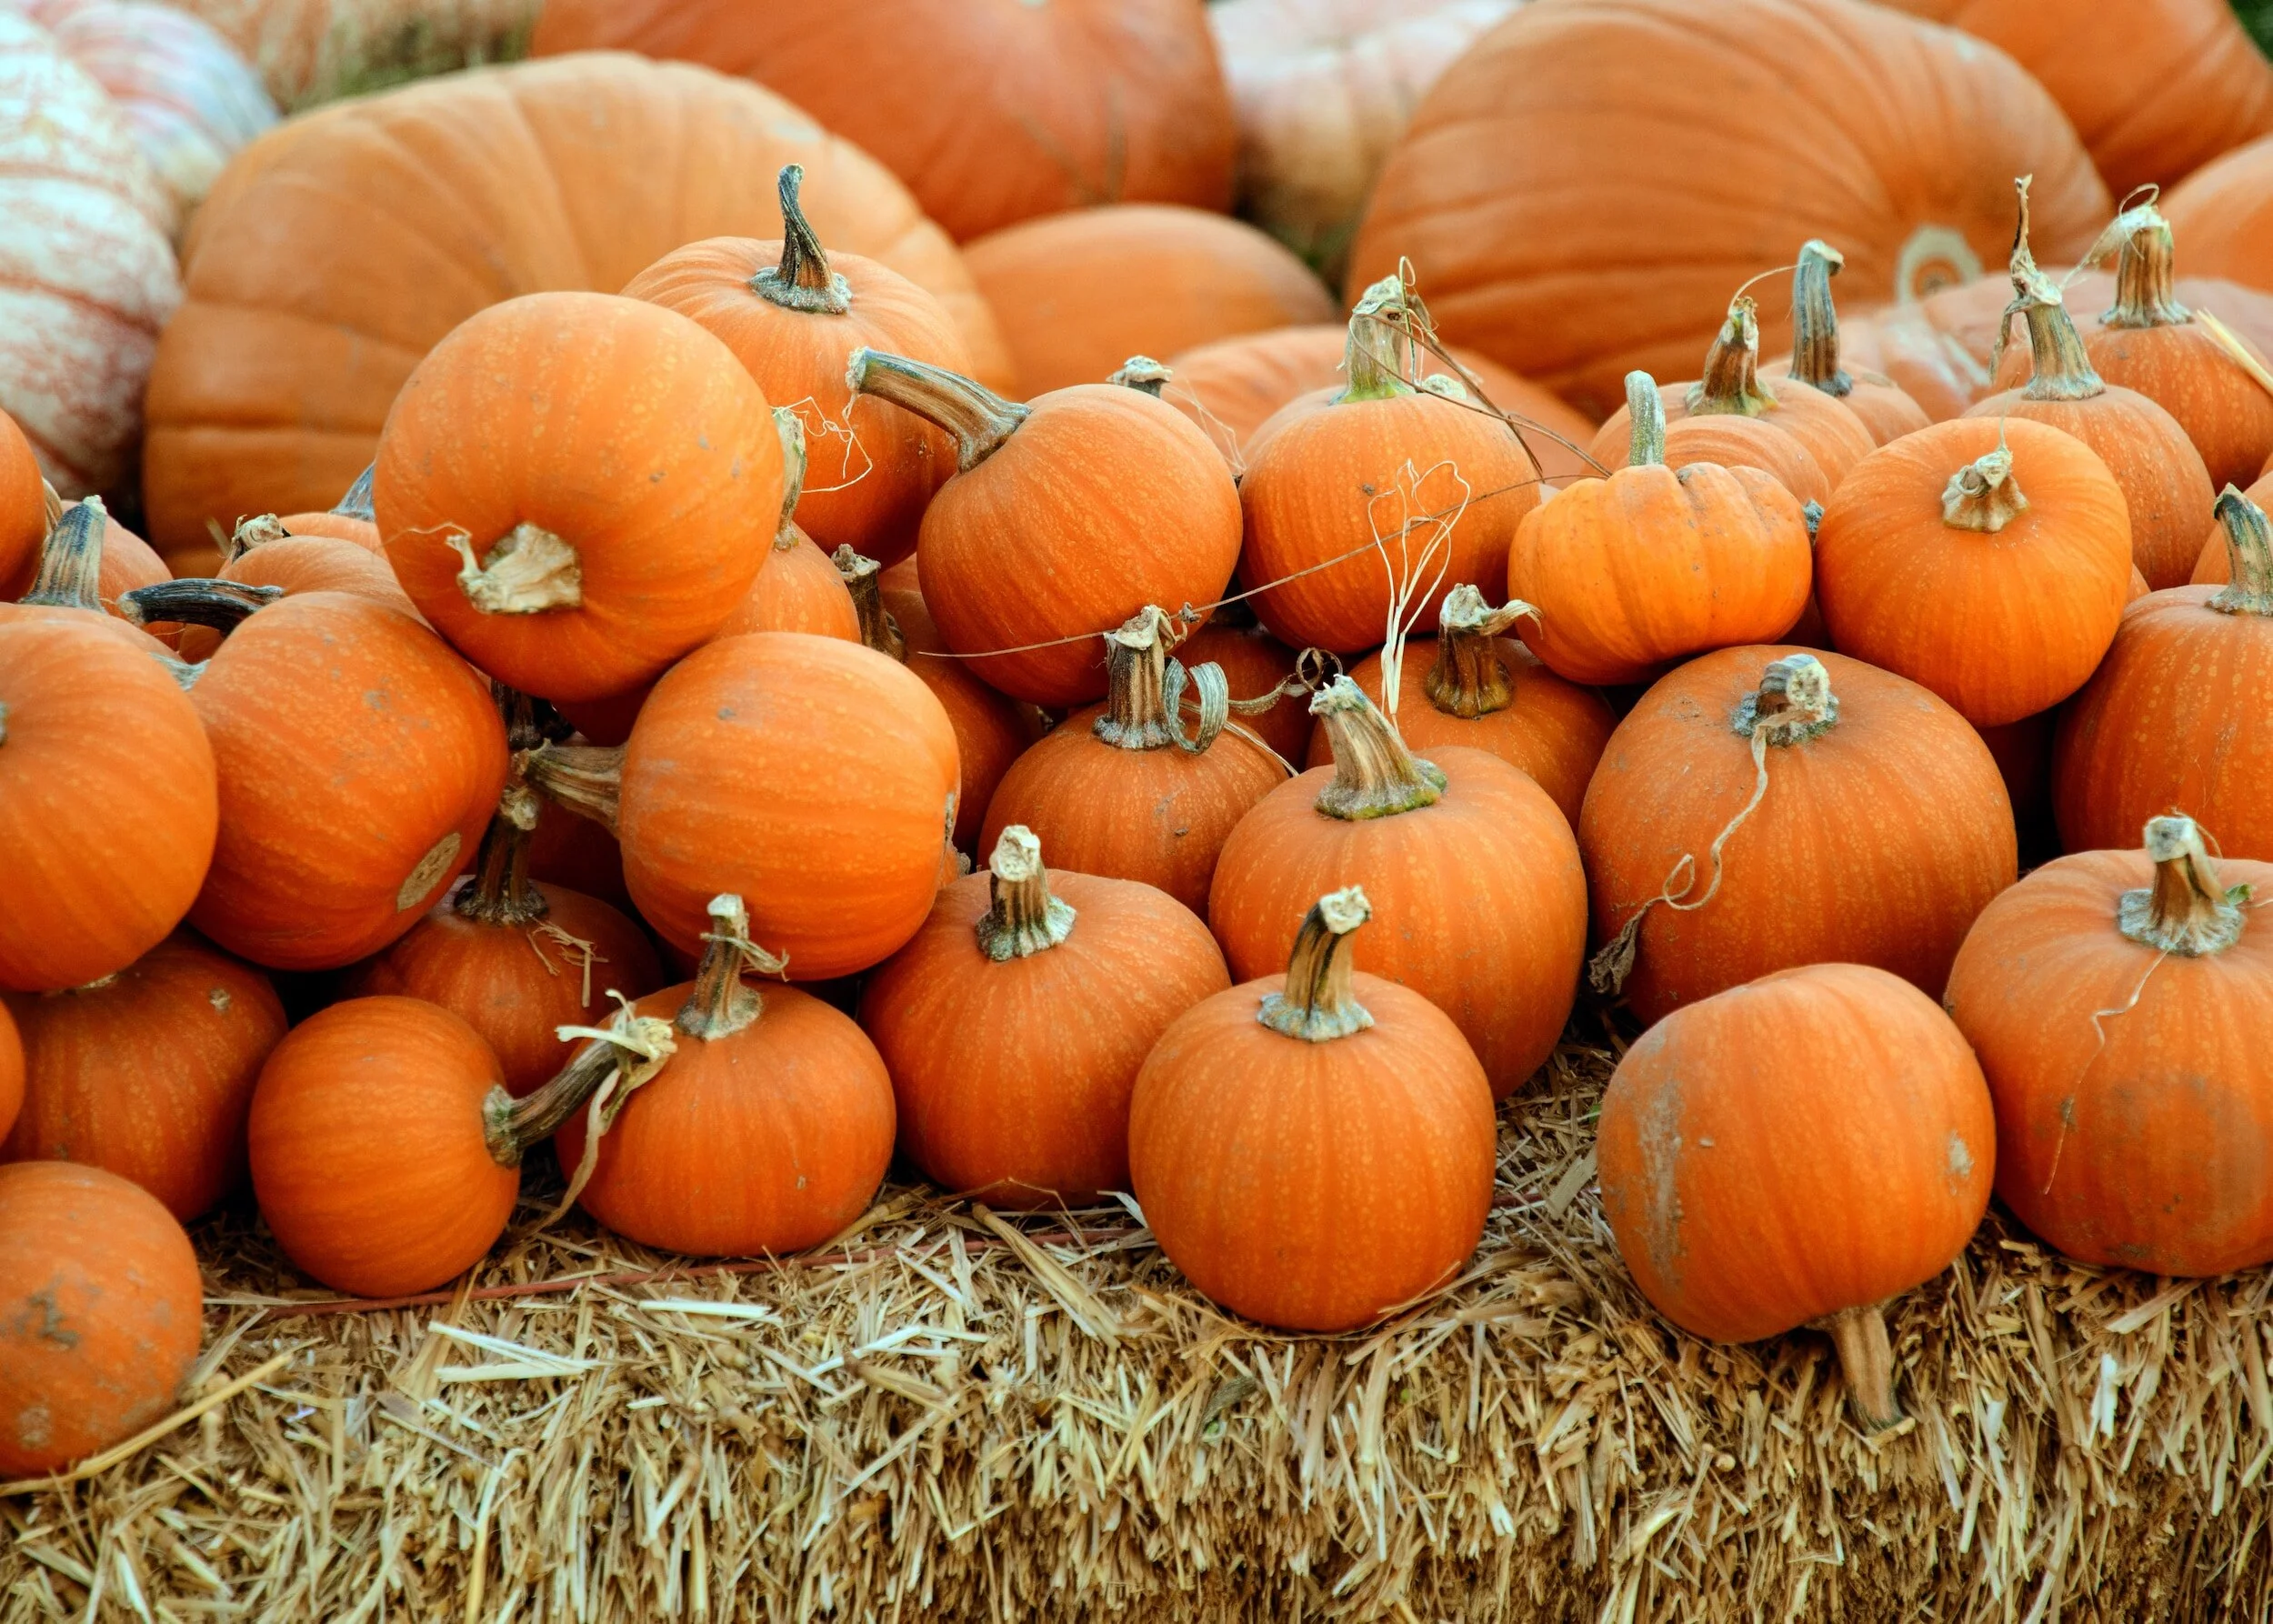
The classic Jack-O'-Lantern Pumpkin boasts a large, round shape and a vibrant orange hue, perfect for carving spooky faces during Halloween. On the sweeter side, the Sugar Pie Pumpkin is smaller and squat, ideal for crafting delicious pies and desserts with its deep orange flesh. For a touch of fairy tale charm, the Cinderella Pumpkin features a flat, deeply ribbed profile in a reddish-orange shade, excellent for both roasting and decorative use.
Opting for a unique aesthetic, the White Pumpkin with its creamy or pale white skin can be used interchangeably with traditional pumpkins in various dishes, adding a visual twist. If seeking a classic pie pumpkin with a twist, the Long Island Cheese Pumpkin flaunts a flat, cheese-wheel shape in tan with light ribbing, lending itself well to pies, soups, and baking. For those drawn to a blue-gray appearance, the Jarrahdale Pumpkin serves as a delightful option, suitable for roasting, mashing, and decorative purposes.
Adding a touch of whimsy, the Fairytale Pumpkin features a flattened and deeply lobed structure in a reddish-orange hue, perfect for roasting and purees, while also bringing a charming aesthetic to dishes. The Musquee de Provence Pumpkin, with its ribbed, squat form and greenish streaks, offers an aromatic sweetness suitable for baking, soups, and decorative applications.
For a playful twist, the Pink Banana Pumpkin stands out with its long, slender shape and pinkish-orange hue, bringing a sweet, banana-flavored note to baking, purees, and creative culinary endeavors.
Rounding out the list, the Galeux d'Eysines Pumpkin captivates with its salmon-colored skin adorned with peanut-like warts, delivering a smooth and sweet flavor profile perfect for soups, stews, and as an eye-catching decorative item. Each pumpkin variety is a canvas for culinary creativity, promising a delightful array of flavors and textures for every kitchen experiment.
WHERE SHOULD YOU PLANT PUMPKINS?
Pumpkin plants thrive in full sun, so it is essential to select a growing site that receives at least 6 to 8 hours of direct sunlight daily. Sunlight is crucial for the growth and development of pumpkins plants, as it helps them produce ample foliage and ensures optimal fruiting. Therefore, choose a location in your garden that is not shaded by trees, buildings, or other structures.
In addition to sunlight, pumpkins plants require well-draining soil. They prefer soil that is loose, fertile, and rich in organic matter. Well-draining soil prevents waterlogging, which can lead to root rot and other diseases. To improve drainage, you can amend heavy clay soil with organic matter such as compost or well-rotted manure. This helps create a looser soil structure, allowing water to flow through and preventing excess moisture retention around the plant's roots.
Pumpkin plants can spread and occupy a significant area, so ensure that you have sufficient space for the plants to grow and sprawl without overcrowding other crops or plants. Adequate spacing allows for good air circulation and helps prevent the development of fungal diseases.
STARTING PUMPKINS PLANTS FROM SEED
This method involves directly sowing pumpkins seeds into the soil or starting them indoors and later transplanting the seedlings. Sowing seeds directly in the garden is a simple and cost-effective approach. On the other hand, starting seeds indoors allows for earlier planting and a head start on the growing season.
Pumpkin seeds should be planted when the soil has warmed up and all chances of frost have passed. This is typically in spring when the soil temperature reaches around 60°F (15°C) or higher. Ensure that the soil is well-draining and enriched with organic matter. Remove any weeds or debris and break up clumps of soil. Plant pumpkins seeds about 1 inch (2.5 cm) deep into the soil. Space the seeds 2 to 3 feet (60 to 90 cm) apart in rows, or follow the spacing guidelines specific to the variety you are planting. You may also plant three seeds in a hill formation. After planting the seeds, thoroughly water the area to ensure good seed-to-soil contact and proper moisture for germination. Keep the soil consistently moist but not waterlogged as the seeds germinate and the seedlings emerge. Once the seedlings have emerged and developed their first set of true leaves, thin them out if they are planted too closely together. Thin the seedlings to the desired spacing, typically leaving the healthiest and strongest ones.
Using seedlings from a nursery offers the advantage of a shortened time to harvest, as the plants are already established. It can be particularly beneficial in areas with a shorter growing season or for gardeners who prefer a more convenient option. Seedlings provide a head start in the growing process, allowing you to harvest pumpkins earlier than if you were to start from seeds, but buying seedlings can be more expensive compared to starting from seeds, and seedlings may experience some level of transplant shock when moved from the controlled environment of the nursery to your garden. This shock can temporarily slow down growth and require extra care during the transition.
HOW TO GROW PUMPKINS VERTICALLY
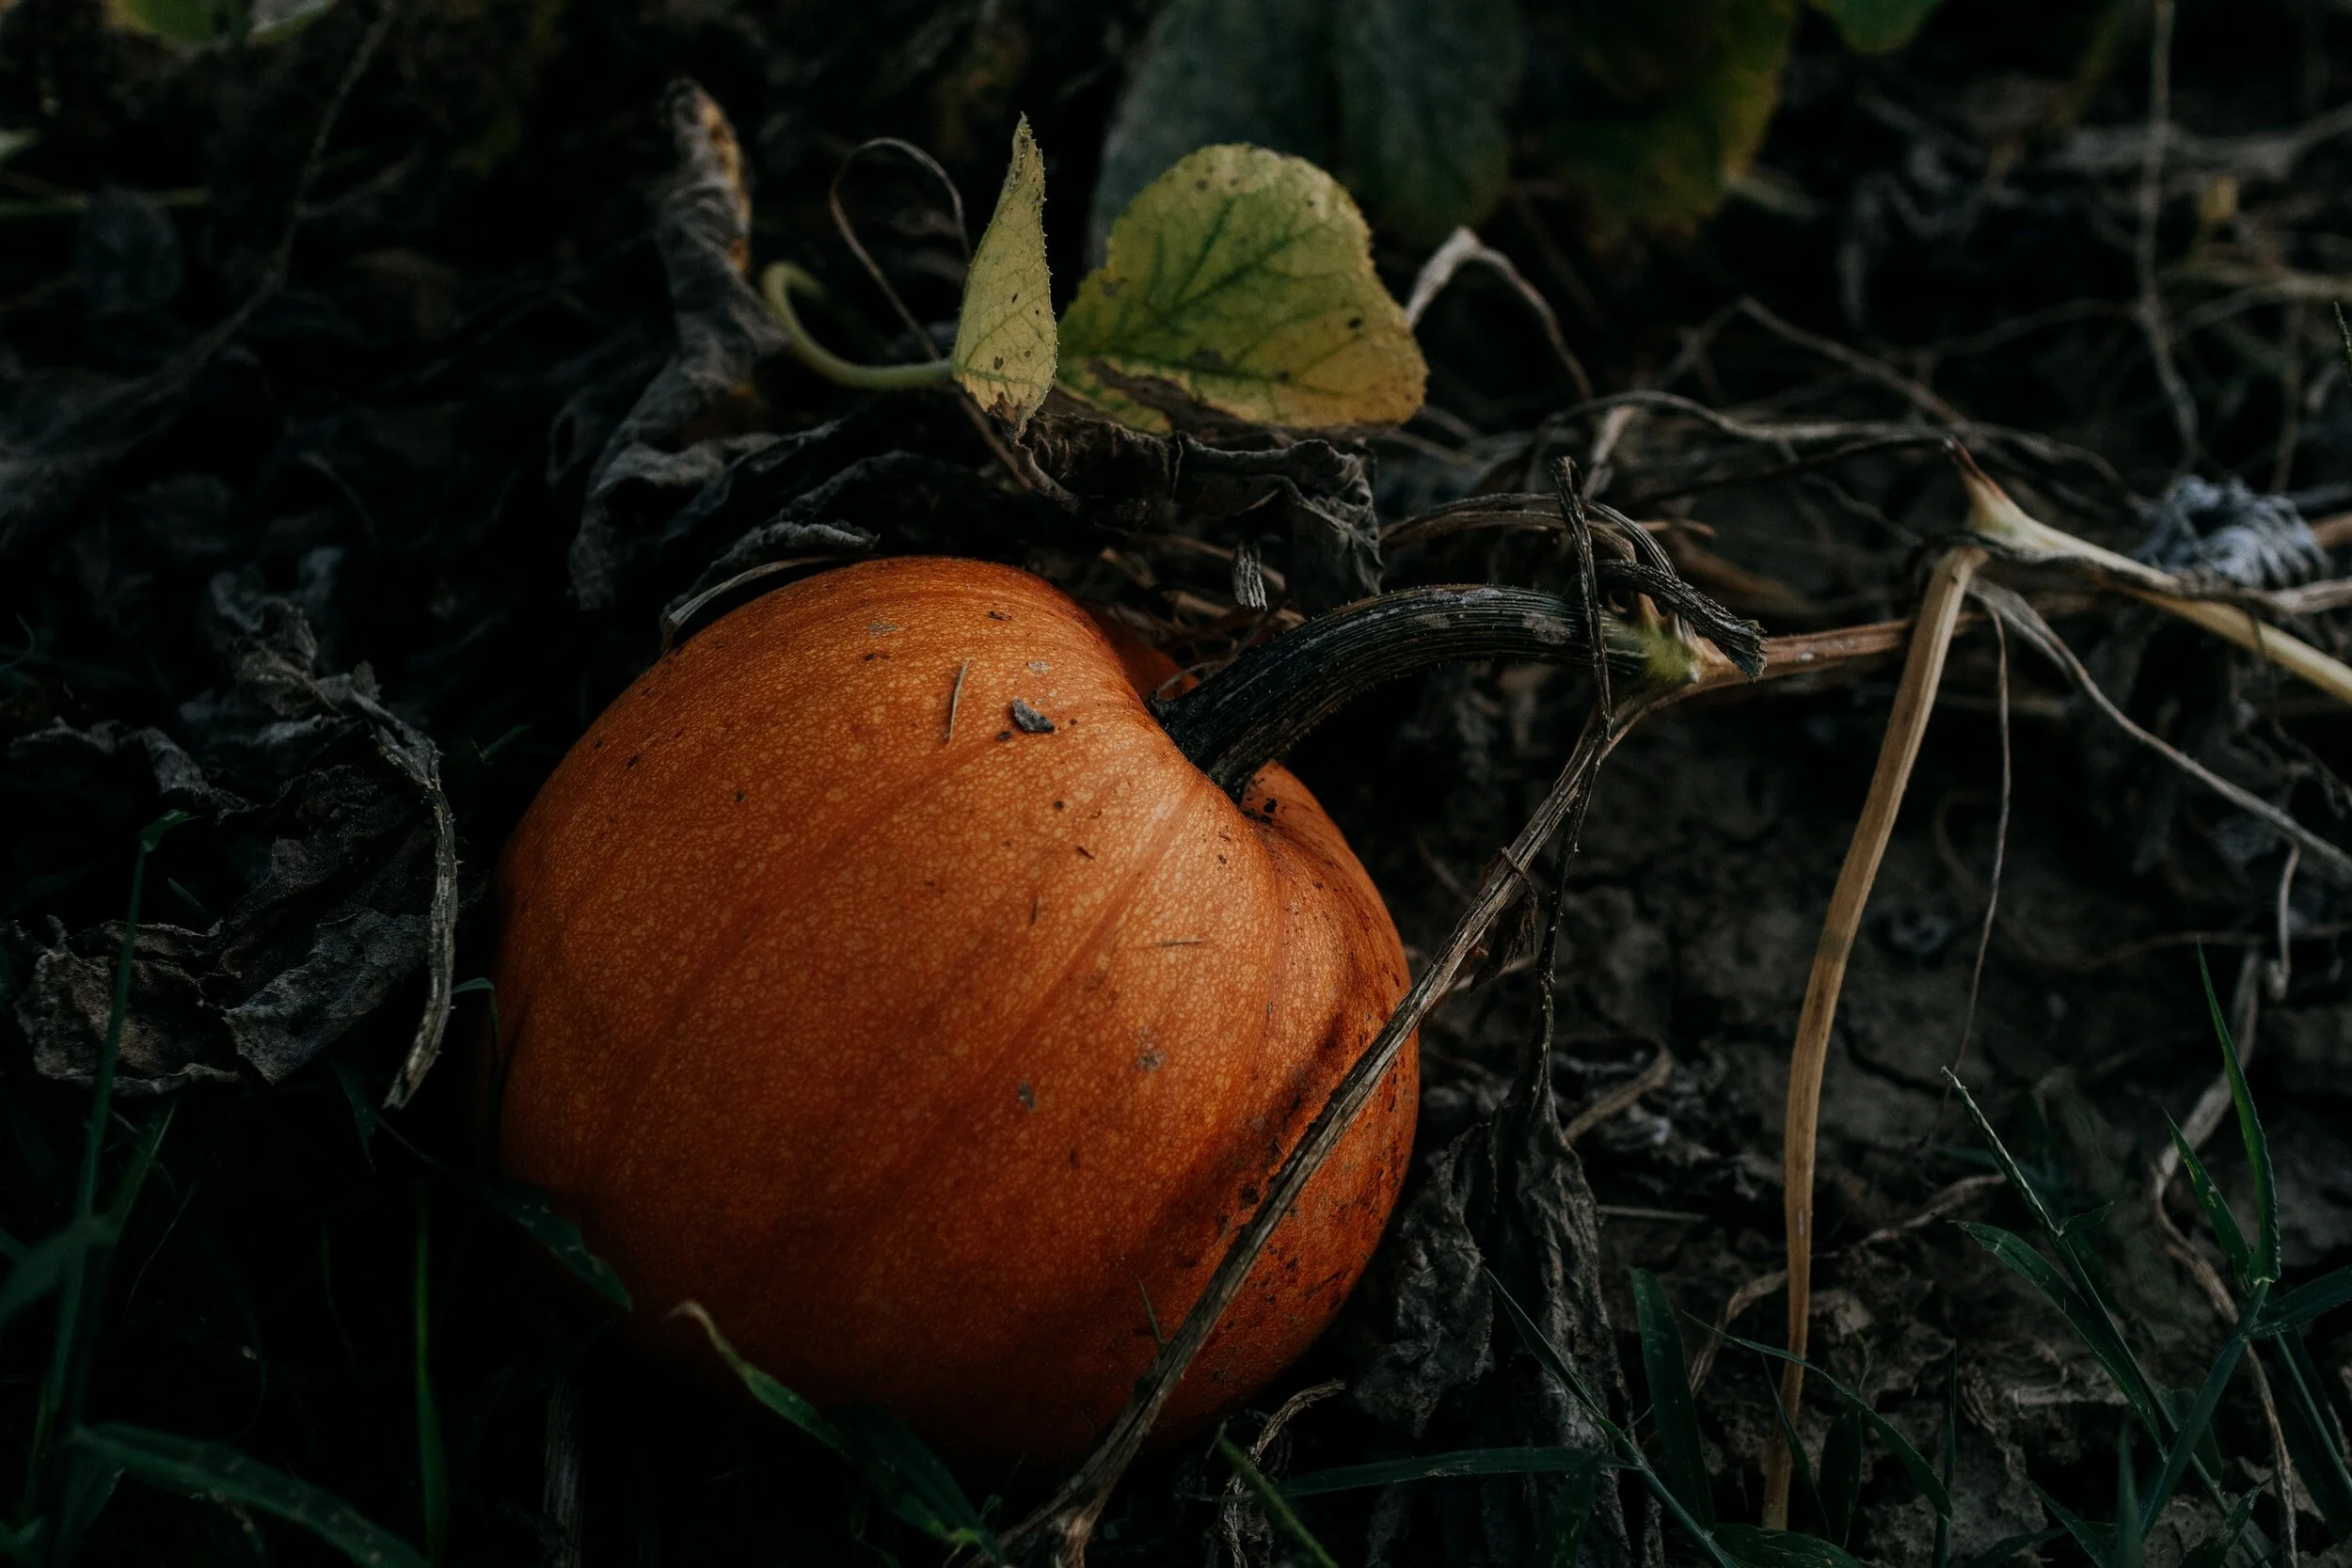
Vining pumpkins tend to spread out and take up a lot of garden space. By providing support or trellises, you can train the vines to grow vertically, saving valuable space in your garden. When vining pumpkins plants are trained upwards, they allow for better airflow around the foliage, reducing the chances of diseases caused by excessive moisture and promoting overall plant health. Growing vining pumpkins vertically makes it easier to locate and harvest the fruits. The pumpkins hang down from the trellis, making them more visible and accessible.
To provide support for vining pumpkins, you can use trellises, stakes, or cages. Install the support structure at the time of planting or when the plants are young to avoid disturbing the roots later. As the vines grow, gently train them to climb the support structure, securing them with garden ties or soft twine if needed. Be sure to choose sturdy supports that can handle the weight of the developing fruits.
WATERING PUMPKIN PLANTS
Pumpkin plants have high water needs, and lack of moisture can lead to stunted growth and poor fruit development. Aim to provide about 1 to 1.5 inches (2.5 to 3.8 cm) of water per week, either through rainfall or irrigation. Fluctuating moisture levels can cause stress to the plants and lead to issues like blossom end rot or fruit cracking. Water the plants deeply, ensuring the moisture reaches the root zone. Mulching around the plants can help retain soil moisture and reduce water evaporation.
MULCHING PUMPKIN PLANTS
A layer of mulch helps retain soil moisture by reducing water evaporation. This is especially important during hot and dry periods when water availability is crucial for healthy plant growth. Mulch acts as a natural weed barrier, preventing weed growth and competition with pumpkins plants for nutrients and water. This reduces the need for frequent weeding, saving time and effort. Mulch helps regulate soil temperature by keeping it cooler in hot summer months and providing insulation during cooler periods. This creates an ideal environment for root development and overall plant growth.
PUMPKIN PESTS AND DISEASES
Squash bugs: These insects feed on the leaves, stems, and fruits of pumpkin plants, causing wilting, yellowing, and decline. They can be identified by their flat, shield-shaped bodies and dark brown or gray color.
Squash vine borers: The larvae of these pests bore into the stems of pumpkin plants, causing wilting, dieback, and eventual plant death. Adult vine borers are clear-winged moths.
Cucumber beetles: These beetles can transmit diseases and damage leaves, flowers, and fruits of pumpkin plants. They are typically yellowish-green with black stripes or spots.
Organic pest control methods can help manage pumpkin pests effectively while minimizing the use of synthetic pesticides. Consider the following approaches:
Row covers: Use lightweight fabric row covers to physically exclude pests from reaching the plants. Cover the plants soon after planting and secure the edges to prevent pests from entering.

Beneficial insects: Encourage the presence of natural predators and beneficial insects in your garden, such as ladybugs, lacewings, and parasitic wasps. These insects prey on pumpkin pests and help control their populations.
Pumpkin plants are susceptible to several diseases that can affect their overall health and productivity. Here are some common diseases that may affect pumpkins:
Powdery mildew: This fungal disease appears as a white, powdery coating on the leaves, stems, and fruits of pumpkin plants. It can cause leaf yellowing, stunting, and reduced fruit production.
Bacterial wilt: This disease is caused by bacteria that clog the water-conducting tissues of pumpkin plants, leading to wilting and eventual death. It is often transmitted by cucumber beetles.
TO PREVENT AND MANAGE PUMPKINS DISEASES, CONSIDER THE FOLLOWING MEASURES:
Crop rotation: Avoid planting pumpkins in the same area of the garden year after year. Rotate your crops to different locations to reduce the buildup of disease-causing pathogens in the soil.
Remove and destroy any infected plant debris to prevent the spread of diseases. This includes removing and disposing of infected plant parts, fallen leaves, and fruits.
Select pumpkin varieties that have resistance or tolerance to common diseases prevalent in your area. This can help reduce the risk of infection and improve plant health.
HOW TO HARVEST PUMPKINS
When it comes to harvesting pumpkins, there are a few signs that indicate the fruits are mature and ready to be picked. Look for pumpkins with firm skin and vibrant color. Depending on the variety, the skin may be tough and resistant to scratching or denting. Additionally, the stem connecting the pumpkins to the vine should be dry and starting to wither.
To harvest pumpkins properly, use a sharp knife or pruning shears to cut the fruit from the vine, leaving a small stem at least one inch long attached. Avoid pulling or twisting the pumpkins, as this can damage the plant and reduce the quality of the fruit. Handle the pumpkins with care to prevent bruising or puncturing.
HOW TO CURE PUMPKINS
Curing is particularly important for pumpkins varieties you want to store long term to last the winter. After harvest, wipe the outside down with soapy water and allow the pumpkins to cure in a warm and well-ventilated area for a period of time, typically about 1 to 2 weeks. This process toughens the skin, enhances flavor, and extends their storage life. During curing, the pumpkins should be kept in a single layer, allowing air circulation around each fruit.
HOW TO STORE PUMPKINS
Storing pumpkins properly is essential to maintain their quality and extend their shelf life. Winter pumpkins can be stored for several months when stored correctly. Keep them in a cool (50-55°F or 10-13°C), dry, and well-ventilated area. Avoid storing winter pumpkins near fruits that produce ethylene gas, such as apples, as this can cause premature ripening and spoilage.
Growing your own pumpkins can be a rewarding experience that provides you with fresh, flavorful, and nutritious produce. By following proper harvesting and storage techniques, you can enjoy your homegrown pumpkins for an extended period, adding versatility and delicious flavors to your meals. Start your own pumpkin garden, explore different varieties, and savor the many culinary possibilities that pumpkins have to offer.
![The 6 Best Garden Shoes for Effortless and Enjoyable Gardening [Roundup]](https://images.squarespace-cdn.com/content/v1/60e85024dc86d643da81c96a/7a0407e3-1c98-4d35-818c-ec2b49d9e8a0/merry+people+bobbi.JPG)
The 6 Best Garden Shoes for Effortless and Enjoyable Gardening [Roundup]
Ask gardeners what their favorite shoes to wear in the garden are, and you’ll get a huge array of responses. Many will say that the best way to garden is barefoot, and while there are many benefits to rooting yourself to the soil through your bare feet, there will always be times when a good garden shoe is required to protect our toes from heavy, rough jobs or hot environments. I often go barefoot in the later days of summer when the garden is mostly self-sustaining, but for big garden tasks like moving soil or constructing beds, garden shoes are a necessity.
The Cottage Peach is reader-supported. When you purchase through links on our site, we may earn an affiliate commission at no additional cost to you. All opinions are our own.
Ask gardeners what their favorite shoes to wear in the garden are, and you’ll get a huge array of responses. Many will say that the best way to garden is barefoot, and while there are many benefits to rooting yourself to the soil through your bare feet, there will always be times when a good garden shoe is required to protect our toes from heavy, rough jobs or hot environments. I often go barefoot in the later days of summer when the garden is mostly self-sustaining, but for big garden tasks like moving soil or constructing beds, garden shoes are a necessity.
In this post we will cover my best tips and recommendations for choosing garden shoes that are comfortable and safe, as well as built to last. If you’re wondering what the best shoes for gardening are, look no further!
When choosing shoes to garden in, finding a shoe that is comfortable should be your first consideration - especially if you garden with chronic pain like I do. Uncomfortable shoes can lead to foot pain, blisters, and other problems that could cost you time in the garden. It is important to choose garden shoes that offer good arch support and cushioning. Your garden shoes should also provide good traction to prevent slipping and falling on wet or uneven surfaces, since we often have to garden in all sorts of conditions.
Your garden shoes should also protect your feet from hazards such as sharp tools, thorns, and poisonous plants, which means your one dollar flip flop sandals probably aren’t the best choice for the task.
Garden shoes are often made with durable and waterproof materials that offer protection from all these hazards, like rubber, neoprene or PVC, as they are exposed to water and mud regularly. For heavy duty garden tasks you may want reinforced toes, and thick soles. Garden shoes usually sit higher on your ankle or offer some type of snug fitting liner to keep dirt and rocks from falling in.
The best garden shoes are also built for breathability and durability. Your garden shoes should be breathable to prevent your feet from getting too hot and sweaty, and durable enough to withstand the wear and tear of gardening activities.
When purchasing garden shoes, you should consider the following factors:
Material: Garden shoes should be made from waterproof and durable materials like rubber, neoprene or PVC, as they are exposed to water and mud regularly.
Comfort: Look for garden shoes with comfortable insoles and a good arch support that will allow you to stand or walk for longer periods.
Traction: It is important to have a good grip on the soles of your garden shoes to avoid slipping and falling in wet or slippery conditions.
Size: Ensure you select the right size for maximum comfort and to avoid blisters or injuries.
Breathability: Your garden shoes should have adequate ventilation to allow air to circulate around your feet, preventing sweating and odor.
Style: Consider your style and preference when choosing garden shoes. There are various styles available from clogs, slip-on, to lace-up.
Purpose: If you plan to use your garden shoes for heavy-duty work, consider getting steel-toed shoes for added protection.
Muckster Low by The Muck Book Company
My own mother’s recommendation are these Muckster ll Women's Rubber Garden Shoes. They will keep you protected from mud and puddles while gardening or doing other outdoor activities. Featuring a lightweight, flexible 4mm neoprene bootie, these 100% waterproof rubber garden shoes are designed to adapt to the movements and contours of your feet while you walk, bend and crouch.
The high-traction outsole makes excellent contact with slick surfaces and it also self-cleans to keep out dirt and debris for better grip. Equipped with an Airmesh lining, these women's garden shoes are breathable for improved comfort in warm weather. These versatile women's rubber shoes are a great choice for gardening, walking the dog and running errands.
100% Waterproof
Full Neoprene Bootie Exposed at Ankle for a Comfortable, Flexible Fit
Breathable Mesh Sandwich-fabric Lining Improves Air Circulation
Self Cleaning Rubber Outsole Built for the Lawn and Garden
bioDEWIX™ Footbed Insert Topcover with NYZM™ for Odor Control and Moisture Management
Available in: Green
Women's Ankle Height Garden Boots by Hisea
The most popular choice of our community. Hisea offers waterproof, breathable, and comfortable women's ultra-versatile rain and garden shoes. This shoe is fully waterproof, has durable uppers made of natural rubber, and is insulated to keep your feet warm in the winter and cool in the summer.
4.5mm neoprene booties give you flexibility and shock absorption; natural rubber layers create extra protection, and waterproof design in any situation. Keeping you dry and providing comfort and support for long days.
Breathable H-Airmesh Lining allows air to travel throughout the boots, which keeps your feet much drier than normal boots in the market. Comfort rated from 14 °F/-10°C to 86 °F/30 °C. Making these boots best for year-round use.
Reinforced rubber layers for additional protection to heel and toe. The aggressive anti-slip rubber outsole increases traction. Comfort massage memory foam insoles offer extra arch support, good for all-day long use on your feet.
Available in: Brown, Camo, Black, Green

Patch Ankle Boots by Bogs Footwear
Available in many fun prints and designs with easy on-off handle cutouts. Bogs is partnering with BLOOM to integrate algae-based EVA footbeds across their entire line. Natural rubber, sustainably harvested in Forest Stewardship Council-approved regions. Rubber factories minimize waste by using as much as 40% post-industrial recycled material.
100% Waterproof
BLOOM eco-friendly, algae-based EVA footbed that helps clean polluted water habitats.
Built in heel kick for hands free removal
Crafted with ultra-soft and flexible rubber
BOGS Max-Wick evaporates sweat to keep feet dry
DuraFresh natural bio-technology activates to fight odors
Available in: Many colors and styles
Women's Rugged Wellie Shoes, Slip-On by LLBean
Exceptionally cushioned with rugged traction for wet surfaces, these slip-ons prove you don't need to sacrifice comfort when protecting your feet from rain and mud. LLBean is always a safe bet for comfort and durability.
Waterproof upper is made of vulcanized rubber.
Comfortable synthetic knit lining.
Stretchy goring allows for easy on/off (not waterproof).
EVA pods in the midsole and forefoot for extra cushioning and comfort.
Super-thick sock liner for comfort and support.
Durable VertiGrip rubber outsole for traction on multiple surfaces.
Available in: Black, Yellow, Green, Blue, Sand
Gardener Clogs by Hunter
A green slip-on shoe handcrafted from waterproof vegan rubber, designed for gardening. Updated with the iconic red box logo, the clog has a flexible natural rubber form and Hunter's signature tread providing grip. Lined with neoprene for breathability and comfort, it protects from the elements as well as supporting the foot. The classic Hunter rain boot you know and love has been reinvented for the garden as an easy to clean clog.
Certified vegan
Waterproof
Handcrafted
Hunter red box logo
Natural rubber construction with matte finish
Neoprene lining
Signature calendered tread
Available in: Grey, Green, Black, Clay
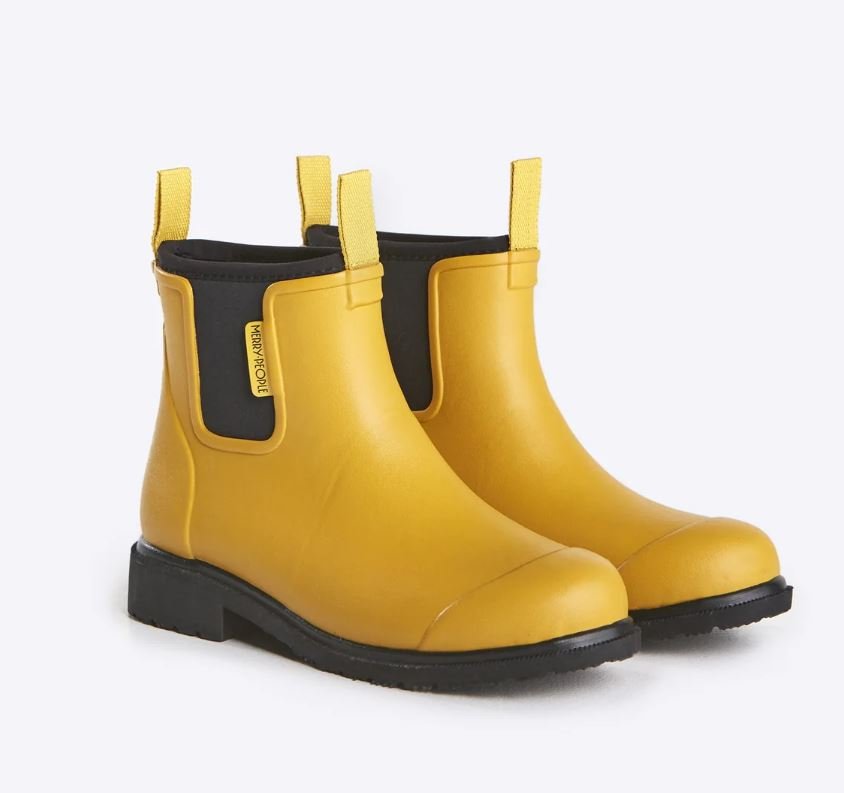
Bobbi Ankle Rain Boot by Merry People
The perfect everyday rain boot works hard in the garden too. The Bobbi seamlessly blends fashion and function with natural rubber and a neoprene lining. Our best-selling boots are designed for utmost comfort. Easy to dress up or down, wear from day to night, the Bobbi comes in a range of colors to match your style and individuality.

Durable chunky tread design for extra traction
100% waterproof and tested for sub-freezing temperatures keeping your toes dry and toasty-warm
Enhanced traction sole tested by Intertek Global testing laboratory
Flexible neoprene lining making it easy to slip on and off in style
100% Vegan, not made from any animal products, or tested on animals
Arch support for all day comfort
Available in: Many colors and styles
One last thing: when I asked our Instagram community what shoes they were wearing in the garden, a number of you said cheap tennis shoes. And I totally get this - if you’re on a budget it can be easy to think that it doesn’t make sense to invest in shoes that will just get worn down with all the hard labor of gardening. I think that whether you garden as a hobby or professionally, protecting your feet with the right garden shoes can make all of the difference and allow you to complete all your garden tasks with ease, especially if you are gardening with chronic pain. A good shoe will allow you to stay on your feet for longer, and is possibly the most overlooked way to make gardening with pain more enjoyable.
Sustainability-wise, going for the cheapest option isn’t a great choice either - a new pair of tennis shoes every season that ends up in a landfill is going to do a lot more environmental harm in the long term than one pair that will last you 5-10 years. If budget is a concern, check out secondhand options like Poshmark. I know secondhand shoes can have an ick factor for some, but the great thing about garden shoes is they are often made of easy to clean materials - dunk em in vinegar and water and leave them in the sun and they’ll be good as new.
Investing in high-quality garden shoes will make your gardening experience more comfortable, safe, and enjoyable. What are your favorite shoes to wear in the garden?
![Why You Need Gardener's Supply Co.'s Raised Beds for Your Garden [Review]](https://images.squarespace-cdn.com/content/v1/60e85024dc86d643da81c96a/774518e8-4fcc-4554-a194-5a5f7605e7e9/Wood+raised+garden+beds-8.jpg)
Why You Need Gardener's Supply Co.'s Raised Beds for Your Garden [Review]
These no-bend garden boxes keep plants hydrated via a series of innovative, connected reservoirs that deliver water to roots on demand. Four generous 5-gallon reservoirs extend the time between watering and create more even moisture throughout the bed. And, since water is drawn primarily from the bottom instead of applied from the top, less water is lost to evaporation too! 10" planting depth accommodates a wide variety of crops, from tomatoes to root-crops like carrots.

The Cottage Peach is reader-supported. When you purchase through links on our site, we may earn an affiliate commission at no additional cost to you. All opinions are our own.
Gardening with chronic illness
I’ve been gardening for most of my life in one form or another, but around ten years ago I was diagnosed with psoriatic arthritis, and since then I’ve had a whole decade to come up with the best gardening hacks to and gardening tools for gardening with chronic pain and low energy.
Psoriatic arthritis often confuses people who don’t have it - its cousins rheumatoid and osteoarthritis are far more common, so there’s a misconception that psoriatic arthritis isn’t as serious or doesn’t have as much of an impact on quality of life as these more well known forms of arthritis. The fact is that psoriatic arthritis is more than a skin condition. I experience severe joint pain and fatigue, just like someone with rheumatoid arthritis or osteoarthritis. I just get the added “bonus” of sensitive dry skin too. While exercise can help with my symptoms, it can also make them worse if I push myself too hard. I’ve had to learn my physical limitations by testing them, and they are a lot lower than someone living without an autoimmune disease. The idea that arthritis is an “old person's” condition is so pervasive that people often think it can’t really be that bad, especially since I don’t look sick and I’m not old. But invisible illnesses like arthritis and other autoimmune conditions can dramatically change your life, no matter your age or outward appearance.
I’ve hit breaking points with my arthritis while gardening many times. I have sat, covered in dirt and crying because I couldn’t bend over or kneel to clear weeds from an in-ground garden bed. I thought the solution was to just scoot along on my butt, but quickly discovered that even though this was easier on my joints it was still physically exhausting and left me too fatigued to finish. I have lost the hand strength to grip a shovel or rake on more than one occasion. I have felt scared that someday even the little things I do could be beyond my ability if I’m not careful. Gardening is rooted in my soul, a part of my identity, and I don’t know what I’d do without it at this point. Gardening and nature in general have brought me out of the darkest moments in my life. Tending to plants gives me purpose and fulfills my need to nurture.
This is the reason I sit here day after day and type these words to you: I grew from these challenges, and I want to show you how you can too. Now these hard times that I faced are just more proof that I know I can trust myself to stand up for my needs and prioritize them. They solidified my identity and brought me closer to knowing myself. Most of this came from mindset (we are hard-wired to see the negative first, but that can be overcome) but after that mindset shift, in order to make real concrete change I invested in gardening tools that would make it possible for me to continue doing what I love. The biggest change I made in the garden to support my body came in the form of 6 new elevated garden beds from Gardener’s Supply Company.
No-Bend, Self-Watering Elevated Planter Box
These no-bend garden boxes keep plants hydrated via a series of innovative, connected reservoirs that deliver water to roots on demand. Four generous 5-gallon reservoirs extend the time between waterings and create more even moisture throughout the bed. And, since water is drawn primarily from the bottom instead of applied from the top, less water is lost to evaporation too! 10" planting depth accommodates a wide variety of crops, from tomatoes to root-crops like carrots.
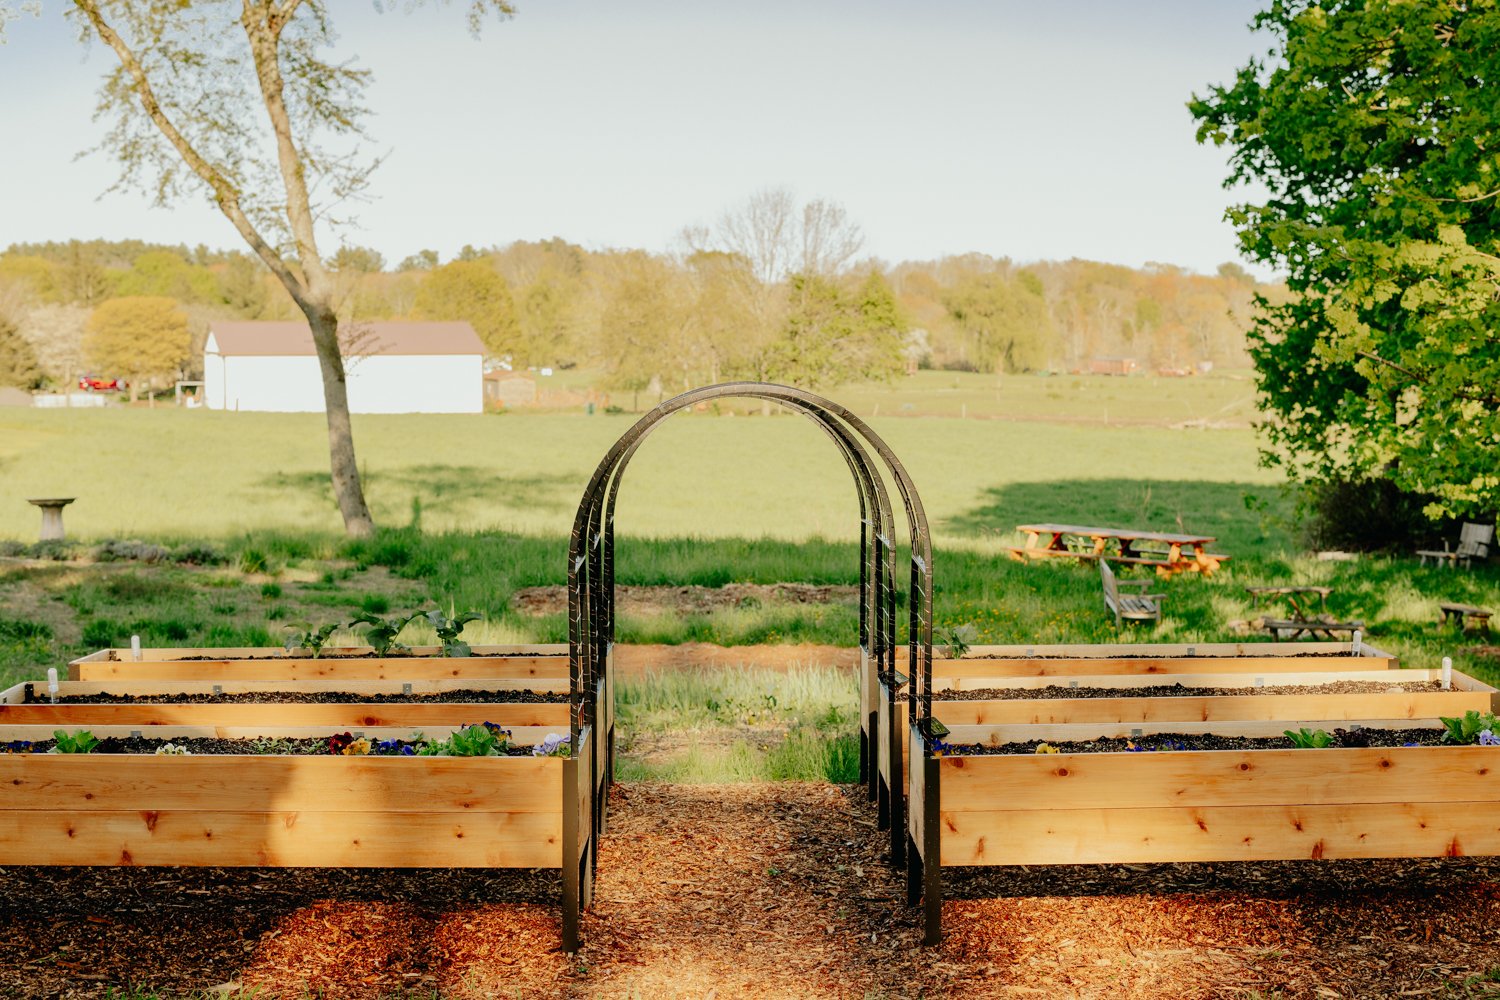
The height of the planter box has other advantages too: fewer weeds, reduced maintenance, and fewer critters nibbling at your prize plants. The sturdy aluminum legs won't buckle or sag, and the wood is naturally rot-resistant and safe for your organic crops. Best of all, it allows me to garden at table-height, eliminating the bending and kneeling that makes gardening difficult on my joints.
They are made of durable cedar wood with metal legs, and I like that the natural materials blend in seamlessly with the environment.

Benefits of raised beds
Able to grow a large variety of fruits and vegetables
Less weeds
Easier to maintain
Control of soil quality and composition
Reduces pests
Depending on the size, raised beds can be a disadvantage for growing larger crops. They aren’t well suited for growing things like corn or potatoes for example. But you’d be surprised how large a plant you can fit - for example, I am growing squash plants along the edges of my beds and trailing them down the side of the planter box.
The best materials for raised beds
Raised beds can be made from many different materials, including metal, wood and plastic. Many people do not want to grow in plastic containers due to concerns of chemicals leaching into the soil (although it’s unlikely that your plants would absorb enough of these chemicals to actually make it into your food). Metal containers can be durable if well constructed, but can be susceptible to rust and don’t always fit into the natural look of your garden since they can be a bit industrial. Wood is a natural and renewable material, and made out of rot-resistant trees such as cedar or cypress such as these beds they will last you a very long time and can even be treated to extend their lifespan. Wood garden beds will blend right into the natural surroundings.
How to build raised beds
Assembling the elevated garden beds from Gardener’s is a little involved, but you don’t need to be a construction expert or have any fancy tools to put them together. I was able to build a single bed in about an hour, and each one after that went a little bit faster. The instructions spell everything out step by step, and with a little patience you’ll have your beds assembled in no time! I do recommend having a second person to help you, since the beds are fairly large and need to be turned on their side for some steps of assembly. We organized all the pieces on the lawn near where the beds would be placed, then worked through each section step by step. You build the exterior of the box first and then each of the four self watering trays sits on top of the metal rail inside. Because these are elevated off of the ground, they are technically container gardens - it’s important to account for the fact that you will need potting soil (made with no actual dirt), not garden soil to fill these beds to provide proper drainage and weight requirements. I filled mine with Coast of Maine’s Bar Harbor Blend Organic Potting Soil (more to come on why I chose this amazing company)
How to maintain raised beds
These raised beds are made from durable and high quality cedar, which will last a long time. You can extend their life even further by sealing the beds. Use a food safe sealer, especially on the interior of the beds, like this one recommended by Gardener’s Supply. The exterior is stained using a finish similar to this one from Gardener’s in “Lakeside Cedar”. With this simple step done, you’re ready to fill your beds and plant.
Since we have harsh winters, I will probably use a firewood cover to protect them when not in use. This firewood cover hack should work for many different raised bed shapes and sizes!
My Honest Review of the Gardener’s Supply Co. Elevated Planter Boxes
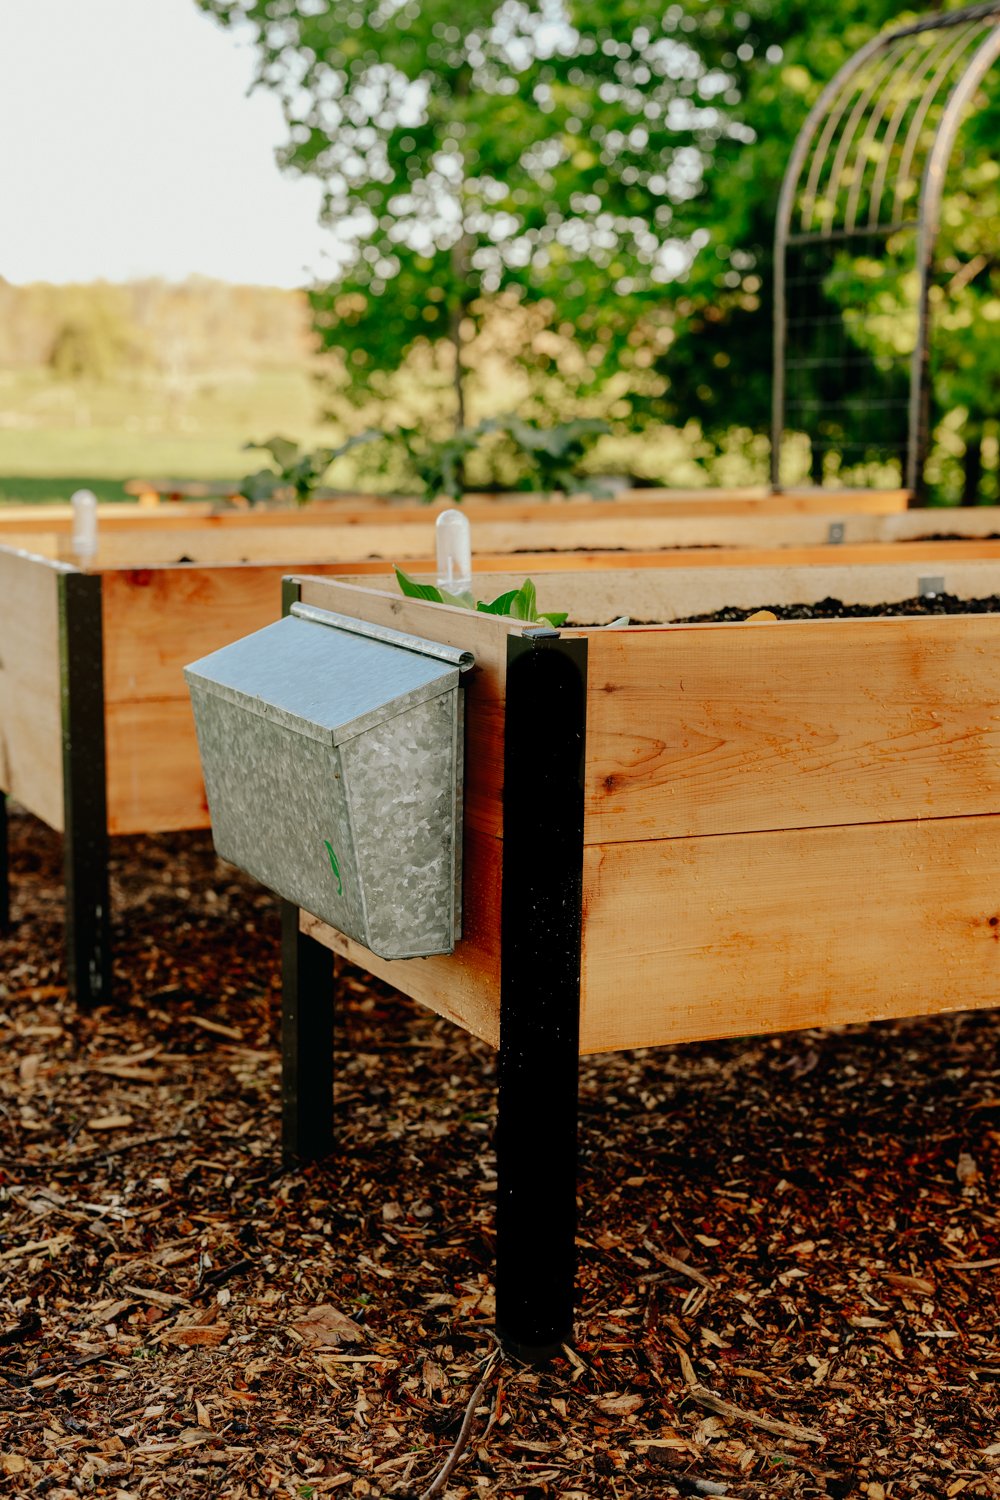
These elevated garden beds from Gardener’s are well constructed, and built to last. I strongly recommend them, especially if you garden with chronic pain like I do. The design is really beautiful and fits in nicely with the natural landscape. I really like the contrast of the black metal legs with the warm wood tones. Best of all, they empower me to do what I love - garden! - without pain from bending and kneeling, and eliminate garden tasks like weeding that drain my limited energy.
Constructing the beds was probably the only area that I can see being a downside for some. It’s not complicated, but it is time consuming and requires that you have a helping hand in order for things to go smoothly. Building boxes and keeping everything square and level can be deceptively challenging, and we encountered a few areas where I wish we had thought to build ours on a flat level surface such as a driveway in order to help everything line up correctly.
I think we will have these garden beds for a long time to come. They are rock solid and make the space feel so much more intentional and cohesive. My garden truly feels like a sanctuary now that I am always finding myself drawn to spending time in.
Toolbox
This galvanized toolbox was such a pleasant surprise. I’m always forgetting my tools - either leaving them in the house which means trips back and forth that drain my limited energy, or leaving them outside to get ruined in the rain! With this box that problem is totally eliminated, and the metal stays pretty cool to the touch too.

Self-watering reservoir
You can get these elevated garden beds without the self-watering insert, but keep in mind that any bed lifted off of the ground is going to dry out much faster than an in-ground garden bed. Without a self-watering reservoir you may need to water every single day. These reservoirs are designed specifically for elevated garden beds and planter boxes, with a 5-gallon reservoir that reduces time between waterings & spreads moisture more evenly for healthier plants. It reduces the need for daily watering, creates more even moisture throughout the bed, and promotes deeper water absorption as roots reach the reservoir. And since you'll mostly be watering from the bottom instead of the top, less water will be lost to evaporation. When combined with additional inserts, it can elevate almost any size elevated raised bed into a self-watering one. These inserts are made from durable, thick plastic (food grade of course) and installation couldn’t have been simpler. The trays simply rest on the metal rail on the inside of the beds and are connected with flexible tubing. The water level indicator leaves nothing to chance, so I always know when it’s time to add more water. I’ve also noticed they serve double-duty as a rainwater collection system, since they fill naturally during heavy rain storms.
What I’m growing in my raised beds
Since these raised garden beds are a generous 10” deep, I am able to grow everything that I would normally grow in my in-ground garden in these beds. Here’s the list of everything I’ll be growing in these raised beds this year:

BASIL
BELL PEPPERS
BROCCOLI
BRUSSEL SPROUTS
CARROTS
CHERRY TOMATOES
CHIVES
CUCAMELON
CUCUMBERS
EGGPLANT
FORGET-ME-NOTS
GREEN BEANS
KALE
LETTUCE
Birdhouse Gourd
PANSIES
PARSLEY
RADISH
SNAP PEAS
SPINACH
SQUASH (SUMMER, BUTTERNUT, ACORN)
STRAWBERRIES
SWISS CHARD
VIOLAS