
BACKYARD GARDENING MADE SIMPLE

Stovetop Pumpkin Oatmeal Recipe
Now that you’ve grown some delicious pumpkins, harvested and cured them. What can you do with a sugar pumpkin besides make the classic pumpkin pie? Pumpkin puree is infinitely useful in baking, but for a simple recipe you can make on your stovetop, let's make some pumpkin oatmeal
The Cottage Peach is reader-supported. When you purchase through links on our site, we may earn an affiliate commission at no additional cost to you. All opinions are our own.
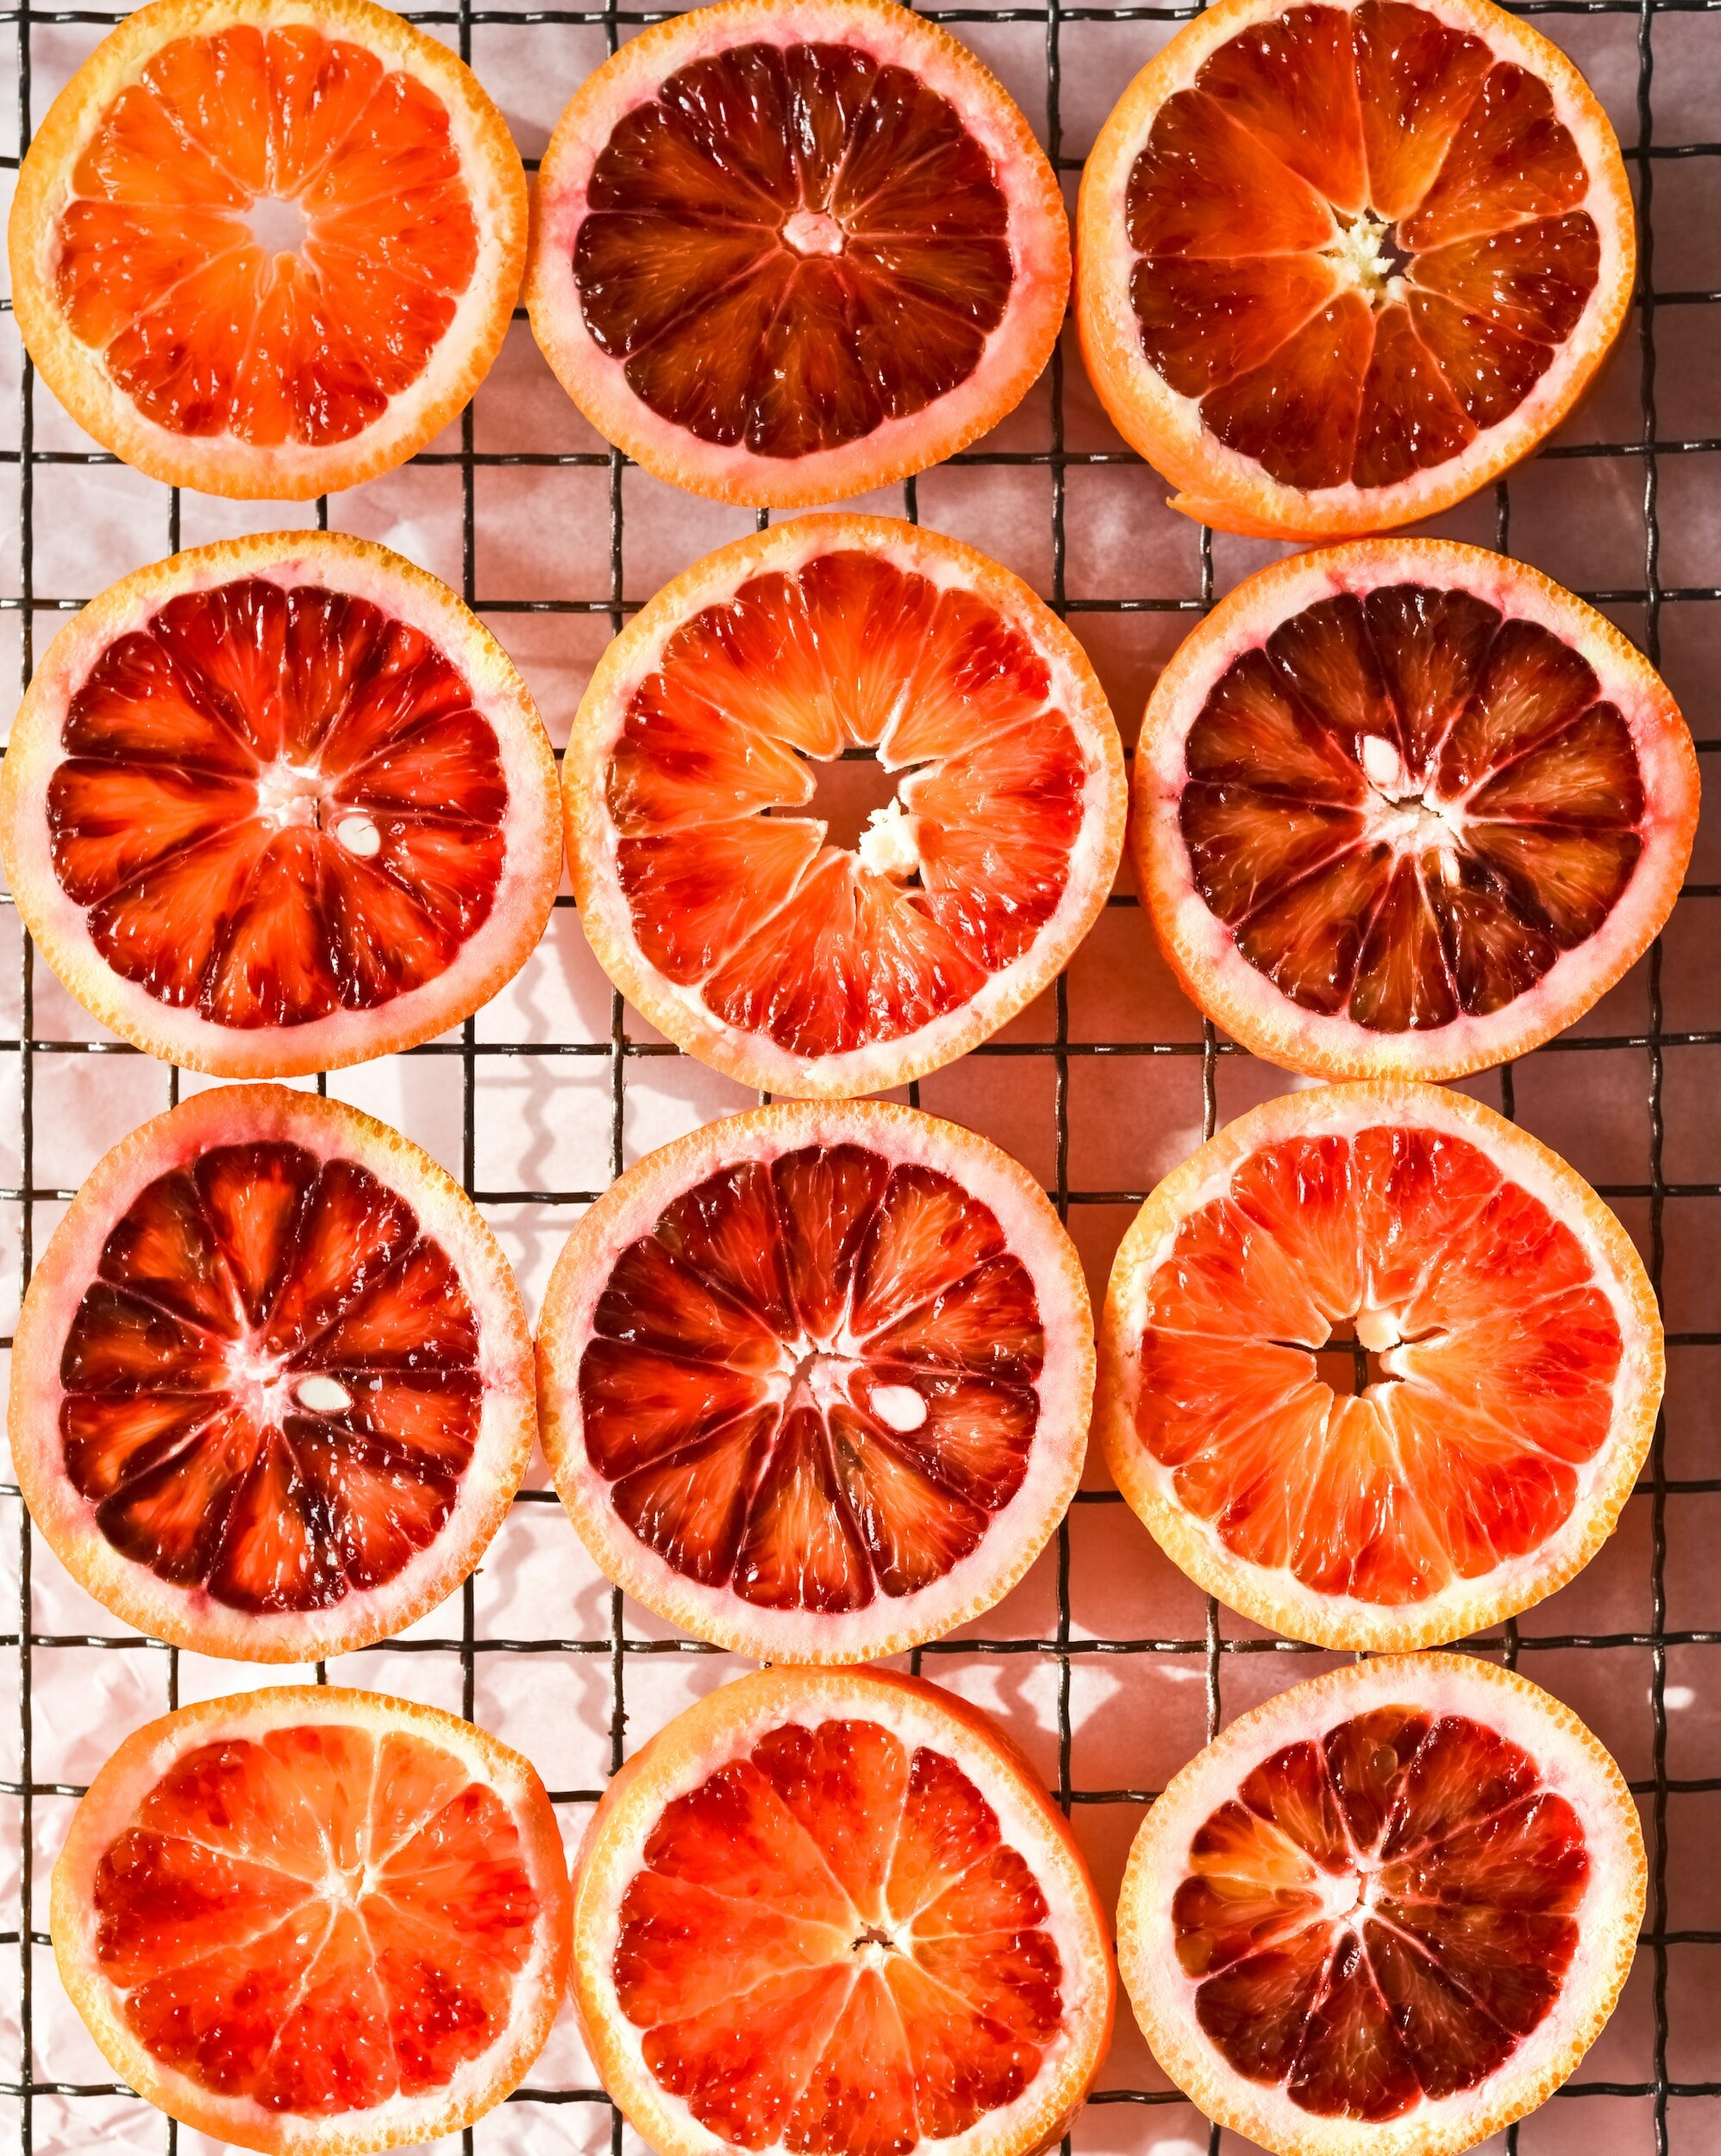
Nothing says fall quite as loudly as bright orange pumpkin. Pumpkin spice lattes give it a good try, but everything leads back to the pumpkin patch. Just about every fall activity – from hay rides to apple picking, cider donuts to corn mazes - includes the squash we call a pumpkin.

By decorating the steps of our houses and carving jack-o’-lanterns, we all pay homage to, as the Charlie Brown special puts it, The Great Pumpkin.
Indigenous peoples used a variety of squashes for eating and making utensils, containers, and musical instruments. In fact, the word squash comes from the Narragansett tribe in what is now called Rhode Island. Humans have eaten squash as far back as prehistoric times.
Are Pumpkins Fruit?
The short answer is yes.
Encyclopedia Britannica defines fruit as, “the fleshy or dry ripened ovary of a plant, enclosing the seed or seeds.” So not only are pumpkins fruit, but so are avocados, peppers, and tomatoes, among others we call vegetables.
Fruits come from the parts of a plant that flower, while vegetables are the stems, roots, leaves, and bulbs of the plants themselves.
And get this – a pumpkin is technically a berry!
There is a difference between what we call things in common usage and how they’re defined in botany.
To most of us, a berry is a small, juicy, bright fruit without a stone or pit. In botany, however, a berry is a fleshy fruit developed by the ovary of one flower. Some of what we call berries do not meet that definition. For example, raspberries are formed by many ovaries, not one.
Botanically, pumpkins, watermelon, tomatoes, cucumbers, bananas, and grapes are all berries, while strawberries and blackberries are not berries at all.
When it comes to eating, though, the words berry, fruit, and vegetable have developed their own meanings, so unless you’re playing a trivia game or want to impress someone with your knowledge of botany, the common usages are just fine to use.
Why Grow Pumpkins?
I grow pumpkins for food and carving, but also for fun. One small seed produces a sprawling monster of a plant and then, at just the perfect time, there are pumpkins in my yard! Magic.
Growing pumpkins is a great project to do with kids, who generally find it as much fun as I do. Pumpkin plants grow easily and dependably, so are not likely to disappoint.
On a more practical note, every part of a pumpkin is edible, and it’s a source of food that can be stored throughout the winter’s lean times. Pumpkins are loaded with nutrients, including vitamin C, beta-carotene, magnesium, and potassium.

Carving Pumpkins vs. Eating Pumpkins
Any pumpkin or gourd can be carved or eaten, but there are a couple of main differences between the pumpkins we carve and the pumpkins we eat.
The pumpkins we carve are referred to as field pumpkins. They have thinner skin and stringy, watery flesh.
The pumpkins we eat are called sugar pumpkins or pie pumpkins. They are generally smaller, have thicker skin, and are more consistently round. Their flesh is not fibrous or stringy, and they have more flesh overall than a carving pumpkin.
Carving pumpkins:
The difference in the types of flesh translates to a difference in flavor. Carving pumpkins generally taste bland and are a little bitter.
Because thin skin is an attribute in a carving pumpkin, when choosing a carving pumpkin pick it up and compare it to others of the same size. The lighter pumpkin will have thinner skin.
Eating Pumpkins:
Sugar pumpkins taste rich and buttery, much like a butternut squash. (In fact, you can use butternut squash to make a pumpkin pie!) Their texture is smooth.
Because they are fleshier, a single sugar pumpkin will yield about as much as a can of the pureed pumpkin you can get at the grocery store.
Varieties of Pumpkin
All pumpkins are squash. There are hard-skinned squash and tender squash, and pumpkins are hard-skinned; a hard-skinned squash is also called a gourd.
While all pumpkins are gourds, not all gourds are pumpkins. Those that are not pumpkins are still edible, but generally have little flesh, and what they do have is bitter, so we use them as ornaments.
When choosing which pumpkins to grow, if you are interested in keeping them throughout the winter months you should look for one that is known as a ‘good keeper’.
Another fun option to grow is a giant pumpkin. Those are the ones you see at county fairs, grown just to see how big you can get them.
Varieties of carving pumpkins:
Gold Fever pumpkins are round and medium orange and weigh from 15-18 pounds.
Gold Rush pumpkins are large, round, jack-o-lanterns that grow from 20-35 pounds.
Howden pumpkins are a classic jack-o’-lantern, slightly taller than they are wide, with dark orange skin. They can grow to between 18-26 pounds.
Jack o’ Lantern pumpkins are great for carving as well as cooking. They grow from 7-10 pounds.
One Too Many pumpkins are a great choice if you want something different from the usual orange pumpkin. They have white and red skin. They grow to about 20 pounds.
Tom Fox pumpkins are deep orange and have fat, dark green stems. They grow to between 12-24 pounds.
Varieties of sugar pumpkins:
New England Pie pumpkins are dark orange and grow to 4-6 pounds. They’re not as sweet as some pumpkins, but they are a classic for pies.
Sweet Sugar Pie pumpkins are very meaty, with dark orange skin. They grow to 6-8 pounds, and are delicious for pies and canning.
Cinderella pumpkins are a great one for kids, as the carriage in the Disney movie is based upon their shape. They are mild and sweet, and can be 15-35 pounds.
Blue doll pumpkins don’t look like your typical pumpkin on the outside, with greenish-blue skin. But inside the pumpkin is dark orange and delicious. They grow to 20-24 pounds.
Lakota pumpkins are pear-shaped, with some combination of orange and green skin, making them a great choice for decoration and eating. They are sweet, and taste like butternut squash. They grow to about 7 pounds.
Dickinson pumpkins are used to make the Libby’s canned pumpkin pie filling you find at the grocery store. They are beige, and weigh 10-40 pounds.
Varieties of giant pumpkin:
Atlantic Giant pumpkins have pinkish orange skin. They grow to at least 300 pounds. The largest grown was over 1,400 pounds!
Big Max pumpkins are oblong with skin in shades of orange to pale salmon. They can grow from 100-300 pounds.
Prizewinner pumpkins have the classic pumpkin color and shape, with glossy skin. They can grow to weigh between 100-300 pounds.
Wyatt’s Wonder pumpkins have intense orange skin which doesn’t fade. They grow to 200 pounds or more.
When to Grow Pumpkins

Pumpkins are generally planted from early May through June, depending on the variety. I usually end up planting in mid-June, here in zone 6.
How to Grow Pumpkins
Pumpkins grow on a sprawling vine which can take up quite a bit of space. Pumpkin seeds can be put directly into the ground.
Choose a sunny spot (fruits like sun) and form small mounds of soil 2-5 feet apart. Plant 3 seeds on each mound. Pumpkins are planted on mounds because the soil in a mound warms more quickly, which helps with germination.
I’ll be honest, though, I don’t bother with mounds. I just plant the seeds in the flat soil and haven’t had a problem with germination. That may be because I plant at the later end of the planting range.
Bury your seeds about as deep as the seed is long. Keep the soil moist until your pumpkin plants sprout.
Once the pumpkins form, you can slip a piece of cardboard under them so they are not in contact with the soil, making them less likely to rot.
As your pumpkins are coloring up, check to see if the bottom is also turning orange. If not, gently rotate the bottom side towards the sun.
When to Harvest Pumpkins
It’s best to leave pumpkins on the vine for as long as possible, but they should be harvested before overnight temperature in the 30s kick in. A frozen pumpkin will immediately rot.
When deciding if a pumpkin is ripe, first check the color. A small amount of green remaining is ok, but not too much.
Tap the pumpkin with your finger. It should feel solid and have a hollow sound. Just like watermelon and fresh baked loaves of bread, a hollow sound means it’s done. Next, push your fingernail into the skin. If it doesn’t puncture the skin, the pumpkin is ripe.
How to Harvest Pumpkins
The first thing to know is you should never carry a pumpkin by its stem. Instead, carry it from the bottom.
You may want to wear gloves when harvesting pumpkins, as the vines and stems are prickly. You can easily wipe the prickles off of the stem with a gloved hand.
Use Felcos or a sharp knife to harvest; the stem of a pumpkin is quite dense. Cut the pumpkin with a stem of at least 2 inches, as a longer stem extends the storage life of the pumpkin.
How to Store Pumpkins
To make a pumpkin last months, it should be cured before being stored. A pumpkin is cured by setting it in a hot, dry place. This allows the rind to harden.
Once your pumpkin is cured, it’s ready for storage. Store pumpkins in a cool, dark place with good airflow. The ideal temperature for storing pumpkins is 55 degrees. They should never be stored at 45 degrees or below.
Place the pumpkins on something that keeps them from touching the floor, and arrange them so they do not touch each other.
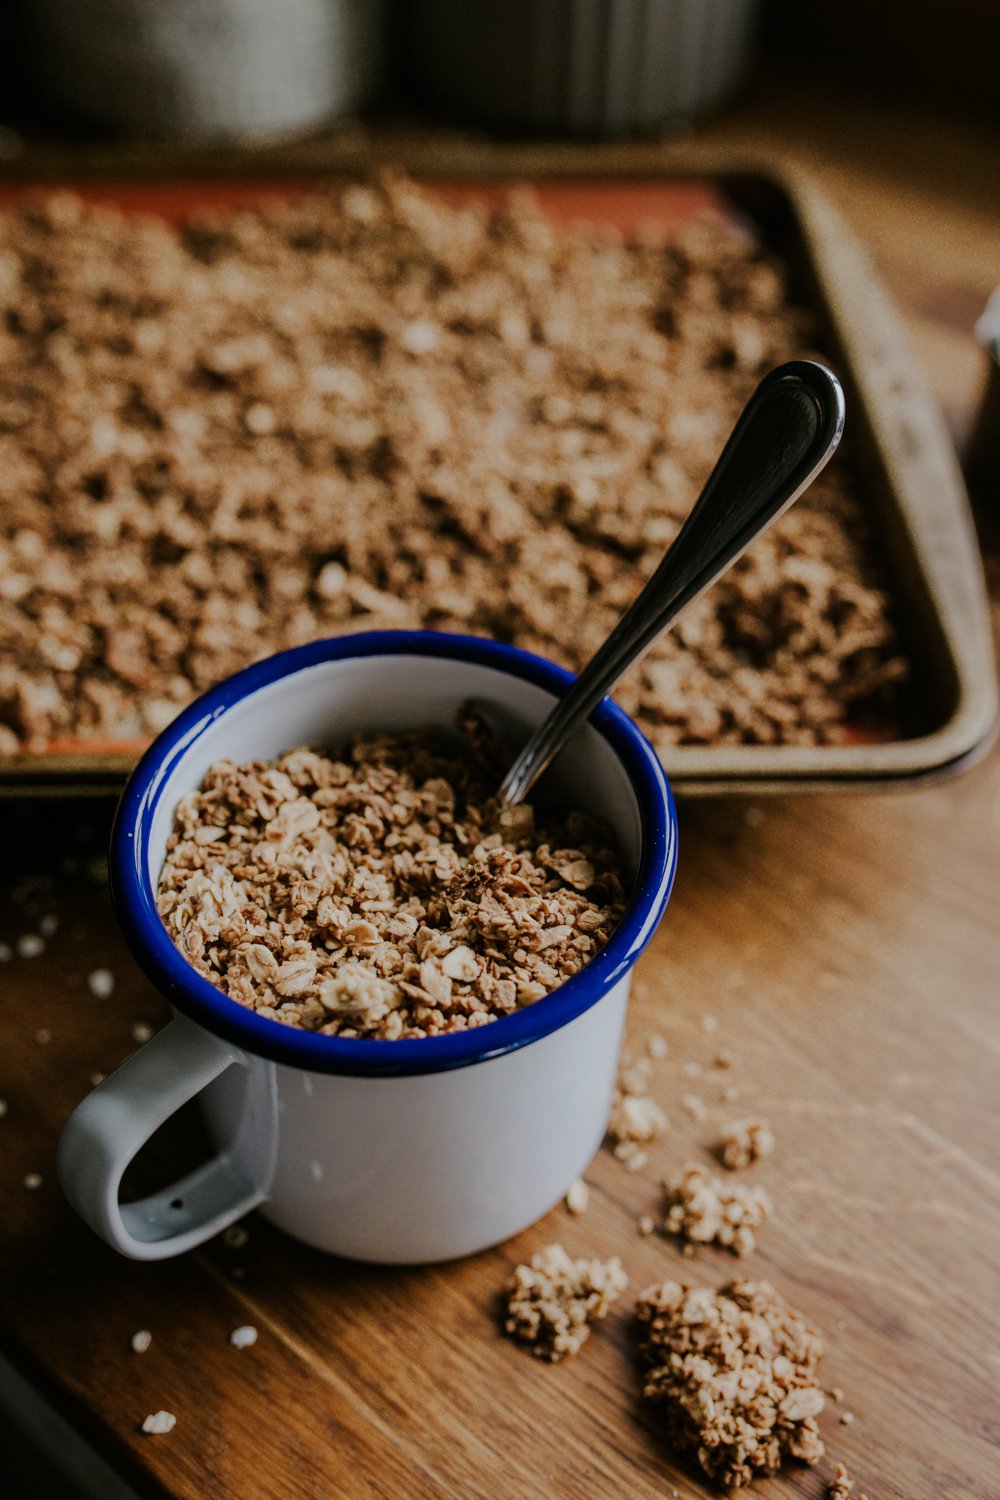
Stovetop pumpkin oatmeal recipe
Making pumpkin oatmeal on the stove is as simple as toasting your spice in your sauce pan, adding your sweetener, liquid and oats and simmering everything for about thirty minutes - until it is nice and soft. Then you can curl up with your warm bowl of cozy and enjoy all that fall has to offer this season! Find the full pumpkin oatmeal recipe below:

Stovetop Pumpkin Oatmeal
Ingredients
- ¼ teaspoon ground nutmeg
- ½ teaspoon ground cinnamon
- ⅛ teaspoon ground ginger
- ¼ cup packed brown sugar
- 1 cup pumpkin puree (make this yourself by roasting your sugar pumpkin face down in the oven at 350 for 45 minutes, scooping out the flesh and blending or mashing with a fork)
- 4½ cups almond or coconut milk
- 1½ cups oats
- ¾ teaspoon salt
- Craisins (optional)
Instructions
- In a large saucepan over low heat, toast the nutmeg, cinnamon and ginger, stirring occasionally until fragrant, about 2 minutes.
- Stir in brown sugar, then add pumpkin and stir to combine. Add milk, raise heat and bring mixture to a simmer.
- Stir in oats, and simmer over medium heat until tender but not mushy, about 25 to 30 minutes.
- Stir in salt.
- Serve with raisins, applesauce, apples, pecans or maple syrup if desired.

Nutrition Facts
Calories
713.65Fat
56.5Sat. Fat
48.56Carbs
52.66Fiber
5.42Net carbs
47.26Sugar
21.14Protein
9.87Sodium
478.25Cholesterol
0


How to Make Healthy Homemade Granola (Recipe)
There’s something about the smell of warm granola cooking in the oven, earthy and sweet, that means home to me. When I was a kid I would smell it from up in my room, and I could just picture my mom mixing it up, spreading it on baking sheets, and tending the oven to pull it out at just the right time. She even made sure to leave a few big chunks for me not broken up, just how I liked it. I’m lucky in that we were never without fresh granola - as soon as my mom noticed the jar getting low, she would quickly pop another batch in the oven to fill up the jar all over again.
There’s something about the smell of warm granola cooking in the oven, earthy and sweet, that means home to me. When I was a kid I would smell it from up in my room, and I could just picture my mom mixing it up, spreading it on baking sheets, and tending the oven to pull it out at just the right time. She even made sure to leave a few big chunks for me not broken up, just how I liked it. I’m lucky in that we were never without fresh granola - as soon as my mom noticed the jar getting low, she would quickly pop another batch in the oven to fill up the jar all over again.
Now I keep a never-ending supply of granola on my own kitchen counter to fill my own house with the aroma of earth and sweetness and home. There really is nothing quite so comforting as the scent of warm granola cooling on the stovetop! You can mix up the flavors to complement the season with cinnamon and pumpkin seeds in the fall, pecans and allspice in the winter, apricots and almonds in the spring, and dried raspberries and blueberries in the summer. Granola also makes a great personalized zero waste edible homemade gift for the holidays - just pop your favorite blend of granola in a mason jar with a cute wooden lid and add some twine and a ribbon for a thoughtful, edible gift everyone will love.
Granola is my favorite mid-afternoon snack with berries and oat milk, and the best thing to bring on a day hike in the woods. What could be more satisfying than sitting down with a Stasher bag filled with granola after a long and strenuous hike in nature? It’s the perfect filling snack.
Why Make Homemade Granola?
There are plenty of tasty granolas available to buy, so why take the time to make your own?
The granola you find at stores is expensive, and making it yourself is much less so. You’ll also have complete control over the ingredients you choose, and won’t add any more packaging to our overburdened planet. And granola is so easy to make!

Homemade granola is healthy, delicious, vegan, and gluten-free (check your oatmeal’s packaging to be sure it is not processed in a factory that also processes products with gluten). It’s also completely customizable.
There’s no need to ever make exactly the same granola twice. Once you’ve mastered the basic method for making homemade granola, you’ll have a feel for it and can begin to make substitutions in oils and sweeteners, and try out additional ingredients.
The basic ingredients of granola are rolled oats, sweetener, oil, and salt. That’s it. And it tastes amazing!
As the main ingredient of the recipe, whole grain oats deliver lots of health benefits and are very filling. They’re anti-inflammatory, both inside the body and to the skin, which is why they’re often used in baths to soothe inflammatory conditions such as eczema.
But why stop at four ingredients when there are other delicious and nutritious foods you can add to take your granola up a level?
Delicious Add-Ins for Granola
The best part about granola is making it your own with different spices, fruits, nuts, seeds and sweeteners. It would be impossible to list all the delicious add-ins you could include in your homemade granola recipe, but here are some ideas to get you started:
Spices:
Cinnamon
Nutmeg
Allspice
Ginger
Nuts and seeds:
Both nuts and seeds provide protein, fiber, healthy fats, and other vitamins, magnesium, and other nutrients. Walnuts, chia, and flax seeds are great sources of plant-based omega-3 fatty acids.
Nuts can be used whole, or you can break them up if you want them to be more integrated into the granola. Mix and match what you’d like, and use it in place of 1 cup of the oatmeal.
Sunflower seeds
Sesame seeds
Pumpkin seeds
Chia seeds
Ground flax seed
Almonds
Pecans
Walnuts
Dried fruit:
In some ways, dried fruits are even better for you than fresh. They contain more fiber and antioxidants which can help lower your chances of developing heart disease, some kinds of cancer, and diabetes.

Raisins
Cranberries
Dates
Apricots
Fig
Banana chips
Cherries
Shaved coconut
Candied orange peel
Flavorings:
Peanut or almond butter
Molasses
Orange zest
Chocolate chips
Cacao nibs
Vanilla
Applesauce
Substitutions for a Homemade Granola Recipe
Experimenting with different oils and sweeteners can take the flavor of your granola in different directions.
Oils:
You can completely replace the vegetable oil with other edible oils, or add a dollop of butter to your oil of choice.
Vegetable oil
Coconut oil
Olive Oil
Butter
Sweeteners:
I love the flavor of maple syrup, and the inflammation-reducing antioxidants, zinc, magnesium, potassium, and calcium that come along with it. But different sweeteners can make a huge difference to the flavor, and also the texture, of your granola.
A crunchy granola is a great option, but if you’d like a chewy granola you could try substituting the maple syrup with honey, for example.
Maple syrup
Honey
Agave
Molasses

Simple Vegan Granola
Ingredients
- 5 cups rolled oats, or 4 cups oats and 1 cup nuts
- ½ cup dark brown sugar
- 1 cup pure maple syrup
- 4 Tablespoons vegetable oil
- 2 pinches of salt
Instructions
- Preheat your oven to 300°F
- Mix the ingredients in the order listed, stirring between each, until well combined.
- Spread the granola in an even layer on the baking sheets.
- Bake for 15 minutes, then stir it around a bit.
- Bake for 10 minutes and stir it again.
- Bake 10 more minutes, and you’re done.
Notes
Customize this simple vegan granola recipe by adding your favorite dried nuts and seeds or fruits and switching up the oil and sugar.
Nutrition Facts
Calories
138.29Fat
3.49Sat. Fat
0.61Carbs
24.98Fiber
2.69Net carbs
23.54Sugar
14.18Protein
2.24Sodium
35.8Cholesterol
0Recipe: Homemade Healthy Granola
Supplies:
2 baking sheets lined with Silpat or parchment paper
A spoon or spatula
A large mixing bowl
Ingredients:
5 cups rolled oats, or 4 cups oats and 1 cup nuts
½ cup dark brown sugar
1 cup pure maple syrup
4 Tablespoons vegetable oil
2 pinches of salt
Instructions:
Preheat your oven to 300 degrees.
Mix the ingredients in the order listed, stirring between each, until well combined.
Spread the granola in an even layer on the baking sheets.
Bake for 15 minutes, then stir it around a bit.
Bake for 10 minutes and stir it again.
Bake 10 more minutes, and you’re done.
Tips for Making Granola
Keep an eye on the granola for the last 10 minutes. Ovens vary, and there’s a short line between done and slightly burned.

The more granola you make, the better you’ll be at judging when it’s ready. You are looking for toasty and golden brown. It may feel a bit soft when you first remove it from the oven. If that happens and you’re not sure if it’s done, take a taste-sized bit out of the oven, let it sit for 1 minute, and then try it.
If you are adding other ingredients, you may need to adjust the amount of oil you use. Many granola recipes will suggest you use equal amounts of oil and sugar. I find that to be too oily. Aim for your oats to be coated, but not soggy with oil.
You can adjust the amount of salt, but don’t remove it completely. The salt enhances each flavor, and helps to bring them all together.
If you’d like your granola to be clumpy rather than loose, press it down with a spatula or the back of a spoon after you’ve done your last stir, and then again when you take it out of the oven.
If you add dried fruit while the granola is still warm, then press it down, that will also help hold the granola together. If you’d like it looser, add the fruit after the granola has cooled. If you’d like it to cook with the granola, only add it for the last 10 or 15 minutes.
If adding nut butter, melt it slightly and combine it with the maple syrup. Vanilla should also be added to a liquid, so that it will coat the oats more evenly.
Chocolate chips can be added after the granola has cooled, or while it’s slightly warm if you’d like it to melt into the oats a bit.
Mistakes to Avoid When Making Granola
If you put an uneven amount of granola on each baking sheet, they will cook at different rates. Be consistent with the amount of granola on each of the baking sheets, so both will cook at the same speed.
Make sure your layer of granola does not thin out around the edges. It is easy to burn granola, and thinner areas will cook much faster.
Coconut shavings burn easily. Don’t add them until the last stir if you’d like them toasted, or after the granola is out of the oven if you’d like them untoasted.
Storing Homemade Granola
Store your granola in an airtight container. It looks pretty in a glass jar on the counter, but a Ziploc will also do.
If you make a large batch, you can store some in the freezer to thaw for later use.
How to Use Granola
Granola is a great snack on it’s own, but there are also tons of ways to use it as an ingredient with other foods:
Ways to use granola
As cereal, in milk or kefir with berries and chocolate chips
On yogurt with a sliced banana
As a crunchy top for muffins or apple cake
On ice cream
Defrost frozen berries in a bowl, then add yogurt and granola for a delicious breakfast
On pancakes with maple syrup
On a salad
![Garden-to-Plate Vegan Chickpea Salad: A Refreshing Summer Salad [Recipe]](https://images.squarespace-cdn.com/content/v1/60e85024dc86d643da81c96a/a75bd4e1-0f65-4944-b023-b975a54502e0/PXL_20220531_172419472.jpg)
Garden-to-Plate Vegan Chickpea Salad: A Refreshing Summer Salad [Recipe]
As the warm summer days approach, there is something magical about harvesting fresh produce from your own garden and transforming it into a delectable dish. Today, I invite you to embark on a culinary adventure with a Garden-to-Plate Vegan Chickpea Salad. This recipe not only celebrates the joy of eating seasonally but also highlights the incredible flavors and health benefits of the ingredients we can grow and harvest right in our own backyard. In this blog post, we will take you on a journey through the garden, delve into the nutritional benefits of chickpeas, almonds, and chives, and guide you through the steps of creating this mouthwatering salad.

Eating is an agricultural act. And so I believe we can’t talk about gardening without covering what to do with all the food your grow. Often times when we grow our own food, we are at the mercy of the garden and what it produces each week. This can make meal planning a challenge, so I often resort to everything but the kitchen sink recipes where you can start from a solid base and add whatever is filling your harvest basket that week.
This way of eating seasonally allows you the framework to eliminate yet another decision in your day - the ever present question of “what are we going to eat?” and turn it into a celebration of whatever ingredients are on hand. You might not know what you’ll pick tomorrow - but I can assure you if you follow the framework for this garden salad (chickpeas + the spices and liquids as a constant, some type of nut, some type of dried fruit and two crunchy fresh veggies) it will come out delicious every time.
As the warm summer days approach, there is something magical about harvesting fresh produce from your own garden and transforming it into a delectable dish. Today, I invite you to embark on a culinary adventure with a Garden-to-Plate Vegan Chickpea Salad. This recipe not only celebrates the joy of eating seasonally but also highlights the incredible flavors and health benefits of the ingredients we can grow and harvest right in our own backyard. In this blog post, we will take you on a journey through the garden, delve into the nutritional benefits of chickpeas, almonds, and chives, and guide you through the steps of creating this mouthwatering salad.
Embracing Seasonality and Celebrating Fresh Ingredients
Picture yourself strolling through your lush garden, feeling the sun on your skin, and taking in the fragrant aromas of blooming herbs. There's a sense of anticipation as you carefully pluck vibrant vegetables and herbs from their natural habitat. Eating seasonally is not only a celebration of the flavors nature provides, but it also connects us to the rhythm of the Earth.
By growing our own food, we have the opportunity to appreciate the beauty and diversity of the ingredients that surround us. From the tender greens to the vibrant vegetables, our gardens offer a cornucopia of flavors. Incorporating these freshly harvested treasures into our meals allows us to savor the true essence of each ingredient while embracing the philosophy of sustainability and self-sufficiency.
Health Benefits of Chickpeas, Almonds, and Chives
In addition to their exquisite taste, the ingredients in this vegan chickpea salad offer a plethora of health benefits that contribute to your overall well-being.
Chickpeas, a staple legume in plant-based diets, are a nutritional powerhouse. Packed with protein and fiber, chickpeas provide a satisfying and nourishing element to any dish. They are also rich in essential vitamins and minerals such as folate, iron, and magnesium. Consuming chickpeas has been linked to improved digestion, reduced cholesterol levels, and better weight management. Their nutty flavor and hearty texture make them a perfect addition to this summer salad.
Almonds, often referred to as "nature's multitaskers," bring a delightful crunch and a wealth of health benefits. These nutrient-dense nuts are an excellent source of healthy fats, protein, and vitamin E. Almonds are known to support heart health and boost brain function. In this salad, their presence adds a satisfying texture and nutty undertones that complement the other ingredients perfectly.
Chives, with their delicate onion-like flavor, provide more than just a pleasant taste. These leafy green herbs are a fantastic source of vitamins A, C, and K. They also offer antioxidants and potential anti-inflammatory properties. Chives not only enhance the flavor profile of the salad but also contribute to its nutritional value.
Making a Garden-to-Plate Vegan Chickpea Salad
Now that we've explored the beauty of seasonality and the health benefits of the ingredients, let's dive into creating this delicious Garden-to-Plate Vegan Chickpea Salad.
Ingredients:

Chickpea Garden Salad
Ingredients
- 2 cans (or 3 cups cooked) chickpeas
- 1 cup carrots
- 1 cup green onion/chives
- 1/2 cup craisins, raisins or chopped dates
- 1/2 cup almonds or cashews
- 1/2 cup radishes (optional)
- 1/3 cup hummus or mayo
- 3 tbs lemon juice
- 1 tbs curry powder
- 3/4 tsp garlic powder
- salt + pepper
Instructions
- Chop any vegetables.
- Mash the chickpeas until only about 1/3 is unmashed.
- Add remaining ingredients to the chickpeas and stir.
- Enjoy on it's own, on a bed of lettuce or with pita.
Notes
Keeps well in the fridge for 3-5 days.
Nutrition Facts
Calories
277.69Fat
10.57Sat. Fat
1.01Carbs
38.26Fiber
11.08Net carbs
27.21Sugar
9.66Protein
11.84Sodium
494.22Cholesterol
01 cup carrots
2 cans (or 3 cups cooked) chickpeas
1 cup green onion/chives
1/2 cup craisins, raisins or chopped dates
1/2 cup almonds or cashews
1/2 cup radishes (optional)
1/3 cup hummus or mayo
3 tbs lemon juice
1 tbs curry powder
3/4 tsp garlic powder
salt + pepper
Instructions:
Chop any vegetables
In a large bowl, mash the chickpeas until about 2/3rds are mashed
Add remaining ingredients and toss gently to ensure everything is evenly coated.
Allow the flavors to meld together for at least 15 minutes before serving.
Enjoy on it's own, in a pita or on a bed of lettuce.
Ways to Enjoy the Garden-to-Plate Vegan Chickpea Salad:
This versatile salad can be savored in various ways, allowing you to explore different culinary possibilities. Here are a few ideas:
Pita Pocket: Fill a warm pita bread with the chickpea salad, adding a dollop of hummus or tahini for extra creaminess. This creates a satisfying and portable meal for picnics or on-the-go lunches.
Bed of Greens: Serve the salad over a bed of fresh salad greens such as spinach or arugula for an extra burst of freshness and added nutrition.
Stuffed Bell Peppers: Hollow out bell peppers and stuff them with the chickpea salad. Bake until the peppers are tender for a delightful, colorful, and healthy main course.
Lettuce Wraps: Wrap the salad in large lettuce leaves, such as romaine or butter lettuce, for a light and refreshing option.
With the Garden-to-Plate Vegan Chickpea Salad, you can embark on a culinary journey that celebrates seasonality, garden-fresh ingredients, and the benefits of a plant-based diet. By savoring this delightful salad, you not only nourish your body with the nutritional goodness of chickpeas, almonds, and chives but also appreciate the joy of growing your own food. So, take advantage of the bountiful flavors of summer, cultivate your own garden-to-plate experience, and delight in the refreshing taste of this vibrant vegan salad recipe.