BACKYARD GARDENING MADE SIMPLE
Caraway Home Non-toxic Cookware Review
I know, these days it feels like you can’t make it to lunchtime without learning that another household product that you’ve been using every day for your whole life is actually full of toxic chemicals. But this one is a big one, so I hope you’ll stick with me: There’s a very good chance if you have non-stick pots and pans that aren’t ceramic, they could be contaminating your food with toxic chemicals while you cook.
The Cottage Peach is reader-supported. When you purchase through links on our site, we may earn an affiliate commission at no additional cost to you. All opinions are our own. Products in this post were gifted.
I know, these days it feels like you can’t make it to lunchtime without learning that another household product that you’ve been using every day for your whole life is actually full of toxic chemicals. But this one is a big one, so I hope you’ll stick with me: There’s a very good chance if you have non-stick pots and pans that aren’t ceramic, they could be contaminating your food with toxic chemicals while you cook.
Here’s what Caraway Home has to say about toxins in your cookware potentially leaking into your food:
A popular material that has been used in the past in such non-stick cookware is Teflon. This synthetic chemical is also known as polytetrafluoroethylene (PTFE). Teflon is often used to coat a variety of products, including cookware, due to its frictionless qualities that provide a non-stick surface.
The issue with this material is that it uses perfluorooctanoic acid (PFOA) during its production. This chemical has been linked to numerous health conditions, including cancer, thyroid disorders, and more. Other chemicals, such as per-and polyfluoroalkyl substances (PFAS), are found in this material and can cause similar health issues as PFOA.
When cooking with non-stick cookware that has these chemicals, you run the risk of accidentally ingesting it. This can happen if the coating gets scratched, as it could flake off while in use and get consumed.
Additionally, when Teflon is heated over 570°F, it begins to break down, releasing the toxic chemicals into the air, which can then be consumed.
Now, most of us aren’t heating our pans to 570°F, but I’d wager that your pots and pans probably have a few nicks, chips and scratches in them - I know ours do. And while this exposure is happening in tiny amounts, there is still the potential for a negative compounding effect when you cook with Teflon coated products on a daily basis that can’t be ignored.
We’re all cooking from home more than we used to
Since the cost of, well, everything, just keeps going up, I know we aren’t the only ones trying to cook more from scratch to combat rising food costs and control our budgets. With more people cooking at home in recent years, the safety of our cookware is taking center stage. After all, what’s the point in spending extra on organic, locally grown produce if all the health benefits are going to be tainted by toxins leaching into your finished recipe? And maybe now that you’re cooking more food at home you’re noticing that that dented and scratched fry pan you’ve had since college isn’t really giving you the results you expect in the kitchen. The last thing we need with rising food prices is to waste perfectly good food simply because it cooked unevenly and burned on an old fry pan.
Is Caraway Home Cookware Easy To Clean?
Caraway home cookware is easier to clean than traditional pots and pans, since the ceramic coating forms a naturally slick frictionless surface that resists stuck on messes. The finish feels almost polished; it is so smooth. Personally, as someone with chronic illness and fatigue, I dreaded lifting clunky heavy cookware in the sink to scrub it forever, so finding a cookware set that is easy to clean makes a huge difference in how draining it is for me to wash and dry my dishes. It also reduces the amount of water and soap I need to use to clean my pots and pans - another win for the environment since any way we can reduce our consumption of packaged products like soaps is a small way we can help the earth.
The ceramic coating also cooks more evenly, meaning you are less likely to ruin your recipe by overcooking certain areas. Less burned food means less food waste too, making this an eco-friendly option for reducing food waste in the kitchen.
Is Caraway Home Cookware Really Non-Toxic?
Yes! Ceramic cookware is totally safe. Caraway home even offers access to their full testing reports showing the safety of their products. It really makes you wonder - if something as simple as ceramic is more effective than these leading companies using toxic products to coat their pans, why do Teflon coated pans even exist? I think we’ll be seeing the end of this kind of toxic cookware in our lifetime, now that so many better options like Caraway Home are available for cooking.
Is the Caraway Home Cookware Set Durable?
If you’re worried because the word ceramic makes it sound like this cookware may break easily, rest assured that ceramic cookware isn't actually made 100% of clay. The ceramic in these pots and pans is a durable multi-layered coating that is put on top of a metal core. We are far from gentle with our pots and pans and our cookware set still looks as good as the day that we bought it. Now, it’s still recommended that you treat your ceramic cookware with care. But that’s easy to do when you no longer have to aggressively scrub your pots and pans in order to remove burnt food residue!
What pots and pans are included in the Caraway Home Cookware Set?
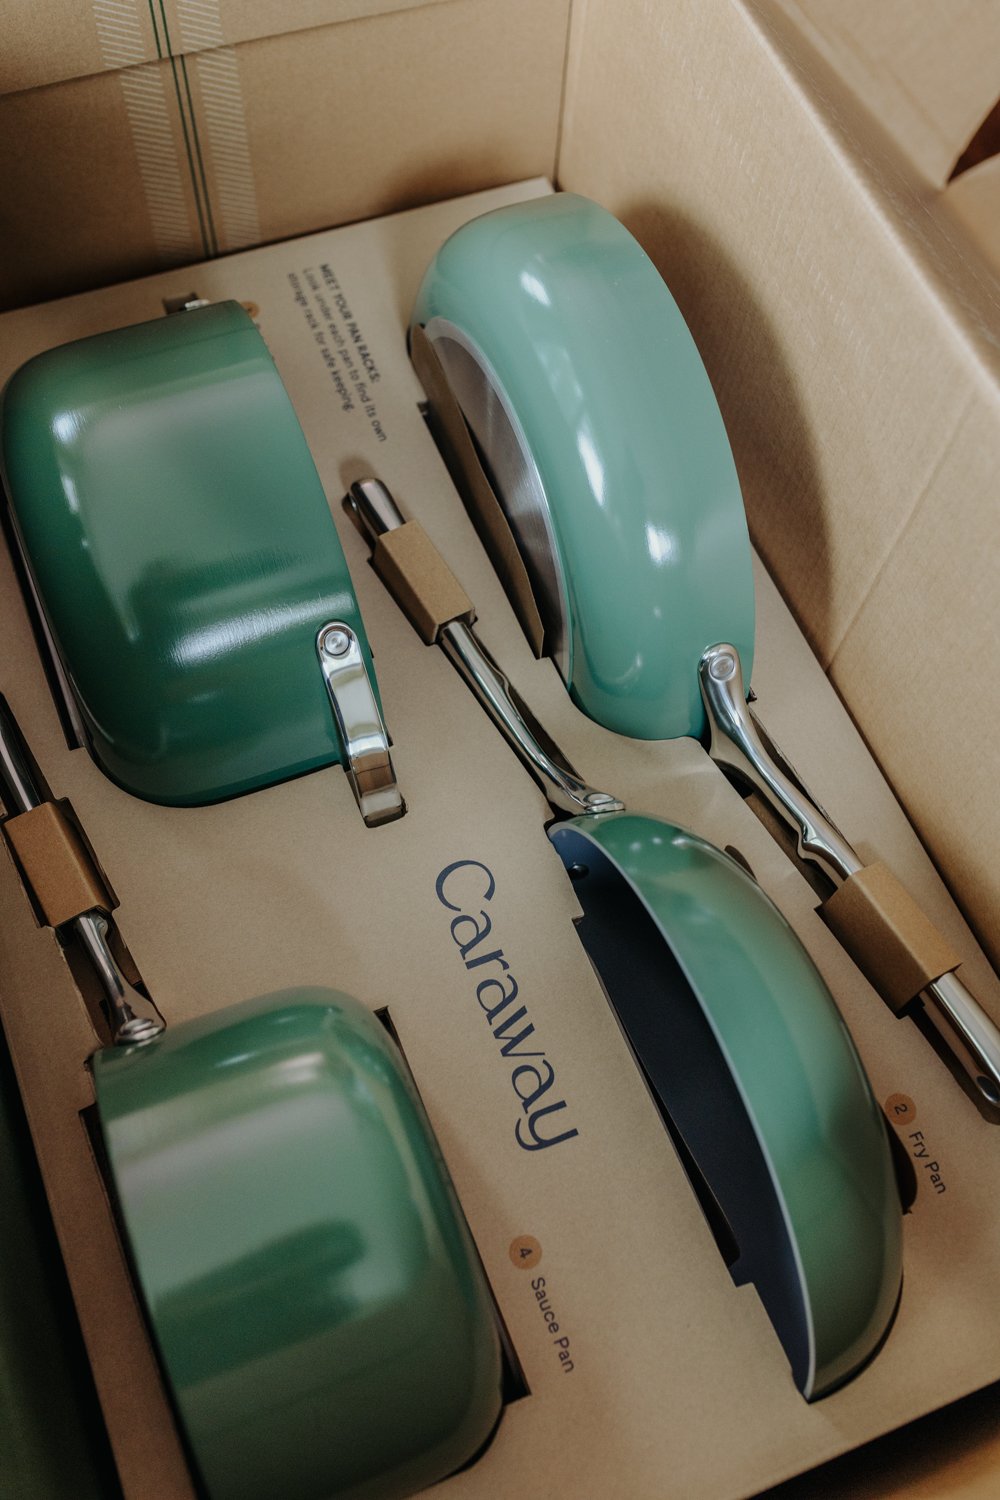
When you purchase the full set, you will receive the 10.5” fry pan, the 3 quart sauce pan, the 4.5 quart saute pan and the 6.5 quart dutch oven. You can also buy each piece individually if you want to build your collection over time. They just released minis of the fry and sauce pans too, which are perfect for smaller kitchen projects like easy-over eggs and gravy.
You can choose from a rainbow of colors to match your kitchen decor including cream, navy, sage, perracotta and marigold. I went with the sage for our kitchen since green is my favorite color and I love how earthy and neutral it is at the same time.
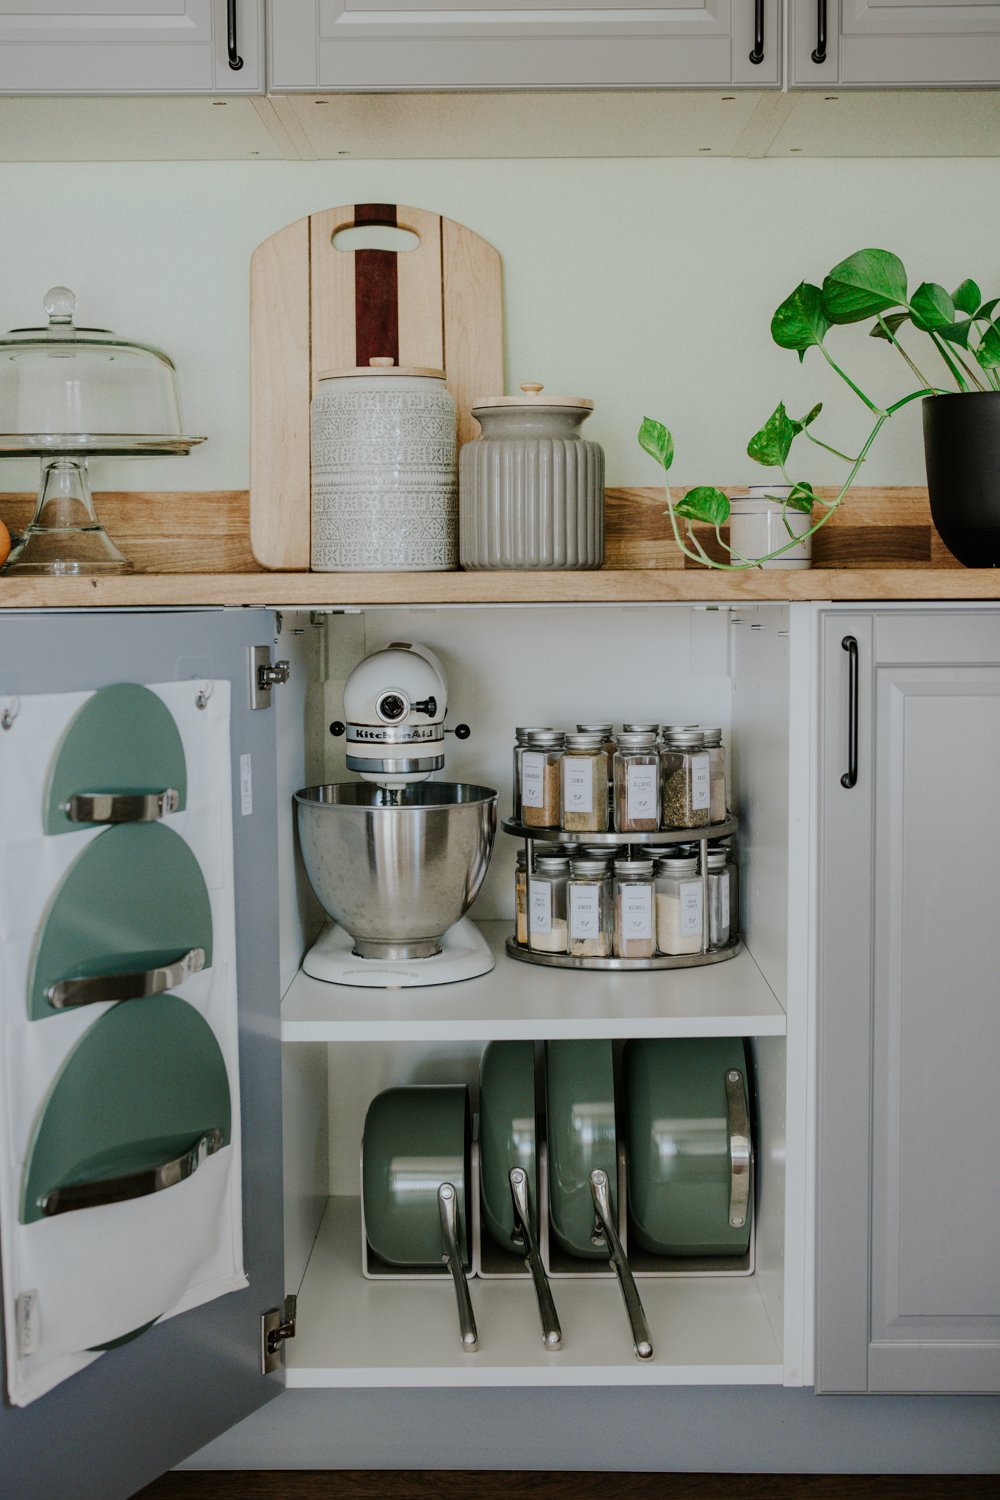
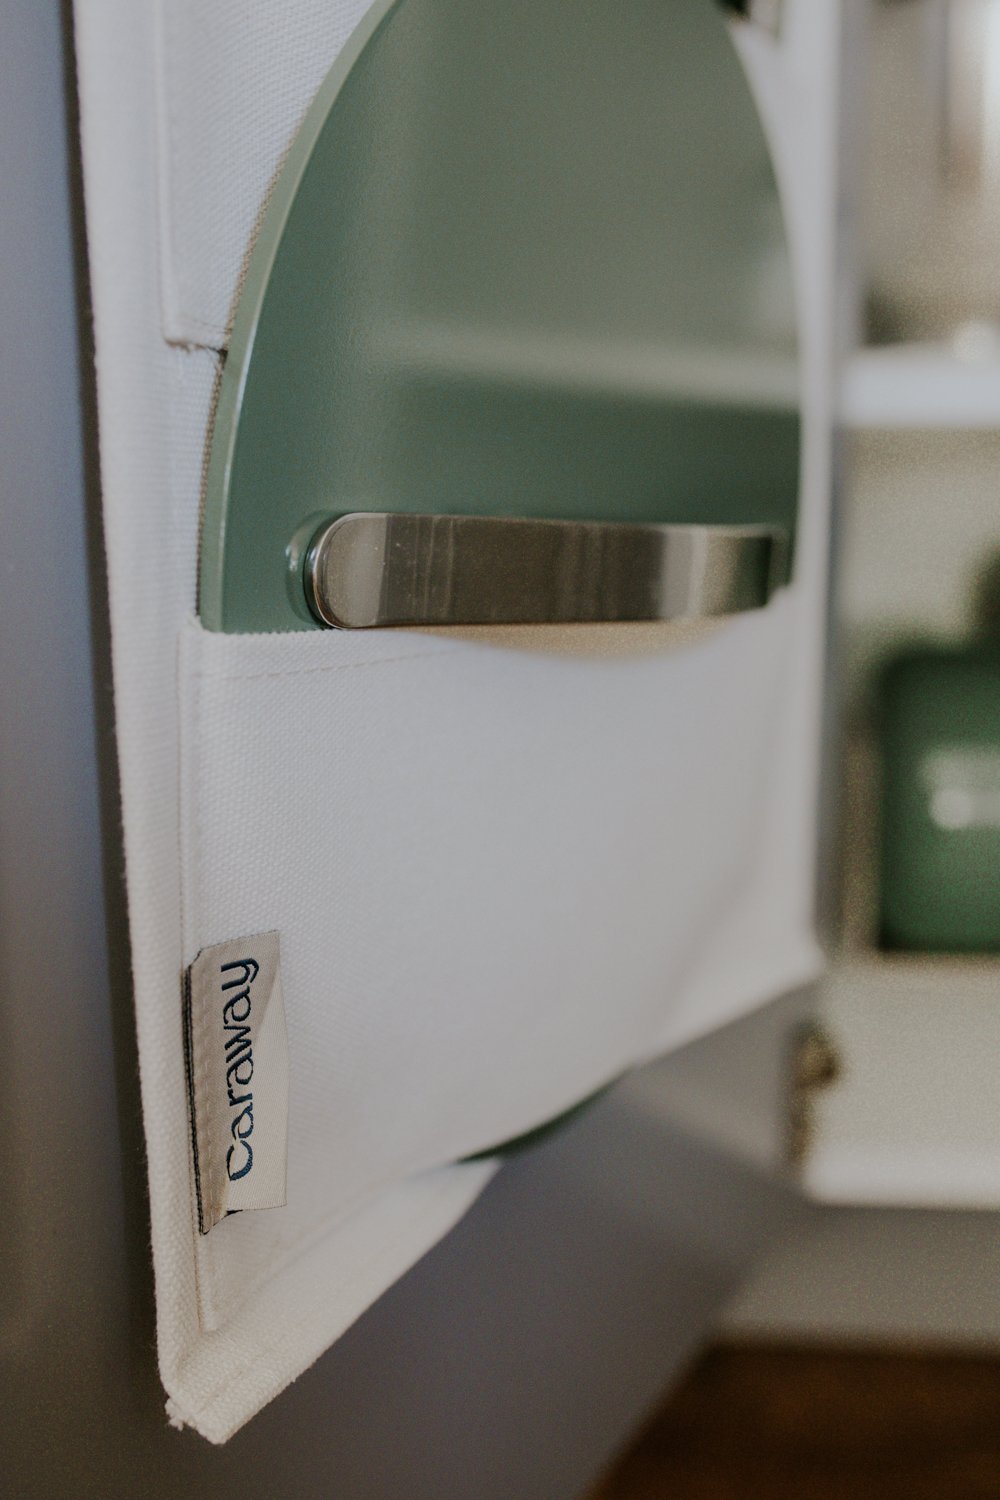
The full set also includes their custom magnetic pan rack and canvas lid holder, eliminating the frustration of trying to keep your pots and pans organized and separate while providing a beautiful system that can even be displayed on your countertop if you want. The canvas lid holder can be affixed anywhere - inside a cabinet door, on the side of your fridge or even on the outside of your end wall cabinet or walls.
Can you use Caraway Home Cookware on an induction stovetop?
Yes - Caraway pots and pans are cooktop agnostic, which means they will work on any type of stove - gas, electric, or induction! This was a big reason I wanted to make the switch, since once our electric range dies we plan to switch to an induction range for the environmental benefits, safety features and ease of cooking.
Caraway Home Cookware Review
After testing the Caraway Home Cookware set in my own kitchen (remember, we eat mostly from scratch vegetarian meals so we cook for almost every single meal) I can confidently say that Caraway offers the best non toxic cookware in 2022. These are really the best non-stick, non-toxic pans you can get.
We tested our pots and pans by cooking a wide array of dishes, from eggs for breakfast to skillet dinners. We even put them directly into the oven (they are oven-safe up to 550F), and found they were easier to clean and resulted in a more even cooking than the competition. That combined with the peace of mind I get knowing that my cookware isn’t contaminating my food has made these one of my top choices for cooking. The non-toxic frying pan gets the most use by far, since we can make such a huge variety of dishes with it. While the pans aren’t necessarily lighter than their competition, since it’s so easy to clean dishes are piling up in the sink far less often than they once did and I’m able to easily grab a pan for dinner than I already used once that day for breakfast without the dreaded sinking feeling you get when you remember you forgot to soak it in the sink.
I wasn’t sure I’d need them, but the magnetic pan rack and canvas lid holder have been an unexpected plus, since I no longer have to move a million other pans out of my way to get to the one I need. They slide easily from the rack with little additional effort, and easily fit into our space so I didn’t have to rearrange the entire kitchen to make them work. One small note - depending on the style of your cabinets, if there is a shelf that is flush with the front of the cabinet box that you are looking to hang your lid holder on you won’t be able to fully close the cabinet door. We solved this by trimming down the shelf, but there’s many other places you could hang your lid holder such as the end of a wall cabinet or on the side of your refrigerator.
Overall, if you’re ready to replace your toxic non-stick pots and pans with something safer I’d definitely recommend the Caraway Home Cookware Set. They also have a full line of bakeware including baking sheets, loaf pans and muffin tins, as well as a super cute tea kettle which I think would make the perfect housewarming gift. We’ll be using our set for years to come, and adding on to the collection as needed. I have a collection of recipes coming up that feature these pots and pans to get you inspired to get in the kitchen and get cooking! I’ll add those to the post below as they are published.
Click here to get your Caraway Home Non-Toxic Non-Stick Cookware Set today.
Stovetop Pumpkin Oatmeal Recipe
Now that you’ve grown some delicious pumpkins, harvested and cured them. What can you do with a sugar pumpkin besides make the classic pumpkin pie? Pumpkin puree is infinitely useful in baking, but for a simple recipe you can make on your stovetop, let's make some pumpkin oatmeal
The Cottage Peach is reader-supported. When you purchase through links on our site, we may earn an affiliate commission at no additional cost to you. All opinions are our own.
Nothing says fall quite as loudly as bright orange pumpkin. Pumpkin spice lattes give it a good try, but everything leads back to the pumpkin patch. Just about every fall activity – from hay rides to apple picking, cider donuts to corn mazes - includes the squash we call a pumpkin.
By decorating the steps of our houses and carving jack-o’-lanterns, we all pay homage to, as the Charlie Brown special puts it, The Great Pumpkin.
Indigenous peoples used a variety of squashes for eating and making utensils, containers, and musical instruments. In fact, the word squash comes from the Narragansett tribe in what is now called Rhode Island. Humans have eaten squash as far back as prehistoric times.
Are Pumpkins Fruit?
The short answer is yes.
Encyclopedia Britannica defines fruit as, “the fleshy or dry ripened ovary of a plant, enclosing the seed or seeds.” So not only are pumpkins fruit, but so are avocados, peppers, and tomatoes, among others we call vegetables.
Fruits come from the parts of a plant that flower, while vegetables are the stems, roots, leaves, and bulbs of the plants themselves.
And get this – a pumpkin is technically a berry!
There is a difference between what we call things in common usage and how they’re defined in botany.
To most of us, a berry is a small, juicy, bright fruit without a stone or pit. In botany, however, a berry is a fleshy fruit developed by the ovary of one flower. Some of what we call berries do not meet that definition. For example, raspberries are formed by many ovaries, not one.
Botanically, pumpkins, watermelon, tomatoes, cucumbers, bananas, and grapes are all berries, while strawberries and blackberries are not berries at all.
When it comes to eating, though, the words berry, fruit, and vegetable have developed their own meanings, so unless you’re playing a trivia game or want to impress someone with your knowledge of botany, the common usages are just fine to use.
Why Grow Pumpkins?
I grow pumpkins for food and carving, but also for fun. One small seed produces a sprawling monster of a plant and then, at just the perfect time, there are pumpkins in my yard! Magic.
Growing pumpkins is a great project to do with kids, who generally find it as much fun as I do. Pumpkin plants grow easily and dependably, so are not likely to disappoint.
On a more practical note, every part of a pumpkin is edible, and it’s a source of food that can be stored throughout the winter’s lean times. Pumpkins are loaded with nutrients, including vitamin C, beta-carotene, magnesium, and potassium.
Carving Pumpkins vs. Eating Pumpkins
Any pumpkin or gourd can be carved or eaten, but there are a couple of main differences between the pumpkins we carve and the pumpkins we eat.
The pumpkins we carve are referred to as field pumpkins. They have thinner skin and stringy, watery flesh.
The pumpkins we eat are called sugar pumpkins or pie pumpkins. They are generally smaller, have thicker skin, and are more consistently round. Their flesh is not fibrous or stringy, and they have more flesh overall than a carving pumpkin.
Carving pumpkins:
The difference in the types of flesh translates to a difference in flavor. Carving pumpkins generally taste bland and are a little bitter.
Because thin skin is an attribute in a carving pumpkin, when choosing a carving pumpkin pick it up and compare it to others of the same size. The lighter pumpkin will have thinner skin.
Eating Pumpkins:
Sugar pumpkins taste rich and buttery, much like a butternut squash. (In fact, you can use butternut squash to make a pumpkin pie!) Their texture is smooth.
Because they are fleshier, a single sugar pumpkin will yield about as much as a can of the pureed pumpkin you can get at the grocery store.
Varieties of Pumpkin
All pumpkins are squash. There are hard-skinned squash and tender squash, and pumpkins are hard-skinned; a hard-skinned squash is also called a gourd.
While all pumpkins are gourds, not all gourds are pumpkins. Those that are not pumpkins are still edible, but generally have little flesh, and what they do have is bitter, so we use them as ornaments.
When choosing which pumpkins to grow, if you are interested in keeping them throughout the winter months you should look for one that is known as a ‘good keeper’.
Another fun option to grow is a giant pumpkin. Those are the ones you see at county fairs, grown just to see how big you can get them.
Varieties of carving pumpkins:
Gold Fever pumpkins are round and medium orange and weigh from 15-18 pounds.
Gold Rush pumpkins are large, round, jack-o-lanterns that grow from 20-35 pounds.
Howden pumpkins are a classic jack-o’-lantern, slightly taller than they are wide, with dark orange skin. They can grow to between 18-26 pounds.
Jack o’ Lantern pumpkins are great for carving as well as cooking. They grow from 7-10 pounds.
One Too Many pumpkins are a great choice if you want something different from the usual orange pumpkin. They have white and red skin. They grow to about 20 pounds.
Tom Fox pumpkins are deep orange and have fat, dark green stems. They grow to between 12-24 pounds.
Varieties of sugar pumpkins:
New England Pie pumpkins are dark orange and grow to 4-6 pounds. They’re not as sweet as some pumpkins, but they are a classic for pies.
Sweet Sugar Pie pumpkins are very meaty, with dark orange skin. They grow to 6-8 pounds, and are delicious for pies and canning.
Cinderella pumpkins are a great one for kids, as the carriage in the Disney movie is based upon their shape. They are mild and sweet, and can be 15-35 pounds.
Blue doll pumpkins don’t look like your typical pumpkin on the outside, with greenish-blue skin. But inside the pumpkin is dark orange and delicious. They grow to 20-24 pounds.
Lakota pumpkins are pear-shaped, with some combination of orange and green skin, making them a great choice for decoration and eating. They are sweet, and taste like butternut squash. They grow to about 7 pounds.
Dickinson pumpkins are used to make the Libby’s canned pumpkin pie filling you find at the grocery store. They are beige, and weigh 10-40 pounds.
Varieties of giant pumpkin:
Atlantic Giant pumpkins have pinkish orange skin. They grow to at least 300 pounds. The largest grown was over 1,400 pounds!
Big Max pumpkins are oblong with skin in shades of orange to pale salmon. They can grow from 100-300 pounds.
Prizewinner pumpkins have the classic pumpkin color and shape, with glossy skin. They can grow to weigh between 100-300 pounds.
Wyatt’s Wonder pumpkins have intense orange skin which doesn’t fade. They grow to 200 pounds or more.
When to Grow Pumpkins
Pumpkins are generally planted from early May through June, depending on the variety. I usually end up planting in mid-June, here in zone 6.
How to Grow Pumpkins
Pumpkins grow on a sprawling vine which can take up quite a bit of space. Pumpkin seeds can be put directly into the ground.
Choose a sunny spot (fruits like sun) and form small mounds of soil 2-5 feet apart. Plant 3 seeds on each mound. Pumpkins are planted on mounds because the soil in a mound warms more quickly, which helps with germination.
I’ll be honest, though, I don’t bother with mounds. I just plant the seeds in the flat soil and haven’t had a problem with germination. That may be because I plant at the later end of the planting range.
Bury your seeds about as deep as the seed is long. Keep the soil moist until your pumpkin plants sprout.
Once the pumpkins form, you can slip a piece of cardboard under them so they are not in contact with the soil, making them less likely to rot.
As your pumpkins are coloring up, check to see if the bottom is also turning orange. If not, gently rotate the bottom side towards the sun.
When to Harvest Pumpkins
It’s best to leave pumpkins on the vine for as long as possible, but they should be harvested before overnight temperature in the 30s kick in. A frozen pumpkin will immediately rot.
When deciding if a pumpkin is ripe, first check the color. A small amount of green remaining is ok, but not too much.
Tap the pumpkin with your finger. It should feel solid and have a hollow sound. Just like watermelon and fresh baked loaves of bread, a hollow sound means it’s done. Next, push your fingernail into the skin. If it doesn’t puncture the skin, the pumpkin is ripe.
How to Harvest Pumpkins
The first thing to know is you should never carry a pumpkin by its stem. Instead, carry it from the bottom.
You may want to wear gloves when harvesting pumpkins, as the vines and stems are prickly. You can easily wipe the prickles off of the stem with a gloved hand.
Use Felcos or a sharp knife to harvest; the stem of a pumpkin is quite dense. Cut the pumpkin with a stem of at least 2 inches, as a longer stem extends the storage life of the pumpkin.
How to Store Pumpkins
To make a pumpkin last months, it should be cured before being stored. A pumpkin is cured by setting it in a hot, dry place. This allows the rind to harden.
Once your pumpkin is cured, it’s ready for storage. Store pumpkins in a cool, dark place with good airflow. The ideal temperature for storing pumpkins is 55 degrees. They should never be stored at 45 degrees or below.
Place the pumpkins on something that keeps them from touching the floor, and arrange them so they do not touch each other.
Stovetop pumpkin oatmeal recipe
Making pumpkin oatmeal on the stove is as simple as toasting your spice in your sauce pan, adding your sweetener, liquid and oats and simmering everything for about thirty minutes - until it is nice and soft. Then you can curl up with your warm bowl of cozy and enjoy all that fall has to offer this season! Find the full pumpkin oatmeal recipe below:

Stovetop Pumpkin Oatmeal
Ingredients
- ¼ teaspoon ground nutmeg
- ½ teaspoon ground cinnamon
- ⅛ teaspoon ground ginger
- ¼ cup packed brown sugar
- 1 cup pumpkin puree (make this yourself by roasting your sugar pumpkin face down in the oven at 350 for 45 minutes, scooping out the flesh and blending or mashing with a fork)
- 4½ cups almond or coconut milk
- 1½ cups oats
- ¾ teaspoon salt
- Craisins (optional)
Instructions
- In a large saucepan over low heat, toast the nutmeg, cinnamon and ginger, stirring occasionally until fragrant, about 2 minutes.
- Stir in brown sugar, then add pumpkin and stir to combine. Add milk, raise heat and bring mixture to a simmer.
- Stir in oats, and simmer over medium heat until tender but not mushy, about 25 to 30 minutes.
- Stir in salt.
- Serve with raisins, applesauce, apples, pecans or maple syrup if desired.
Nutrition Facts
Calories
713.65Fat
56.5Sat. Fat
48.56Carbs
52.66Fiber
5.42Net carbs
47.26Sugar
21.14Protein
9.87Sodium
478.25Cholesterol
0

